Tag Archives: Antenna Projects

Guest Post: Switching a Remote Antenna, Low Noise Amplifier, and an Antenna and Audio Between Two Radios

Many thanks to SWLing Post contributor, Bill Hemphill, who shares the following guest post:


Remote Antenna Switching Remote Low Noise Amplifier Switching and Switching an Antenna and Audio Between Two Radios

by Bill Hemphill, WD9EQD

Remote Antenna Switching

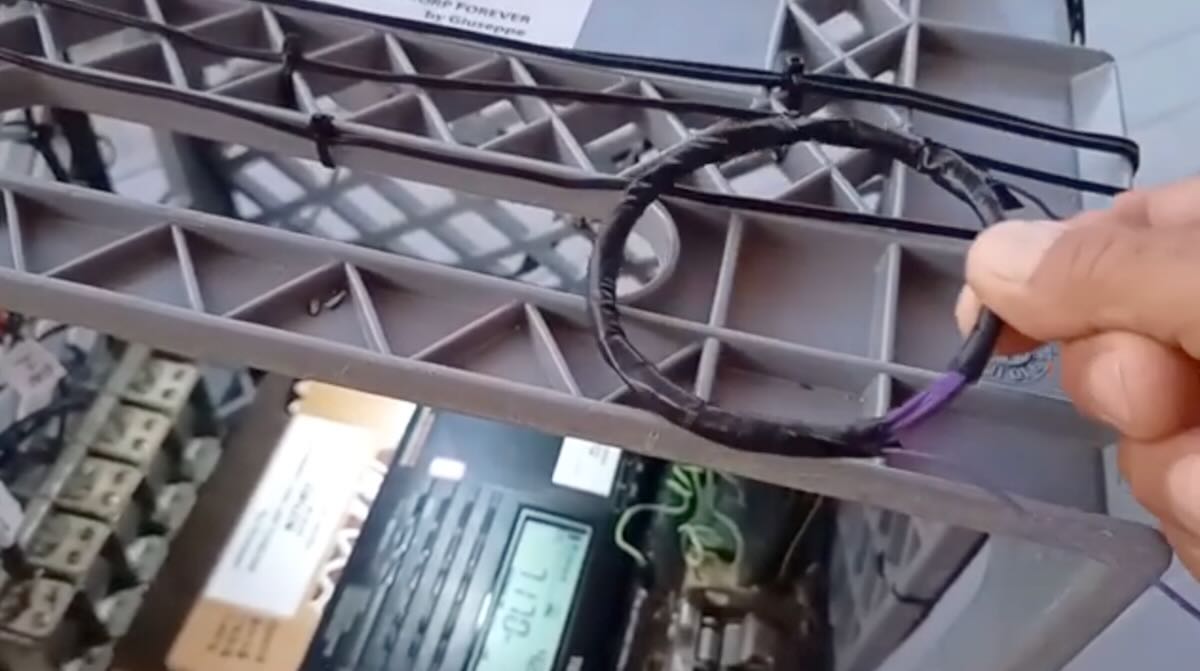
I have two YouLoop Antennas.  I had been placing them at right angles to each other.  I would then put one of them on the AirSpy software defined radio.  But manually switching from one antenna to the other was a real pain.  If only there were a way to electrically switch between the two antennas.

It would be nice to place the antennas remotely from the radio (and computers) and then have some sort of remote switch that would select an antenna and then a single feed line to the radio.  It was research time.

The YouLoop and the Airspy both use SMA connectors.  An SMA switch would be required.  A little research and I came across the following small board that can switch between two SMA antennas:

From Amazon Description:  50 Ohms RF Switch Module, 3-5V Remote Wireless RF Switch Single Pole Double Throw Board Input Output Impedance for DIY Electric Doors (HMC349)

This board is perfect for RECEIVE only projects.  Apply 5V to the board and then 5V to the VCC (control pin) to switch from RF1 to RF2.

Now that I had the SMA switch module, a way to actually do the switch remotely was required.  Maybe WI-Fi or Bluetooth module would do the trick.  I found a nice Wi-Fi module on Amazon that looked like it would do the trick:

Amazon Description:  DIYmalls SV Safe Low Voltage WiFi Wireless Switch Module DC 5V-24V Phone APP Remote Control Smart Home for Amazon Alexa Google Assistant

But do I really want to use a phone app to switch antennas.  Further investigation discovered a really neat module that uses a Car Fob type control:

Amazon Description:  RODOT Mini Relay Wireless Switch, 433Mhz Remote Control Relay Switch, DC 6V 12V 24V 1CH Channel Relay Wireless Secure RF Transmitter and Receiver kit, Momentary Toggle Latched Mode

BIngo!!  I could just press a button and switch antennas.  But a problem quickly arose.  I hadn’t fully read the description of the RODOT switch:

The blue output wire is ALWAYS Vcc (input voltage)! The device only switches the ground.

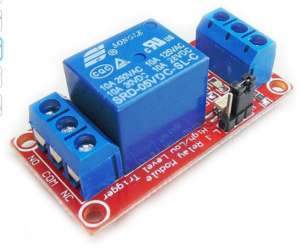
So the RODOT switches the ground but the HMC349 uses positive voltage to switch.  OOPS.  Next step was to place a latching relay to take the on/off ground and convert it to on/off positive.  Again, another nice board was found:

Amazon Description:  HiLetgo 2pcs 5V One Channel Relay Module Relay Switch with OPTO Isolation High Low Level Trigger

The nice thing about the Relay Module is that it can be latched either High or Low, so the RODOT switching ground can be used to latch the relay and then provide a positive voltage to the HMC349 antenna switch.

All modules are powered by 5V.  There are other modules available that use higher voltages.  But I wanted to be able to use a 5V power source for everything.

I learned a quick lesson on the first layout I did. I had directly connected the antenna cables to the HMC349 module.  A quick accidental side yank on one of the antenna cables and the SMA connector tore off the board.  A replacement board and some quick wiring and I had a workable antenna switch that with the press of the car fob button, either antenna could be selected.

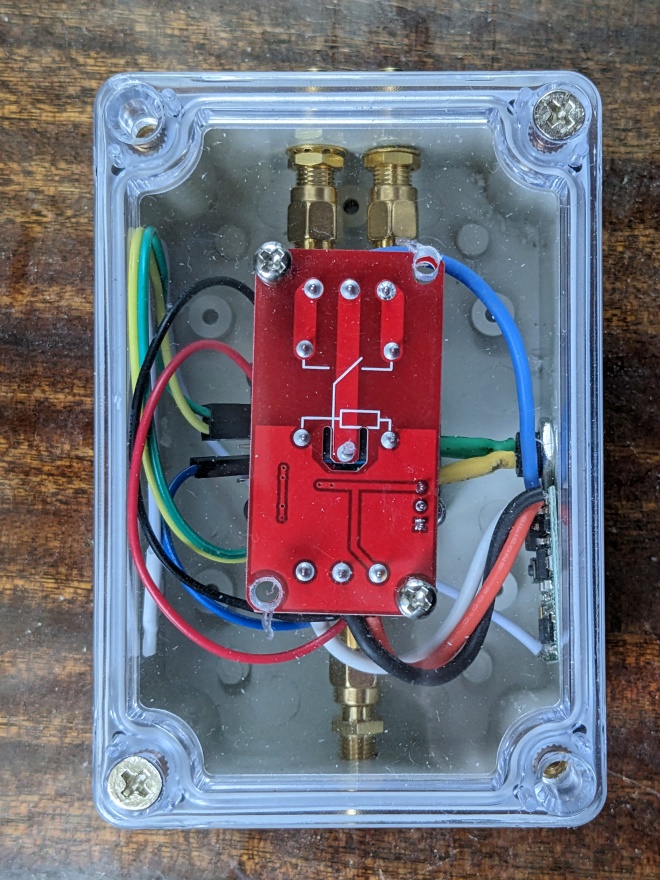
I found a nice small plastic box that allowed for the HMC349 module to be suspended between SMA bulkhead connectors.  By using bulkhead connectors, there is no strain placed on the HMC349 connectors. The relay module was attached to the box lid.  The modules are mounted using brass standoffs.  The finished box is about 3”x4”x 2” high.  Either battery or a 5V wall module can be used to power it.

Overall, I’m quite pleased with the results.  I find that sometimes switching antennas (and their orientation) can make a big improvement in the signals.  Other times, there’s very little difference.

Remote Low Noise Amplifier along with Antenna Switching

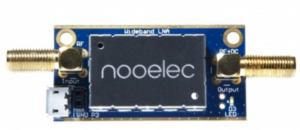
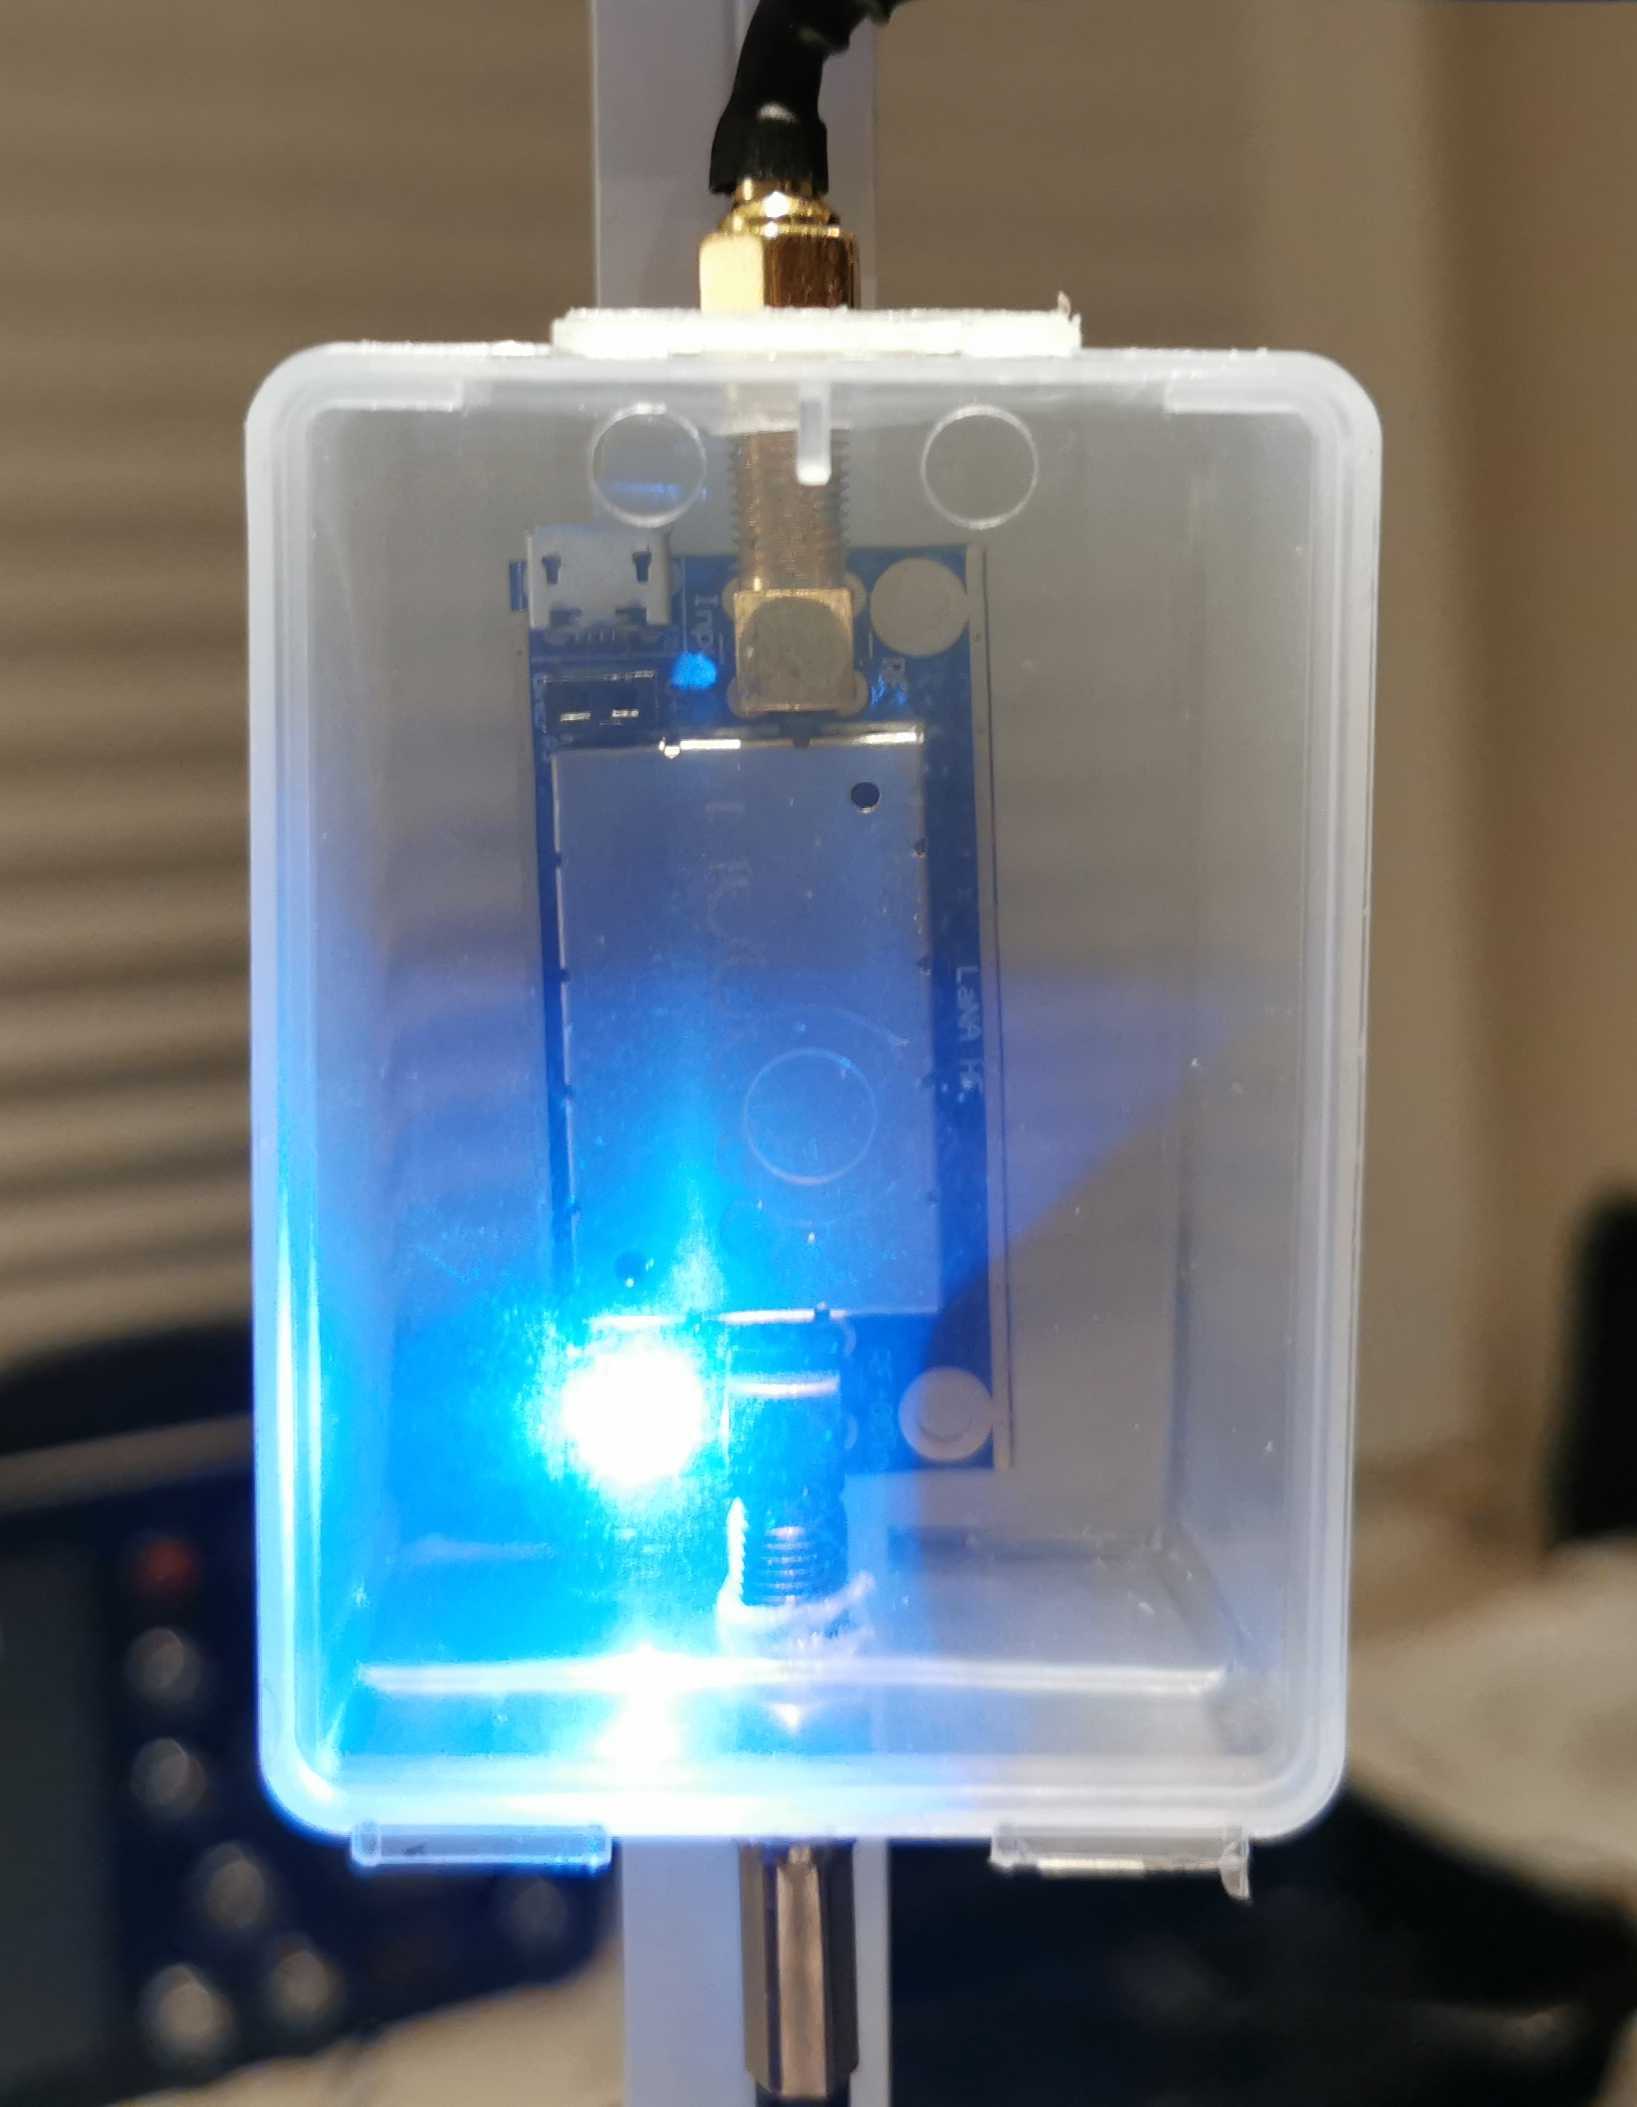
Now that the antennas can be switched, it would be nice if a Low Noise Amplifier could be switched in and out of the circuit.  Something like the Lana HF Barebones LNA made by NooElec:

For testing purposes, I first did a quick layout of just using one antenna with the ability to switch the LNA in and out.  Note:  I took a gamble on hooking the antenna cables directly to the HMC349 modules.  Luckily, the SMA connects didn’t tear off the boards.

Two HMC349 modules are used.  The first module selects the bypass or the LNA.  Likewise, the second module also selects either the bypass or LNA.  Note that the second module is turned upside down so that the switches match up when activated.  Two modules were used so that the LNA is totally switched out of the circuit. Continue reading

Spread the radio love

Small Unidirectional Loop Antenna (SULA) Part 3: Questions & Answers

Many thanks to SWLing Post contributor extraordinaire, 13dka, who brings us Part Two of a three part series about the new SULA homebrew antenna project. This first article describes this affordable antenna and demonstrates its unique reception properties. The second article focuses on construction notes. This third and final article will essentially be a Q&A about the SULA antenna. 

This wideband unidirectional antenna is an outstanding and innovative development for the portable DXer. I love the fact that it came to fruition via a collaboration between Grayhat and 13dka: two amazing gents and radio ambassadors on our SWLing.net discussion board and here on the SWLing Post. So many thanks to both of them!

Please enjoy and share Part 3:


Part 3: SULA Q&A

by 13dka

Q: Where can I ask questions, discuss all aspects of the the SULA or collaborate in its further development?

A: There is a thread dedicated to the SULA in the new SWLing.com message board: https://swling.net/viewtopic.php?t=55

Q: Since the antenna is “lossy”, what’s the point of having a “beam”?

A: The answer is once again “SNR”: First off, remember that the LNA is there to make up for most of the losses. Secondly, this is all about the noise pickup, 20dB less gain/more losses outside the main lobe means also a reduction of atmospheric/cosmic/whatnot QRN and of course everything manmade from all these sides. The wide horizontal lobe is more or less one hemisphere horizontally, but the flat-ish vertical pattern makes that only a slice of it. In other words, there will be less QRN and QRM pickup from the back and the top. The idea is that the SNR will ideally increase more than the preamp’s noise figure will cost and it often sounds like this is what actually happens. Of course it’s also nice that you can turn an unwanted signal down using the more or less pronounced notch in the backside pattern up to 21 MHz – also very helpful for direction finding.

Q: Do I need a rotor?

A: It depends. If you are one of the lucky few still having a low-QRM-environment at home and you want to put it in the backyard, you really may want to be able to turn it remotely. If you’re using it portable you can simply rotate the mast manually. If you have local QRM or can’t mount it very far away from your or other houses, you may want to rotate the back of the antenna towards that source, leave it at that position forever and enjoy what’s coming in on the pretty wide main lobe of the antenna. The horizontal lobe covers more or less half of the horizon, depending on your stations of interest and location you could get away with never turning the antenna at all.

Q: Is it better than the XYZ loop?

A: Hey, that’s exactly what I wanted to ask you! 🙂 Even though the SULA is very similar in appearance and performance to a good SML working in ideal (ground conductivity) conditions, the SULA is a pretty different animal with a different behavior: Regular small loops, besides being bidirectional, can lose quite a bit of their low angle sensitivity over “poor” ground while the SULA is supposed to be retaining its properties better over any type of ground. Also, while many SMLs are tuned for VLF through the lower portion of the shortwave, the SULA complements those with quite uniform (good) properties up to 30 MHz and beyond.

Q: I have an end-fed random wire or dipole strung up from the house to a tree etc. – can the SULA beat that?

A: That’s quite possible. To get low takeoff angles from horizontal wire antennas you need to string them up at least 1/2 wavelength high, that’s 20m/66ft on 40/41m, 10m/33ft on 20m and so on. If you can’t do that, the SULA may be your ticket to listen farther beyond the horizon. Also, wire antennas are often strung up to match space restrictions or avoid QRM vectors and that way you may end up with some directionality in directions you don’t want, or no directionality at all when the wire is too low. Another noteworthy point is the ground: For most horizontal antennas, better ground means a considerable higher takeoff angle so the dipole needs even more height for low angles. The SULA’s takeoff angle benefits a little from the better ground and only gets a little worse over poor ground.

Q: Do I really need an LNA?

A: I hope so? Of course it depends… if you are going to try this antenna in a very noisy environment, the LNA may have little to no benefit. The noise is limiting your “radio horizon” to very loud signals anyway and for those you may not need an LNA, ever. On the other hand, the antenna is very lossy and in a quiet environment where noise is not an issue at all, weak signals may drop below the sensitivity threshold of your receiver without the LNA. The less noise you have, the more you’ll be able to benefit from an LNA. You will also need one when your radio isn’t all that sensitive, similar to the requirements to run a YouLoop. Andrew kept the loop impedance as constant as possible in order to allow any low impedance coax preamp to work behind the Balun. Any LNA with 20dB of gain should do, as per usual, better stuff may bring better results.

Among the sparse offers for decent shortwave LNAs, the NooElec LANA HF seems to be the only decent LNA sold via Amazon. It’s comparatively low-cost and unlike the other offers on Amazon, ready to be powered via Bias-T or even via Micro-USB and therefore happy with 5V. Since I also had the balun from the same company I could simply connect that all with a couple of these cute little SMA plumbing bits and it worked. The downside is its unknown but perceivably low resilience against intermodulation (low 3rd-order intercept point), this is usually not a problem with such a small loop but it can be in the presence of nearby transmitters.

If you do have nearby transmitters and don’t mind sourcing an LNA from Europe, Andrew recently pointed me to preamps from here. They offer a moderately priced preamp with a 2N5109 transistor (based on the W7IUV design) for a high IP3 value and low noise, which is also available in PCB-only and fully assembled versions including a compartment. They also offer Bias-T boxes.

Q: What is special/different about this antenna? There are already very similar designs!

A: It’s supposed to be simpler and more compact/portable, and it seems to deliver more consistent results over the entire coverage range in different usage environments than similar designs. The SULA was designed to be made with things that are particularly easy to obtain, or which were already obtained — many of us SWLs have some of that Nooelec stuff in our drawer anyway, even when (or because) we’re not habitual antenna builders and balun winders. Now making a better balun and buying a better preamp is not hard and could even bring better results but the point is that you don’t have to. In summary, this is not meant to be a miracle antenna, just number of compromises re-arranged to create a particularly uncomplicated, small, unidirectional loop antenna that aims for DX, for apartment dwellers and DX nomads like me.

Spread the radio love

Small Unidirectional Loop Antenna (SULA) Part 2: Construction Notes

Many thanks to SWLing Post contributor extraordinaire, 13dka, who brings us Part Two of a three part series about the new SULA homebrew antenna project. This first article describes this affordable antenna and demonstrates its unique reception properties. This second article focuses on construction notes. The third and final article will essentially be a Q&A about the SULA antenna. All articles will eventually link to each other once published.

This wideband unidirectional antenna is an outstanding and innovative development for the portable DXer. I love the fact that it came to fruition via a collaboration between Grayhat and 13dka: two amazing gents and radio ambassadors on our SWLing.net discussion board and here on the SWLing Post. So many thanks to both of them!

Please enjoy and share Part 2:


Part 2: SULA Construction notes

by 13dka

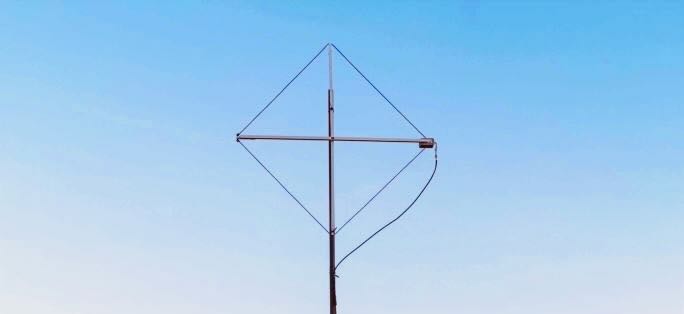
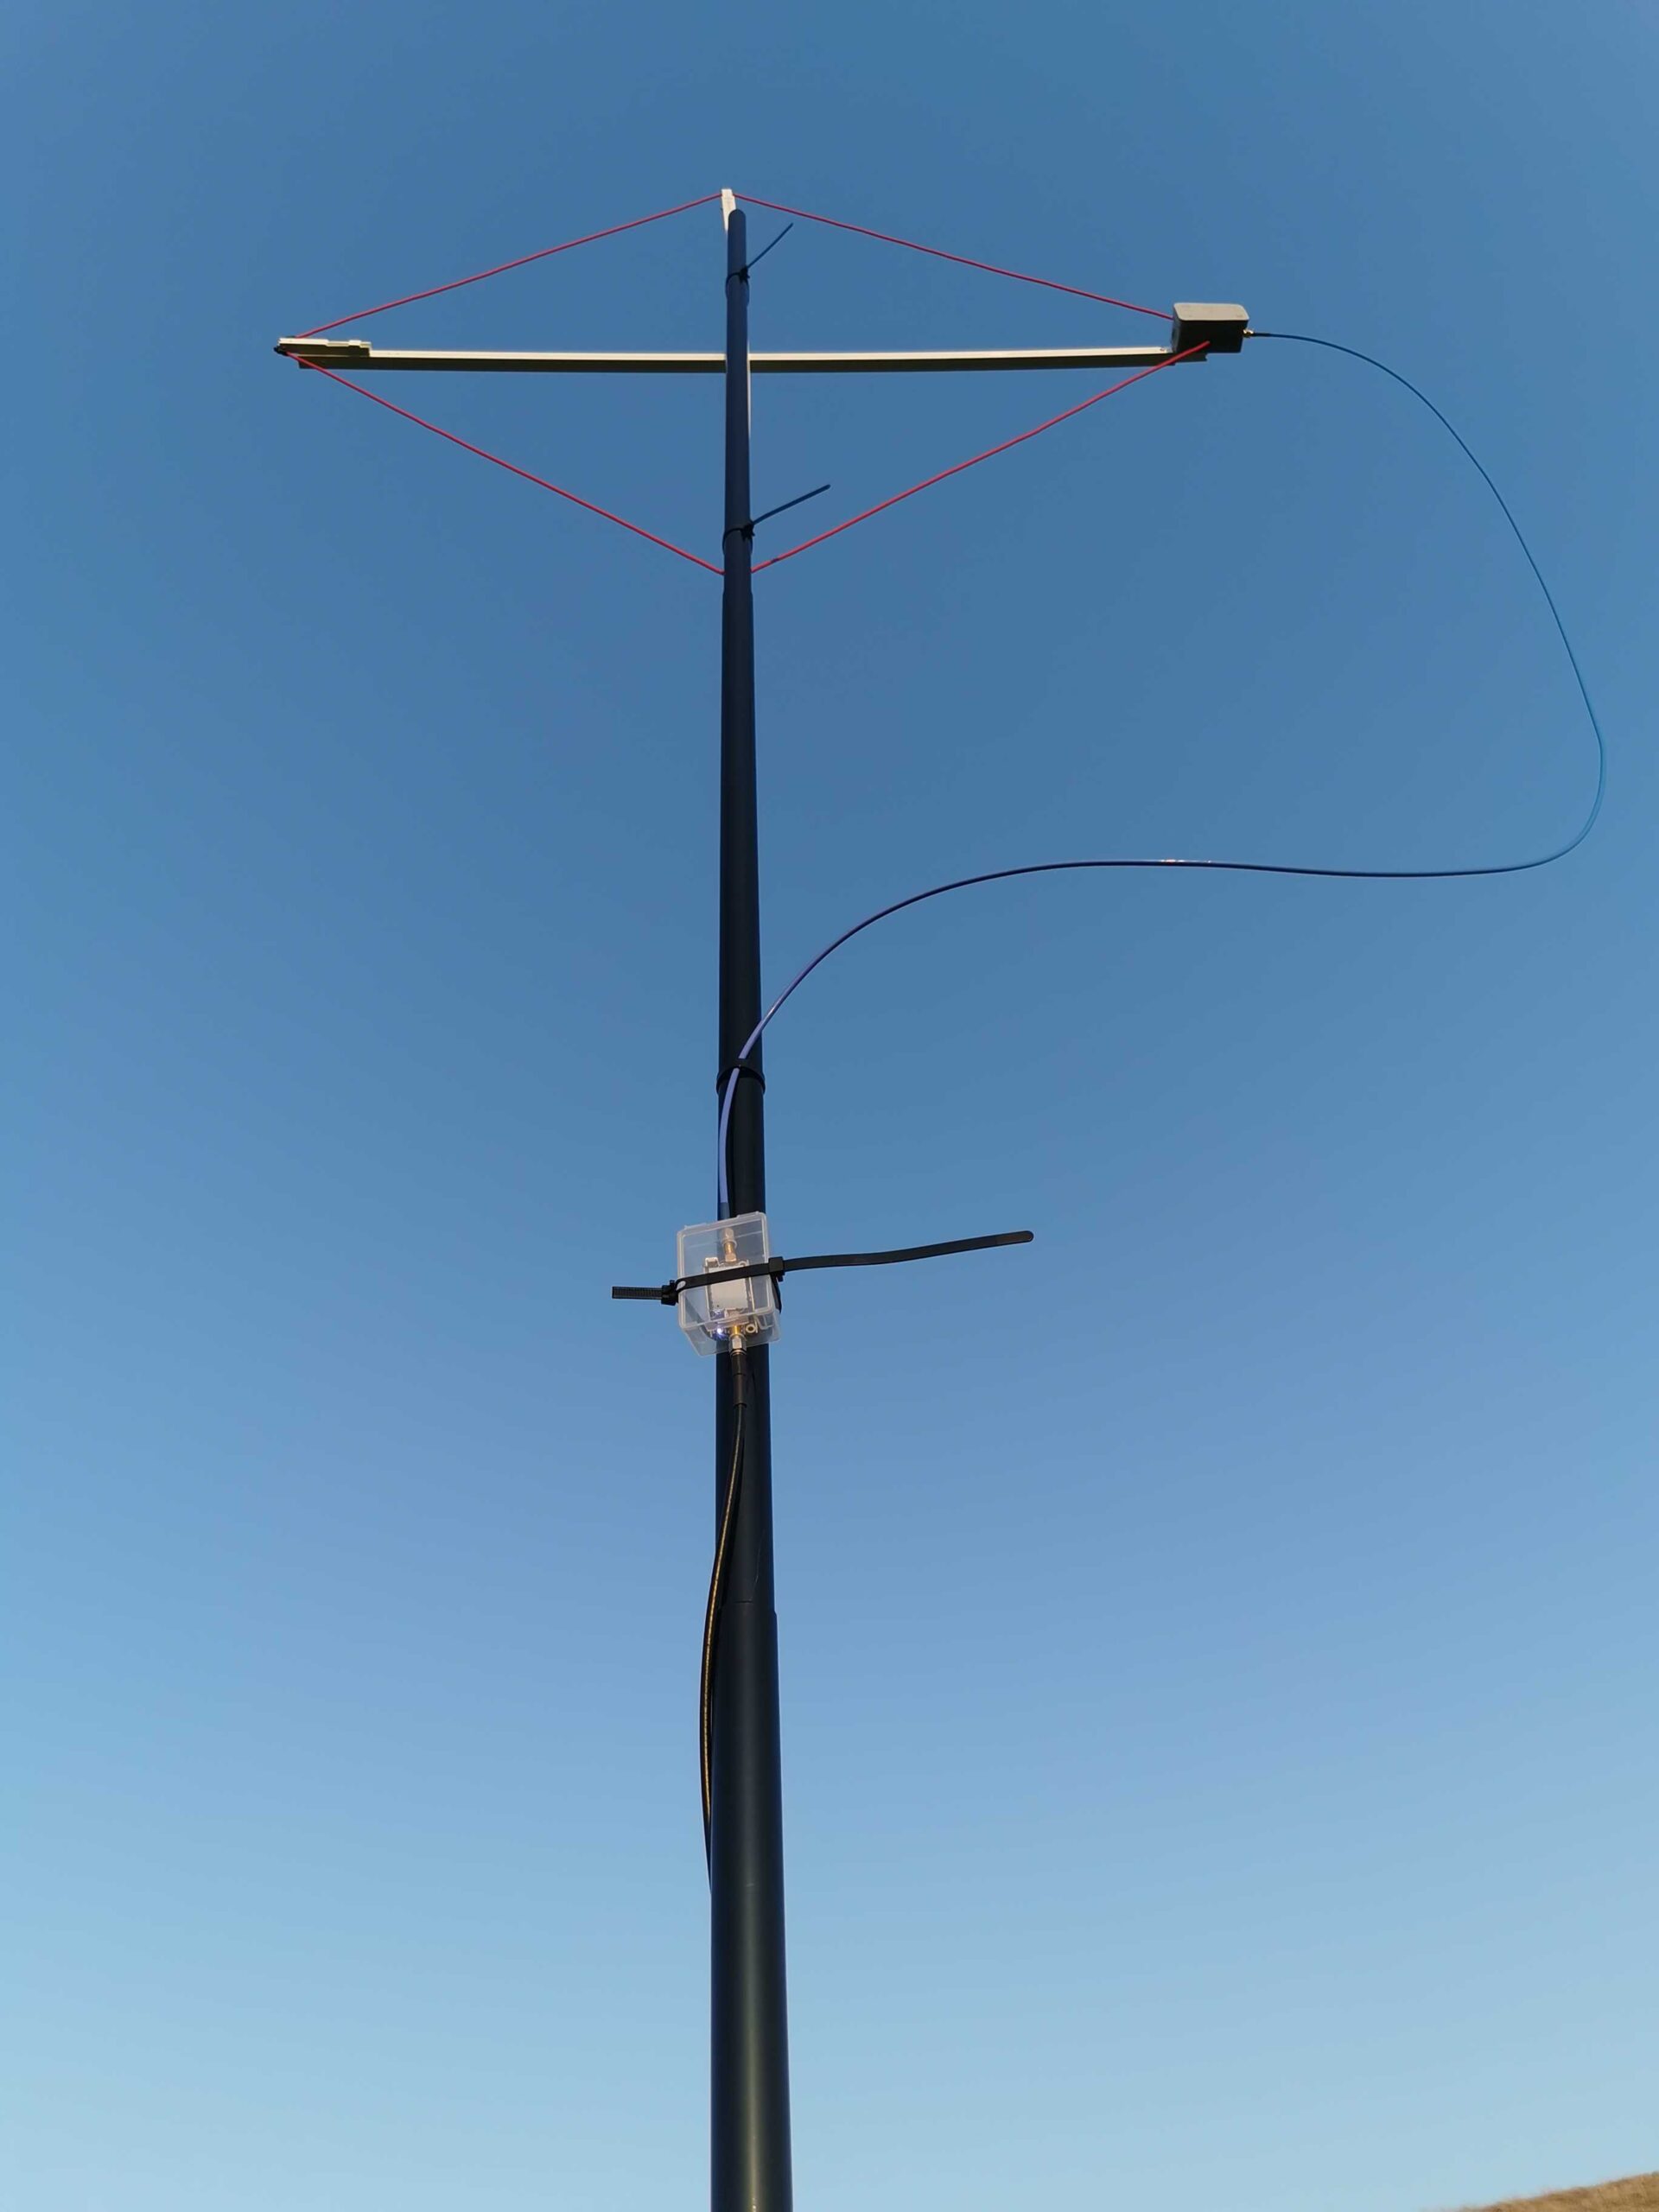
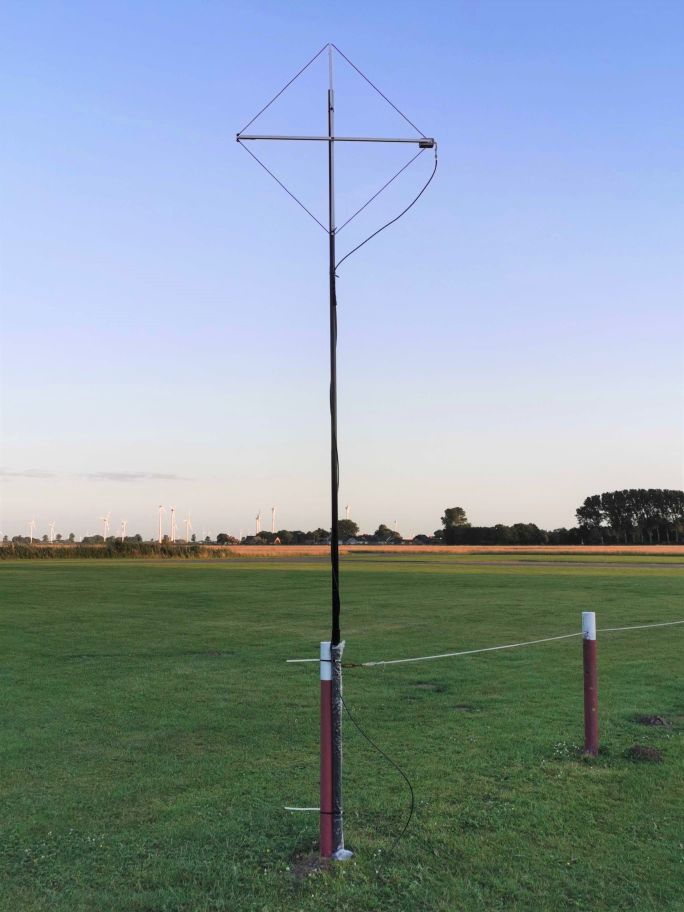
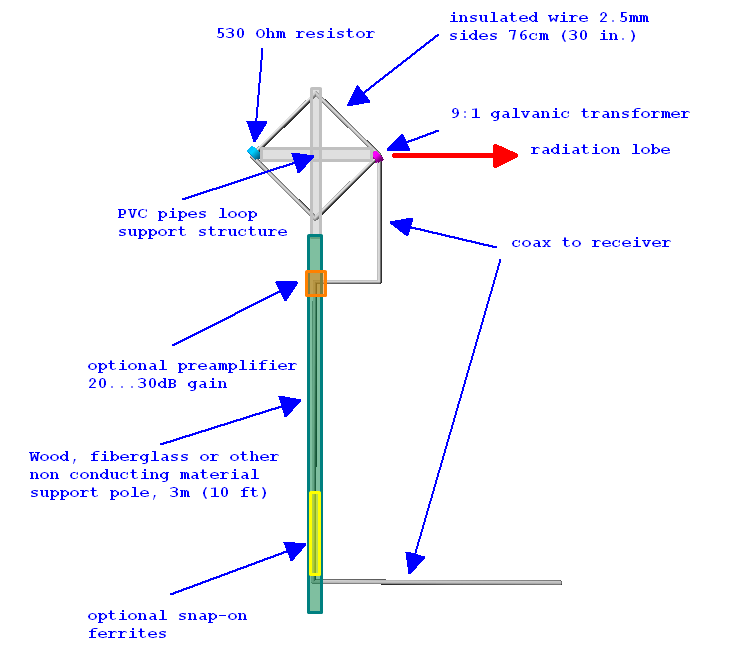
The drawing [above] has all you need to know. You basically need to put up a symmetrical wire diamond starting with a balun at the one end and terminating in a resistor at the other end of the horizontal boom, the sides are supposed to be 76cm/29.92″ long so you need to make yourself some…

Support structure:

I used 0.63″/1.6cm square plastic square tubing/cable duct profiles from the home improvement market to make the support structure. You can use anything non-conductive for that of course, broom sticks, lathes… The plastic profiles I used had the advantage of being in the house and easy to work on with a Dremel-style tool and everything can be assembled using the same self-tapping screws without even drilling. The profiles are held together with 2 screws, for transport I unscrew one of them and put that into an extra “parking” screw hole on the side, then I can collapse the cross for easy fit into the trunk, a rucksack etc.

These profiles are available in different diameters that fit into each other like a telescoping whip. This is useful to make the support structure variable for experiments and to control the loop shape and tension on the wire. The booms end up at 1.075m each, the profiles come in 1m length, so that’s 4 short pieces of the smaller size tube to extend the main booms by 37mm on each side

On the resistor end of the loop that smaller tube isn’t mounted in the “boom” tube but to the side of it in order to keep the wire running straight from the balun box on the other side.

Mast/mounting:

You can use anything non-conductive to bring it up to height. On second thought that is indeed bad news if you were planning on putting that up on your metal mast…and we have no data on what happens when you do it anyway. I don’t know if the smallest (4m) telescoping fiberglass poles would suffice for portable operation, but I’m a fan of just using the big lower segments of my 10m “HD” mast for the stiffness they give me (3 segments for the height, the 4th collapsed into in the base segment for easy rotation). Telescoping masts also give you easy control over…

Height:

The published patterns are for 3m/10′ feedpoint height over “average” ground. Increasing height further has no expectable advantage, instead it will deteriorate the favorable directional pattern of the loop. Flying it lower, or even a lot lower in windy weather on the other hand is causing a surprisingly moderate hit on performance.

Continue reading

Spread the radio love

Introducing the amazing SULA: An affordable unidirectional DX-grade loop antenna that you can build!

Many thanks to SWLing Post contributor extraordinaire, 13dka, who brings us a three part series about the new SULA homebrew antenna project. This first article describes this affordable antenna and demonstrates its unique reception properties. The second article will focus on construction notes. The third and final article will essentially be a Q&A about the SULA antenna. All articles will eventually link to each other once published.

This wideband unidirectional antenna is an outstanding and innovative development for the portable DXer. I love the fact that it came to fruition via a collaboration between Grayhat and 13dka: two amazing gents and radio ambassadors on our SWLing.net discussion board and here on the SWLing Post. So many thanks to both of them!

Please enjoy and share SULA Part 1:


Introducing the Small Unidirectional Loop Antenna (SULA) 1-30MHz

A small and simple, unidirectional and DX-capable loop “beam” for SWLs!

by 13dka

In early June, Andrew (grayhat), SWLing Post‘s resident antenna wizard suggested a variation of the “cardioid loop” on the SWLing Post message board: The original “cardioid loop” is a small loop receiving antenna deriving its name from a cardioid shaped (unidirectional) radiation footprint. The design is strikingly simple but it has a few downsides: It relies on a custom preamp, it needs a ground rod to work and it is unidirectional only up to 8 MHz.

Andrew’s version had the components all shuffled around and it did not only lose the ground rod, it also promised a nice cardioid pattern over the entire shortwave, from a small, diamond shaped loop. Wait…what? It can be made using parts available on Amazon and your DIY store:

You need some 3m wire and PVC tubes to create a support structure to hold the wire, a 530 Ohm resistor and a 9:1 balun like the popular “NooElec One Nine”. Since it’s a “lossy” design, adding a generic LNA like the NooElec “LANA HF” would help getting most out of it. When you put that all together you have what sounds like an old shortwave listener’s dream: a small, portable, tangible, and completely practical allband shortwave reception beam antenna with some more convenient properties on top, for example, it is a bit afraid of heights.

That sounded both interesting and plain crazy, but the .nec files Andrew posted were clearly saying that this antenna is a thing now. Unfortunately Andrew suffered a little injury that kept him from making one of those right away, I on the other hand had almost all the needed parts in a drawer so I ended up making a prototype and putting it through some of its paces, with Andrew changing the design and me changing the actual antenna accordingly, then mounting it upside down. Let me show you around:

  •  Small, diamond shaped wire loop (with 76cm/29.92″ sides), needing as little space as most other small loops.
  • Unidirectional with a ~160° wide “beam” and one pronounced minimum with a front/back-ratio of typically 20dB over the entire reception range 1-30MHz.
  • Moderate height requirements: It works best up to 3m/10′ above ground, where it gives you…
  • …a main lobe with a convenient flat takeoff angle for DX
  • Antenna is comparatively insensitive to ground quality/conductivity.
  • Wideband design, works best on shortwave and is pretty good up to 70cm.

A functional small beam antenna for shortwave reception that’s just as small and possibly even more lightweight (prototype:~250g/9oz) than your regular SML, that can be easily made out of easy to obtain parts and easily carried around for mobile/portable DXing and due to its cardioid shaped directional pattern also for direction finding, a “tactical” antenna that’s also doing DX? Unlike conventional, Yagi-Uda or wire beams it can achieve a low takeoff angle at only 3m/10ft height or less, the front/back ratio is typically better than that of a 3-element Yagi, with a particularly useful horizontal pattern shape. That it’s rather indifferent to soil quality could mean that more people get to reproduce the good results and being a real wideband antenna is making the SULA an interesting companion for multiband radios and SDRs. Really? A miracle antenna? Is it that time of year again? If I had a dollar for every….

Continue reading

Spread the radio love

How to Build a Simple Linear-Loaded Dipole for Low-Noise Shortwave Radio Listening

Many thanks to SWLing Post contributor and RX antenna guru, Grayhat, for another excellent guest post focusing on compact, low-profile urban antennas:


A linear loaded dipole for the SWL

by Grayhat

What follows is the description of an antenna which may allow to obtain good performances even in limited space, the antenna which I’m about to describe is a “linearl loaded dipole”(LLD) which some call the “cobra” antenna due to the “snaking” of its wires
The arms of the antenna are built using 3-conductors wire (which may be flat or round) and the 3 conductors are connected this way:

That is, connected “in series”, this means that, the electrical length of the antenna will be three times its physical one; this does NOT mean that the antenna will perform like a single wire of the same (total) length, yet it allows to “virtually” make it longer, which in turn gives it good performance even with relatively short sizes. Plus, the distributed inductance/capacitance between the wires not only gives it a number of “sub” resonance points, but also helps keeping the noise down (in my experience below the noise you’d expect from a regular dipole).  At the same time it offers better performances than what one may expect from a “coil loaded” dipole. Plus, building it is easy and cheap and the antenna will fit into even (relatively) limited spaces (a balcony, a small yard and so on…).

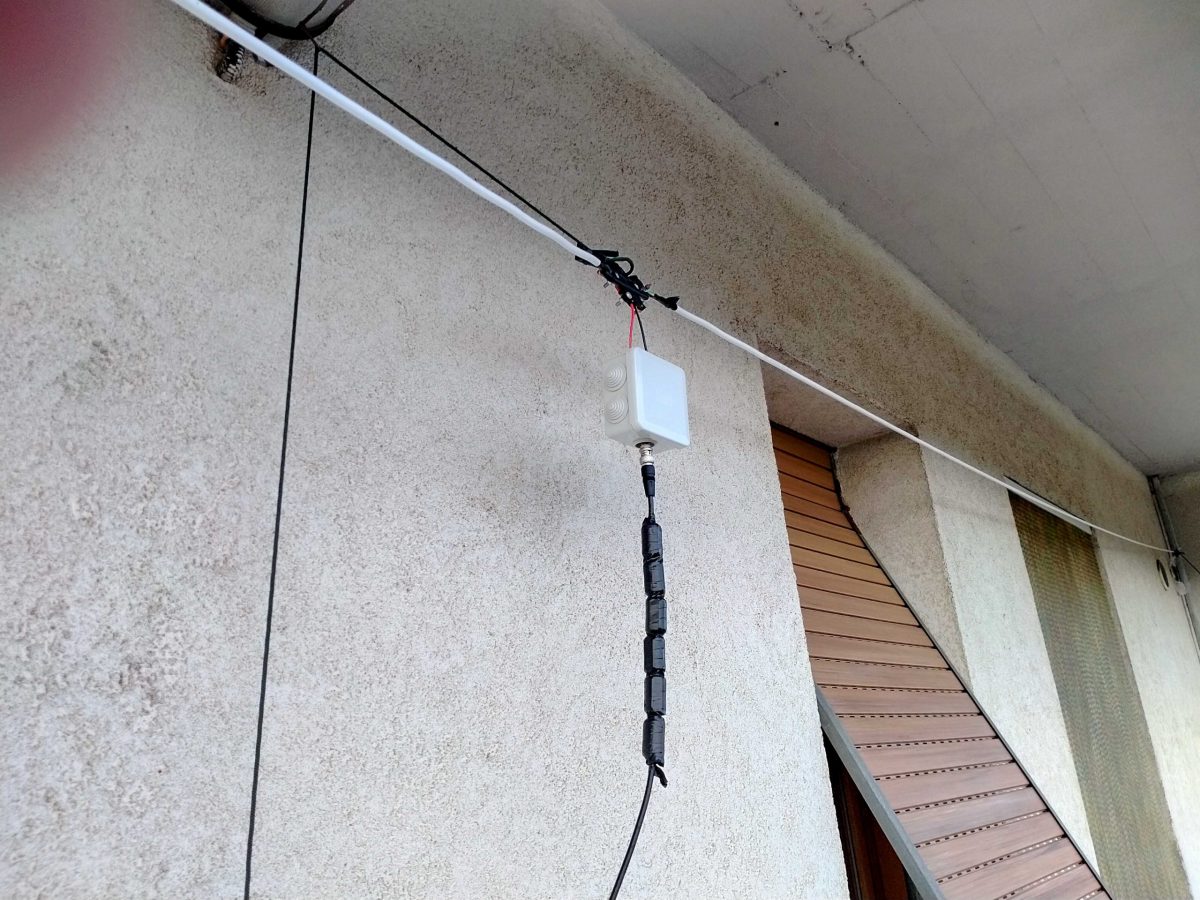
Interested–? If so, read on and let me start by showing my (short – 9mt total) LLD installed on a balcony:
Here it is in all its “glory”–well, not exactly–I fiddled with it lately since I’m considering some mods so the tape isn’t correctly stuck and it has been raised and lowered quite some times, but in any case that’s it.

Bill of Materials

Here’s what you’ll need to build it (the links are just indicative, you may pick different stuff or buy it locally or elsewhere).

  • Some length of 3-conductors electrical wire which will fit your available space (pick it a bit longer to stay on the safe side), it may be flat or round, in my case I used the round type since it was easily available and cheap: https://amzn.to/3g2eZX3
  • A NooElec V2 9:1 BalUn–or, if you prefer you may try winding your own and trying other ratios. I tested some homebuilt 1:1, 1:4 and 1:6 and found that the tiny and cheap NooElec was the best fitting one): https://amzn.to/3fNnvce
  • A small weatherproof box to host the BalUn: https://amzn.to/33vjZy3
  • A center support which may be bought or built. In the latter case, a piece of PCV pipe with some holes to hold the wires should suffice. In my case I picked this one (can’t find it on amazon.com outside of Italy): https://www.amazon.it/gp/product/B07NKCYT5Z
  • A pair of SMA to BNC adapters: https://amzn.to/37krHwj
  • A run of RG-58 coax with BNC connectors: https://amzn.to/2JckHcR

Plus some additional bits and pieces like some rope to hang the antenna, some nylon cable ties, a bit of insulated wire, duct tape and some tools. Notice that the above list can be shortened if you already have some of the needed stuff and this, in turn will lower (the already low) cost of the antenna.

Putting the pieces together

Ok, let’s move on to the build phase. The first thing to do will be measuring your available space to find out how much wire we’ll be able to put on the air; in doing so, consider that (as in my case), the antenna could be mounted in “inverted Vee” configuration which will allow to fit the antenna even in limited space.

In any case, after measuring the available space, let’s subtract at least 1m (50cm at each end) to avoid placing the antenna ends too near to the supports. Also, if in “inverted Vee” config, we’ll need to subtract another 50cm to keep the feedpoint (center/box) away from the central support.

Once we’ve measured, we may start by cutting two equal lengths of 3-conductor wire. Next, we’ll remove a bit of the external sleeve to expose the three conductors and then we’ll remove the insulator from the ends of the three exposed wire (and repeat this at the other end of the cable and for both arms).

The resulting ends of each arm should look somewhat like in the example image below

Now we’ll need to connect the wires in series. We’ll pick one of the cables which will be the two arms of our antenna and, assuming we have the same colors as in the above image, we’ll connect the green and white together at one end and the black and green together at the other end. Repeat the same operation for the second arm and the cables will be ready.

Now, to have a reference, let’s assume that the ends of each arm with the black “free” (not connected) wire will go to the center of our dipole.

Leave the two arms alone for a moment, and let’s install the balun inside the waterproof box. To do so, we’ll start by cutting a (small) hole through the single rubber cap found at one side of the box, then insert the cap reversed, so that it will protrude to the inside of the box and not to the outside. Slide the balun SMA connector through the hole so that it will protrude outside the box.

Now use a marker to mark the balun position and remove the balun from the box. Pick a piece of wood/plastic or other insulating material, cut it to size (refer to marking and to balun size) and drill four holes matching the one found on the balun board. Slide four screws through the holes and lock them with nuts, the screws should be long enough to extrude for some mm. Now insert the balun in the screws using the holes present on the balun board and lock it with nuts (be gentle to avoid damaging the balun). At this point, add some “superglue” to the bottom of the support we just built, slide the balun SMA connector through the rubber cap hole we already practiced, and glue the support to the bottom of the waterproof box.  Wait for the glue to dry.
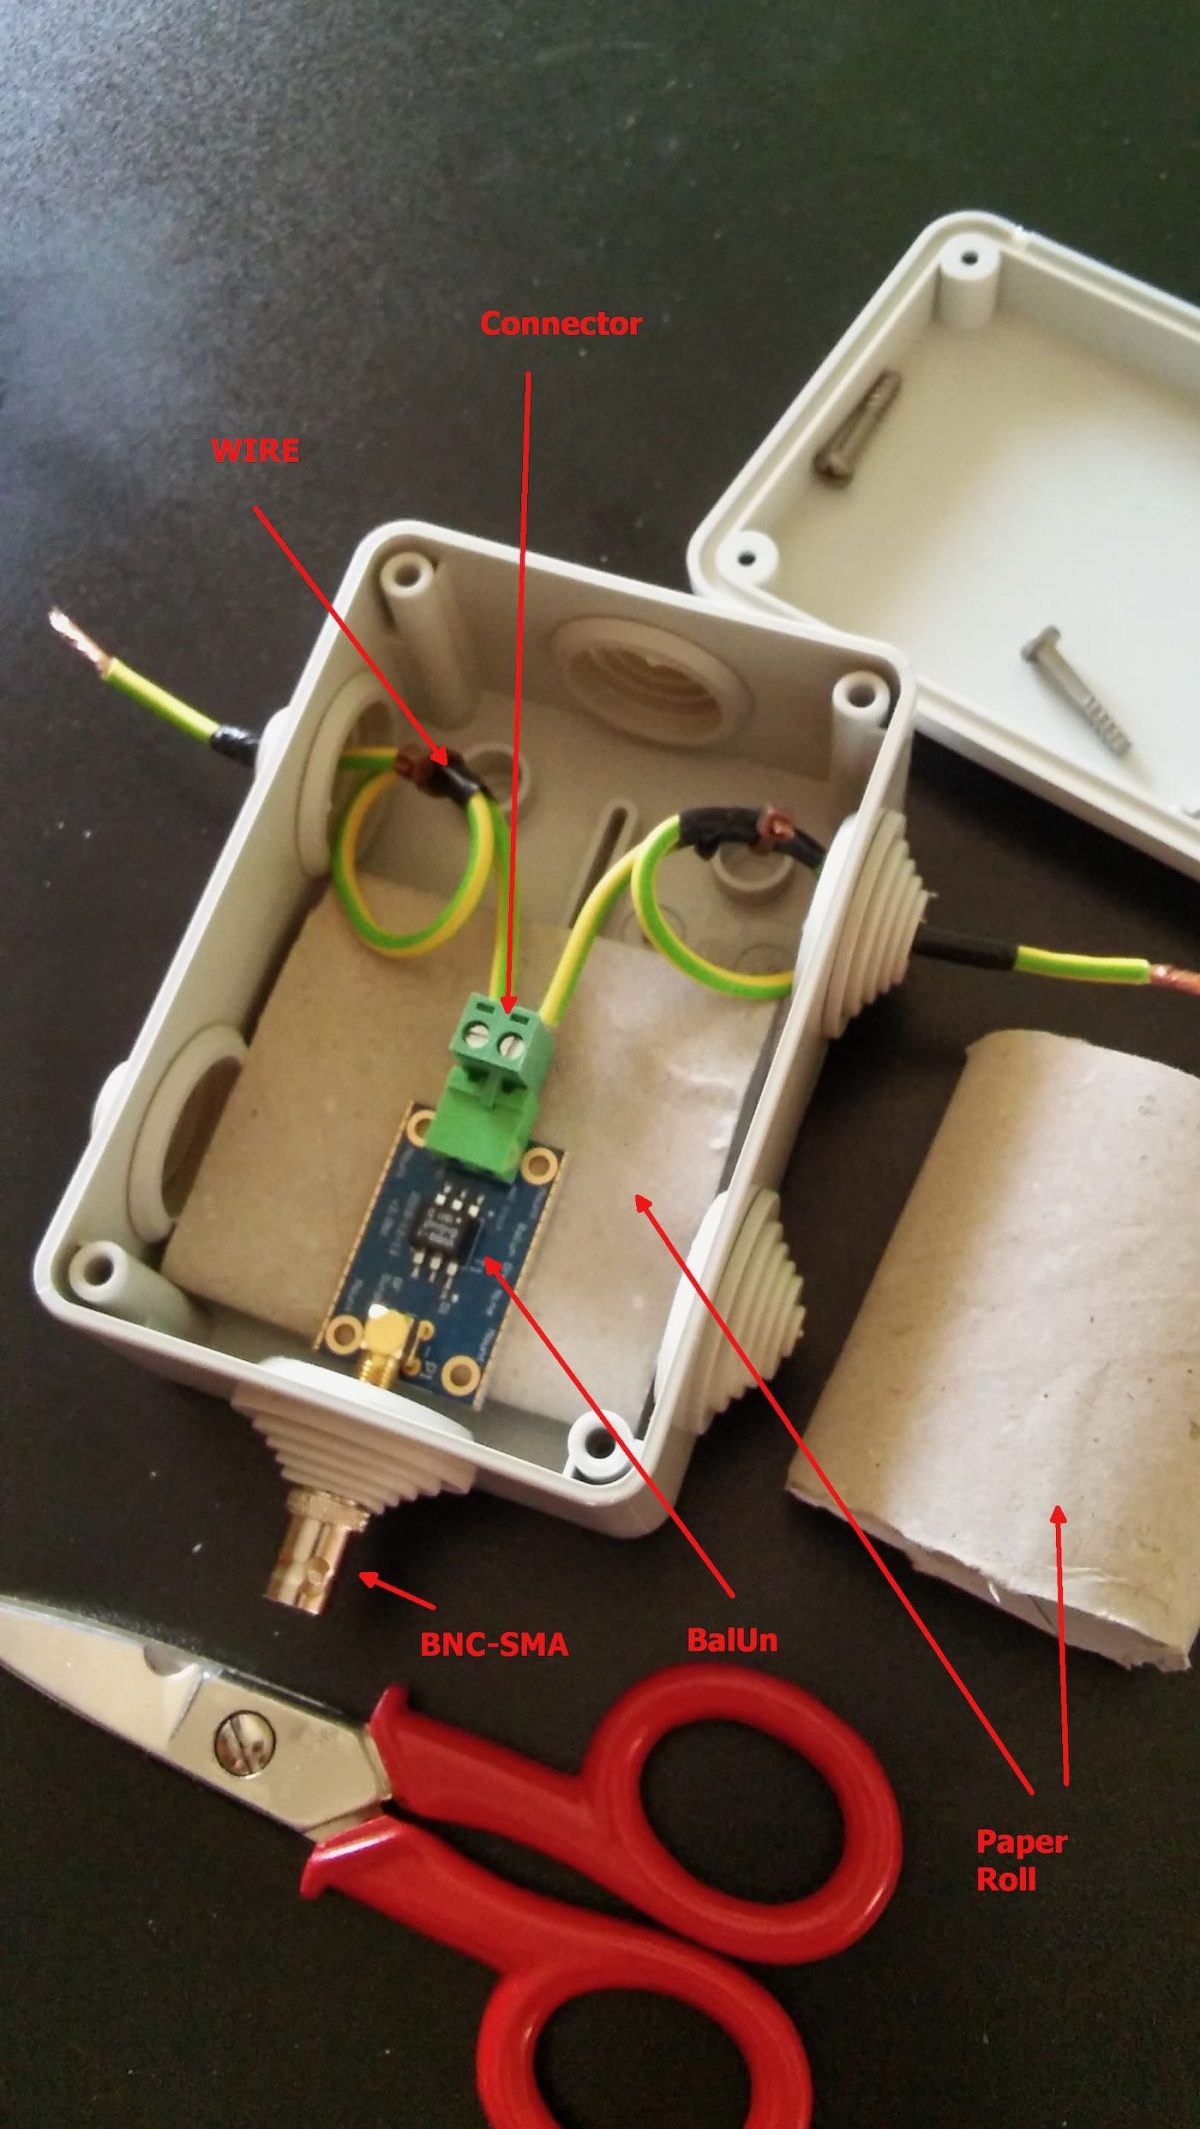
Just to give you a better idea, see the photo above. That’s a photo of the early assembly of my balun. Later on, I rebuilt it as described above (but took no pics!), the image should help you understanding how it’s seated inside the box–by the way in our case it will be locked by the screws to the plastic support we glued to the box.

While waiting for the glue to dry, we may work on the dipole centerpiece.

If you bought one like I did, connecting the arm “black” (see above) wires should be pretty straightforward. If instead you choose to use a PVC pipe you’ll have to drill some holes to pass and lock the wire so that the strain will be supported by the pipe and not by the wire going to the balun box. In either case, connect a pair of short runs of insulated wire to the end (black) wire coming from each end. Those wires should be long enough to reach the balun wire terminal block inside the box.

Assuming the glue dried, it’s time to complete the feedpoint connection.

Bring the two wires coming from the centerpoint inside the waterproof box. Pick one of the wire terminal blocks which came with the balun (the “L” shaped one should be a good choice) and connect the wires to it. Then, slide the block in place until it locks firmly. After doing so, close the box and screw the SMA-BNC adapter onto the SMA connector coming from the balun. Our centerpiece and arms will now be ready, and will be time to put our antenna up!
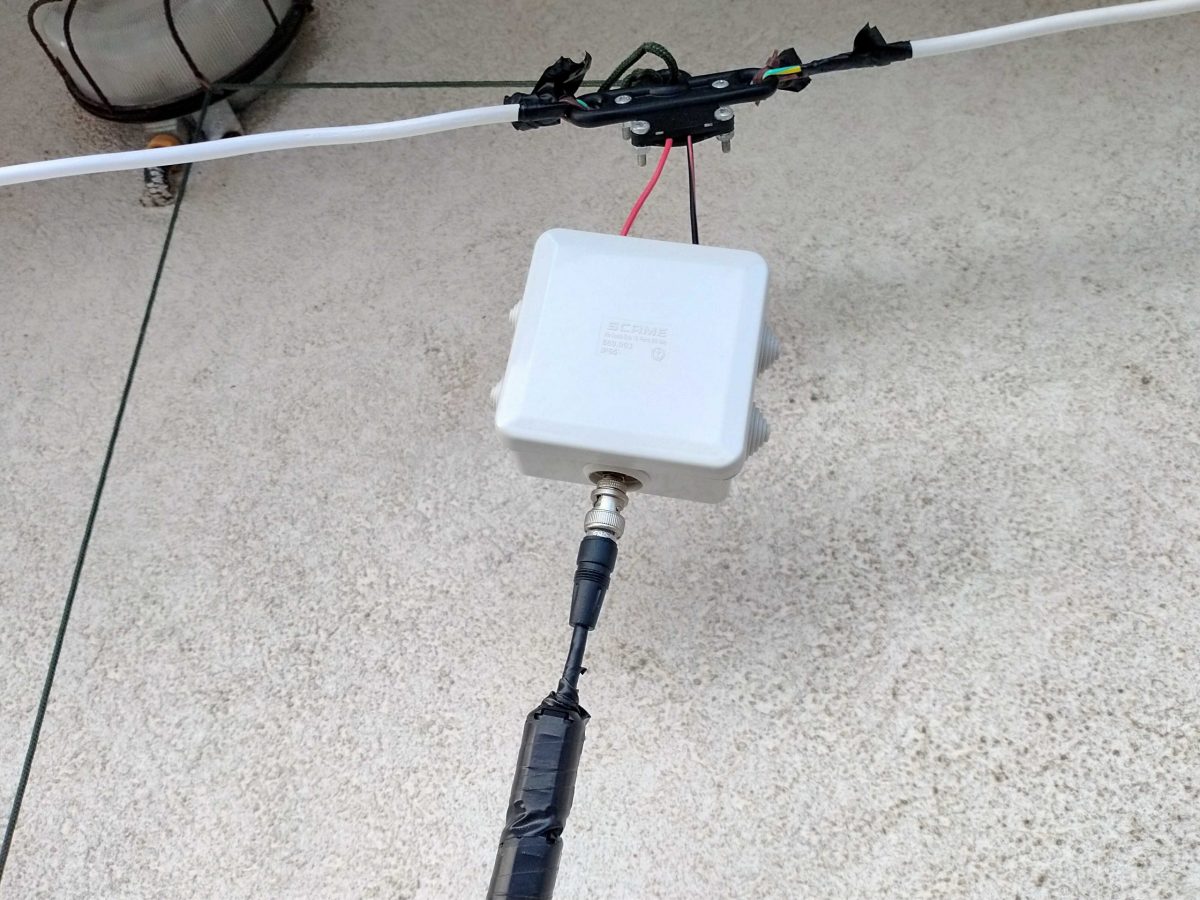
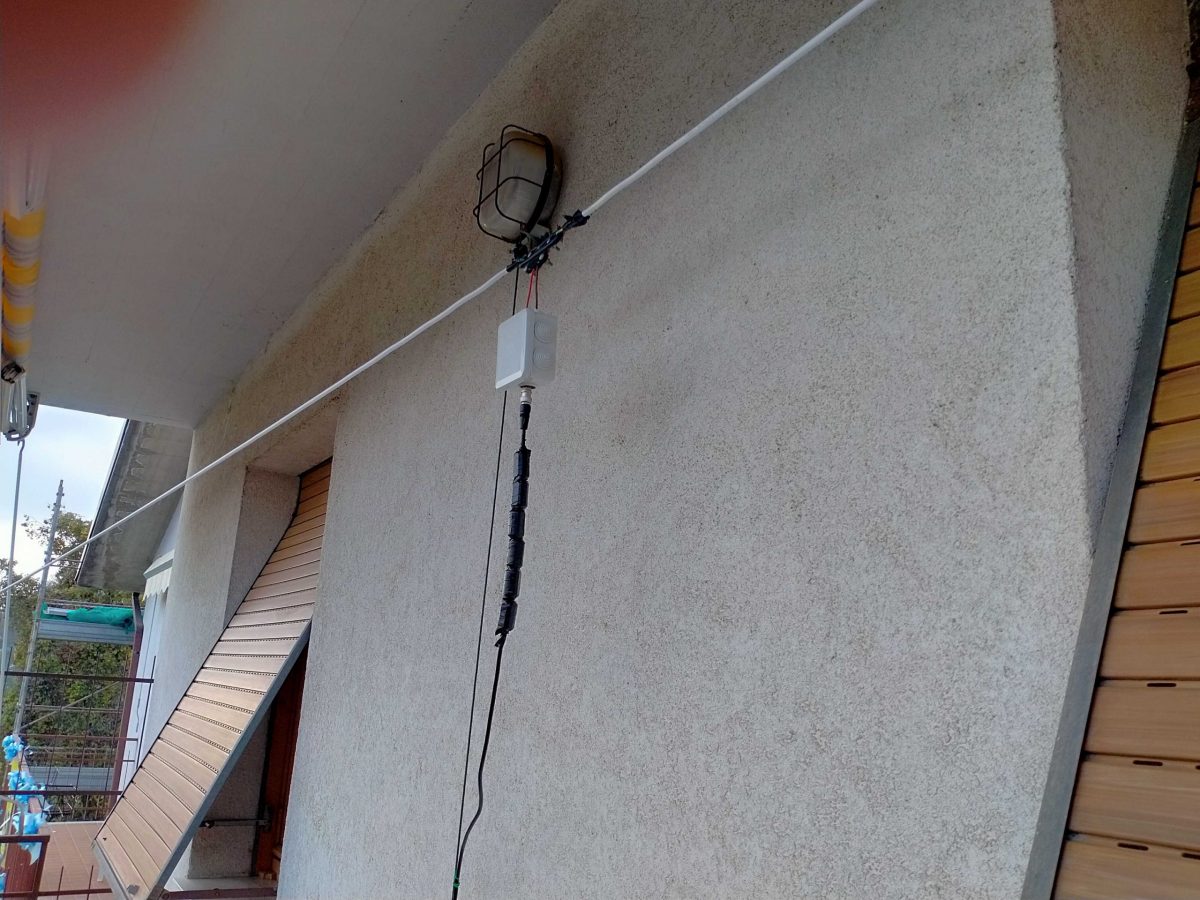
I’ll skip the instructions about holding the arm ends and the centerpiece up, since I believe it should be pretty straightforward. Just ensure to put the antenna as high as possible and, if you have room make the arms as long as possible. In my case, due to my (self-imposed) limitations, the antenna was installed on a balcony. The arms have a length of about 3.5m each and the feedpoint (in the image above) sits at about 9m off the ground.

The more acute readers probably noticed those “blobs” on the coax, they are snap-on ferrite chokes I added to the coax (there are more of them at the rx end) to help tame common mode noise. I omitted them from the “BoM” since they may be added later on.

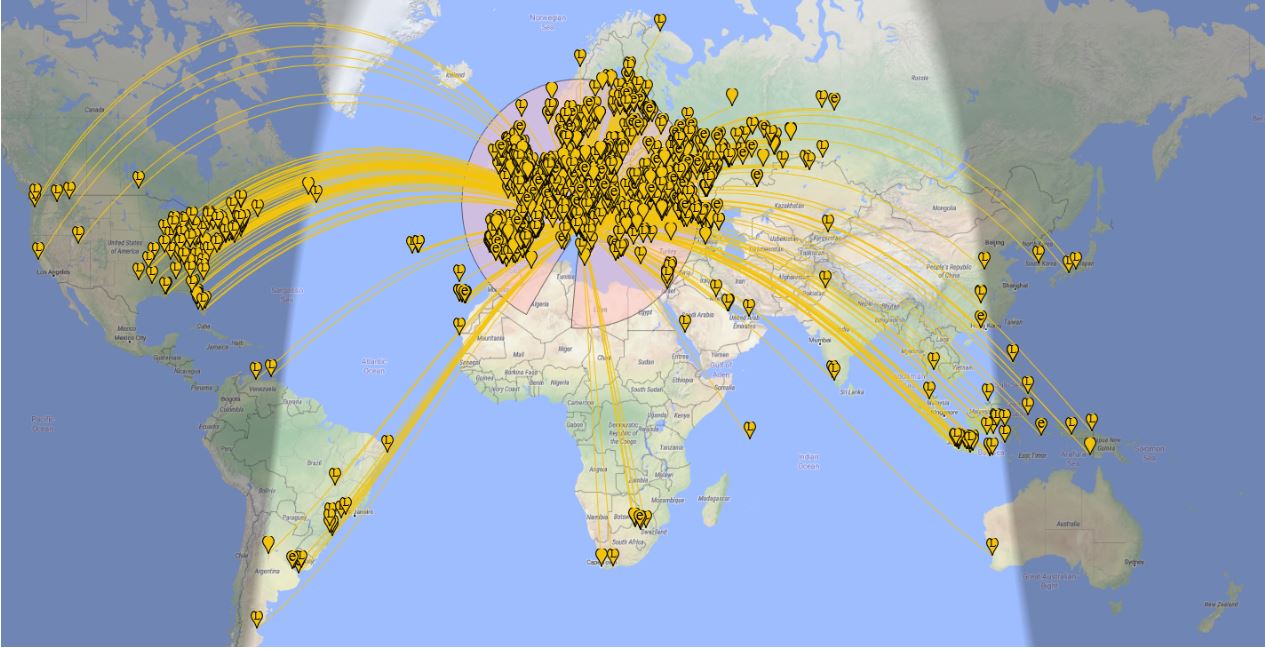
Anyhow, now that you have your LLD up it will be time to give it a test! In my case, I decided to start by running an FT8 session to see what the antenna could pick up during 8 hours, and the result, on the 20 meters band, is shown on the following map (click to enlarge):
Later, that same antenna allowed me to pick up signals from the Neumayer station in Antarctica–not bad, I think!

Some final notes

While running my “balcony experiment”, I built and tested several antennas, including a vanilla “randomwire”, a dipole, and a T2FD.

Compared to those, the LLD offers much less noise and better reception on a wide frequency range. By the way, it won’t perform miracles, but it’s serving me well on the LW band, on most ham bands, and even up to the Aircraft bands–indeed, was able to pick up several conversations between aircraft and ground air traffic control.

All I can suggest is that given a linear-loaded dipole is so simple, quite cheap, and may fit many locations, why don’t you give it a spin–?  🙂

Spread the radio love

Guest Post: Building a magnetic loop antenna & broadband amplifier for your SDR

Many thanks to SWLing Post contributor, Dave Gahimer (K9ZCE) for the following guest post:


Loop-Antenna

Small Magnetic Loop Antenna with Broadband Amplifier for SDR Reception

by Dave Gahimer (K9ZCE)

Those with limited space, or antenna restrictions, might find a small 1 meter loop antenna a solution.

My son lives in an apartment. One Loop leaning against a wall gives him acceptable reception with the SDRPlay RSP on the ground floor–2nd or 3rd level flats should have very good reception.

Ten meters off the ground outside should give reception equal to any SWL antenna. We all with SDRs fight the image problem. Normal resonate ham band antennas show too strong reception of unwanted bands/stations. Did I mention noise? Loops are well known for –6 db noise reduction.

Then there is the possibility of SDR chip damage from your 1.5 KW station! In researching Loops we came across LZ1AQ. A Brilliant design /engineer (http://www.lz1aq.signacor.com/). Deep reading sometimes, but a great understanding of what makes a good receiving loop antenna.

Those who chase DX know that sometimes fading is caused by the signals’ polarization changing in the Ionosphere. Having both vertical and horizontal loops, and the ability to combine both signals diminishes this fading problem. Being able to filter the powerful, commercial FM transmitters diminishes image problems. Clipping strong signals at the antenna from very near powerful antennas/transmitters could save the SDR receiver from damage.

The LZ1AQ broad band Amp solves all these problems. http://active-antenna.eu/amplifier-kit/.

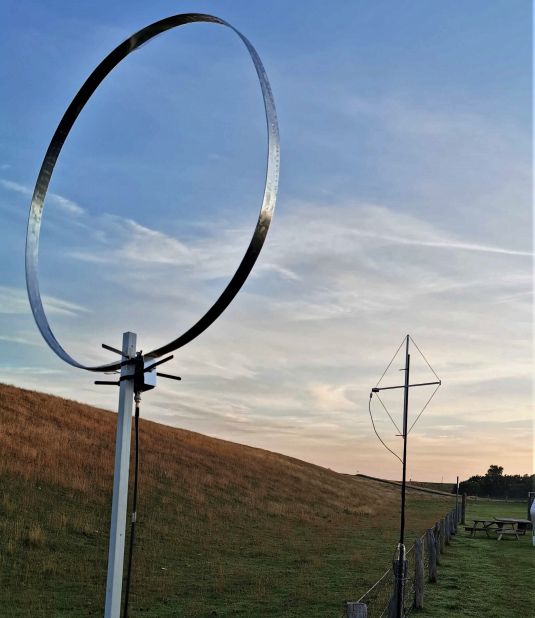
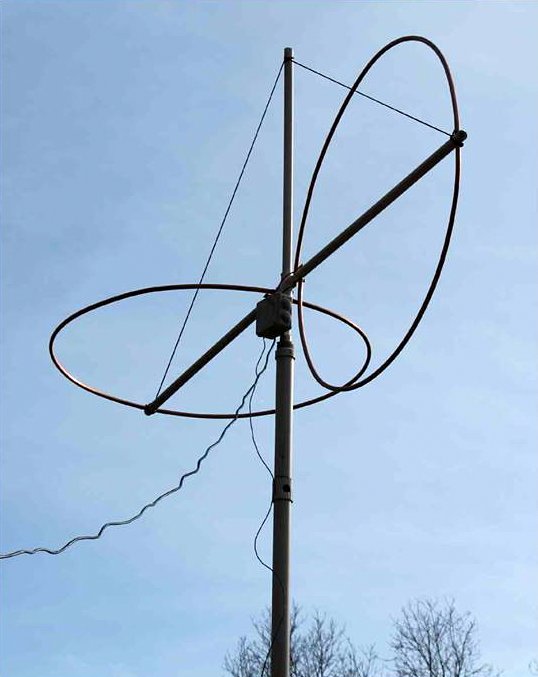
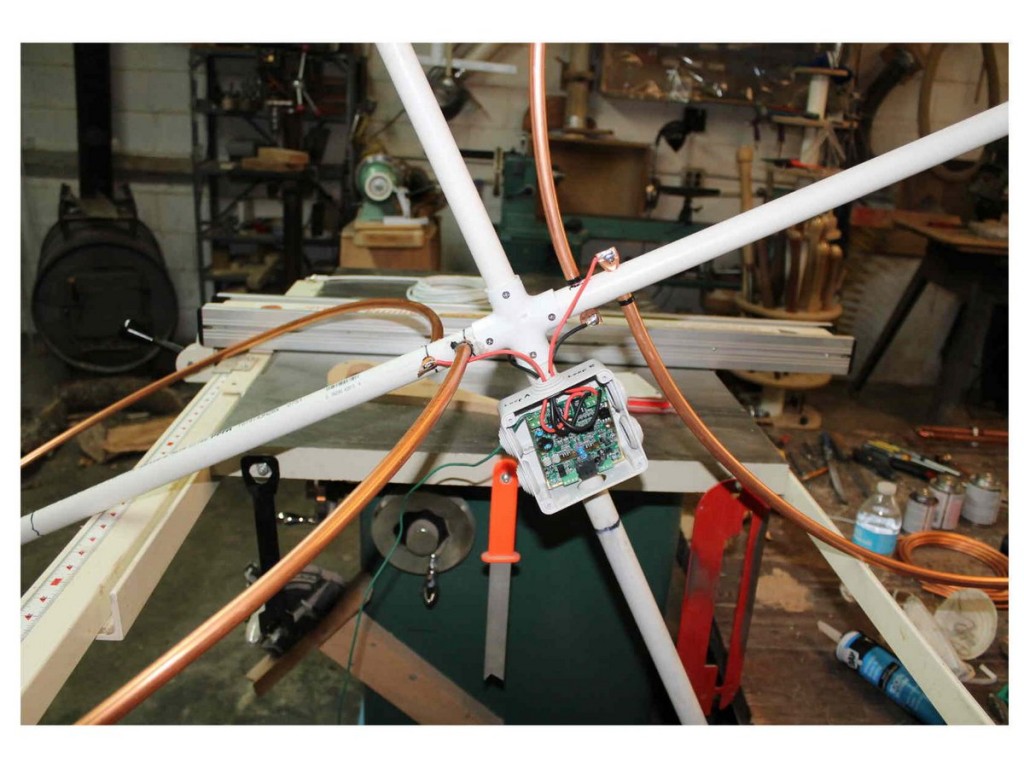
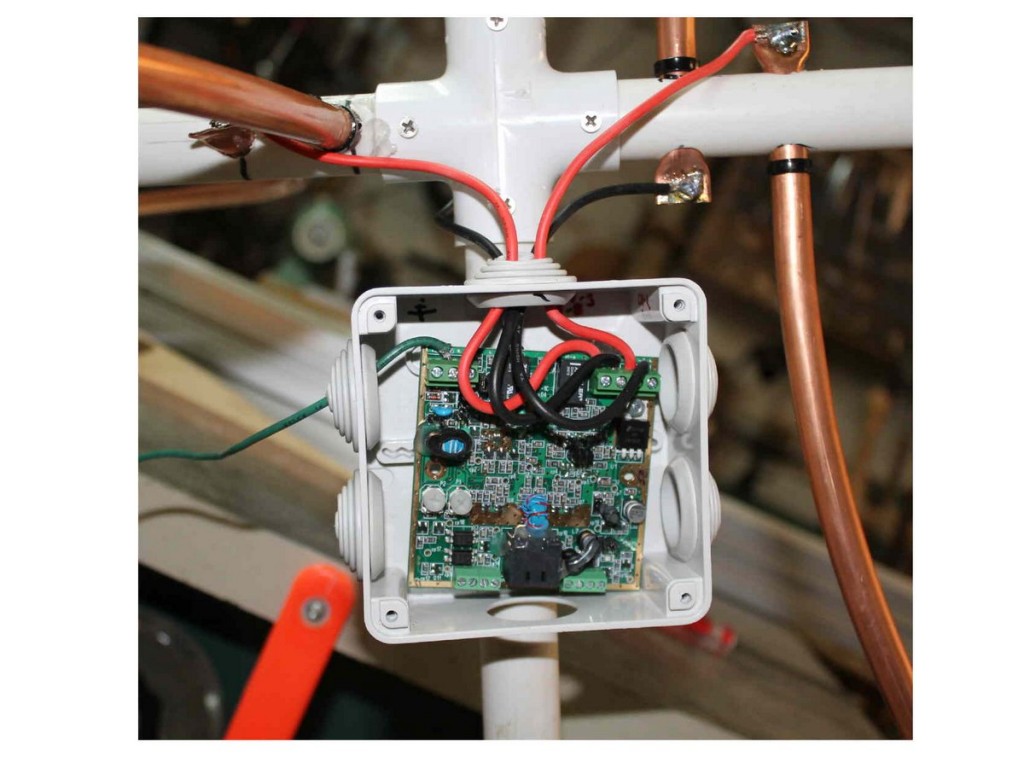
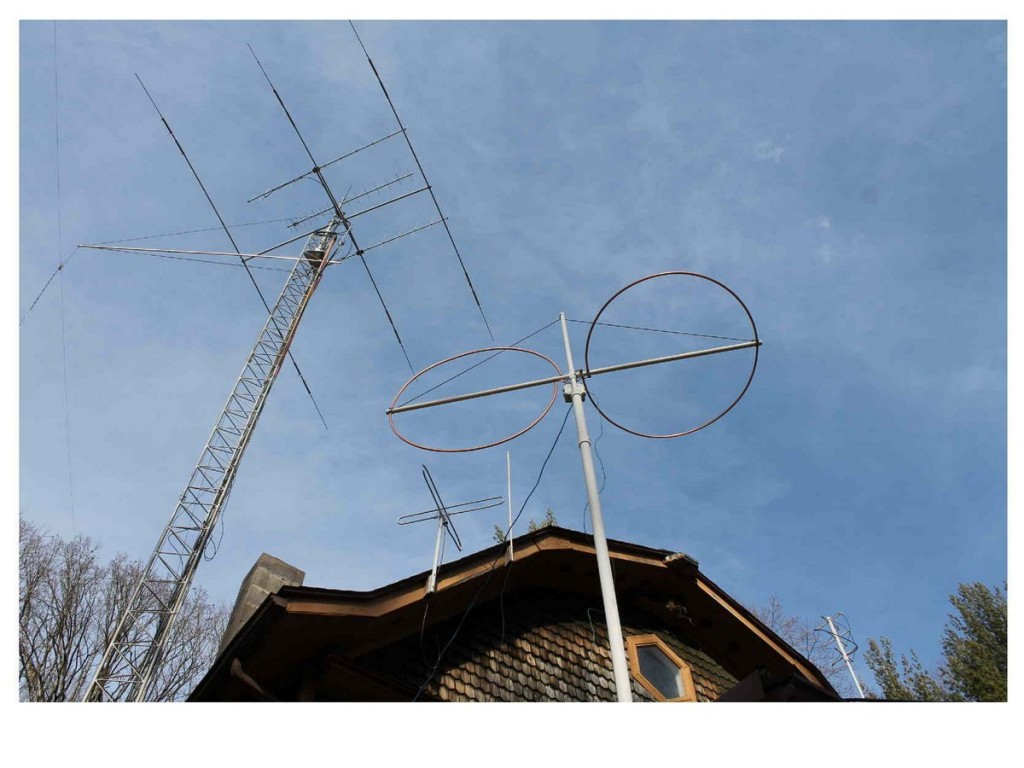
My son Ted and I built three, one meter loops from soft ½ inch copper plumbing tubing. One for his apartment, two for my crossed loops antenna. We weather proofed the Copper from corrosion by coating with outdoor clear spar varnish. We shaped the circle by drawing the tubing around a round glass top patio table.

The soft copper loop in held by white PCV plastic plumbing pipe. 1” or 1.25 inch schedule 40. Be careful to check that the PVC is schedule 40, thick wall. The thin wall pipe is not strong in the wind and will crack when you try to drill it.

Drill up to a 3/8 hole for the ½” copper tube to go through, then file out to fit. Here are some photos (click to enlarge):

crossed loops up 3 crossed loops up 4

Check out these links (all courtesy of LZ1AQ) to acquaint yourself with the loop construction and amplifier installation:

http://active-antenna.eu/tech-docs/2_ActiveAA_Mount_20.pdf

http://active-antenna.eu/tech-docs/1_ActiveAA_DandS_20.pdf

http://active-antenna.eu/tech-docs/3_ActiveAA_Antena_11.pdf

Many SDR receiver owners have seen improved noise and Image reduction by placing the plastic cased SDR unit on a small shielded/ grounded case.

crossed loops up 5

The Amp needs 12VDC from in the shack. The Amp has two relays that you can switch, from in the shack, to select Vertical or Horizontal loops, or a dipole. The loop amp connects back to the shack via a shielded Cat 5 cable, Make sure you get shielded CAT 5 to reduce noise pickup. Make sure you provide an adequate good Ground below the antenna, less noise pickup and lightening protection.

crossed loops up

Have fun!
Dave, K9ZCE
Retired from EE Dept @ Rose-Hulman Institute of Technology
Terre Haute, Indiana


Thank you so much, Dave!

Readers: yesterday I saw Dave’s loop antenna photos on the SDRplay RSP Facebook page. I was fascinated by his horizontally/vertically oriented loops and asked if he would write up a short guest post.  He kindly obliged in a matter of hours!

If you have an antenna project you’d like to share, please contact me. So many SWLs and ham radio operators live in areas with restrictions and pervasive RFI–projects like Dave’s can revive one’s radio life!

Spread the radio love