Category Archives: Guest Posts

Dan reviews the Tecsun PL-368: “Large Receiver Features In Smaller Vertical Handheld”

Many thanks to SWLing Post contributor, Dan Robinson, for the following guest post and review:


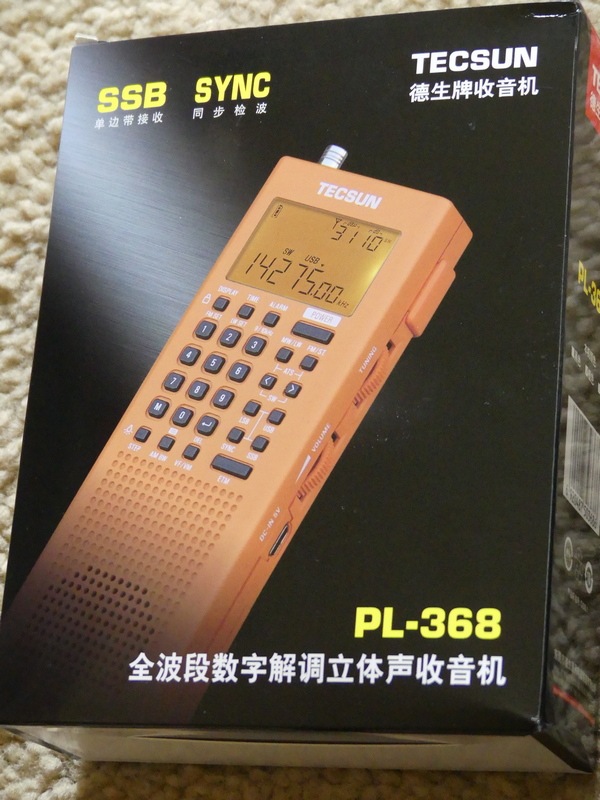
Tecsun PL-368Tecsun PL-368:  Large Receiver Features In Smaller Vertical Handheld

by Dan Robinson

It was back in 2020 that the first photos surfaced online of the PL-368 – posted on Facebook by someone attending the electronics fair in Shanghai, China.

Photos showed the successor to the PL-360/365 receivers – and also the PL-990, successor to the PL-880, as well as the new king of the hill for Tecsun, the larger dual speaker H-501.

Things looked promising, and it was pretty exciting.  Tecsun designers upgraded the PL-365 which had become a favorite of preppers and SWLs, but which was hobbled by the lack of a keypad, to the re-named PL-368.

The PL-365 and PL-360 before it were plagued by the problem of being overly sensitive to the touch – when holding the radio, reception was fine, but remove your hand and signal levels plummeted.  Usually, a full hand grip was necessary to obtain full sensitivity and any variation in grip reduced sensitivity – this was noticed mostly in shortwave mode.

Previous 360/365 models were known for the included small rotatable ferrite

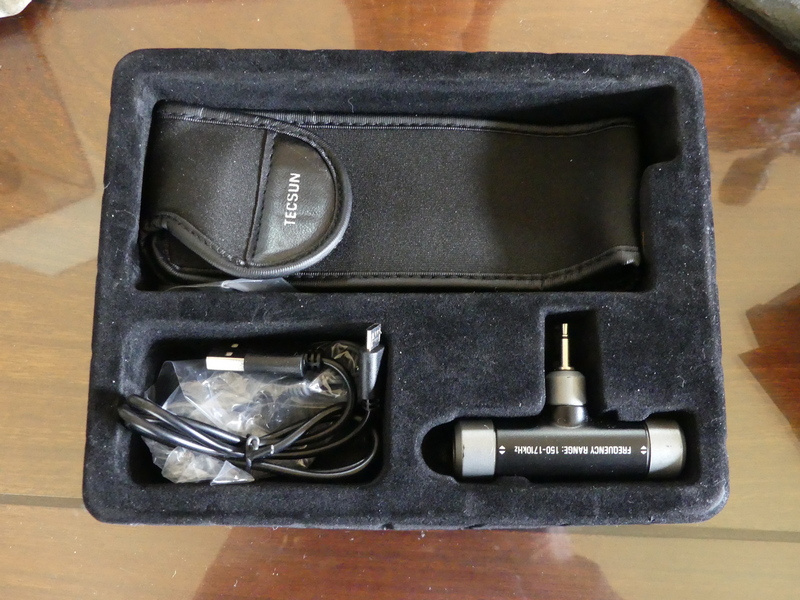
AM amplified antenna which performed miracles in nulling mediumwave stations – for those who still like to listen to the AM band.  The 368 also comes with this additional ferrite antenna.

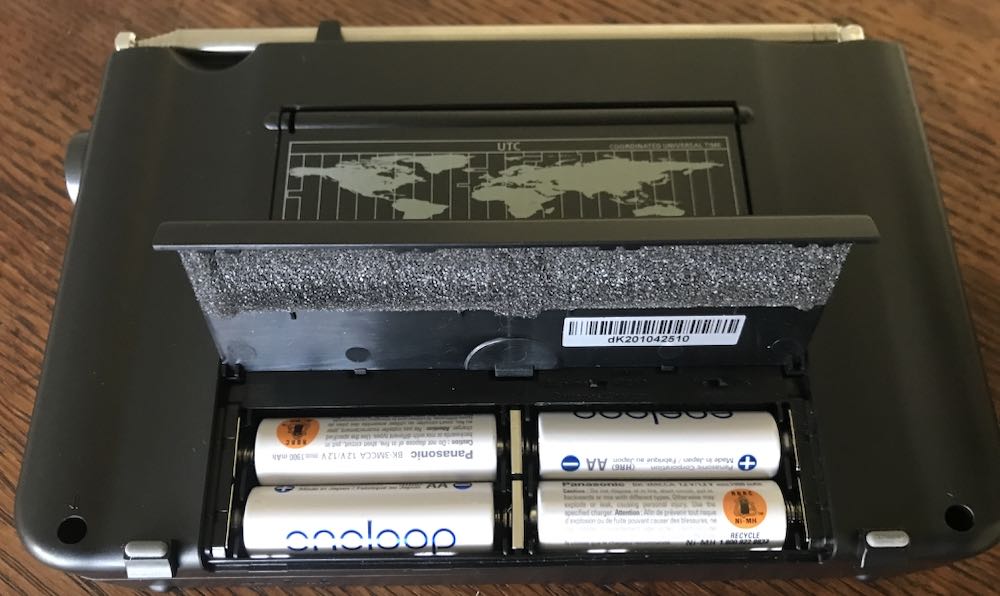
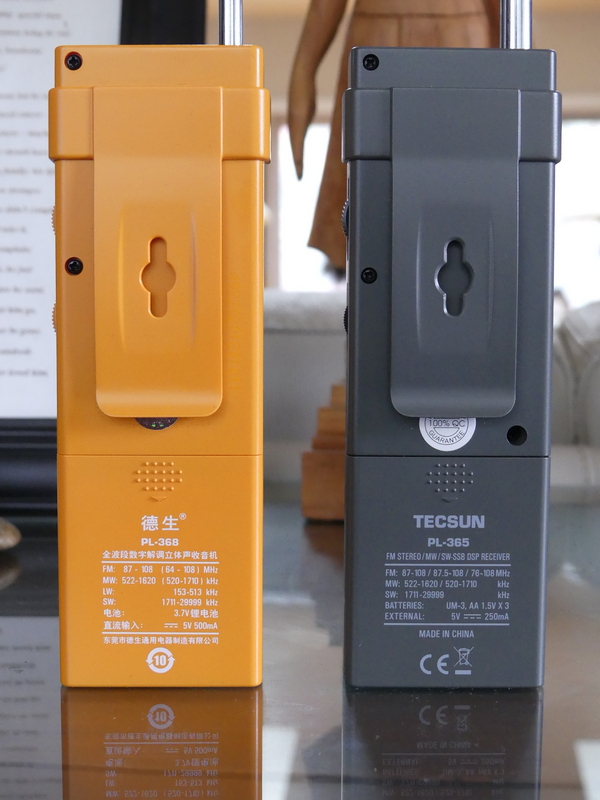
And the 365/360 (which were and still are sold by CountyComm as the GP-5) used AA batteries, making it very easy to find replacements anywhere the radio is being used in the field.  Tecsun changed that on the 368.

After the photos appeared, I contacted Benny Zhao, who had posted them on one of the Facebook groups and asked if he could send me a sample of the PL-368.  He obliged and a 368 was sent on its way.

The radio was sent without the BL-5C flat lithium battery which was prohibited in postal shipments.  It took a long, long time (3 months, apparently the package was sent by snail mail) but it finally arrived here and I have been putting it through some tests.

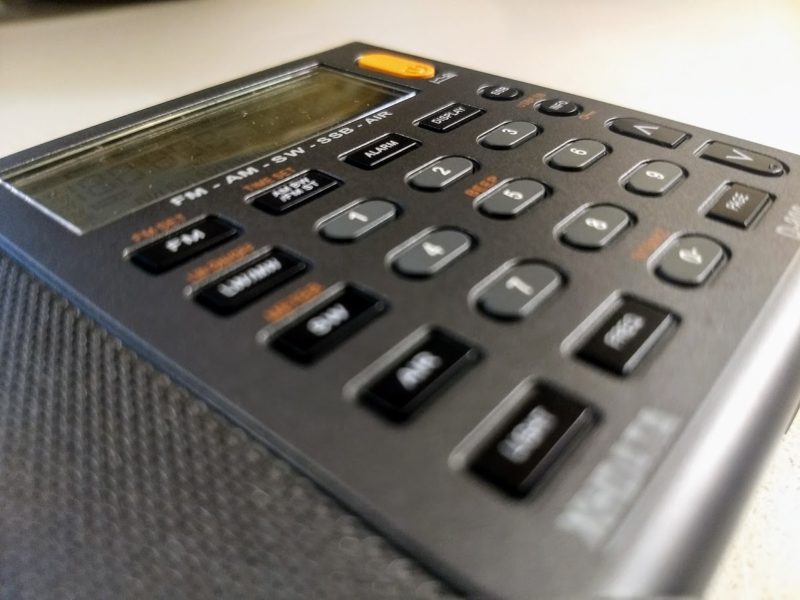
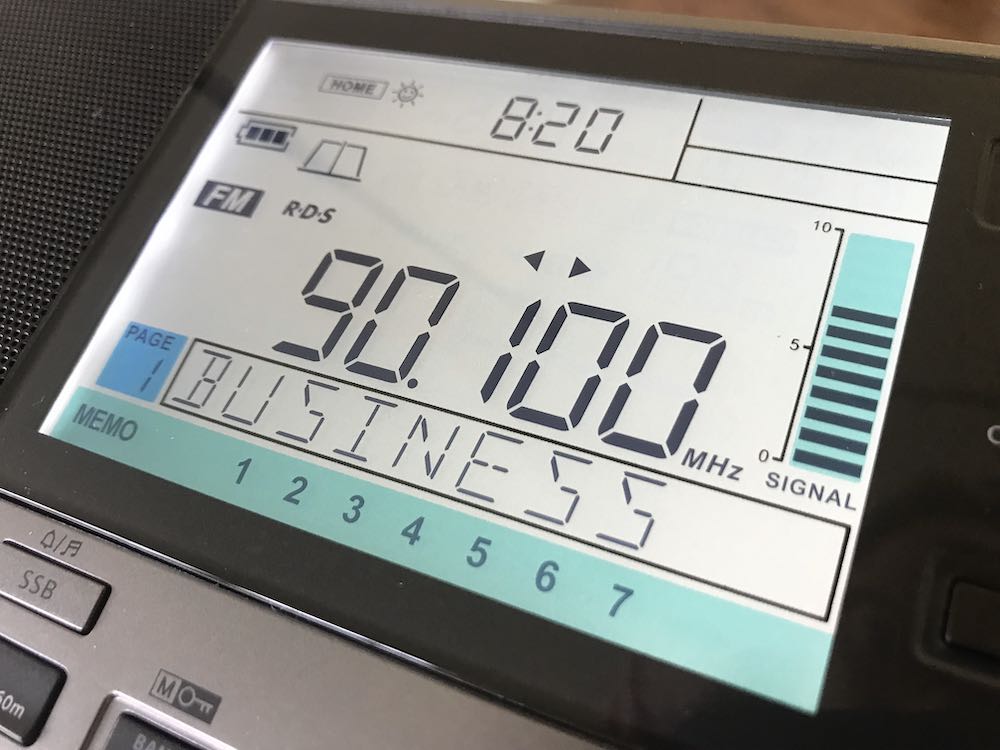
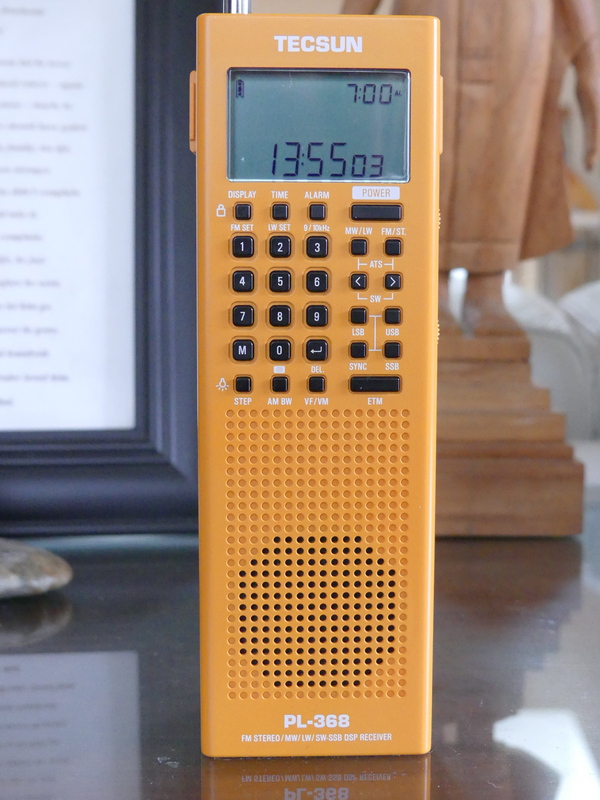
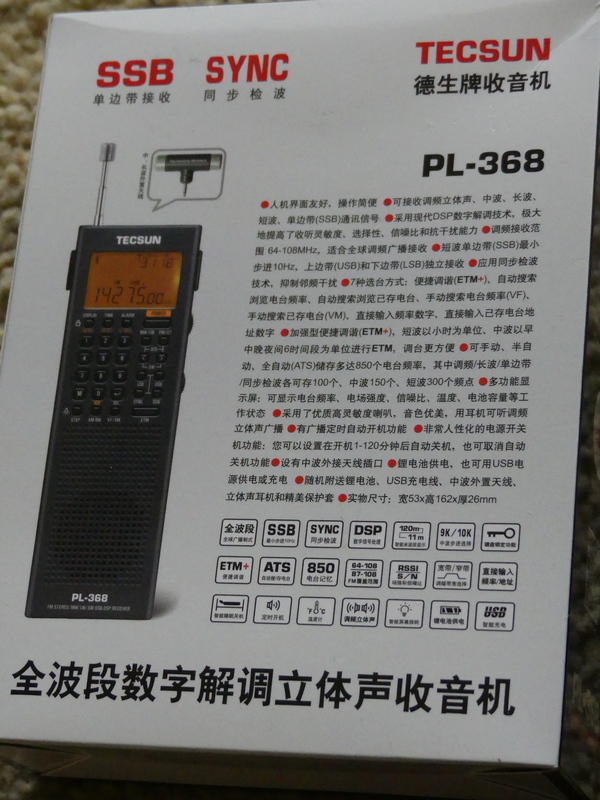
Tecsun PL-368

The PL-368 that I received has the notation “2020.12 VER 1” so it’s clearly a first version from 2020 production.

Tecsun PL-368

Like the models before it is a great, handy, portable to grab if you’re going on a trip.  It is lighter than the older 360/365s.  The change from three AA batteries to the flat BL-5C explains some of that.  There is a heft to the older models that the 368 doesn’t have.  I am not sure about differences in thickness of the 368 cabinet.  Perhaps we will find out more from Tecsun (see notes below regarding issue of tapping the front of the 368 cabinet).

Tecsun PL-368

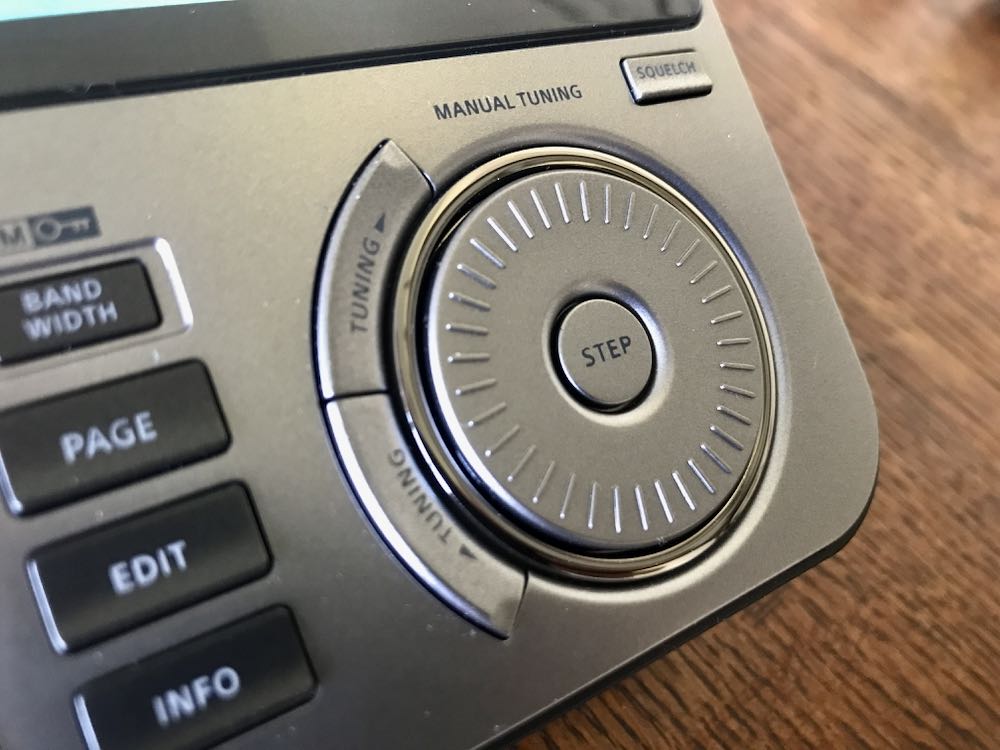
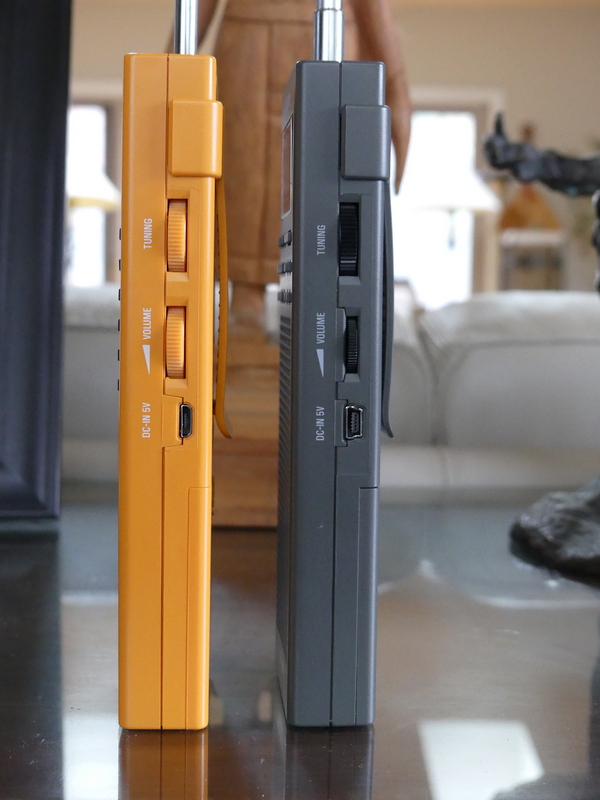
The 368 retains the two multi function adjustment wheels on the right side, one for Volume, the other for Tuning.  These are also used for time and bandwidth control.

Tecsun PL-368

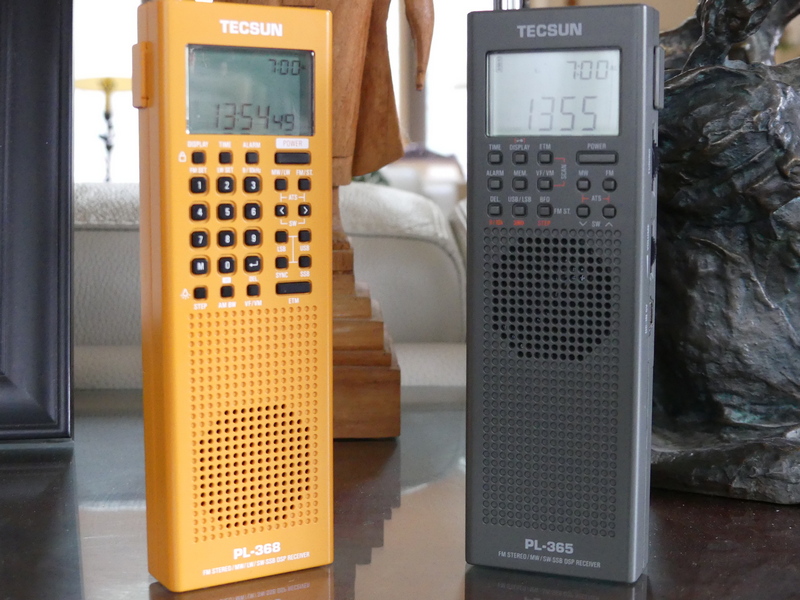
Tecsun PL-368 (left) and PL-365 (right)

On the 360/365 radios, I never found the tuning wheel approach to be particularly efficient since it was limited to a certain number of kHz per turn, either 5 or 1 kHz depending how fast you turned.

On the 368 it appears you can obtain up to 40 kHz from a single turn of the wheel, while on the 360/365 that was limited to 15 to 20 kHz depending on the speed you were turning.

Tecsun PL-368

Tecsun PL-368 (left) and PL-365 (right)

The antenna on the 368 is thinner, but 8 inches longer than the 360/365 models, and in the box you will find the included and very effective rotatable ferrite antenna for mediumwave that inserts in a jack on the top.

On the 368 the volume wheel has detents, whereas on the 360/365 the wheel had smooth turning.

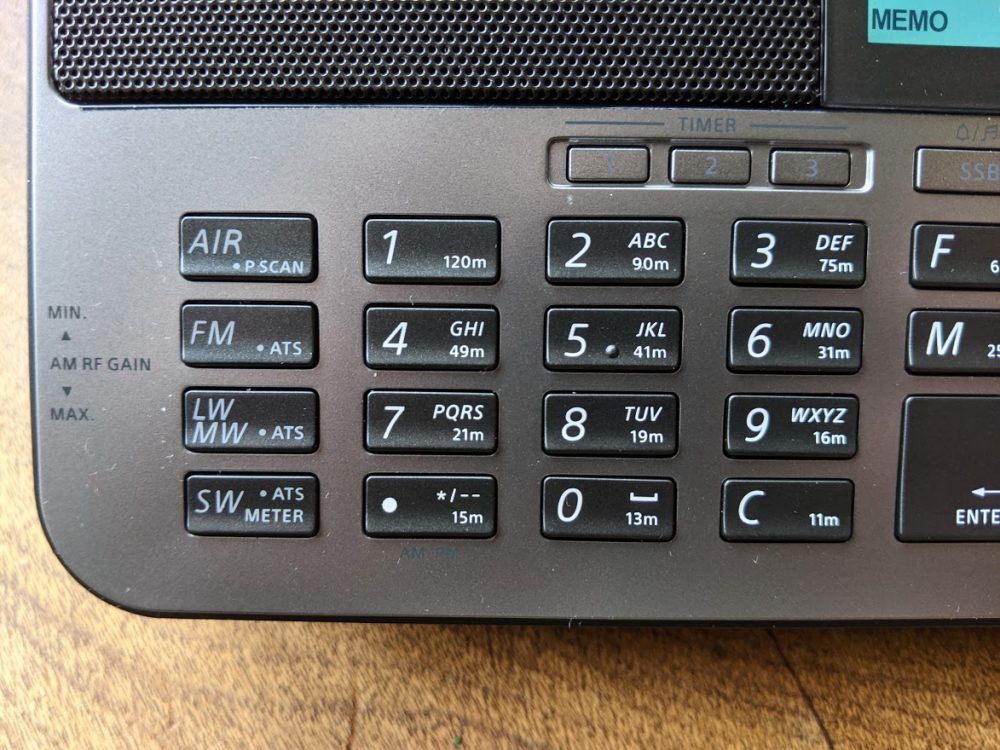
We have gone from 14 buttons on the old PL-360/365 models to 28 buttons on the PL-368, including addition of the keypad.

UPGRADES

Tecsun PL-368

Tecsun has upgraded the 368 in line with improvements seen in the PL-990x and H-501 receivers.  There are now adjustable bandwidths – a particularly useful tool.  These bandwidths also operate in SSB, something that the new Sangean ATS-909×2 doesn’t offer.  Bandwidths are:  LW/MW 2.5, 3.5, 9.0  SW: 2.5, 3.5, and 5.0 SSB: 0.5, 1.2, 2.2, 3.0 and 4.0 kHz

Also in the 368 is now synchronous detection, a feature left off Sangean’s 909×2.  And you get the same intelligent tuning features seen in the 909x/501x models as well as the previous PL-880.

Tecsun added a control that enables activation of the light – this is located on the same button as the Step control which adjusts the tuning steps.

The 368 display now has the ability to tune in 10 Hz increments, an overdue upgrade from the 360/365 models.

Charging of the BL-5C battery can be carried out by connecting a DC 5V/0.5A adapter to the micro-USB port on the side of the radio.  The English manual notes that when charging, the charging time is displayed at the top right corner of the display while the “Charge” indicator flashes.

Adjustments for 9/10 kHz mediumwave, Longwave, and FM frequency range can be found on the 1, 2 and 3 keys.

The manual notes that in addition to the internal ferrite bar antenna, the external supplied MW/LW ferrite antenna can be connected to the antenna socket on top and rotated to obtain optimum reception.

Addition of the keypad makes the PL-368 far more useful than its predecessors for instantaneous frequency access.   This was the major drawback of the 360 and 365 receivers.  This can’t be emphasized enough.

This is a day versus night difference and vastly improves the attractiveness of the 368 over previous models.

There are 850 memory presets, 100 for FM/LW, 150 for MW, 300 for SW, and 100 each for SSB and SYNC.

ATS tuning, like the 990x and 501 receivers enables ATS within all meter bands by holding the [<] or within a selected meter band by holding the [>].  The manual also notes the ability to auto scan all stored stations within a frequency band or mode (SYNC/SSB) staying on each station for about 5 seconds before resuming.

The 368 has what Tecsun now calls Enhanced Tuning Mode (ETM+) – as explained in the manual, this allows auto tune and storing of FM, LW, MW and SW stations into ETM memory.  Unlike ATS, scanned stations will not be stored into regular memory (VM) – in this way, when in a different city or country, ETM+ can be used to auto search new stations without overwriting any previously stored stations.

FM De-emphasis Time Constant – as explained in the manual, while receiving FM broadcasts, long pressing [4] will adjust the de-emphasis setting for Europe, Australia, Japan (and most other locations), or for Americas and South Korea.

Add Seconds to the Clock – with the device powered off, press and hold [8] to add seconds to the clock.

Sleep Timer – as with its predecessors, the 368 has a Sleep Timer, with an indicator on the LCD display.

Alarm –  and like earlier models, there is also an Alarm function, which allows the radio to turn on at a preset time.  It’s possible to select a specific frequency to be used with the Alarm.

RE-CALIBRATION –  I have not been able to determine yet if the 368 has a re-calibration function as can be found on the PL-330, 909x, and H-501.

PROBLEMS

Let’s get one headline out to start:  The 368, as with the 909x and H-501 all have the useful Synchronous Detection mode.  However, SYNC continues to be hobbled, showing distortion and loss of lock.

As I have mentioned in reviews of the 330, 990x, and 501x any successful use of SYNC requires a delicate dance involving careful selection of various bandwidths while in SYNC mode and fine tuning.

The 368 manual contains 3 pages of explanation of SYNC noting that it can “eliminate distortion generated in the IF filter due to local fading, slight offset, modulation overshoot, as well as inter-channel interference and cross-talk modulation, and can also reduce noise interference.”

The problem with all of the Tecsun DSP chip receivers after the PL-880, which had a hidden SYNC feature that was the worst of the bunch, is the extent to which SYNC still suffers from distortion and loss of lock that renders the feature far less useful than it could be.

Ideally, one would want SYNC to match the capability achieved in such older receivers as SONY’s ICF-2010, SW-100S, SW-07, 7600GR.  You’re not going to get that with Tecsun receivers.

Like its predecessors, the 368 is still sensitive to touch.  I noticed this immediately on the old 360/365 receivers, especially when using the radios

at the beach.  If I was recording a station on shortwave, and left for a few minutes, I would return to find that sensitivity had dropped because the radio was not still being held in the hand, which rendered the recording useless.

I am continuing testing of the 368 to try to determine if this issue has been reduced to any extent and will update this review with any further findings. This sensitivity issue is not specific to the 368 – it can be seen on other older and newer receivers.

Many older portables (the SONY ICF-SW55 comes to mind) were constructed with robust cabinets that were less sensitive to touch.  Touching the whip antennas on some older receivers improved reception, while on others touching the whip antenna actually reduced sensitivity.

URGENT ATTENTION FOR TECSUN:  My initial testing of this particular China market unit of the PL-368 – again, it is marked as December 2020 Version 1 production – identified an additional issue.

When in SSB modes or SYNC, tapping on any area of the keypad and LCD display produces a warbling/distortion effect in the audio.  One can only surmise that this is attributable to insufficiently robust construction of the PCB board underneath.

(Video shows problem created when physically tapping front of PL-368 cabinet.)

This is NOT a problem seen with my PL-365 when it is in SSB mode.   

I hope that Tecsun gives this the attention it needs and corrects the problem in future production runs.

SUMMARY

Tecsun PL-368Were it not for the major problems detailed above, the PL-368 would be an automatic must-buy receiver in my book.

Addition of the keypad is a night and day improvement and when combined with additional features such as multi-bandwidth options and the still-to-be-perfected synchronous detection, the 368 would be a killer portable.

But as with the PL-330, 909x and 501x the problem with SYNC mode is still a major drawback on a feature that is supposed to lift Tecsun receivers out of the pack of portables that are on the market in 2021.

One can live with the issue of cabinet sensitivity – but the additional issue I identified where there is instability introduced when tapping on the front panel/keypad/LCD is a QC problem that simply must be addressed by Tecsun.

But as I have said in reviews of other Tecsun receivers, let’s back up a bit.  Imagine if we had had portable receivers with the capabilities that these have, back in the 1960’s or 1970’s.

It’s one of the great ironies of the radio listening hobby, that in 2021 any company is willing to continue producing receivers of this caliber as use of shortwave by major broadcasters continues to decline.

The obvious other killer feature to include in portables such as this would be to somehow integrate DRM into them.  However, I have a feeling that will never happen

Dan’s review of the flagship Tecsun H-501x portable shortwave receiver

Many thanks to SWLing Post contributor, Dan Robinson, for the following guest post and review:


The H-501:  Jewel in the Tecsun Crown, With Some Attractive Features

by Dan Robinson

Since 2020, there has been one Tecsun receiver I have been most looking forward to reviewing, and that is Tecsun’s H-501.

Videos showing the pre-production and mainland China versions of the 501 started appearing online at least a year ago.  There are also numerous videos showing comparisons between the H-501 and PL-990x as well as the PL-330.

What I will do here is provide an assessment of the 501 informed by my use of a H-501 just received, the other two Tecsun receivers, and my decades of experience using a wide range of portable receivers.  This review is based on initial tests of a H-501x, among the first production units.

Video: Unboxing

HOMAGE TO RECEIVERS OF THE PAST

The elephant in the room with the 501 is, of course, its two large left and right speakers.  This reminds one of another Tecsun DSP portable, the PL-398BT with a similar left-right speaker arrangement.

On the left of the H-501, from the top, are the Volume, Treble, and Bass knobs which like the PL-880 and 990x has obvious lineage back to the famous Grundig portables of the 1990’s – the Satellit 500 and 700.  Both of those were limited to two bandwidths.  Only the 700 had anything approaching usable synchronous detection.

Each of the left hand control knobs on the 501 contains a dot to indicate where you are in the Maximum/Minimum range.  At the bottom of the left side is a micro-USB port for when the receiver is used as a computer speaker – quite a nice feature!

On the right side of the 501 you find ports for AM and FM antennas, each with a rubber traction cap, similar to what is found on the PL-990x.  There is also a three position sensitivity sliding switch for Local, Normal, and DX modes – that’s one more than usually found.

Knobs on the right side are the Main tuning and Fine tuning, again similar to the PL-990x.  At the very bottom of the right side is the 5v 1.0 amp micro-USB charging port.

ERGONOMICS

NEGATIVE:  Here I discuss one of two major negatives with the 501.  The tuning knobs are embedded quite far into the radio body.  Each has a round piece of rubber covering on the knob end surface designed obviously to provide traction, possibly also as a protective measure.

The reality is that on the 501, more seriously on the PL-330, embedding of the knobs so far into the cabinet makes it virtually impossible to undertake rapid tuning using those knobs if you are just placing your finger on the top barrel part of the knob itself!

As you will see in photos and video accompanying this review, holding a finger against the rubber on the end of each knob, or closer to the center, to achieve more rapid tuning.  But it’s kind of annoying.  On the PL-990x the knobs are somewhat different – extending a bit farther out of the cabinet, but also with the rubber coverings.

So, this is a design point for Tecsun to consider.  Surely, it should be possible to come up with slightly different knobs for the 501 that make it more comfortable to achieve rapid tuning.  As it is, the knobs on the 501 barely extend beyond the cabinet edge, including the end and rubber cap.

The same goes for the PL-330 – which has knobs that only one half inch in depth, and extending only about 1/16 of an inch beyond the cabinet edge.  Part of the attractiveness of the 330 is its compact size and I doubt Tecsun will be moving to put slightly larger knobs on that radio anytime soon.  But as it is, using the main and fine tuning controls on the 330 gets you maybe 10 kHz in tuning range.

[UPDATE]  I realized after further use of the 501x that Tecsun clearly intended for the rubber knob cap covers to act as traction for tuning.  The problems I see:  after significant use over time, those rubber covers will lose their stickiness and thus their ability to help tuning will be reduced.  Also, the fine tuning knob is smaller — and even using the rubber cover on the knob for more traction, it is somewhat difficult to achieve rapid tuning in 1 kHz mode.  Tecsun could help 501x owners on the issue with the tuning knobs by including spare rubber knob caps.  But it’s uncertain how the existing rubber knob covers are attached to the original knobs and how easy it would be to replace them when they lose their stickiness.

H-501 IMPRESSIVE FRONT PANEL 

At the top of the H-501 radio above the LCD display can be found the Display/Snooze/Lock button.  On an older Tecsun radio, the PL-880, this button doubled as the calibration adjust control.  On the PL-990x this triple function button is located on the top of the radio.

LCD DISPLAY

POSITIVE:   One of the big positives of the 501 is the large LCD display.  The number digits are absolutely huge and make it easy to read frequencies.

Thanks Tecsun!  The display contains numerous bits of information about receiver operation, the signal strength meter, etc.

Below the display is the keypad, with special dual keys for 9/10 kHz mediumwave, Longwave activation, and FM range adjustment.  Backlight activation is on the 5 key.  At the bottom you have the VF/VM key to select between frequency tuning and memories.  To the right are the FM, MW/LW, and SW + and – buttons.  These put the radio into shortwave mode and as is the case with the PL-990 and other receivers, activate ATS/ETM tuning.

At the very bottom of the front panel can be found PLAY/PAUSE, RR, and FF buttons for control of SD card audio when using the microSD card, which like on the 990x is located on the bottom of the receiver.  According to the manual, by the way, the microSD slot accepts cards of up to 128 GB.  Included in the box is a 16 GB SanDisk Ultra card.  A reset hole is also on the bottom of the radio.

Finally, at the bottom of the 501 face are rubber covered input ports for Earphones, Line In, and Line Out.

METAL TILT BAIL

POSITIVE AND NEGATIVE:  On the back of the receiver, you find the metal tilt bail which folds down and locks into two plastic tabs and can be lifted easily with a finger from an indentation in the cabinet.

This was a good design move by Tecsun, with the following observations:  there are no incremental positions on the metal bail as you find on, say, a Microsoft Surface or similar tablet type PC.  The only fully stable position is to have the metal bail fully extended back. That places the 501 in a great position if you’re standing or even sitting to a degree.  But if you try to place the bail in any middle position you’re in danger of having the radio become unstable.  Tecsun should definitely give some thought to a re-design, though the bail is better than the flimsy plastic stands found on the PL-990 and PL-880 and some older portables.

Still on the back of the radio, intelligently, Tecsun marks a screw hole which can be used to remove the telescopic antenna (marked as ANT SCREW).  The other screw holes for removal of the back of the radio are also clearly marked.  Thanks Tecsun!

However, one additional partial negative – there are no rubber pads on the bottom back edge of the 501x which will be contacting whatever surface the radio is sitting on while the metal bail is in use.  So, if you don’t want that bottom back edge to be scratched, place the radio on something to cushion it.

BATTERY CHARGING

POSITIVE:  Another interesting feature not found on other radios:  Tecsun has created a dual charging system for the 501 which uses two 18650 batteries.

In viewing numerous videos, I have not seen this discussed much.  Basically, this enables you to use the receiver’s internal charging capability to choose which battery you are charging.  The manual states that the battery contains space for a “spare” battery.  The charging indicator on the LCD display will flash while charging is underway – there does not appear to be a separate display for battery A or B.  However, and this is quite a unique capability – while you are using the 501x, the switch changes which battery the radio is using.

It’s not clear to me whether the receiver while powered on is taking energy from one or both batteries simultaneously.  As I note in my reviews, and this is amplified in the manual, do not expect to be able to charge a battery internally and listen to the radio at the same time because there WILL be noise.

HUGE WORLD MAP AND RADIO DIAGRAM INCLUDED

Tecsun includes a huge – and I mean HUGE – World Amateur Radio map in a plastic pouch with the manual.  On the back of this is a large photo of the 501 with clear English guide points to each and every feature of the radio.  In this, Tecsun is really going out of its way to make owning the 501 a special experience.

In the box (see photos) Tecsun includes 2 18650 lithium batteries, a 5 volt double USB A charging cube, a mini to mini cord, a USB charging cable, and to boot, a pair of fairly high quality wired earphones complete with spare ear tips.

PERFORMANCE

Anon-co advises that the H-501x uses a different IC than the PL-990x.  No further details were available as of the time of this writing.

This is clearly a sensitive radio, as is the PL-990X.  In these days of declining use of shortwave, almost any receiver is going to be able to hear “stuff” all over the bands and the 501x and 990x as well as the 330 are all quite capable in this regard.

In the video, I tune some familiar stations, including Voice of Greece and BBC

and move through the excellent bandwidth options.  This is where the 501, with its large dual speakers, excels because if you’re on a strong station – Greece is a great example because of its great music programs – and you have that wider option, it’s really pleasant to listen to.

NEGATIVE:  However, one has to puzzle over the decision to limit bandwidth to 6 kHz when in shortwave mode.  On mediumwave (AM) you have a 9 kHz option which provides some fine listening.  Perhaps Tecsun felt that there are few stations using shortwave these days that would benefit from having a significantly wider option?  I would urge Tecsun to make 9 kHz available in shortwave.

SYNCHRONOUS DETECTION

NEGATIVE:  I really had some hope that Tecsun would go farther toward

solving the problem of unstable/distorted SYNC mode with all of these recent radios.  Unfortunately, it was not to be.

Using SYNC on these radios – though this was not the case with the PL-660 and 680 – involves a delicate dance, requiring using a combination of bandwidth filters and LSB/USB.  SYNC works fairly well with some stations, but it really depends on signal level, and to an extent signal level of any station close to the frequency you are on.

There is a 1 kHz fine tune spread when using SYNC after which lock is lost.  And still, lock is often lost even when you’re on center frequency and not using

fine tune in SYNC – the signal just becomes distorted.  Not fun.  The PL-990x has the same issues.

Now, Tecsun has definitely made progress since the horrendous implementation of SYNC on the PL-880, which wasn’t even an official feature.  But it’s disappointing that given the design features in the 501, especially the wonderful dual speakers, a way has not been found to resolve this issue which obviously involves the DSP chip that is the brain of the receiver.

Video: Detailed testing of Tecsun H-501x

ANTENNA

NEGATIVE: One of the things the folks at SONY, Panasonic and some other manufacturers did so well was design radios with antennas that nested inside the radio and could be pulled up and out of the cabinet, and because of this, there was clearance from the top of the radio so the antenna can achieve vertical position.   Tecsun has not done the same.  Antennas on the H-501x, PL-990x, PL-330 swivel but cannot take up vertical position, and of course they are nested on the top of the radio.  One would have thought that after years of producing portables, and coming to dominate the portable market, someone at Tecsun would have recognized the importance of antenna re-design.  NOTE:  the antenna on the 501x is sufficiently long, but on the PL-330 for example, seems to be not long enough.

BLUETOOTH

POSITIVE:  Hooray for Tecsun in integrating BT capability into the 501x and 990x.  This was such an obvious move and thanks to Tecsun for really hitting it out of the park. Unfortunately, we don’t get the ability to record audio from the radio on to microSD cards – that would truly have been a major step forward

CALIBRATION

The H-501 has the same re-calibration adjustment feature as is seen in the PL-909x and the PL-330.  This involves going into LSB or USB mode, holding down the USB or LSB keys until a flash appears, then using the Fine Tuning knob to achieve zero beat on WWV or strong station that is known to be on frequency, then holding down USB or LSB again to have the radio re-zero itself.  This is a fine feature that we have seen since the PL-880.

When I first received the H-501 it appeared that the receiver was fairly on zero beat from mediumwave up through 25 meters shortwave.  Further testing revealed that re-calibration was necessary, but the degree of error from mediumwave up through 19 meters was not as significant as I have seen on the PL-990x.  Re-calibrating at a mid-point of 25 meters appears to be a good mid-point choice, but inevitably, doing re-calibration on shortwave will throw the receiver off by a bit down on mediumwave.

A cautionary note:  when undertaking this calibration function be sure to give the radio time to confirm it’s in calibration mode with the FLASHing LCD. Sometimes, the readout will jump a full 1 kHz above or below the frequency you’re zeroing on – if that happens use the MAIN TUNING knob to get yourself back (i.e. 9,704 to 9,705.00) and complete the zero beat operation with the FINE TUNING knob, then hold down LSB or USB to complete.

All of this may be overkill for most people – I am just among those who obsess over having receivers as exactly on zero beat as possible.  That’s more difficult or impossible to achieve with older receivers that have no calibration function, such as the ICF-2010 or SW-55 without literally taking those radios apart to access internal points of adjustment.  The fact that Tecsun provides this capability in these portables is something we should all be very grateful for.

CIRCUIT LOCKUP

All of the Tecsun radios have a “reset” hole to be used if the receiver is not functioning properly.  I had one occasion of lockup with this sample of the H-501x.  Rather than using the reset hole, I decided to remove one of the two 18650 batteries, which of course reset the receiver.  I have alerted Anon-co to this issue, but it’s hard to tell whether it’s a major problem without having other H-501 units to compare to.

CARRYING CASE

POSITIVE:  The H-501 that I received for review from Anon-co came with a beautiful faux leather case complete with a convenient carrying handle.  My understanding is that this matches mainland China versions that have been widely seen in videos online.

Anon-co advises that the first batch of 501x to be carried by them will come in a gift box with this PU leather case, possibly to be followed at some later point by a hardcover carrying case.  Indeed, a photo can be found online showing the H-501 in a hardcover carrying case similar to the cases for the PL-880 and PL-990x kits.

As of early April, Anon-co advises that while the price for 501x is not set yet, it’s expected to be somewhere in the $310 – 330 range including shipping to the U.S.

AM/MEDIUMWAVE AND FM PERFORMANCE

Not much to say here – I find FM performance on the 501x to be superb, and mediumwave reception is more than satisfactory.

CONCLUDING THOUGHTS

As I noted earlier, these days amid declining use of shortwave by remaining broadcasters, almost any DSP or older portable receivers are capable of producing excellent results for shortwave listening.

Facebook groups devoted to shortwave (they have become the new gathering place and information exchanges for those of us who still love the hobby) are

full of newcomers inquiring about which Tecsun, Degen, or other portables are best.

Often, my advice is to consider older portables that are still quite competitive, especially considering the reduction in the number of stations still on shortwave.  These would include such classics as the Grundig Satellit 700/500, the SONY

ICF-2010(2001D), SONY ICF-SW77, and ICF-SW55, along with the venerable Panasonic RF-B65 and SONY ICF-SW100S in the smaller category.

What Tecsun has done with what we have to assume may be the final group of DSP receivers it produces is come up with small (PL-330), medium (PL-990x), and large (H-501) radios that combine extremely attractive features and excellent audio.  The H-501x, in effect, is a Grundig Satellit 700 re-born for the 21st century and the path to it was paved by the PL-880.

Though implementation of SYNC in each of these receivers still leaves much to be desired, having this feature is enough to push prospective buyers to choose one or more of these Tecsun units over older portables.

Note that Sangean, which is now producing its ATS-909×2 (though the radio has growing pains and is having its firmware updated by Sangean) seems to have taken note of Tecsun’s dominance of the market and provided multi-bandwith capability, and an improved and enlarged LCD display on the 909×2 along with finer frequency resolution.

In a strange but perhaps understandable decision, Sangean left SYNC mode off of its new flagship receiver.  Whether this had more to do with production costs or a decision that synchronous detection really brings little to the game these days, or both, along with other factors, remains a puzzle.  It does appear, from early reviews, that Sangean may have improved sensitivity on the 909×2, though this too remains unconfirmed.

But again, even with the negatives I noted here about the H-501x, what Tecsun has accomplished is significant.  It has given remaining potential buyers of multi-band portables three superb receiver choices. There are others in the Tecsun line such as the S-8800 and S2000, but of these only the S8800 is something I would recommend.

As I noted in a recent review of the PL-330, had we enjoyed a situation back in the golden days of shortwave in the 1960’s/1970’s/1980’s where a portable provided multiple bandwidths, advanced memory operations, and synchronous detection, DXing would have been even more of an enjoyment than it was.  Certainly those Country Heard/Country Verified totals would have been higher!

The H-501x could easily be considered the crown jewel in the Tecsun group with its killer looks, large speakers, and performance equaling the PL-990x.  Each of these receivers is arguably an easy choice as a “daily driver” for traveling, though where air travel and TSA issues are concerned, the PL-330 would be a better choice.

RECOMMENDATION:  Of the negatives I discuss in this article, only one I would consider fairly huge, and that is the ongoing issue with synchronous detection.  If the 501x, like the 990x and 330, were to have this issue resolved that would make it easy to recommend any of the three radios.  As it is, the attractiveness of the 501x lies with its beautiful two speaker design.  Even with the annoying SYNC  issue, I would recommend the radio to anyone who understands the SYNC issue and doesn’t mind and who wants a nice, larger version of the 909x.

Dan reviews the Tecsun PL-330 portable shortwave radio

Many thanks to SWLing Post contributor, Dan Robinson, who shares the following guest post:


Tecsun PL-330:  The Powerful Mini With One Serious Design Issue

by Dan Robinson

As SWLing Post readers know, I have a huge radio collection – including premium receivers and portables, now nearly 100 in all.

So, these days I am hesitant to add too many, but I continue to take interest in what companies such as Tecsun and Sangean are doing in the way of stuffing the latest chip technology and capabilities into portables radios.

The last receivers I reviewed included the Tecsun PL-990x, which has developed quite an enthusiastic following since its consumer version was released in 2020, and the Tecsun S-8800.

Out for some time now is the Tecsun PL-330.  By now there are many reviews of it on You Tube and elsewhere.

It’s become a familiar observation for many of us – if this were still the 1960’s and 1970’s – even into the 1980’s, which could be considered the golden days of shortwave and we had receiver technology like this, well what a joy that would have been.

When I traveled around the world both before and after college, and professionally for Voice of America in the 1980s and 1990s, wow what a good time I could have had with today’s portables!

Some world band portables radios back then were superb performers.  The Grundig Satellit series 500/700/600/650 come to mind – but these were not exactly what I would call small portables.

Paging through Passport to Worldband Radio from 1990 (wow, that’s 30 years ago!) you see others such as the SONY SW-1, Panasonic RF-B65, and of course, the SONY ICF-2001D/2010 which introduced killer synchronous tuning technology in the 1980s and remains popular today decades after it first appeared.

Also available were the SONY ICF-SW55 and later in competition with the 2010, the SONY ICF-SW77.  Today, I have four SW-55s and two SW-77s and still use them regularly.

Tabletop receivers back in the good ol’ days offered multiple selectivity positions.  One of those was the Lowe HF-225 (and later Europa version) along with the HF-250, Kenwood R-5000 and R-2000, ICOM IC-R71A, and Yaesu FRG-8800 among many others.

But as far as smaller portables go, features such as synchronous detection and multiple selectivity were still pretty limited, and a number of receivers didn’t offer selectable synchronous as was eventually offered on the Drake R8B and later production of the SW-8.

The RF-B65 by Panasonic – which today remains sought after for its amazing sensitivity – was hobbled by having a single selectivity position.  Same with SONY’s SW-1 and SW-100, and 7600GR, though SONY’s PRO-80 had two bandwidths.

Indeed, it wasn’t until Eton brought out the E-1, with its three bandwidths combined with Passband Tuning (though no notch filter) that a portable finally reflected capabilities of some of the better tabletop radios (though lacking a notch filter).

The Grundig Satellit 800 was close in competition with the E-1 (though the earlier Sat 600/650 series also had multiple bandwidths) but was bulky.

Fast forward to 2021 – credit due to Tecsun and more recently to Sangean with its 909X2, for some years now we have enjoyed Asia-originated portables with multiple selectivity and synchronous mode, though sync implementation on some has left much to be desired.

Which is where the PL-330 comes in.  When I look at the 330, I am reminded of one of the now ancient SONY portables, the ICF-4920 which was a super small slide-rule receiver that nevertheless was quite sensitive.

Like the 4920, which you could easily slip in a pocket, the PL-330 is a perfect travel portable.  Only the Belka-DX SDR and still wonderful SONY SW-100 compete in terms of performance and size.

The 330 is basically a PL-990x in miniature:  smaller speaker obviously, shorter antenna, no bluetooth capability or card slot.  But as many people who frequent the Facebook groups have observed, pretty much anything the 990x can do, so can the 330.

This radio has ETM/ATS tuning, synchronous detection, multiple bandwidths in AM, SSB and MW, FM mono-stereo speaker control, alarm/timer functions, external antenna jack, display light, and other features.

Tecsun decided to go with a BL-5C battery here – the same with the new PL-368.  I think this is unfortunate, since it requires one to obtain a number of those flat batteries if you want to travel and not have to re-charge.  On the other hand, this is not a crippling design decision.

What is an unfortunate design problem, in my view, involves the simple question of tuning the receiver.

The main and fine tuning knobs on the right side of the PL-330 are embedded into the cabinet just far enough as to make easy rapid finger tuning of the radio nearly impossible.

In fact, in my testing it’s impossible to thumb tune the radio more than 10 kHz at a time.  The same applies to using the lower knob which controls volume.  When in FM mode, this issue make tuning just as frustrating almost forcing one to use rapid scan mode.

Another puzzler:  Tecsun limited bandwidths in AM SW to three, while in SSB you have 5 bandwidth options.  In AM mode, you have a 9 kHz bandwidth, another puzzling choice.  Longwave too is limited to 3 bandwidths.

But overall, none of these problems really knock the PL-330 down very far.  This is one mini powerhouse of a radio, one that makes you think “wow, if I had just had this back in 1967 or 1973 or 1982.

Some additional thoughts.  My particular PL-330 was supplied by Anon-co but is a pre-production version and so does not have the latest firmware.  Thankfully, I have not experienced the issue of SSB tuning running in reverse as others have.

NOTE:  As most users know by now, but some newer users may not, you cannot charge one of these radios – whether Tecsun or Sangean – using the mini-USB port and use them at the same time. . . there is just too much noise introduced from the charging process.

This little mentioned feature:  just as the Tecsun 990x has a re-calibration function, so does the PL-330.  Tecsun itself initially declined to acknowledge this, but finally confirmed through Anon-co.

The procedure: Switch to LSB/USB.  If the station is not zero beat, hit STEP button once and then quickly again to move the flashing display down arrow so it’s above the far right digit.  Then fine tune the station for zero beat.  Hold LSB or USB in for a couple of seconds.  The LCD blinks.  You then have zero beat – but be sure to repeat the process for LSB and USB.

I should mention that just like on the 990x, the re-calibration process doesn’t mean the receiver is then zeroed up and down the shortwave bands.  You will likely have to repeat the process from, say 25 meters, to 19 meters, to 49 meters, etc.

I have come to enjoy using the PL-330 here in my house, though like other portables in my collection I need to position it in one particular corner of my home away from incoming cable TV lines.

Belka-DX and Tecsun PL-330

The PL-330 and the Belka DX are currently king of the pile when it comes to my smaller travel portables.

I fully expect there will be no further receiver development by Tecsun after the PL-330/990x/H-510 radios – but that company will certainly have left us with some great receivers as the days of shortwave approach an end.

Video

Guest Post: Indoor Noise and Ferrites, Part1

Many thanks to SWLing Post contributor, TomL, who shares the following guest post:


Indoor Noise and Ferrites, Part 1

by TomL
My magnet wire loop antenna on the porch reminded me to revisit aspects about my noisy Condo that I still needed to understand.  Some RF noise I could control if I could find the right kind of information that is understandable to a non-engineer like me.  There is a lot written about the general problem of noise and radio listening, for instance this ARRL article with web links to research – www.arrl.org/radio-frequency-interference-rfi, but I needed to get more specific about my particular environment.
I had tried some common clamp-on TDK ferrites I had obtained from eBay a long time ago but they only seemed to work a little bit.  I have since found out these are probably the ones which are widely used on home stereo system connections used to reduce noise on those systems.  There must be a better way.

The more I researched topics, like a portable “Loop on Ground” antenna, or, using RF chokes on the magnet wire loop, it dawned on my feeble, misguided brain that I was wrongly thinking about how to use ferrite material.  For one thing, the material used to suppress RF noise is made with a certain “mix” of elements, like Manganese-Zinc, that electrically “resists” a specified frequency range.  Fair-Rite has a useful Material Data Sheets web page which lists the Types of ferrite material.  For dealing with noise (at the Source causing the problem), I needed to use the right kind of “Suppression” materials and proper placement.  So, it (partly) made sense why the TDK snap-on ferrites might not fully work to reduce certain noise coming from my computer screens, LED lights, USB devices, and cheap Chinese-made power adapters.

A very good  paper is by Jim Brown (K9YC) of Audio Systems Group entitled, “Understanding How Ferrites Can Prevent and Eliminate RF Interference to Audio Systems [PDF]”.  There is a longer paper speaking directly to Amateur Radio folks, but the Audio version is simpler and it uses some of the same  graphs and ideas.  I was drawn to the very detailed Impedance measurements of many different “Types” of ferrite material used for different noise mitigation.  I remember the traumatic pain of my college experience trying mightily to understand the Van Vlack Materials Science text book to no avail.  But Jim’s paper reminded me of the importance of using the correct type of ferrite material and in an optimal way that reacts favorably in the target frequency range to solve a particular noise problem.  So, what are my problem areas?

Shortwave Noise

Loop antennas have been what I have experimented with the most.  They do not pick up as much man-made noise (QRM) and they have a space saving footprint.  Fortunately, there is a wooden porch where these things have been tried.  I had successfully built a broadband amplified “ferrite sleeve loop” (FSL) in the past.  It was useful for a while but it fell into disrepair and also the Condo building has steadily increased in noise output.  The amplifier was just amplifying the noise after a while.  I also tried phasing two antennas but found the ever increasing noise cloud was coming from all directions and I could not null it out.  I even tried a “mini-whip” from eBay but that just produced a wall of noise.

I recently tested AirSpy’s YouLoop written about before, and the results were good.  However, it seemed obvious to me that it was too small as a passive loop to capture shortwave signals strongly enough without resorting to another amplifier attached at the antenna and would not improve the signal/noise ratio.  My current solution is a unamplified stealth magnet wire loop about 32 feet in circumference.  In that article, I mention things like common mode RF chokes at both ends of the antenna connection, horizontal polarization, and basically accepting that only the stronger shortwave signals will be received in a predictable manner.  I think for now, this is about all I can do for shortwave and mediumwave noise, as far as my own Condo-generated noise. Neighborhood noise is a different topic.

VHF Noise

I then started to isolate which devices caused which kind of noise when listening to my outside amplified antennas for FM/VHF and UHF-TV transmissions.  Many consumer Power adapters make a lot of noise from VLF up into UHF ranges.  One thing I did right was to try a 10 pack of these little miracle “Wall Wart” toroids from Palomar Engineers.  One by one, I put one of these small toroids (19mm inside diameter) on my home AC adapters as shown in the pictures, and the noises started disappearing.  It does not explicitly say, but I believe it is Type 75 material which suppresses the noise generating AC adapter (at very low frequencies) when wrapped 8 – 12 times.

Most egregious of these was my CCrane FM2 transmitter.  A strangled warbling sound kept emanating from the monitor closest to my laptop. Installing ferrites on the laptop and back of the monitor were not working.  I moved the FM Transmitter and noticed a reduction in noise.  So, I put one of these little toroids on the power input of the device and the noise disappeared.  Apparently, it was picking up noise from the monitor (as well as its own power adapter) and rebroadcasting it to all my other radios!  The strangled warbler is no more, I choked it (HaHa, sick bird joke).

While looking for the monitor noise, I put the eBay TDK ferrites on all the USB ports and HDMI ports.  This has helped greatly on VHF and confirms my suspicion that these cheap TDK ferrites are indeed a common type of ferrite material.  Some informative graphs can be seen in Jim Brown’s Audio paper mentioned before.  One example might be Figure 22, which shows the #61 Series Resistance which peaks around 100 MHz when using a toroid with three “Turns”.  More confused, I could not find a definition of a “Turn”.  Eventually, in his longer paper to Amateur Radio operators, he defines it, “…is one more than the number of turns external to the cores”.  Somewhere else he describes using many single snap-on ferrites being electrically equal to just one toroidal ferrite with multiple Turns.  And interestingly, more Turns shifts the peak impedance substantially lower in frequency.  So, using the graphs he supplies, one can target a noisy frequency range to try to suppress.

I then put 6 of the TDK ferrites on the VHF input to the AirSpy HF+.  Some FM grunge was reduced and was thankful for that.  The rest of the background noise truly seems to be coming from the outside picked up by the amplified antenna.

Also, I juggled a couple of the amplifiers around and now have separate VHF/FM and UHF/TV amplifiers which cleaned up the FM reception a little bit more – https://www.youtube.com/watch?v=zkDsy95et2w .

UHF TV Quality

On a whim, I put the balance of the TDK ferrites on the FM/TV splitter input cable, 10 in all.  The FM reception did not improve but the Over The Air UHF TV reception Quality improved noticeably.  My weakest TV station now has a stable Signal level and the Quality is pegged at 100%.  This is a nice surprise since it means that now all local TV stations on UHF will come in cleanly without dropouts and I can view all digital subchannels.  I was even able to rescan and added two more low-power stations never seen before. ?

LED lights

I have common LED lights hanging over a number of fish tanks and some grow lights over an indoor plant box and can hear this noise on upper shortwave and higher radio bands.  In a future article, I will explore RF noise from lights as its own special topic. For instance, why do some LED lights generate RFI and how to know before buying (I am using BR30 spot bulbs from name brands)?  Also, there is a new kind of LED “filament” light out now that uses much smaller LED’s on both sides of an aluminum strip, greatly reducing electromagnetic noise output (or do they??).  More questions than answers.

I will explore creating my own customized AC power cord attached to the AC power strips of the LED lights.  I will need to test this for safety and efficacy, so I will want to take some time to do this right.  The hope is that, using Jim’s info, I will be able to create a broad spectrum RFI suppression AC power cord and cost less than $30 each cord.  We’ll see.

Finally, I will look at “stacked” toroids using different mixes of ferrite Types, creating a custom RF suppression better than using just one Type of ferrite material, using AC cords as the main examples. For instance, the best set of graphs in Jim’s paper, in my opinion, are Figures 21 and 24 compared to each other.  Something I did not know before is that one can not only use multiple turns on a single toroid to get a lower, peaked frequency response, but also stack multiple toroids of the same Type to get a smoother frequency response.  Then on top of this, combine that set with other Types to create a customized frequency response curve.

Radios are quieter now.  Those pesky grow lights are still a problem as well as the upstairs neighbor’s lights which seem to be on a timer, making FM reception noisy again after 5pm!

Michael pairs the Tecsun PL-990 and the AOR LA400

Many thanks to SWLing Post contributor, Michael Ye (BD4AAQ), for the following guest post:


In the Loop: PL-990 and LA400, a Perfect Match

by Michael Ye (BD4AAQ)

PL-990 and LA400

I have been a happy owner of Tecsun’s PL-880 world band receivers for years. In fact I have two PL-880 radios, one sitting at home and the other staying in my car. So, after Tecsun introduced the new model PL-990 in late 2020, it didn’t take me long to decide to purchase one. In this article I will discuss the Tecsun PL-990 receiver working with loop antennas, while referencing some relevant features of the PL-880.

Overall performance of the PL-990

Merely by its model number, it is easy to regard the PL-990 as an upgraded version of the already highly reputable PL-880. As expected, the PL-990 can very much be regarded as a combination of all the existing fine radio features of the PL-880 AND the music and bluetooth additions, with a number of improvements for instance in shortwave and medium wave performance. The ergonomic design of the PL-990 looks and feels different from that of the PL-880 in a number of ways. Although I may prefer the the more slim and elegant appearance of the PL-880, the PL-990 gives a more rugged and durable feeling, among other improvements over the older PL-880.

Working with loop antennas

The PL-990 and the PL-880 side by side

Living on the twelfth floor of a condominium in the crowded Shanghai, I have often been fascinated with loop antennas. As a licensed amateur operator, I have used the MFJ-1786X and have been impressed with its performance. On reception, I also find loop antennas appealing, as they are able to pull in weak signals while noticeably reducing electro-magnetic interference rampant in the urban environment. I have an unbranded shortwave loop antenna which I believe is based on and performs similarly with the AOR LA320. Despite its excellent performance, it is only good for the 5MHz – 15MHz shortwave range. So a few years ago when AOR launched the new LA400 wideband loop antenna, I bought one, which I often pair up with the PL-880 and other radios for shortwave listening, and get satisfactory results!

Antenna Switch on the PL-990

Now, back to the PL-990. When I first tried the PL-990 with the LA400, the results were generally good but not as good as as compared with using the same LA400 on my PL-880. This puzzled me for a day or so until I realised that the PL-990 actually has an antenna switch which the PL-880 does not have. The switch is used to toggle between an internal antenna (i.e. the built-in ferrite bar/telescopic antenna) and an external one (e.g. the AOR LA400). So a new PL-990 user who has often operated the PL-880 when first using the PL-990 could easily ignore the switch which should be pushed to “Ext” when plugging in an external antenna. This explains why the PL-990 may suddenly appear less sensitive than expected.

“Ext” antenna input for all bands

Contrary to the PL-880 whose external antenna socket is only good for shortwave signal input, the PL-990’s external antenna socket works with all bands, from long wave to FM. I found this to be an important and very useful change, and a pleasant surprise for my LA400, which covers a wide range of frequencies from long wave to medium wave to FM and up to 500MHz.

Once the LA400 is connected, the correct band selected, and last but not least the antenna switch turned to “Ext”, the PL-990 and the LA400 work like a charm in the indoor setting, remarkably better than the built-in telescopic antenna. With the loop connected, while there is not much to expect on the long wave band because of very few long wave stations remaining in the world, reception improves considerably on all other bands including on the medium wave and FM bands, as is also reflected on the upper right hand display of the signal strength and S/N ratio readings. Needless to say, performance on shortwave is as good as on the PL-880, if not better (again, remember to push the antenna switch to “Ext” when using it on the PL-990). Using the AOR loop on the PL-990 for FM reception is somewhat different as there does not seem to be a noticeable tuning point. Simply select the “Others” band, which appears to be broad enough for fair FM reception.

Tecsun AN-200 loop antenna

It is worth mentioning that I have a Tecsun AN-200 tunable medium wave antenna, which I have not used often. As its name suggests, it is for medium wave reception only. I tried it on the PL-990. Works great.

The AN-200 and the PL-990

It is hard to tell which one, the PL-LA400 or the AN-200, fares better, as the signal strength and S/M readings are quite close. They both perform better than the radio’s internal ferrite bar antenna to varying degrees, by improving the signal strength or the S/N ratio or both. The Tecsun loop is a passive antenna, meaning no power is required, making it easy to be used “wirelessly”, by simply placing the loop close to the radio, without having to be connected to the radio via a cable.

Chocolate, our house cat, tries to enhance reception with her tail

It should be noted that in the “wireless” mode of the AN-200 the antenna switch on the PL-990 should remain at “Int” so as for its built-in ferrite bar and the loop to couple with each other.

Radio on TV: Science Channel Segment

Image Credit: Wiki Logos Public Domain

Guest Post by Troy Riedel

In keeping with a popular theme here – “radio in/on TV & movies” – I wanted to share the following that I saw on the Science Channel (part of the Discovery Network):

Show: What on Earth?
S5 Ep2
Originally aired 1/15/19

The above referenced episode has a segment on Cuban Numbers Stations – it’s at minute-45 in the 60-minute broadcast version with commercials.

Of course the show’s premise is “what’s this” so the segment starts out (as every segment does) analyzing a satellite photo and shapes (that turn out to be antennas). This segment is more about the “set-up” than the numbers stations themselves. It’s not really geared for radio enthusiasts but rather as something that may interest the general viewer – that there are active “espionage” Cuban Numbers Stations, when & why they started, and a brief mention of the arrests of what eventually became known as the Cuban Five.

The entire segment is only 5-minutes (approximately the same length as their “non-feature”, or minor segments).

I know it’s available free On Demand via Dish Network & is likely available for free on other services. Again – this won’t enlighten anyone who already knows there are “Cuban Numbers Stations”, but it is nice to see shortwave radio on mainstream “educational” TV programs.

The “Signal Sweeper”: How to build a portable Wellbrook loop antenna

Many thanks to SWLing Post contributor, Matt Blaze, for the following guest post:


The “Signal Sweeper”, a portable Wellbrook antenna setup

by Matt Blaze

Here’s a very simple construction project that’s really improved my travel shortwave and mediumwave listening experience.

When I go somewhere interesting (whether a day trip on my bike or a longer excursion to an exotic locale), the two things I’m sure to want with me are my camera gear and at least one good receiver. Fortunately, there are plenty of good quality shortwave receivers to choose from these days; the hard part is packing a suitably portable antenna that can do justice to the signals wherever it is I’m going.

I’ve long had a Wellbrook antenna on my roof at home. These wide-band amplified loops famously enjoy a reputation for excellent intermod and noise rejection, as well as an almost magical ability to pull in signals comparable to much larger traditional HF and MF receive antennas. A portable Wellbrook – something I could pack in my luggage that performs as well as the one on my roof, would be just ideal.

Fortunately, Wellbrook sells a “flex” version of their antenna intended for just this application, the model FLX1530LN. It’s essentially just the amplifier of their fixed-mount antennas, equipped with a pair of BNC connectors for you to attach a user-supplied ring of coaxial cable that serves as the antenna loop. This way, you don’t need to travel with the awkwardly large 1 meter diameter ring of aluminum tubing that makes up the normal Wellbrook. You can just bring a compact spool of coaxial cable and configure a loop out of it when you arrive at your destination.

The tricky part is how to actually form a stable loop out of coaxial cable without needing lot of unwieldy supporting hardware. In particularly, I wanted something that could be set up on a camera tripod to be freestanding and easily rotated wherever I happened to find myself wanting to play radio. The key would be finding or making some kind of mostly non-metalic support for the coaxial loop that could be folded down or collapsed to fit in my baggage or backpack for travel.

And then I found it: a humble 3-section telescoping broom handle sold on Amazon for about $15 that’s exactly the right size: the “O-Cedar Easywring Spin Mop Telescopic Replacement Handle“. It collapses to 22 inches (just short enough to fit in my suitcase), and extends to 48 inches (comfortably long enough for a one meter diameter loop).

Normally, a wire loop would need both vertical and horizontal supports in a cross configuration, but by using a reasonably stiff coaxial cable, I figured I could get away with just using the broom handle vertically. I found that LMR400 (the basic kind, not the “Ultraflex” version) holds its shape quite well in a one meter loop supported this way.

At this point, it was just a matter of the details of attaching and mounting everything together into a portable package.

A one meter diameter loop, which is the ideal size for the Wellbrook amp, can be made from 3.14 meters of cable (ask your middle-school math teacher). That’s about 10 feet for Americans like me. High precision is not required here, so I just cut 10 feet of LMR400.

The next step is to attach the middle of the cable to the top of the broom handle. The O-Cedar handle has a loop at the end for hanging it on a hook in your broom closet. It happens to be just the right diameter for LMR400, but not with BNC connectors attached. So you’ll have to thread the cable through before you crimp or solder on the with connectors. (See photo above). I used the Times Microwave crimp-on BNC connectors, which I had some extras of lying around. I also put some shrink wrap on the cable at either side of the broom loop, just to keep it from slipping out and becoming unbalanced, but that was probably unnecessary.

Now I needed a way to to attach the Wellbrook amplifier to the other end of the handle, as well as some way of mounting the whole thing to a camera tripod. My first thought involved a lot of duct tape. But I wanted something more permanent and reusable.

The key is something called an “L-Plate”, which is a piece of hardware intended to allow you to mount a camera to a tripod in either “landscape” or “portrait” mode. It’s basically two tripod dovetail mounts attached at a 90 degree angle. I used one that was in my junk box, but you can buy them new or used on eBay. I also needed a clamp to attach the L-plate to the broom handle. I used the Novoflex MiniClamp 26, which I got from B&H Photo. The clamp attaches to the inside of the L-plate with a captive screw. (See photos)

Next, I attached the amplifier to the other side of the L-plate using an ordinary screw-on hose clamp. Easy enough, and surprisingly sturdy.

And that’s it. To assemble the antenna, just extend the broom handle to about one meter, allowing for a roughly one meter diameter loop that’s as round as you can make it with the amplifier at the bottom. Then clamp the L-plate to the bottom of the handle so that the handle is just above the base of the plate, and attach to the tripod. (See the photos).

The Wellbrook is powered over the feedline with a 12VDC bias-T injector. So you need a clean source of 12 volts. I use a cheap Talent Cell battery pack (available on Amazon in various capacities). These actually deliver 11.1 VDC (3x 3.7V), rather than the 12V the Wellbrook calls for, but it works fine in practice. I can also use the same pack to power the radio and digital audio recorder.

In the photos, you can see the finished antenna setup on my roof, with my permanent base Wellbrook on the rotor in the background. The performance of the two antennas is quite comparable.

(Note that there’s an eBay seller that makes a somewhat similar travel loop. The performance is quite good under normal conditions, but it is a bit more subject to MW overload when near a transmitter site. So I prefer the Wellbrook, which is much less susceptible to overload, I’ve found.)

My usual complete travel setup is either a Reuter RDR Pocket C2 radio or a Sangean ATX-909X (recently upgraded to the X2 model). Both these radios work well with the Wellbrook. I use a Sound Devices Mixpre 3 to record airchecks in the field. In the photos, I’m on a rooftop DXpedition listening to Toronto traffic and weather from CFRX on 6070 kHz on a warm later winter afternoon.

The whole setup breaks down for travel pretty easily, and fits easily in my suitcase, backpack, or bike bag (see photos). I usually bring a larger tripod than this if I’m also taking my camera.

The Wellbrook setup has really made bringing a receiver into the field a lot easier and less uncertain. There’s no worry about finding trees or other supports for wires, and packing and unpacking is quick and easy. Have fun!