Category Archives: How To

Valentino experiments with a ferrite sheet loop antenna

Valentino’s homebrew ferrite sheet antenna.

Many thanks to SWLing Post conttributor, Valentino Barbi (I4BBO) who writes detailing a novel approach to FSL antenna design.

Please note that I translated Valentino’s message from Italian to English via Google translate so please forgive any errors. Valentino writes:

FSL antenna radio enthusiasts typically use numerous ferrite bars with high cost, weight and scarcity,

Ukrainian ferrite bar producers have now finished stocks and have raised their prices.

Normally you use this site to build FSL antennas:
http://www.am-dx.com/antennas/FSL%20Antenna%20Design%20Optimization.htm.

I’ve been experimenting with a new antenna design for about 10 days comparing it with a classic FSL with 20 ferrite bars.

Listening to the audio signals are the same, only instrumentally the antenna FSL in ferrite film
Loses -2dB.

The construction is very simple in that the two ends overlap 5 mm.

I did this:

  • I took a sheet of A4 paper, I cut 5mm paper at one end.
  • I laid this sheet on a 10 cm (10 cm) diameter PVC tube.
  • The uncovered part of the tube is cut, now we will have exactly the exact diameter to fix the A4 sheet of ferrite with the overlap of 5 mm.

As for where to source a ferrite sheet, after much research I discovered this supplier almost by accident:

Click here to view the product page and ordering information.

In summary, the main advantages of this antenna design is weight, cost and availability of A4 sheet of ferrite.

Click here to follow Valentino’s antenna project on his website.

Fascinating, Valentino! Please feel free to share any further information about this FSL antenna as you experiment. It’s true that ferrite bars are becoming difficult to source. Sounds like this is an affordable alternative antenna design for ultralight DXing.

Sticky radios: time may be your friend

One thread that’s had a surprisingly long run here on the SWLing Post deals with sticky radios.

A number of portable radios manufactured in the past decade were coated in a rubberized, tactile material that was quite functional when the products were new. With time, however, the coating breaks down and becomes incredibly sticky to the touch. We’ve published a number of articles about how to clean sticky radios–click here to read our archived posts.

Many thanks to SWLing Post contributor, Lee Reynolds, who writes with his suggestion:

Gunk on radios – I was the lucky winner of an E1 at one of the ‘fests.

Of course, the coating went bad and it would up looking like the flypaper/Wino of radios.

I made a desultory attempt at cleaning it (using that Purple Power stuff) but it was a nasty, dirty job that I didn’t complete. A disheartening mess.

Fast forward three or four years after that. I had some time on my hands, I took another look at the radio.

I found that the gunk continues to mutate – it had actually lost most of its ability to adhere to the radio’s casing. Now it would rub off with a paper towel and nothing else.

A couple of rolls of paper towels and some Pledge left it something you no longer needed to put gloves on in order to feel comfortable touching.

So – another fix for the gunk – time and patience. No cleaners needed.

Thanks for sharing, Lee. Worth noting: if you gave up on your sticky radio some time ago, perhaps you should pull it back out of storage and see if the coating has deteriorated to the point it might simply rub off? Time might have made the job much easier.

Guest Post: How To Convert Navtex from SVO Olympia Radio into an other languages

Many thanks to SWLing Post contributor, Klaus Boecker (DD2DR), who shares the following guest post:


Converting Navtex from SVO Olympia Radio into an other languages

by Klaus Boecker (DD2DR)

SVO’s NAVTEX transmission uses the Greek language in Latin letters.

Unfortunately, the Google translator can‘t translate Greek transmitted in Latin characters.
I found a German web site to convert the Latin letters (the complete text) to Greek letters.

After converting it is possible to use Google Translate to finish the translation.
So, it becomes more readable for people who are not familiar with the Greek language. 🙂

Use the following site to convert Latin letters to Greek letters:

http://www.griechisch-konverter.de/?area=konverter&direction=1

Here is a step by step description:

Convert Latin letters to Greek letters:

http://www.griechisch-konverter.de/?area=konverter&direction=1

After converting, it is possible to use Google Translate and translate the text to a language of your choice:

https://translate.google.com

All the conversions/translations are not 100% perfect, but better than nothing.

Some frequencies used by the NAVTEX service from SVO Olympia Radio. Maybe this list is not complete.

Navtex frequencies SVO in kHz

  • 4209
  • 4214.5
  • 4216
  • 6314
  • 6325.5
  • 8416,5
  • 8421
  • 8424
  • 12586
  • 12590.5
  • 12603.5
  • 16585
  • 16815
  • 16818
  • 16830.5

73 de DD2DR Klaus


Many thanks for sharing your tutorial, Kaus! You’re right about Google Translate, too; it’s far from perfect, but generally conveys the overall meaning of the the message. 

Tecsun PL-660 Hidden Feature: FM Calibration

Many thanks to SWLing Post contributor, Rick B, who writes:

I just thought I’d share with you a hidden function I discovered documented on the web for the Tecsun PL-660. It’s how to calibrate the FM band if you have a radio that is off frequency.

As my current PL-660 is accurate on FM, I haven’t had to try this myself. But perhaps it could save someone else from having to return/exchange a radio.

http://kaito.us/miscellaneous/qa/how-to-calibrate-the-pl660-on-the-fm-band.html

“Re-calibrating FM, radio needs to be on and set to FM band. Tune to the desired frequency/station you wish to listen to, press “SYNC” for about 3 seconds back light will flash. Tune up until the frequency/station sounds more clear press “1” to confirm re-calibration. If done correctly the correct frequency/station will be displayed on the display. Keep the battery in for all the time…”

Very cool!  Thank you for sharing the tip, Rick!

Tecsun PL-310ET: resolving a tight antenna

Many thanks to SWLing Post reader, Joey (KE4DRJ), who writes:

I was hoping that you or the readers might be able to help me with a problem. I just received my new pl-310et. Which I purchased from anon-co. The issue is with the whip antenna. When I try to rotate the whip, it’s very stiff. I can feel the plastic around the antenna base flexing. I’m worried about cracking the housing. Is there a fix for this issue? Thank you

Thanks for your question, Joey.

I’ve never had to resolve an antenna issue like this and while I do have some ideas, they’ve never been tested. I feel confident, though, some of our readers know tried and true methods that might help. Please comment if you can offer a safe suggestion.

Note, too, that if this issue makes using the PL-310ET difficult, you should also contact Anon-Co as I’m sure they can also help.

How to safely archive QSLs, postcards, photos, and printed memorabilia

Recently, an SWLing Post reader asked this simple question:

“If you were me, would you laminate a super-rare QSL card?”

The short answer–?  Please don’t!

Never laminate a QSL card, photo, page or postcard

You should never apply heat-seal or adhesive (cold) seal lamination to a QSL card or any other paper memorabilia if your ultimate goal is to protect and archive it.

Why?  Doesn’t lamination, for example, make your card impervious to moisture (and spilled coffee)?  Sort of.  So that makes it safe for the long term, doesn’t it? Well…not exactly.

These forms of lamination, over time, basically destroy printed media. In the short term, laminating your cards can look great, and will keep some of the coffee off (though it may still seep in the sides); in the long term, however, the (petroleum-based) plastic can “off gas,” causing a detrimental chemical reaction with the media it attempts to protect.  Plastic can also be acidic.  Coupled with the lamination heat (or the adhesive, in the case of cold-seal lamination) these processes can actually speed up the aging process “causing progressive deterioration and eventual embrittlement,” according to one archiving source.

I feel fairly passionate about this because, during my undergraduate studies, I worked for my university archives department where I was taught (by an excellent and knowledgeable archivist) to handle, document, index, and preserve sensitive documents, books, photos, cards, slides and other forms of media (known in the trade as “ephemera”).  Many times, we’d receive important documents or photos from donors who had laminated them, believing they were archiving these items for future generations. Alas, we saw the results of the lamination damage first-hand:  decades-old items that had been heat-laminated were separating and clouding up, often tearing apart the item inside. Our head archivist likened laminating to a self-destruct mechanism.

Take away? Lamination is a very bad idea for the long-term protection of any print media.

How to archive a QSL card––or any document, for that matter

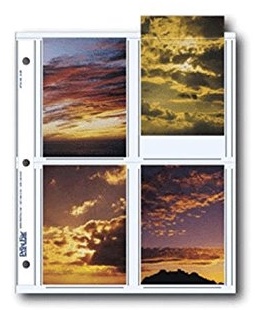
Archival sleeves come in all forms. This one holds four cards and fits in a three ring binder.

Fortunately, there are effective (and fairly affordable) ways to properly archive and organize your QSL card collection, as well as other sentimental and/or valuable ephemera.

Look for archival transparent sleeves supplied to libraries. These are generally made of polyethylene, mylar/polyester, or another transparent archival material that passes the Photographic Activity Test (PAT).

In short: If you find an archival sleeve, from a reputable seller that passes the P.A.T. test, you’ll know it’s safe.

Archival products are acid-free, lignan-free, and chemical softener-free, thus should not interact or bind with the media you’re preserving as non-acid-free items are prone to do. With anything I wish to archive, I go with archival quality all the way.

For example, I make sure not only the clear sleeves or pages are archival, but that the binder or box containing the items are acid-free and of archival quality, as well. Any labels I use are archival, as well . That may seem like overkill to many, but it’s just what an archivist would do!

Storage of the media is also important; you don’t want to put your cards in archival sleeves and then leave them in a damp shed or shack where moisture can become trapped between your card and the encapsulating archival sleeve; mold could still develop.  So a dry, somewhat temperature-controlled environment is key.  Generally speaking, keeping ephemera indoors where you live may be a better option.

Sources of Archival Materials

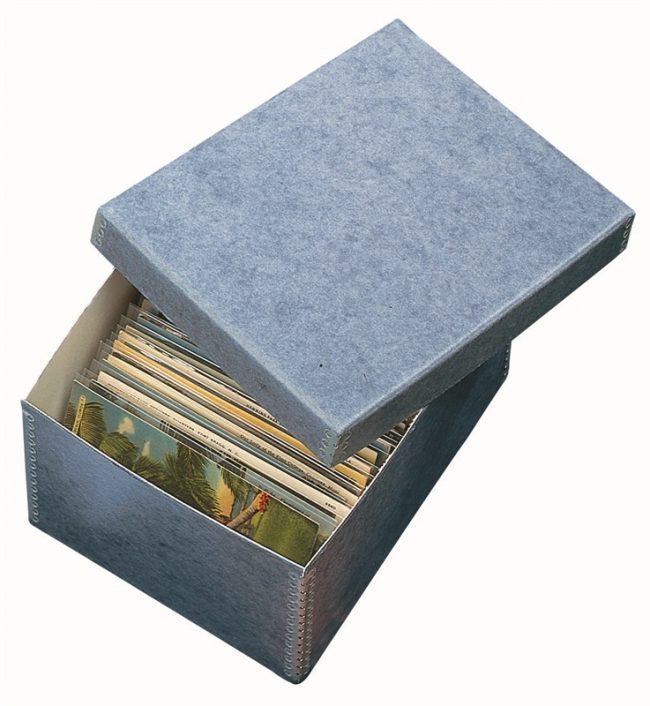
A simple acid-free box can store hundreds of QSL cards in archival sleeves sleeves.

Archival products are more expensive than standard office products, but they’re worth it. Make sure you’re purchasing the best quality you can afford. Two of my favorite suppliers are Gaylord Archival and Light Impressions, though there are many other reputable ones out there.

Amazon and eBay offer sources of archival quality products, as well, and pricing can be more competitive than either of the retailers I’ve listed above.

As for myself,  I only buy archival products from retailers that specialize in them. Both Light Impressions and Gaylord Archival have helpful staff you can call on the phone. They’ll help you find the best material for the preservation of your collection of QSL cards or whatever else you may want to protect.

I’d rather support Light Impressions with my purchase knowing that their standards are strict and their reputation rides on their products meeting strict archival standards. If you’re going to pay for something to protect your memorabilia, I say, go for quality!

And in the meantime…give the heat lamination a miss.

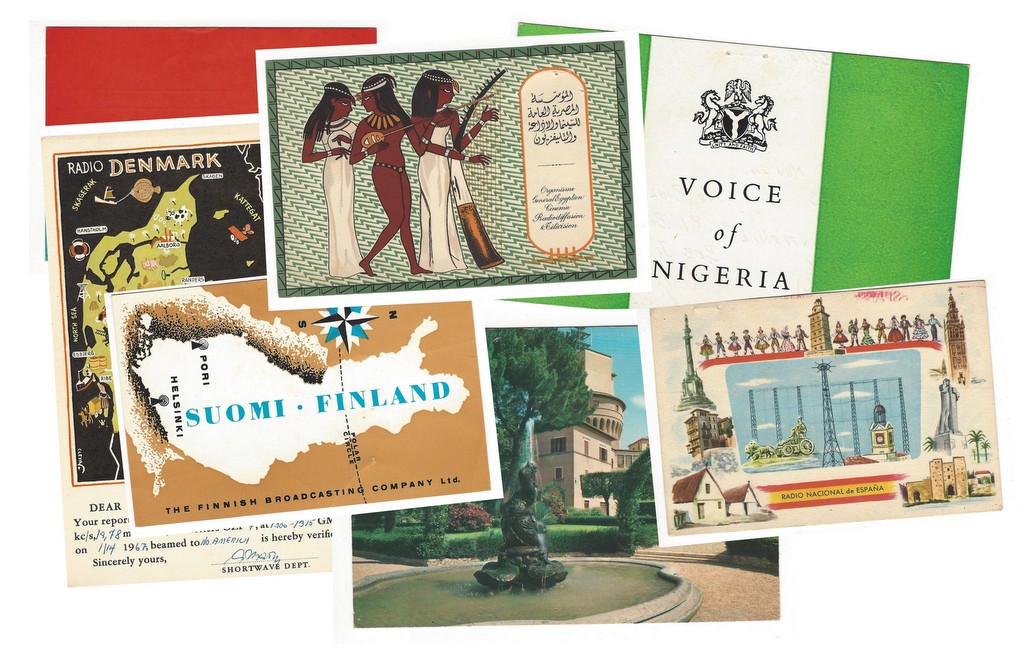
Good luck with your long-term archiving!  And don’t forget to share those rare QSL cards with us here.

Video: Lightbulb vs Radio Beacon by Thomas Cholakov (N1SPY)

Many thanks to SWLing Post contributor, Ivan Cholakov (NO2CW), who writes:

My 11 year old son Tommy (N1SPY) completed a project where he compared a 1W lightbulb to a .25 W radio beacon that he put together and bet that the radio beacon can be heard around the world. I asked him to document his activities as he went along. The project took a couple of months but is now complete and we stitched together a video of his activities.

Click here to view on YouTube.

Wow–Tommy, you’ve done an amazing job here!

I especially like how you’ve taken time to explain the principles behind the various steps of the process. Brilliant job!

Tommy, your future videos are always welcome here. Keep up the good work and we’d love to hear how many new countries you’ve racked up on your WSPR system!