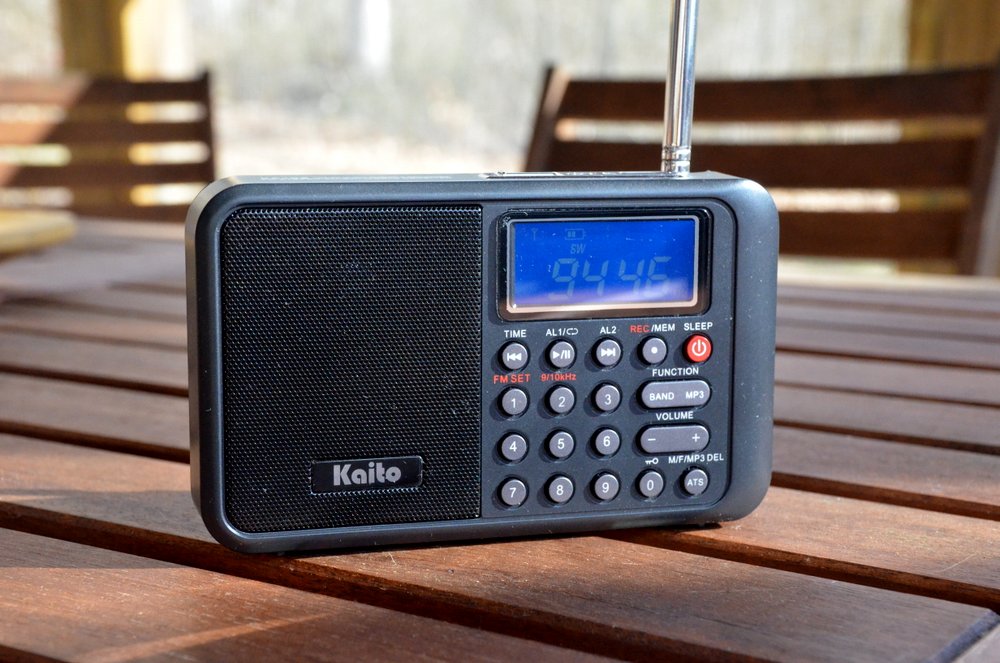
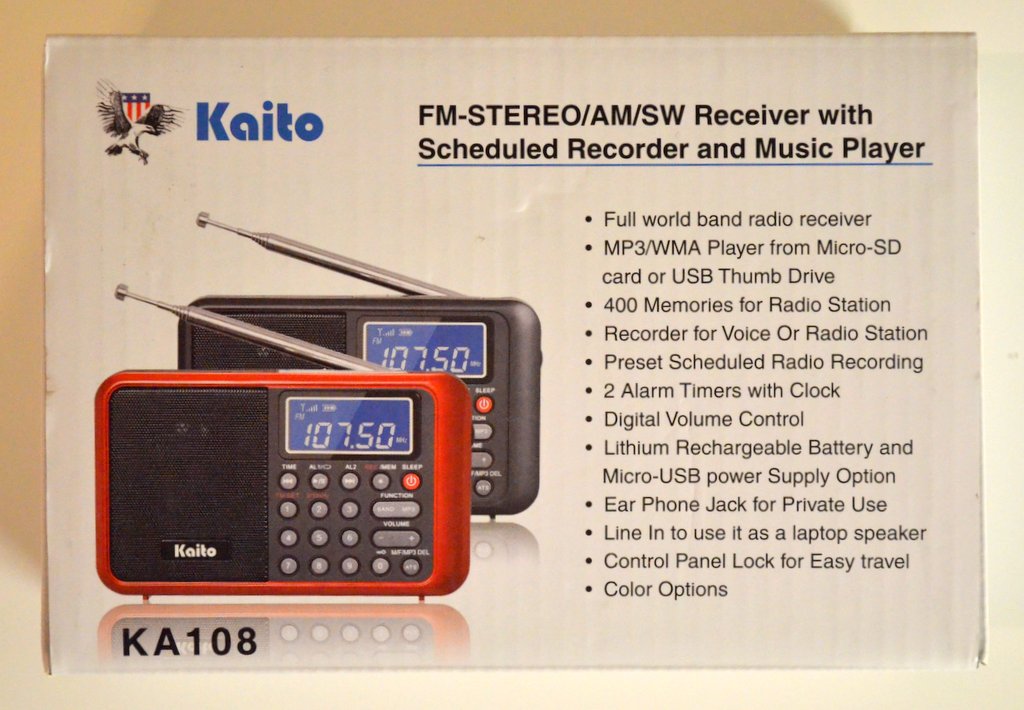
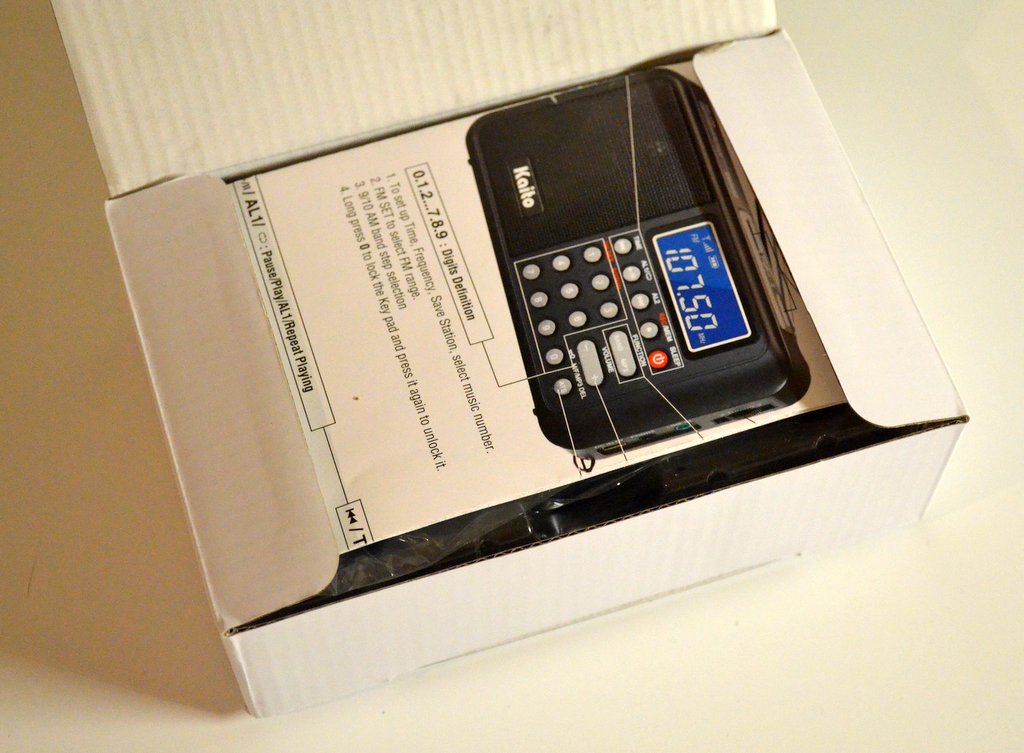
Recently, I learned about a new portable by Kaito Electronics: the Kaito KA108. While there are a number of compact portables on the market, the KA108 really caught my attention because it features a built-in digital recorder. Which is to say, you can listen to a station on shortwave, press a button, and the KA108 will record it to a MicroSD card. Pretty cool, right? It’s also the first shortwave portable I’ve ever known that offers a scheduling feature for recordings.
In the past there have been a few shortwave portables with digital recording capabilities, but most of these have been plagued with poor performance. So this time, I had my fingers crossed that Kaito might have produced a winner.
Having used the KA108 for several days now, my initial review follows, with a focus on shortwave as well as mediumwave performance.
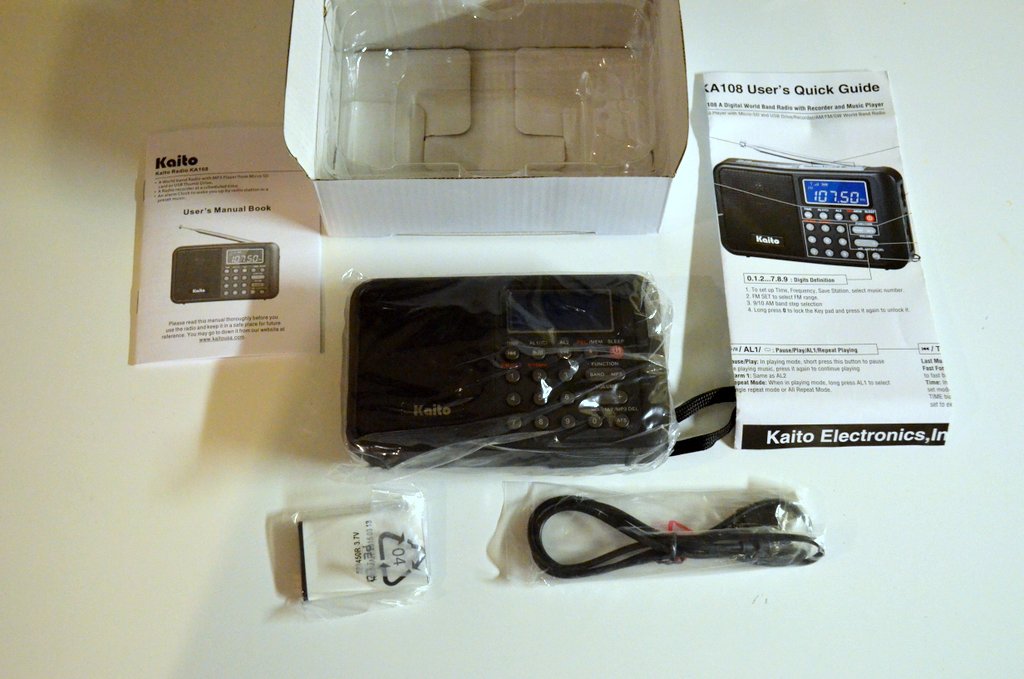
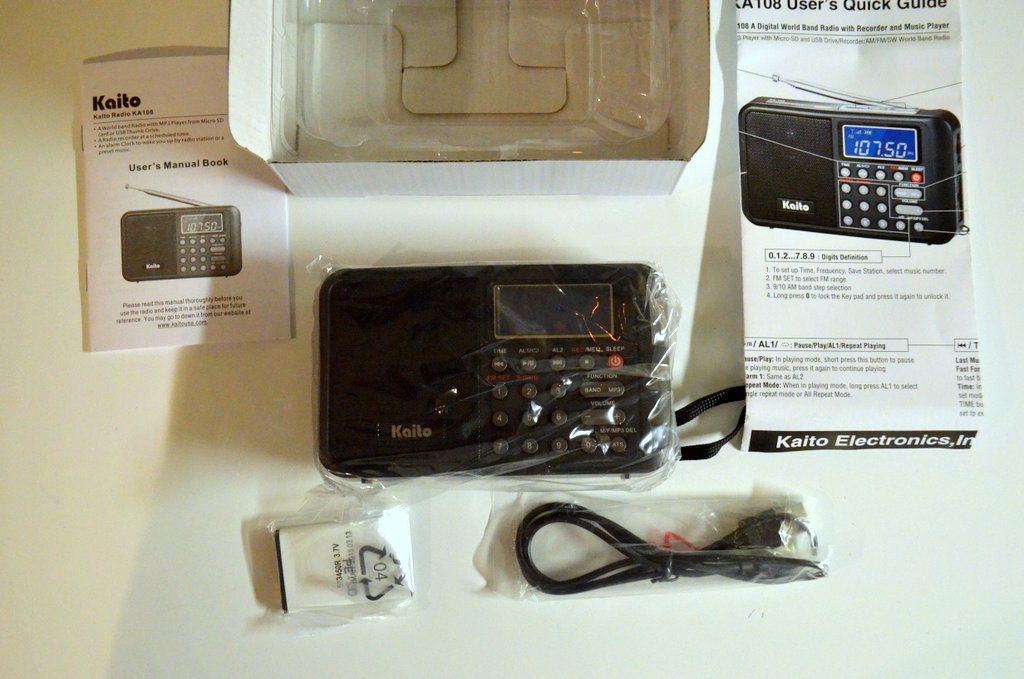
User’s Manual
The KA108 actually ships with two manuals: a quick start reference guide and a proper highly-detailed user’s manual.
The manual is written in English and is quite descriptive, despite a number of spelling and grammar errors that should have been caught before going to print. It’s obvious that Kaito didn’t hire a native English speaker/professional editor to check their copy. (I don’t understand why a company would go to the expense to produce a manual without having it professionally edited…Kaito, please take note!) Fortunately, these spelling and grammar errors, while annoying, can be overlooked and/or deciphered by most English-speaking readers.
Tuning
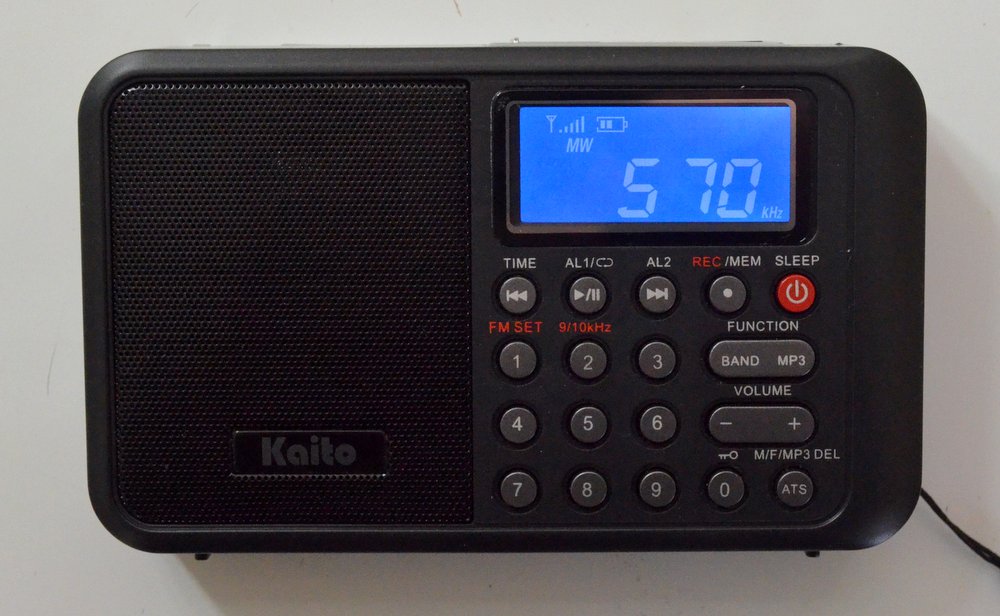
On the plus side, the KA108 sports a full number keypad for direct frequency entry. This makes tuning to a known frequency a very simple process––with one exception (see below). There’s also a tuning wheel on the right side of the radio.
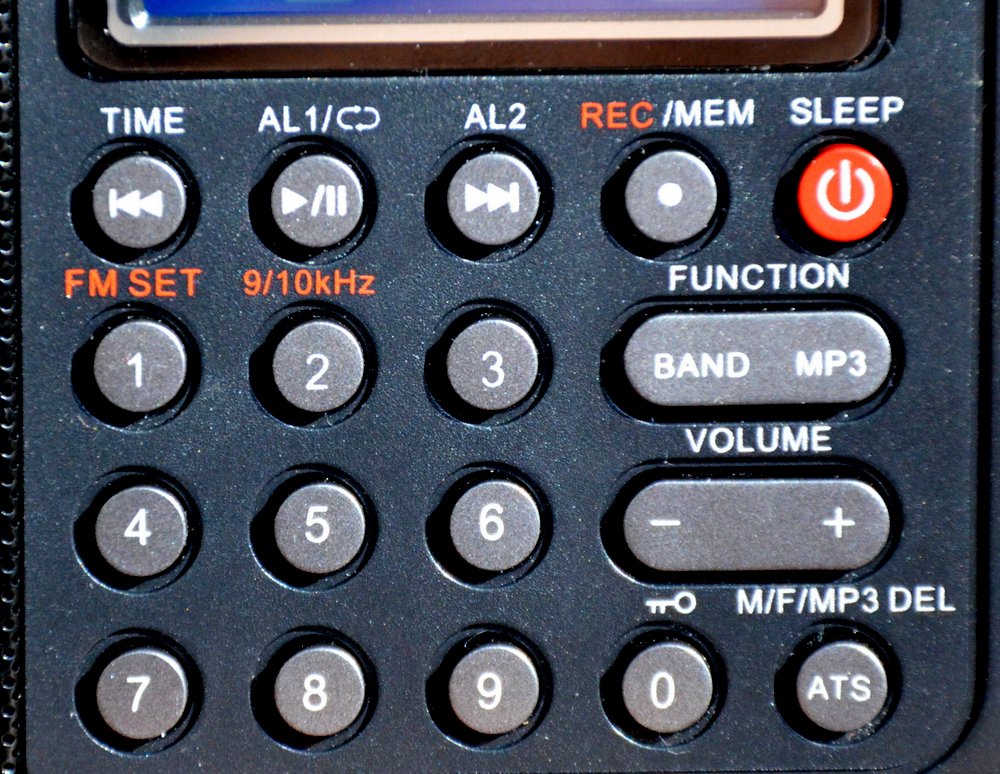
Note where the “0” is placed on the keypad: why the change?
Using the keypad requires some getting used to, however. Most of us––myself included––are familiar with traditional numeric keypads, but the KA108 inexplicably changes the game plan: as you can see above, the “0” button is located on the lower right side of the main keypad. So it took me a few hours of use before I could reliably key in a frequency without looking at the radio.
In my humble opinion, Kaito should have moved the number pad up one row, positioned the “ATS” button to the lowest row on the left, the “0” button to its immediate right, and completed the bottom row with the “Rewind/Play/Fast-Forward” buttons.
Another annoyance––and this is a big one for me–-is that the KA108 has extended muting between frequency changes. It makes band-scanning a frustrating experience. I made a short video demonstrating this:
Audio
 The KA108 is designed around a very innovative small speaker with an acoustic chamber that significantly boosts bass response. This is the same speaker used in the Melson S8 that I reviewed some time ago.
The audio fidelity is excellent on FM, and when playing back a full-fidelity digital recording. Unfortunately, when tuned to the AM broadcast (mediumwave) band or to the shortwave bands, the KA108 falls short; the bass response actually becomes an impediment to listening.
In a nutshell: the KA108 audio has issues. A further explanation of the KA108’s audio is described in the performance notes that follow.
FM Performance
On a positive note, the Kaito KA108 has respectable FM reception. I was able to receive all my benchmark FM stations with little trouble, and the KA108 maintained a strong lock on all signals.
And as mentioned above, KA108 audio via the built-in speaker is much better on FM than on any other band. Indeed, on FM, the KA108 produces rich, full-fidelity audio that can easily fill a room. Audio is similar to that of the Melson M7 and the Melson S8.
If you’re seeking a nice FM portable with robust audio, you’ll enjoy the KA108.
Shortwave Performance
I’m quite disappointed with the KA108’s shortwave performance.
Almost immediately after unboxing the KA108, I inserted a battery, walked outdoors, and tuned through the 31 meter band.
Other than a couple of blow-torch North American private broadcasters, I heard…nothing. It was during this first band scan that I realized how annoying the tuning mute could be. And the audio, meanwhile, sounded muffled and garbled: I assumed that there was some local interference, and simply turned the radio off, hoping the following day would produce a change for the better.
The following day, I spent a great deal of time with the KA108 on the air, and compared it with the Eton Traveller III and the Tecsun PL-310ET––both capable, similarly-priced compact DSP radios.
Sure enough, when compared with other portables, the KA108’s reception is, sadly, rather poor.
At first I thought it might be an issue with receiver sensitivity, but the KA108 could receive almost every station the Traveller III and the PL-310ET could receive. But the audio was so muffled on the KA108, even with the use of headphones, that spoken word was hard to interpret. Additionally, the over-active AGC (Automatic Gain Control) meant that audio levels were all over the place. That combination makes for fatiguing listening.
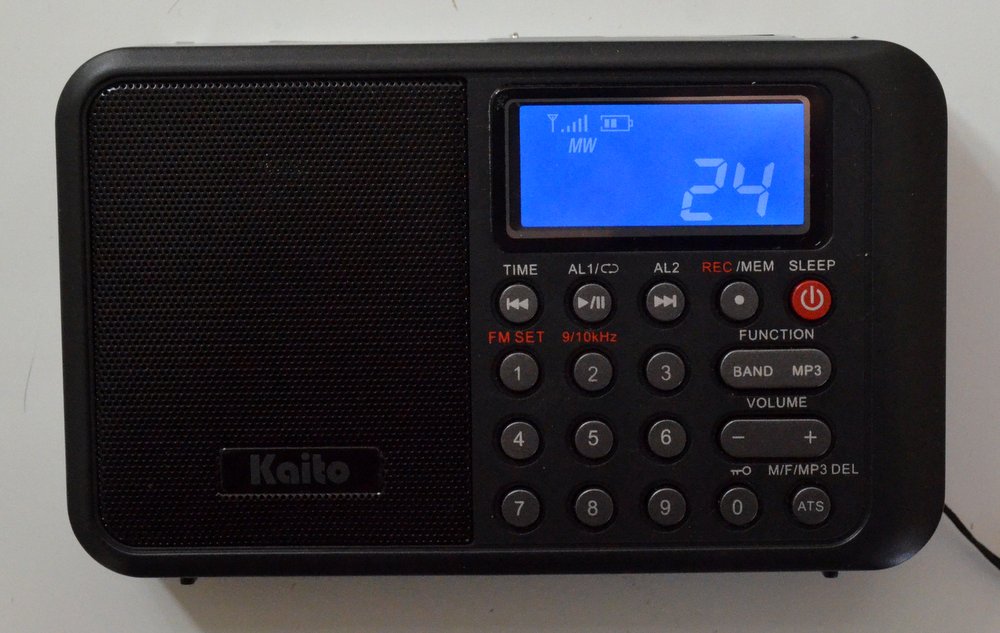
Volume level indicator.
Over the next few days with the KA108 on shortwave, I drew a few conclusions.
After recognizing that the audio fidelity did not improve significantly when using headphones, I realized that at least three factors are having a negative impact on shortwave audio, as follows:
- The default AM bandwidth is too narrow for broadcasts, and cannot be adjusted
- The AGC setting is over-active and causes audio pumping; it, too, cannot be adjusted
- Portions of the shortwave bands are polluted by internally-generated noise/interference
This combination makes for sloppy shortwave performance.
To save time in making the KA108’s comparison information readily available, as well as to indicate actual speaker performance, I decided to take a few quick comparison videos not with the KA108 or an external mic but simply with my smartphone. While my phone’s microphone is somewhat limited, I believe you’ll be able to observe the inherent problems with the KA108.
I compared the KA108 with the Traveller III in each video.
In the first comparison, I tuned to Radio Exterior De España on 9690 kHz, as you’ll see. The signal was marginal or relatively weak at the time:
(Click here to view the video on YouTube.)
Next, I tuned in a very strong shortwave signal from Radio Havana Cuba on 11,670 kHz:
(Click here to view on YouTube.)
Finally, later in the afternoon, I tuned to All India Radio on 9,445 kHz––again, a marginal signal:
(Click here to view this video on YouTube.)
Mediumwave Performance
Mediumwave (a.k.a., AM broadcast band) performance is very similar to shortwave performance.
In this video, I’ve tuned to an AM station located twenty-five miles away on 1600 kHz. The KA108 can receive the station, but audio is not pleasant and the AGC is, yet again, overactive. I’ve noticed that the mediumwave band is plagued by more internally-generated noise than are the shortwave bands.
(Click here to view this video on YouTube.)
Note that YouTube’s copyright checking system flagged my video because it recognized the song being played in the background on WTZQ. I believe this easily qualifies as fair use since the clips are short and it’s an off-air recording with dialog on top. I’ve disputed this, but YouTube may choose to delete this video. In anticipation, I’ve saved the audio from this video–you can listen to it by clicking here.
In a nutshell, AM performance on the Kaito KA108 is frankly poor. Even when I tuned to strong local stations, the audio sounded muffled and distorted, much as in the Radio Havana Cuba example above.
So you can forget about using the KA108 for mediumwave DXing.
MP3/WAV Playback and recording
There are some redeeming virtues with the KA108, however. Here’s a positive: digital playback with the KA108 is fantastic. I’ve played a wide variety of audio files on the KA108, and am very impressed with its on-board MP3/WAV player. While audio characteristics unfortunately cannot be adjusted––i.e., there’s no equalization––I find the default audio settings well-balanced for both music and voice.

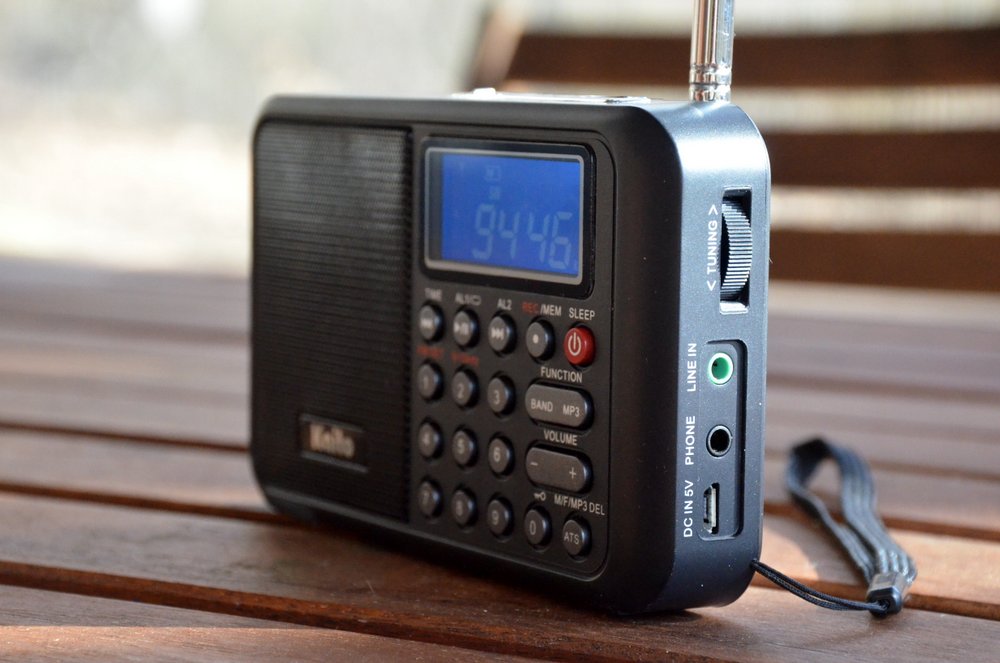
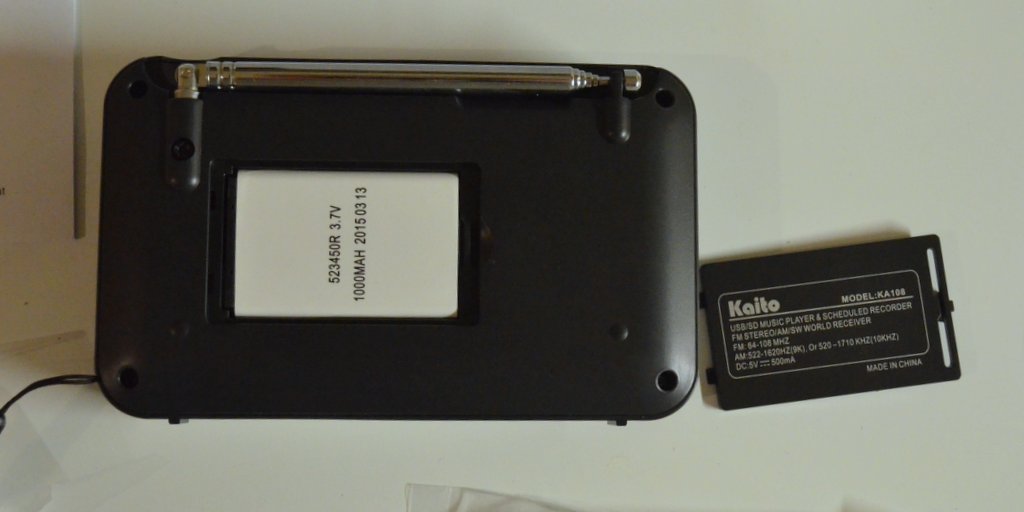
The KA108 has a dedicated MicroSD slot and a covered USB slot on top of the unit.
Recording directly from shortwave and mediumwave is also quite good. I believe its on-board recorder is perhaps the best I’ve tried in recent portables; it’s a marked improvement over that of the Kaito KA29, for example. It seems to capture the receiver’s produced audio well, with only a slight, high-pitched “hiss” injected in the audio, though this is not a major distraction.
Sadly the main distraction is that the recorder is recording audio, as I’ve outlined above, from a sub-par receiver.
Still, as an MP3/WAV player, it’s brilliant, and boasts excellent audio.
Summary
Invariably, all radios have strengths and weaknesses; here’s a list of my notes from the moment I put the KA108 on the air:
Pros:
- Great portable size
- Clear back-lit display
- Numerous recording and playback features
- Audio via MP3 or headphones is strong, considering the small speaker with acoustic chamber provides more bass response and volume than comparable portables (see con)
- Excellent FM reception
- Excellent MP3/WAV playback with well-balanced audio fidelity
- Recorder schedule function
- Alarms and sleep timers easy to use
- Dedicated MicroSD and USB slots on top of chassis
Cons:
- Mediocre sensitivity on SW and MW
- Internally-generated noise on MW and SW
- Audio (via built-in speaker) is:
- too bass-heavy, lacks treble on MW/SW
- garbled and mushy on MW/SW
- “hot” and often splatters/distorts when signals are strong
- Tuning
- extended mute between frequency changes
- no “scan to next station” function (only ATS)
- Odd numeric keypad layout
- Any local RFI garbles reception even further on SW/MW
- No SSB (in fairness, few radios in this price class have SSB)
- Antenna swivel to the front somewhat blocked by the radio’s chassis
- No backstand
Conclusion
I really wanted the Kaito KA108 to be a strong––or even average––performer. Why? Because, like many of you, I would love to have a capable shortwave/mediumwave radio with built-in digital recording and playback.
Sadly, the KA108 falls short on multiple levels.
Concerned that I might have simply received a defective unit––as I did when I reviewed the Sangean ATS-405––I contacted Kaito Electronics USA. I mentioned my disappointment with the radio’s performance, and detailed the negatives mentioned in this review.
I asked Kaito’s technician if I might have received a defective unit? He responded that my experience seems to be the norm with this particular production run. He, too, had noted muffled/garbled audio on shortwave and mediumwave. Per his request, I sent a detailed list of the KA108’s shortcomings with suggested fixes. He is planning to send this to Kaito’s current manufacturer in China.
The KA108’s poor performance issues would likely be mitigated to a great extent, if the manufacturer would simply make the following adjustments:
- Widen the AM bandwidth
- Tweak the AGC for greater stability
- Adjust the audio settings for the AM mode
- Minimize/shorten muting between frequency changes
- Improve internal shielding and grounding
- And while they’re at it, have the radio manual edited by a native English speaker
Since this is a DSP-based radio, I imagine the first four adjustments can be made via firmware upgrades.
Time will tell if the second production run of the Kaito KA108 improves on the first. Fingers crossed…! Kaito, we’d like you to succeed on this score.
Again, many thanks to Universal Radio for supplying me with a KA108 for this review.


 In response to
  I’m very pleased to have just received the 7th edition of John Figliozzi’s Worldwide Listening Guide (WWLG), the latest, most updated version of the excellent guide
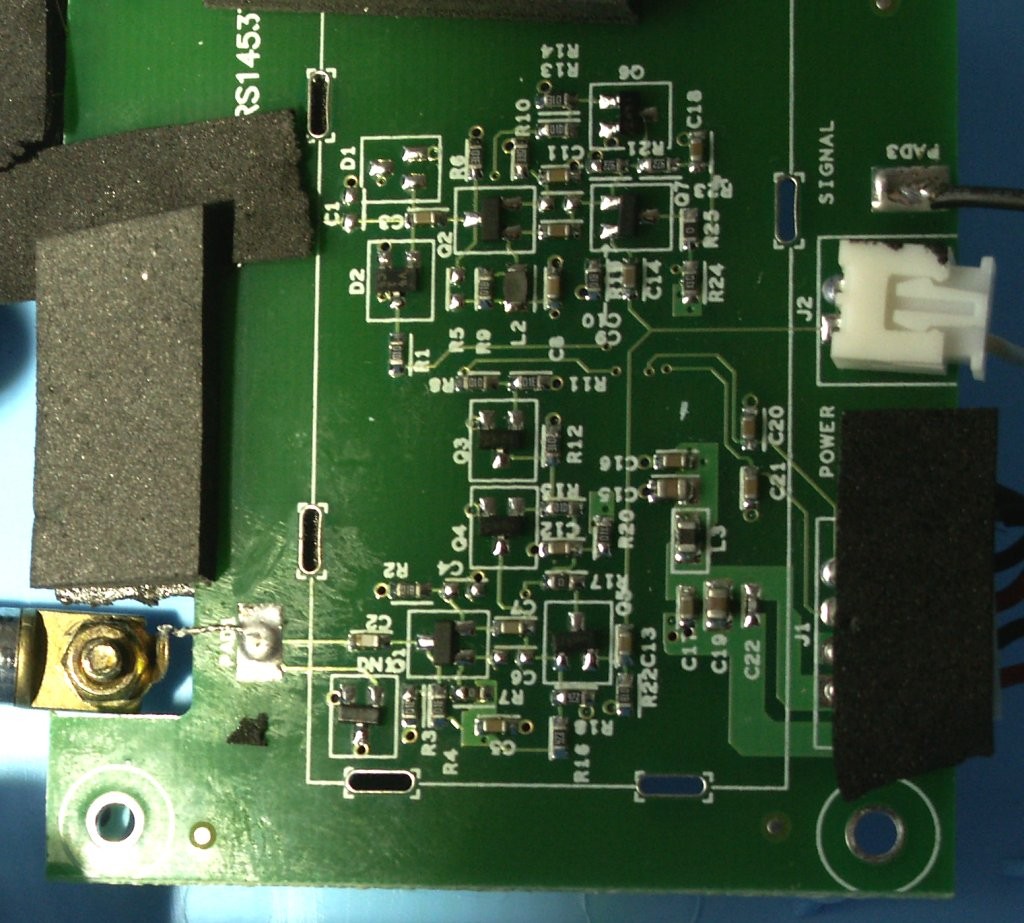
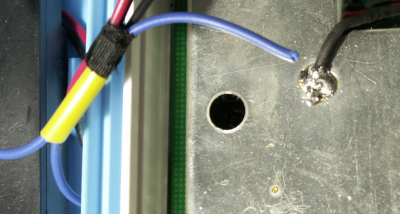
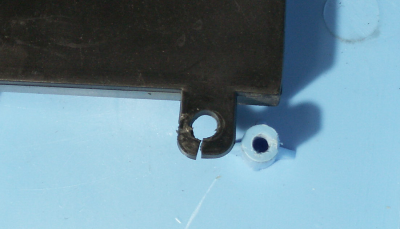
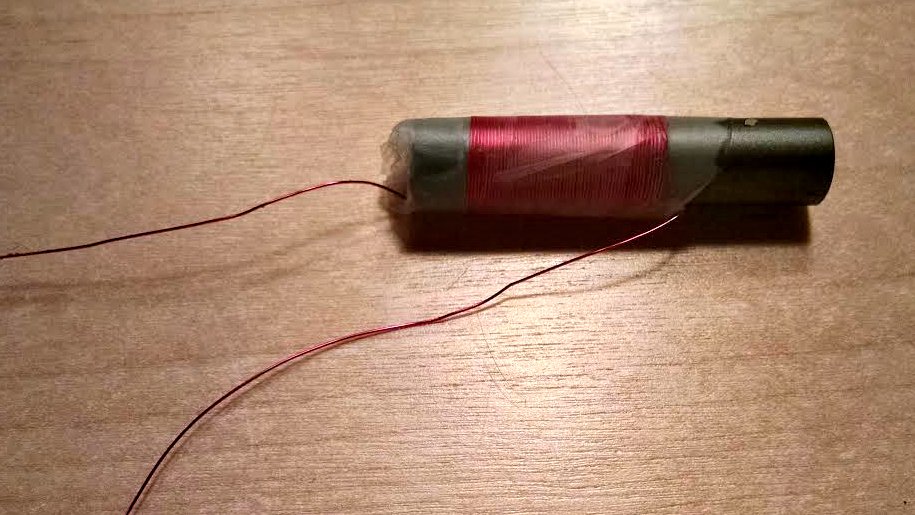
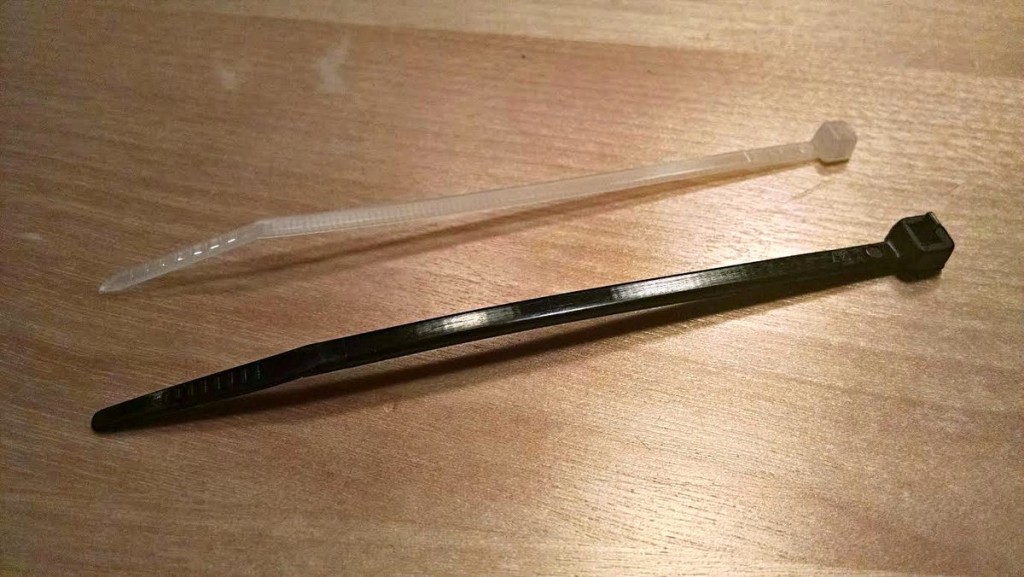
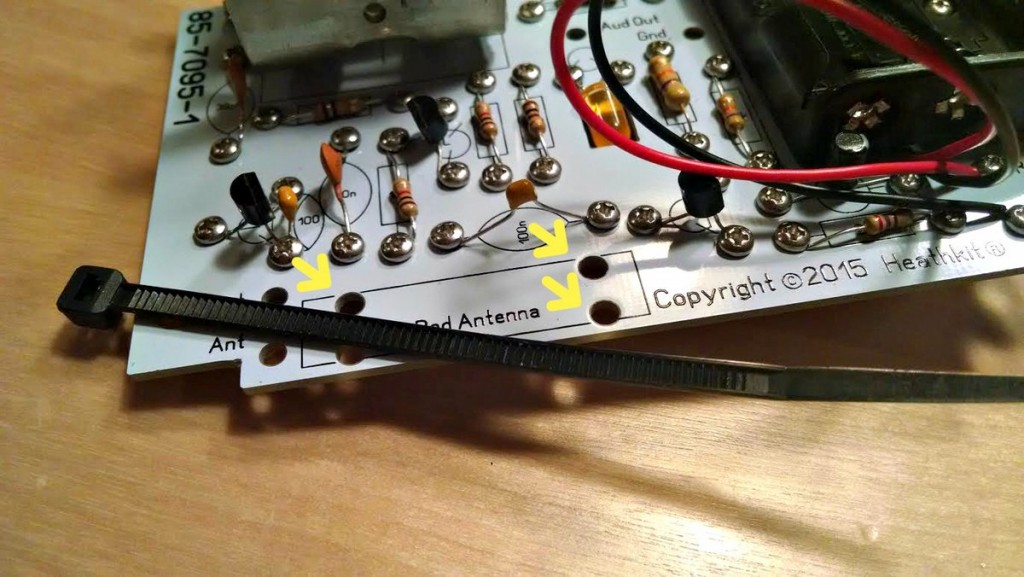
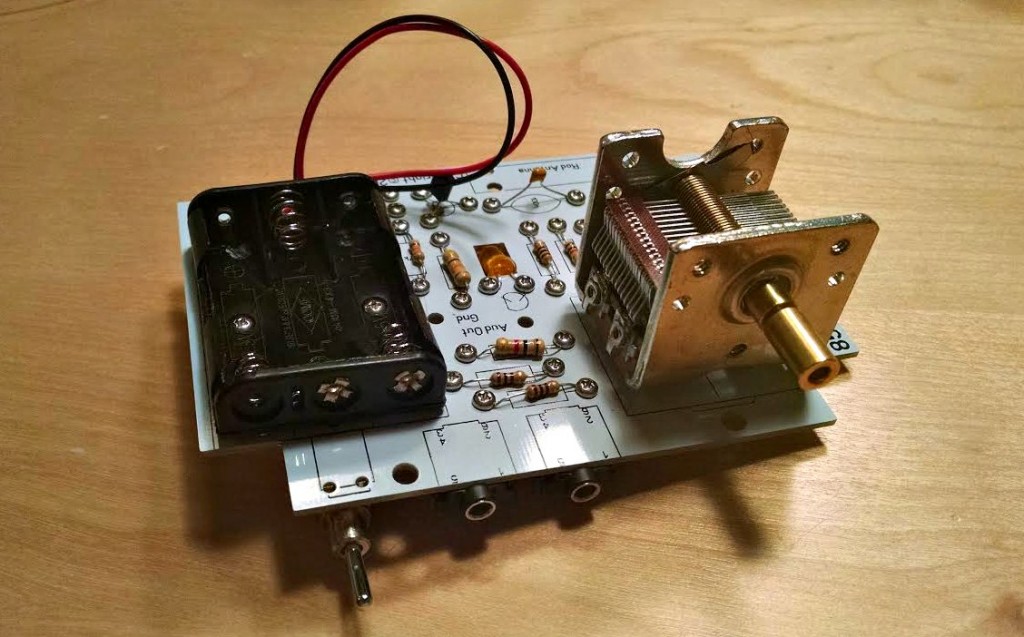
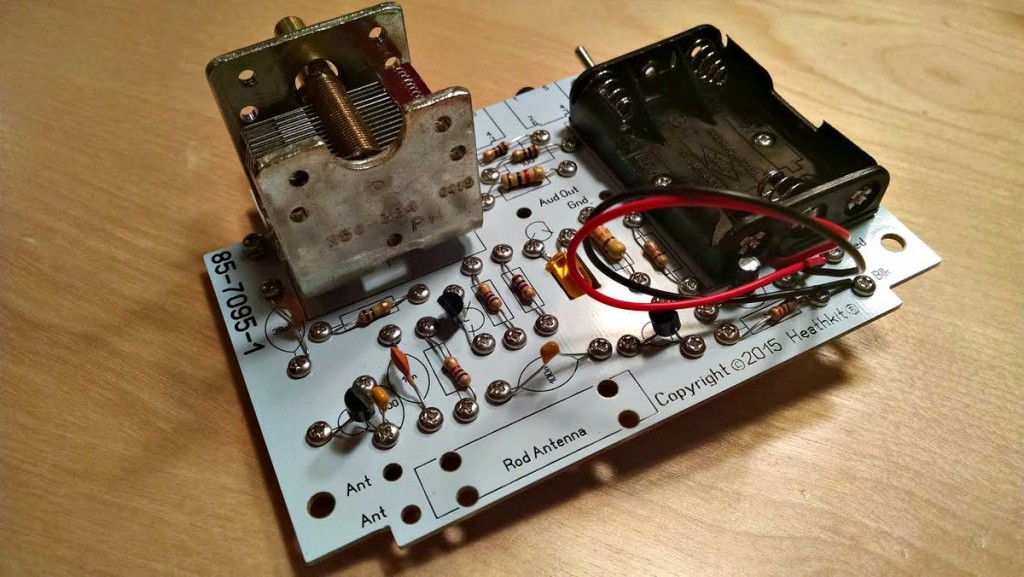
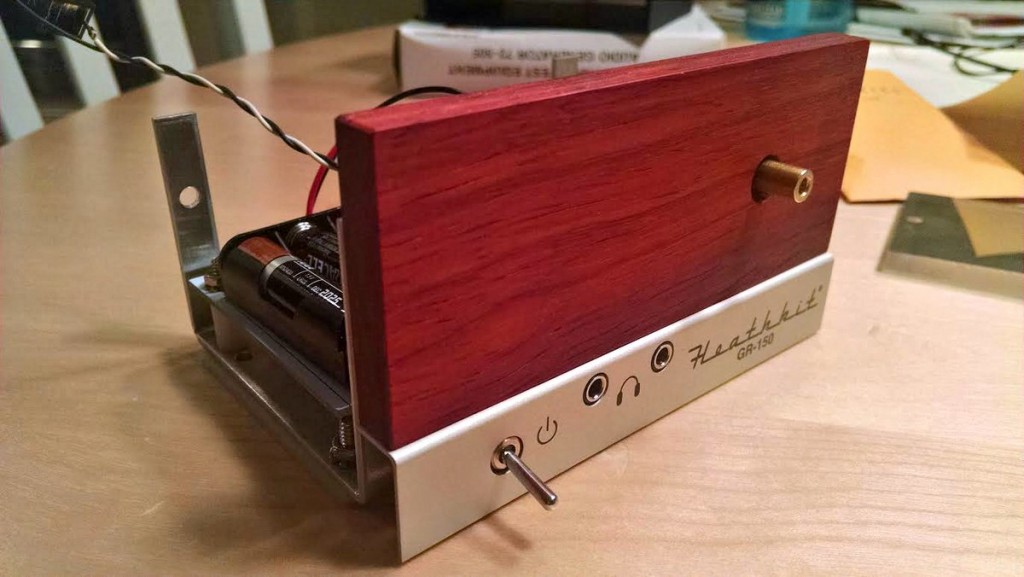
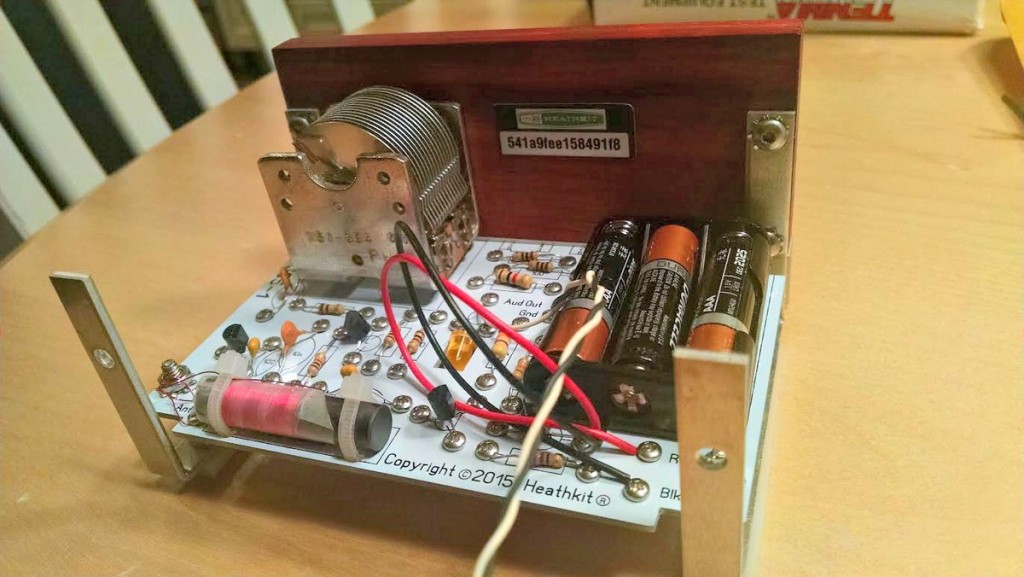
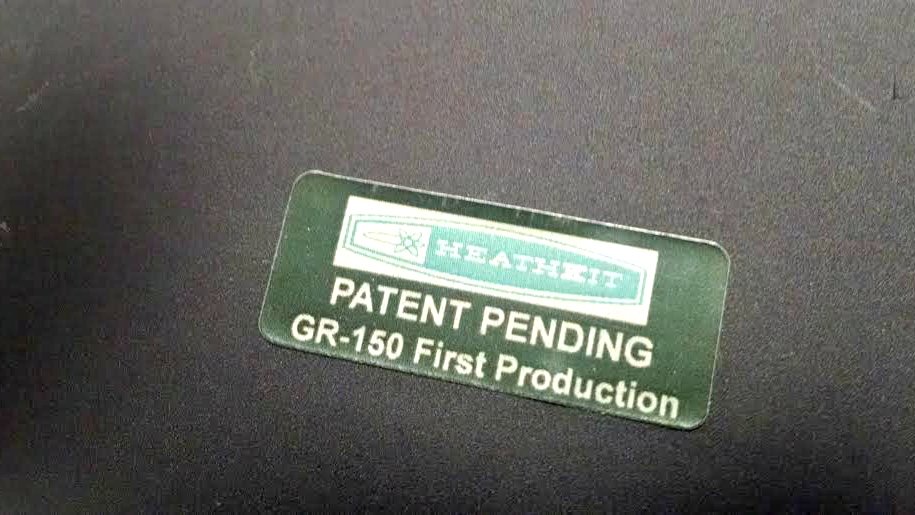
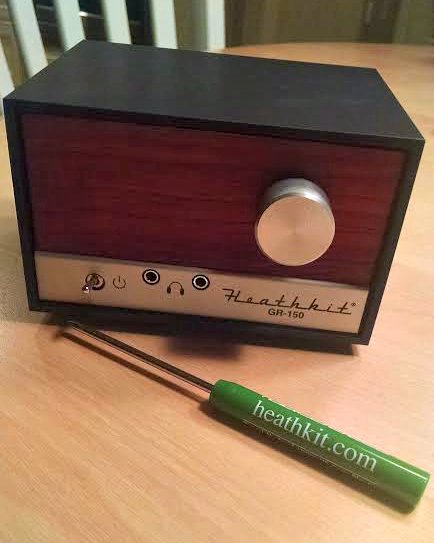
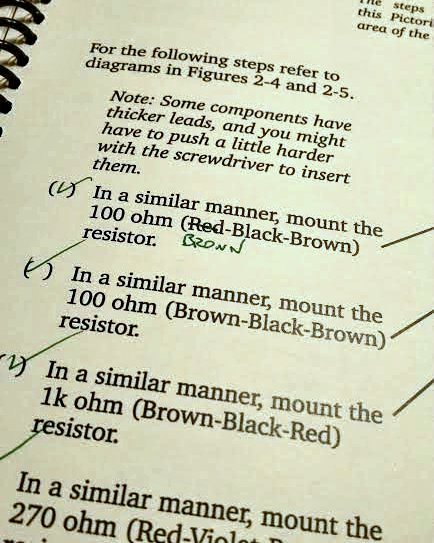
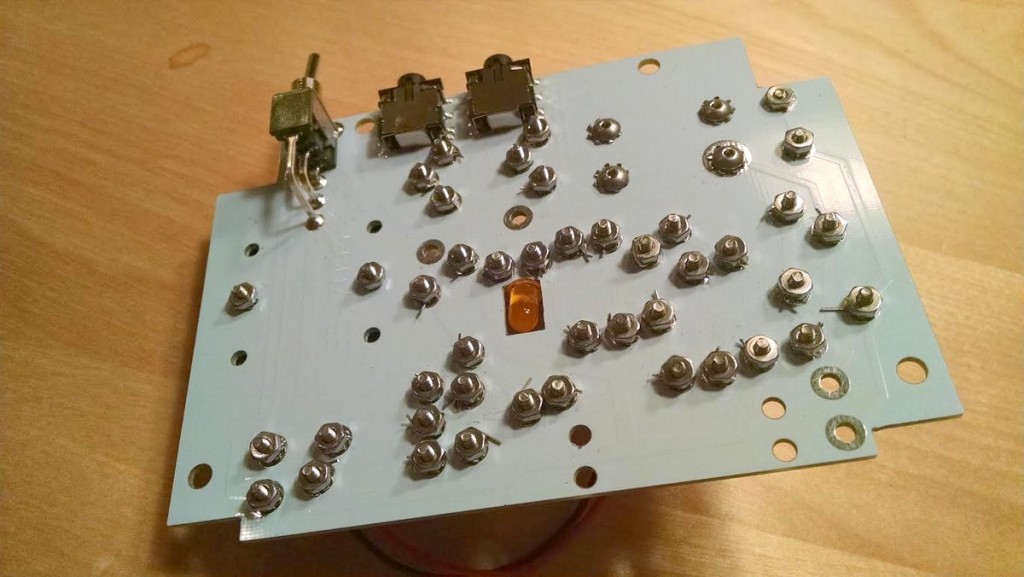
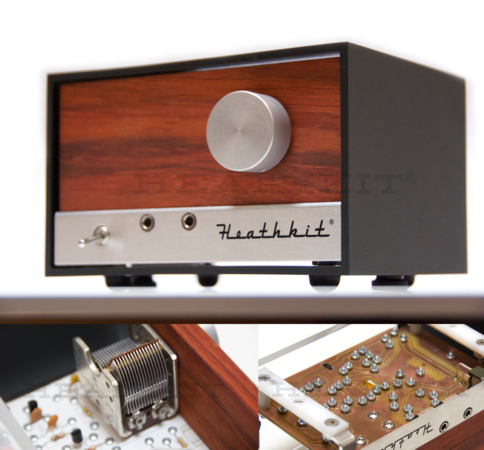 Many thanks to SWLing Post contributor, James Surprenant (AB1DQ), who shares this review and photos of the new Heathkit Explorer Jr. TRF AM radio receiver kit:
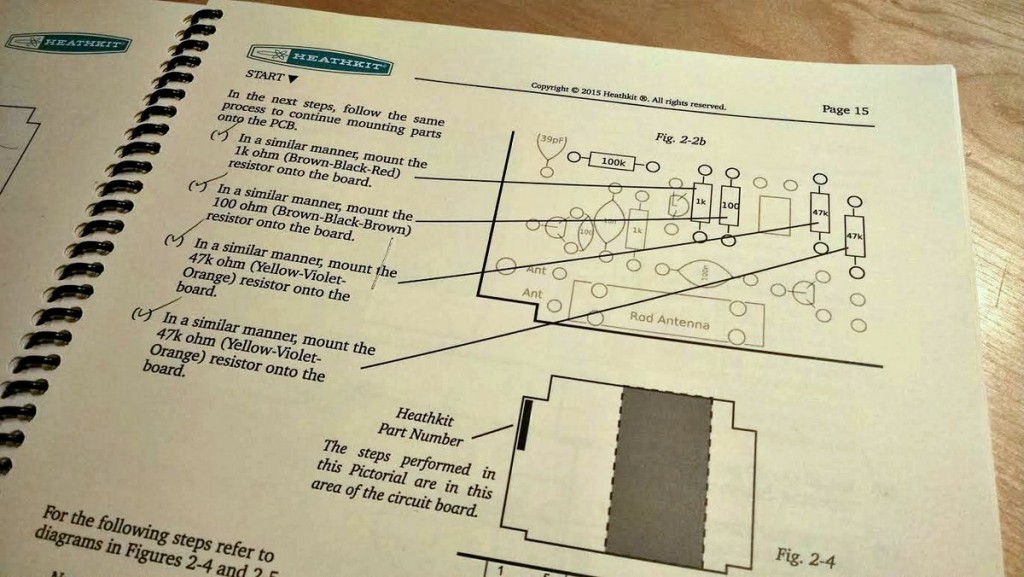

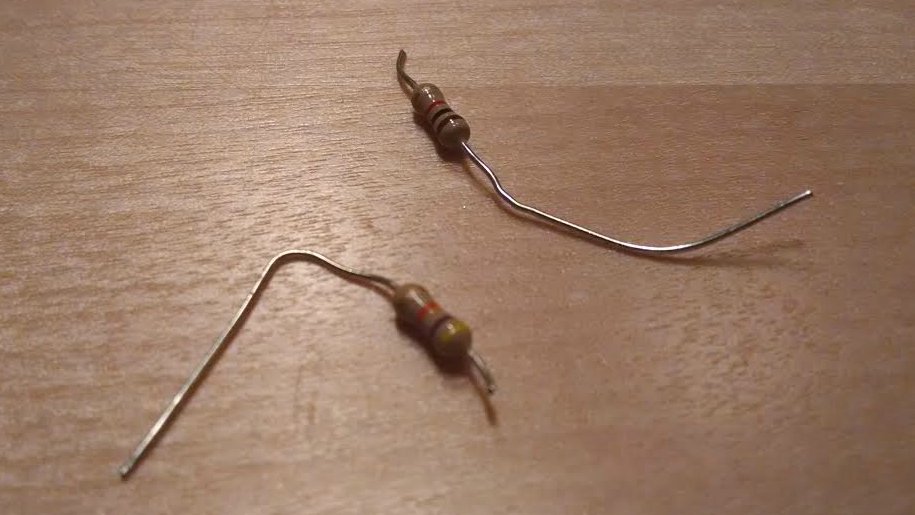 On the downside, I managed to sheer off the leads on TWO resistors when tightening the screws. Fortunately I was able to replace the busted resistors from my on-hand stock.