Many thanks to SWLing Post contributor, Paul Dobosz (K8PD) who shares his review of the Kaito KA108. Paul originally wrote this for the Michigan Area Radio Enthusiasts and has kindly allowed us to post it here:
Kaito KA-108 Review
by Paul Dobosz (K8PD)
Kaito just introduced a pocket sized DSP based MW/SW/FM receiver with some interesting features missing in other SW receivers its size. I just got my hands on one for the first time a couple of months ago and am getting familiar with its features, performance, and quirks. I first saw the KA-108 at the Consumer Electronics Show in early January when I visited the Kaito booth and spoke with Walter about their newest radios. There are no schematics included with the KA-108 and I haven’t cracked open the case but based on the functionality, size, and price point it appears that the KA-108 utilizes the now common DSP based receiver architecture found in most of the new portable radios.
First of all, a brief run down on the features and functions of this compact little radio.
- Compact Size – 5.5” x 3.25” x 1.1” Weight 9 oz
- Frequency Coverage – MW: 520 – 1710 KHz, FM: 64 – 108 Mhz, SW: 2300 – 23000 KHz
- Memories – 400 (100 MW, 100 FM, 200 SW)
- Power – BC-5 Rechargeable LiPo 3.7V battery
- Other Features
- Timer/Clock radio dual alarm function
- MP3 Timer record & playback to/from a Micro SD card
- Standard USB port that accepts a thumb drive.
- Exceptional Bass Response for travel sized radio
- “Auto Store” feature will scan and store frequencies
- Battery charging via micro USB (no wall wart to carry)
- Audio “line In” can be used as computer or MP3 speaker
Most radios have their good and not so good points and the Kaito KA-108 is no exception. Here is a rundown on the LA-108’s “HITS & MISSES”
The HITS
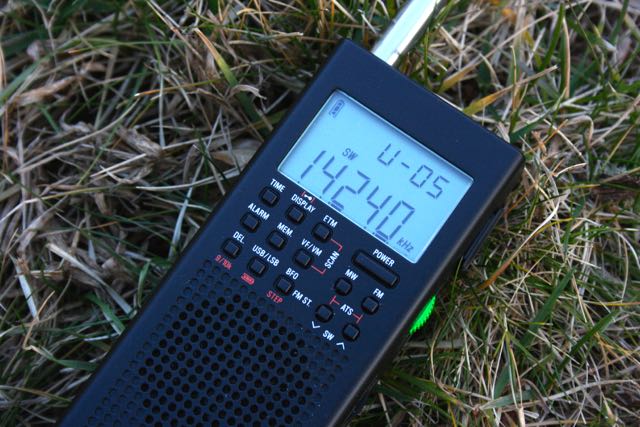
This radio is small and lightweight which makes it an ideal travel radio. The control layout features a full keyboard for frequency entry as well as up and down keys that will search for signals when held down. The fit and finish are excellent and the keys have good positive tactile feel. There are two rocker switches, one for volume up/down and the other for band/mode selection. The radio comes with a decent user manual and quick start guide. The manual’s English is a little awkward in places but is fully understandable.
The backlit LCD display is brightly lit with large white numbers on a blue background. It is easy for older eyes to read, even without glasses. The signal strength meter is actually fairly useful which is rare for radios at this price point.
The standard frequency step is matched to channel spacing for the band in use with exception of the FM band which tunes in 100 KHz increments instead of the US standard 200KHz steps when the frequency range is set to the North American band. The FM band can be set up to tune all the way down to 64 MHz if desired but since TV has migrated from analog to digital the usefulness of that coverage is minimal for North American users. AM is 9 or 10 KHz step capable with a frequency range to match all parts of the world. In addition to the standard frequency steps, the thumbwheel encoder can be used to fine adjust the frequency between the standard increments in 1 KHz steps.
The MP3 playback is very pleasant to listen to. I tested it with several different genres of music with consistently good sound quality. I haven’t tried the recording function yet but it is definitely a nice feature, especially in such a compact package. The KA-108 has a standard USB input (not mini or micro) behind a sliding door on top of the radio for external memory devices like thumb drives. MP3s can be played and audio recorded to/from this port as well as the Micro SD card slot aside of it. I’m also hopeful that the USB port may be capable of upgrading the radio firmware in the field. If not, that’s another feature that Kaito should definitely consider for future versions of the KA-108. (More on that later)
One feature I really like is the rotary tuning thumbwheel encoder on the side of the radio. It has a light detent feel that allows you to manually tune the radio in 1 KHz steps to easily allow you to move to one side of a signal. Frequency entry via the numeric keyboard is straight forward and intuitive with exception of the non-standard location of the zero key to the right of the bottom row of the numeric keys.
The FM reception is excellent with bass response that makes you wonder how such a mellow sound comes out of such a small box. Despite the 1.5” speaker, the audio has lots of bass and lacks the “tinny “sound of most travel portables with small speakers. It plays loudly without distortion.
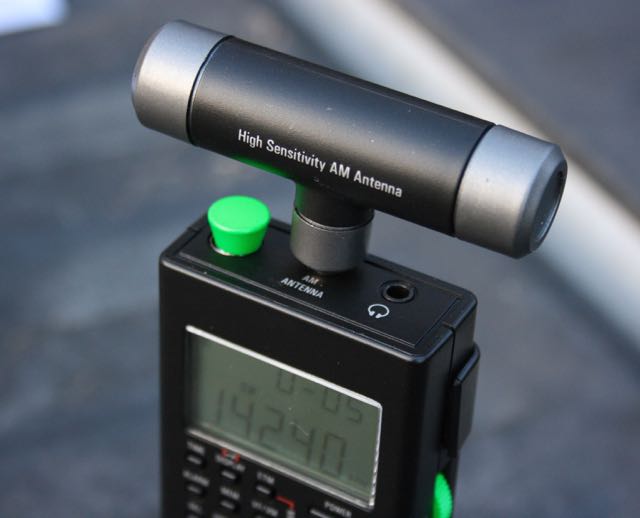
MW reception was typical for a radio with limited space for a small ferrite antenna and I was able to hear the usual SWBC stations and time/frequency UTE’s on the HF bands. SW reception using just the 20” whip was just OK with easily listenable strong signals found on most of the active SW bands 2MHz and above. The KA-108 is AM only on the HF bands (no SSB or CW). There are some quirks with the MW and AM reception that I’ll cover in the MISSES section of this review
The MISSES
I never thought I would complain about a portable receiver with a “too tight” a bandpass filter but the KA-108 is a first. The bandpass filter for MW &SW are extremely narrow which when coupled with the KA108’s exceptionally strong bass response, reduces the intelligibility of the received audio on the MW and Shortwave bands. I have been able to mitigate the situation a little bit acoustically by covering a portion of the speaker grille with my hand or placing a small tube in front of it which seems to attenuate the bass and improve the overall audio response but the audio is still lacking in the higher frequencies that make things like music and the human voice more intelligible.
Tuning 1-2 KHz off of the carrier frequency with the thumbwheel helped improve things a little bit similar to the way you might use IF shift on a high end tabletop receiver. I also noticed that stronger stations that have a signal that spills further down the filter’s skirts had better audio response than those that lacked sufficient strength to spill over the filter response curve. I am hopeful that Kaito will offer a firmware upgrade to open up the bandwidth. If the USB port used to play thumb drives has hooks into the radio’s CPU then it might be possible to open up the bandwidth and improve the MW and SW audio without cracking open the radio case to re-flash the CPU or make a hardware change. The bandwidth issue is the largest single miss for the KA-108 in my opinion
I found a few buzzes and whistles on the MW band and you can hear the CPU clock oscillator strongly at 12MHz. I haven’t looked inside of the radio yet but I would imagine that some of the MW noise can be tamed with a bit of internal shielding.
I also found the AGC setting to be a bit too abrupt, jumping up and down in almost a step function with a signal whose level was fluctuating quite a bit. That’s another minor software adjustment to consider for the next edition.
Due to the KA-108’s small size, the whip antenna is rather short (only about 20”) which means the front end must have a lot of gain leaving it more vulnerable to overload. I was able to receive a the stronger SWBC stations while sitting in the middle of my house but I also heard another faint signal under the SW stations. The interfering signal turned out to be a local 1KW AM station on 145o KHz whose transmitter is about 4 miles from my home. It was present in the background while listening to SWBC and was heard standalone on its 2nd and 3rd harmonics which were most likely generated internally due to the high gain front end. The short SW antenna does create the need for higher front end gain but should be accompanied by a high pass filter behind the SW whip antenna or at least a 10dB attenuator. Either or both of those features would reduce AM BCB intrusion while listening to SWBC.
In the coming weeks I’d like to do some parametric measurements on the KA-108 and will also see how it behaves with a longer antenna and antenna tuner with low pass filter ahead of it. That should be a good test to see if a simple filter can eliminate the AM intrusion. Improvements to widen the AM/SW filter bandwidth and reduce the AM overload should be high priority improvements for the next version of the KA-108.
Summing It Up
I found the KA-108 easy to operate as I’ve explored the AM/SW/FM and MP3 operating modes and it’s a nice sized radio for casual listening when I’m at home or to take with me as I travel for use as an alarm clock, music player, and radio in one compact package.
The KA-108 has potential with a few software and hardware tweaks. Fixing the MW/SW bandwidth is #1. A simple high pass filter that rolls off just above the AM broadcast band behind the SW whip antenna is #2. I can live with a few buzzes and tones but why not fix them with a little inexpensive shielding while adding the other fixes.
The KA-108 will never match the performance of tabletop or lunchbox sized portables, but if you’re looking for a nice little radio that will almost fit in your shirt pocket with nothing more than a micro USB cable to tote along for battery charging, and a radio that sounds twice its size, this radio fits the bill. I hope that Kaito will address the issues I’ve noted with future software/hardware revisions to improve the performance of the KA-108 and maybe even offer a way for current owners to field upgrade their radios.
That’s a thoughtful and fair assessment of the Kaito KA108, Paul. It’s a reminder that, with a few strategic tweaks, the KA108 could be a great little portable. Thank you for sharing your review with us!