Tag Archives: Field Radio

Social DXing: Looking back at one very radio-active year

One year ago, I posted an article about making the most of social distancing as the world started locking down due to the rapid spread of Covid-19. Here in March 2021, the news is looking much better: vaccines are being distributed at a record pace across the globe and number of cases and deaths are mostly on the decline.

Looking back

As I look back at the Social DX Bucket List I made last year, I’m happy to see that I actually accomplished about 64% of the goals I listed. I knew some of those goals would take well over a year to achieve (the QRP EME one especially).

In particular, I’m chuffed that I braved up and started doing Parks On the Air (POTA) and Summits On The Air (SOTA) activations in CW (Morse Code). That was a huge step for me and I’ll freely admit: I was nervous about it. But in July 2020, I managed to do my first CW activation and since then it has become my choice mode of operating in the field. CW is such a simple mode and so efficient–plus it gives me a sense of connection with the roots of radio communications.

I also accomplished a few things I never set out to do:

Not a typical radio year for me

In a “normal” year, I do way more SWLing than I do ham radio activity.

Last year, I started doing caregiving for my parents in my hometown–I’m typically there 2-3 days a week. While I’ve done shortwave listening and even a little MW DXing in my hometown, I typically don’t have a lot of time, especially in the evening hours. I just want to hit the sack early. QRM is also debilitating there and while I’d like to install a permanent Loop On Ground antenna to mitigate the noise (you heard that right, Andrea!) I’m not entirely sure I’d even have the dedicated listening time to justify it. When I’m there, I like to spend quality time with my folks.

In general, I’ve had much less free time. Indeed, if you’ve written to me via email, you’ll know this based on how long it’s taken me to reply. It can take several weeks especially if the reply requires a detailed response (which many do).

En route to, and on the way back from my hometown, I’ve found that doing park and summit activations has been very rewarding. Last year, I believe I completed a total of 82 park activations.

POTA has given me an excuse to explore public lands I’ve never visited before. Plus, I love nothing more than taking radios to the field–both receivers and transceivers.

Hamming and SWLing

At the end of the day, I’m an SWL and a ham radio operator. I find the two activities complimentary.

Side note: As I mentioned in my Winter SWL Fest presentation this year, it saddens me when I receive angry emails from readers after I post items that are ham radio related. We’ve upwards of 7,000-10,000 daily readers on the SWLing Post and the number of complaints are a teeny, tiny fraction of our readership. I only receive messages like this about once a month and they typically say something akin to “I don’t like the ham radio stuff, so if you don’t stop posting it, I’m leaving!” (FYI: That’s a real quote taken from the last one I received in January). I can only assume that at some point in the past, a ham radio operator has been a jerk to this and other radio enthusiasts. It’s a shame, too. I hate seeing the negative impact of one loud troll compared with the encouragement and support of much better people. All of my ham radio friends are not only supportive of SWLing, but almost all got their start in radio via the shortwaves. I’m certainly a case in point.

I love all things radio and I believe the SWLing Post is a reflection of that. If it offends you, then it might make sense to surf somewhere else.

Now where was I? Oh yeah…

POTA and SOTA outings have helped to satisfy some of my travel cravings as well. I miss going to radio conventions, hamfests, and especially traveling internationally with my family. We are a family who love national parks, forests, and other wildlife areas. Having an excuse to explore public lands we haven’t visited before has been amazing fun.

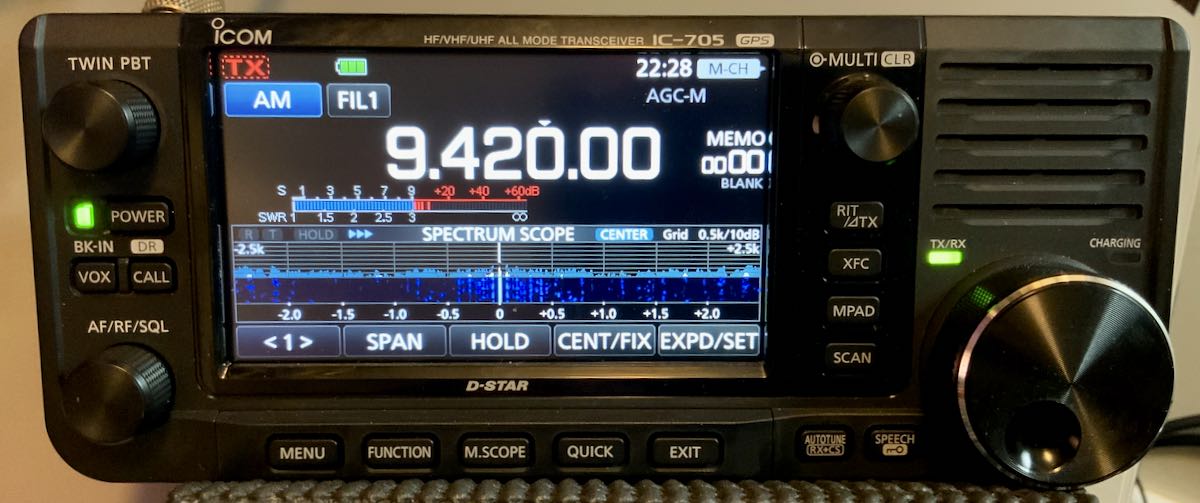
After POTA activations, I’ll often do a little SWLing since I already have an external antenna up and it’s typically connected to a good general coverage transceiver in a spot with zero RFI or QRM. I’ve especially enjoyed my DXing sessions with the superb Icom IC-705.

Listening habits

One indicator that I did less radio listening last year was the low number of recordings I made. I checked my audio folder recently and saw that I only made a couple dozen recordings–most were staple broadcasters, not rare or special DX.

At the end of the day, I realize that when I do SWLing sessions I like to have dedicated time–at least an hour or two–with headphones on, losing myself on the radio dial.  I simply haven’t had many opportunities this past year to make that a reality.

That’s okay, though. The great thing about the shortwaves is that they’re always there, patiently waiting for us to dive back in!

Looking forward

I’m really not sure what’s in store for me this year, but I know it’ll involve a lot of radio time and that pleases me to no end. I’ve made a few fun goals, but my hope is that, by the end of the year, I may even be able to do some proper travel–maybe even take a flight!

I do know this: I have an even more profound appreciation for my radio enthusiasm as I realize it’s the perfect space to travel and explore the world no matter how “locked down” things are. Based on feedback from readers and contributors to this site, I know I’m not the only one who feels this way.

How about you?

Did your radio activity change or pivot this past year? Did you have more or less time to hit the airwaves? Please comment!

Spread the radio love

Loop-On-Ground Antenna Part 2: Tom upgrades his low profile, low noise, portable DXing antenna

Many thanks to SWLing Post contributor, TomL, who shares the following guest post:


Loop on Ground Part 2

by TomL

My previous Loop on Ground (LoG) experiment was useful which entailed connecting my Wellbrook loop amplifier to a 100 foot loop of speaker wire in the field at my favorite local Forest Preserve. It really brought in stations I had never heard before or strong stations in a more powerful way that made the audio really pleasant to listen to.  This report will describe more experiments with smaller wire loops to see what the limitations are.  100 feet of wire is quite a lot of wire to mess around with especially in the cold weather or public places that do not have as much private space.

I don’t understand all the electrical interrelationships but a long posting at RadioReference.com had  a great discussion about creating a 160-20 meters LoG receive-only antenna. It is 11 pages long but is worth reading how “nanZor” experimented with various parameters for general use. Kudos to him for documenting the findings as the design changed over time. You can find it here:

https://forums.radioreference.com/threads/160-20m-log-loop-on-ground.370110/

nanZor basically boils it down to a few guidelines.

  1. Keep it on the ground. Lifting the wire more than an inch or two decreased the lower angle signal reception greatly.
  2. Calculate the optimal length for one full wavelength of wire at the highest target frequency, say for example, the top of the 20 meter band (14350 kHz). 936/14.350 MHz * 0.9 velocity factor of simple insulated wire = 58.7 feet.  You can round up to 60 feet, no big deal since this is broadband.  The antenna should have a predictable reception pattern from 1/10th wavelength up to 1 full wavelength. Outside that range, the pattern gets “squirrely”.
  3. Using a 9:1 balun seemed to be a little better than a 4:1 balun at the antenna feedpoint. This gets into things I cannot measure and has to do with rising impedance as a loop gets closer to ground level. I am not sure but I think my Wellbrook amp has a built in 4:1 balun and it seems to work just fine.
  4. Make sure to use an RF Choke at BOTH sides of the feedline coax cable. He was adamant that the loop can get easily unbalanced and allow noise into the antenna and/or feedline and so it must be isolated and the ground allowed to “float” in his words.

Personally, I also wanted to use less wire and happened to have a length of 42 feet of landscape wire which should work well below 5 MHz with the Wellbrook amp engaged.  Results were not bad even though on hard frozen ground. Signal levels were down a little compared to the 100 foot of wire.  Here are a couple of examples, first one in a fast food parking lot with a grass field next to it and second at the usual Forest Preserve parking lot on a grass field.  I made sure that my car blocked the view of the wire so people would not get nervous!

La Voz Missionaria, Brazil:

Voice of Welt from Issoudun France in Kurdish:

These are not necessarily “DX” but definitely good for SWLing. I like the signal strength with the amplifier inline at the antenna feedpoint and I did not have to use an RF Choke at the receiver side as was suggested.

I had a 75 foot long insulated wire and used that at the Forest Preserve parking lot on a couple of different days.  Lower frequency signal strength and signal/noise ratio improved a little bit to be noticeable.

US Air Force HFGCS “numbers” station. Remote controlled from Andrews or Grand Forks bases (https://en.wikipedia.org/wiki/High_Frequency_Global_Communications_System), there was no way for me to know which of the 6 transmitters it was coming from:

BBC from Tinang Philippines in Korean:

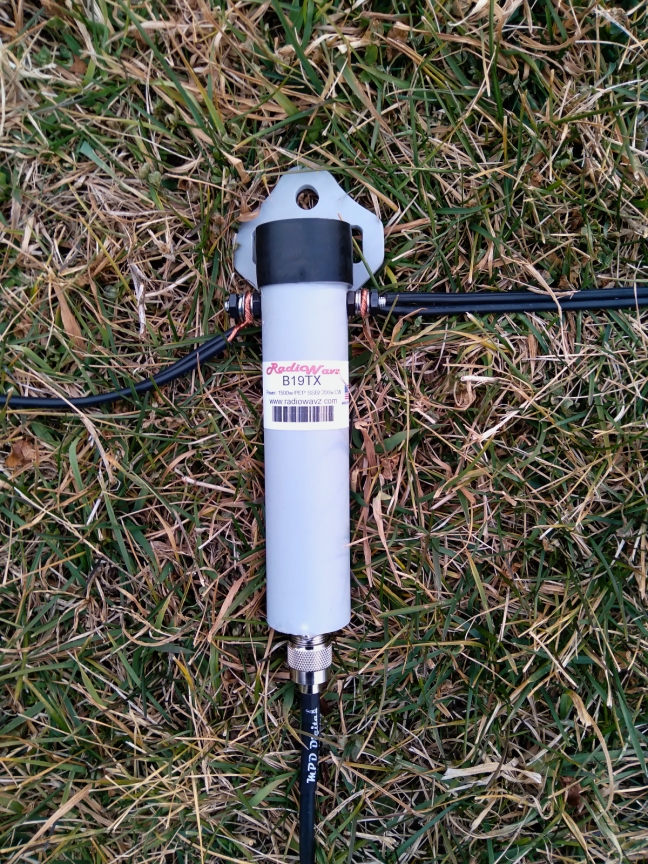
Then, as nanZor suggested in his postings, I purchased a 9:1 balun/RF choke (it has both a balun and an RF choke built-in) from Ham Radio Outlet and put that in place of the Wellbrook amplifier.

I have not worked with it, but it is reported that the Nooelec.com v2 model is cheaper and works just as well – https://swling.com/blog/2019/10/the-nooelec-balun-19-v2/

Examples below with the 42 foot loop and 9:1 balun/choke, no amplifier:

KSDA, Agat Guam in English

WB8U doing a POTA activation of Leavenworth State Fishing Lake

VOLMET weather, Shannon Ireland

HCJB Quito Ecuador, probably in Quechua

As a side note, there is a posting that mentions low-angle DX is better with regions that have better “ground conductivity”, salt water being the best. I have no way of verifying this.  See post# 126 by KK5JY Matt.

So, bottom line is that a Loop on Ground can be useful for pleasant SWLing and portable.  Best to use it on grass, not asphalt.  The loop amplifier is useful to get signal levels up if you have to use a smaller loop size but the signal/noise ratio will suffer due to its smaller aperture.  And, warning, the public will find a way to trip over the wire no matter where you set it up (I may try putting the wire around my car if I can park on a grass surface and/or use the gaudiest, brightest neon green or orange wire I can find – they can’t trip over THAT, can they?).

TomL


Thanks, Tom, for sharing your update. Obviously, the LoG is working brilliantly. It’s amazing that you got such clear reception from the parking lot of a fast food restaurant.  If you were using a vertical instead, I bet signals would have been buried in the noise. 

I can also relate to people tripping over antenna wires. I remember one POTA activation recently (the first activation in this three park run) where I intentionally laid my counterpoise on the ground, off a foot path, in the brush and where I couldn’t imagine anyone ever stepping. Ten minutes into the activation and for no reason, someone walked off the path, into the brush, and it snagged them. Maybe I’m just a Ninja level trapper and never realized it!?

Thanks again for sharing the results of your LoG, Tom. Inspiring! 

Spread the radio love

Tom builds a portable Loop-On-Ground antenna

Many thanks to SWLing Post contributor, TomL, who shares the following guest post:


My First Loop-On-Ground antenna

A number of people have mentioned the Loop On Ground (LOG) antenna in the past as a good receive-only antenna.  I did some research but could only find a few examples by amateur radio operators.

Matt Roberts (KK5JY) has a good article including some antenna theory and measurements, you can find it here:

http://www.kk5jy.net/LoG/ 

Someone named Tom (KG3V) has a write up on it but it is a little short on details:

https://kg3v.com/2020/01/04/loop-on-ground-the-simplest-receive-antenna-you-will-ever-build-and-it-works/

Stana Horzepa (WA1LOU) has something similar:

https://tapr.org/loop-on-ground-log-antenna/

I also read somewhere that for transmitting, a LOG antenna is useless as it radiates much of the energy right into the ground!  But I didn’t care about that.  I needed something for receive I can deploy easily without supports and take down just as easily.  As you may recall, my home condo is literally saturated with noise and I cannot null it out.  So a wire looped on the ground is supposed to work?  You bet it does!

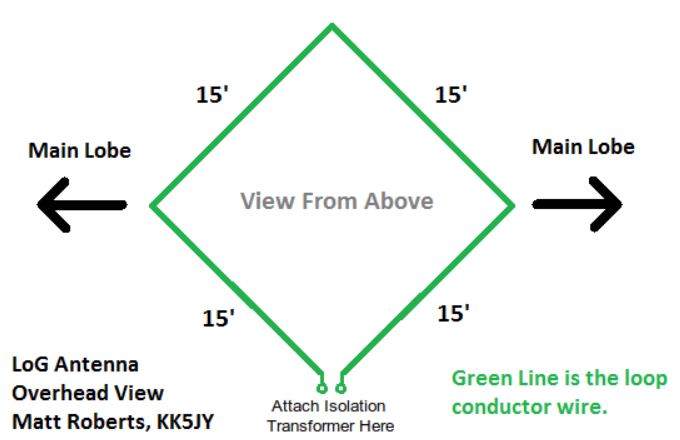
Of course, there are some conditions to meet.  There has to be enough flat ground away from people or pets (or lawn mowers!) who would get tangled in the wire on the ground.  The wire should be as close to the ground as possible (although I had good results laying the wire on top of cut grass).  The loop of wire can vary in circumference from about 20 feet to 150 feet (the shorter length will stay in an omnidirectional pattern higher in frequency but lower in signal pickup and vice-versa for the longer length).  The wire needs to be insulated.  That’s about it!

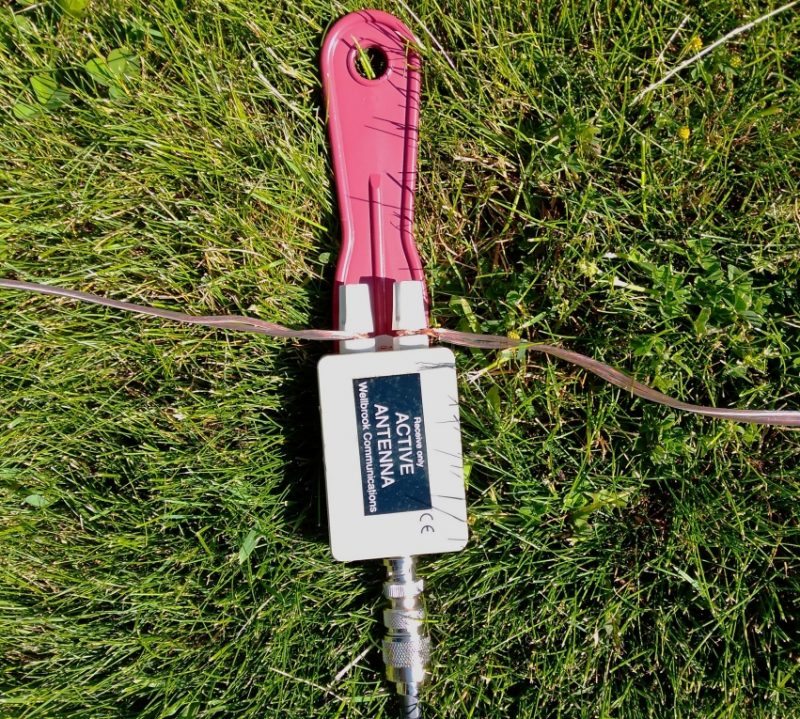
So, off to the hardware store to buy a cheap spool of 100 foot 18 gauge speaker wire.  But, the articles mention using a balun and they all made their own.  I did not feel like doing that (I am not that good at making things from scratch) and I did not want to spend money ordering one. More reading somewhere informed me that my existing Wellbrook Medium Aperture loop amplifier has a built-in balun at the antenna side of the device.  Hallelujah!

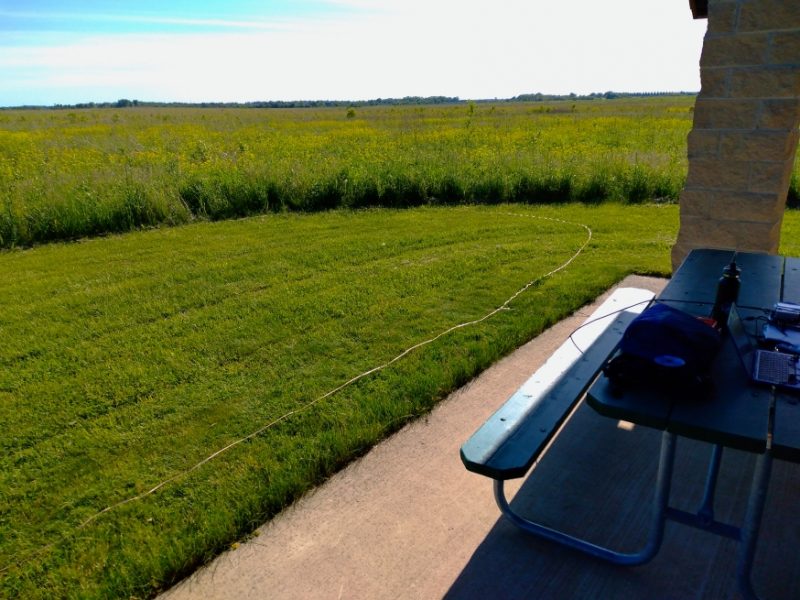
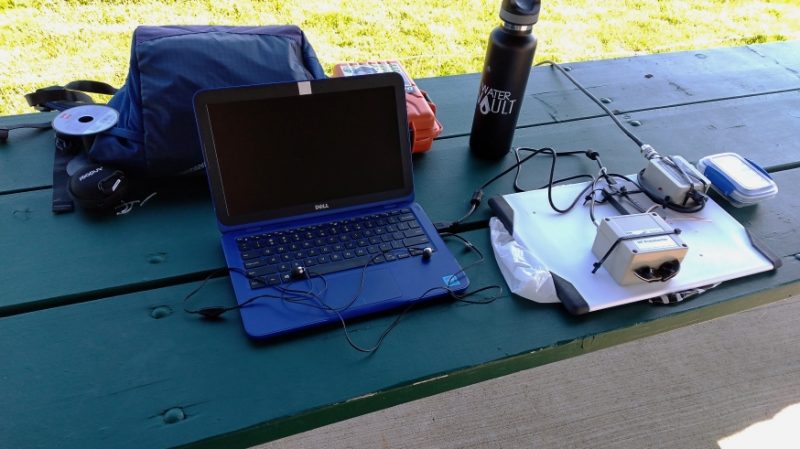
I bundled together the wire, Wellbrook parts and battery supply, small laptop and Airspy HF+ to my favorite Lake Nelson Forest Preserve.  The shelter there is little used and is adjacent to the prairie with cut grass.  It did take a good 15 minutes to lay out the 100 feet of wire on the ground while trying to keep it as flat as possible. And I did not have enough space for a circle, so I ended up with an oblong shape.  The long sides are facing directly north-south, so in theory (I think) this gives me an oblong shaped reception pattern east-west.  The photo shows half of the wire laying on the grass.

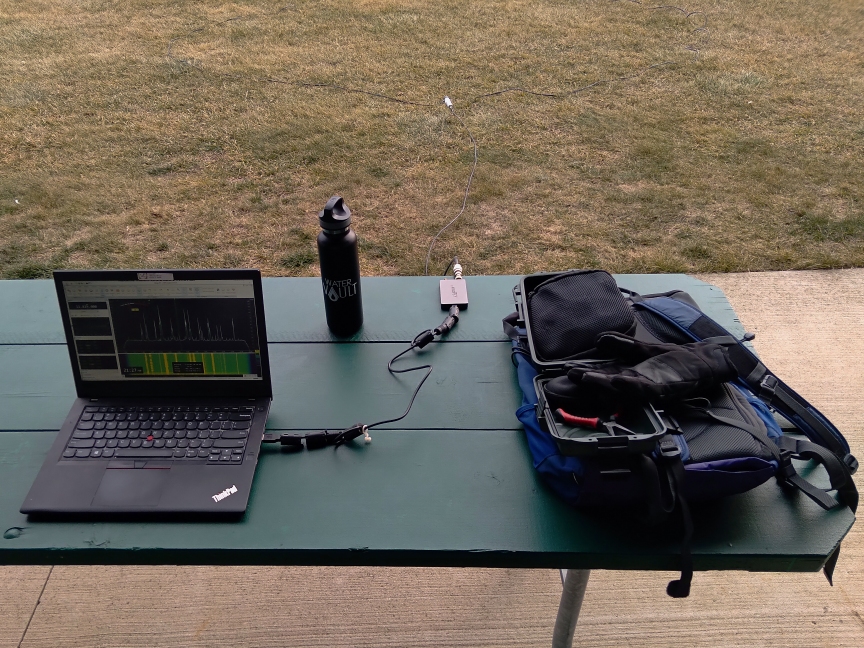
I ended up with this setup on a picnic table at the rear end of the shelter.  The coax wire goes from the Wellbrook amp into its power module, then to a Cross Country Wireless preselector, then to the Apirspy HF+ and laptop.

I was really impressed by the signal strength of the usual suspects like Radio Nacional da Amazonia.  I could see that the Wellbrook amp was boosting signals across the board with only a little extra noise.

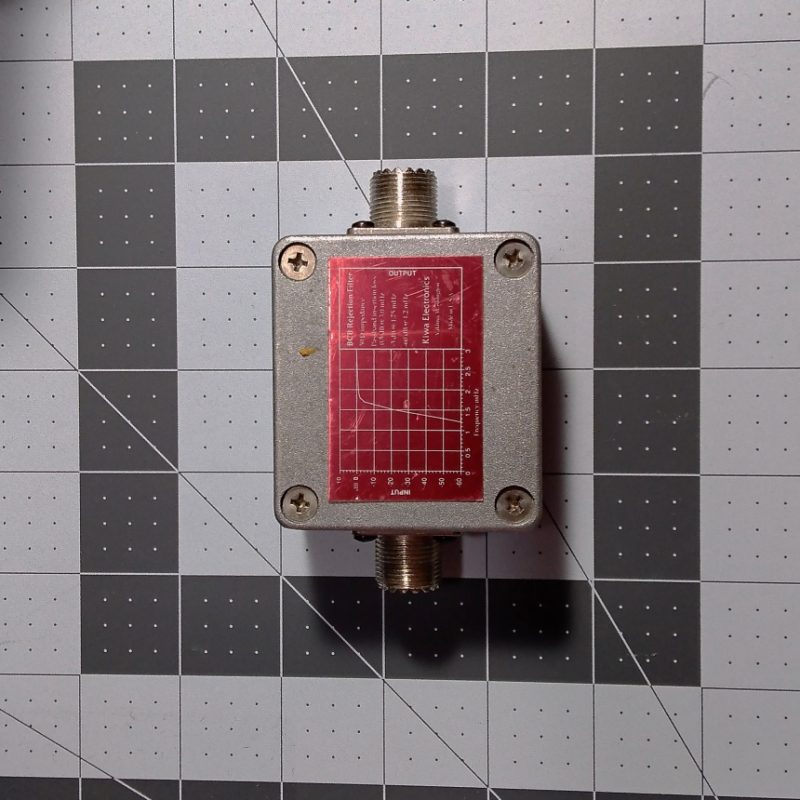
I use the preselector to try to keep the Airspy radio from overloading, especially mediumwave broadcast signals which can sound like a small amount of extra “hash” type noise in the background.  I have since added into the accessory chain an old Kiwa Electronics BCB filter that does a great job of knocking down the frequencies below 2 MHz.

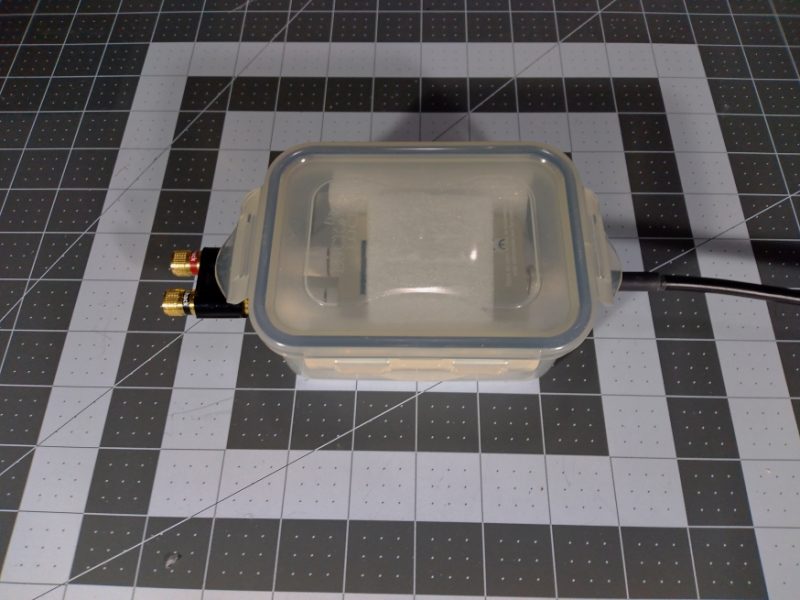
I have also since added a water resistant box to enclose the Wellbrook amp to keep it safe from getting stepped on or too wet.

Also, a couple of weeks later I was able to go to a campgound and try out 60 feet of wire but the result was noisier since I was surrounded by RV vehicles in a crowded campsite.  It was not horrible and I was able to listen to some good radio stations but location can matter with any antenna.

I hope you like the recordings below.  Because of some serious health issues this summer, these May 31 2020 recordings & report are just being published now (I am recovering slowly but surely!).  My small laptop is under-powered, so I was only able to record MP3 files one at a time.  It kept me busy as I went from one frequency to the next and kept recording anything I heard.  I was able to hear a couple of stations I never heard before and that is a success in my book.

It remains to be seen if this antenna is as good as my 19 foot vertical antenna attached to the top of the car roof, especially low-angle DX signals.  Maybe you will have the chance to experiment as well and share your experience, too.  Now, will a small loop-on-ground antenna around my car parked late at night at a far corner of the grocery store work OK???  I will have to try it!

Recordings (crank up the volume if it is too weak):

22:00 UTC, Radio Saudi (Arabic) 11915 kHz

22:04 UTC, KDSA Adventist Radio (Indonesian) 11955 kHz

22:14 UTC, KDSA Adventist Radio (English) 12040 kHz

22:20 UTC, Voice of Korea (Japanese) 11865 kHz

22:23 UTC, Yemen Radio (heavily jammed) 11860 kHz

22:35 UTC, Radio Brazil Central (Portuguese) 11815 kHz

22:50 UTC, WWV booming in 10000 kHz

23:11 UTC, UnKnown (might be FEBC) 9795 kHz

23:15 UTC, China Radio Int’l (Spanish teaching Chinese, from Kashi) 9800 kHz

23:17 UTC, China Radio Int’l Business Radio (from Xianyang) 9820 kHz

23:19 UTC, China Radio Int’l (Chinese from Urumqi) 9865 kHz

23:21 UTC, Voice of Korea (Korean) 9875 kHz

23:23 UTC, Maybe Radio Taiwan without jamming from CNR 9900 kHz

23:34 UTC, China Radio Int’l (Chinese from Bamako Mali) 7295 kHz

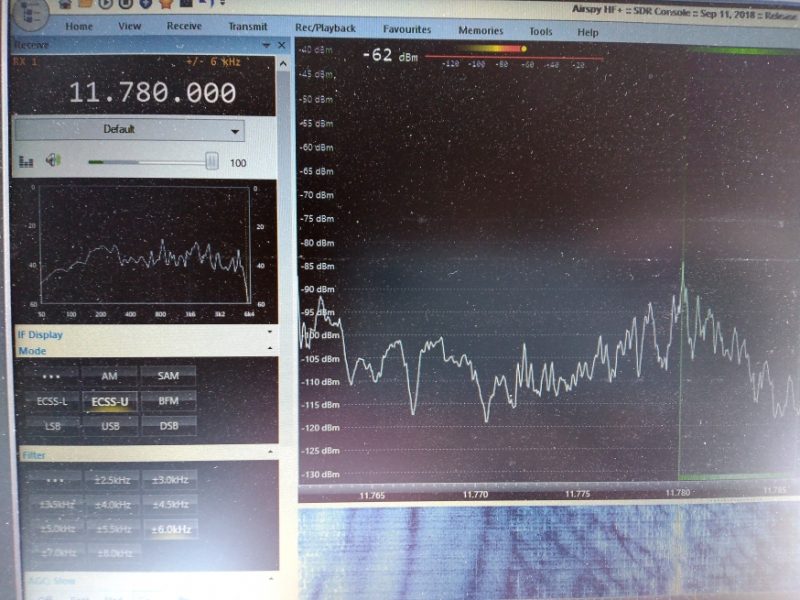
23:43 UTC, Radio Nacional da Amazonia 6180 kHz (& 11780 kHz around 40 seconds)

23:50 UTC, MAYBE China PBS from Xinjiang in Kazakh (nothing else listed on schedules) 6015 kHz

23:56 UTC, Radio Mali (French announcer humming to music and acting crazy) 5995 kHz

00:07 UTC, Radio Rebelde (Spanish w/clear signal, Bauta, Cuba) 5025 kHz

00:15 UTC, 75 meter Amateur Radio 3913 kHz (LSB)

00:27 UTC, CHU Ottawa 3330 kHz

00:30 UTC, XEPPM Radio Educacion (Spanish Mexico City) 6185 kHz


This is brilliant Tom! Thank you for sharing. 

Our antenna guru contributor, Grayhat, has been encouraging me (understatement!) to build a Loop-On-Ground antenna but I haven’t done this yet because, at home, our driveway would interfere with its deployment. That and I have no RFI to speak of in my rural/remote home so my skyloop antenna is tough to beat. But having one available for portable use would make a lot of sense.  I’m going to put this on my 2021 project list!

Post Readers: Do you use a LoG antenna at home or in the field? Please comment!

Spread the radio love

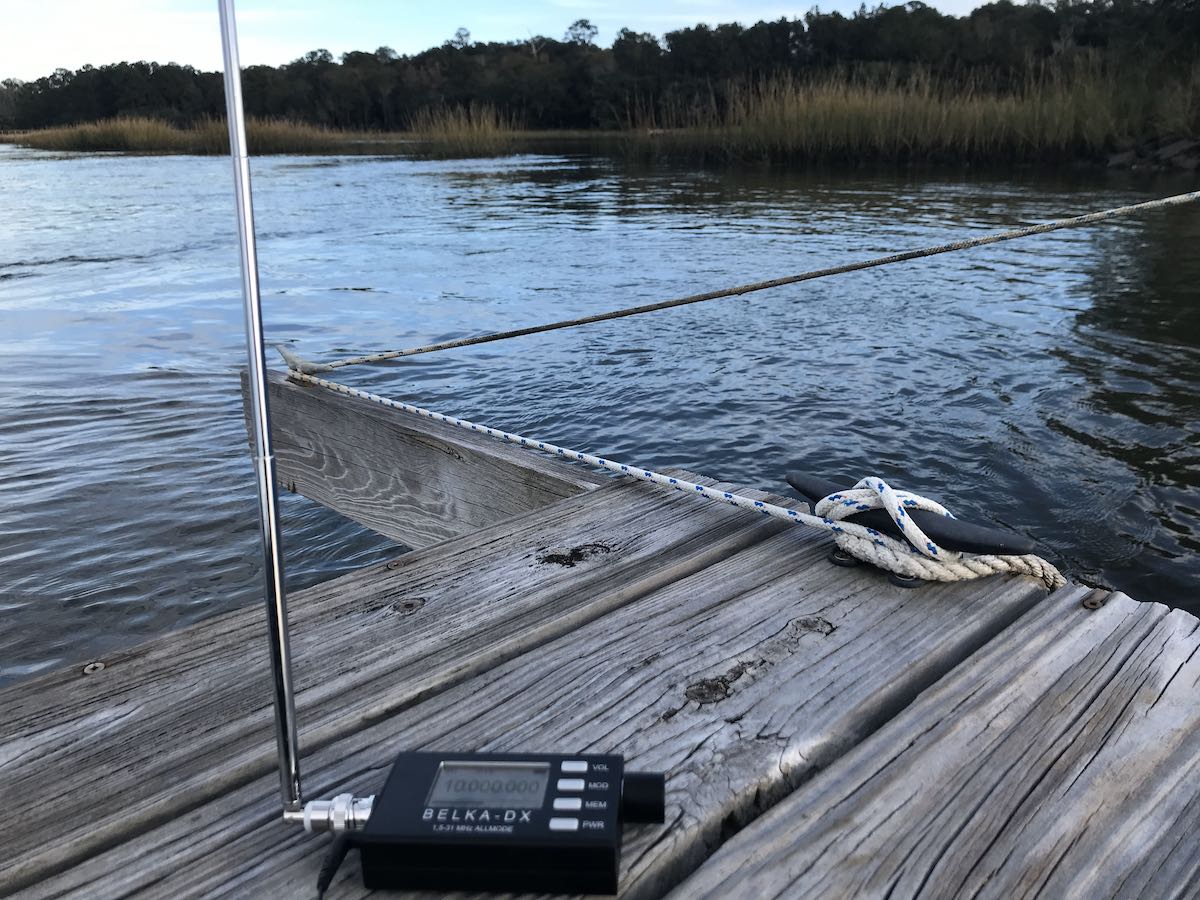
Dockside DXing with the super-portable Belka-DX receiver

I’ve been on the coast of South Carolina enjoying a little R&R with my wonderful family.

We rented a vacation home on a tidal river just south of Charleston, SC and it was just what the doctor ordered. The location was gorgeous, the weather was amazing, and there was very little RF interference outside our home.

The best part? We had full access to a private dock.

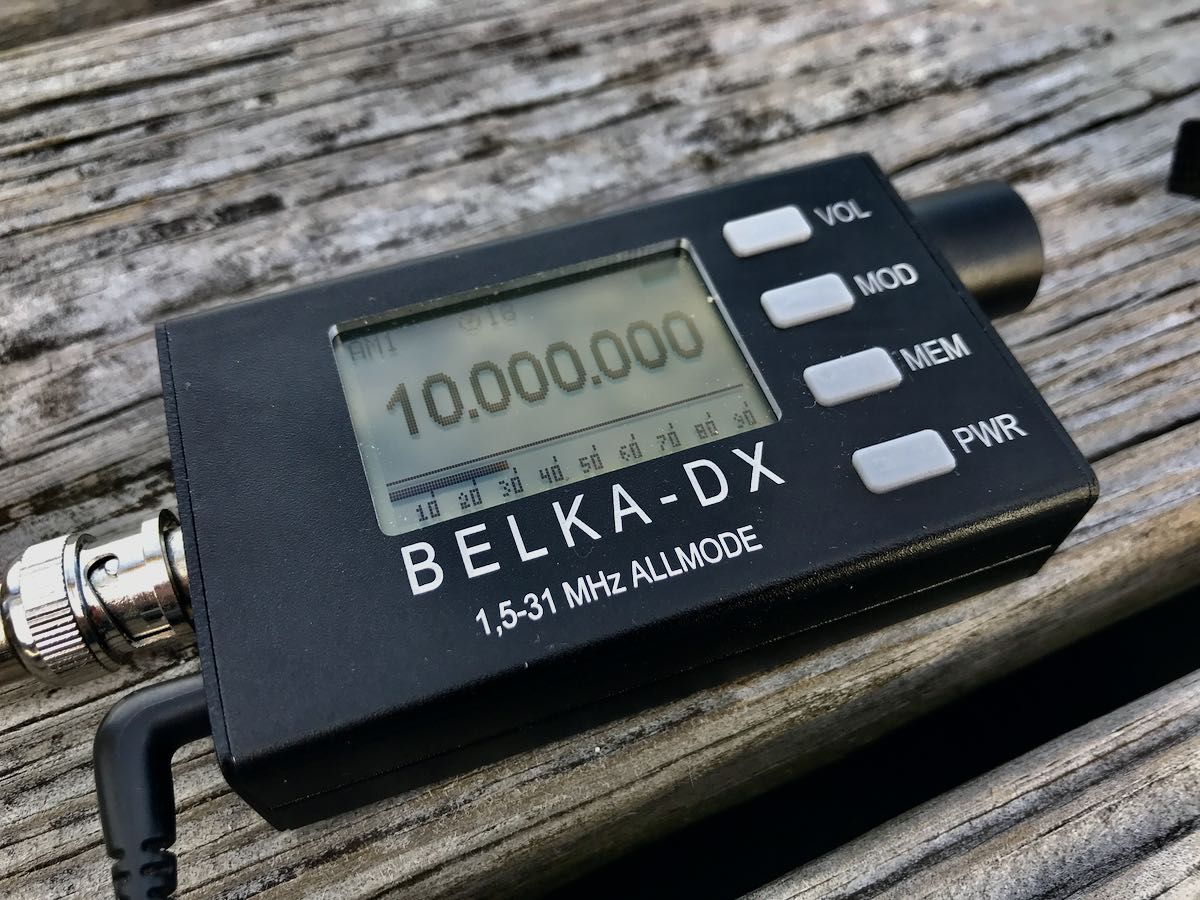
I took a few portable radios on vacation (ahem…obviously!) but I so thoroughly enjoyed my time with the Belka-DX.

If you haven’t gathered already, I really appreciate simple radios for field operation and it doesn’t get much more simple than the Belka-DX or Belka-DSP.

The radio is so incredibly compact, durable, and a pleasure to operate–especially if cruising the broadcast bands.

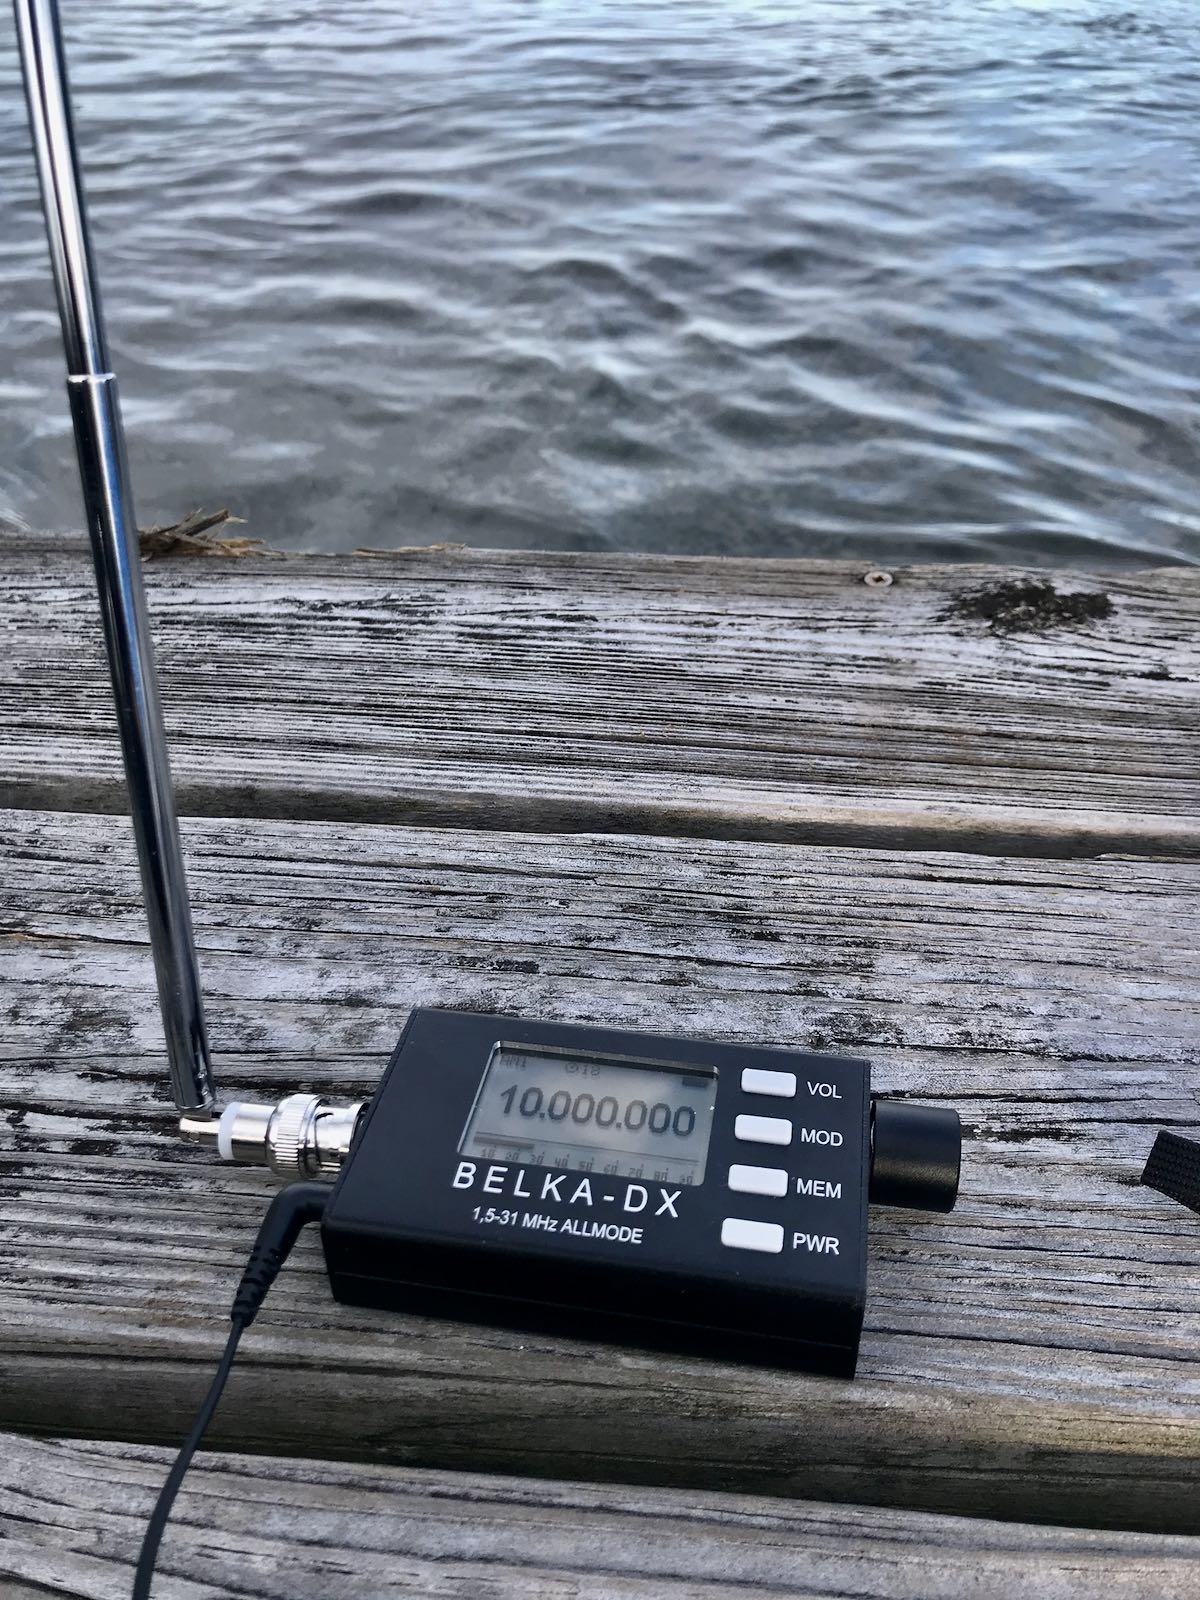
On the dock, I didn’t have a place to easily hang a wire antenna, so I used the supplied telescoping whip antenna. It served me well on a number of listening sessions.

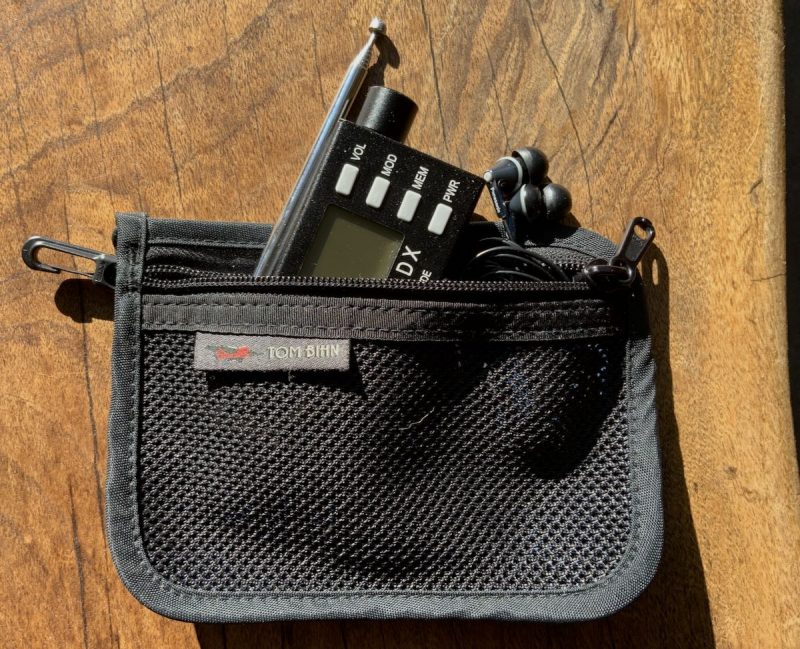
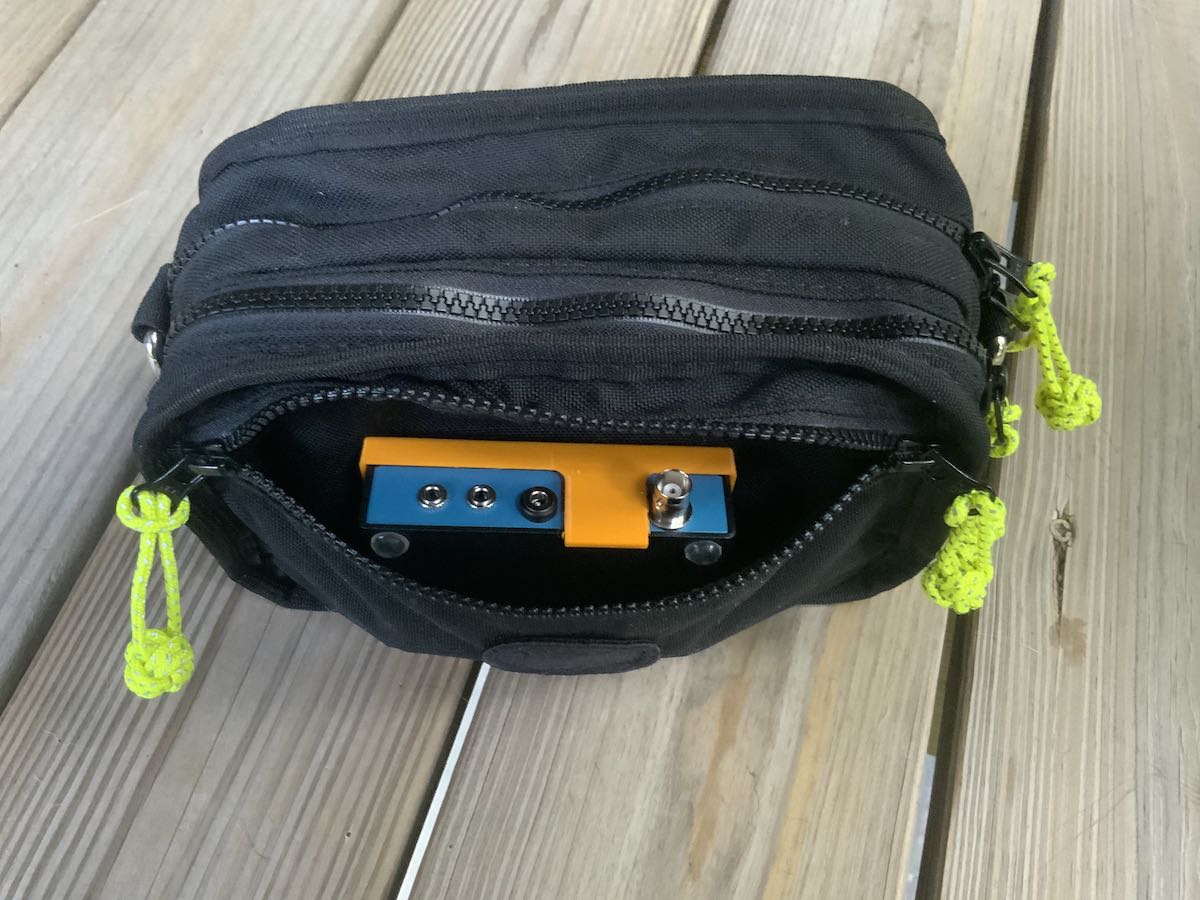
As 13dka pointed out in his brilliant review of the Belka-DSP, the Belka radios are so compact, yet pack so much performance, they smack of a little spy radio! On top of that, the chassis is incredibly durable. I can’t tell you how much I love this. My Belka receiver has been living in my EDC bag in a small zippered pouch.

I barely notice it in my bag–it take up almost no space and weighs so little–but in the back of my mind I know I have a portable DXing machine everywhere I go.

I have no fear of being damaged in my bag, either–the chassis protects it so well.

Since London Shortwave has sorted out how to make spectrum recordings using the Belka-DX I/Q out, you’d better believe I’ll be sampling spectrum as I travel the globe post-pandemic!

I didn’t have time to gather what I needed for making Belka-DX spectrum recordings on this trip, but you can be certain I will when I return!

I should add that one of the little joys about my dockside DXing spot this past week was watching dolphins swim by as I tuned to some of my favorite broadcasters. Bliss.

Post readers: Have you taken your radios on vacation recently? Please comment! Better yet, consider submitting a guest post with photos!

Spread the radio love

A comprehensive review of the Mission RGO One general coverage 50 watt transceiver

The following review was first published in the November 2020 issue of The Spectrum Monitor magazine:
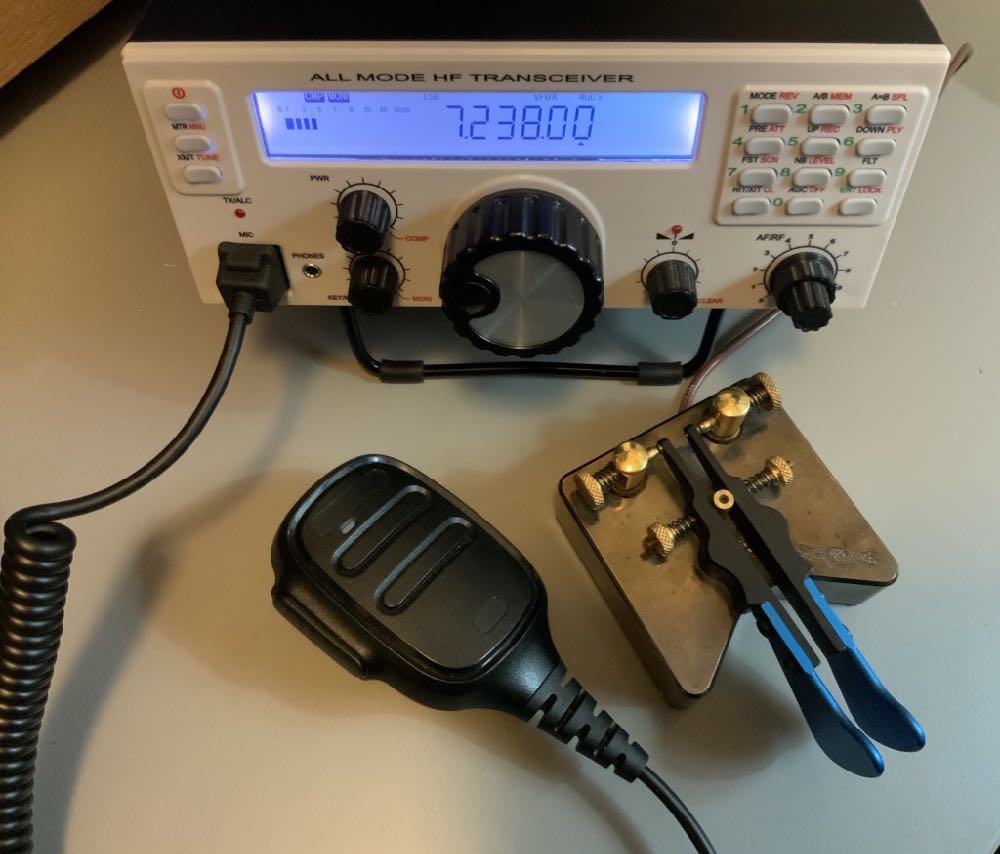

A review of the Mission RGO One ham radio transceiver

by Thomas (K4SWL / M0CYI)

Wow…I love this!

If I am perfectly frank, that would sum up my initial impression of the Mission RGO One.

It was the 2018 Hamvention in Dayton, Ohio, and I had just met up with radio engineer Boris Sapundzhiev (LZ2JR) who was debuting the prototype of his 50-watt transceiver kit, the Mission RGO One. With its clean, functional design and simple front face, large weighted encoder, and enough tactile buttons and multi-function knobs to keep one’s most needed features within reach, the kit was certainly pushing all the right buttons for me.  Without a doubt, I was impressed from the start.
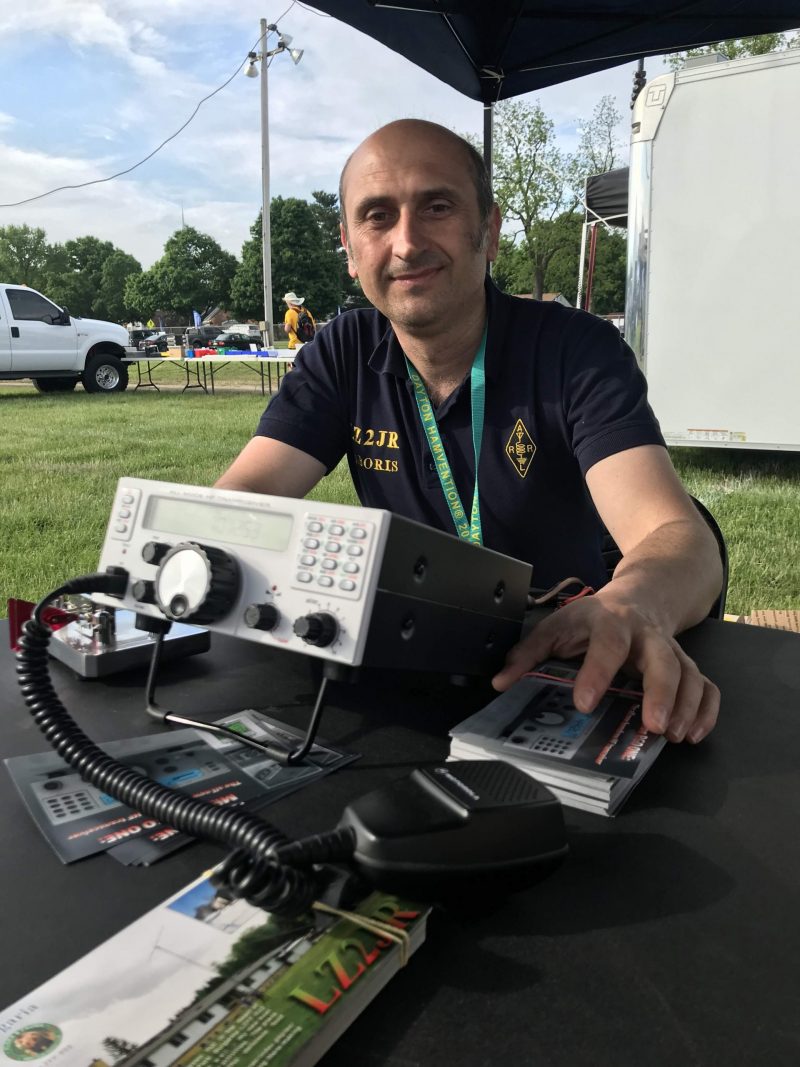
Boris (LZ2JR) the designer and engineer of the Mission RGO One.

To my mind, the RGO One smacks of classic 1990s-era transceivers:  a traditional tabletop front-facing panel, a large fold-out bail, and a unfussy backlit LCD display that’s large enough to read in the field and viewable at any angle.
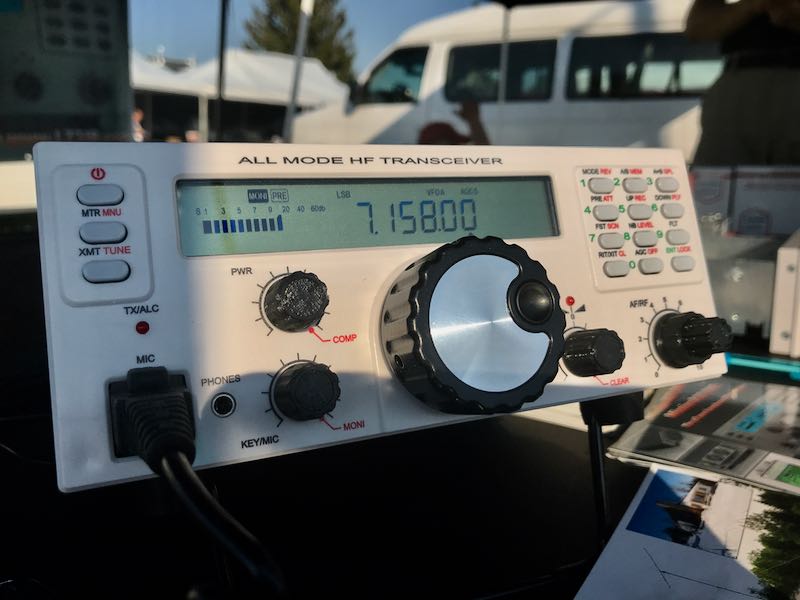
Perhaps it’s only because I can’t turn off the innate radio reviewer, that I was rapidly checking mental boxes in this first encounter with the RGO One.  Indeed, when I first set eyes on any new radio, I do skim through my mental “operations checklist” to see how difficult the rig might be to use at home and/or in the field. Specifically, I’m looking for the following controls:

  • Encoder
  • AF Gain
  • RF Gain
  • Mode switch
  • Power output adjustment
  • Tune/Xmit button
  • Preamp/Attenuator
  • VFO A/B
  • Split and A=B
  • Mic gain and keyer speed
  • RIT
  • Filters
  • Band switching and direct frequency entry
  • Key and encoder lock

Of course, these days it’s fairly rare that radios actually contain all of these functions without the user having to dig into layers of menus, multi-function controls, or touch-screen options to access them.
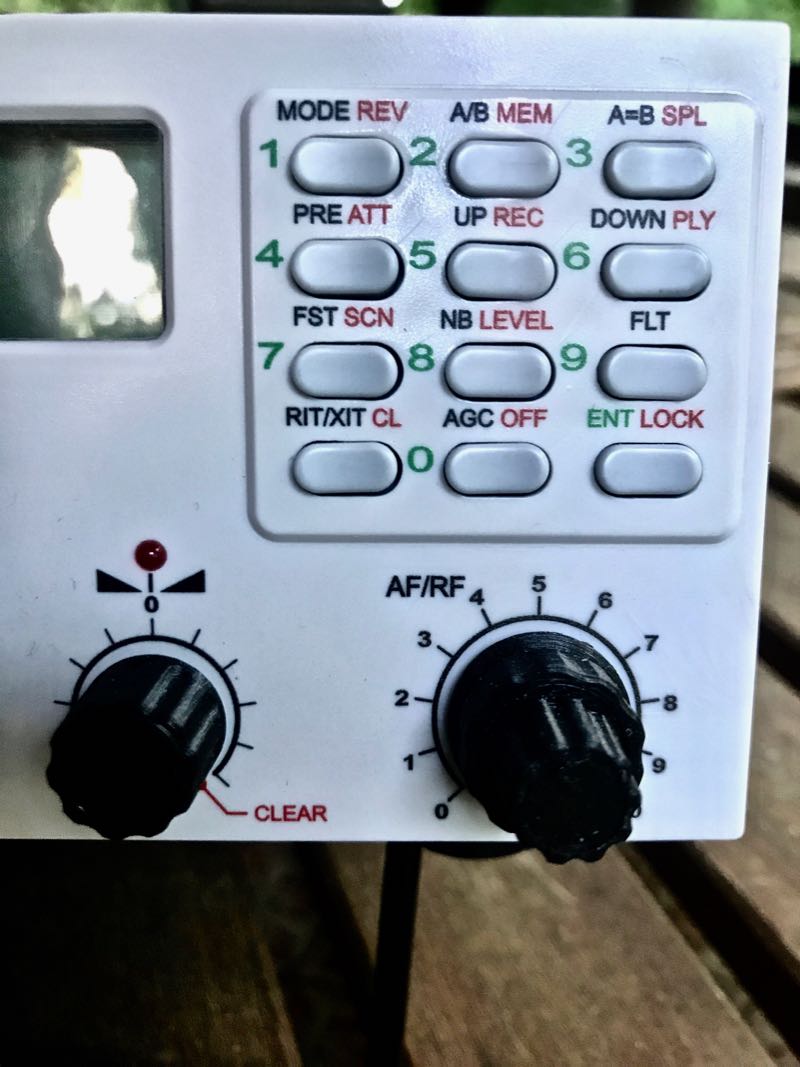
Remarkably enough, the Mission RGO One, despite simple design, manages to include all of these features on the front panel without the need of embedded menus. In contrast with some of the radios I’ve tested and evaluated over the past several years, I could tell by the layout alone that the Mission RGO One was developed by an active ham radio operator and DXer: the controls are that intuitive.

Alas, the tantalizing prototype on Boris’ table in the 2018 Hamvention flea market was for show only.

Boris promised that he’d have fully-functional models available at the 2019 Hamvention. Because of this, following that first meeting in 2018, I kept in touch with Boris; we arranged to meet again at the 2019 Hamvention so I could take a second, much closer look at the RGO One––especially since he intended to start shipping the first very limited, early-production-run rigs shortly afterward.

So…did Boris deliver?  And more importantly: did the RGO deliver––?  Let’s find out.

On The Air
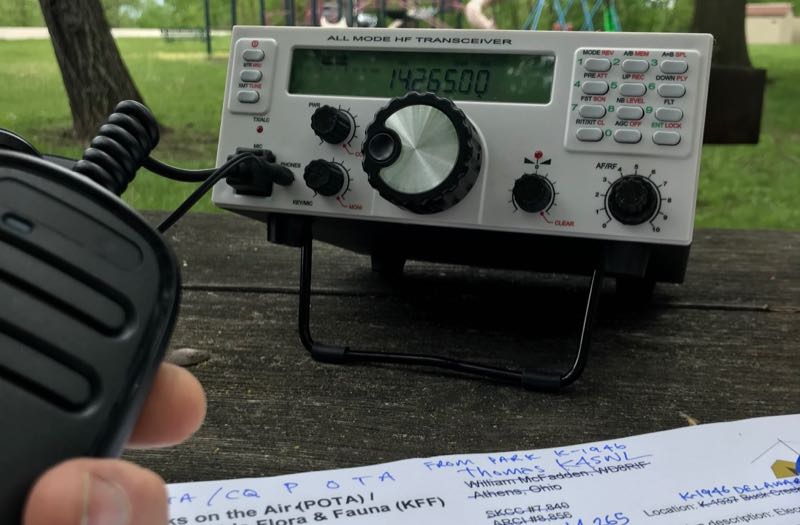
Within hours of taking delivery of the prototype radio, I had it in the field activating parks.

It was May 2019 when Boris delivered on his promise, handing me a loaner prototype RGO One. He did so with the understanding that the prototype was still a little rough around the edges. I acknowledged this, thinking in terms of a late Beta-test model since he welcomed reports of any bugs or anomalies I encountered and was fully prepared to address them.

After taking the initial RGO One to the field, I did note a few bugs, but nothing major.  All of my field notes were then sent to Boris and turned into action items.

Then, in July of 2020, Boris sent me a fully-upgraded Mission RGO One with the new internal ATU and optional adjustable filter. This radio represented the “fully-grown” production model, and in preparation to put it through its paces, I returned the prototype.

Although there are planned hardware upgrade options and, of course, firmware upgrades, the RGO One has now reached full maturity as a transceiver.

However, it was one thing to have ham-friendly ergonomic controls. The real question was, how did the RGO One stack up against the competition? It was time to find out.  After all, this is the danger of a “love at first sight” radio encounter––it often leaves the door open for disappointment, and of this I was well aware.

What follows is my full review of this 2020 Mission RGO One transceiver. Let’s take a deep dive into this rig…

Features and specifications
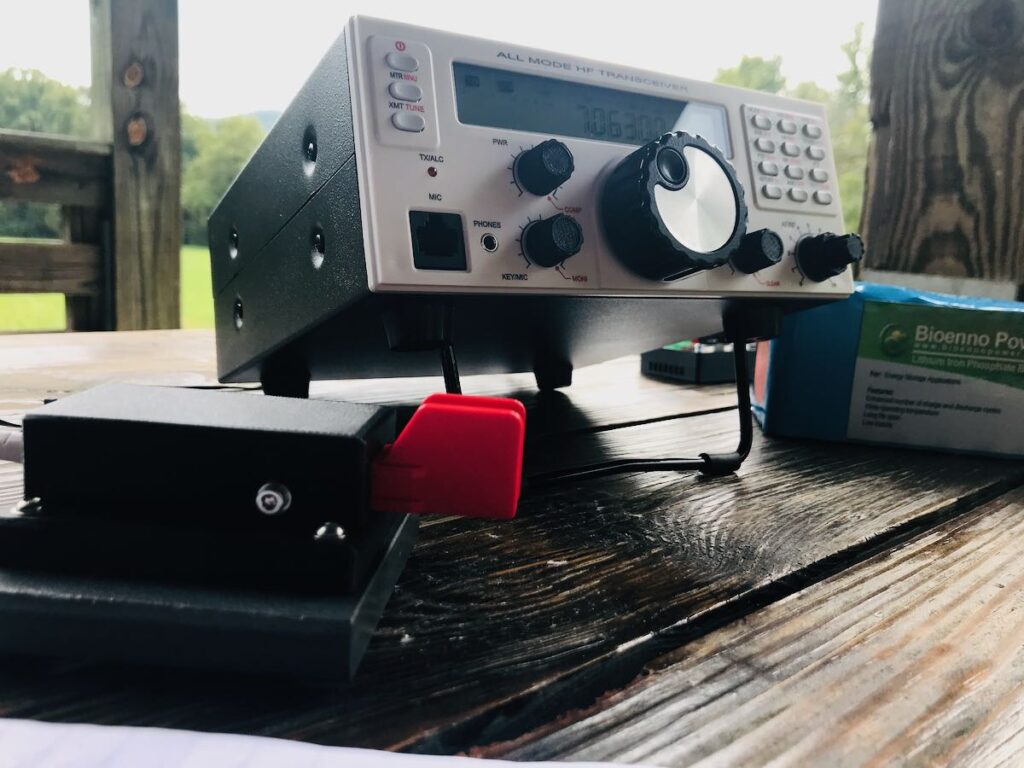
 

What follows are some of the RGO One features and highlights as written in the product manual (PDF):

  • QRP/QRO output 5 – 50W [can actually be lowered to 0 watts out in 1 watt increments]
  • All-mode shortwave operation – coverage of all HAM HF bands (160m/60m optional)
  • High dynamic range receiver design, including high IP3 monolithic linear amplifiers in the front end, and diode ring RX mixer or H-mode first mixer (option)
  • Low-phase noise first LO – SI570 XO/VCXO chip
  • Full/semi (delay) QSK on CW; PTT/VOX operation on SSB. Strict RX/TX sequencing scheme with no “click” sounds
  • Down conversion superhet topology with popular 9MHz IF
  • Custom-made crystal filters for SSB and CW and variable crystal 4 pole filter – Johnson type 200…2000Hz
  • Fast-acting AGC (fast and slow) with 134kHz dedicated IF
  • Compact and lightweight body, only 5 lbs
  • Custom-made multicolor backlit FSTN LCD
  • Custom-molded front panel with ergonomic controls
  • Silent operation with no clicking relays inside – solid state GaAs PHEMT SPDT switches on RX (BPF and TX to RX switching) and ultrafast rectifying diodes (LPF)
  • Modular construction – Main board serves as a “chassis” also fits all the external connectors, daughter boards, plus inter-connections, and acts as a cable harness
  • Optional modules – Noise Blanker (NB), Audio Filter (AF), ATU, XVRTER, PC control via CAT protocol; USB UART – FTDI chipset
  • Double CPU circuitry control for front panel and main board – both field programmable via USB interface
  • Memory morse code keyer (Curtis A, CMOS B); 4 Memory locations 128 bytes each

Build quality
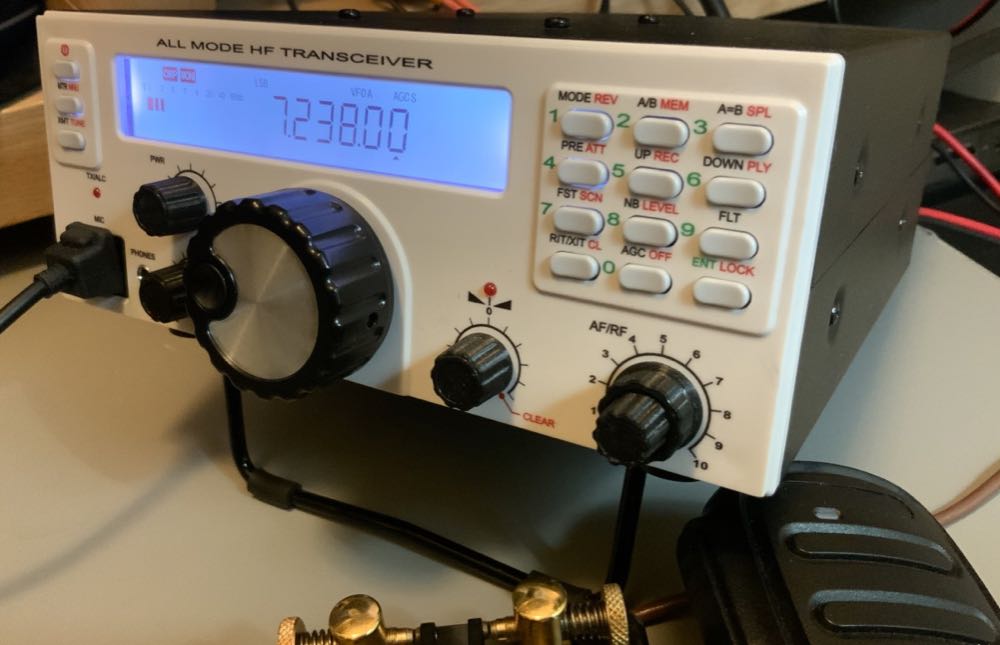
First impressions proved accurate in terms of construction.  I’m very pleased with the build quality of the Mission RGO One. Keep in mind, however, you might note from the photos that some items––like the volume and multifunction knobs––are 3D printed, and I’m not certain if they’ll ever have custom knobs manufactured.  But I really don’t even think this is necessary, as the 3D printed ones are very nice, indeed––moreover, should a replacement ever be needed, I love the idea I could simply print one myself!

The RGO One main optical encoder/tuning knob is just brilliant. It’s weighted properly for the right amount of “heft” while tuning. I’m very pleased with the overall feeling and quality. It’s substantial, yet silky-smooth in operation, just what I look for in a tuning knob.

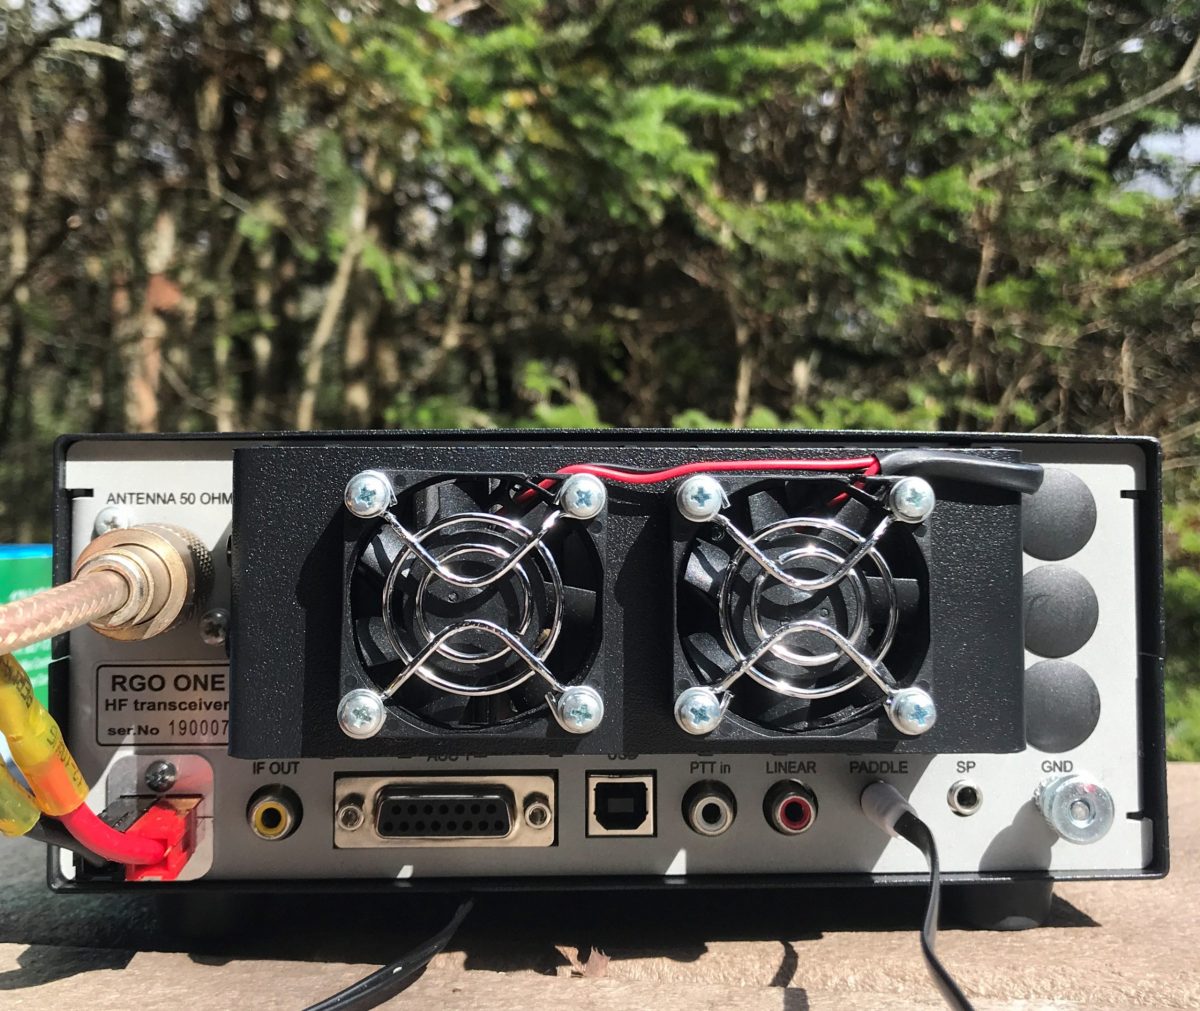
On the back of the unit, there is an externally-mounted heat sink with two small fans. These fans are quiet and efficient.
The chassis and bail are both top-shelf quality and should withstand years of field use. Just do keep in mind that like almost every other amateur transceiver currently on the market (save the recently reviewed lab599 Discovery TX-500), the chassis is neither water-proof nor weather-proof, so will require common-sense care to protect it from the elements.

Portability

The Mission RGO is relatively compact, lightweight (only 5 lbs without the ATU), and has a power output of up to 55 watts, even though the specs list just 50 watts. As a point of comparison, most other rigs in this class have a maximum output of 10 to 20 watts, and require an external amplifier for anything higher. The form factor is very similar to the Elecraft K2.

The light weight of the rig and the extra power makes the RGO One a capable and versatile field radio. Although the RGO One is configured like a desktop radio (with a front-facing panel), it’s still relatively compact and can easily be set up on a portable table, chair, or on the ground. Unlike field-portable rigs with top-mounted controls (think the Elecraft KX3 or KX2), obviously, it would be tough to do handheld or laptop operation.

The RGO One should also play for a long time on battery power as the receive current drain is a respectable 0.65A with the receiver preamp on. It’s not as efficient as, say, an Elecraft KX3 or the new Icom IC-705, but keep in mind the RGO One can provide 50 watts of output power and has a proper, internally-mounted, amplified speaker. The popular 100 watt Yaesu FT-891, in comparison, has a current drain closer to 1.75 to 2.0 amps [update: actually the specifications indicate 2 Amps in receive, but user reports are less than half that amount].  I pair the RGO One with my larger 15 aH Bioenno LiFePo battery. When fully-charged, I can operate actively for hours upon hours without needing to recharge.
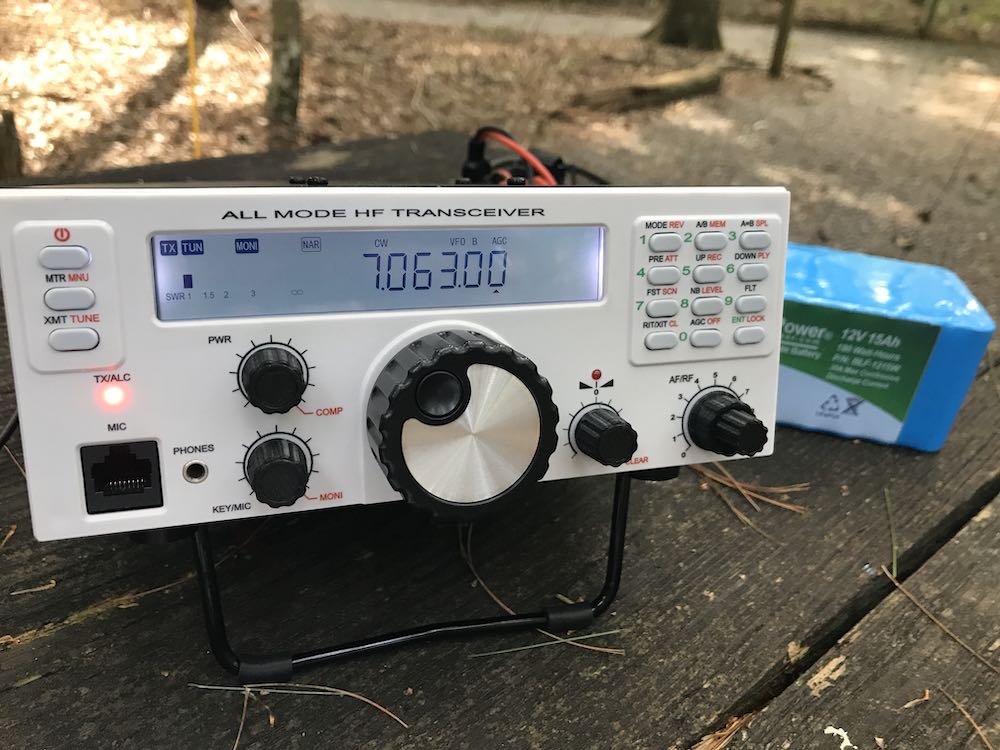
Mission RGO One Bioenno LiFePo

The Bioenno 15aH battery powers the Mission RGO One for hours at a time in the field.

If it’s any indication of how much I wanted to take this rig to the field, when Boris handed me the prototype RGO One on Saturday at the 2019 Hamvention, I had it on the air that same day doing a Parks On The Air activation at an Ohio State Park.

Since then, I’ve easily taken the Mission RGO One on 30 or more park activations.

Performance
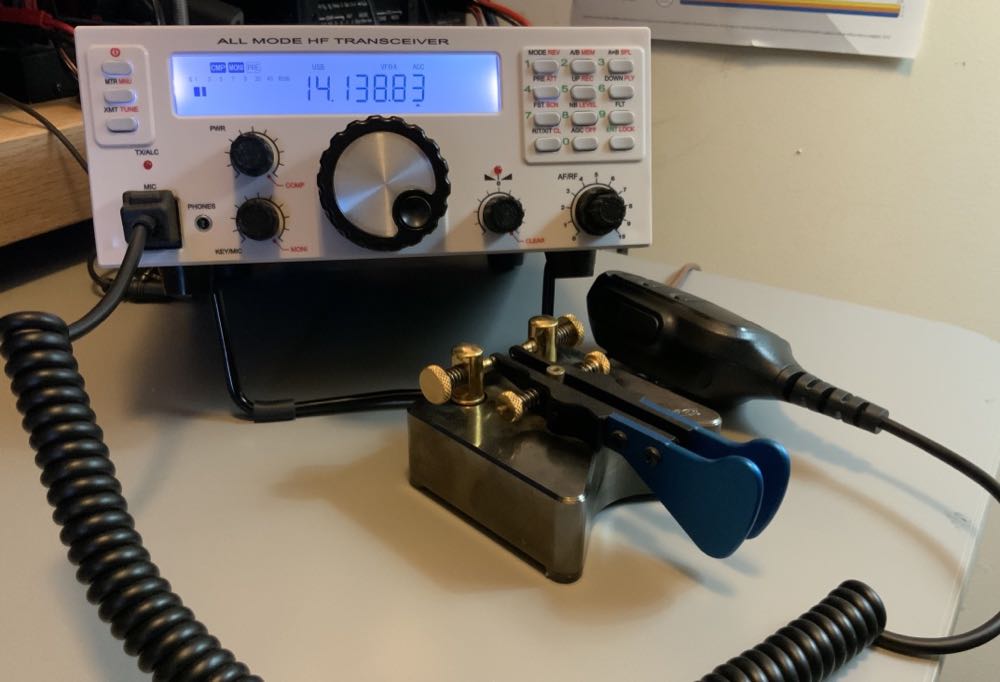
What’s most striking and obvious about the Mission RGO One’s receiver from the moment you turn it on is the low noise floor. It’s incredibly quiet. So much so that more than once, I’ve double checked to make sure RF gain hadn’t been accidentally altered as I started a field activation. I’d call CQ a few times, though, and when stations return they literally pop out of the ether. The RGO One currently has no digital noise reduction (DNR) but frankly, I don’t miss it like I might in other transceivers. Indeed, the RGO One is a radio I’ve reached for when the bands are noisy because the AGC and receiver seem to handle rough atmospheric conditions very well.

The RGO One’s built-in, top-mounted speaker provides ample audio levels for the shack, but in a noisy field environment, I wish it had a little more amplification. I’ve also used my Heil Pro headset and even inexpensive in-ear earphones connected to the front panel headphones jack in the field. The audio via headphones is excellent.

Let’s take a look at how well the RGO One performs by mode:

CW
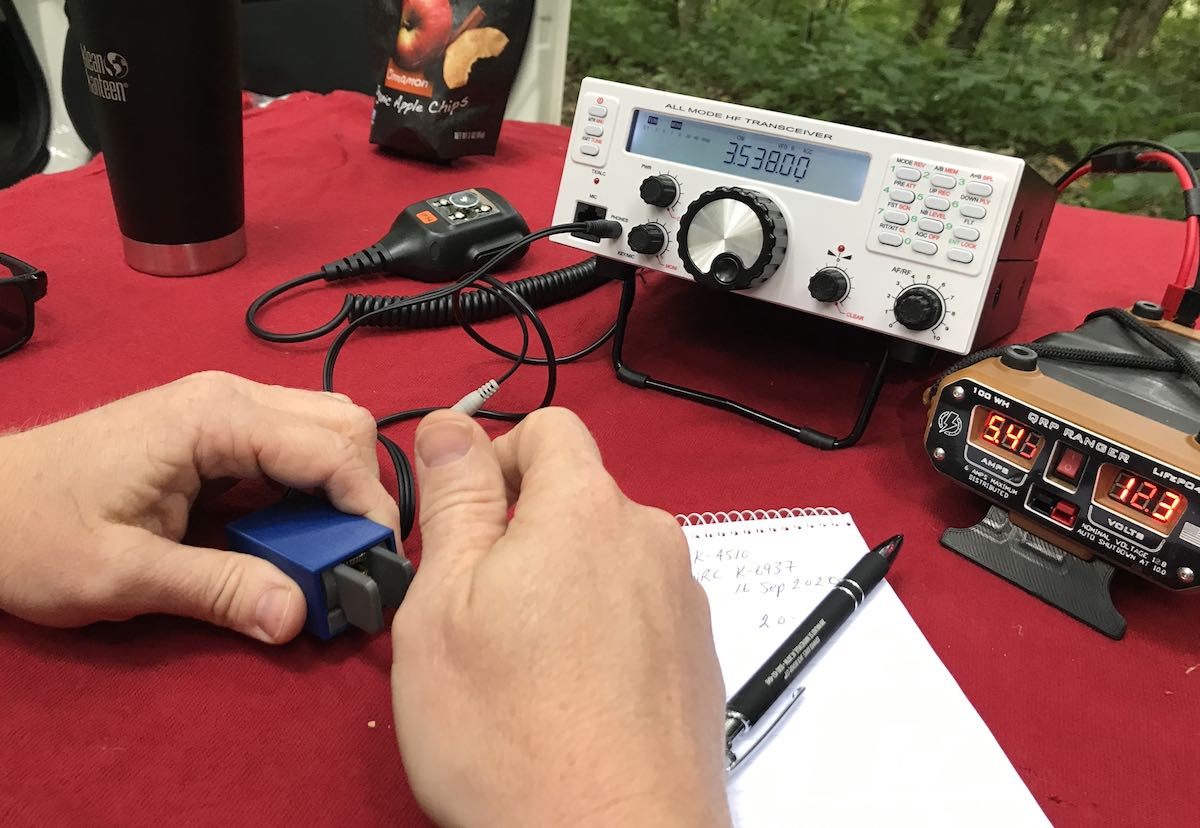
First and foremost, CW operators will appreciate the RGO One’s silky-smooth full break-in QSK. The  RGO One employs clickless and quiet pin diode switching–a design feature I’ve become particularly fond of as traditional T/R relays can be noisy and distracting when not using headphones.

The RGO One also has a full compliment of adjustments for the CW operator including adjustable delay (default is 100ms), iambic mode, weight ratio, hand key/paddle, adjustable pitch, and sidetone volume.

The key jack is a standard three conductor 1/8” jack found on most modern transceivers. It’s located on the back of the radio.

My review unit has the optional variable width narrow filter which I highly recommend if operating in crowded conditions. I’ve used the RGO One on ARRL Field Day and found that it easily coped with crowded band conditions. Even after a few hours on the air, I had very little listener fatigue.

I also find that, as I mentioned earlier, CW signals just seem to “pop” out of the ether due to the low noise floor and excellent sensitivity/selectivity.

The RGO one also sports four CW keying memories where you can record your CQ, callsign, or even contest exchange. I’ve become incredibly reliant on memory keying to help facilitate my workflow in the field—while the radio is automatically sending my CQ or my regards and callsign to an station I’ve just worked, my hands are free to log the contact, adjust the radio, or even eat lunch!

Memory keying does require one long-press of the “6” button followed by either the “1,” “2,” “3,” or “4” button to play a message. Occasionally I won’t hold the 6 button long enough and accidentally move my frequency down one meter band since the 6 button is also the band “down” button. While it doesn’t happen often, it’s frustrating when it does but I think it could easily be fixed in the firmware as it’s really a timing issue.

SSB
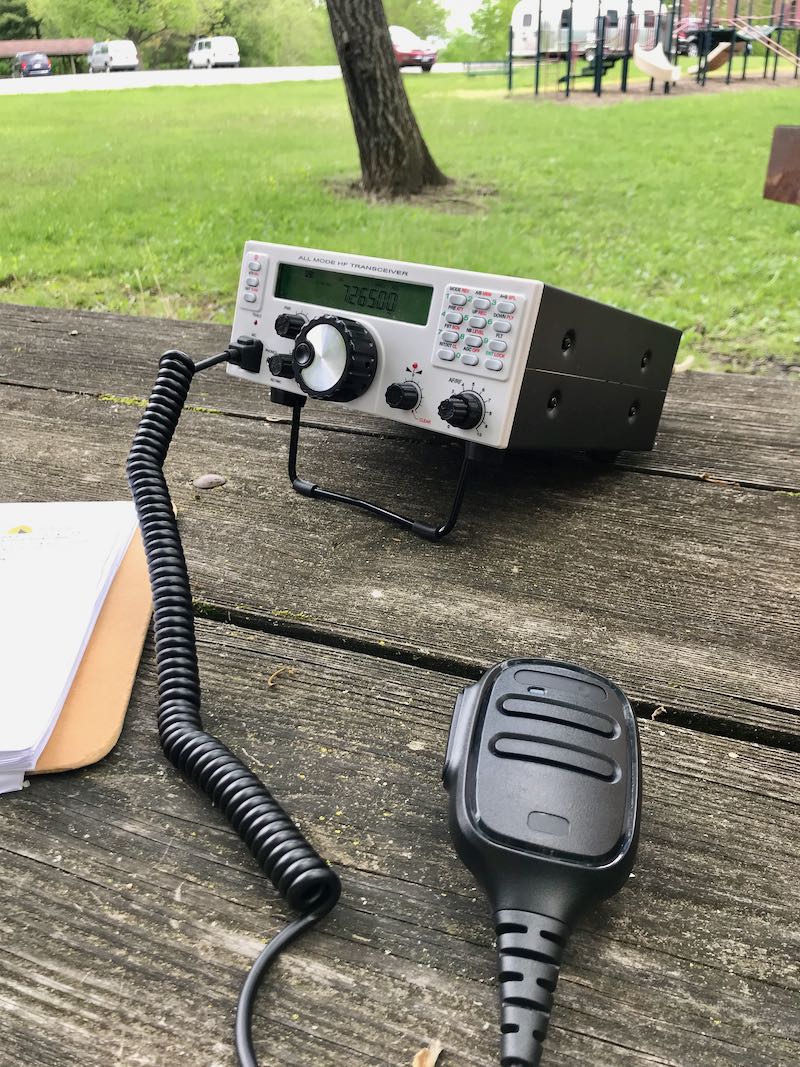
Likewise, phone operators will be very pleased with the Mission RGO One. During all of my testing, I’ve only used the microphone supplied with the radio mainly because I don’t currently own another radio with an RJ-45 type microphone connector.

I do love the fact the microphone port is on the front panel of the radio—it’s very easy to connect and disconnect (in contract to the recently released Icom IC-705, for example). I’ve gotten excellent audio reports with the RGO One in SSB mode and have even monitored my own tests and QSOs via the KiwiSDR network.

Compression, gain, and VOX controls are easily accessible. One missing feature at present is a voice memory keyer. For field operators activating sites for the POTA, WWFF, or SOTA program, voice memory keying is huge as it saves your voice from calling “CQ” over the course of a few hours. I understand Boris does plan to implement voice memory keying in a future speech processor board.

AM Mode

Since the RGO One has general coverage receive and since I’m a shortwave broadcast listener, I was disappointed to find that there is presently no AM mode. Boris told me he does plan to add AM mode, “to be implemented in future versions of the IF/AF board only on RX.”

With that said, I can always zero-beat a broadcaster and use a wide SSB filter to listen to broadcasts which is more than I could do, for example, with my (ham band only) Elecraft K2.

At the end of the day, the RGO One is a high-performance, purpose-built ham radio transceiver, so the current lack of AM mode isn’t a deal-breaker for me, but I would love a wide AM filter on this rig.

ATU

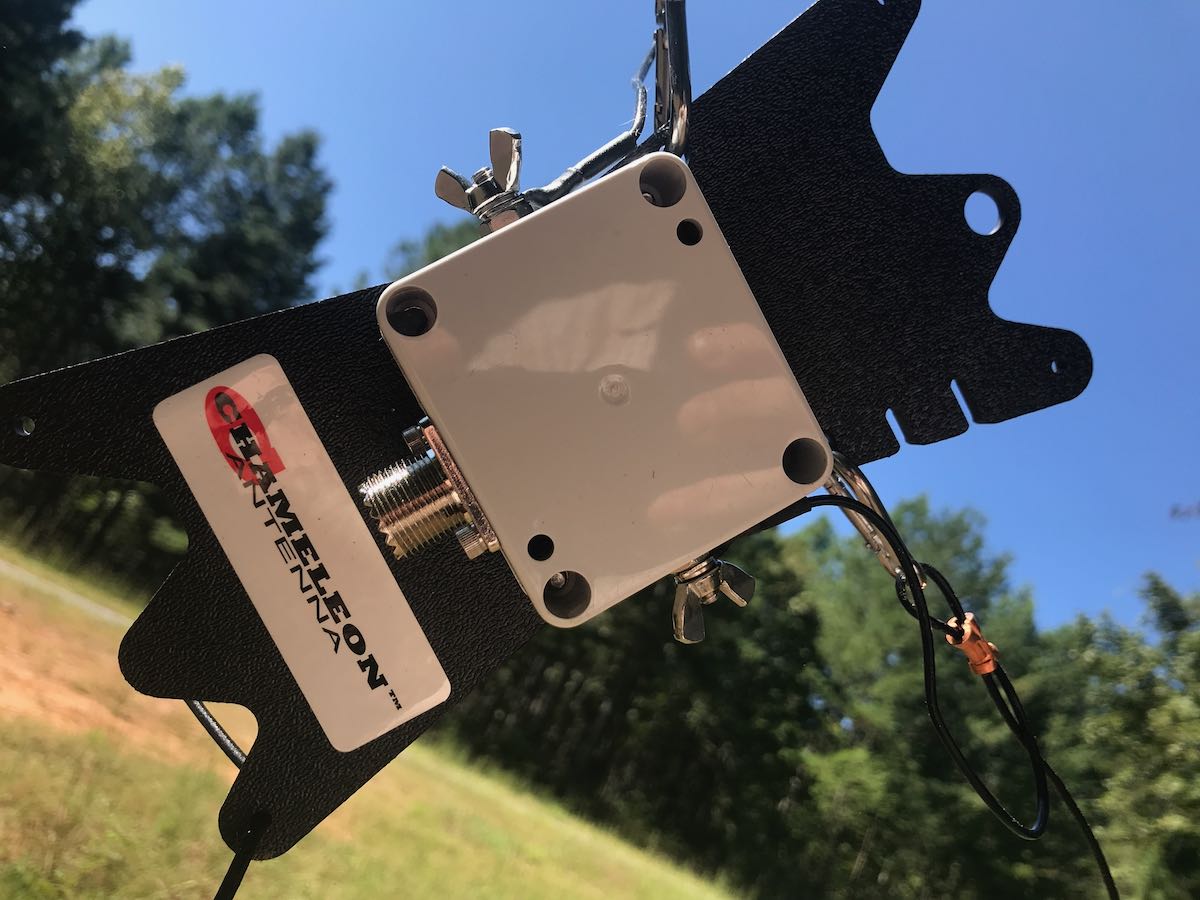
The 2020 review model I received has the internal automatic antenna tuner which I feel is a worthy upgrade/addition. In the field, I’ve paired the RGO One with my Chameleon CHA Emcomm III Portable random wire antenna which requires an ATU in order to find matches across the bands. The pairing has been a very successful one because the Emcomm III can handle up to 50 watts power output in CW and covers the entire HF band when emptying the RGO One ATU.


Even though it’s a minor thing, I also like the fact that the RGO One ATU operates so quietly, even though with the present firmware it takes longer than some of my other ATUs to find a match.

Power

One thing I’ve found very useful in the field and, no doubt others will as well is the power output. In many ways, the RGO feels like a larger QRP radio (think Ten-Tec Argonaut V or VI) but it’s actually able to pump out 55 watts (often five watts more than specified). In single sideband mode, this is a meaningful amount of power output compared to, say, 5 or 10 watts. When I activate a rare park, or an ATNO (All Time New One), I’ve been taking the RGO One more times than not in order to get the best signal possible and maximum amount of contacts. Running full power, the rig never feels warm—heat dissipation is superb—and the fans on the back of the heat sink are super quiet.
I actually feel like the 50 watts of output power gives the RGO One a market niche since it sports top-shelf performance as you might expect in the venerable Elecraft K2, for example, but  not being a 10 watt or 100 watt radio, rather something in between which saves a little weight and also the need for heftier heat dissipation.

Other unique features

The RGO One has some interesting features not found in similar radios.

For one, there are no less than ten color options for the custom backlit LCD display, along with adjustable contrast and backlighting intensity.

The RGO One team also documents how to access hidden admin menus for granular adjustments to transceiver parameters, but of course you’d want to adjust those with caution and note values prior to changing them. When you receive your RGO One, Boris includes a sheet with all default values to make stepping back much easier.

Hands-on philosophy

At the end of the day, the Mission RGO One is a kit that can eventually be purchased in kit form, or as a fully assembled transceiver. It’s modular: you can add and upgrade features as you wish. Some field operators, for example, may wish to omit the ATU to save a little extra weight or cost. I actually love this philosophy and I think it’s one that’s made Elecraft such a successful manufacturer.

The process of upgrading firmware is slightly more involved than you might find with, say, an Elecraft, Icom, or Yaesu product. It’s a two stage process where one upgrades both the front panel and the main board separately. I completed a firmware update only a few weeks prior to publication. It took me perhaps 15 minutes with my PC as I followed Boris’ step-by-step instructions (http://lz2jr.com/blog/index.php/rgo-one-firmware-update-procedure/).

There is also an active email discussion group for the Mission RGO One (https://groups.io/g/RGO-ONE/) where participants share experiences, modifications, and even any glitches or bugs that are discovered. This group is closely monitored by the RGO One team, so items are addressed very quickly. I highly recommend joining this discussion group if you see an RGO One in your future.

Also, I’ve gotten great customer support from Boris (LZ2JR) and have heard the same from group members. He’s very much open to critical customer feedback.

Summary
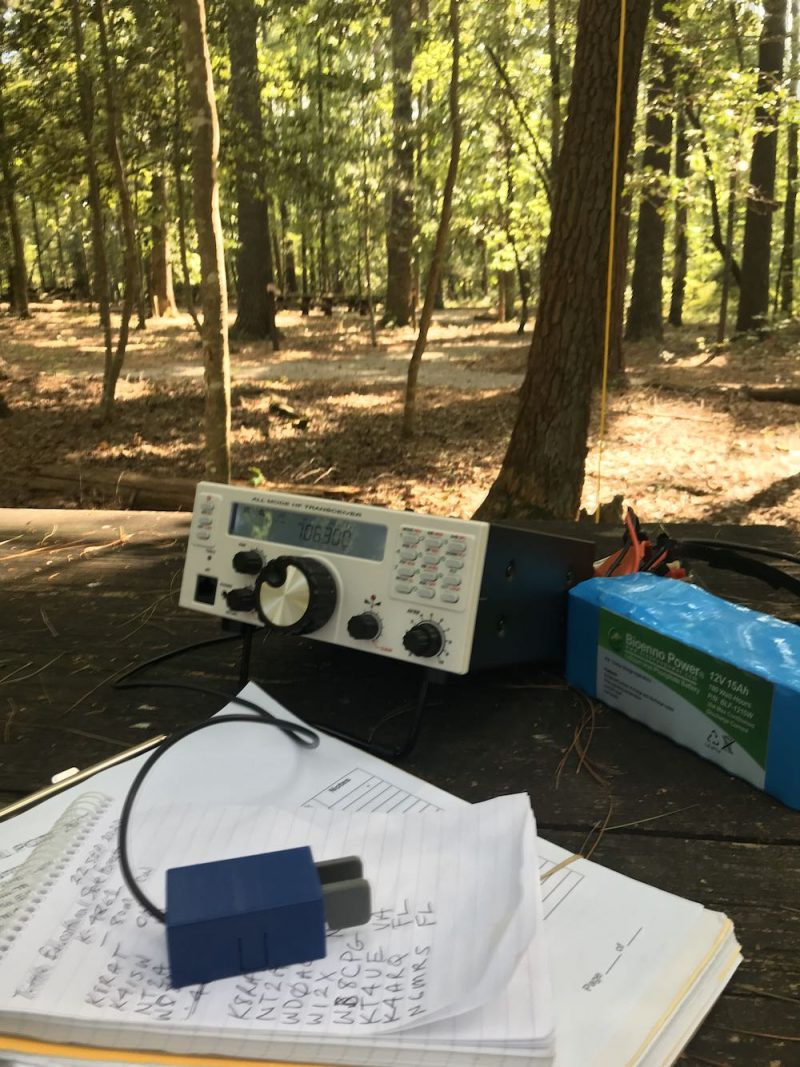
Mission RGO One POTA

Every radio has its pros and cons. When I begin a review of a radio, I take notes from the very beginning so that I don’t forget some of my initial impressions. Here is the list I formed over the time I’ve spent evaluating the 2020 production model Mission RGO One.

Pros:

  • Excellent sensitivity and selectivity
  • Very low noise floor
  • Excellent, clean audio (see con)
  • Silky-smooth QSK
  • Full compliment of CW and SSB features and adjustments
  • CW memory keyer
  • Superb ergonomics with no need to access embedded menus for common features
  • 50 watts output power with effective quiet heat dissipation
  • Lighter weight compared with comparable transceivers
  • Direct frequency entry
  • Standard Anderson Powerpole power port on rear panel

Cons:

  • No voice keyer memory (at time of posting, but is planned in upgrade)
  • No notch or auto notch filter (at time of posting, but is planned)
  • No 6 meter option
  • No AM mode (at time of posting, but is planned)
  • Firmware updates are a two stage process
  • Would like slightly more audio amplification while using internal speaker in noisy outdoor environments

Conclusion

If you can’t tell, I’m impressed with the Mission RGO One because it does exactly what it sets out to do.  The RGO One is designed for an operator who appreciates rock-solid performance with simple, intuitive ergonomics.

While teaching an amateur radio course to our homeschool cooperative high school students last year, I picked the RGO One as the best field radio for HF demonstrations.
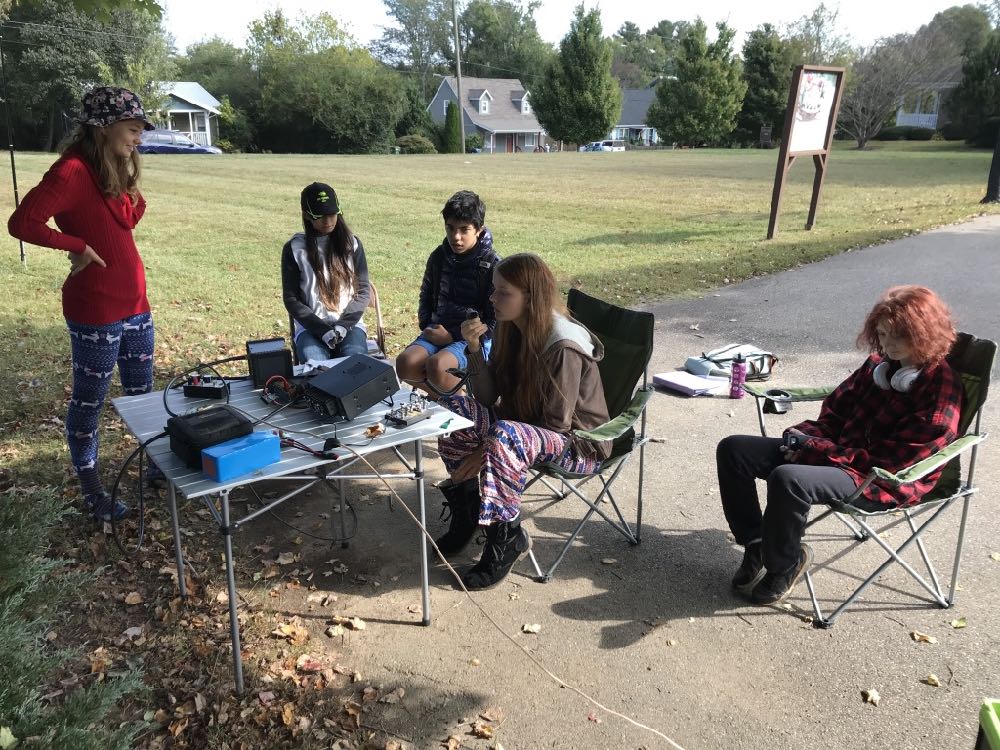
I’ll never forget setting the (prototype) RGO One for the first time on a folding table outside the classroom under a large tree. I had the students erect both an end-fed resonant antenna and a simple 20 meter vertical. I picked the RGO one because all of the adjustments we had talked about in the classroom—AGC, Filters, A/B VFOs, Direct Frequency Entry, Pre Amp, Attenuation—are on the front panel and one button press away.

We hopped on the air with one of my students calling CQ single sideband on the 20 meter band.  Her very first contact was with a station in Slovenia—and she simply beamed with excitement. All of my female students that term passed their Technician exam by the end of the term.

The RGO One is a very inviting radio.

I’ve had the luxury of testing, evaluating, and working with everything from one of the first prototypes to the latest updated version of the RGO One. It’s rare that I’m able to evaluate a radio over such a long period of time.

Even with the very early, bare-bones prototype, I was impressed with this transceiver’s performance characteristics. I’m not the only one either. It’s almost become routine new discussion group members join prior to receiving their radio, then announces how blown away they are with its performance. Check out eHam reviews, too—at time of posting, it’s a solid five stars at time of posting.

The RGO One reminds me of simple, classic radios of the 1980s and 90s, but underneath, it’s packing state-of-the-art performance.

Is it perfect? No radio is perfect, but I must say that for what it offers, it really hits the sweet spot for this radio operator.  It’s a joy to use.
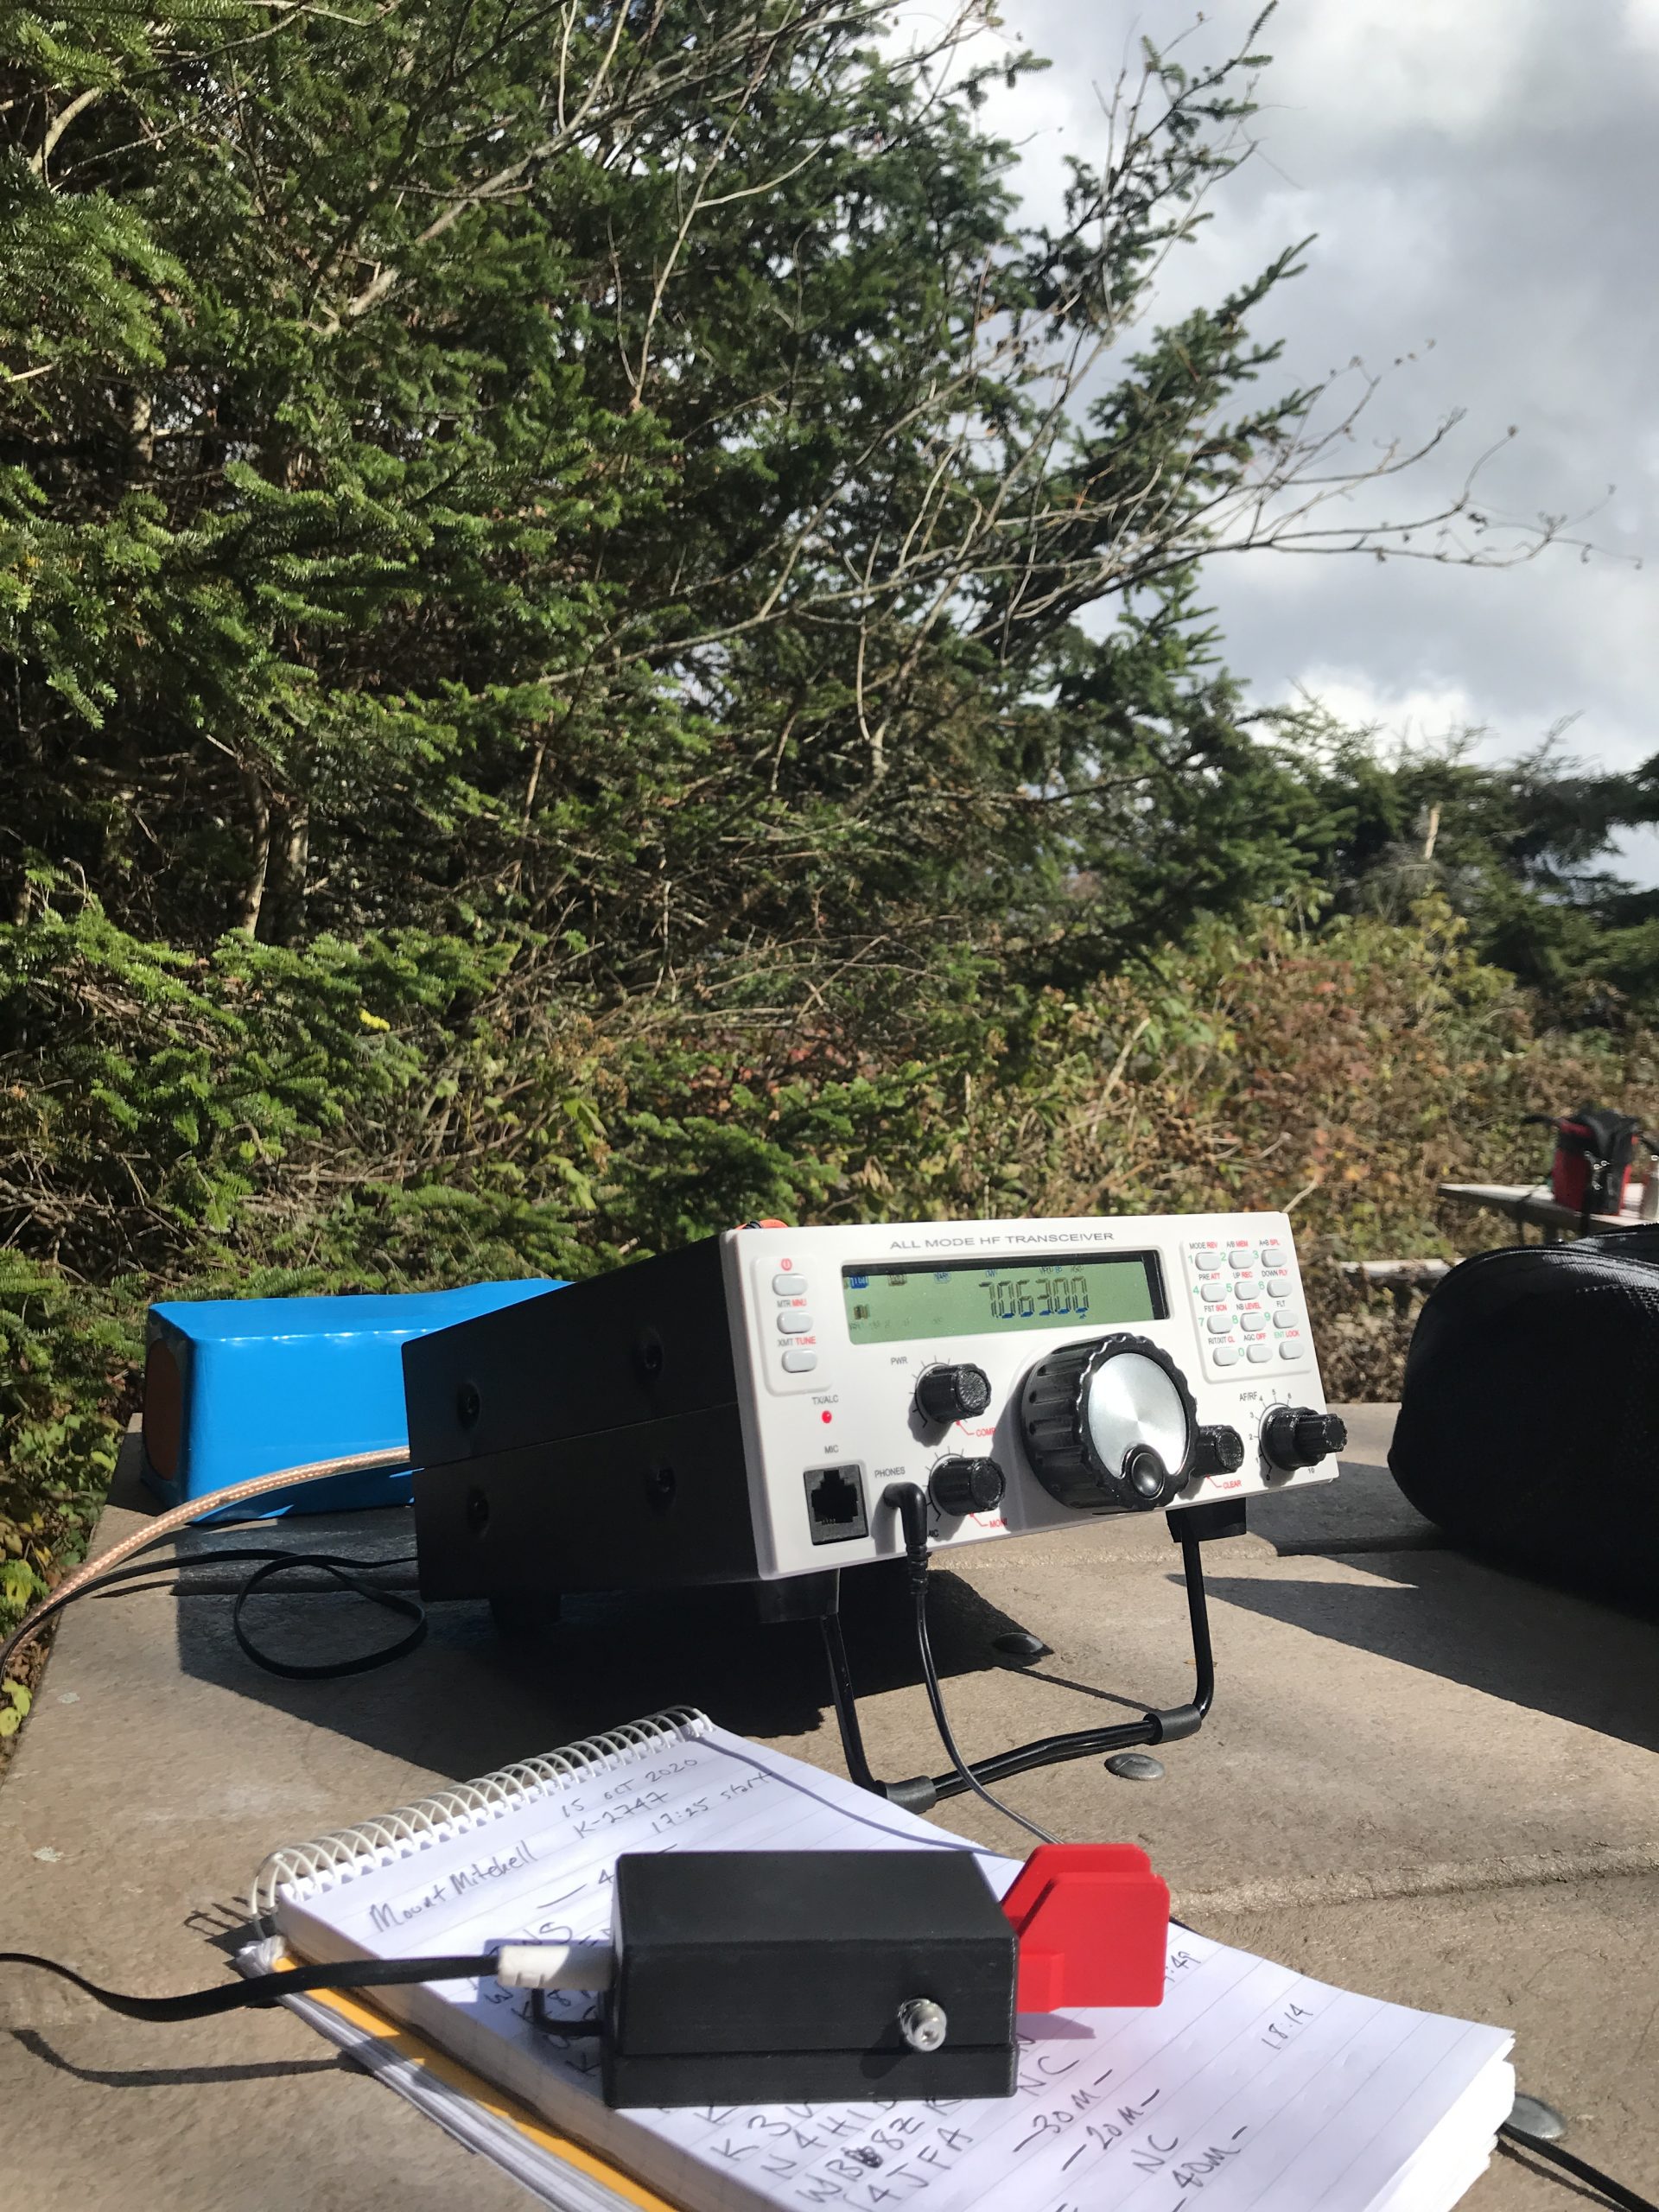
There are still features in the works that will either be implemented with future firmware updates, or with future boards. In terms of performance and appearance, it reminds me of the Ten-Tec Eagle and Elecraft K2—both benchmark rigs in my world. And like the Eagle and K2, the RGO One is happy in the field, at home, or even on a DXpedition. It’s a simple radio that beckons to be on the air.

If you’re interested in the Mission RGO One, check the following web page for the pre-order form and pricing list. The RGO One is produced in batches, so you’ll need to reserve your model.

Click here to view the Mission RGO One order page.
Spread the radio love

Spectrum recordings with the new Belka-DX and a Zoom H1 digital recorder

I’m so pleased to see a fascinating new post from our friend London Shortwave this morning.
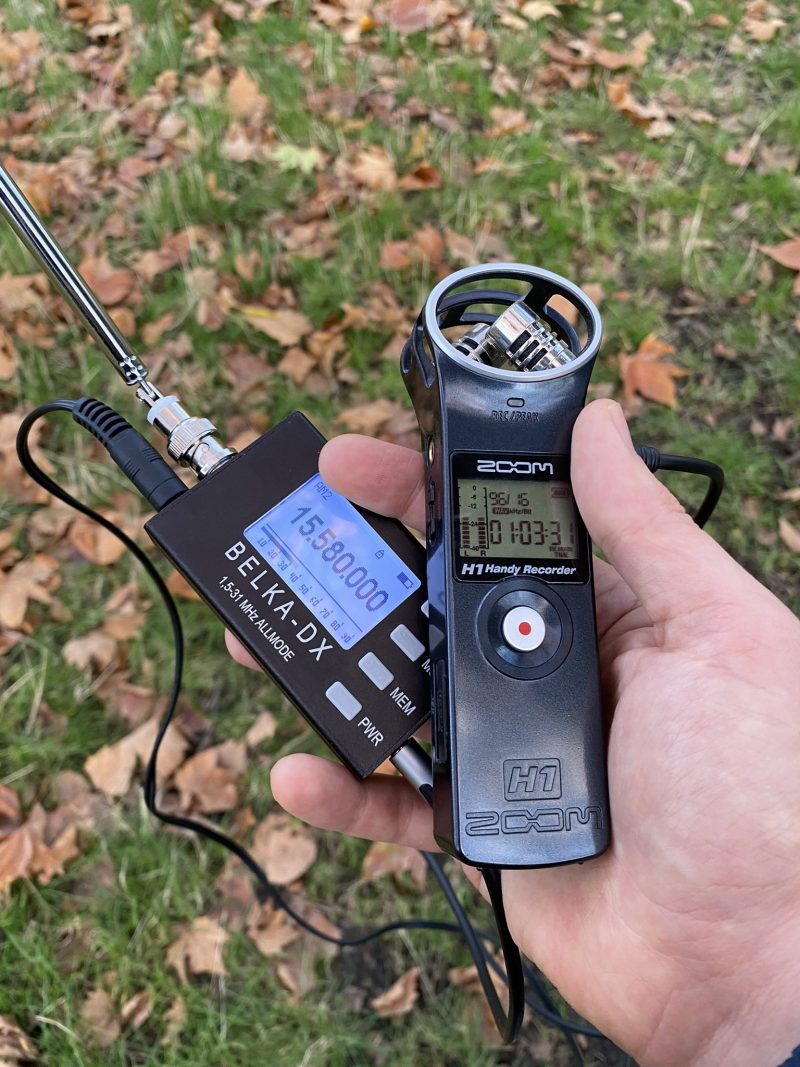
In his latest article, London Shortwave demonstrates how he has been making super simple spectrum recordings by pairing the new Belka-DX receiver (which has an I/Q out port) with a Zoom H1 handheld digital recorder. The recorded I/Q files are then imported into SDR# for tuning and listening.

The process is quite easy to follow and he includes a number of examples–a highly-recommended read!

Click here to read his full article.

Spread the radio love

My Obsession with Muji A6 Mini Logging Notebooks

In many ways, I’m old school. While I love leveraging technology to make the most of my radio world, I also have a sincere appreciation for simple “analog world” solutions to my needs.

I’m a notepad guy.

When I moved to France to do undergraduate studies in the early 90s, I became reliant on small notepads to keep my brain organized and maintain some sense of sanity. I kept one in my pocket, my backpack, and had larger notepads for each one of my classes. It was in France I discovered the amazingly wide variety of notepads that could be found in a Papeterie or stationery store. While I could hardly afford notepads and pens/pencils I found in those stores, I did occasionally splurge.

To this day, I keep notepads in my EDC bag and near my radio desk. I find that the act of writing something down–pen to paper–locks thoughts/memos in my memory much better than taking notes on a digital device.

Paper Logging

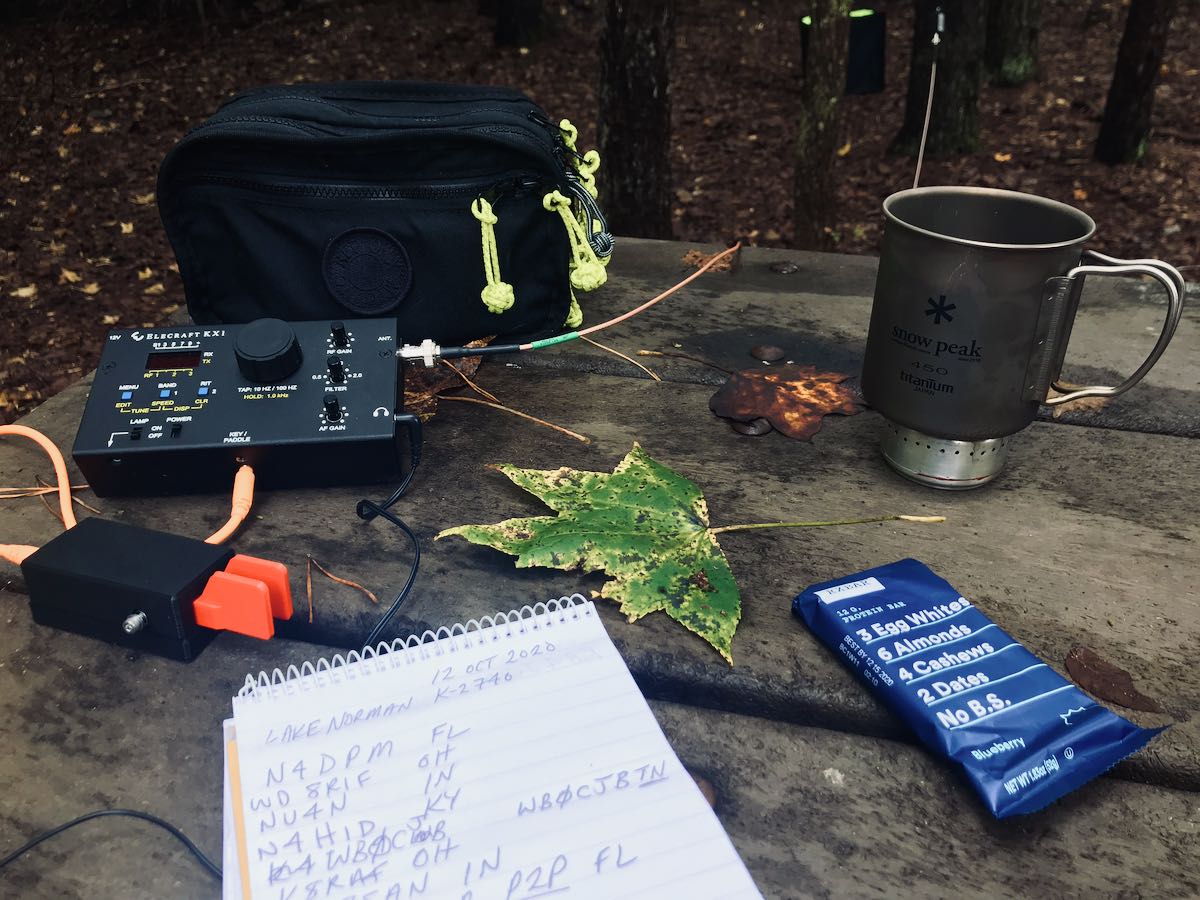
If you’ve followed any of my field reports for Parks On The Air (POTA) here on the SWLing Post  or on QRPer.com, you’ve probably seen me employ a wide variety of note pads and logging sheets.

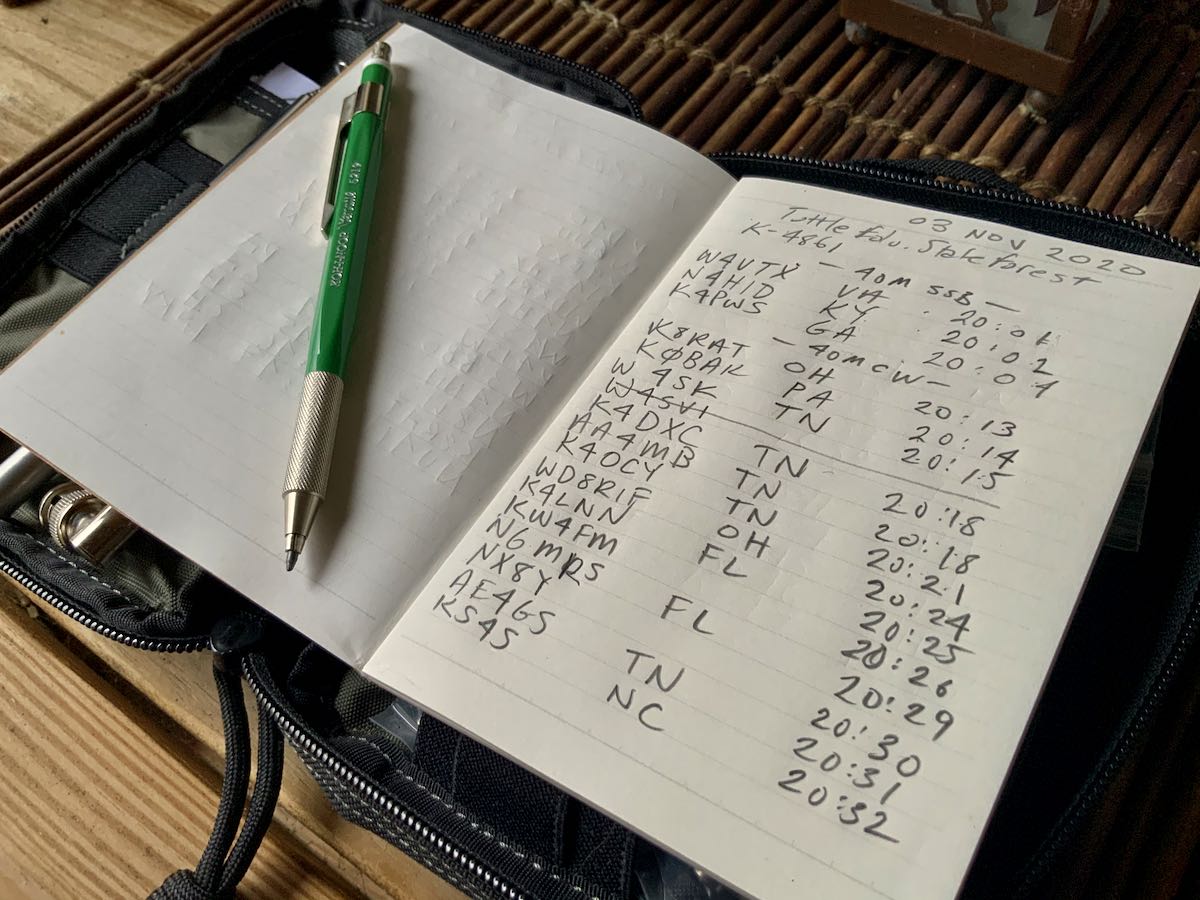
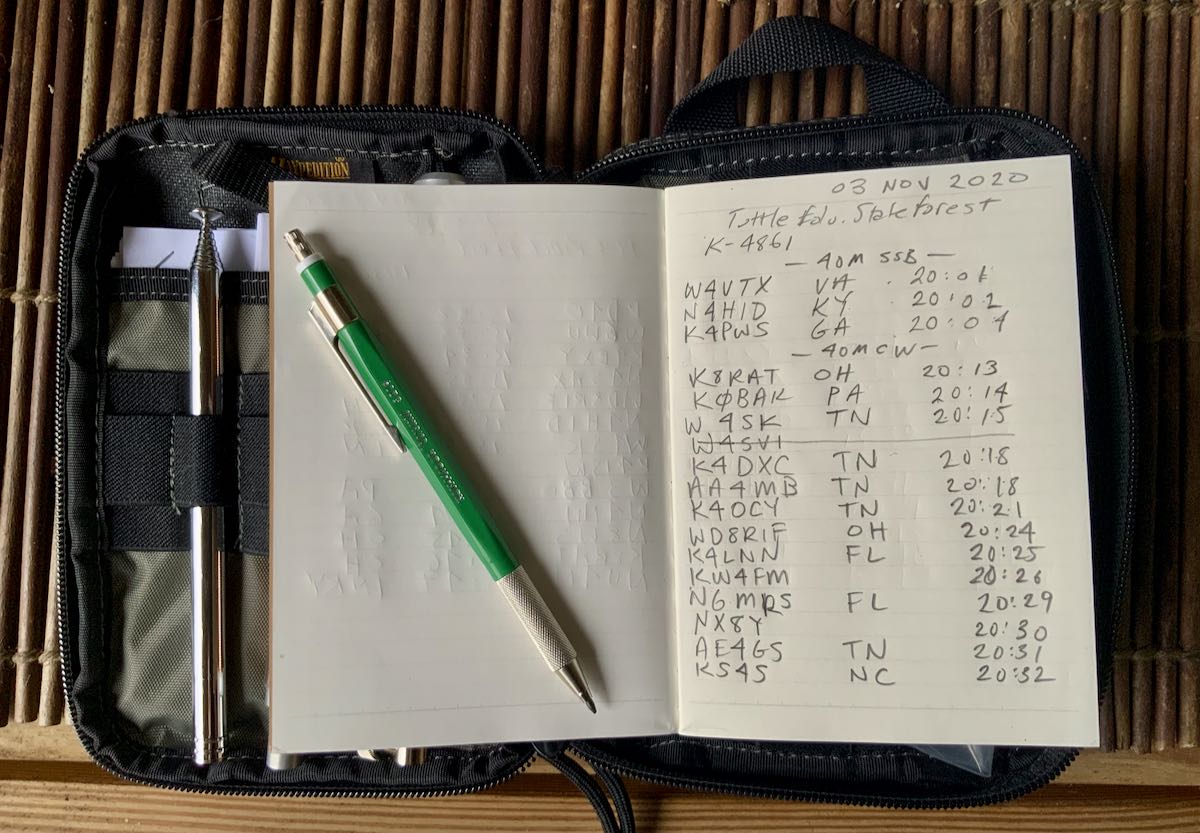
While I often do live logging with my Microsoft Surface Go tablet to speed up log submissions, I always log on paper first. Always.

For one thing, when I’m copying a callsign in Morse Code (CW), I prefer writing down the call as it’s being sent. Regardless if a contact is in CW or phone, I copy the callsign and exchange information on paper first, then immediately transfer it to my logging software on the tablet. I carry the Surface Go tablet with me on about 75% of my field activations, but leave it at home if I’m doing a substantial amount of hiking.

Not only do I find it easier to log on paper first, but by having a full set of logs in notebooks, I know I’ve got a proper archive of the activation if my tablet fails me.

Plus–if I’m being completely honest here–I love seeing my handwritten logs after an activation. It gives me more of a sense of accomplishment for some reason. Don’t ask me why.

Muji A6 Notebooks

A couple months ago, I was searching for a notepad that could easily fit in one of my compact field radio kits.

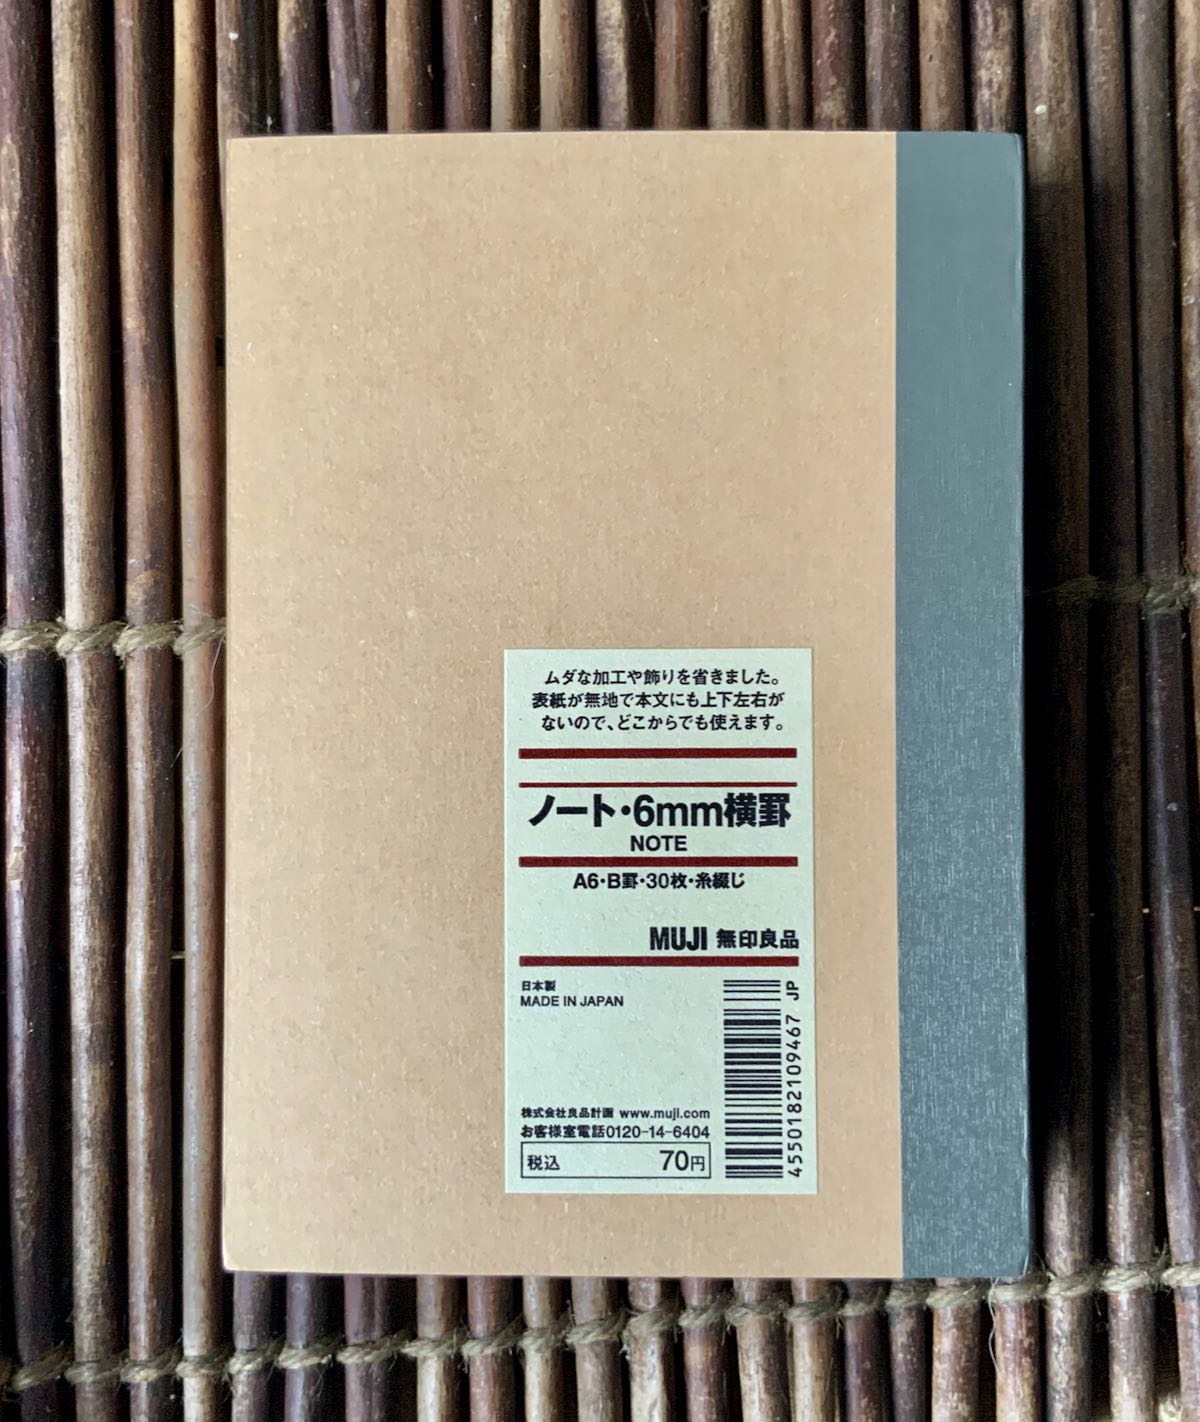
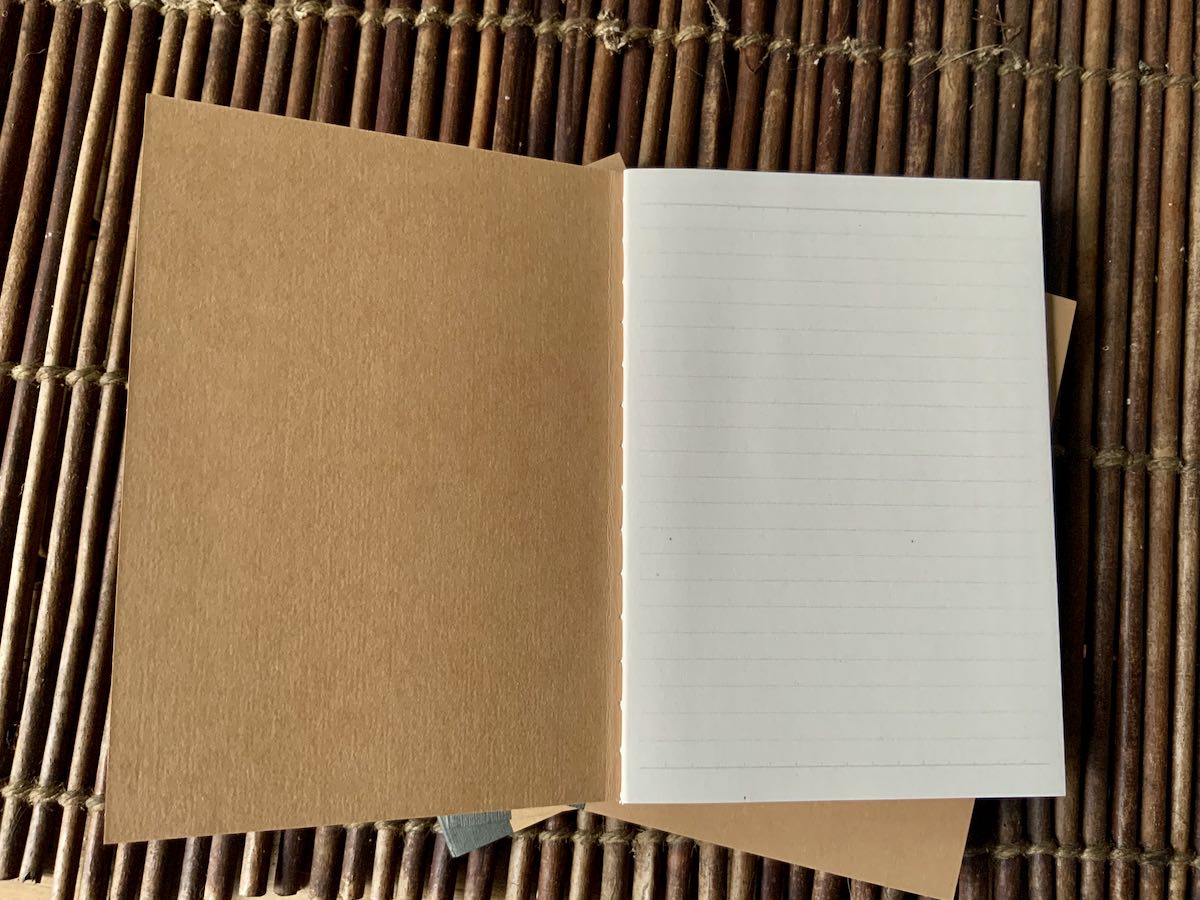
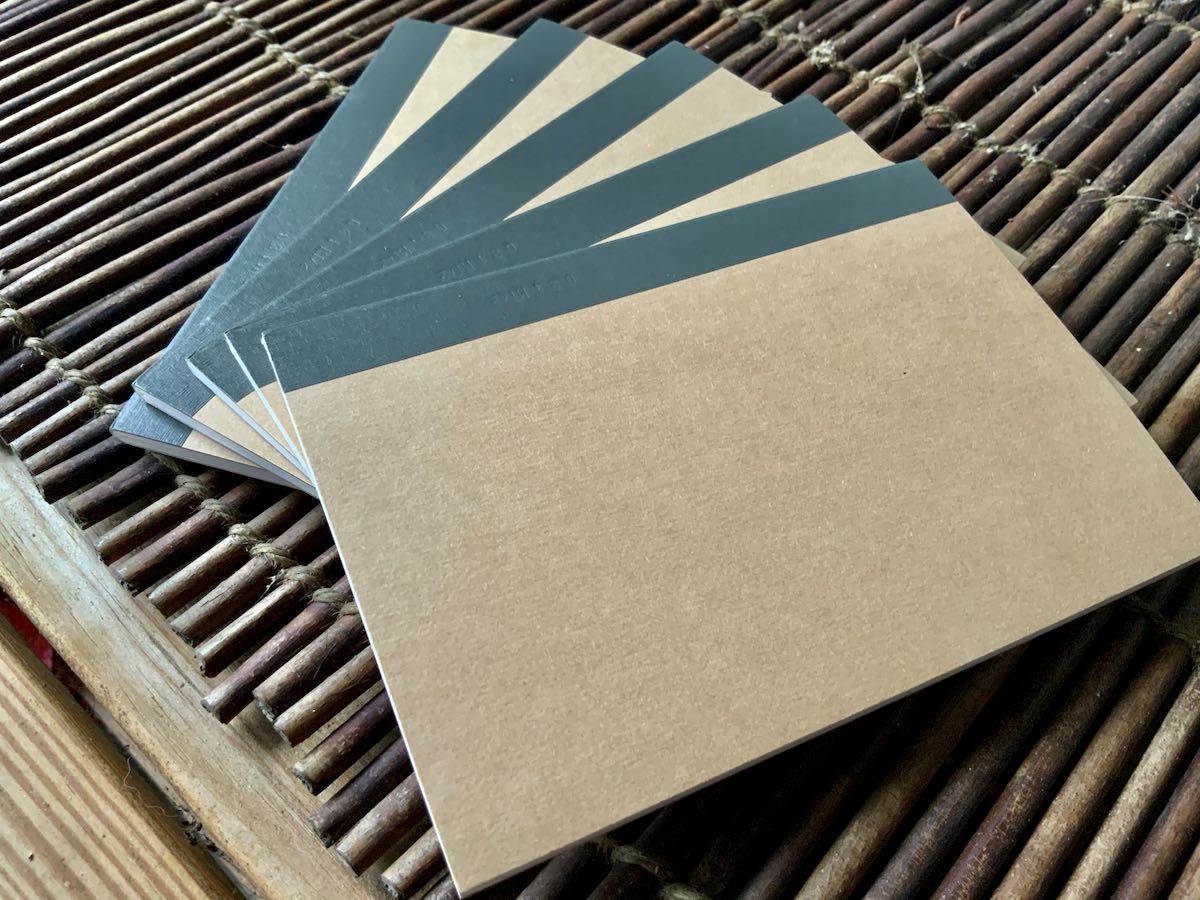
My wife (an artist) suggested I check out Muji Notepads of Japan because she’s both pleased with the quality and price as compared with other quality notebooks. She measured my field kit pack and suggested the Muji A6 lined notebook. On Amazon, they’re sold in packs of 5 books for $12.00 US. I was skeptical about the size, but placed an order anyway.

Each book has 30 pages which means if I write on the front and back of each sheet, it should last me up to 30 average park activations (assuming roughly 25-40 contacts per activation). Since my activations tend to be short, it’s rare that I exceed 40 contacts.

I purchased a pack of five notebooks and put one notebook in each of my radio field kits. I even dedicate one for my Elecraft AX1 antenna kit.

I love these Muji notepads–they’re compact and thin, but the paper quality is nice and it’s large enough I can use “normal” hand writing. While I tend to prefer spiral-bound notebooks for logging, I like the binding on these notebooks because it doesn’t catch on anything and keeps the profile super thin which is perfect for small packs and cases. The pages lay flat once open, too.

For the record, I also keep a few Rite in the Rain weatherproof notebooks handy if I’m heading to a park or summit after heavy rainfall, if there’s the possibility of rain in the forecast, or if I’m camping. They’re also indispensable. The Muji Noteboooks aren’t designed to handle water, but in truth it’s very rare that I’m playing radio in the rain. I prefer the slim profile of the Muji Notebooks for day-to-day field work.

I just ordered another pack of five this Muji A6 Notebooks this week and plan to put one in my portable SDR kit, and two of my portable receiver kits. In truth, my shortwave radio logs are less organized than my ham radio logs, but I’m constantly jotting down broadcasters, times, frequencies and receiver performance notes.

Click here to check out Muji A6 Notebooks on Amazon (affiliate link supports the SWLing Post). 

Spread the radio love