Category Archives: Portable Radio

One week of Hamvention, Air Force Museum, Wright Brothers and National Parks On The Air

DSC_4449I returned home last night from my week-log Dayton Hamvention trip around 8:30 PM.

The Hamvention actually ended at 1:00 PM on Sunday, May 22, but my buddy Eric McFadden (WD8RIF), his son Miles (KD8KNC) and I stayed Sunday night in Dayton, and Monday night at Eric’s home in Athens, Ohio.

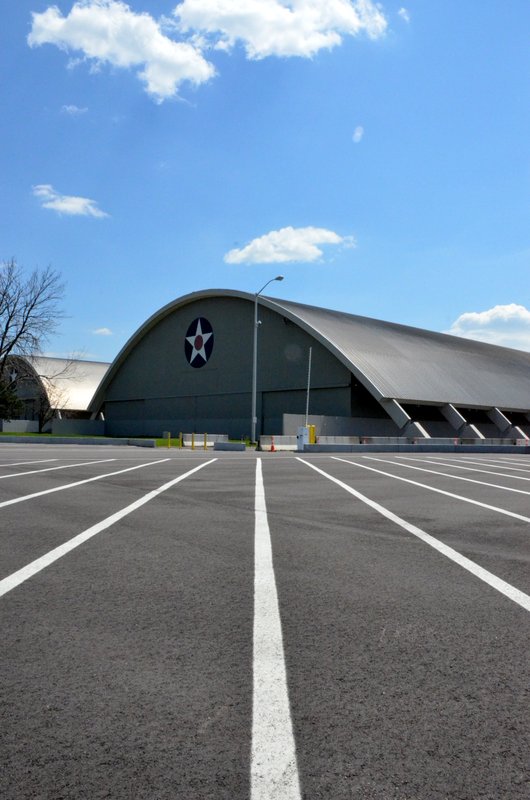
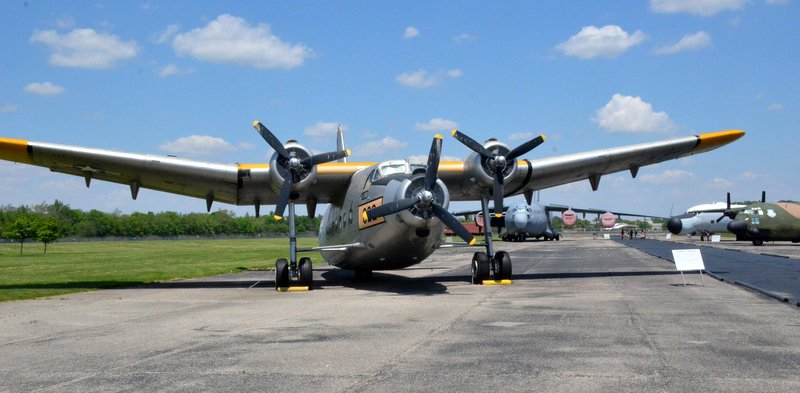
After packing up our Hamvention booth (for Ears To Our World) on Sunday, we made our way to the nearby National Museum of the USAF–the largest aviation museum in the world. We visit the museum every year–and every year I discover something new.

BC-348-B29

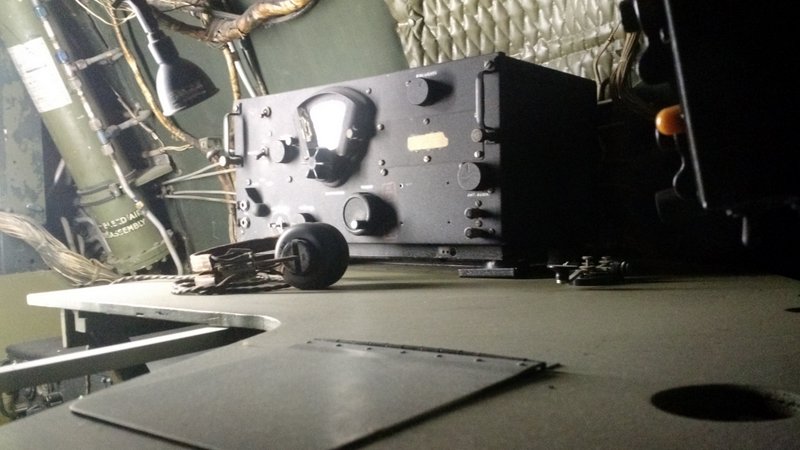
This BC-348 can be found in one of the museum’s B-29 displays.

DSC_4443 DSC_4455

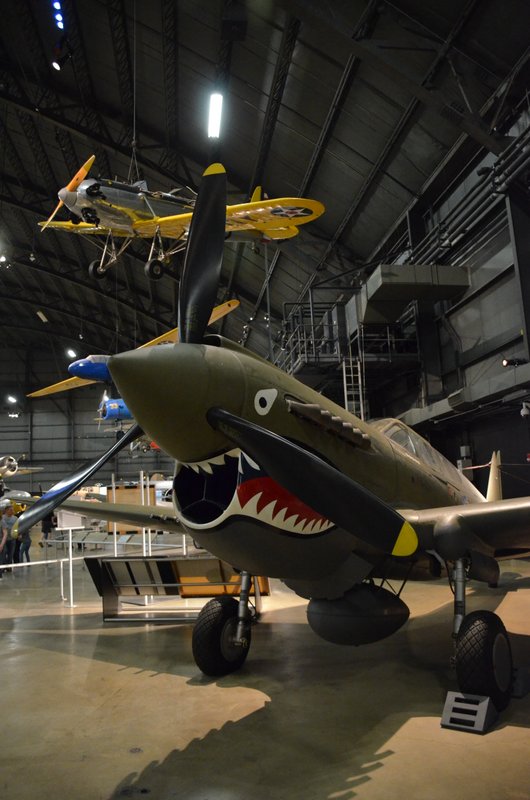
In June, the Air Force museum is actually opening a fourth building which will house an additional 70 aircraft in four new galleries.

If you’re an aviation buff–trust me–the  National Museum of the USAF is worth a pilgrimage to Dayton, Ohio.

NPOTA activations

Monday morning, Eric, Miles and I packed up, ran a few errands on Wright Patterson Air Force Base, then made our way to our first National Parks On The Air activation: the Dayton Aviation Heritage National Historical Park (HP11) and North Country National Scenic Trail (TR04) “two-fer” at Huffman Prairie Flying Field Interpretive Center in Dayton, Ohio.

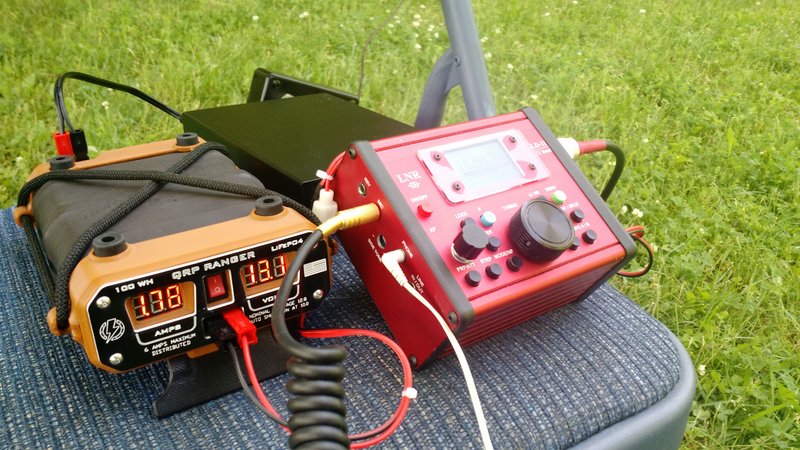
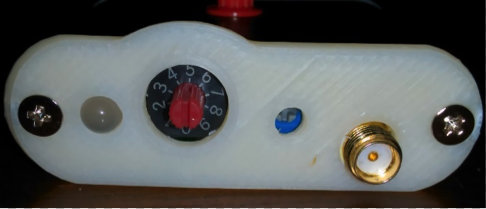
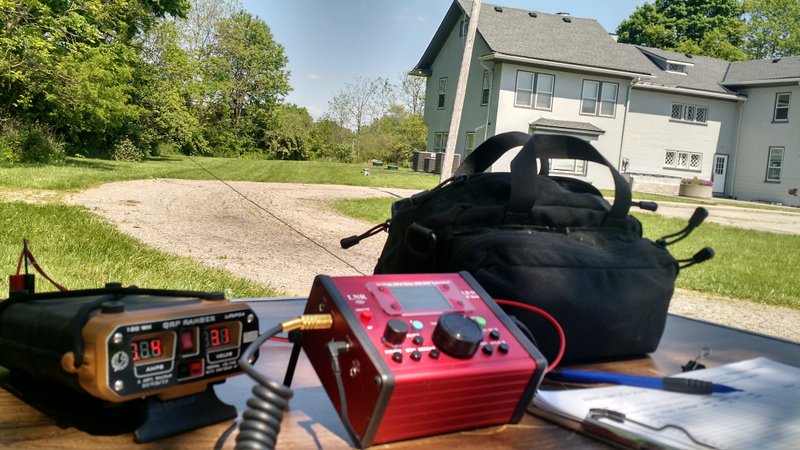
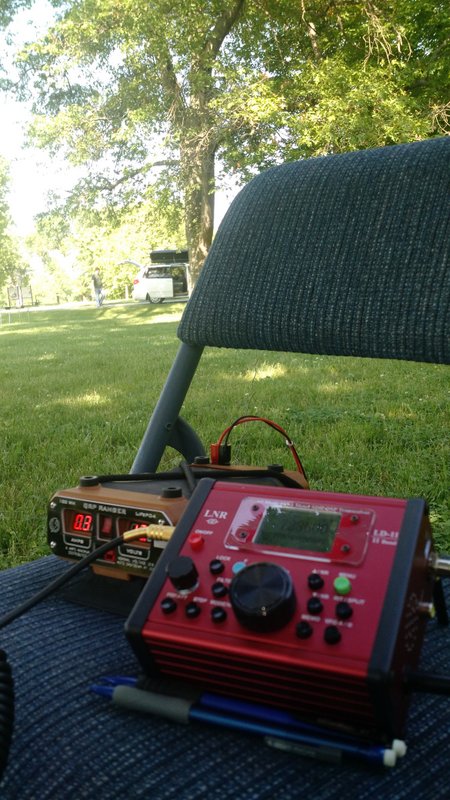
Eric worked CW on 20 meters and I worked SSB on 40 meters using the LNR Precision LD-11 transceiver (which I’m currently reviewing) and my recently-purchased Hardened Power Systems QRP Ranger.

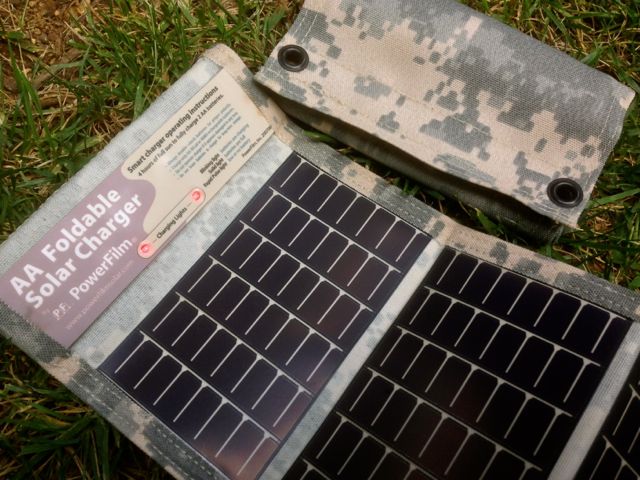
For all of my Monday NPOTA activations, I used the EFT Trail Friendly antenna I purchased at the Hamvention:

EFT-Trail-Friendly-Antenna-QRP

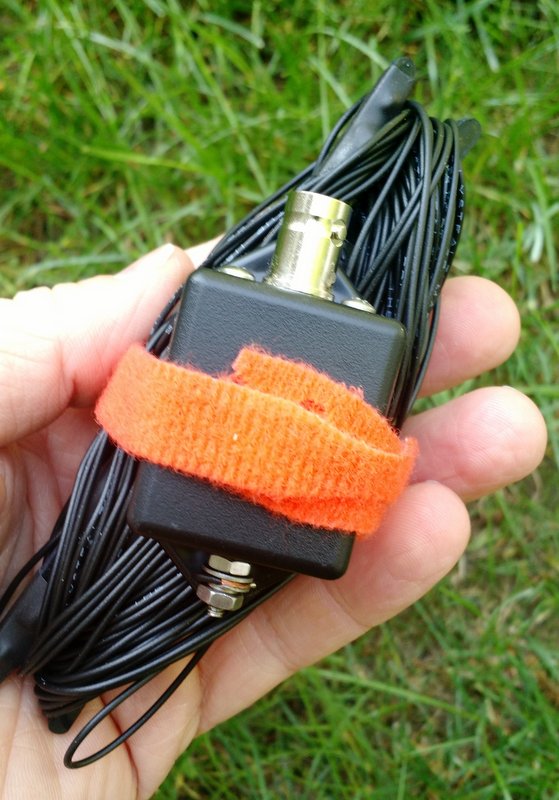
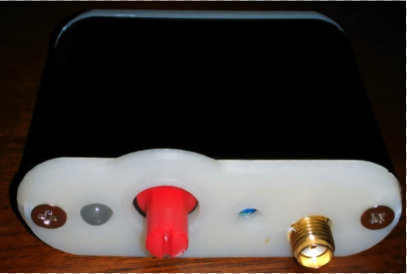
The EFT Trail Friendly Antenna made set-up a breeze: simply throw a line into a tree, hang the end of the antenna, then hook up the other end to the feedline/transceiver. No antenna tuner is needed for 40, 20 or 10 meters once the antenna is tuned for resonance. It packs up into a small bundle that easily fits in my radio go-kit (see photo above).

The LD-11/QRP Ranger/EFT antenna combo worked amazingly well and made for very quick deployment.

LNR-LD-11 and QRP Ranger NPOTA

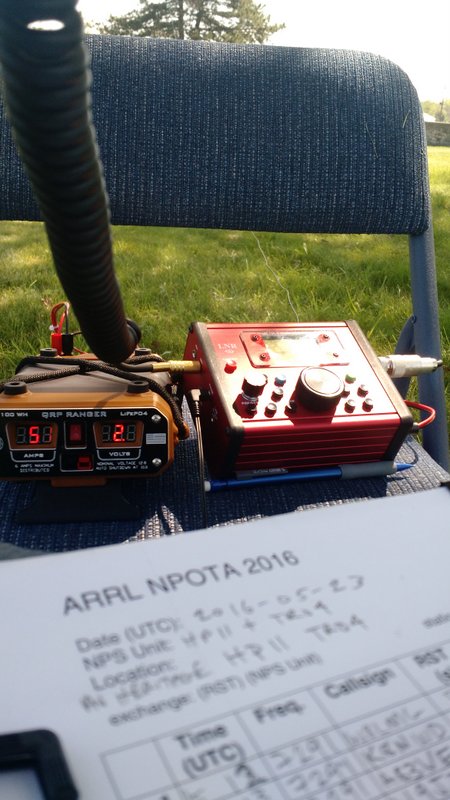
I can easily fit the LD-11 transceiver and QRP Ranger on a foldable metal chair (my make-shift field table!).

My buddy Eric, I should mention, is typically on the leaderboard for NPOTA as he’s an avid QRP field operator.

WD8RIF-20M-Vertical-NPOTA

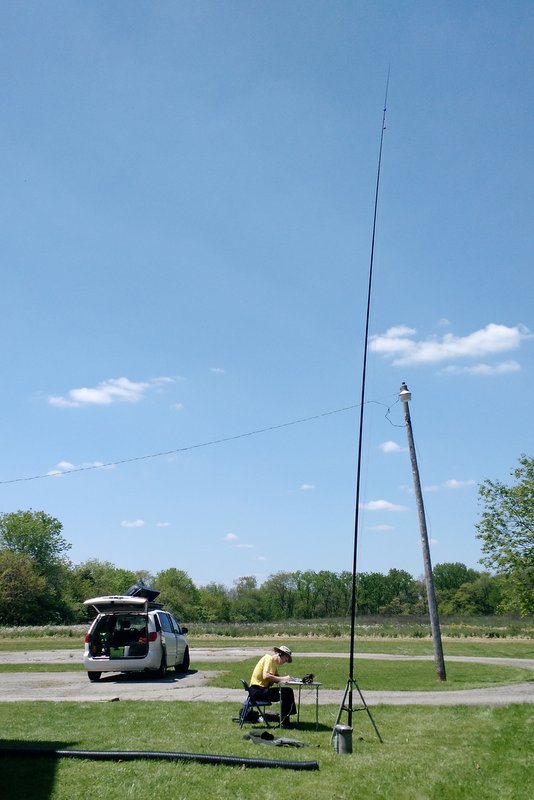
Eric (WD8RIF) operating NPOTA with his field-portable vertical HF antenna.

You can follow Eric’s activations on QRZ.com or his website.

Eric's field-portable HF vertical packs up into this small canvas bag.

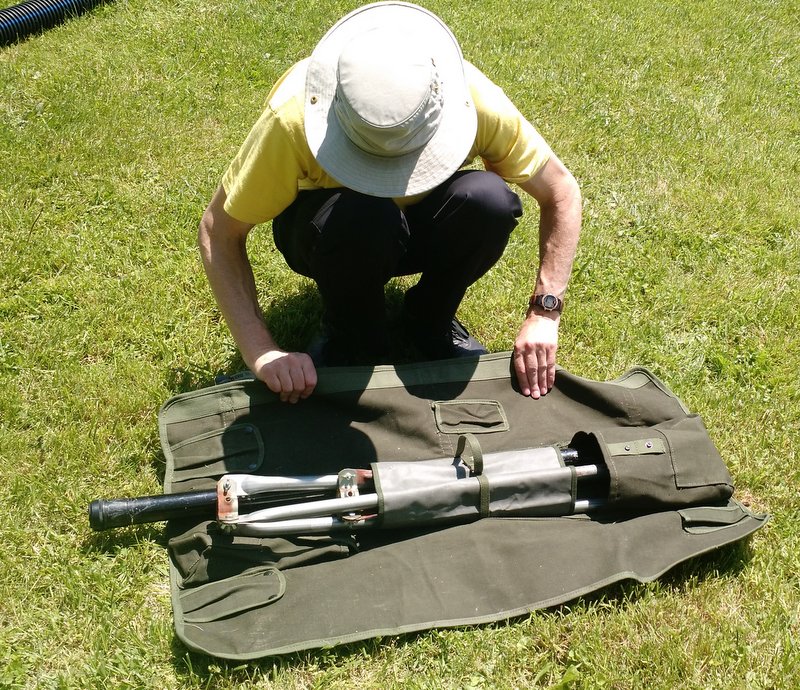
Eric’s field-portable HF vertical packs up into this small canvas bag.

We had a tight NPOTA activation schedule to meet Monday, but after packing up from our first sites, we took 30 minutes to stop by the Wright-Dunbar Interpretive Center and The Wright Cycle Co. museum in downtown Dayton.

IMG_20160523_135344026

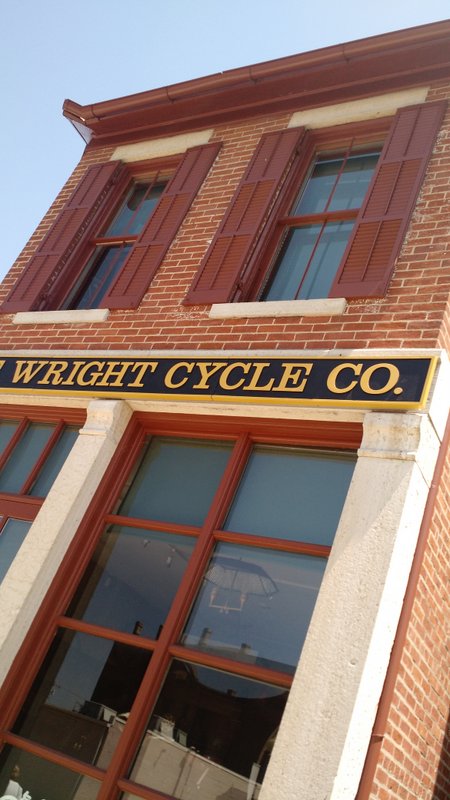
Well worth the short visit! Next year, I’ll plan to revisit both museums when I have more time.

Next, we made our way to the second scheduled NPOTA activation site: the Charles Young Buffalo Soldiers National Monument (MN18).

NPOTA-QRP-LD-11-QRP-Ranger

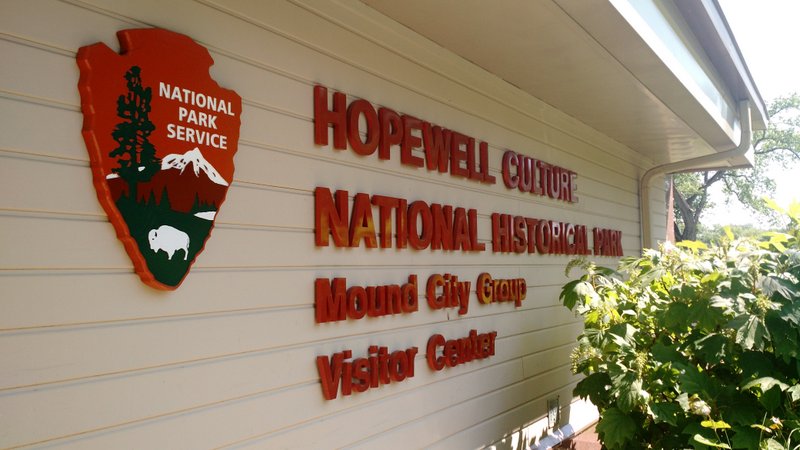
Despite not having my antenna very far off the ground (my antenna line fell down one branch in the process of hanging) I still managed to work a pile-up of stations from Georgia, North Carolina, Ohio, Illinois, Connecticut, Michigan and Indiana. After Eric and I racked up a number of QSOs, we packed up our site in haste and made our way to the final activation of the day: the Hopewell Culture National Historical Park (HP15). We arrived as the Park Ranger was getting in his car to leave for the day!

At Hopewell, I managed to deploy the EFT antenna much higher off the ground. I worked a small pile up of stations from all over the region which, to my surprise, included two radio friends (Ed and Eileen) in Franklin, NC. Eric also worked blogging buddy John Harper, AE5X on 20 meters CW (got your message, John!).

NPOTA-QRP-LD-11-QRP-Ranger-Hopewell

All in all, it was a fantastic day to be outdoors and on the air.

Of course, a side benefit of doing National Parks On The Air activations is that you get to check out all of these amazing park sites.

Without a doubt, this was one fun-filled and radio-centric Hamvention week! It couldn’t have been better.

NPOTA Log

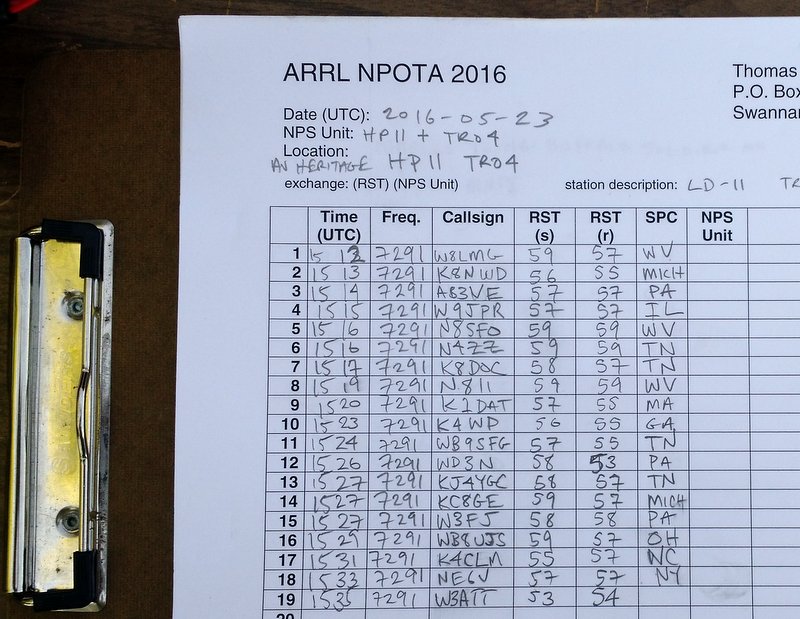
Part of my log sheet for NPOTA HP11 and TRO4 “Two-Fer” activations. Not bad for such a tight schedule!

Thank you

Many thanks to my friends Eric (WD8RIF), Miles (KD8KNC), Mike (K8RAT) and Christine (KM4PDS) for volunteering to manage our Hamvention booth for Ears To Our World. It was a record year for collecting donations. Many thanks to all of you for the support!

I’d also like to thank the SWLing Post readers who stopped by to visit our new location in the Silver Arena–it was great seeing everyone!

Now that I’m back home, I essentially have one week of emails and comments in my backlog to sort before hitting the road again rather soon. I appreciate your patience as I catch up. If you don’t hear back from me soon, it’s okay to give me a nudge! 🙂

National Parks On The Air (NPOTA) activations today

IMG_20160519_105823050_HDREn route to the 2016 Dayton Hamvention, I’m doing a few National Parks On The Air (NPOTA) activations with my my buddy, Eric (WD8RIF).

Eric is currently the number one activator in the state of Ohio.

NPOTA is a great excuse to get outdoors and play radio.

For me, it’s a great excuse to test the LNR Precision LD-11 and my new QRP Ranger portable power pack.

The QRP Ranger (left) and LNR Precision LD-11 transceiver (right)

The QRP Ranger (left) and LNR Precision LD-11 transceiver (right)

I am loving the new QRP Ranger power pack–it is the solution I decided on after publishing this post a few weeks ago. It’s a little pricey, but it’s built like a tank, very lightweight, includes a charge controller made specifically for the LiFePo cells, and made here in the USA. It also had a very readable LED display that my buddy Eric says is, “reminiscent of the displays on the Apollo 11 module.” He’s kind of right!

It’s so nice to have both a volmeter and ammeter on the front panel.

IMG_20160519_111039495

We just finished activating the Hopewell Culture National Historical Park (I’m writing this post while Eric drives us to our next activation). I made 12 contacts running SSB at 8 watts. Eric made 16 contacts via CW at 5 watts.

We have planned two more activations this afternoon:

  • Charles Young Buffalo Soldiers National Monument at 16:30 UTC
  • Dayton Aviation Herital National Historical Park at 21:00 UTC

I’ll be calling CQ on 14.290 MHz and 7.290 MHz +/-.

Please hop on the air listen and/or answer my call if you’re a ham!

Of course, tomorrow through Sunday, you can find us at the Dayton Hamvention in booth SA0359 in the Silver Arena.

Hope to see you there!

Off-Grid Radio: Portable power recommendations?

Elecraft-KX3This year, I have a lot of portable radio play in mind as I travel across the continent. At some point, I even plan to spend several days in an off-grid cabin on the coast.

In the past, I’ve powered my 12 VDC ham radio transceivers with a system comprised of three PowerFilm solar 5 watt foldable PV panels (see below), a Micro M+ charge controller and several gel cell type sealed batteries (a couple 7 Ah and one 20 Ah).Powerfilm-Solar-Panel

The system works well, but the batteries are a little heavy and unhandy when I want to hike into a remote site or play radio on the beach, for example.

PowerFilmAACharger-1

In terms of receivers, my portables (like the Sony ICF-SW7600GR, Tecsun PL-660, etc.) simply use AA batteries which I charge with PowerFilm AA PV chargers (see above). My CommRadio CR-1a has an internal battery that will power it for hours at a time.

Power is much less of an issue with receivers because they’re quite resource efficient.

I mainly need a system to power my QRP ham radio gear, and that’s where I could use your experience!

Wish list

Charge controller

I need a new charge controller since my Micro M+ (no longer produced) is now being used to power a remote antenna tuner.

Of course, I’ll need an inexpensive charge controller that doesn’t produce RFI (radio interference).

It would be an added bonus if the charge controller could also charge my batteries when grid power is available.

12 VDC Battery packs

I’d like something relatively lightweight and safe.

Note: LiPo packs worry me, especially since I had one (an early GoalZero model) quite literally melt down and burn up on my bed only a few hours after bringing it back from an eight hour flight a few years ago. Scary!

Pure Sine Wave Inverter

PureSineWaveInverter

I’d also like a small, efficient pure sine wave inverter that I I could connect to my largest battery and power my laptop for extended SDR spectrum recording sessions while off-grid.

I’d love a recommendation from someone who uses one and can confirm a model that doesn’t create radio interference while operating.

Recommendations?

Post readers: Please comment with your recommendations and include model numbers and links if possible. Thank you in advance!

SDR Touch now supports the SDRplay RSP in Beta release

sdrtouch

(Source: SDRplay Blog)

Good news for Android users – SDR Touch have released a beta version of their software with SDRplay RSp functionality – go to https://play.google.com/apps/testing/com.sdrtouch.sdrplay to sign up as a beta tester.

SDR Touch works on most recent Android Phone or Tablet devices.

Simple modification to disable soft mute on the Tecsun PL-210

pl210_mod4

Many thanks to SWLing reader, Mini, who wites:

I am Japanese short wave listener.

I found the method that disable soft-mute of TECSUN PL-210.
And, I posted the article in my blog.

pl210_mod1

Please forgive me that may be difficult for you to understand the content.
It is automatic translation from Japanese my blog.

Thanks mini

Click here to read Mini’s blog post via Google translate.

Click here for the original in Japanese.

Thank you, Mini! I don’t have the PL-210, but if I did I would certainly disable the soft mute as I find it very distracting during routine band scans.

Mike’s overview and review of the $40 Soft66RTL3 SDR by Kazunori Miura (JA7TDO)

RTL3

Many thanks to SWLing Post contributor, Mike Ladd, for the following guest post and overview of setting up and using the Soft66RTL3 SDR:


Soft66RTL3 SDR: A low cost…Good performer direct from Japan

by Mike Ladd

Much has changed in the last 8 years in the world of SDR radios. Fast forward to 2016 and just about everyone in the hobby has heard the buzz word “SDR radio”. When SDRs first came out to the market they were all aimed at HF listening and you had two types to pick from. The first being soundcard based and the second being direct sampling. The price gap between the two were several hundred dollars. The more expensive being direct sampling. As the hobby progressed, so did the technology and the prices started to shift dramatically.

You can now purchase a TV dongle for $10.00 and turn it into a SDR. The Soft66RTL3 is basically a TV dongle but with a lot more features.

The Soft66RTL3 comes from an engineer who is no stranger to the world of SDRS. Kazunori Miura (JA7TDO) has been designing and selling many models of SDRS over the internet and shipping them direct from Japan for about 7 years. The Soft66RTL3 is his latest of model hot off his bench. This SDR is a dual input RTL-SDR with a built in 50 MHz upconverter along with 4 user selectable band pass filters that greatly increase your signal to noise ratio in the HF bands.

Soft66RTL3-board-001 Soft66RTL3-Board 2 Soft66RTL3-board

The frequency range of the RTL3 is from DC to Daylight (0.4 kHz to 1.7 GHz). Miura also addressed a heat issue with the previous version (RTL2) by adding a thermal pad and heatsink. RTL dongles are notoriously unstable due to overheating. In theory, the thermal pad should add frequency stability and keep drift to a minimal.

RTL3-TrimmerPot

The last feature of the RTL3 is the input gain trimmer pot (see image above). The trimmer pot is for the HF side of the SDR and is already set before it’s shipped from Japan. If you would like to reduce or increase it the trimmer pot is easily accessible. I would suggest leaving it as is.

The RTL3 is broken down into two sections: the HF input side and the VHF/UHF input side.

Soft66RTL3-encoder

The HF side of the SDR (above) has a red rotary encoder and trimmer pot port. The VHF/UHF side (below) has the USB Mini-B connection.

Soft66RTL3-back

Both sides of the RTL3 terminate to a SMA-Male connection and Power comes from a single USB Mini-B cable.

Soft66RTL3-BandPassFilter

Band pass filter selection

If you look at the rotary encoder (red cap cover) you will see a small notch window. The 12 o’clock position is #5 on the encoder dial. One click clockwise will take you to switch position #6 and one click counterclockwise will take you to #4. You should pull the red cap cover off to have a look and get your bearings.

The band pass filter selection is as follows:

  • #4 enables BPF 0.4 to 1.2MHz
  • #5 enables BPF 1.2MHz to 5MHz
  • #6 enables BPF 5MHz to 15MHz
  • #7 enables BPF 15MHz to 30MHz
  • #8 or #9 enables the VHF UHF side of the SDR

All other positions will bypass the filtering section on the HF side of the SDR.

Installation

If you already have a RTL-SDR on your system then all you need to do is swap it out with the RTL3 and change the offset of -50,000,000 in HDSDR or SDR# to listen to the HF side of the RTL3–but if this is your first SDR we will need to install 2 items: the front end app and the driver.

I will assume your system is Win-7 or better and we will be using SDR# as our program of choice to drive the RTL3. The RTL3 runs just fine in HDSDR and SDR-Console, but by choosing SDR# it will reduce our setup time considerably.

ScreenShot-SDR

  1. Plug in the RTL3
  2. Make a folder on your desktop and name it SDR#
  3. Download the latest version SDR# from www.airspy.com and copy the contents of the zip file to your newly created SDR# folder
  4. Inside of your SDR# folder, double click on install-rtlsdr
  5. After the batch completes, double click on the “zadig.exe” inside your SDR# folder

screengrab

When you run the “zadig.exe” make sure you select “list all devices” as shown above.

ScreenGrab-Window

The next 3 steps are:

  1. Select “Bulk-In Interface” (Interface 0)
  2. Make sure the proper USB device is selected (2838)
  3. Click “install driver”

The RTL3 is now ready to be used and no further setup is required.

For a more detailed installation I would visit RTL-SDR.COM for a complete setup instructions: http://www.rtl-sdr.com/rtl-sdr-quick-start-guide

I will assume you did not have any issues setting up the ZADIG driver and now move on to using the RTL3 inside of SDR#. I will show you real world conditions that are not from any scientific standpoint.

Antenna wise, for the HF side I will be using a G5RV mini and for the VHF/UHF side I will be using a Scanntenna ST-2.

You can now launch SDR# and check the following settings (see image below).

SDRSharp-Settings

For the VHF/UHF side of the RTL3 you will want the rotary encoder on position #9. You want the cutout in the encoder cap showing the 5 o’clock position.

Summary

I have been using this SDR for a little over 3 months. Out of all the low cost SDR’S on the market, this one gives you the most bang-for-your-buck and it is a great entry level SDR with some “Pro” features.

Pros:

  • Low Price
  • HF VHF/UHF in one package
  • Works with any app that supports the RTL-SDR front end
  • 4 user selectable band pass filters for HF
  • Highly sensitive user controlled input RF amp
  • Small & very compact metal case
  • Dual input SMA jacks
  • ESD protection diode

Cons

  • Some intermod in the 460-470 MHz range
  • Inputs are on opposite sides of the SDR body

The Soft66RTL3 price is $40.00 US shipped–click here to order.


Mike, thank you so much for this excellent overview of the Soft66RTL3!  I’m especially appreciative of the time you’ve taken to explain the installation process–for many, this is one of the more difficult RTL-SDR learning curves.

I’m very tempted to check this out for myself–I love the fact that this little SDR has bandpass filters.

Post Readers: I suspect Mike will monitor the comments in this post, so feel free to ask questions. Make sure to check out Mike’s website, where you’ll find more articles about software defined radios.