The following review of the Xiegu G90 originally appeared in the August 2020 issue of The Spectrum Monitor magazine:
A comprehensive review of the Xiegu G90 general coverage transceiver
My coming of age in the world of radio was during the era of big US and Japanese radio manufacturers. Icom, Kenwood, Yaesu, JRC, and Ten-Tec––these were the icons of my youth. And, I freely confess, I developed a partiality for their products.
So when incredibly inexpensive transceivers from manufacturers in China started showing up on the market a little over a decade ago, I was…well, skeptical. Very. Many of these radios were a fraction of the cost we had been paying, and some models looked like direct copies of radios that were already on the market…but these copies were all-too-often second-rate either in features or performance.
Thus, as it was my policy to invest in quality products, I continued to put my money toward US, Japanese, and European legacy manufacturers that I felt would be here for the long haul in the amateur radio and SWL communities.
Had I become a bit of a radio snob? I admit it…maybe I had. But in truth, I was simply waiting for a quality Chinese-made radio to come along and change my viewpoint.
Times have changed
Recently, I compiled a list of general coverage QRP transceivers for the SWLing Post. My buddy Eric (WD8RIF) pointed out that I neglected to include any of the Chinese-made Xiegu brand transceivers, all of which offer general-coverage receiving.
I know a number of hams who use Xiegu (pronounced roughly “SHEH-goo”) brand portable transceivers for Parks On The Air (POTA) and Summits On The Air (SOTA) activations, and like them very well. So I decided to waive my doubts and check out Xiegu’s transceivers. I found myself intrigued with one in particular: the G90.
The Xiegu G90
At time of publication, there are three Xiegu models widely available: the G1M, X5105, and the G90.
The GM1 ($260) is a compact, four-band 5-watt QRP transceiver, while the X5101 ($520) is a 160M-6M 5-watt Double Conversion Superheterodyne QRP transceiver. Both look promising, but the G90 is a 20-watt 160M-10M transceiver sporting a 24-bit 48 kb/s sampling analog-to-digital/digital-to-analog converter at just $450. That’s the one I chose to investigate.
I found both the G90 receiver specs and 20-watt-output power very appealing, especially considering the modest $450 price tag. But I found this receiver has other impressive features:
- Detachable faceplate with included separation cable
- Full-color backlit display with both spectrum and waterfall
- Built-in side panel extensions to protect the front face and back of the radio
- General coverage receiver (0.5~30MHz) in SSB/CW/AM
- Built-in automatic antenna tuner (ATU)
About the only feature the G20 doesn’t include is an option for a built-in battery pack. Certainly not a deal-breaker by any means, since more often than not I use an external LiFePo battery for field-portable radio work.
I made up my mind to bite the bullet and purchase the G90. I was incredibly curious whether it could compete with my Elecraft KX3 and/or KX2, and I also wanted to explore the capabilities of its general coverage receiver for broadcast listening.
I placed an order with US distributor MFJ Enterprises for a total cost––including shipping––of $467.95.
Initial impressions
I tend to review ham radio transceivers around the time they hit the market. One of the unique advantages of being one of the first people to review a transceiver is that I really have no idea what to expect in terms of performance, other than perhaps what the manufacturer’s reputation has taught me over the years. And if the manufacturer is fairly new to me––? Then it’s truly a roll of the dice.
The G90, however, had been on the market for quite a few months, so I simply avoided reading any in-depth reviews so I could form my own opinions. With that said, I knew in advance that this radio is already well-loved by a very active and enthusiastic community of amateur radio operators. So I had only to make up my mind, myself. I got to work.
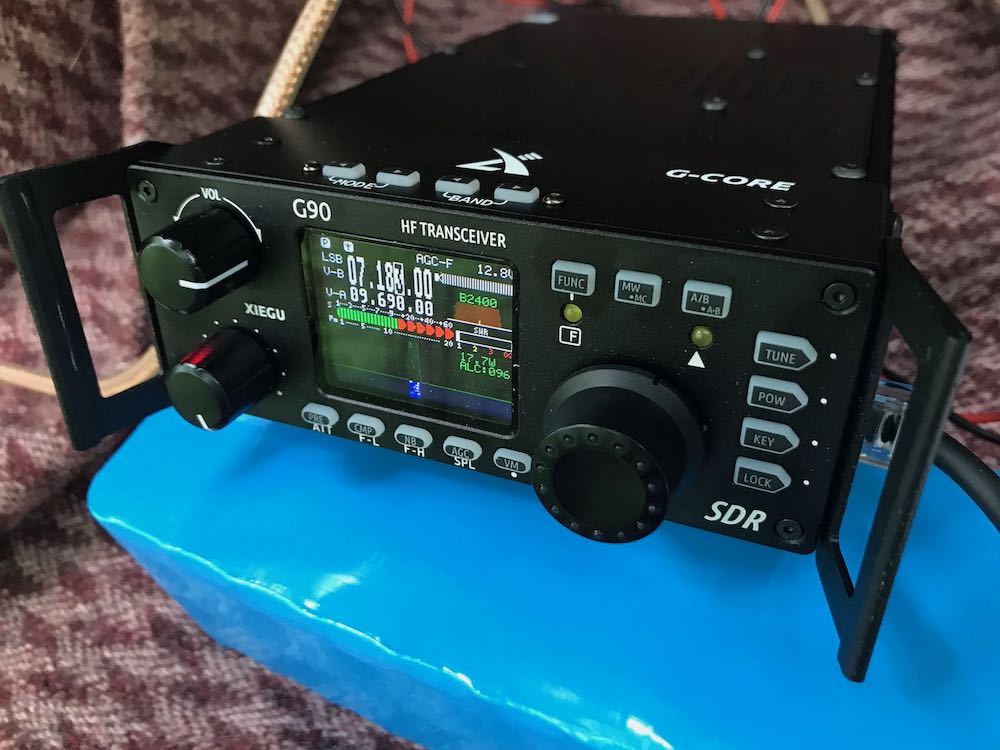
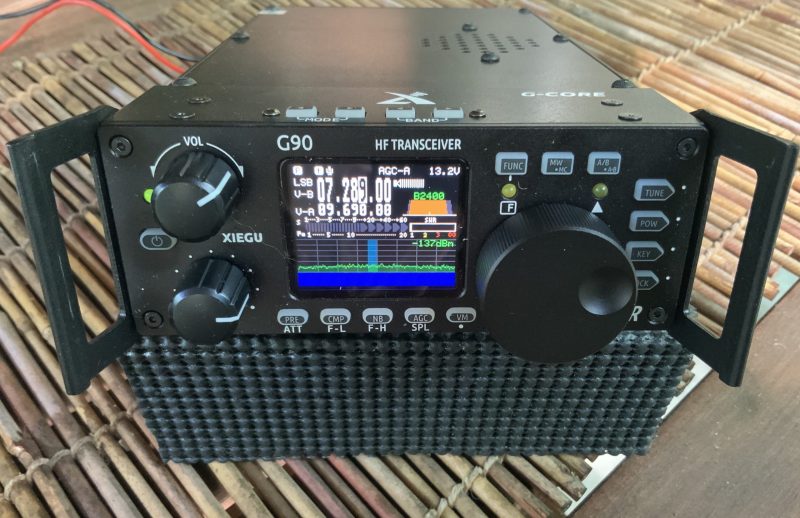
Form-factor
When I first removed the G90 from its box, I was struck by its weight, build quality, and size. First off, it’s a heavy little radio. The Xiegu site notes that the weight of the radio is about 2.2 lbs (1 kg), but perhaps due to its compact size, it felt heavier to me. Indeed, when I placed it on my postal scales, it came in closer to 3 lbs 10 oz. Still a very reasonable weight for a portable radio, but a bit heavier than described.
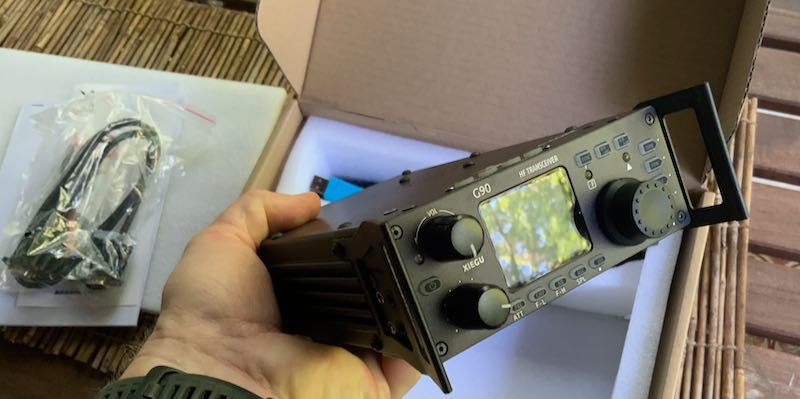
Speaking of size, the G90’s shape is pretty unique. Looking at the radio head-on, it’s reminiscent of most portable QRP transceivers (like the CommRadio CTX-10 or Yaesu FT-818, for example) meaning that the front face is compact. The depth of the radio, though (or length, depending on how you look at it), is about 8.3 inches––or nearly 10” if you include the side panels––equivalent to many of my 100 watt radios.
The build quality of the G90 is truly impressive. Holding it in your hand, you feel like you’ve acquired a quality piece of kit. The chassis is very durable, the buttons have a tactile response, and both the front and rear are protected by built-in side panels (typically side panels would be a third-party addition for most radios).
Audio
Audio from the internal speaker, which is mounted on the top of the radio, is loud and punchy, a desirable attribute for a field radio. Better yet, when you port the audio to an external amplified speaker (headphone jack is on the left side of the radio head), fidelity is quite good. The audio and noise floor, to my ear, is rougher than that of pricier QRP transceivers.
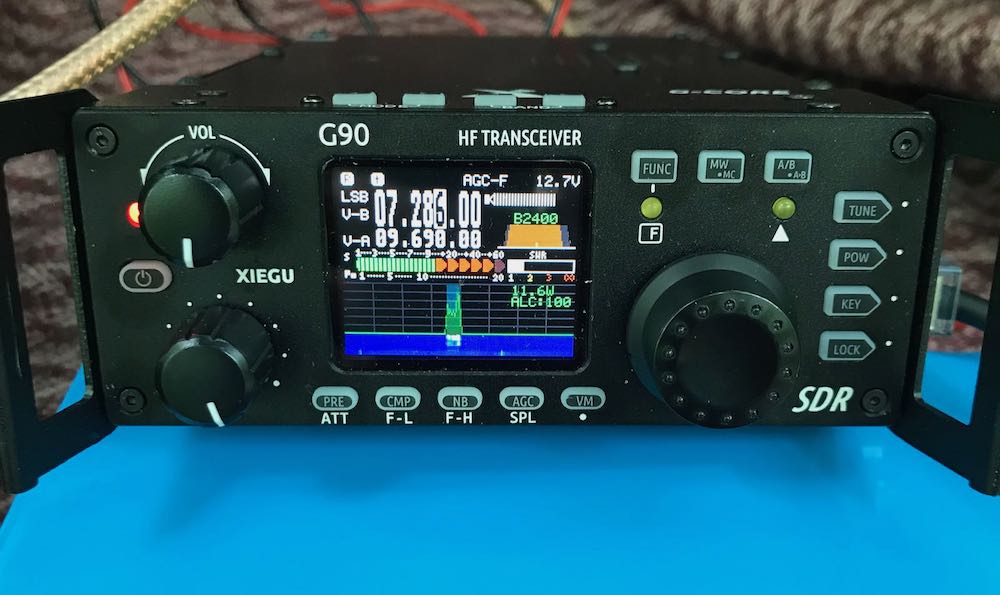
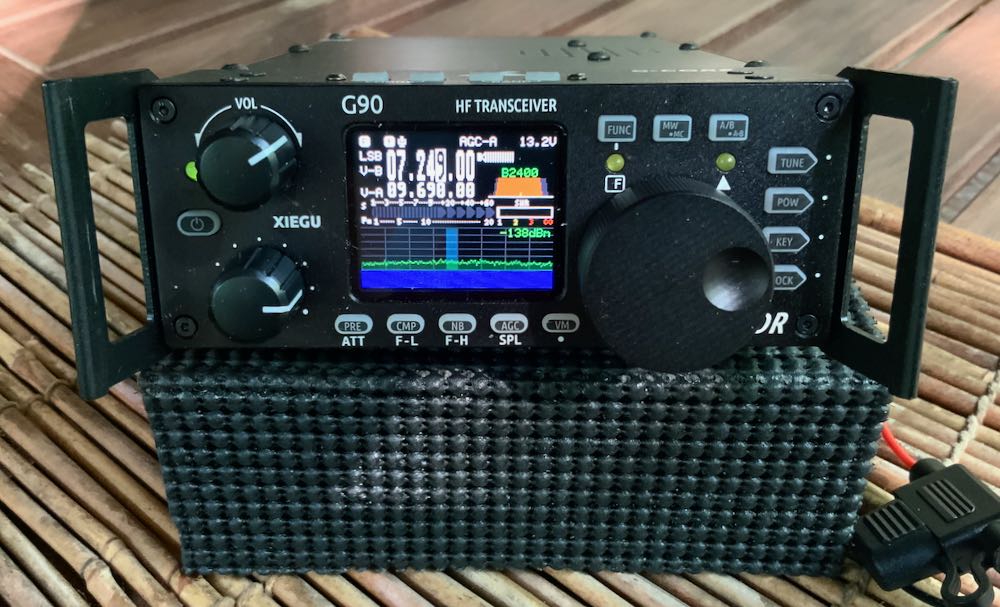
Display
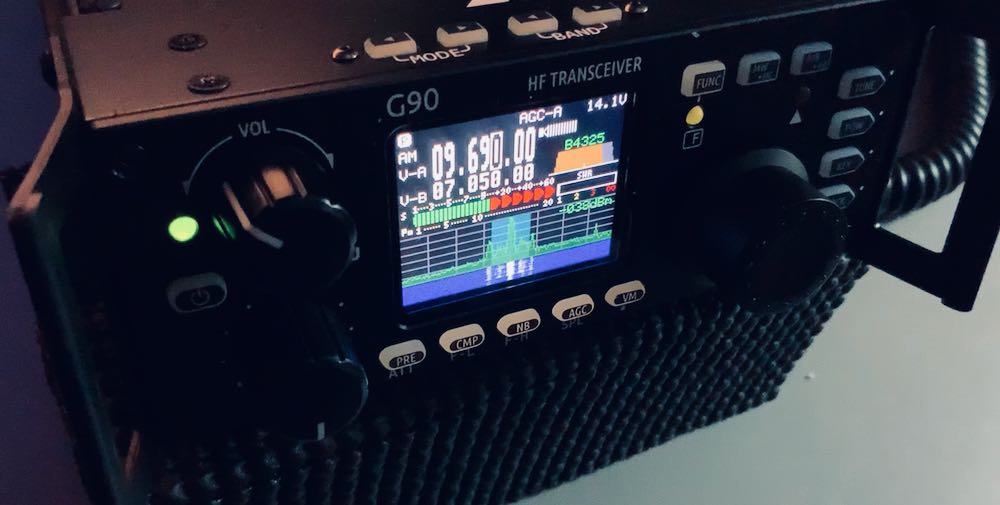
The color TFT LCD screen measures only 1.8,” one of the smallest I’ve ever tested on a radio, but Xiegu did an admirable job laying out the interface so that it’s easy to read at any viewing angle. If you wear reading glasses to read a book, you’ll need them to read this display––some of the numbers and labels are tiny, but very sharp, crisp, and high contrast. I’ve had no difficulty whatsoever reading the display in the field.
What’s more, the spectrum display and waterfall are responsive and in real-time––there’s no delay or averaging which I especially appreciate when chasing CW and SSB signals. Although at first blush one might think the spectrum and waterfall are just too small to be useful, that would be a mistake. I was guilty of this prejudice myself, and now find I rely on the spectrum display to help locate unused frequencies, spot someone calling CQ, and even identify the relative proximity of an adjacent signal. Truly a helpful feature.
Bail
Unfortunately, there’s one very conspicuous omission on the part of the G90 designers: it has no bail nor feet of any sort to support the front of the radio and angle it for ergonomic operation. Herein lies my biggest criticism of this radio, because it truly needs something to prop up the front of the radio for comfortable operation, not to mention, to allow the bottom of the radio to dissipate heat effectively.
There are a number of third-party producers that will supply a bail for the G90, but many are clunky and expensive, and I feel an attached/integrated bail is always best.
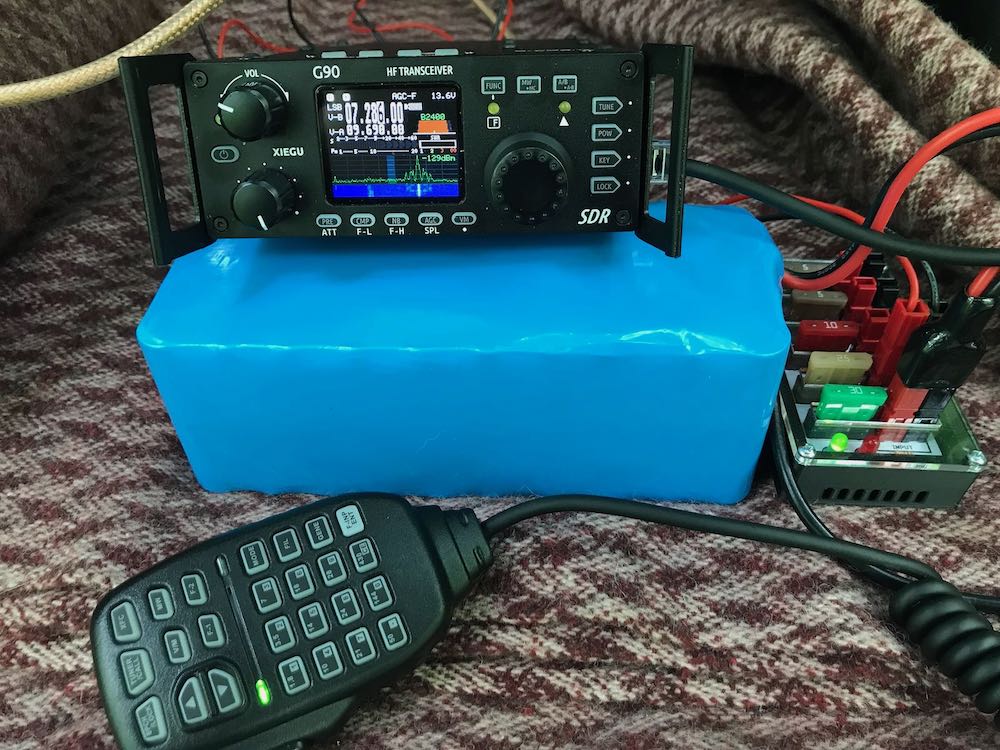
Ad hoc solutions to the fore: in the field, I simply prop the G90 on my
Bioenno 15 aH LiFePo battery; in the shack, I use a small support stand I purchased for my Elecraft KX3. Not as good as a purpose-made bail, but this works.
Microphone
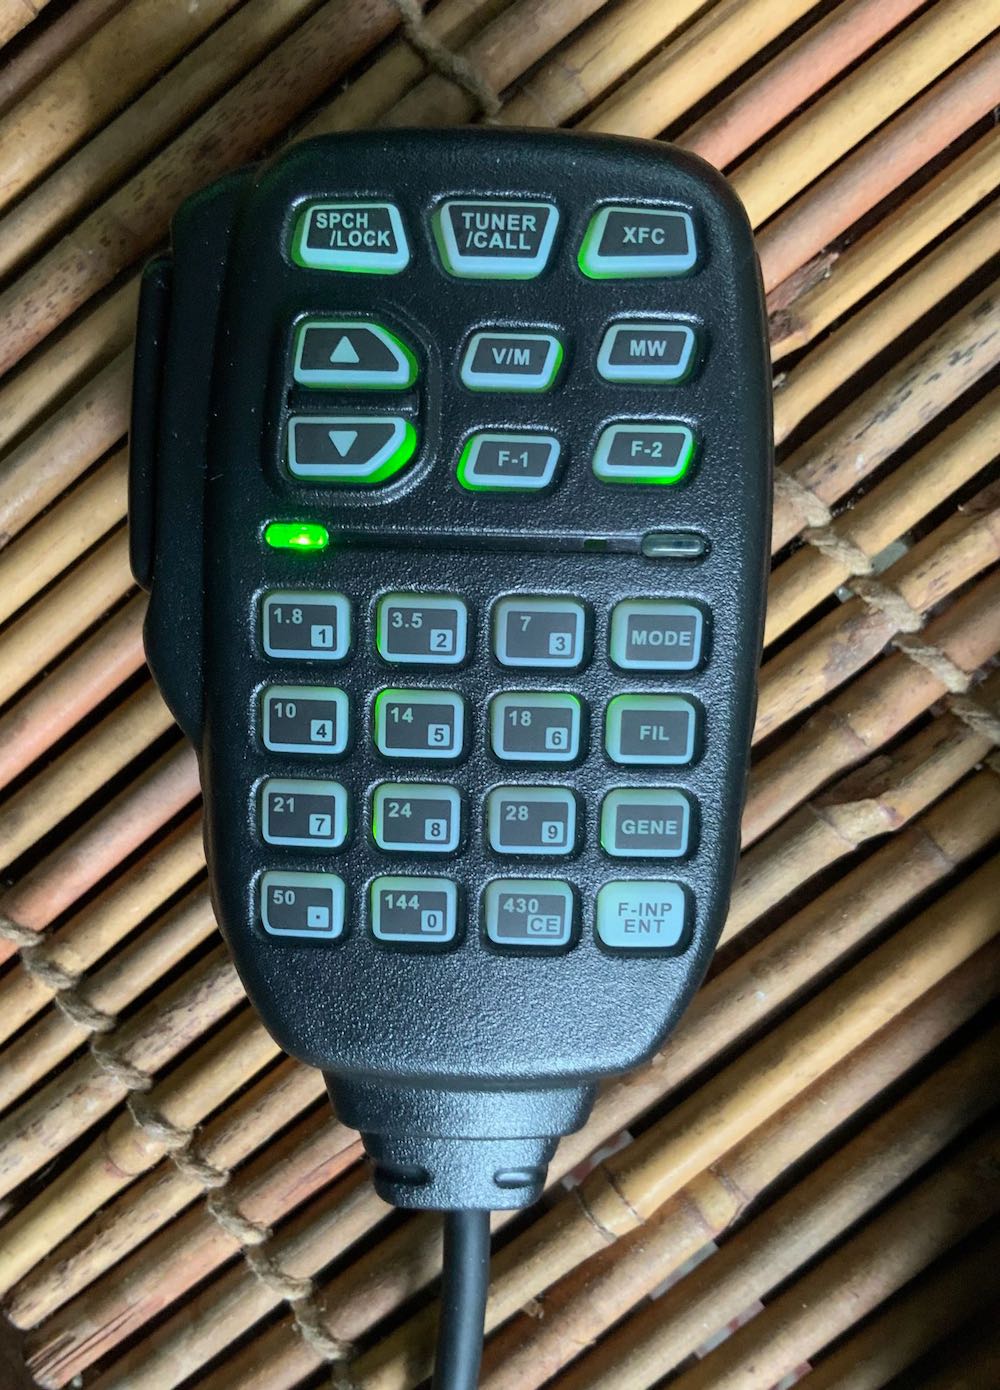 The microphone that accompanies the G90 is what you would expect from a mobile HF rig: almost all functions can be controlled by its backlit keypad. I have read a few reports of people dropping and breaking the supplied mic. Turns out, the Mic’s 8-Pin Modular Plug is configured like a number of Icom radio models, and a replacement mic can be purchased on Amazon for about $22.
Remote head
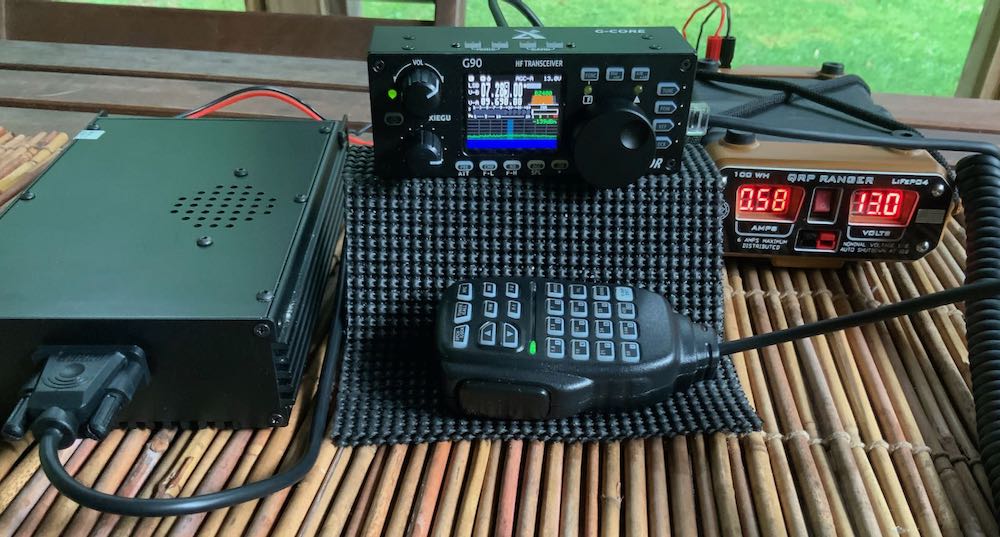
As mentioned earlier, the control head of the G90 can also be separated from the body for use in mobile applications such as a car, RV, or even in the shack. The real surprise here is that the separation cable is included in the package. I’m not sure I’ve ever owned a mobile radio that came with a separation cable––what a luxury! Great addition.
Internal ATU
Another surprise for a radio in this price class: the G90 has a built-in automatic antenna tuner (ATU). When I first made the decision to purchase and review the G90, I didn’t realize this, and in fact would have never guessed it to be a possibility in a $450 transceiver. What’s more, this ATU is one of the best I’ve ever used in the field: it’s quick to match, and seems to find a match with almost any setup. I almost wish Xiegu sold a stand-alone portable ATU so I could use it with my other radios that lack an internal ATU.
Power output
Unlike most of the portable transceivers on the market that have maximum output power of around 5-15 watts, the Xiegu G90 will pump out up to 20 watts. While 90% of all of my ham radio communications are accomplished at 10 watts or below, I’ve appreciated a little extra “juice” while operating in the field.
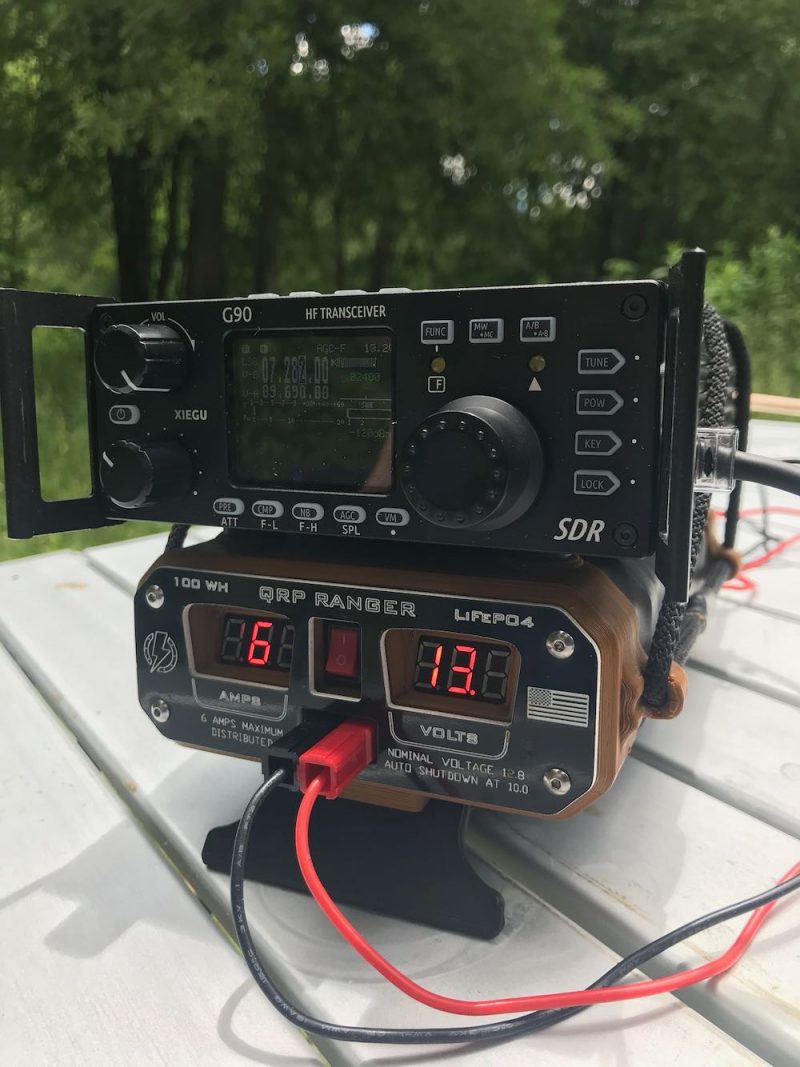
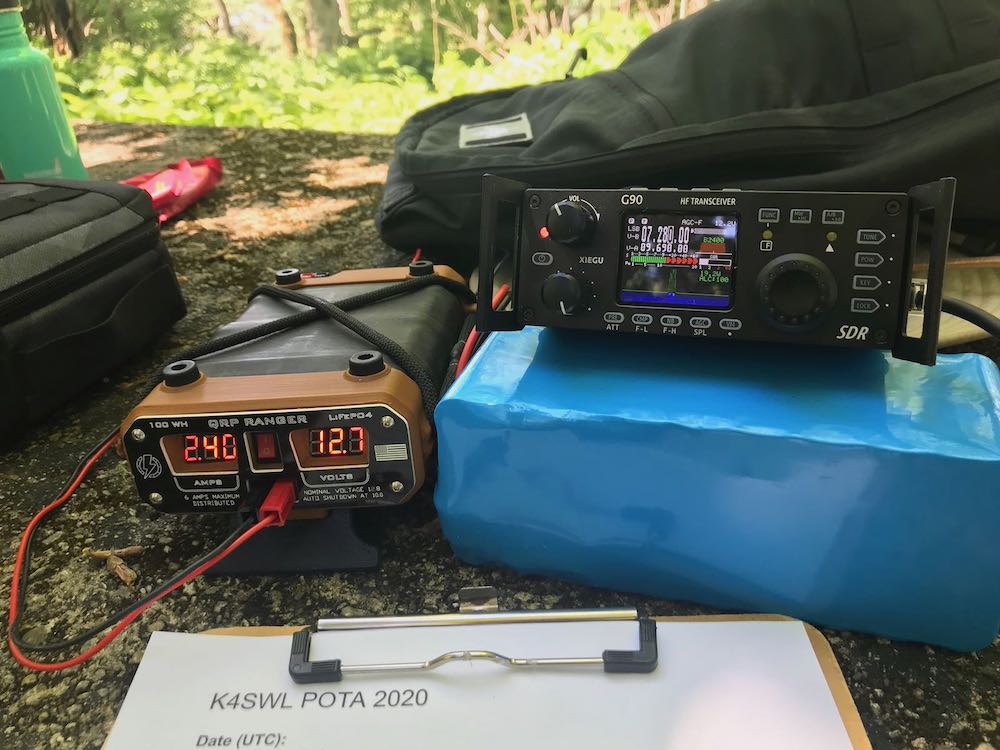
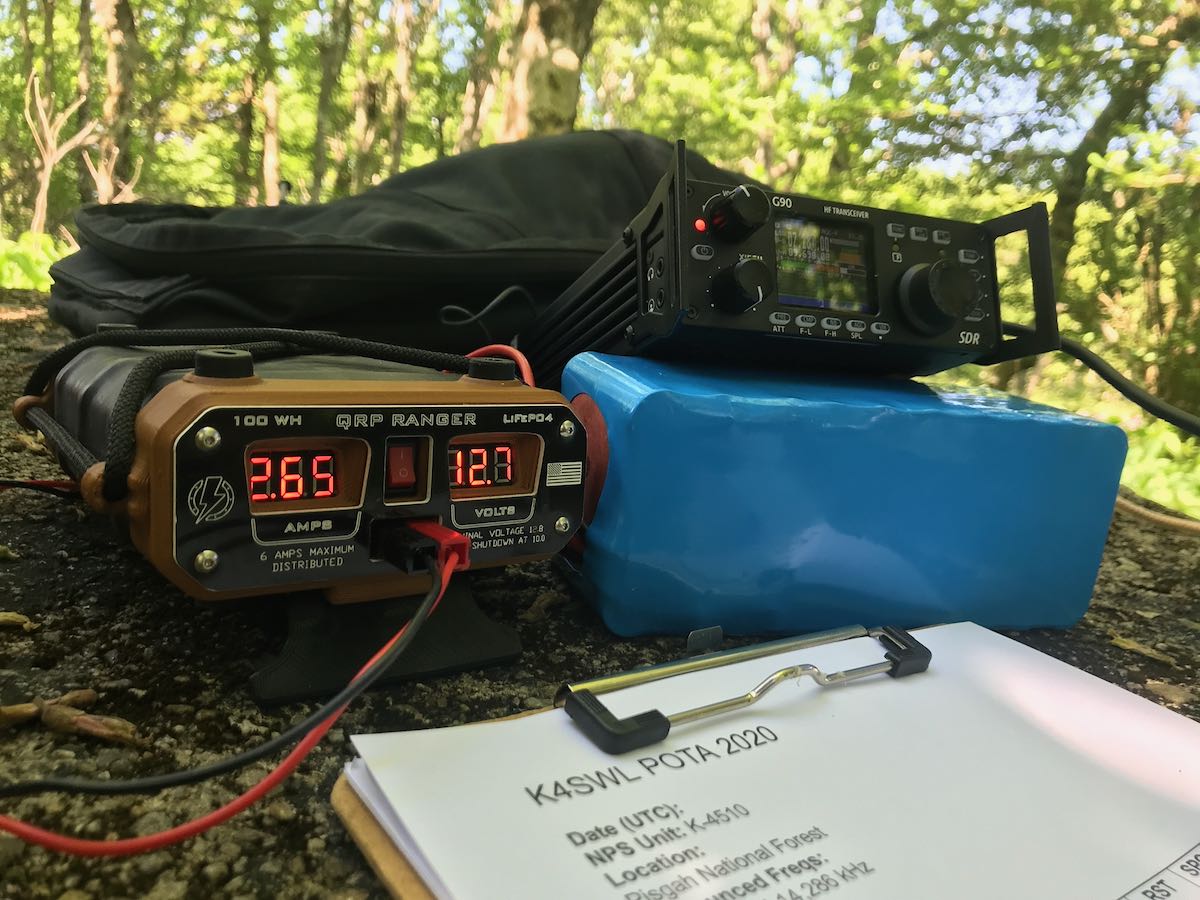
Note: due to the speed of my phone camera, not all of the LED segments of my battery pack are visible.
With all that’s packed into this transceiver, no wonder it’s a heavy little unit!
My conclusion here is that the G90 feels like a quality rig. But how does it perform? Let’s first take a look at how I evaluate the transceiver as a ham radio operator, then as a broadcast listener and SWL.
Ham Radio Operation
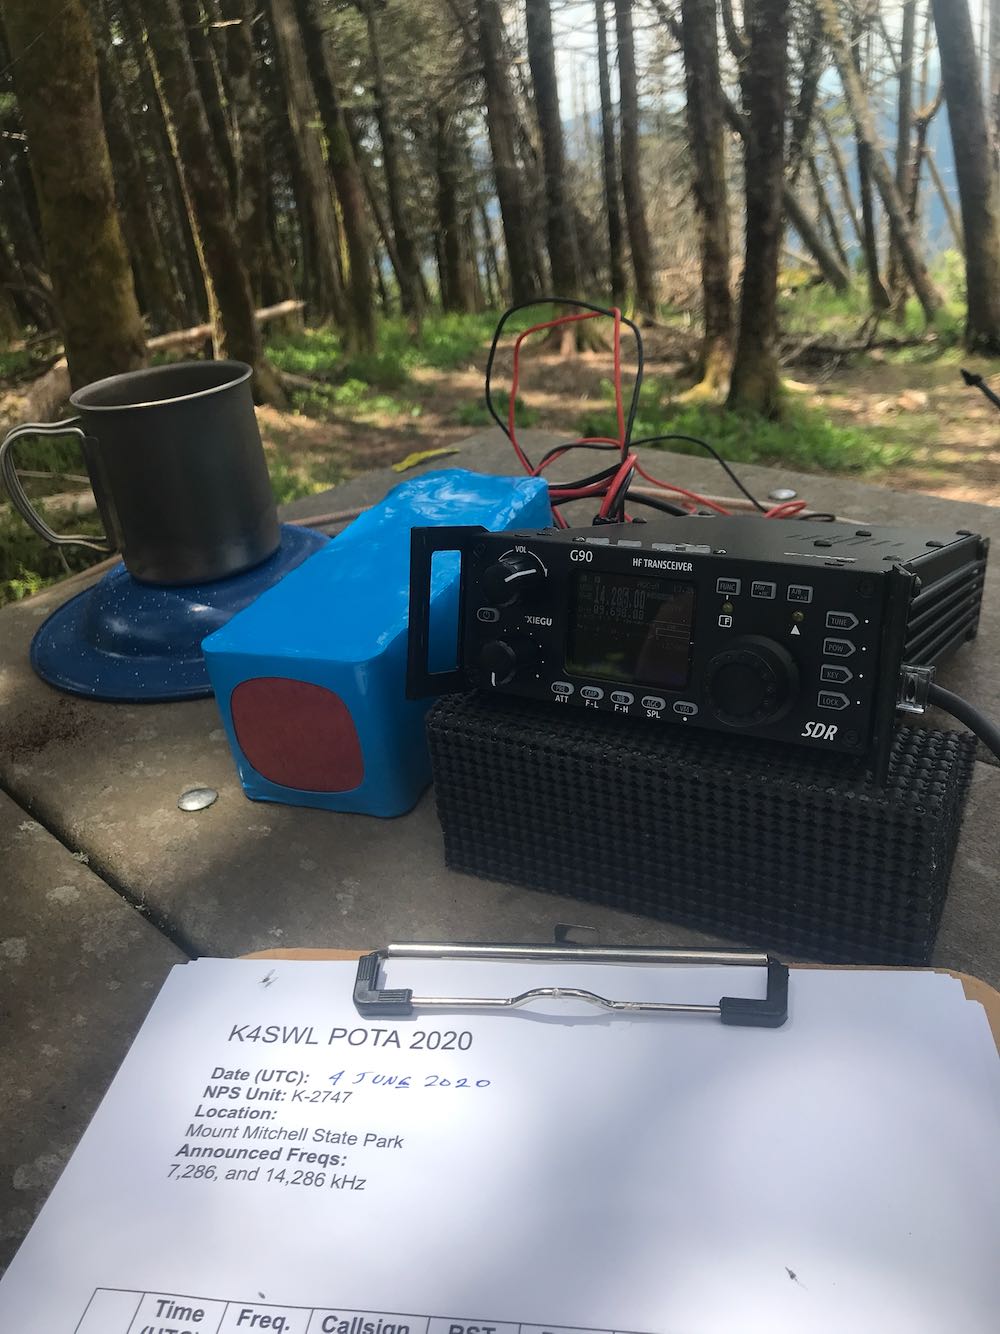
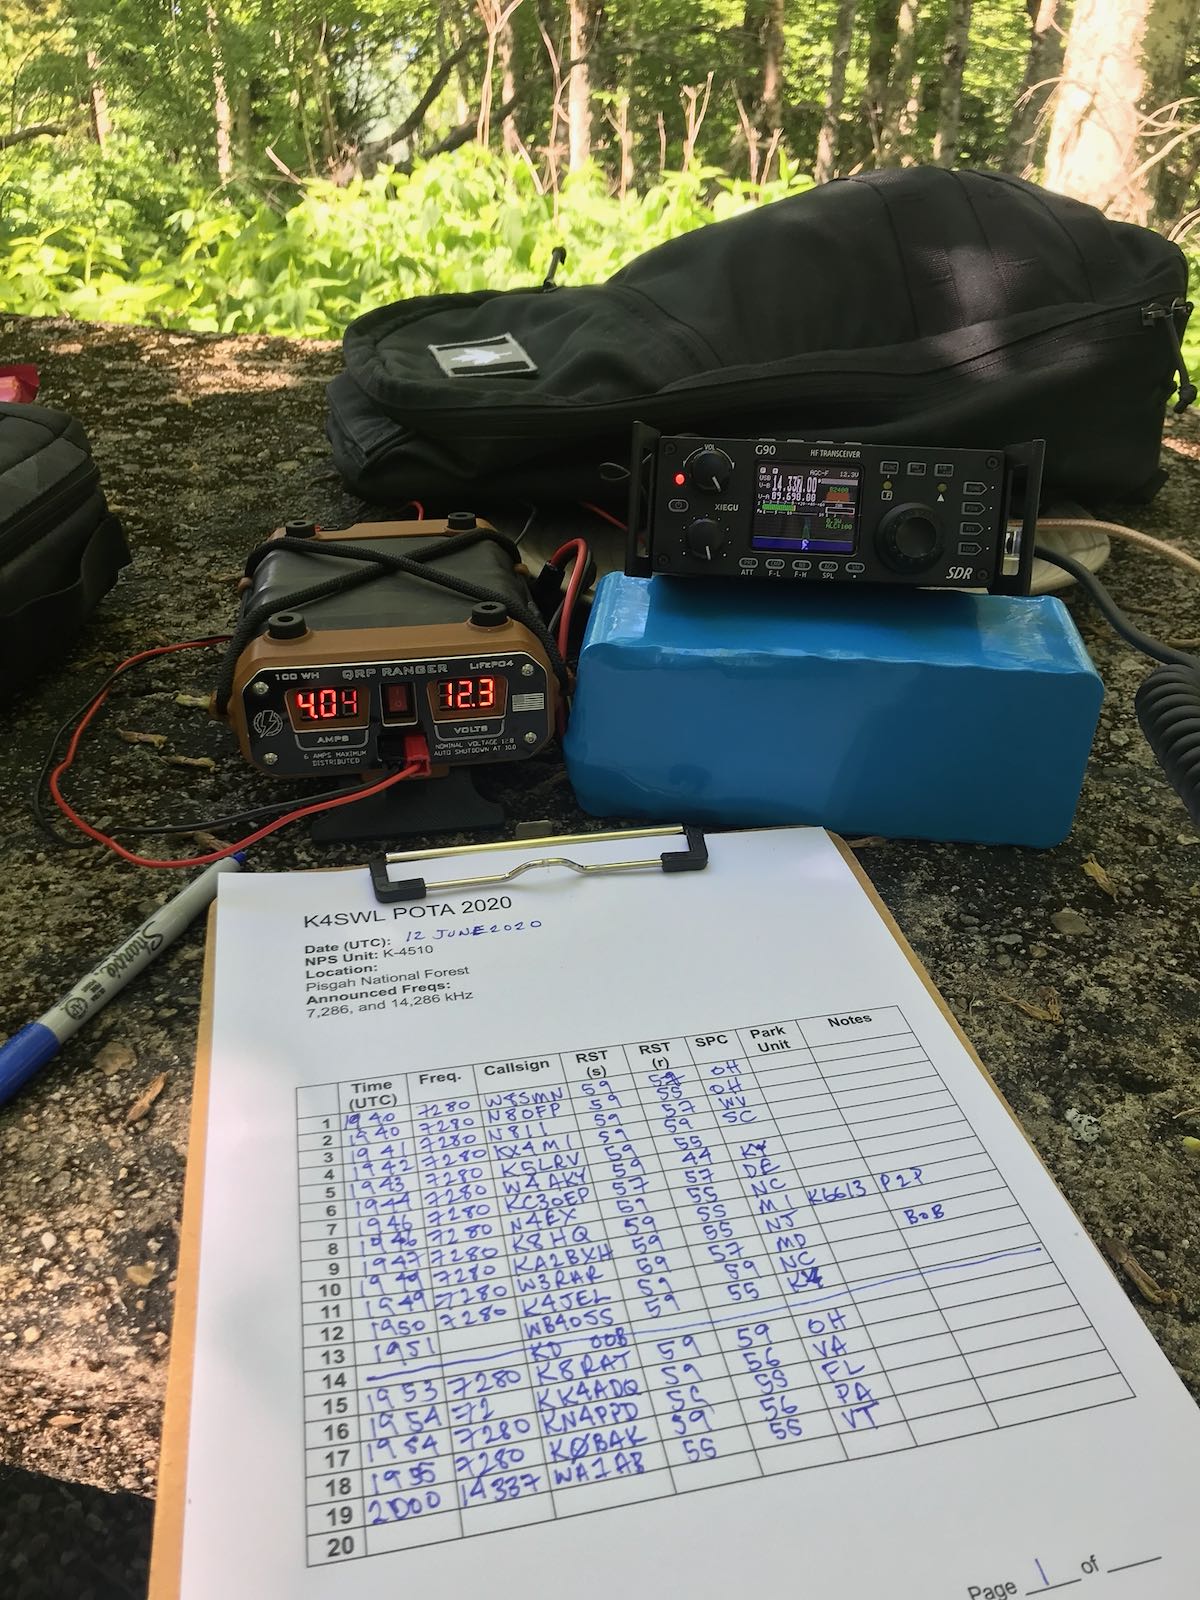
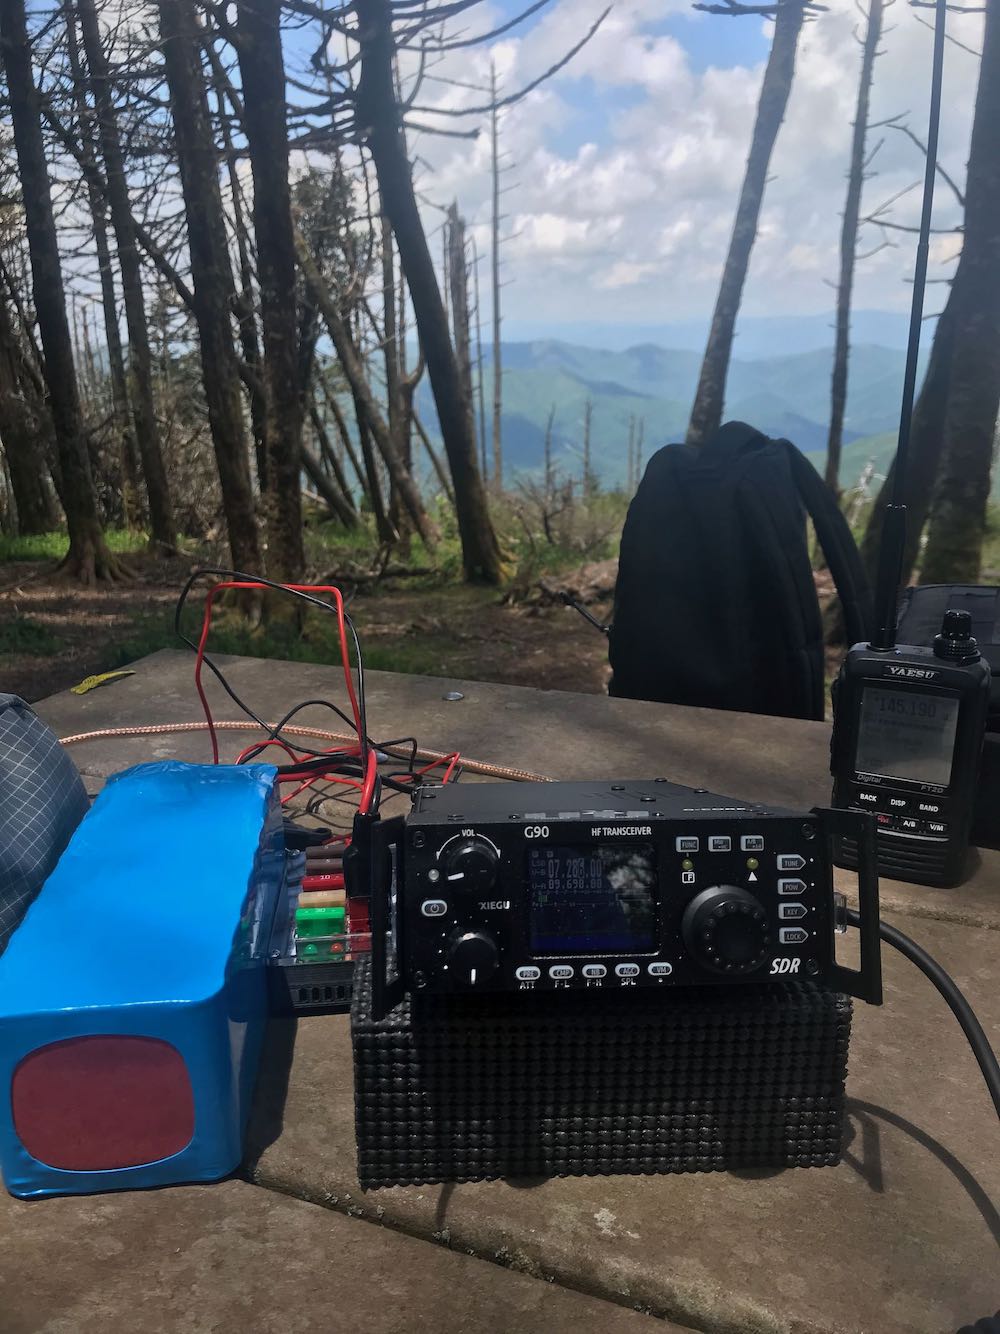 Over one month of operating the G90, most of that time has been in the field, as I’ve taken the radio along for a number of Parks On The Air (POTA) field activations. Although I’ll be commenting about the G90’s performance as a transceiver in general, keep in mind that I do so mainly through the eyes of a field operator.
Although I often dislike operating compact radios due to small buttons and complex embedded menus that supply knobs and buttons with multiple duties, I find operating the G90 surprisingly pleasant. All of the most important functions of the transceiver can be called up with one or two button presses. Obviously, a real ham radio operator played a part in designing the G90’s operation.
Tuning the G90 is a simple process. The main encoder, of course, allows you to tune up/down the band. By short-pressing the encoder knob, you can change between the hundreds, tens, ones, tenths, and one-hundredths of a kHz. In fact, it’s very simple to move around a band this way. The encoder action is defined by detents that you feel as you rotate the knob. Normally I’m not a fan of detents on a radio’s main encoder knob, but since this one is so small, I think I actually prefer it as a means to control the spinning action. There is no brake adjustment.
Upgraded G90 Encoder
The supplied encoder knob is made of plastic and has dimples on the front to give your finger a bit of grip as you tune up or down. Upon the recommendation of a friend, I purchased a third-party dimpled aluminum knob to replace it––a major upgrade for a modest $8 investment!
Changing between bands and modes is very simple with the G90. There are dedicated band and mode up/down buttons on top of the radio’s front panel much like those on the venerable Yaesu FT-817 and 818 series. The G90 defaults to ham radio band allocations, but there is a menu setting that allows you to also include broadcast bands between band changes. Nice touch.
There is a dedicated AF gain control on the front of the radio. After receiving the radio, I was disappointed by the lack of an RF gain control, something I use a lot during noisy band conditions. Fortunately, Xiegu included an RF Gain control in one of the latest firmware updates: to access it, simply press and hold the AGC button, then make adjustments to the RF Gain percentage with the main encoder. The G90 defaults to a 50% setting. While I’m not really sure what this setting means, I do find the RF gain control quite effective, even though it doesn’t respond like a legacy receiver’s RF gain control.
The Xiegu G90 has a simple and effective variable-filter control: simply press the FUNC button then the CMP button, and use the encoder to adjust the low end of the filter. To adjust the high end, press the FUNC and NB button in the same way. I love the fact that the filter can be adjusted from both the high and low ends, and that it’s variable instead of set at predetermined fixed widths such as “wide” and “narrow.” All mode filters are adjusted in this fashion.
CW Mode
The G90 is a capable CW transceiver and should please the CW operator. The keyer speed, ratio, auto modes, and paddle setup are all accessible from the KEY function button. By pressing the FUNC and Key buttons, you can access the CW volume and tone parameters. The G90 also allows you to turn on a QSK function and adjust the hang time. The G90’s version of QSK isn’t the full-break-in variety you might find in, say, the Elecraft KX series radios. Meaning, while the hang time is very short, if sending at high speed you won’t be able to hear another station break in between your characters. You will note a slight relay click. With that said, I find the QSK mode to be quite effective for my use because I’m not really a “full-break-in” kind of operator.

The yellow CW tune LED on the front of the G90. Some might find it distracting if engaged.
Speaking of CW, the G90 features a CW tune feature that indicates when you’ve locked onto a CW signal: a yellow LED will flash as CW is received. While I find this feature a bit distracting, I’m sure some operators will appreciate it. In addition, the G90 features a CW reader that will decode CW when a station is properly tuned in and isolated from others.
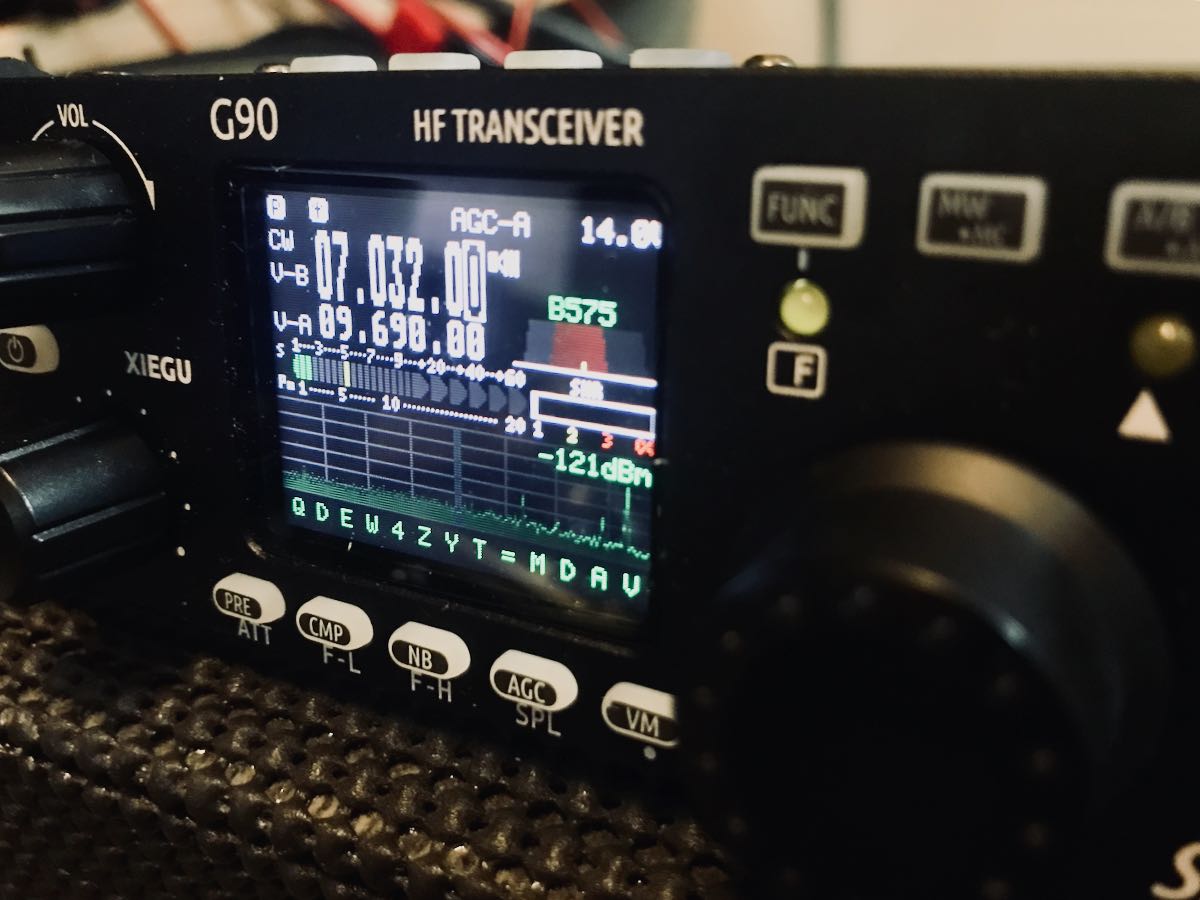
Note the CW decode at the bottom of the display.
In the field, this feature has helped me confirm call signs––but like most transceiver CW readers, it’s not always accurate, especially if the CW operator on the other end uses a hand key or bug. Still: a welcome feature.
SSB mode
 Most of my operating time on the G90 has been in SSB mode, and I’ve been very pleased with the radio’s performance in this mode. The G90 allows you to adjust the mic gain and enable compression. I’ve gotten excellent audio reports from the numerous SSB contacts I’ve made on the G90.
I should note here that although I feel you get much more radio than you pay for with the G90, I do wish it had a voice keyer. Especially when I’m activating a park via POTA, I call CQ a lot. With my Elecraft KX3 and KX2, for example, I set the voice keyer to “beacon” mode which allows me to pre-record a CQ and have it playback the message on a loop with a few seconds in between to allow me to recognize anyone replying to my call. I rely so heavily on this feature for SSB park activations, just to save my voice, I know the G90 can never displace my Elecraft field radios. Again, I wouldn’t expect such a feature in this price class, but it would make for a near ideal field radio.
Digital modes
One thing that surprised me about the G90––especially since it is an SDR––is that operating digital modes is less “native” than I would have expected. Many modern SDR transceivers make setting up for modes like FT8 relatively easy with both CAT control and often the radio itself is identified as a sound card, thus no external interface is needed. When I decided to try running FT8 on the G90, I was discouraged by the fact that setup is much more like that of a legacy radio. Indeed, many users have had communication issues with popular software packages.
Since I wanted to test the G90 as a field radio and since I do very little FT8 in the field, I simply omitted testing this functionality. I have read that many operators have, of course, been able to successfully use the G90 for digital modes, but be prepared to read through the G90 email discussion group (see link at end of article) for best practices.
Update: SWLing Post contributor, David White, brings up one fine point about the G90’s VOX control. “I use that feature for TX control when running any of the digital modes with the laptop audio in/out going through the rear AUX connection.” Thanks for pointing this out, David. VOX control really facilitates using digital modes because the radio can detect audio comping from the computer and engage transmit without having to use CAT control of any sort.
Receiver Performance
Overall, I’m favorably impressed with the G90’s receiver. Both sensitivity and selectivity are above par, especially for a radio in this price class. The G90’s noise floor is acceptable, though not as low as that of my Elecraft radios. I do find that with the G90, I often need to ride the RF gain control in our noisy summer band conditions. I find that by adjusting the RF Gain and selecting the most effective AGC setting, I’m able to achieve an excellent signal-to-noise ratio. I find the G90 audio a bit fatiguing when I’m operating for long periods of time–at least, compared to some of my other transceivers.
In a nutshell: the G90 packs a lot of performance in an affordable radio, especially if you’re willing to tailor the filter settings, AGC, and RF gain to best accommodate the conditions.
Field notes
I’ve been very pleased with how long I can operate on battery power with the G90. Even with the display backlit set to 80% and with the volume set to high, I found that the maximum amperage the G90 would consume was about 0.60 amps. While I wouldn’t consider that benchmark, it is respectable.
I also like the G90’s built-in antenna analyzer. By pressing and holding the POW button, the G90 will display a graph showing the SWR figures across your specified frequency range. A brilliant and handy feature in the field! It’s important to note, though, that during the test the radio is transmitting a little RF so don’t try it with a receive-only antenna.
I do find that the G90’s body gets pretty warm–downright hot–when activating a park. It’s no wonder, really, because I often end up calling CQ at five second intervals over the course of 60-90 minutes on average. That’s demanding a lot of a fanless radio, thus it gets very warm to the touch. Still, while I never had any overheating issues, I’ve also never operated the radio in direct sunlight for extended periods of time and I’ve always propped up the radio so that air can flow underneath the chassis. Again, if for no other reason than to dissipate heat, Xiegu should have incorporated a bail or folding feet. As much as I love the front and back panel extension, I would have chosen a bail over these.
Broadcast listening
While broadcast listening is often an afterthought for most ham radio operators, it never is for me. I like to travel lightly and I like my QRP transceiver to double-duty as a tool for SWLing.
From day one, I have spent a great deal of time with the G90 across the broadcast bands.
Shortwave
One of the main reasons I decided to review the Xiegu G90 is because I found so little information out there about how well the general coverage receiver worked for HF broadcast listening. The G90 has a frequency range of 0.5-30 MHz (SSB, CW, and AM).
But I couldn’t find a specification showing the maximum width of the AM filter. In a few display photos with the AM filter width was indicated as 5.4 kHz––if this was so, I concluded, it was fairly workable if not particularly wide. However, only moments after opening the box and putting the G90 on the air, I tuned to the Voice of Greece (9,420 kHz) and learned how to change the AM bandwidth. I was very pleased to find that in AM mode, that indicated filter width is only half the actual width: this means the G90’s AM filter can actually be widened to 10.8 kHz––brilliant!
In short, I’ve been very pleased using the G90 for shortwave broadcast listening; it has exceeded my expectations. I find that in terms of both sensitivity and selectivity, it offers performance on par with a dedicated receiver.
For an idea of how the G90 sounds on shortwave with its internal speaker only, check out the following videos:
The Voice of Greece
Radio Nacional De España
Broadcast listening is basic with general coverage transceivers: the G90 has no synchronous detector with selectable sidebands, for example. G90 users have requested this feature in a future firmware update, but I wouldn’t hold my breath in anticipation. I imagine G90 developers will be more concerned with ham radio-specific functionality.
Mediumwave
Let’s face it: Asking the G90 or any ham radio transceiver to perform on the mediumwave/AM broadcast band is asking it to do something it was never designed to do.
With that said, I have been very pleased with the G90 on the AM broadcast band.
Audio fidelity is excellent, especially with the AM filter widened appropriately and when using an external speaker or headphones.
The G90 performs so well between about 900-1700 kHz, I have even done some proper mediumwave DXing with it.
Below 900 kHz, I’m still able to tune strong and weak stations, but I have found some odd behavior with imaging as I tuned down to 500 kHz: some stations would move across the spectrum display in the opposite direction to which I was moving the encoder. I suspect this may be due to a very strong local station near me on 1010 kHz that was overloading the front end.
Again, however, I never expected any reasonable performance on mediumwave–especially since many transceiver manufacturers intentionally attenuate those frequencies, so I’ll accept any quirks it may have here and consider any G90 mediumwave functionality at all simply icing on the cake.
Important caveat for the broadcast listener
 While, overall, I’ve been super pleased listening to the shortwave and mediumwave with the G90, there is (at time of publishing) a major drawback for anyone who would like to use the G90 exclusively as a stand-alone receiver: there is no way to completely disable the transmitter.
The lowest power setting on the G90 is 1 watt. While that’s not a lot, it’s more than enough to fry your amplified magnetic loop antenna, for example. So, please use caution.
Although you could make it more difficult to transmit by not hooking up the microphone or a key (of course), there’s no way to disengage the internal ATU. If you accidentally press and hold the TUN button, it will engage the ATU and transmit.
In addition, if you press and hold the POW button, you will engage the antenna analyser function which will also inject RF as it sweeps across the bands testing the antenna’s standing-wave ratio.
Based on a suggestion, I even tried setting up the G90 in split mode with the transmit frequency set well outside the meter band I was operating. I thought by having the transmit frequency out-of-band, it would keep the radio from transmitting. Turns out, I discovered a bug in the G90. When you perform this procedure, it essentially bypasses the safeguards that keep an operator from transmitting out-of-band. Since this is public now, I assume it will be addressed in a future firmware update.
And, as careful as I am as an operator, I would never hook my G90 up to an active receiving antenna for this very reason. While I’m sure there’s probably a hardware modification to kill the transmitter section on the G90, it would be brilliant if Xiegu developers include a function via a firmware update to snuff transmit. At the very least, perhaps they could devise a way to disengage the ATU and antenna analyser functions via firmware.
Summary
Every radio has its pros and cons. When I begin a review of a radio, I take notes from the very beginning so that I don’t forget my initial impressions and observations. Here’s the G90’s list, from the first moments I turned it on to the time of writing this review:
Pros:
- Amazing “bang-for-buck”––a lot of radio for the money
- Crisp, easy-to-read backlit color display
- Detachable control head, cables included
- Built-in side panel protection for head and back
- AM broadcast listening
- Excellent shortwave reception
- Capable mediumwave performance
- 20 watts power output
- Mic can control all-important radio functions, including direct frequency entry
- Very good audio from internal speaker
Cons:
- No built-in bail
- No manual or auto notch filter
- Very few options for customizing the display
- (Minor) Firmware updates must be made to faceplate and transceiver body separately
- MW: some weird functionality below 800-900 kHz (eg, images in opposite direction)
- No voice keyer
- No CW memory keyer
- No internal battery option
- Cannot lower power output below 1 watt, cannot disable transmit
- Bottom of chassis gets hot during prolonged periods of operation
- ARRL and Sherwood testing shows key clicks in transmit
- Received audio a bit fatiguing over long listening sessions
Conclusion
 Despite the shortcomings above, I have to say: the Xiegu G90 has exceeded my expectations, and then some.
Without a doubt, the G90 is a solid radio and a steal at $450 US. If you’ve always wanted a field-friendly portable transceiver, but didn’t want to shell out a lot of money, you can buy the Xiegu G90 for the same price you might pay for a two year-old iPhone. Impressive.
Although the G90 is a budget radio, it doesn’t play like one. Performance is on par with a radio twice its price and not only does it pack a lot of extras––like an internal ATU, mobile-worthy control microphone and detachable faceplate––those extras actually work just as they should. Nothing about this radio feels “cheap.” In fact, I’d be more inclined to call it a little workhorse of a radio.
To answer a question I asked myself early in this process: will the G90 displace my Elecraft KX2 as my field radio of choice? No, but that’s because I already own the KX2 and find that it fits my operating style better than any other transceiver I’ve owned thus far. Yes, I still prefer the KX2’s operation, performance and versatility over that of the G90–it’s more refined–but the former is more than twice the price when similarly configured.
I think the G90 would also make for a stellar beginner’s radio, as it is a totally self-contained station; simply apply power, and play!
In short, I’m pleased to report that I’ve finally found a very affordable radio that’s a basic solid performer, and I look forward to further offerings from Xiegu.
Resources
Retailers
Do you enjoy the SWLing Post?
Please consider supporting us via Patreon or our Coffee Fund!
Your support makes articles like this one possible. Thank you!