Category Archives: Tutorials

Guest Post: London Shortwave’s guide to mitigating urban radio interference

London-Urban-CityMany thanks to SWLing Post contributor, London Shortwave, who is kindly sharing this guest post–a brilliant article he recently posted on his own website.

I’m very grateful: one of the most common questions I’m asked by readers is how to cope with the radio interference so many listeners and amateur radio operators experience in high-density, urban areas. If this is you, you’re in for a treat–just keep reading:


Dealing with Urban Radio Interference on Shortwave

by London Shortwave

Shortwave radio listening is an exciting hobby, but for many of us city dwellers who either got back into it recently or tried it out for the first time not long ago, the first experience was a disappointing one: we could barely hear anything! Station signals, even the supposedly stronger ones, were buried in many different types of static and humming sounds. Why does this happen? The levels of urban radio frequency interference, or RFI, have increased dramatically in the last two decades and the proliferation of poorly engineered electronic gadgets is largely to blame. Plasma televisions, WiFi routers, badly designed switching power adapters and Ethernet Over Powerlines (also known as powerline network technology, or PLT) all severely pollute the shortwave part of the radio spectrum.

Does this mean we should give up trying to enjoy this fascinating medium and revert to using the TuneIn app on our smartphones? Certainly not! There are many angles from which we can attack this problem, and I shall outline a few of them below.

Get a good radio

The old adage “you get what you pay for” certainly holds true even when it comes to such “vintage” technologies as shortwave radio. Believe it or not, a poorly designed receiver can itself be the biggest source of noise on the bands. That is because many modern radios use embedded microprocessors and microcontrollers, which, if poorly installed, can generate interference. If the receiver comes with a badly designed power supply, that too can generate a lot of noise.

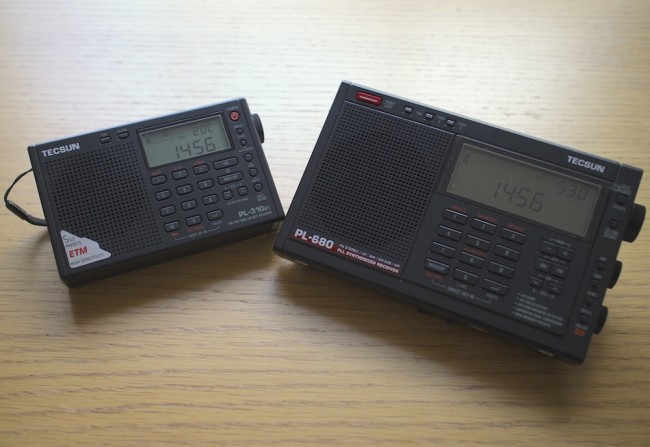
So how does one go about choosing a good radio? SWLing.com and eHam.net have fantastic radio review sections, which will help you choose a robust receiver that has withstood the test of time. My personal favourites in the portable category are Tecsun PL310-ET and Tecsun PL680. If you want a desktop radio, investigate the type of power supply it needs and find out whether you can get one that generates a minimal amount of noise.

It is also worth noting that indoor shortwave reception is usually best near windows with at least a partial view of the sky.

Tecsun PL310-ET and Tecsun PL680, my two favourite portable shortwave radios.

Tecsun PL310-ET and Tecsun PL680, my two favourite portable shortwave radios.

Identify and switch off noisy appliances

Many indoor electrical appliances generate significant RFI on the shortwave bands. Examples include:

  • Plasma televisions
  • Laptop, and other switching-type power supplies
  • Mobile phone chargers
  • Dimmer switches
  • Washing machines / dishwashers
  • Amplified television antennas
  • Halogen lighting
  • LED lighting
  • Badly constructed electrical heaters
  • Mains extension leads with LED lights

Identify as many of these as you can and switch them all off. Then turn them back on one by one and monitor the noise situation with your shortwave radio. You will most likely find at least a few offending devices within your home.

Install an outdoor antenna

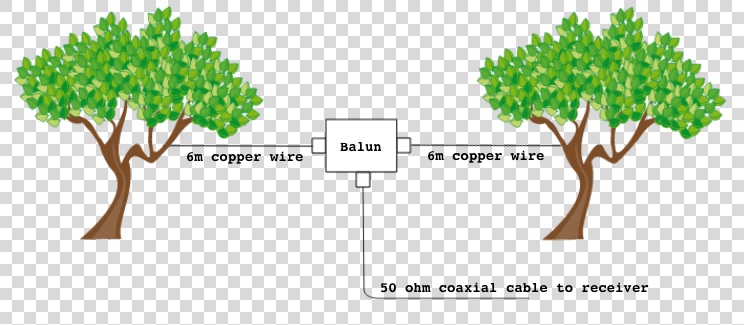
If you have searched your home for everything you can possibly turn off to make reception less noisy but aren’t satisfied with the results, you might want to look into installing and outdoor antenna. That will be particularly effective if you live in a detached or a semi-detached property and have a garden of some sort. Of course, you will need a radio that has an external antenna input, but as for the antenna itself, a simple copper wire of several metres will do. An important trick is making sure that the noise from inside your home doesn’t travel along your antenna, thus negating the advantage of having the latter installed outside. There are many ways of achieving this, but I will suggest a configuration that has worked well for me in the past.

Fig.1 Schematic for an outdoor dipole antenna.

Fig.1 Schematic for an outdoor dipole antenna.

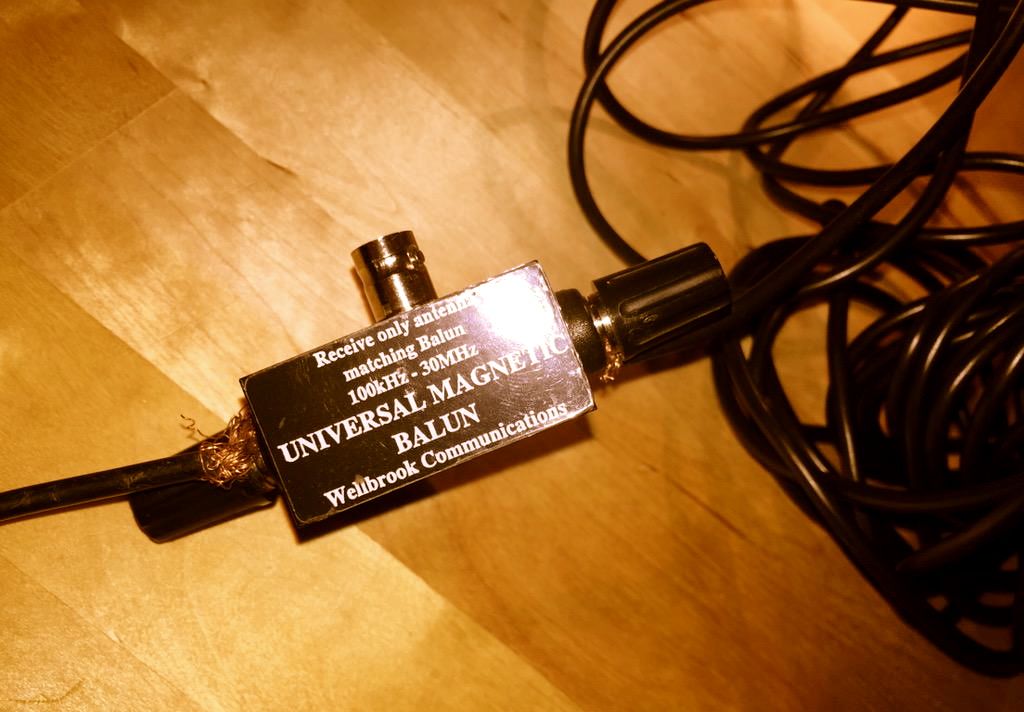
I have used a three-terminal balun (positioned outdoors), and connected two 6 metre copper wires to its antenna terminals to create a dipole. I then connected the balun to the radio indoors through the feed line terminal using a 50? coaxial cable. In the most general terms, the current that is generated in the antenna wires by the radio waves flows from one end of the dipole into the other, and a portion of this current flows down the feed line into your radio. The balun I have used (Wellbrook UMB130) is engineered in a way that prevents the radio noise current from inside your house flowing into the receiving part of the antenna.

Wellbrook UMB130 balun with the feed line terminal disconnected

Wellbrook UMB130 balun with the feed line terminal disconnected

Antenna preselectors

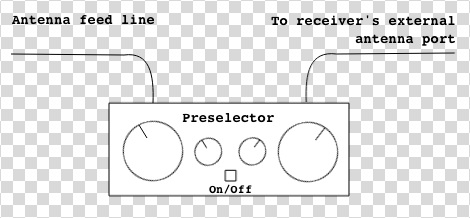
There is a catch with using an outdoor antenna described above — the signals coming into your radio will be a lot stronger than what would be picked up by the radio’s built-in “whip” antenna. This can overload the receiver and you will then hear many signals from different parts of the shortwave spectrum “mixing in” with the station you are trying to listen to. An antenna preselector solves this problem by allowing signals from a small yet adjustable part of the spectrum to reach your radio, while blocking the others. You can think of it as an additional tuner that helps your radio reject unwanted frequencies.

Fig.2 Schematic of a preselector inserted between the outdoor antenna and the receiver

Fig.2 Schematic of a preselector inserted between the outdoor antenna and the receiver

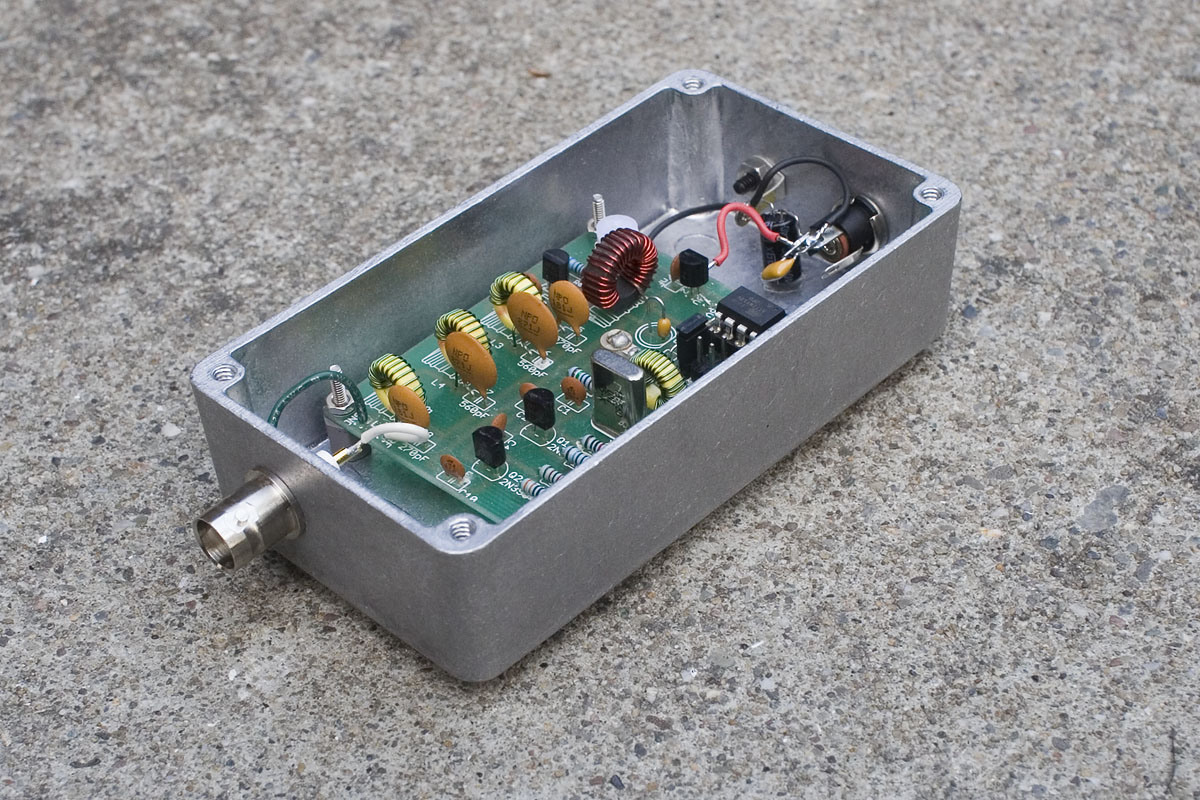
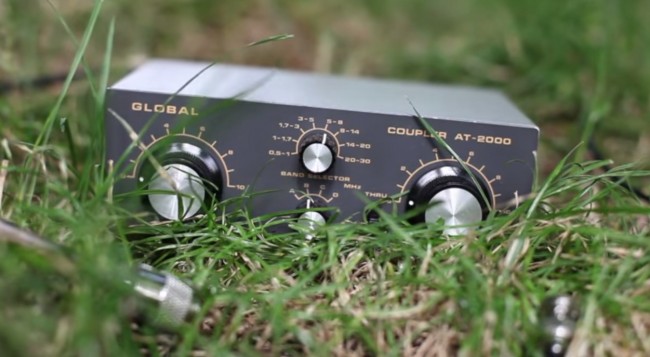
There are many antenna preselectors available on the market but I can particularly recommend Global AT-2000. Although no longer manufactured, many used units can be found on eBay.

Global AT-2000 antenna coupler and preselector

Global AT-2000 antenna coupler and preselector

Risk of lightning

lightning

Any outdoor antenna presents the risk of a lightning strike reaching inside your home with devastating and potentially lethal consequences. Always disconnect the antenna from the receiver and leave the feed line cable outside when not listening to the radio or when there is a chance of a thunderstorm in your area.

Get a magnetic loop antenna

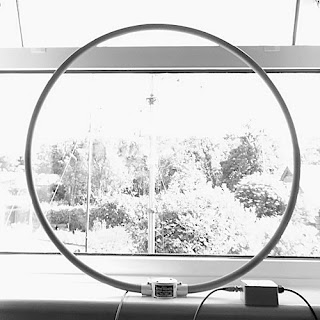
A broadband loop antenna (image courtesy of wellbrook.uk.com)

A broadband loop antenna (image courtesy of wellbrook.uk.com)

The outdoor long wire antenna worked well for me when I stayed at a suburban property with access to the garden, but when I moved into an apartment well above the ground floor and without a balcony, I realised that I needed a different solution. Having googled around I found several amateur radio websites talking about the indoor use of magnetic loop receive-only active antennas (in this case, “active” means that the antenna requires an input voltage to work). The claim was that such antennas respond “primarily to the magnetic field and reject locally radiated electric field noise”[*] resulting in lower noise reception than other compact antenna designs suitable for indoor use.


Interlude: signal to noise ratio

In radio reception, the important thing is not the signal strength by itself but the signal to noise ratio, or SNR. A larger antenna (such as a longer copper wire) will pick up more of the desired signal but, if close to RFI sources, will also pick up disproportionately more of the local noise. This will reduce the SNR and make the overall signal reading poorer, which is why it is not advisable to use large antennas indoors.


The other advantage of a loop antenna is that it is directional. By rotating the loop about its vertical axis one can maximise the reception strength of one particular signal over the others, once the antenna is aligned with the direction from which the signal is coming (this is termed “peaking” the signal). Similarly, it is possible to reduce the strength of a particular local noise source, since the loop is minimally sensitive to a given signal once it is perpendicular the latter’s direction (also known as “nulling” the signal).

It is further possible to lower the effect of local noise sources by moving the antenna around. Because of the antenna’s design, the effect of radio signals is mostly confined to the loop itself as opposed to its feed line. Most local noise sources have irregular radiation patterns indoors, meaning that it is possible find a spot inside your property where their effects are minimised.

Many compact shortwave loop antennas require an additional tuning unit to be attached to the loop base (much like the preselector described above) but broadband loops do not. Wellbrook ALA1530S+ is one such antenna that is only 1m in diameter, and it was the one I chose for my current apartment. I was rather impressed with its performance, although I found that I need to use a preselector with it as the loop occasionally overloads some of my receivers when used on its own. Below is a demo video comparing using my Tecsun PL680’s built-in antenna to using the radio with the Wellbrook loop.

As you can hear, there is a significant improvement in the signal’s readability when the loop is used.

Experiment with a phaser

Although the loop antenna dramatically reduces the levels of ambient RFI getting into the radio,  I also have one particular local noise source which is way too strong for the loop’s nulling capability. Ethernet Over Powerlines (PLT) transmits data across domestic electrical circuits using wall socket adapters, as an alternative to wireless networking. It uses the same frequencies as shortwave, which turns the circuits into powerful transmitting antennas, causing massive interference. One of my neighbours has PLT adapters installed at his property, which intermittently become active and transmit data. When this happens,  it is not merely noise that is generated, but a very intense data signal that spreads across the entire shortwave spectrum, obliterating everything but the strongest stations underneath. Fortunately, a mature piece of radio technology called antenna phasing is available to deal with this problem.

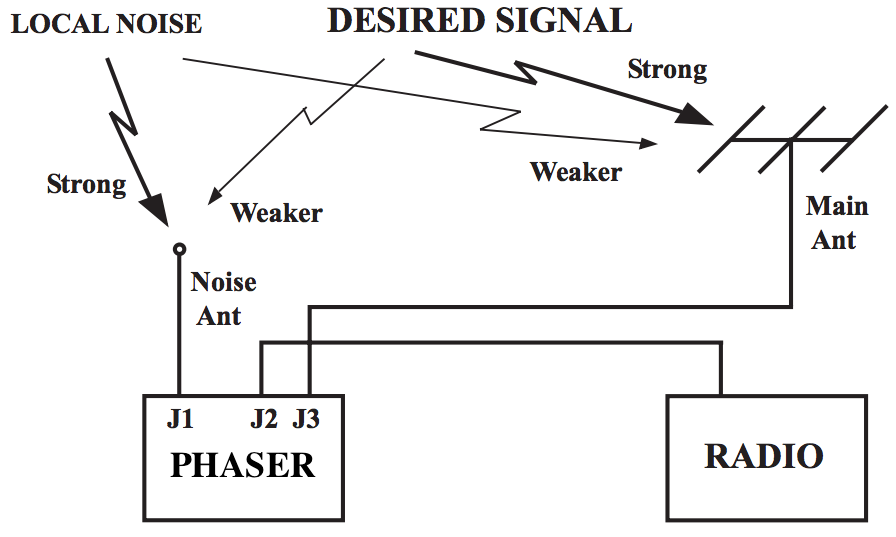
Fig.3 The principle of antenna phaser operation (adapted from an original illustration in Timewave ANC-4's manual)

Fig.3 The principle of antenna phaser operation (adapted from an original illustration in Timewave ANC-4’s manual)

Signal cancellation using phase difference

A phaser unit has two separate antenna inputs and provides one output to be connected to the radio’s external antenna input. The theory of phase-based signal cancellation goes roughly as follows:

  • The same radio signal will arrive at two different, locally separated antennas at essentially the same time.
  • The phase of the signal received at the first antenna will be different to the phase of the same signal received at the second antenna.
  • This phase difference depends on the direction from which the signal is coming, relative to the two antennas.
  • The phaser unit can shift the phases of all signals received at one antenna by the same variable amount.
  • To get rid of a particular (noise) signal using the phaser unit:
    • the signal’s phase at the first antenna has to be shifted by 180° relative to the signal’s phase at the second antenna (thus producing a “mirror image” of the signal received at the second antenna)
    • its amplitude at the first antenna has to be adjusted so that it is the same as the signal’s amplitude at the second antenna
    • the currents from the two antennas are then combined by the unit, and the signal and its mirror image cancel each other out at the unit’s output, while the other signals are preserved.

Noise sampling antenna considerations

To prevent the possibility of the desired signal being cancelled out together with the noise signal — which can happen if they both come from the same direction relative to the antennas — one can use the set-up illustrated in Figure 3, where one antenna is dedicated to picking up the specific noise signal, while the other is geared towards receiving the desired broadcast. That way, even if the phases of both the noise and the desired signals are offset by the same amount, their relative amplitude differences will not be the same, and thus removing the noise signal will not completely cancel out the desired signal (though it will reduce the latter’s strength to some extent).

It is possible to use any antenna combination for phase-based noise signal cancellation. However, one has to be careful that, in the pursuit of removing a specific noise source, one does not introduce more ambient RFI into the radio system by using a poorly designed noise-sampling antenna. After all, the phaser can only cancel out one signal at a time and will pass through everything else picked up by both antennas. This is particularly relevant in urban settings.

For this reason, I chose my noise sampling antenna to also be a Wellbrook ALA1530S+. The additional advantages of this set-up are:

  • It is possible to move both loops around to minimise the amount of ambient RFI.
  • By utilising the loops’ directionality property, one can rotate the noise sampling loop to maximise the strength of the noise signal relative to the desired signal picked up by the main antenna loop.
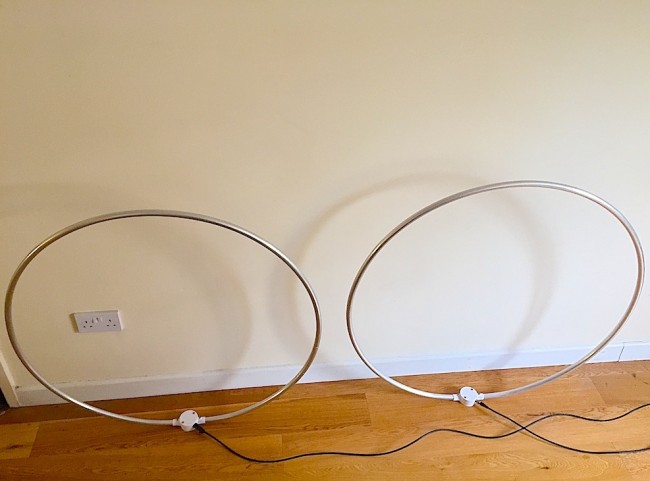
Two Wellbrook ALA1530S+ antennas combined through a phaser

Two Wellbrook ALA1530S+ antennas combined through a phaser

And now onto the phaser units themselves.

Phaser units

dxe-upload

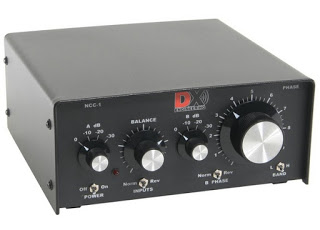
DX Engineering NCC-1 (image courtesy of dxengineering.com)

I have experimented at length with two phaser units: the MFJ 1026 (manual) and DX Engineering NCC-1 (manual). Both solve the problem of the PLT noise very well, but the NCC-1 offers amplitude and phase tuning controls that are much more precise, making it a lot easier to identify the right parameter settings. Unfortunately this comes at a price, as the NCC-1 is a lot more expensive than the MFJ unit. As before, a preselector is needed between the phaser and the radio to prevent overloading.

Below is a demo of DX Engineering NCC-1 at work on my neighbour’s PLT noise. I have chosen to use my SDR’s waterfall display to illustrate the nefarious effect of this type of radio interference and to show how well the NCC-1 copes with the challenge.

Cost considerations

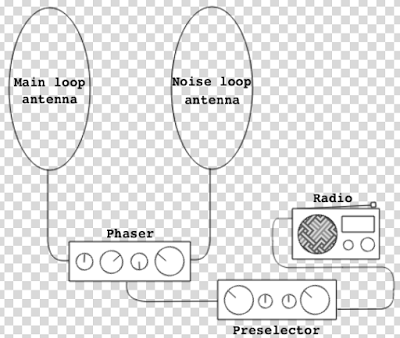
Fig.4 Final urban noise mitigation schematic

Fig.4 Final urban noise mitigation schematic

It would be fair to say that my final urban noise mitigation set-up, shown in Figure 4, is quite expensive: the total cost of two Wellbrook antennas ($288.38 each), a DX Engineering phaser ($599.95) and a Global AT2000 preselector ($80) comes to $1257. That seems like an astronomical price to pay for enjoying shortwave radio in the inner city! However, at this point another old saying comes to mind, “your radio is only as good as your antenna”. There are many high-end shortwave receivers that cost at least this much (e.g. AOR AR7030), but on their own they won’t be of any use in such a noisy environment. Meanwhile, technological progress has brought about many much cheaper radios that rival the older benchmark rigs in terms of performance, with Software Defined Radios (SDRs) being a particularly good example. It seems fair, then, to invest these cost savings into what makes shortwave listening possible. You may also find that your RFI situation is not as dire as mine and you only need some of the above equipment to solve your noise problems.

Filter audio with DSP

If you have implemented the above noise reduction steps but would still like a less noisy listening experience, consider using a Digital Signal Processing (DSP) solution. There are a number of different approaches and products available on the market, and I shall be reviewing some of them in my next post. Meanwhile, below are two demo videos of using DSP while listening to shortwave. The first clip shows the BHI Compact In-Line Noise Elimination Module at work together with a vintage shortwave receiver (Lowe HF-150). The second video compares using a Tecsun PL-660 portable radio indoors on its own and using the entire RFI mitigation set-up shown in Figure 4 together with a DSP noise reduction feature available in the SDR# software package, while using it with a FunCube Dongle Pro+ SDR. As a side note, it is worth remembering that while DSP approaches can make your listening experience more pleasant, they can’t recover what has been lost due to interfering signals or inadequate antenna design.

Set up a wireless audio relay from your radio shack

The above RFI mitigation techniques can result in a rather clunky set-up that is not particularly portable, confining the listener to a specific location within their home. One way to get around this is by creating a wireless audio relay from your radio shack to the other parts of your house. I did this by combining the Nikkai AV sender/receiver pair and the TaoTronics BA01 portable Bluetooth transmitter:

Head for the outdoors!

So you have tried all of the above and none of it helps? As a last resort (for some, but personally I prefer it!), you can go outside to your nearest park with your portable radio. After all, if shortwave listening is causing you more frustration than joy it’s hardly worth it. On the other hand, you might be surprised by what you’ll be able to hear with a good receiver in a noise-free zone.

Acknowledgements

Many of the above tricks and techniques were taught to me by my Twitter contacts. I am particularly grateful to @marcabbiss@SWLingDotCom, @K7al_L3afta and@sdrsharp for their advice and assistance over the years.


Thank you–!

What I love about my buddy, London Shortwave, is that he didn’t give up SWLing just because his home is inundated with radio interference–rather, he saw it as a challenge. As you can see, over the years, he has designed a system that effectively defeats radio interference.

I also love the fact that he uses an even more simple approach to defeating RFI: he takes his radio outdoors. A kindred spirit, indeed.

I encourage all SWLing Post readers to bookmark and search London Shortwave’s website. It’s a treasure trove for the urban SWL. We thank him for allow us to post this article in its entirety.

How to replace a noisy wall power supply

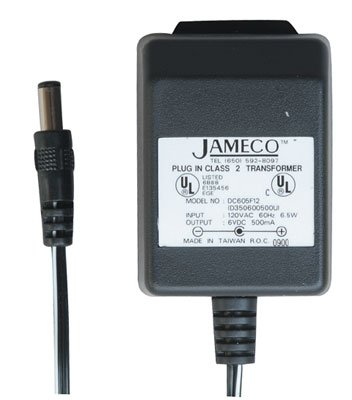
JamecoWallPowerSupplyRegarding noisy switching power supplies, SWLing Post reader, Dan Lewis, comments:

“Google the following: “Jameco linear wall transformer”, and you’ll find a suitable non-switching replacement.

Jameco still has a number of linear transformers in their catalog at reasonable prices. I haven’t bought anything from them in many years but when I dealt with them frequently a number of years back they were always reputable.”

Many thanks for your suggestion, Dan! Jameco is a reliable company and I’ve also been a long-time customer. If you know how to pick the proper power supply for your radio (or any other electronic device) click here to view a list of regulated linear supplies on Jameco’s website. [Also note this follow-up post.]Otherwise, keep reading…

How to find a replacement AC adapter/power supply

When you purchase a replacement power supply, you must make sure that several properties match that of the device it will power, else you could cause damage.

There are four properties you need to match: voltage, rated current, polarity and tip size.

Voltage

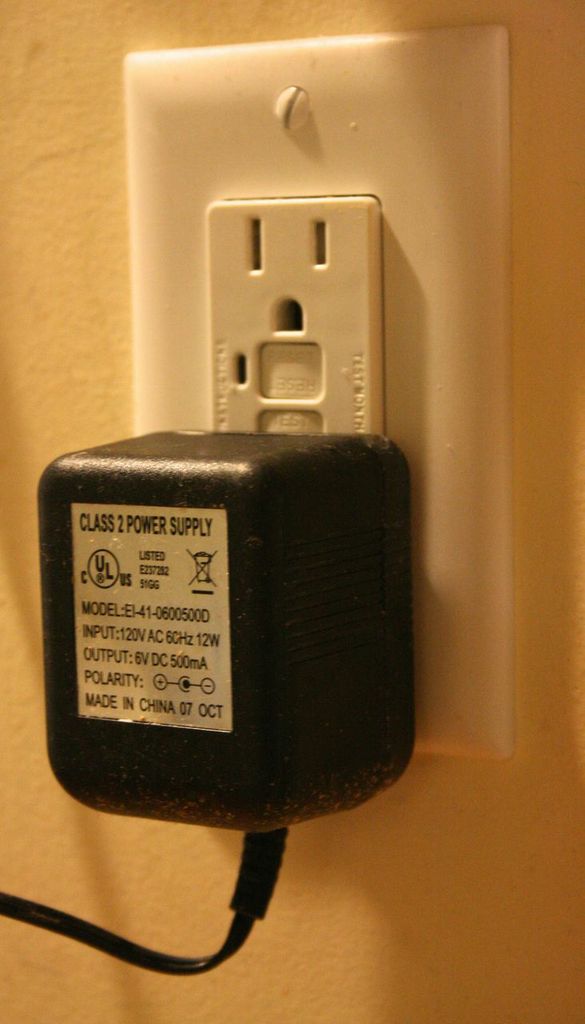
Most consumer electronics are powered by and rated for 4.5, 5, 9, 12, or 13.8 volts DC. Of course, there are exceptions. It is important that you match the required voltage exactly. Most radios and electronic devices display their required voltage and voltage tolerance on the unit itself, on the supplied switching power supply, and/or in the owner’s manual.

Rated Current

Like voltage, rated current is usually displayed somewhere on the device, existing power supply or in the owner’s manual. Current is usually indicated in amps (A) or milliamps (mA). Unlike voltage, rated current on your power supply does not have to match the device exactly. You simply need to make sure the power supply meets or exceeds your radio’s required current.

For example, if your radio requires 800 mA (or .8 A) and you find a power supply rated for 500 mA, you should not use it. If you find a power supply rated for 2 amps (or 2000 mA), it exceeds the 800 mA rating, so you’re good to go!

Unlike voltage, your electronic device or radio will only draw the amount of current it needs from the power supply.

Polarity

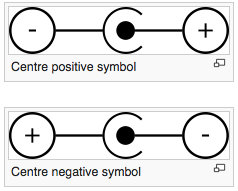
Click here to read more about tip polarity. (Source: WikiPedia)

Click here to read more about tip polarity. (Source: WikiPedia)

You’ll need to determine if your radio requires a plug with a positive or negative tip (a.k.a. center conductor).

Fortunately, manufacturers have long used standard symbols to make polarity obvious (see image).

You’ll typically find a polarity symbol printed on the back of your radio, near the plug-in point, in the owner’s manual or on the back of the existing wall adapter.

Note: Be very careful matching polarity! Some radios and electronic devices are not properly protected against reverse polarity; damaged can occur immediately after supplying voltage with incorrect polarity.

TJamecoWallPowerSupplyip/plug size

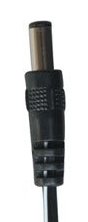
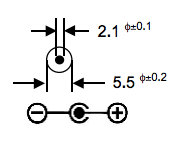
You need to make sure that the inner diameter and outer diameter of a replacement wall adapter will match that of your existing adapter.

This can be the most difficult property to match.

Occasionally, radio manufacturers will actually specify the tip size in their owner’s manual, spec sheets, or on the product page of their website. I’ve even had luck calling manufacturers and asking a technician for the plug size.

ACAdapterTip

Specification sheets will typically indicate plug dimensions with an illustration.

Otherwise, you can always measure the existing power supply tip (both inner and outer dimensions) using calipers.

Once you have those dimensions, finding the appropriate replacement power supply is quite easy. Indeed, companies like Jameco provide specification sheets (click here for an example) that indicate dimensions for each power supply they sell.

Once you’ve matched the voltage, rated current, polarity and tip size, you can purchase a regulated linear power supply with confidence!

Keep in mind: there are most likely other devices in your home with noisy switching power supplies that could be causing radio interference. Check out my noise trouble shooting section of this article to help identify local sources of radio noise.

Update: check out this follow-up post regarding Jameco power supplies–not all are truly linear regulated.

Video: How to fight radio noise in urban areas

LondonLondon Shortwave, a regular contributor to the SWLing Post, lives in London, England and copes with serious amounts of radio noise (QRM) at his home. Unlike many urban radio listeners, the QRM didn’t chase him away from the hobby, rather he looked at it as a challenge. Besides taking his radio kit outdoors to escape the noise, he also has a noise mitigation set-up at his home which has been refined over the years.

London Shortwave shared this video demonstration earlier this year on his YouTube channel. Here’s his description:

In this video I demonstrate an improvement to indoor radio reception quality, which is possible to achieve in an urban environment.

I compare using a Tecsun PL-390 portable receiver to a radio set-up that combines Lowe HF-150’s sync detector, the Wellbrook active loop antenna and real-time noise reduction software.

I recently told London Shortwave that he’s a QRM-fighting Samurai; I believe he certainly deserves the title!

Any other QRM Samurai’s out there?

FM DX courtesy of the Camelopardalis meteor shower

Perseids meteor shower Photo: NASAHat tip to David Goren for sharing this article from Alltop:

“Just in case it’s cloudy where you are [tonight] when the new Camelopardalis meteor shower is set to hit, check out how you can still tune into the show without any equipment fancier than an AM/FM radio.

The key is to find a station on the FM dial, most likely below 91.1 MHz and tuned to a distant station, where the appearance of the large meteors expected from the shower will momentarily enhance reception as they fall to Earth.” [Continue reading…]

Ham radio operators, like my buddy Mike Hansgen (K8RAT), were already anticipating a little DX from these ionized trails. Mike suggests that you should listen on a clear frequency, or as he put it, “[n]ot only can the signal of a weak station be enhanced by a ping off a falling rock, but you can tune to a frequency where no signal at all is normally heard and listen for momentary bursts from never before heard stations.”

The only catch is that the best Camelopardalis viewing/listening time, for many of us, is between 2:00-4:00 AM. I hope I can wake up in time!

For more info, check out this article at EarthSky.

Frugal SWLing: Investing little, but getting a lot out of your radio

This article originally appeared in the April 2014 issue of The Spectrum Monitor Magazine.

RadioDialLet’s face it: SWLers and amateur radio operators are some of the most frugal hobbyists out there.  But the good news is that radio is a hobby that favors the frugal.  There are many practical and time-tested ways to make radio listening fun and effective–such as improving your shortwave radio reception–that are absolutely free, or that cost very little.

And how do I know this?  Among the frugal, I’m the most frugal SWLer I know! Yet there’s a method to my frugal madness:  because I simply can’t afford to waste hard-earned radio money on gadgets and accessories that are ineffective, I count my pennies in order to make quality purchases with longevity in mind.  Meanwhile, I track down ways to keep my hobby cost-effective.

I’ve gathered here some of my favorite frugal tips and quality purchase suggestions here. So, without further delay, let’s start SWLing–and saving money.

1. Check your shack/home for RFI. Cost: Free

Checking your shack for RFI is vitally important, a procedure every radio listener or operator should undertake.

The truth is, very few of us regularly experience ideal conditions for HF or AM radio listening. Devices like plasma TVs, laptop power supplies, and the ubiquitous AC adapter inject distracting noise into our otherwise peaceful environs, disrupting our hobby. This noise is known as RFI (Radio Frequency Interference).
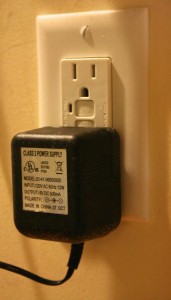
These "Wall Wart" type adapters can create a lot of RFI

These “wall wart” type adapters can create a lot of RFI

A number of times, I’ve received a message from one of my readers on the SWLing Post claiming that their new shortwave radio can “only” hear strong, blowtorch stations. My simple advice? Put batteries in your radio, turn it on to an unoccupied frequency in your favorite shortwave meter band, go to your circuit breaker box, and turn off everything in your house. (Warning: Do warn your housemates beforehand, to avoid any loud protestation! And do reset your clocks and check your refrigerator/freezer after this test.)

Did the noise level on your radio decrease? If the decrease coincided with the power cut, then one or more electronic devices in your house are generating RFI. RFI often sounds like static–very loud static–and is often so wide in bandwidth that it can cover several megahertz. RFI can overwhelm your portable radio and basically “deafen” it to anything but the loudest stations that break through the elevated noise floor.

Next comes the process of elimination: systematically turn on circuit breakers until you hear the noise return. If you’re fortunate enough to have accurately-labeled circuit breakers, you will at least know what area in your house holds the infamous disruptive device. Here’s a short list of the usual RFI culprits:

  • the ubiquitous AC adapter (aka, “wall wart”)
  • laptop power supplies
  • flat screen TVs: especially Plasma TVs
  • heating devices like electric blankets
  • external hard drives
  • lamp dimmers
  • touch lamps

Good luck tracking it down!  Chasing RFI can be complex.  Check out this list of RFI resources on the ARRL website for methods and ideas to cope with RFI.

2. Take your radio outside. Cost: Free
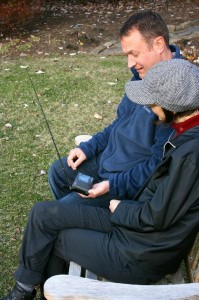
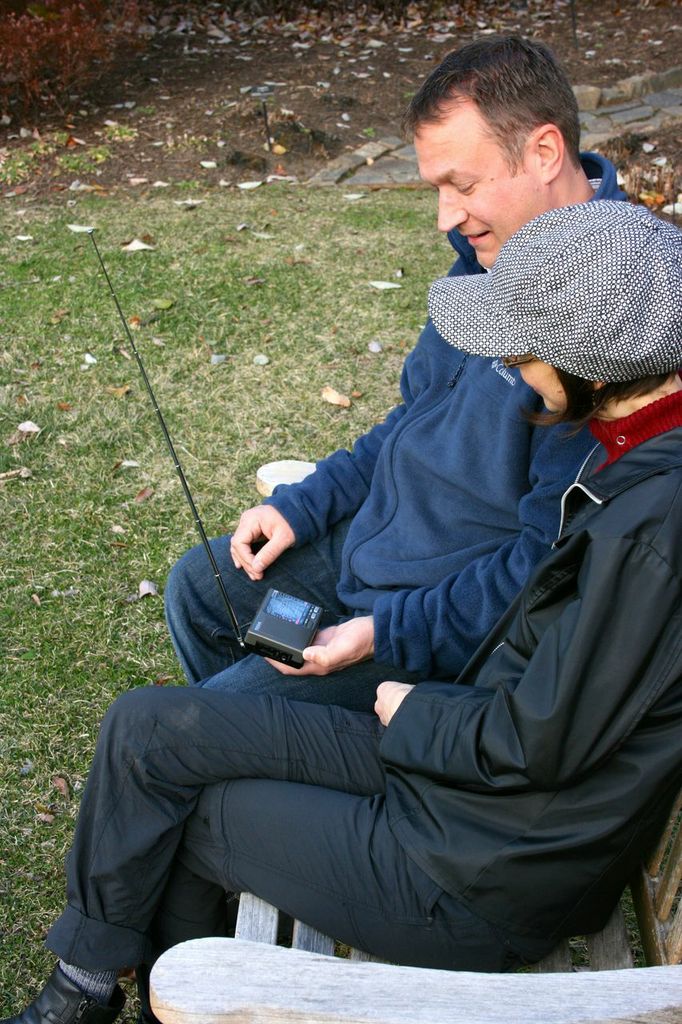
ParkListeningIf you live in a condo, high-rise, or high-density neighborhood, my first suggestion may be of little use to you. In this case, your neighbor(s) may be causing RFI; turning off your own power may have little to no effect.  Fortunately, there’s an easy–albeit modestly inconvenient–way to deal with neighborhood RFI. Leave the neighborhood! No, not permanently; just for a fun afternoon outing (with radio, of course).

If you live in a city, grab your radio, and head for a park or other area with wide open space and no buildings. Listeners who live in urban areas frequently enjoy radio listening via headphones on a park bench; some even have a favorite bench for their fair-weather pastime.

The benefits in this case are two-fold: firstly, you’re removing yourself from the vicinity of RFI, but secondly–and the icing on the cake–is that you’re taking your radio, and its antenna, outside.  Antennas always function better outside. Walls and even windows attenuate HF signals.  Plus, outdoor settings nearly always equal fun.

Want some inspiration? Check out how this SWL plays radio in central London.

By the way, if you have no local parks to which you can escape, consider taking your radio in the car and driving to a national park. Better yet, combine camping and SWLing.  I like to do this, although I don’t have an RFI problem where I currently live.

3. Make a simple wire antenna. Cost: Free (or, at most, $10-15)

Most shortwave portables radios on the market today have a telescopic whip antenna that will suffice for casual listening. But often you can increase the antenna gain by simply adding more length in the form of a simple thin wire. Keep in mind that many radios actually ship with a clip-on antenna wire. Check your original box and make sure you haven’t overlooked it, as it’s fairly easy to do.
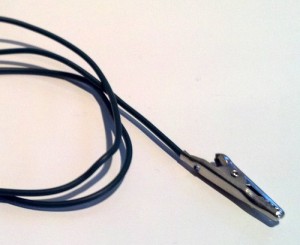
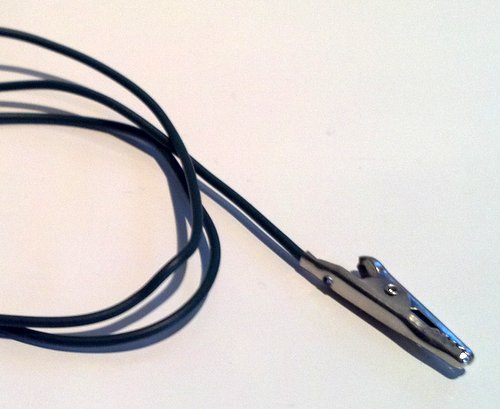
An alligator clip offers serious bang-for buck--especially if you already have the parts lying around

An alligator clip offers serious bang-for buck–especially if you already have the parts lying around

If you didn’t receive a factory-supplied clip-on antenna, no worries!  They’re a breeze to make and quite cheap: indeed, if you have a junk box of electronics parts like so many hobbyists I know, you may already have what you need. Simply obtain a 20 foot length of jacketed (insulated) wire–gauge is not important, just something thin enough that you can easily roll up to transport. Next, strip ¼ inch of insulation off the end of the wire. Solder and/or crimp an alligator clip to the end of the wire, making sure you have a solid, stable connection.

Now, stretch out this wire and attach it to your antenna.  You will most likely find that this improves antenna gain. The effectiveness of the wire varies with the receiver. When I’ve made clip antennas in the past, I’ve simply made them longer than I thought I might need, then later cut it off at the optimum length based upon signal strength.

Two caveats:

  1. If you live in an RFI-heavy environment, adding a wire antenna at home may only increase your noise level (after all, it will make the radio better at “hearing” the noise).
  2. Some receivers are susceptible to overloading and electrostatic discharge (the Tecsun PL-600, Grundig G5 and G3 come to mind). To be on the safe side, do not attach any wire to your portable that is in excess of twenty feet in length.  Twenty feet should be more than sufficient length to increase antenna gain without any negative repercussions.

4. Use batteries––preferably rechargeable ones. Cost: $5- $20

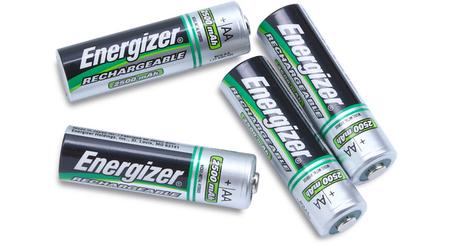
Not all rechargeable batteries are created equally. Lean toward name brand, higher quality cells. Dollar store batteries lack longevity.

Not all rechargeable batteries are created equally. Lean toward name brand, higher quality cells. Dollar store batteries lack longevity.

This is one suggestion that may require a modest investment, but will pay off in more ways than one. I honestly can’t think of the last time that I listened to a portable radio while it was plugged into mains/grid power via an AC adapter. Since at least 2007, I have been powering my portables exclusively with good-quality rechargeable batteries.

Why rechargeables–? First and foremost, with rare exception, shortwave radio manufactures give little thought to the AC adapters they include with a portable shortwave radio; they’re simply an accessory that is expected, so they deliver. Indeed, the AC adapter that came with my Tecsun PL-880 (Tecsun’s latest flagship portable) came with an AC adaptor that does a great job charging the internal batteries, but injects copious amounts of RFI in the process. Running the radio off of batteries solves the problem instantly.

Many radio manufacturers now include rechargeable batteries with the purchase of a radio. Some of these batteries are AA cells, others are slim packs resembling cell phone batteries. Consider purchasing an extra battery if you’re worried yours might die away while you’re listening to your favorite program; a quick switch, and you scarcely miss a beat. If your portable comes with rechargeable batteries, most likely the radio even has a built-in charge control circuit.

I should add that I’m a fan of the traditional AA battery, even though they’re bigger than other battery types. After all, they’re nearly always accessible.  If a radio takes AA batteries, I never use the radio’s built-in recharger, instead I prefer a MAHA brand battery charger, as they condition and give a longer life to the rechargeable cells.

Sure, buying rechargeable batteries and, potentially, a good battery charger require an initial outlay of money, but the rewards are a quieter receiver and a more earth-friendly approach than heavy-duty or alkaline batteries can deliver.

5. Listen with headphones or earphones.  Cost: $0 – $100
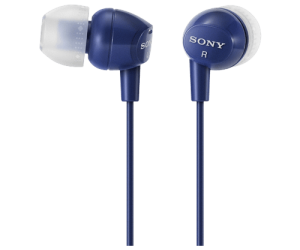
Sony MDREX10LP in-ear headphones are inexpensive and effective.

Sony MDREX10LP in-ear headphones are inexpensive and effective.

Why headphones? Ask any serious DXers (amateur radio or SWL) and they’ll tell you headphones are an indispensable tool. While armchair listening is great with your radio’s built-in speaker, headphones give you better sound isolation, and your radio’s audio is equally balanced. Digging a weak station out of the ether is easier with headphones.

Almost every portable you buy today will come with a complimentary set of earphones. Quality varies amongst these, but in my experience, the headphones included tend to be of the lowest quality; for shortwave listening, these may suffice.

Though AM and shortwave radio is not considered a “high-fidelity” medium, thus not requiring a wide frequency response, I still prefer listening with quality earphones/headphones. As long as your headphones have a decent frequency response–I usually aim for 8 – 22,000 Hz–you’ll be pleased.  And do make sure your headphones or earphones are comfortable to wear for extended periods of time.
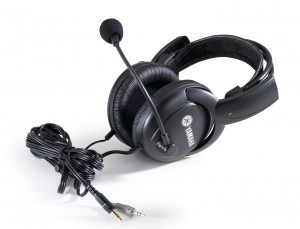
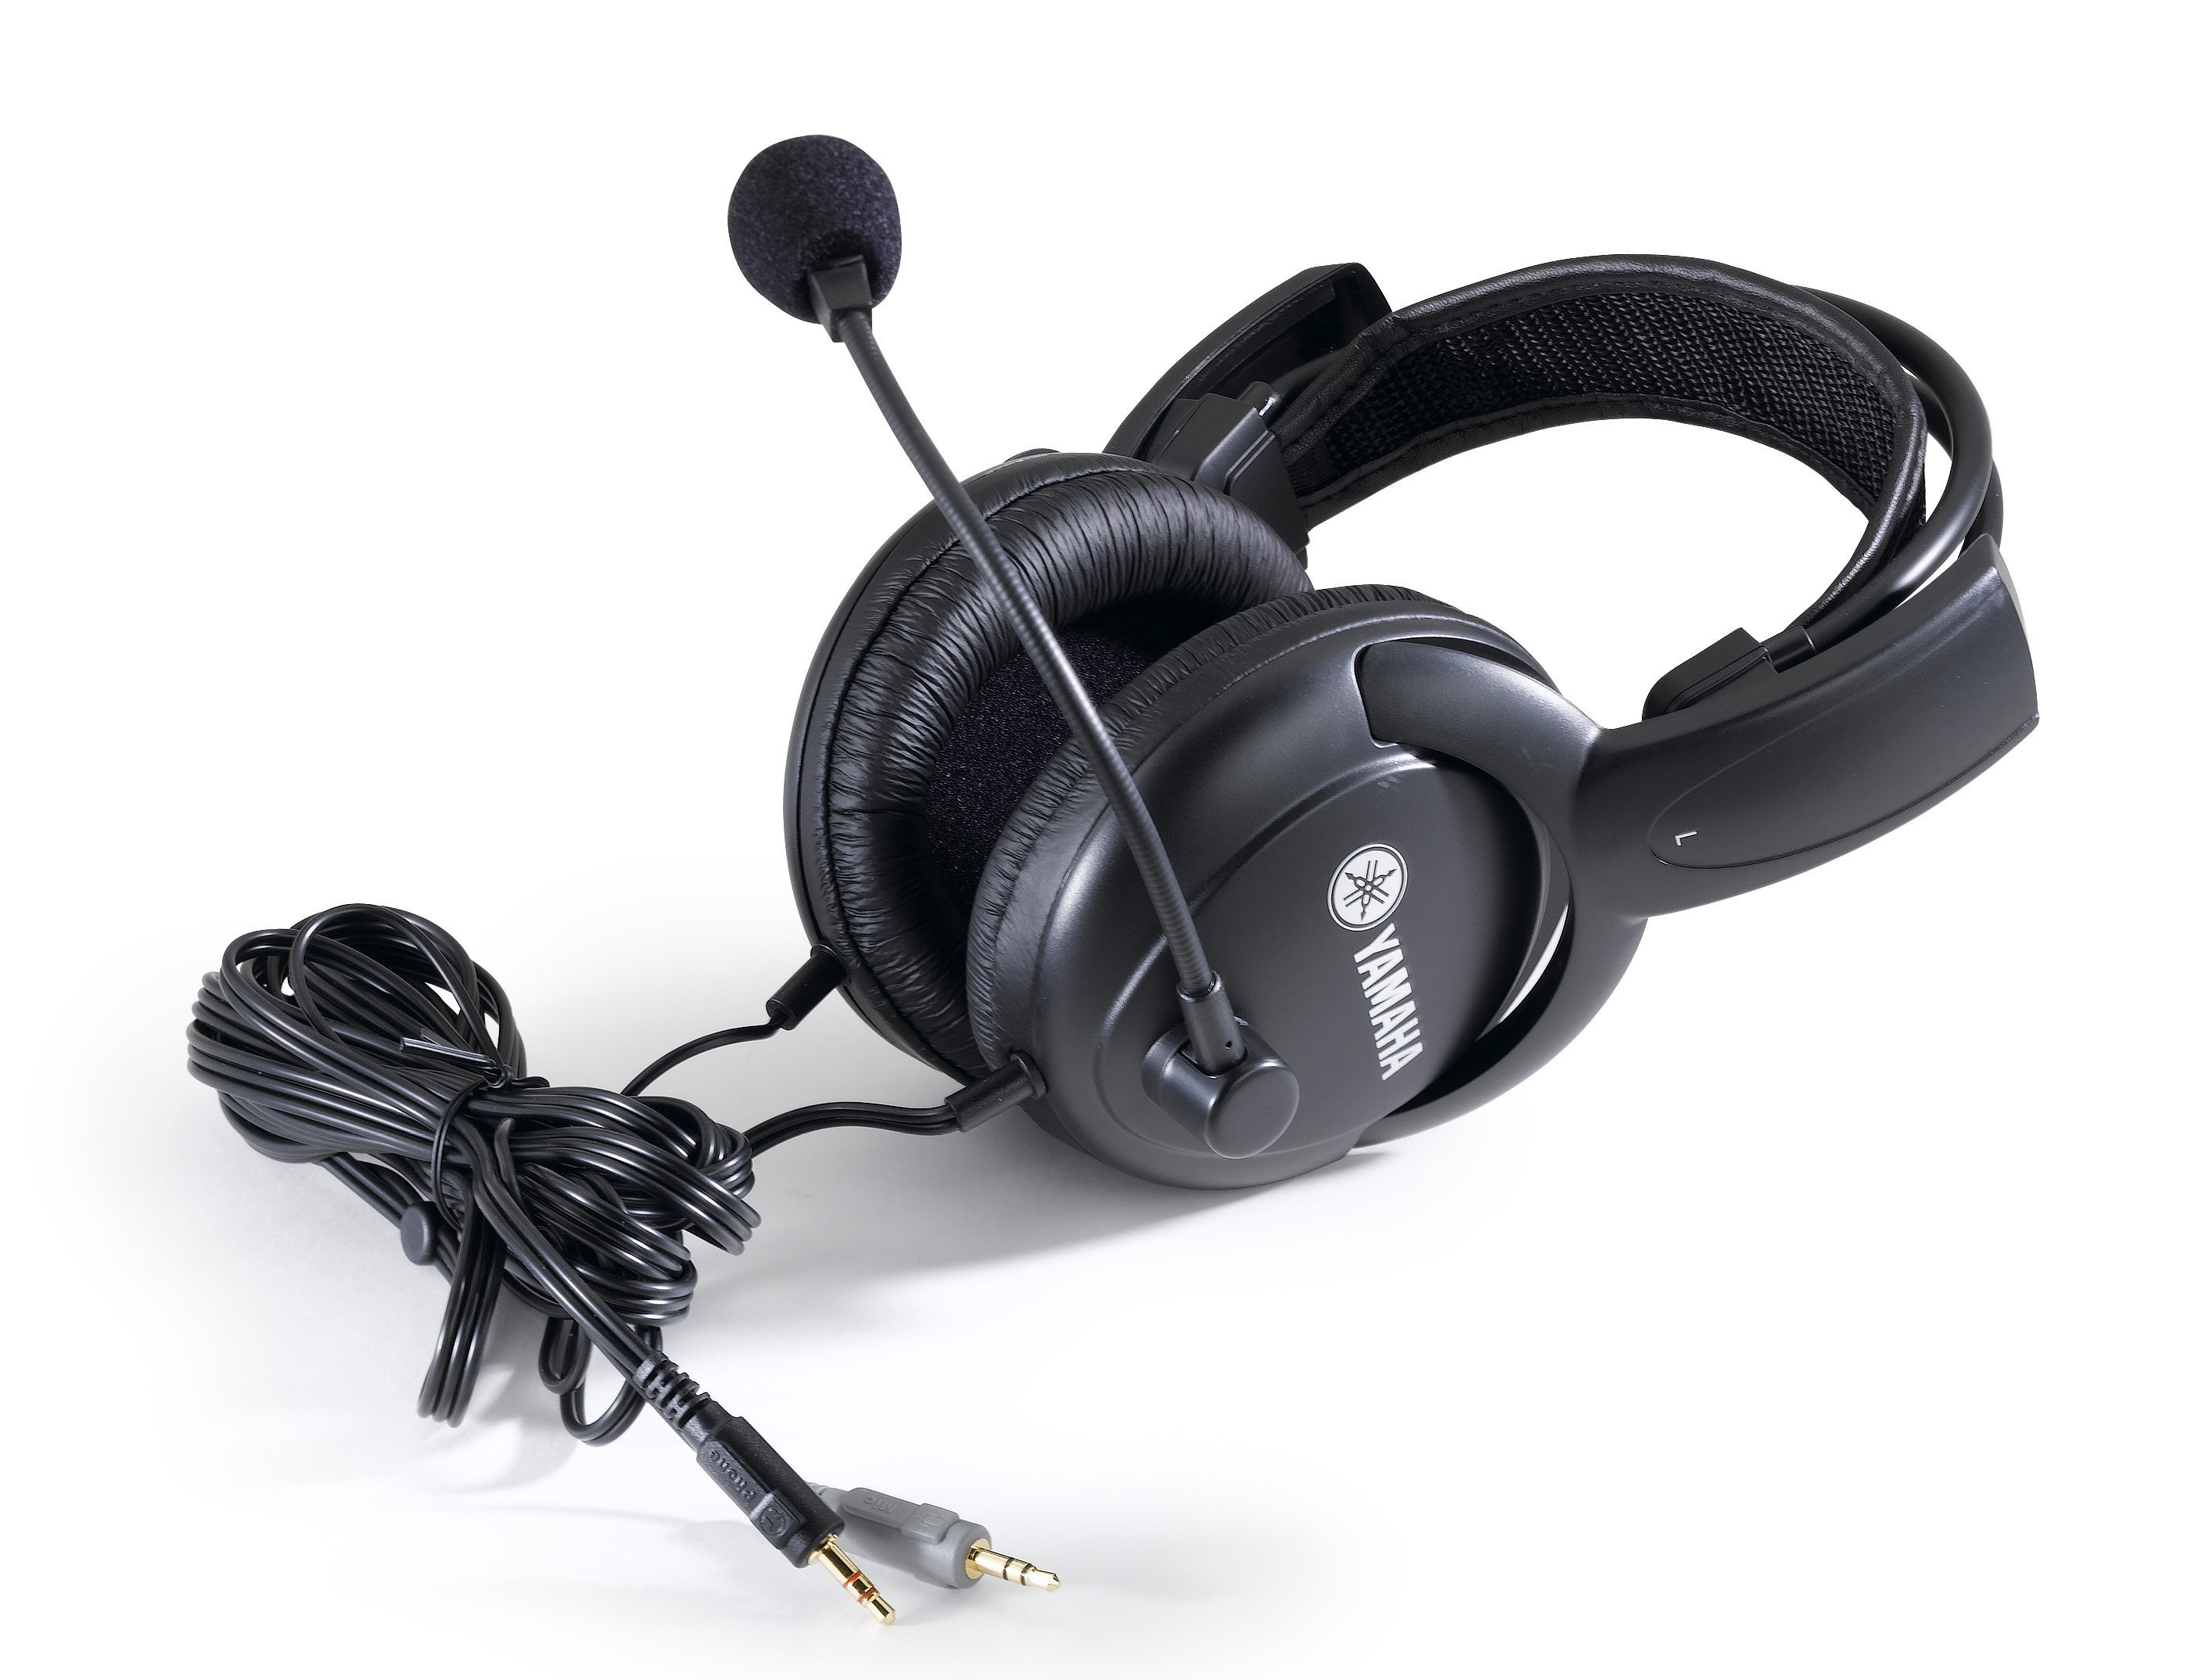
Yamaha CM500's are a worthwhile investment if you're an amateur radio operator.

Yamaha CM500’s are a worthwhile investment if you’re an amateur radio operator.

One of my favorite pair of in-ear earphones for SWLing are the popular Sony MDREX10LP series. They’re comfortable, responsive, isolate noise, and are available from a number of retailers for about $10 USD per pair.

For over-ear headphones, I like the Panasonic RP-HTF600. They’re large, comfortable, and deliver amazing fidelity for about $30 USD.

If you also happen to be an amateur radio operator, the Yamaha CM500 headphones have a built-in boom mic that works amazingly well.  At $50 USD, they are a steal. When I received mine, I opened the package, plugged the headphone and mic jacks into my Elecraft KX3, and I was on the air with them in seconds.

6. Learn to use use Exalted Carrier Reception (ECR/ECSS). Cost: Free
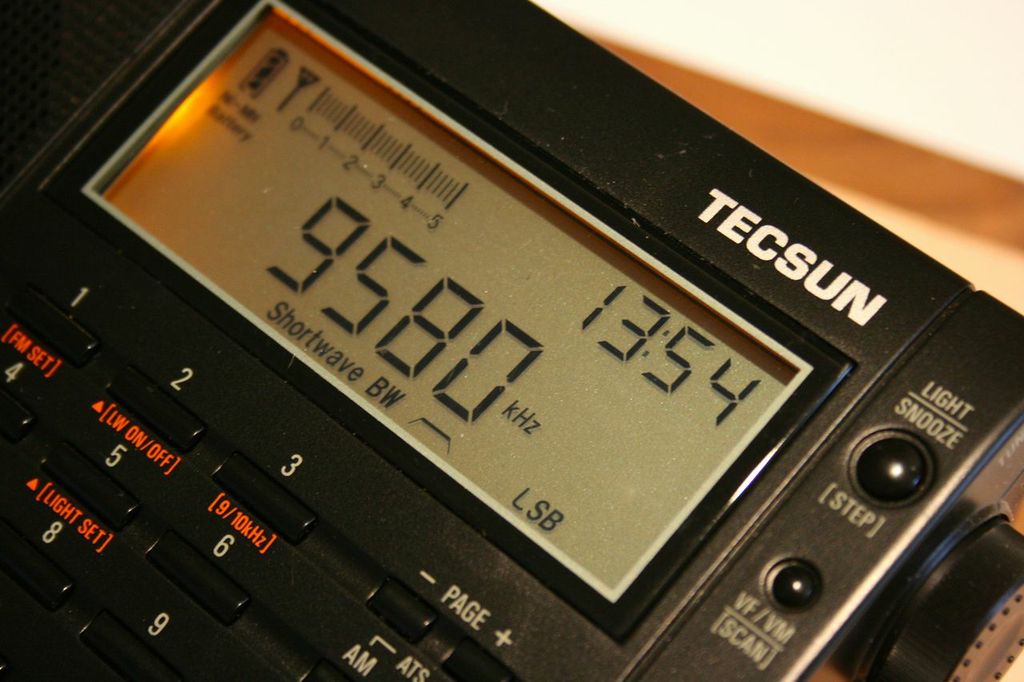
ECSS-PL-660“Exalted Carrier Reception” (ECR) a.k.a. Exalted Carrier Single-Sideband (ECSS) is just a fancy way of saying that an AM broadcast carrier is tuned in while in single-sideband mode. This is most useful when you’re trying to listen to weak broadcasters.

This (ECR) is, in a sense, the frugal listener’s version of synchronous detection. Why does it work?  As my knowledgeable ham buddy Mike (K8RAT) explains: ”You’re removing any selective fading problems by filtering away one of the sidebands, and injecting a carrier of steady amplitude which eliminates the ‘tearing’ heard when a broadcast carrier is varying in amplitude.”  Got that?

Even if you don’t understand it exactly, here’s how to use ECR:  Simply find a strong AM station on your radio.  Next, turn on the BFO or SSB mode on your radio. As you adjust the tuning knob, you’ll hear an audible whine, the pitch of which will change with every increment of tuning. “Zero-beating” the carrier follows next–this is simply tuning in the signal until that whine is gone, and the AM station can be heard as clearly as if the radio were in AM mode.

The fidelity of ECR/ECSS is typically not as good as AM–mainly because SSB filters are usually narrower than AM filters–but it does lower the noise floor, increase the stability of the received signal, and make this signal “pop out” a bit more.

But don’t take my word for it–let your ears be your guide! In this recording, I tune in a low-power station on my receiver in standard AM mode, but at 15 seconds into the recording, I switch to the upper-sideband (SSB) mode, zero-beat the frequency, then open up the SSB filter a little wider.  Then, just before I end the recording, I switch to lower-sideband–something you can do if there is interference in the upper-sideband, for example:

It’s amazing how much background noise ECR removes.

If you’re lucky enough to have a tabletop radio, chances are it has an SSB mode (although there are some very rare exceptions). Less than a third of portables on the market, however, have SSB. Here is a list of the most popular portables with SSB that are, or have recently been, in production.

7. Use a web receiver.  Cost: Free

If you live in an area with frustrating RFI, but want to listen to the shortwave bands from home, try an online web-based receiver. Sure, it’s not quite like tuning a radio at your fingertips, but it’s the next best thing, and also a handy tool for checking propagation or verifying your own signal (if you’re an amateur radio operator).

My two favorites site are:

  • GlobalTunersGlobal Tuners which has a number of remotely-controlled radio receivers all over the world. You must register before you can participate, but registration is free. Global Tuners even has a free Android app that permits remote receiver control via your smart phone or tablet.

  • utlogo4bThe University of Twente Wide-band WebSDR is an amazing resource. Not only can you control this receiver, but so, too, can a few dozen other web guests––all at the same time! I’ve used U Twente’s receiver on a number of occasions to listen to European pirates. Cost? Again, it’s free.
  • The KiwiSDR network has become the largest network of web SDRs since we first published this post. You can literally travel the world via the KiwiSDR network! Click here to view KiwiSDR stations on a map, and here to view them in a searchable list.

8. Finally, practice listening. (Cost: Just some time)
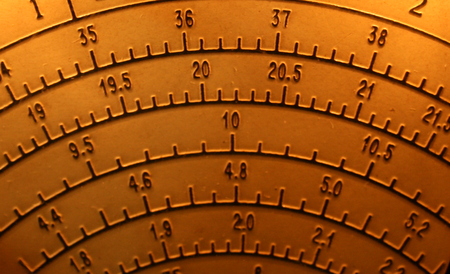
SP600Dial3My final bit of “free” advice sounds a little philosophical, but rest assured, it isn’t.

I’ve always likened radio listening to another of my interests, astronomy–an entirely different hobby that, unless you’re a radio astronomer, relies on an entirely different sense.

Why the comparison?  I’ve known some talented astronomers that, with just a basic pair of binoculars, can see much more in the night sky than I ever could. Are their eyes better than mine? Not necessarily. Their eyes are just experienced in the field of stargazing; they know what to look for, and most importantly, what to appreciate. Their brains decipher the images of bright or faint stars, subtle variations in color or shape, and focus on what they consider important. In short, this is not an ability you can pick up overnight; it takes patience, experience–and true passion.

Radio listening is, in that sense, much the same. Though I’m by no means a good example, I do wish I could go back to the days of my youth with the ability to listen that I have developed over the decades. There must have been so many jewels of stations hidden in the ether that I completely skipped over…My ability to, for example, pick out the ID of a faint station, to tune accurately and quickly, and to cope with adjacent noise, have all been honed since then, a result of time spent just listening.

My good friend Vlado (N3CZ) is a case in point: he is one of the most capable ham radio DXers I know. His extraordinary ability to pull intelligible conversations and CW (Morse code) out of the static, even in crowded radio conditions, is simply astounding. Vlado’s main transceiver is nearly two decades old, and by no means a benchmark technically. If you ask Vlad if he uses filters and digital signal processing, he will wisely tell you, in his Macedonian accent: “Your best filter is between your ears.”

The same goes for SWLing. I have spent enough time listening to shortwave and weak DX that I can now pull conversations out of the noise that my (non-radio) friends can barely detect. I’m convinced this is healthy exercise for the old grey matter.

David Goren, good friend and the highly-creative radio producer behind Shortwaveology.net, describes how shortwave listening enhanced his career:

“When I first discovered shortwave, I’d strain my ears through the static and all the layers of jumbled up sounds trying to hear as far around the world as I could. Years of this kind of intensive listening tuned my ears in such a way that allows a laser-like focus on the sonic details when working in the production studio making radio stories.”

Indeed, I’ve heard and can certainly appreciate the results of his remarkable “laser-like” listening ability; check out Shortwaveology.net for your own experience of David’s talented ears. You’ll be glad you did.

No doubt you enjoy listening already; my contention is that it has more benefits for your brain than Sudoku puzzles, and iis even more fun. Plus, did I mention that it’s free? You don’t need to pay a subscription to listen to the radio. There’s no real trick to this: it just takes time…interest…and a pair of ears.

Happy listening!

Video: Build a radio in less than one minute

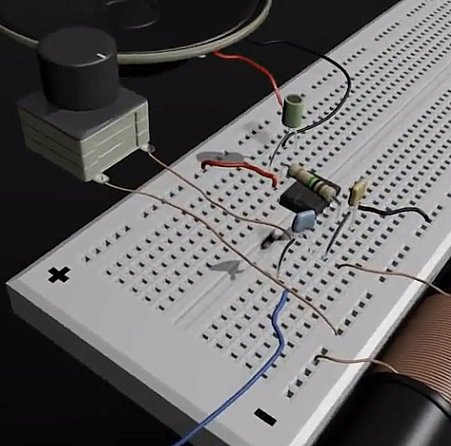
DIY-Radio(Source: Southgate ARC)

“Due to the numerous requests from his Build-a-radio-in-5-minutes, radio amateur Tommy Helgevold OZ4KID decided to make a better video with explanations on how to make a radio like this

He also decided to beat his old challenge as well…

…so without further ado, I present to you – How to build a radio in less than 1 minute, can you build it?

There’s even a schematic in the end of the video + an animated version of the entire breadboard setup.

Thanks for watching, & enjoy.

Watch Build a radio in less than 1 minute”


Click here to view on YouTube.

While less detailed, you can also view OZ4KID’s DIY Radio in less than 5 minutes by clicking here or viewing via the embedded video below:

How to decode WBCQ’s digital message

Last night, WBCQ’s sent a digital message about ten minutes before the end of the Allan Weiner Worldwide show. If you missed the broadcast, no worries; we recorded the show, and you can download the audio (below) to try decoding the message for yourself.

The digital message can be decoded using a variety of free software packages. The package we used–and which we use for many other digital modes–is FLDIGI, which can be found at http://www.w1hkj.com/Fldigi.html.

Downloading and installing FLDIGI is straightforward. But although this is a simple program, there is a slight learning curve involved.  Below, we explain how to use FLDIGI to decode the message.

1. Download the mp3 recording by clicking here (right-click, then save file).

2. Download and install FLDIGI.

Screenshot of digital mode being selected in FLDIGI. Click image to enlarge.

3. Launch FLDIGI and tell it that you wish to decode the digital format MFSK-64. Do this by selecting the menu items “Op Mode” –> “MFSK” –> “MFSK-64.”

4. Play the audio so FLDIGI can decode the message.

There are a few simple ways to play the audio:

  • If your computer has a built-in microphone, simply play the pre-recorded audio file from an mp3 player with a built-in (or amplified) speaker. Hold the speaker near the computer’s microphone. FLDIGI can decode the digital signal from the computer’s buit-in microphone if the mp3 player volume and microphone gain are adequate. FLDIGI is reasonably forgiving, but you should try this in a low-noise environment.
  • Better yet, if you have a way to feed the audio directly from your mp3 player into the line-in (or microphone input) on your computer–say, with a shielded audio patch-cord–this will insure a clean signal into FLDIGI. Note that you should lower the volume of your mp3 player to do this. In some cases, you can actually damage your sound card if you feed it audio at a high volume.
  • Another method would be to play the mp3 file on your computer and use a program such as Virtual Audio Cable to link the audio to FLDIGI.

FLDIGI capturing the digital message and decoding. Note the solid block of color in the waterfall display. Use your pointer to click in the middle of this block in order to tell FLDIGI where to decode. Click image to enlarge screen capture.

Note that in our recording we include several seconds of normal audio before and after the digital message. When you watch the “waterfall” display on FLDIGI, you will see a solid block of coloring indicating the digital message when it begins (see screenshot on right). When the hosts are talking, this block will not be visible.

5. When the digital message begins, use your pointer to click in the middle of the block of color that represents the digital message in the waterfall display of FLDIGI. This tells FLDIGI where to find the digital message in the audio.

6. Your decoded message will appear in the text area of FLDIGI (as in the screenshot).

Image of decoded message as an HTML page. Note that copy was excellent, save one small error in the text. These minor errors are fairly normal in a digital broadcast. Click to enlarge.

7. Copy the decoded text to your PC’s clipboard, and paste into Notepad (or Word, OpenOffice, etc) and save the file as HTML by giving it a “.htm” or “.html” file extension.

Now the message should appear.

See, that wasn’t so difficult! This digital message could be decoded without purchasing any special software or other accessories. Most of us have everything we need to decode the bulk of the digital messages on the shortwave bands–and there are many, many more out there.

Please leave a comment if you successfully decoded this message, or if you have any other tips for decoding it.