Tag Archives: Radio Repair

Frank seeks guidance to repair his Sony AN-100E antenna

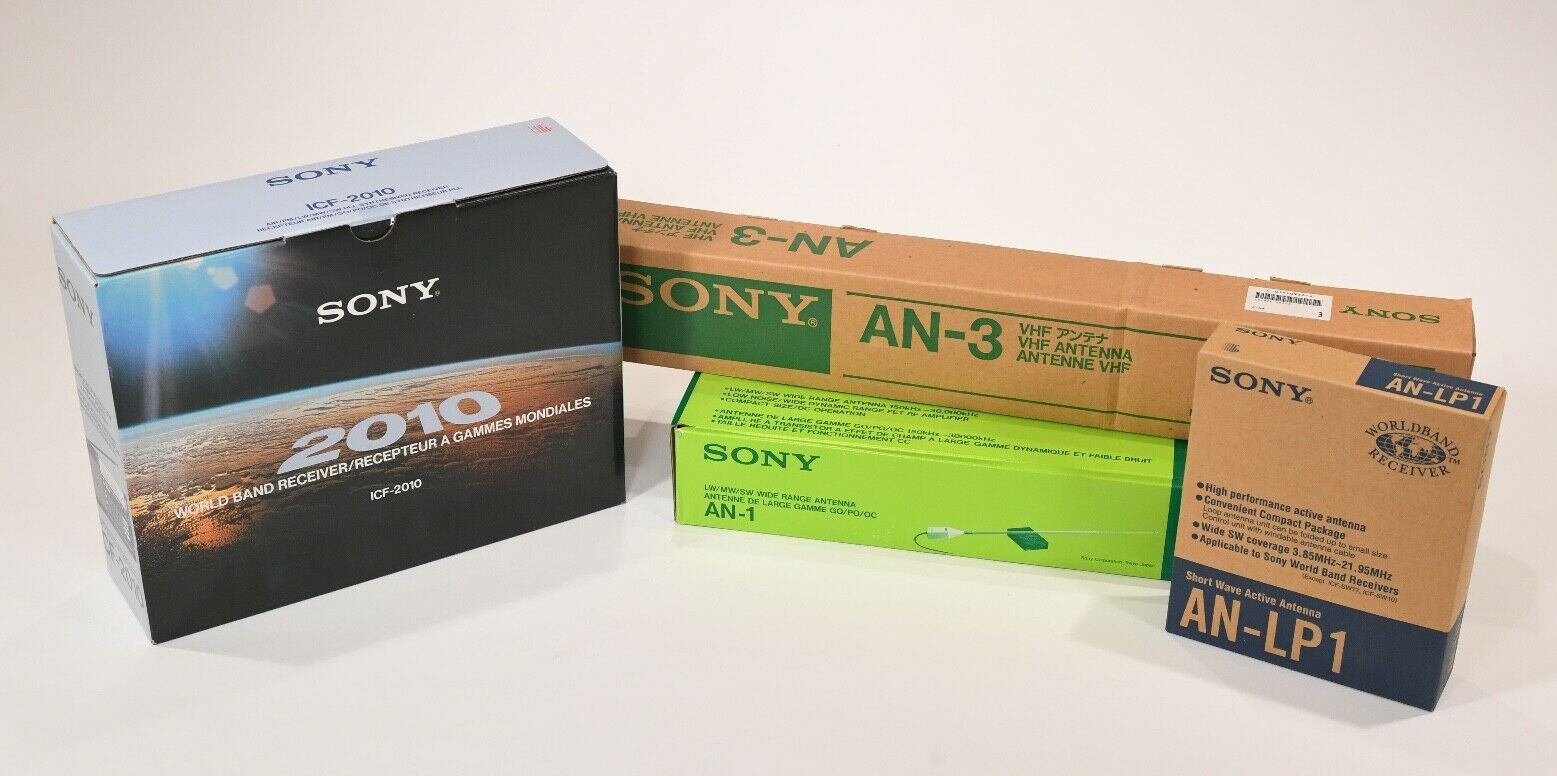
Many thanks to SWLing Post contributor, Frank Sturzaker, who writes:

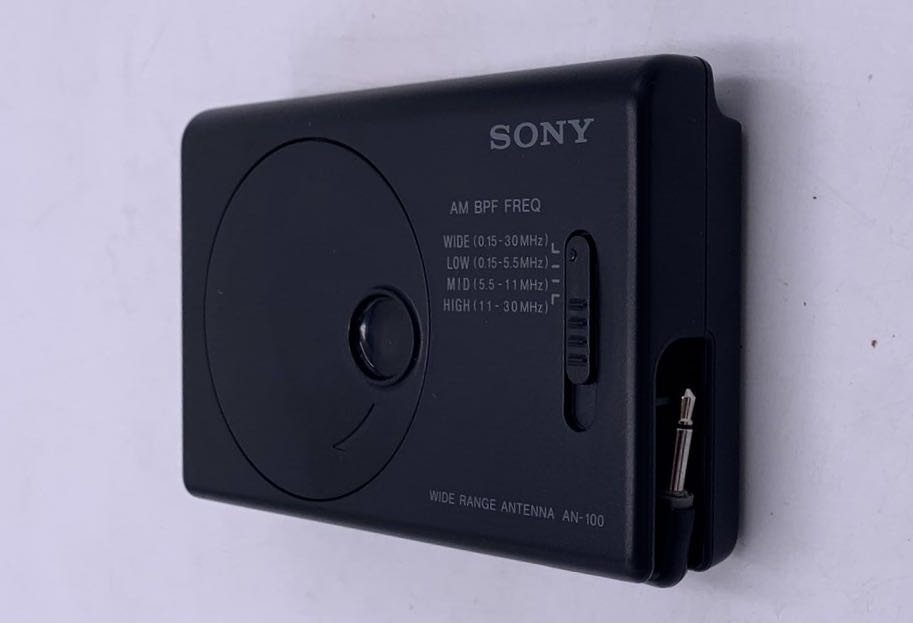
I am a new SW listener in the UK and am using an elderly Sony ICF SW100E picked up from selling website here in the UK fairly cheaply as a starter. It gets excellent reviews and seems to do what is required very well. A couple of weeks ago I also picked up a non-working Sony AN-100A external antenna at a charity / thrift store here in the UK. Cheap because not working.

The antenna section simply pulled out of the plastic case so I opened it up to have a poke about inside to try to solve the problem.

The antenna has been “ripped” from however it was mounted and has taken the thin metallic shaped piece / strip that somehow connects it to the circuit board and twisted it. I would guess that this has happened when trying to rotate the extended antenna when the extending sections had become too stiff to rotate – the pieces visible from outside the unit would not rotate inside the fixed section that sits in the unit.

Photos

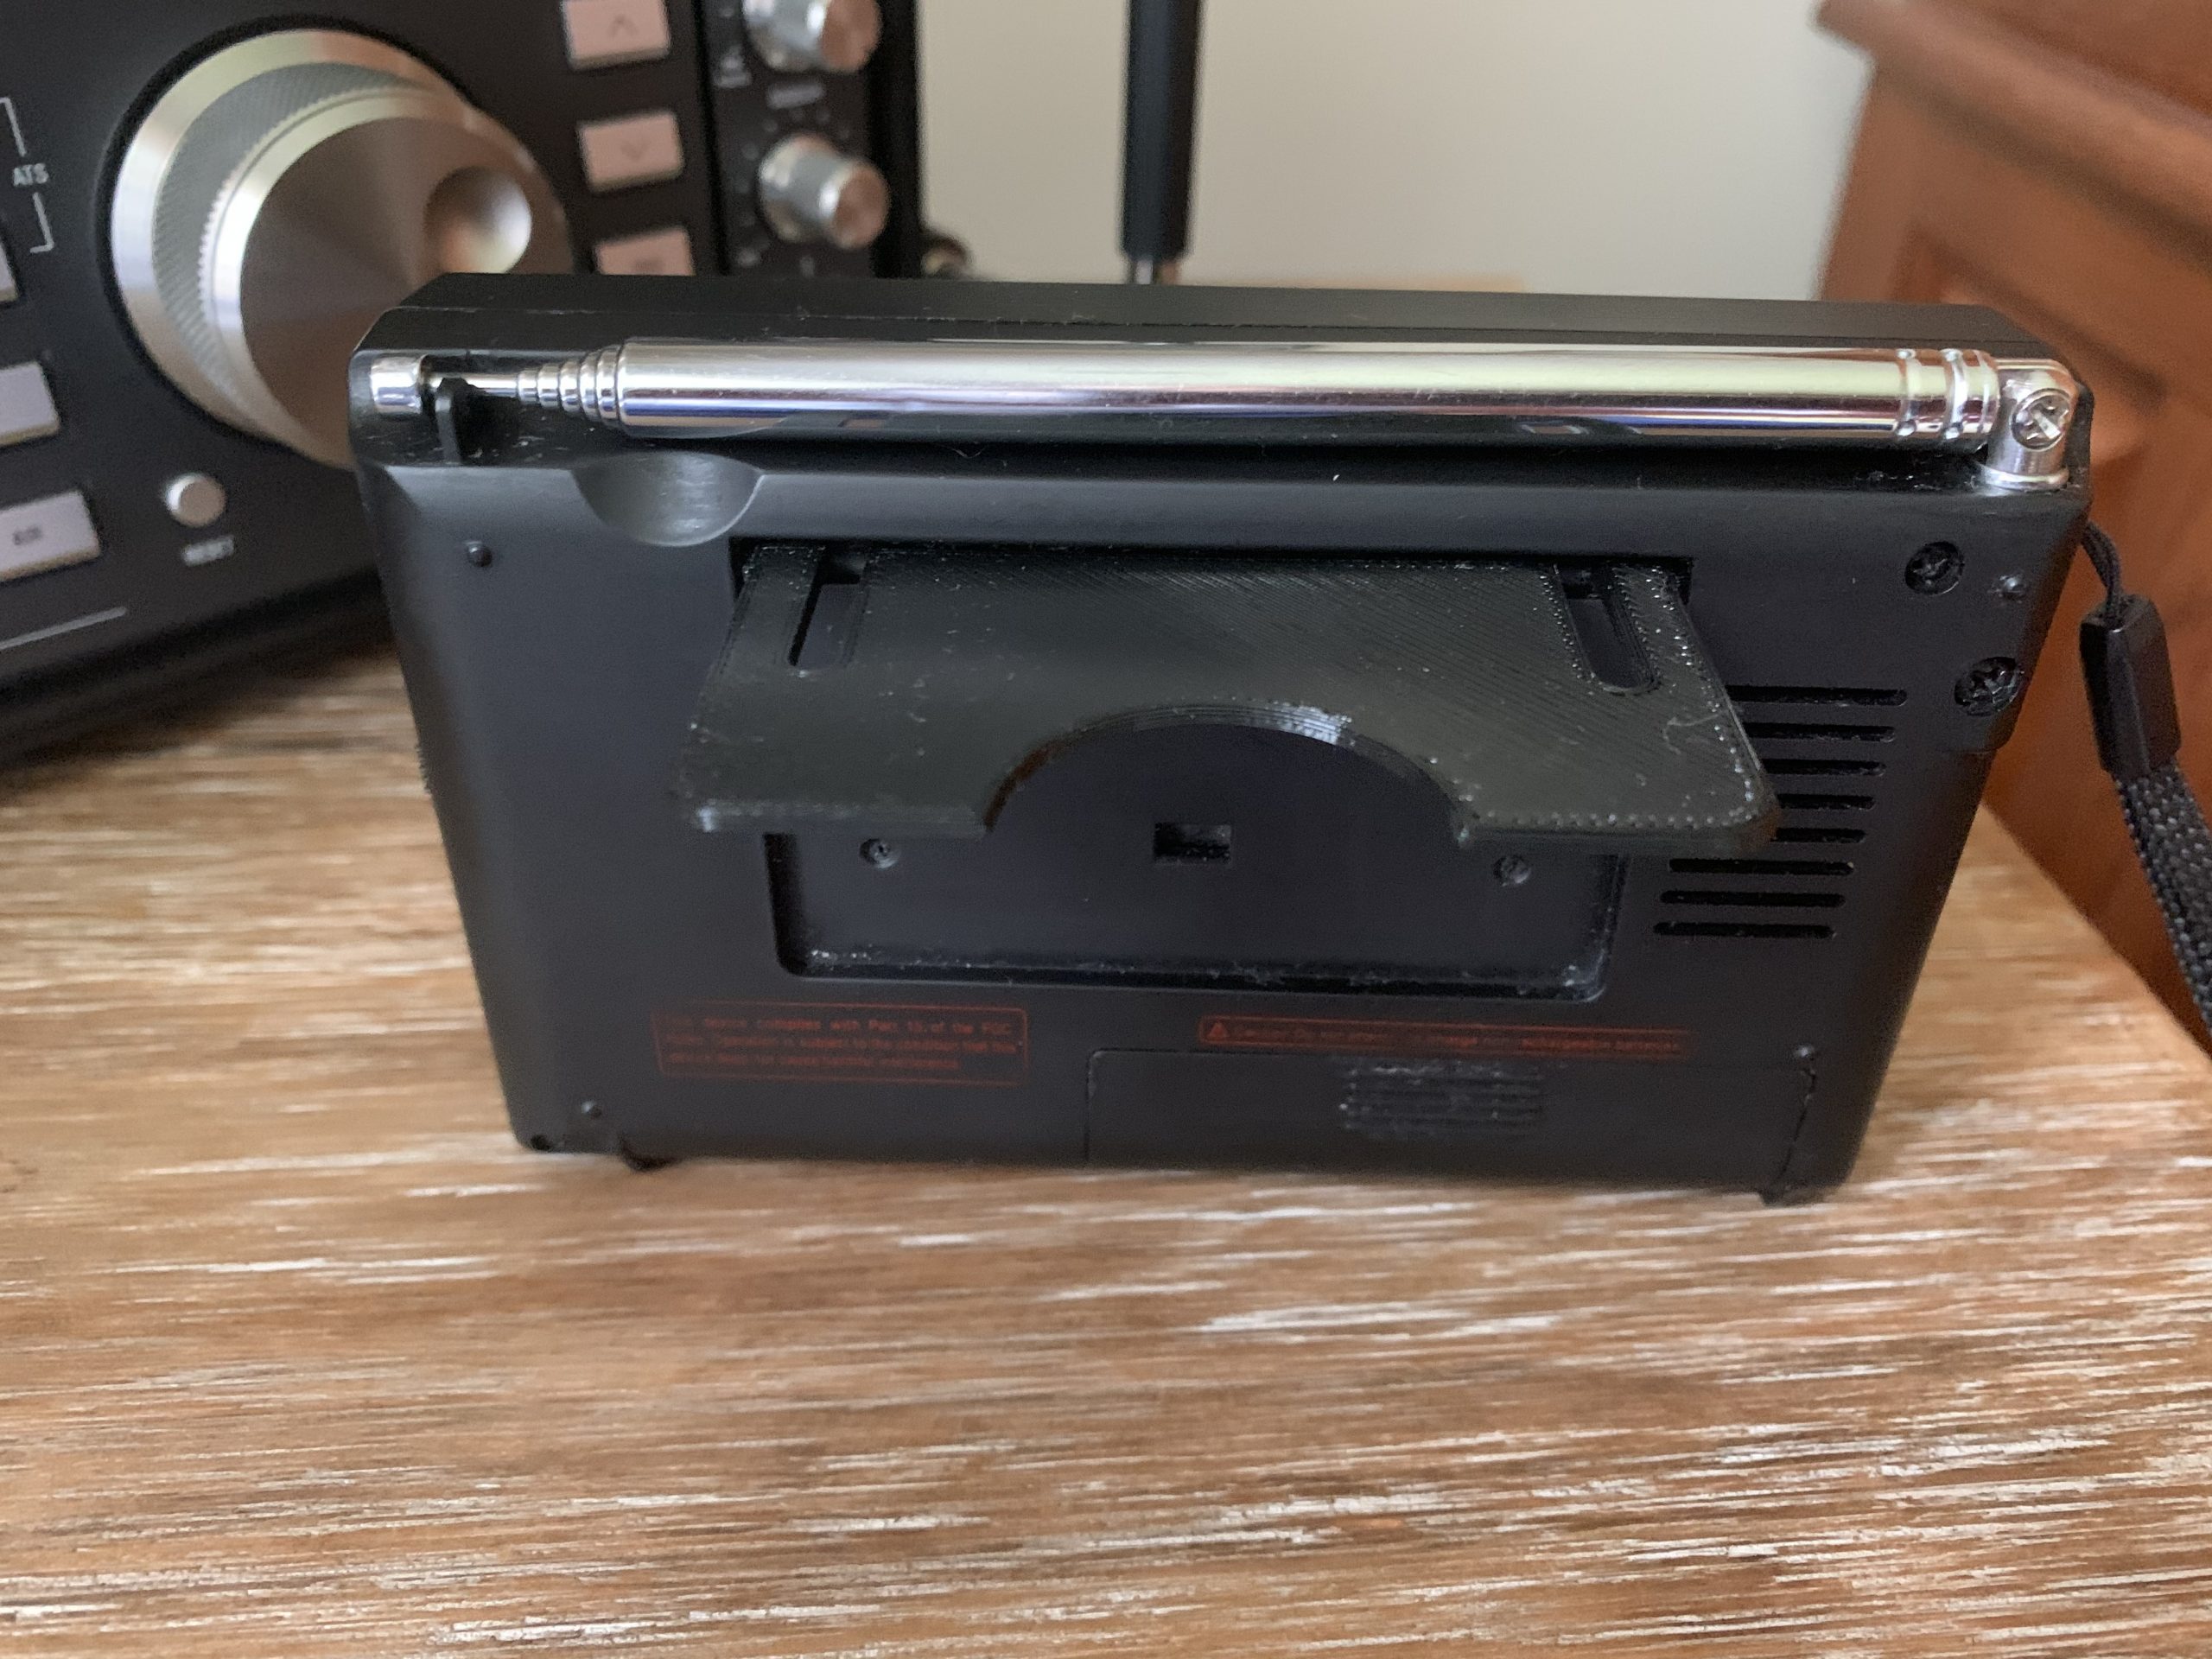
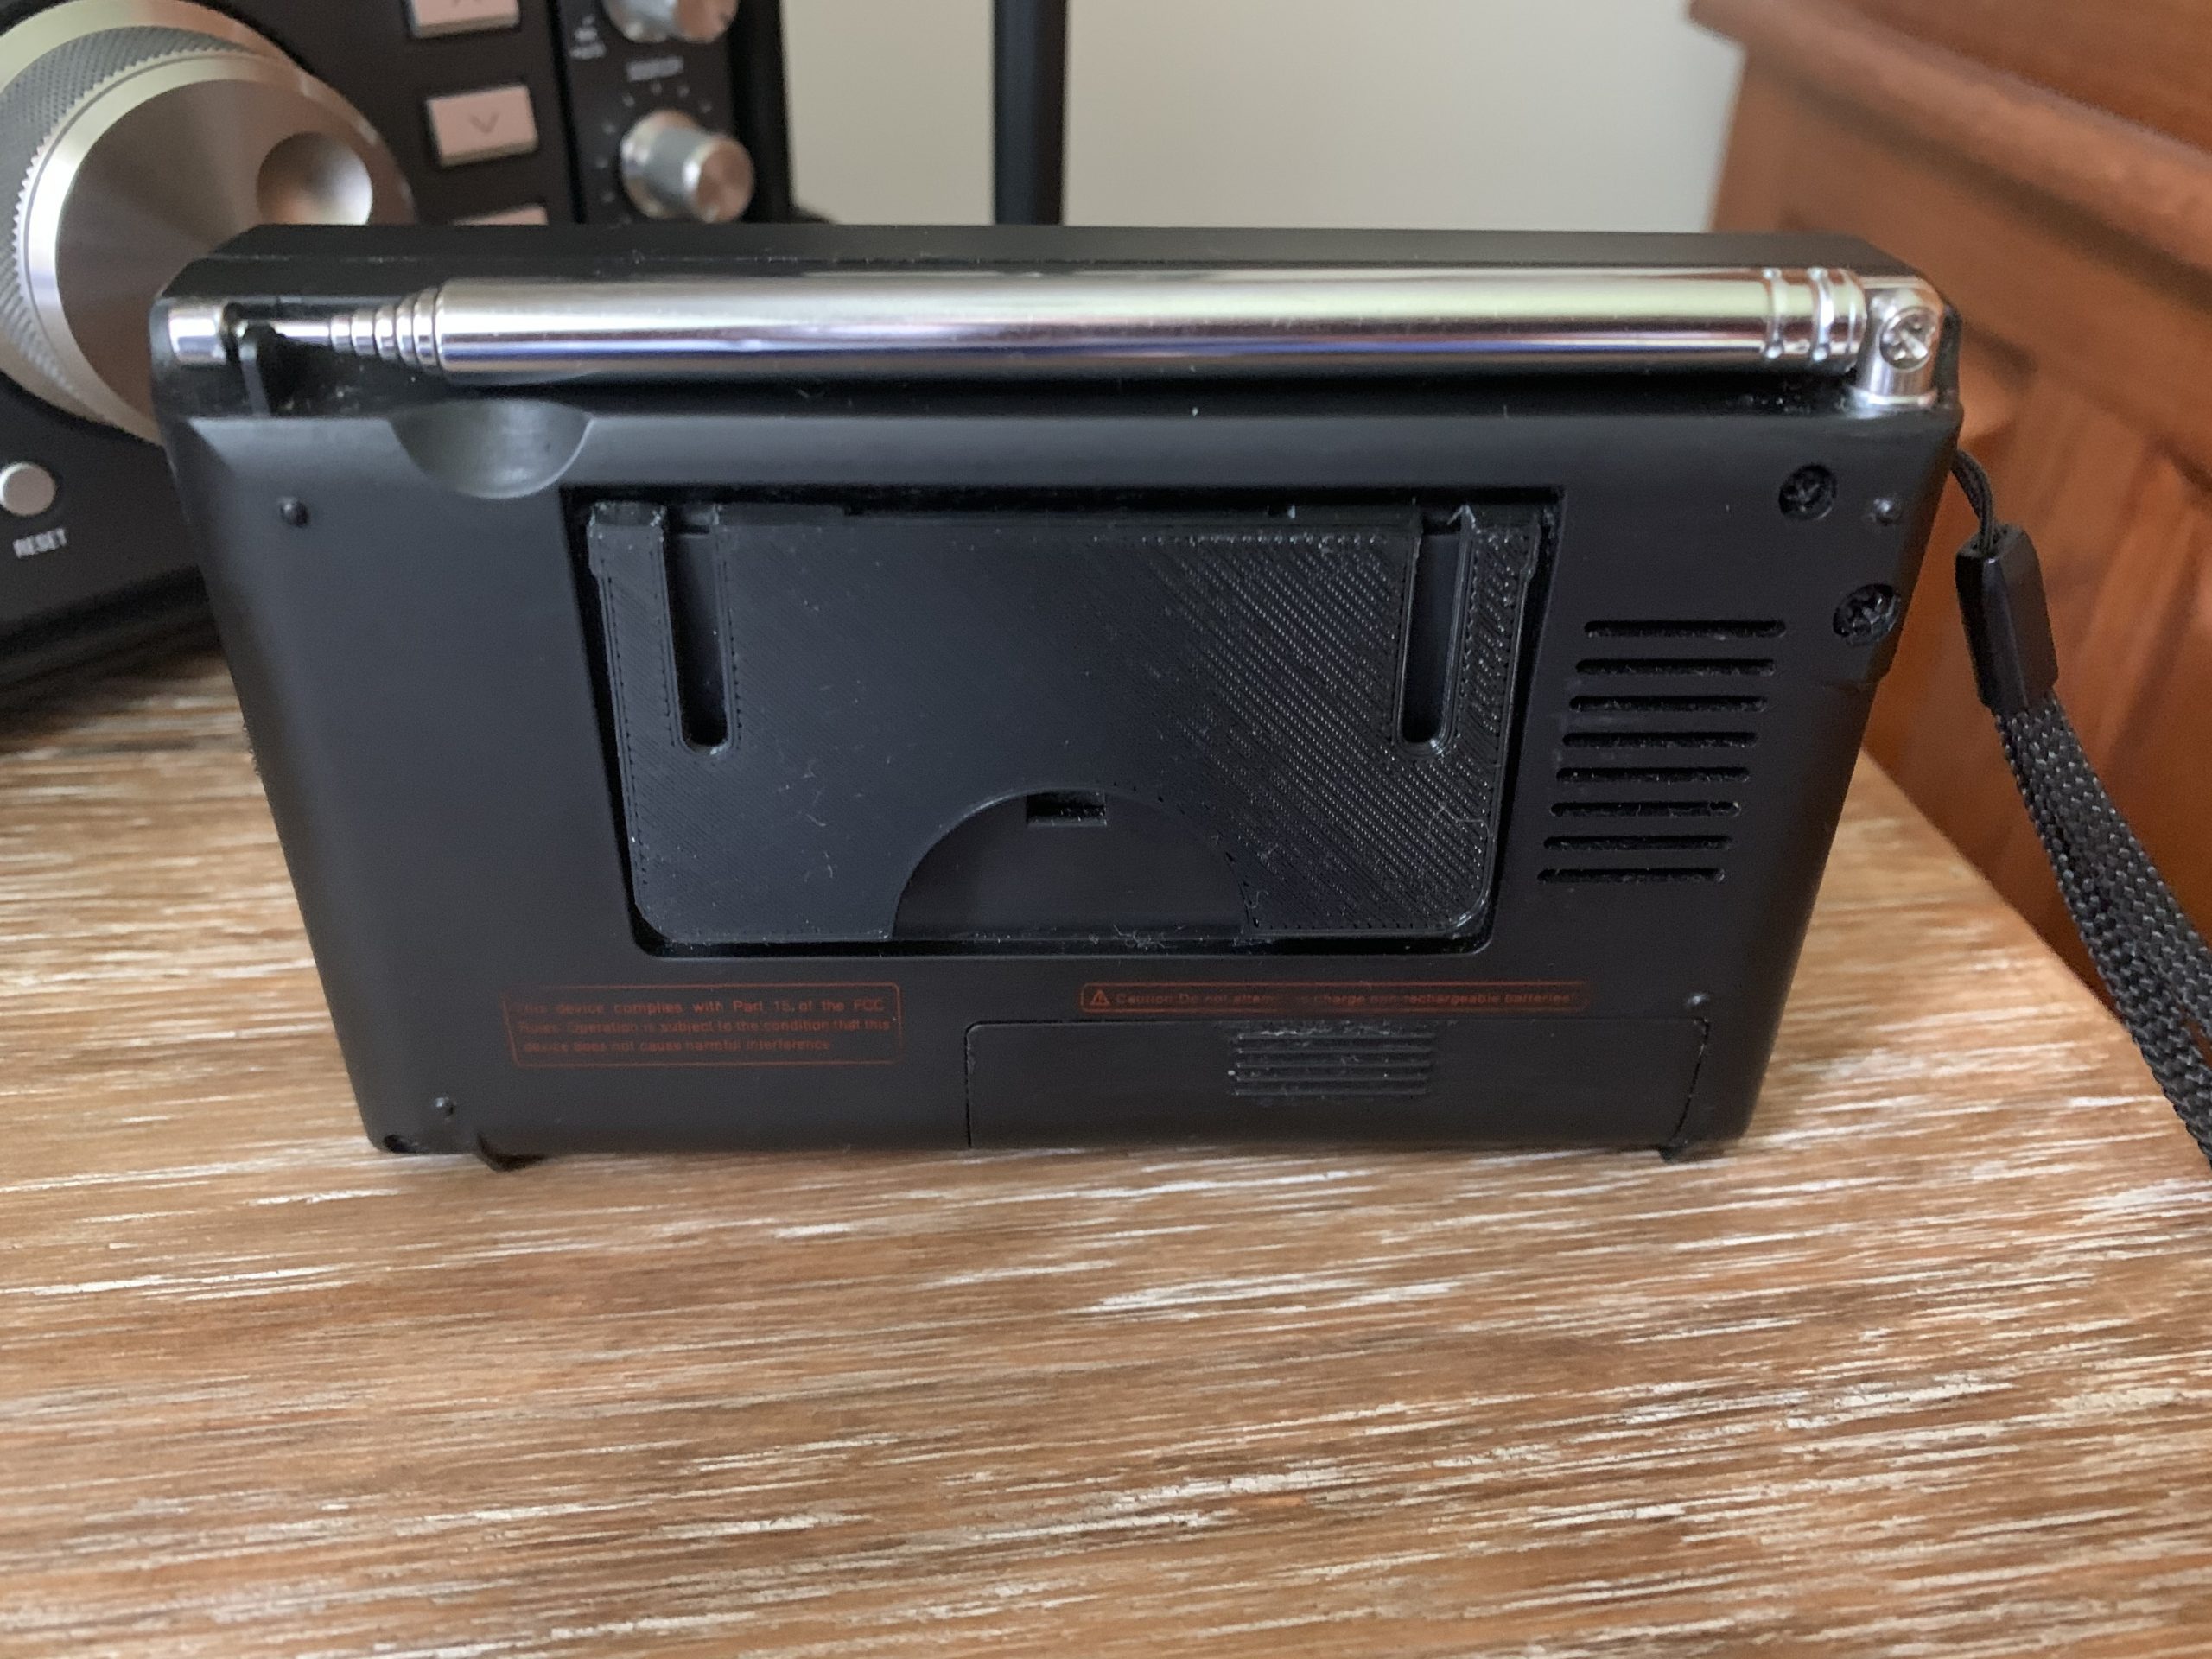
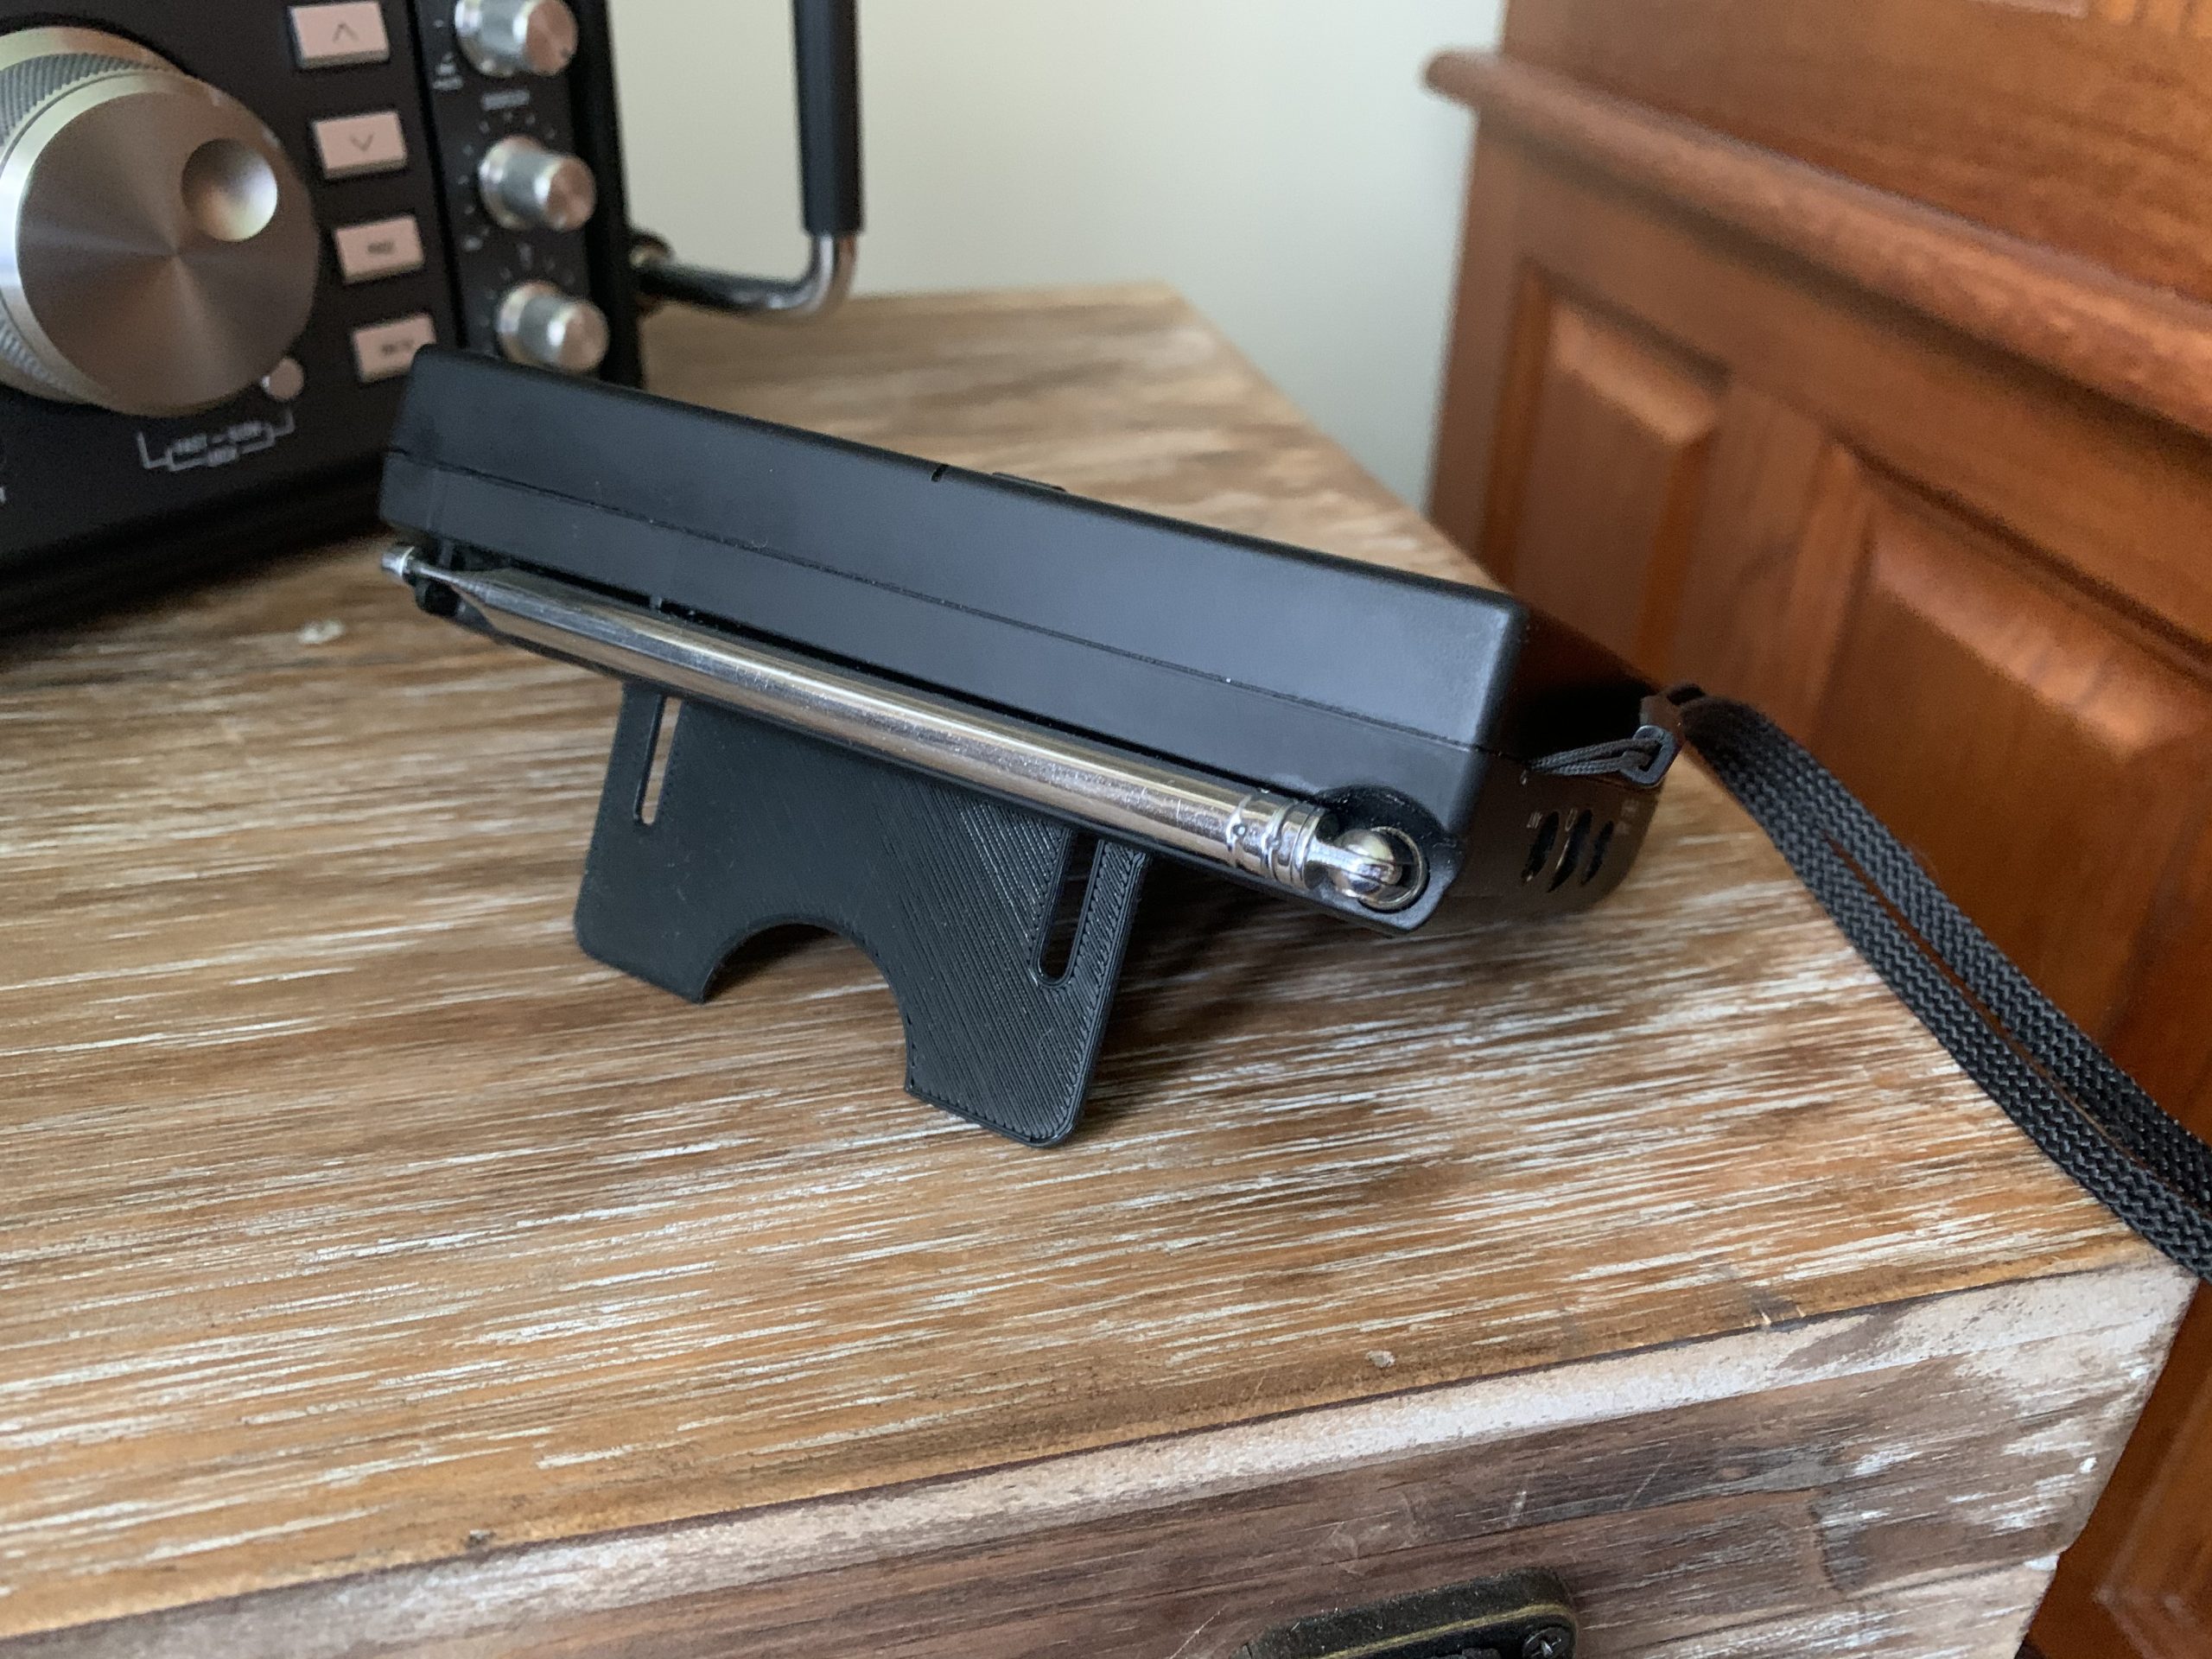
1 – This is what I bought (although the antenna itself was in the correct place in the case):

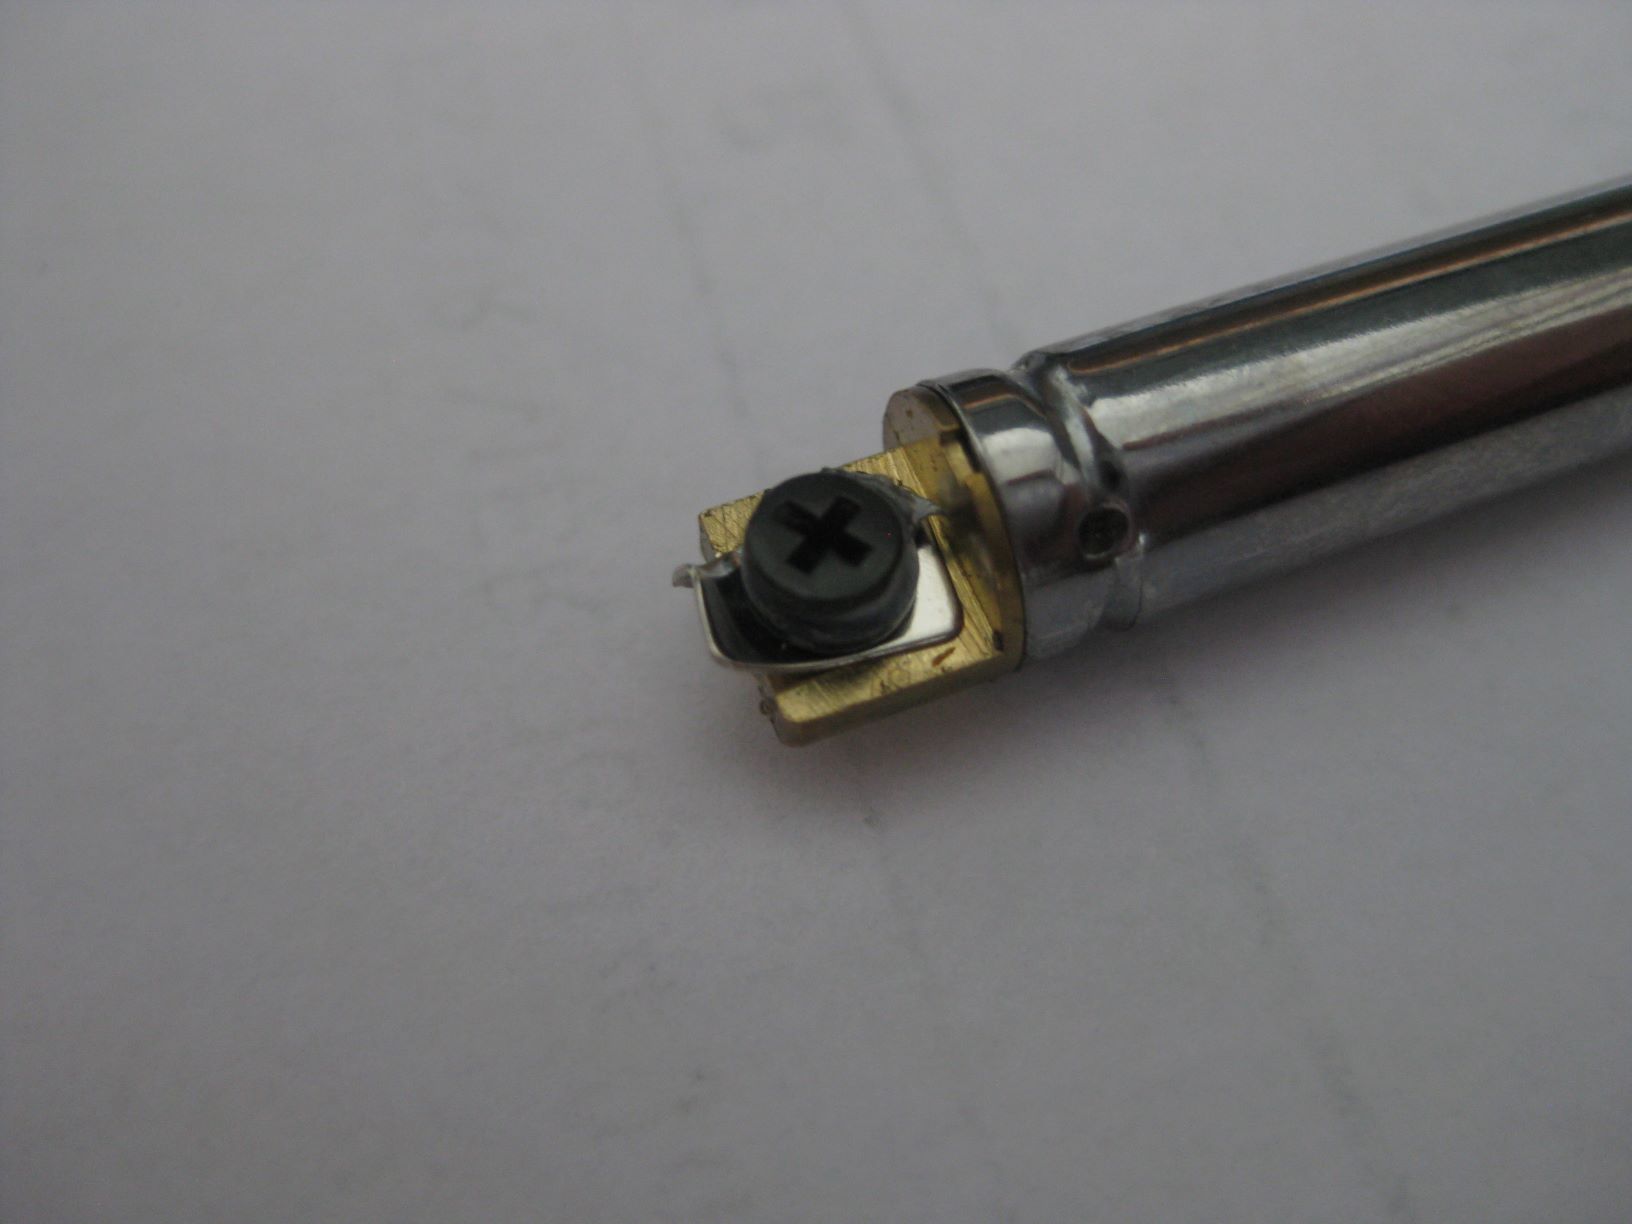
2 – This is a close up of the base of the antenna when first bought:

3 – The two halves of the case with the antenna in place but about 0.5″ short of where it should be:

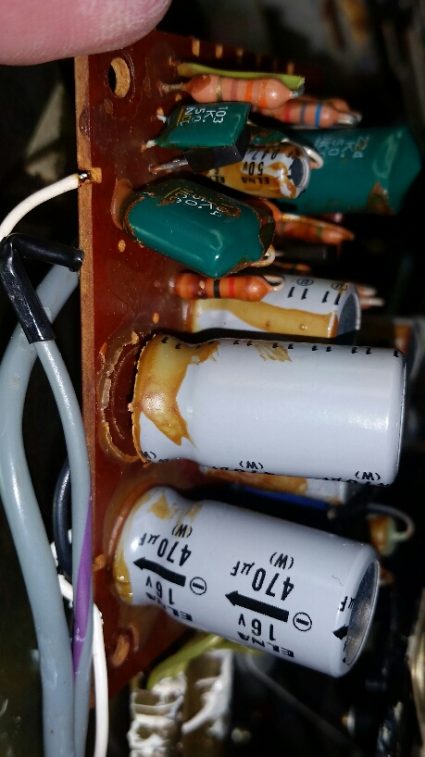
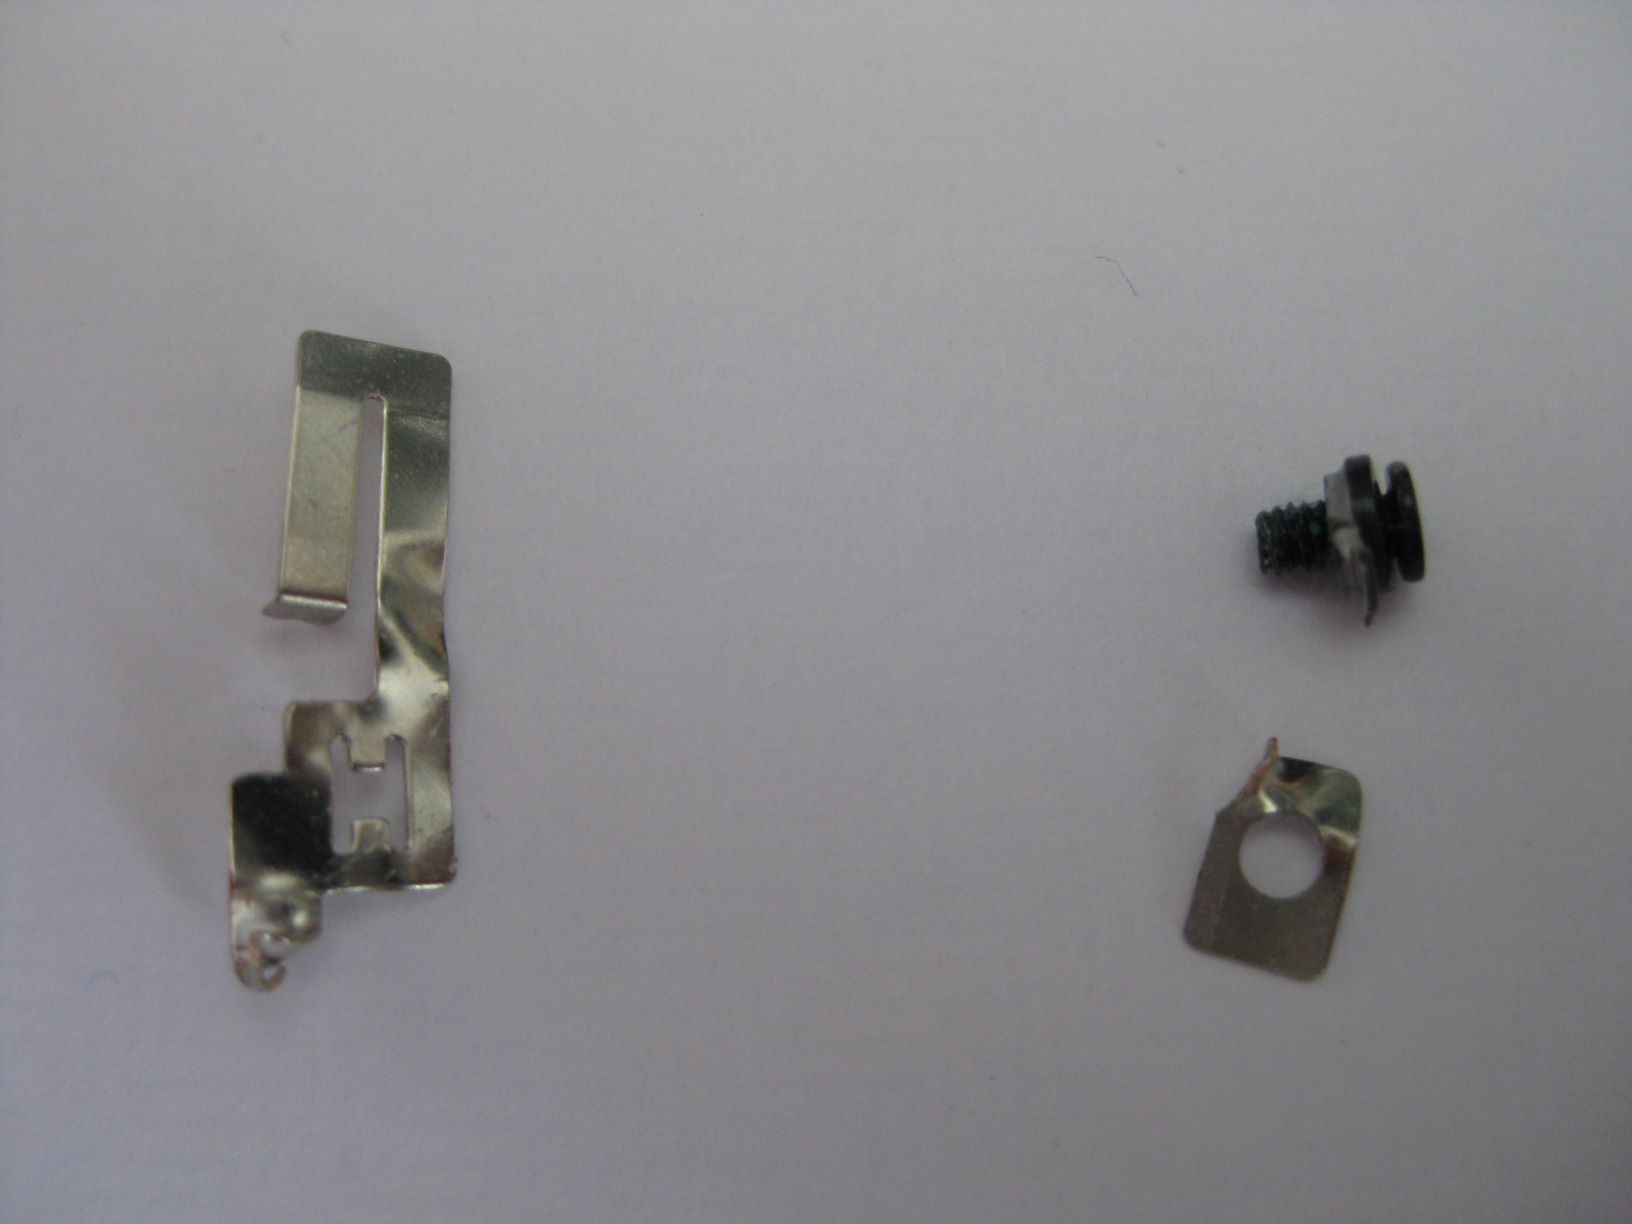
4 – A close up of the ‘loose pieces’ from inside the case and the bottom of the antenna – on the right are the pieces that were left on the antenna and on the left is the this metal piece that makes contact with the circuit board from the antenna

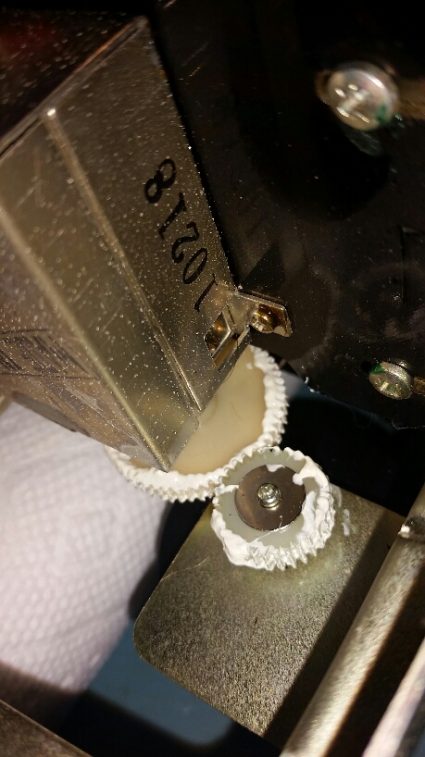
5 – Photo of antenna screw hole in rear of case from inside – the broken plastic is obvious round the screw hole:

6 – Photo of underside of circuit board showing the flat metallic area where the metallic strip from the antenna makes contact:

My questions about how it all fits together (as a starter) are:

    • Is it ONLY the screw from the outside holds the whole antenna assembly in place or is it fixed with glue etc. when originally shipped? It looks to have been ONLY the screw because there are no traces of any adhesive etc.
    • Should the antenna be able to rotate at its lowest section – like on the SW100E?
    • Is the thin metal strip fixed to the circuit board by anything (solder??) or does it just ‘brush against’ the metallic surface?
    • If I simply fix the antenna in place with epoxy or similar and run a connector between the bottom of the antenna and the circuit board will this work or are there other things that should be done or done in a specific way?

If someone can help then great. I repeat, I am not an electronics wizard – a master with a soldering wand I am not!!!

I could go at this like a bull at a gate but advice would be appreciated if there is any out there.

Post readers: if you can offer Frank some advice, please comment. Also, if you own an AN-100E and could share some internal photos, that might help him sort out how it was originally attached inside.

Spread the radio love

Caveat Emptor: A quick note about buying vintage solid state radios

Even rare NIB (New In Box) finds can have age issues internally

After posting links to a few used radios online yesterday, SWLing Post contributor, Jim Teddford, commented:

The thing to remember when buying solid state mulitiband radios online is that you’re buying “a pig in a poke.” Meaning you are buying a radio at your own risk. Radios from the 70s/80s/90s-(Panasonic Command Series and the Sony classics: ICF-6800, ICF-2021, etc.) are now to the point where components like capacitors, displays, knob/switches etc.are failing due to age. Unless you can repair or restore the radio, don’t buy it. Just admire the photo online.

Jim has a valid point here and it’s one I echo a lot when readers contact me asking if they should, for example, be looking for a used Sony ICF-2010 instead of a new radio like the Tecsun H-501x.

Although I bet 1970s-1990s era solid-state radios have much better longevity than our newer DSP receivers, at this point you must assume components will need to be replaced.

I’ve purchased two Panasonic RF-2200s in the past decade and both needed to have capacitors replaced, an internal cleaning, and DeOxit applied to the switches and pots. I assumed this much when I made the purchases. Mechanically, the radio worked well, but…what…four decades(!?!) of age will take a toll on the internals.

I’m not an expert on re-capping and restoring vintage radios, for that I rely on folks like Vlado and Chuck. Mentally, I set aside a budget to have work done on the radio and I add that to the purchase price.

Most of the time, components like capacitors, resistors, inductors, etc. can be replaced with no issues.

Keep in mind, though, that some items particular to any one model–like digital displays and integrated circuits–may already be obsolete. I’ll be the first to admit that if a digital display doesn’t work on a used solid state radio, I skip it for this very reason.

So when a newcomer to the radio world asks me they should purchase a used Sony ICF-2010 or a modern portable that’s still in production, my tendency is to dissuade them from the vintage set unless they have the skill or funds to give it a little TLC if needed.

With those disclaimers out of the way, I must say that I’ve yet to meet a modern DSP radio that has the audio fidelity of a 1970/80s era solid state radio like the GE Superadio or Panasonic RF-2200. And the Sony ICF-2010 or the Panasonic RF-B65? Both are still benchmark receivers and can wipe the floor with many of our late model radios.

In a nutshell: if you’re willing to put a little time and money into re-capping, repairing and restoring a reputable solid state radio, go for it! Otherwise, stick with a late model receiver that may even be backed by a manufacturer’s warranty.

Me? I’m willing to take the risk and invest to give these vintage portables a new lease on life!

SWLing Post readers: What do you think? Have you ever purchased a solid state radio that failed shortly after purchase? Have you ever restored a solid state radio? Did I miss any important points? Please comment!

Spread the radio love

Vlado restores Mike’s vintage Sony CRF-160

Sony CRF-160 Dial

Many thanks to SWLing Post contributor, Michael Schuster, who shares the following guest post:


Vlado works his magic on my Sony CRF-160

by Michael Schuster

Back in the 1970’s my grandfather gifted this solid-state portable to me as it was more than he needed. It was the first “real” radio I can remember owning, and it initiated my habit of scanning the dials into the wee hours of the morning. I began my serious SWLing using this set as it had excellent sensitivity, dual conversion design, big booming audio, and generous bandspread tuning for each major SW broadcast band.

One of the best-known SWL programs at the time was Happy Station on Radio Nederland, and I have distinct memories of listening in our back yard one summer afternoon when the show came up on the African Service over the Madagascar relay. My family was astonished at the program coming from so far away and even more so when Tom Meijer happened to read my letter over the air during the mailbag segment!

Fast forward many years (and two moves) later, it sat on a shelf until, trying it out again, I was dismayed to find both slide rule tuning dials, and the rotary drum band selector, to be frozen in place. And so there it sat until….

In a few online forums I kept hearing about a magician named Vlado at Ham Radio Repair. He specializes in restoring old sets, and has the courage and curiosity to tackle just about anything. Thinking this might be my last chance to bring this fossil back to life, and armed with a scanned copy of the service manual downloaded from the Radio Museum web site (the Internet is a marvelous thing) I began a several months’ long email exchange with Vlado entitled “Would you be willing to work on…”

He is chronically swamped with sets to work on, and has little room to store pending jobs, but was more than willing to have a look. Several months, and one pandemic later, we touched base again and I arranged to ship this monster off to him. Vlado is especially interested in the stories behind old hardware, so I shared its history with him as it adds that extra “human factor”.

The radio is in great shape as he noted, but needed a total rework of the tuning dials and drum selector. He also replaced all of the electrolytic capacitors (most were leaking as pictured), replaced some tiny light bulbs with LED’s, and realigned all of the circuits for maximum performance.

Unpacking and trying out the restored set was a true blast and somewhat miraculous. It performs just as I remember and now sits on the shelf, this time in use rather than in storage, booming its audio across my basement work room.

Now this set will probably outlive me as it did my grandfather; hopefully it will end up in the hands of an appreciative recipient for the next generation of radio enthusiasts.


Thank you for sharing this repair story, Mike. I visited Vlado’s home a few weeks ago and saw the box labeled “Sony CRF-160” in-line to be repaired. As Vlado worked on it, he sent me a couple of photos, too, because I believe it was the first time he had ever worked on this particular Sony model. It is certainly a gorgeous radio–wow! And I do love your philosophy as it’s the one I adopt too: keep vintage radios alive and working beyond our generation. 

Vlado is truly the most capable ham radio repair guy technician/engineer you’ll ever meet. He’s also as honest as the day is long. If you have a vintage or late-model solid-state radio that needs repair or restoration, contact him.

Click here to check out Vlado’s website HamRadio.repair.

Spread the radio love

My Replacement Stand Journey for the Grundig G6 Aviator


Guest Post by Troy Riedel

I’ve mentioned here in the past that I am an astronomy hobbyist first, and an SWL hobbyist second (call SWL my cloudy nights hobby).

A couple of years ago my Grundig G6 suffered from the troublesome “sticky” body that afflicts all of the Grundig/Eton radios of that era.  I used the recommended cleaning agent as has been posted here (Purple Power) to remove the sticky residue.  It worked great – but I discovered one must be very careful using this cleaner.  Why?  Excess cleaner seeped into the crevices where the radio stand mounts, was not fully removed/dried, and the cleaner “ate” the nubs off that hold the radio stand in place.  The result: a broken radio stand!  Right Photo: you’ll see glue residue smeared on the broken stand – where I tried to make & glue new nubs and failed miserably.

Through my astronomy hobby, I discovered someone (Joel) who 3D prints some astronomical accessories.  After ordering & receiving three quality products, we established a friendly rapport.  I asked him if he knew of anyone who 3D printed and commercially sold radio stands.

He replied “No” – and frankly he wasn’t quite sure what I was referring to – but he essentially conveyed “if you supply me a photo and dimensions, I will gladly print one that you can try”.  Great news!

After supplying him a photo and supplying dimensions, Joel printed off a stand plus a spare and shipped it to me.  Unfortunately, it did not fit … the side nubs were simply too small.

I wrote-off the encounter as having been worth the nominal cost & effort.  But Joel was not ready to write this off!  He asked for more details re: why it didn’t fit (we designed the stand about .25mm too thin – a small tolerance but significant in that the stand simply would not fit – the nubs were too small at the thickness that was printed).  We consulted, both made recommendations, then Joel promptly 3D printed another stand (v.2) and mailed it to me.

The end result: it fits perfectly – works perfectly.  I now have a replacement G6 stand and I feel my little Grundig Aviator Buzz Aldrin Edition (note the astronomy connection) was now, once again, whole!


For those who’ve replaced radio stands before, the biggest obstacle is *not* breaking it when you try to insert it into the back of the radio.  A tried and true trick is to freeze the replacement stand, so it contracts very slightly (by the mm), and then insert it into the body of the radio.  The great thing about this stand: it is designed with a cut-out on each side.  This cut-out allows the stand to ever-so-slightly flex (better – and probably more safely – than the freezing trick). This design allowed me to safely and rather effortlessly insert the stand without fear of breaking it.  And the stand’s thickness is quite capable of supporting the weight of the radio (note: the plastic of the 3D printed stand is not quite as hard as the OEM stand but it is still more than capable of supporting the radio’s weight).

I’m sharing this because Joel has added the G6 stand to his little BuckeyeStargazer Web Store , for $10 – what a great deal for us suffering G6 folks with broken stands.

At this time, the Buckeye Stargazer only offers the G6 stand.  But, who knows?  Before I came along, he didn’t offer any stand.  You might be able to cajole Joel into prototyping another stand?  For that – you’d have to contact him directly to see if he were receptive to more experimentation.

So, thanks again to the Buckeye Stargazer!  It’s always nice to tie my two hobbies together: astronomy & shortwave radio.

Spread the radio love

The radio man of Kumartuli

Set against this unlikely backdrop, Amit Ranjan Karmakar’s little shop is easy to miss. In his mid-60s, the ‘radio man’ of Kumartuli sits surrounded by radio sets of all sizes and vintages. (Express photo: Shashi Ghosh)

Many thanks to SWLing Post contributor, Kim Elliott, who shares a link to this short but fantastic photo pdoc about Kumartuli’s radio man, Amit Ranjan Karmakar.

Click here to view at The Indian Express.

Spread the radio love

Guest Post: Repairing the National Panasonic DR22, the Panasonic RF-2200’s Euro-Sibling

Many thanks to SWLing Post contributor, Mario Filippi (N2HUN), who shares the following guest post:


National Panasonic DR22, the Panasonic RF-2200’s Euro-Sibling

By Mario Filippi, N2HUN

(All photos courtesy of author)

Thomas, your recent and thoroughly excellent post on the Panasonic RF-2200 was the inspiration for this short review of the RF-2200’s European sibling, the National Panasonic DR22.

A few years back when I was hunting for a used RF-2200, a second-hand National Panasonic DR22 was for auction on eBay. These radios were sold in Europe and are almost an exact match for the RF-2200, with a few minor cosmetic differences.  It was so close in appearance that I decided to bid and won the auction. The cost was around $150.00 plus shipping.

Author’s National Panasonic DR22, a.k.a. RF-2200BS

The seller described the unit as working, not a tech special, and was complete except for the original earphone.  The strap, which can be missing on some used models was in place, the antenna and all the knobs were there. When the radio was received, all appeared to be working well and most importantly the rotatable ferrite antenna was fully functional.  With the exception of tiny paint specks and years of accumulated dust the unit was cosmetically acceptable for a 40 plus year old radio. After a close olfactory inspection (smelling the unit hi hi) it was determined the radio was from a smoke-free home, which is important as smoke not only causes yellowing of plastic components, but it inundates the internal electronic components and coats them with a yellowish-brown stain.

National Panasonic DR22 Dashboard Shows Slight Labeling Differences

On close inspection, the unit differs slightly from the RF-2200, in that it is branded as a “National  Panasonic” along with the “DR22” designation on the upper right of the unit. And, the National Panasonic logo can be seen to the left of the AM/SW gain control.  Another difference is the additional labeling found above each shortwave band, the designations are KW1, KW2, etc.

Power, Dial Light, and BFO Switches Are Identical to RF2200

As for the rear panel of the DR22, a major difference is the presence of a voltage selector which allows one to switch from European voltage (220) to the US standard (110).   Inside the unit there’s a transformer that handles this option. Alternatively you can simply use four “D” batteries to power the unit.

DR22 Line Voltage Selector Switch

After receiving the unit, first order of business was a good cleaning of the outer case with mild soap and water.  All the knobs and carrying strap were removed and soaked in a warm soapy solution. A toothbrush was put to work to remove years of human tactile residue from the sides of the knobs.

Knobs (left) removed for cleaning. Carrying strap (right) was inundated with decades of dirt.

Next on the “to do” list was to obtain a copy of the service manual, available on line.  You’ll find it under the title of National Panasonic RF-2200BA. It’s an excellent manual with detailed photos of the circuit boards, exploded diagrams of the mechanical parts, parts list, schematics, and of course the alignment procedure.   Cracking open the case required removal of all the case screws and very gently coaxing of the two panels apart. Years of use, rust on the screws, and dirt/dust buildup all contribute to the challenge of this endeavor.

DR22 Case Disassembly

The alignment took several weeks as the radio was worked on in my spare time.  Note that I did not replace any electrolytic capacitors, and yes it was the lazy man’s way but a basic inspection of the caps for any evident leaks, explosions, or burns was conducted.  In short I did not want to replace capacitors at this time since the radio, as received from the former owner, was working well on all bands. Surely, as other operators have reported, cap replacement will restore full operational excellence but I felt if the radio passes the alignment specifications  that was good enough for me at this point.

DR22 Undergoing Testing

After several weeks the radio was restored to specifications, all switches were cleaned and dusted and the radio reassembled.  This was done a few years ago and the radio continues performing well. Even the 125/500 KHz crystal markers are pretty much on the money when checked against WWV.  No scratchy pots either hi hi. So now the radio sits in my kitchen and is on at least a few hours a day and keeps company with its sister, my RF2200. Note that recently DR22s have sold on eBay for $150 – $300US. Tech specials/parts radio run considerably less.  Thanks and 73’s de N2HUN.


Thank you, Mario! It looks like you scored an excellent deal on the DR22 and it’s serving you quite well! I’m glad you spent time checking for leaky capacitors after opening the chassis. Using the DR22 so frequently will keep those caps “juicy!”

Post Readers: Please comment if you love the National Panasonic DR22!


Do you enjoy the SWLing Post?

Please consider supporting us via Patreon or our Coffee Fund!

Your support makes articles like this one possible. Thank you!

Spread the radio love

Video: N1SPY brings a GE seven band radio back to life!

Many thanks to SWLing Post contributor, Ivan Cholakov, who writes:

Thomas Cholakov (N1SPY) picked up an old General Electric radio from the 2019 Orlando Hamcation and brought it back to life. Unfortunately with all of the radio’s 7 bands, it did not have shortwave.

Click here to watch on YouTube.

Brilliant job resurrecting that GE portable, Tommy!!! Thank you for sharing.

Spread the radio love