Shortwave listening and everything radio including reviews, broadcasting, ham radio, field operation, DXing, maker kits, travel, emergency gear, events, and more
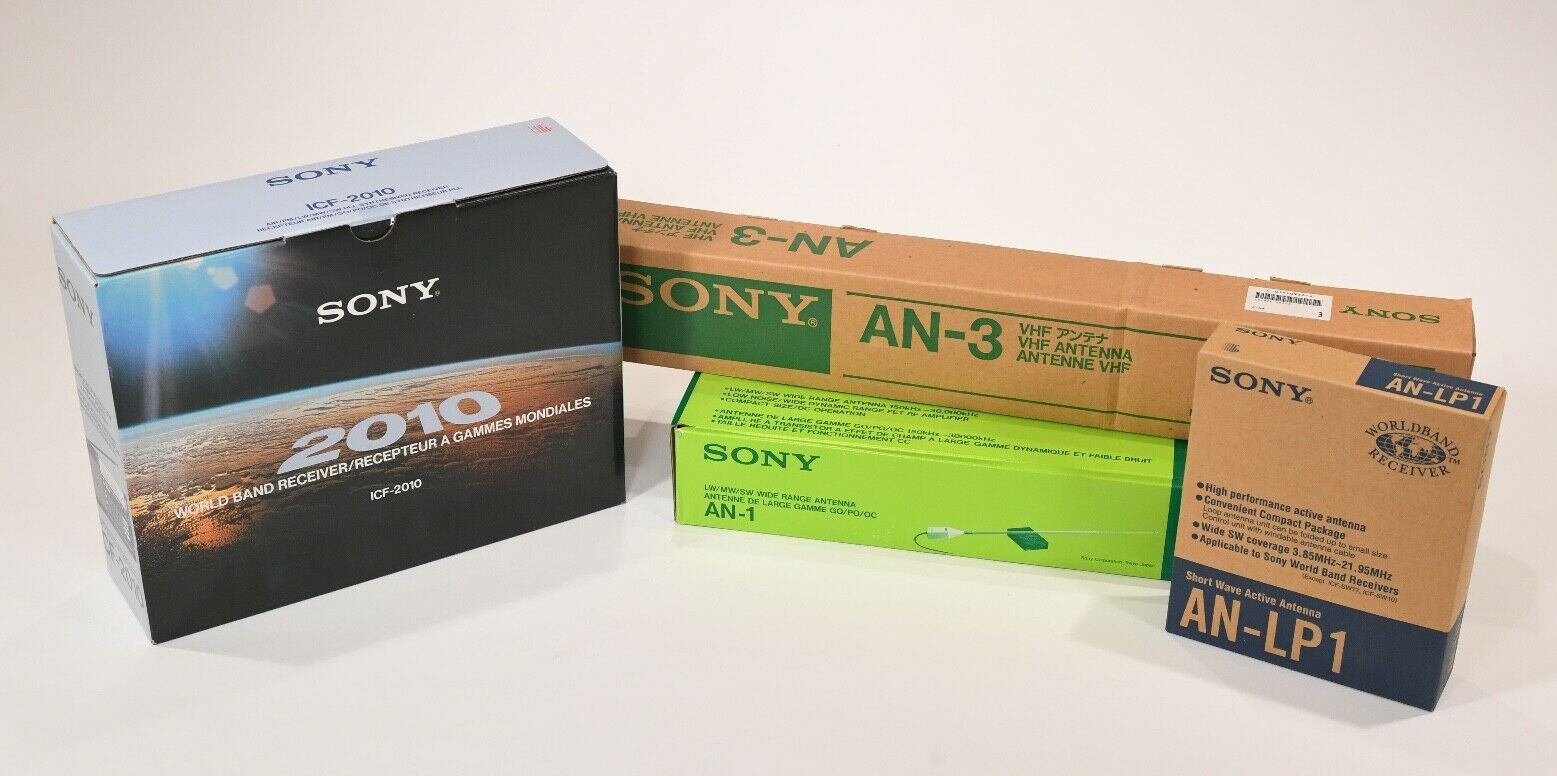
Even rare NIB (New In Box) finds can have age issues internally
After posting links to a few used radios online yesterday, SWLing Post contributor, Jim Teddford, commented:
The thing to remember when buying solid state mulitiband radios online is that you’re buying “a pig in a poke.” Meaning you are buying a radio at your own risk. Radios from the 70s/80s/90s-(Panasonic Command Series and the Sony classics: ICF-6800, ICF-2021, etc.) are now to the point where components like capacitors, displays, knob/switches etc.are failing due to age. Unless you can repair or restore the radio, don’t buy it. Just admire the photo online.
Jim has a valid point here and it’s one I echo a lot when readers contact me asking if they should, for example, be looking for a used Sony ICF-2010 instead of a new radio like the Tecsun H-501x.
Although I bet 1970s-1990s era solid-state radios have much better longevity than our newer DSP receivers, at this point you must assume components will need to be replaced.
I’ve purchased two Panasonic RF-2200s in the past decade and both needed to have capacitors replaced, an internal cleaning, and DeOxit applied to the switches and pots. I assumed this much when I made the purchases. Mechanically, the radio worked well, but…what…four decades(!?!) of age will take a toll on the internals.
I’m not an expert on re-capping and restoring vintage radios, for that I rely on folks like Vlado and Chuck. Mentally, I set aside a budget to have work done on the radio and I add that to the purchase price.
Most of the time, components like capacitors, resistors, inductors, etc. can be replaced with no issues.
Keep in mind, though, that some items particular to any one model–like digital displays and integrated circuits–may already be obsolete. I’ll be the first to admit that if a digital display doesn’t work on a used solid state radio, I skip it for this very reason.
So when a newcomer to the radio world asks me they should purchase a used Sony ICF-2010 or a modern portable that’s still in production, my tendency is to dissuade them from the vintage set unless they have the skill or funds to give it a little TLC if needed.
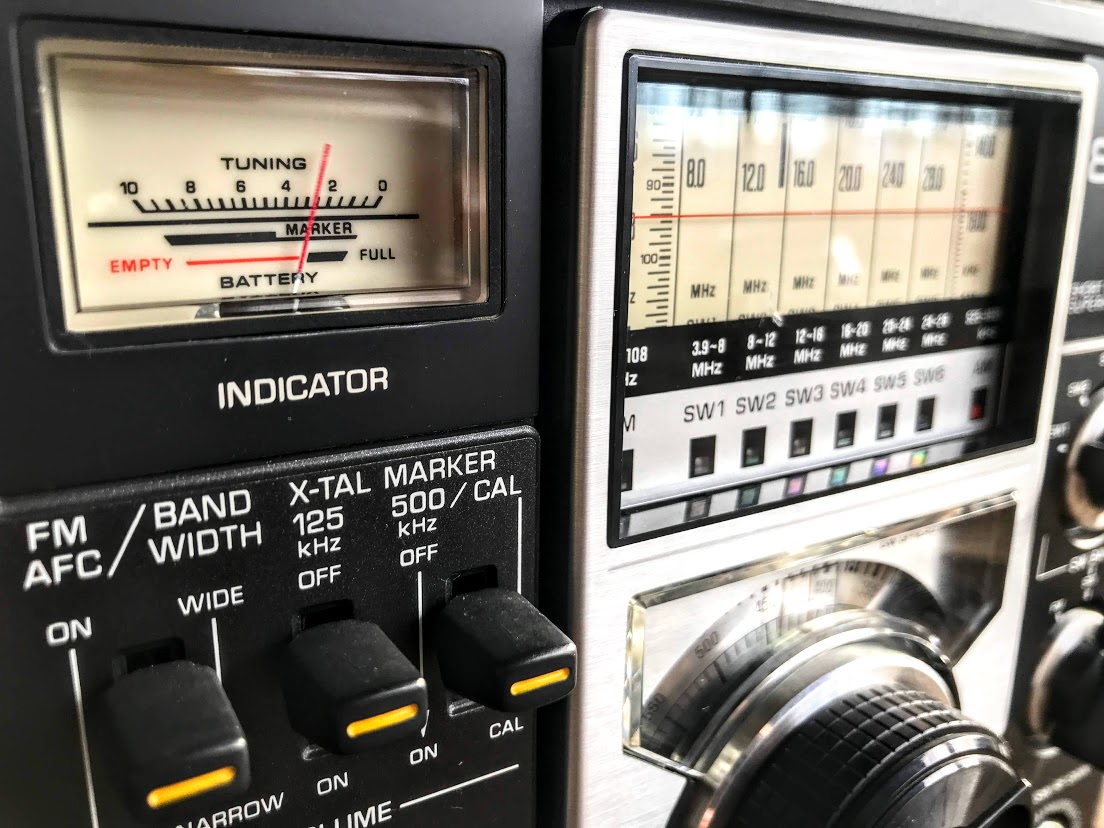
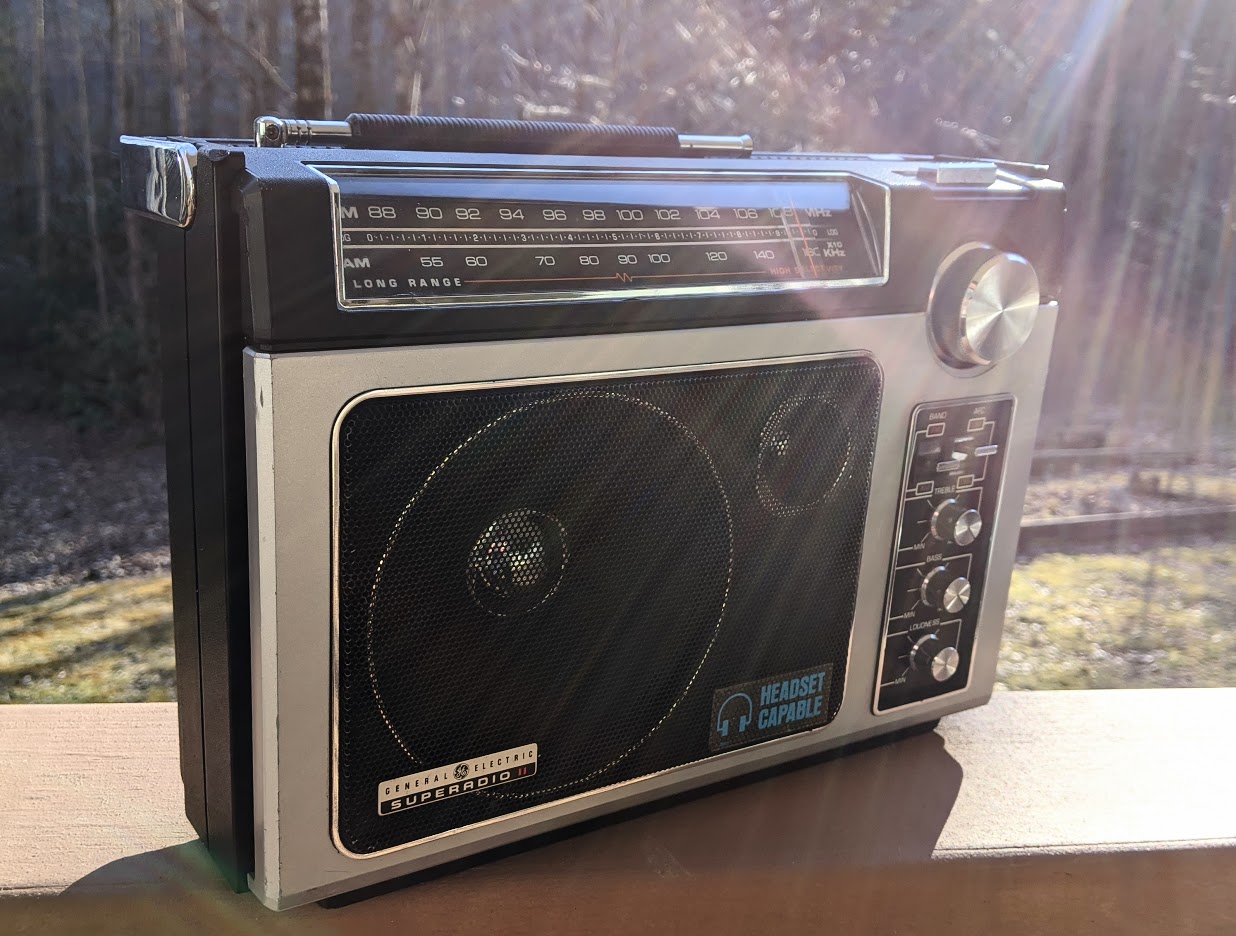
With those disclaimers out of the way, I must say that I’ve yet to meet a modern DSP radio that has the audio fidelity of a 1970/80s era solid state radio like the GE Superadio or Panasonic RF-2200. And the Sony ICF-2010 or the Panasonic RF-B65? Both are still benchmark receivers and can wipe the floor with many of our late model radios.
In a nutshell: if you’re willing to put a little time and money into re-capping, repairing and restoring a reputable solid state radio, go for it! Otherwise, stick with a late model receiver that may even be backed by a manufacturer’s warranty.
Me? I’m willing to take the risk and invest to give these vintage portables a new lease on life!
SWLing Post readers: What do you think? Have you ever purchased a solid state radio that failed shortly after purchase? Have you ever restored a solid state radio? Did I miss any important points? Please comment!
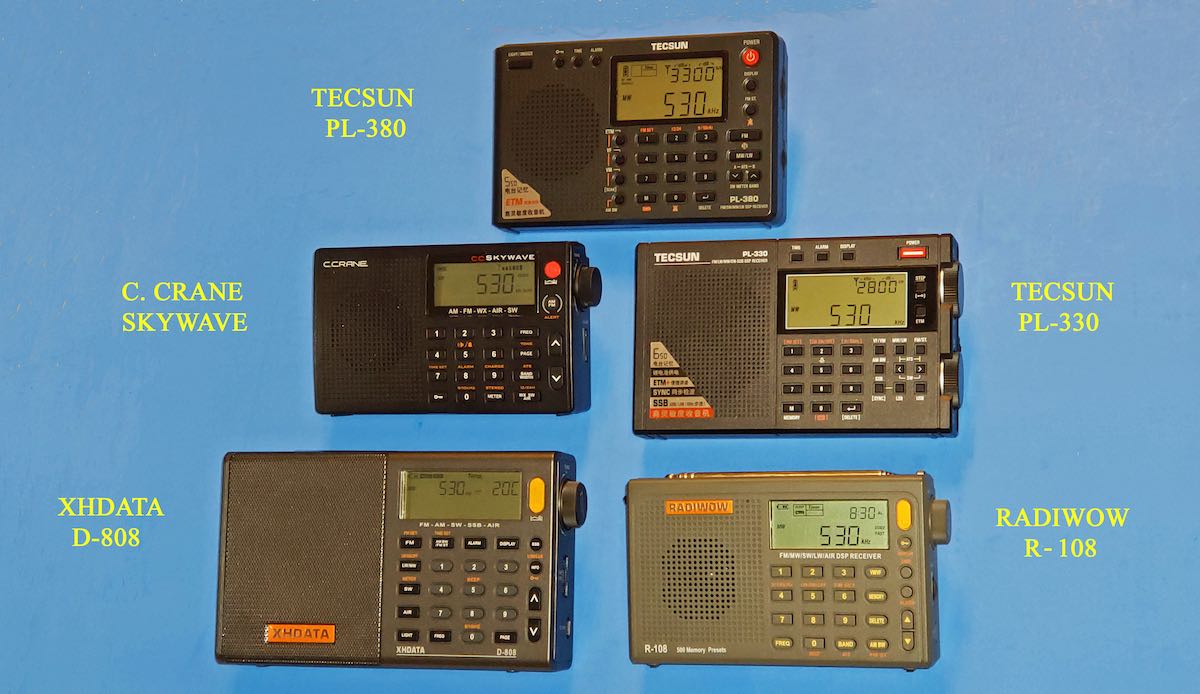
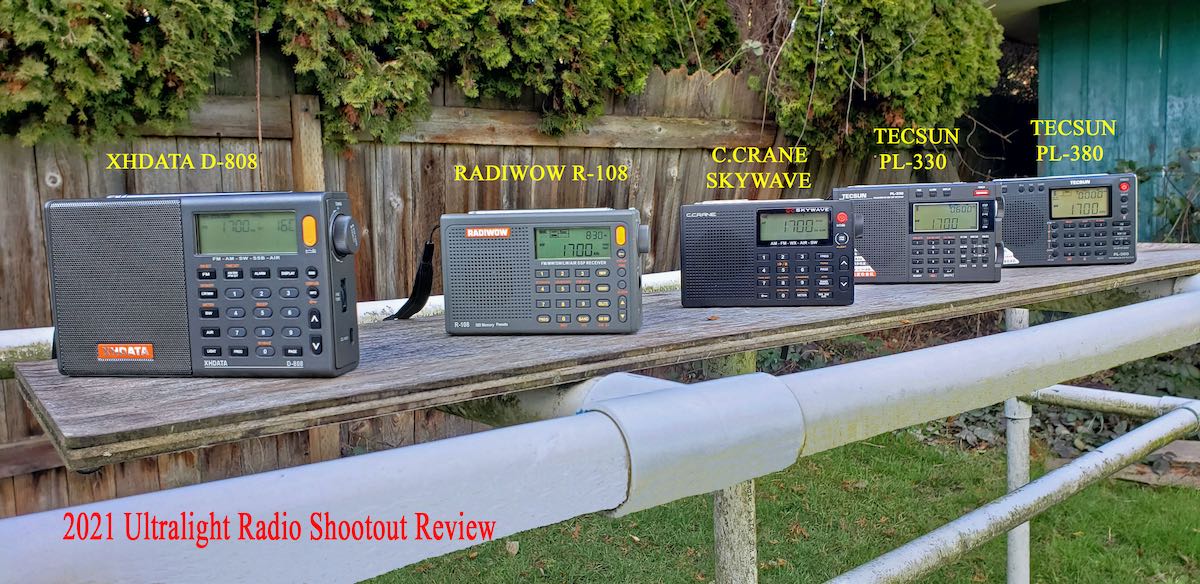
Many thanks to SWLing Post contributor, Gary DeBock, who shares his extensive 2021 Ultralight Radio Shootout.
This is truly a deep dive featuring five popular ultralight portable radios and examining mediumwave, shortwave, FM, and AIR Band performance.
The review is an amazing 40 pages long! In order to display the entire review, click on the “Continue reading” link below.
2021 Ultralight Radio Shootout
Five Hot Little Portables Brighten Up the Pandemic
By Gary DeBock, Puyallup, WA, USA April 2021
Introduction The challenges and thrills of DXing with pocket radios have not only survived but thrived since the Ultralight Radio Boom in early 2008, resulting in a worldwide spread of the hobby niche group. Based upon the essential concepts of DXing skill, propagation knowledge and perseverance, the human factor is critical for success in pocket radio DXing, unlike with computer-controlled listening. The hobbyist either sinks or swims according to his own personal choices of DXing times, frequencies and recording decisions during limited propagation openings—all with the added challenge of depending on very basic equipment. DXing success or failure has never been more personal… but on the rare occasions when legendary DX is tracked down despite all of the multiple challenges, the thrill of success is truly exceptional—and based entirely upon one’s own DXing skill.
Ultralight Radio DXing has inspired spinoff fascination not only with portable antennas like the new Ferrite Sleeve Loops (FSL’s) but also with overseas travel DXing, enhanced transoceanic propagation at challenging sites like ocean side cliffs and Alaskan snowfields, as well as at isolated islands far out into the ocean. The extreme portability of advanced pocket radios and FSL antennas has truly allowed hobbyists to “go where no DXer has gone before,” experiencing breakthrough radio propagation, astonishing antenna performance and unforgettable hobby thrills. Among the radio hobby groups of 2021 it is continuing to be one of the most innovative and vibrant segments of the entire community.
The portable radio manufacturing industry has changed pretty dramatically over the past few years as much of the advanced technology used by foreign companies in their radio factories in China has been “appropriated” (to use a generous term) by new Chinese competitors. Without getting into the political ramifications of such behavior the obvious fact in the 2021 portable radio market is that all of the top competitors in this Shootout come from factories in China, and four of the five have Chinese name brands. For those who feel uneasy about this rampant copying of foreign technology the American-designed C. Crane Skywave is still available, although even it is still manufactured in Shenzhen, China—the nerve center of such copying.
Prior to purchasing any of these portables a DXer should assess his own hobby goals, especially whether transoceanic DXing will be part of the mission– in which case a full range of DSP filtering options is essential. Two of the China-brand models use only rechargeable 3.7v lithium type batteries with limited run time, which may not be a good choice for DXers who need long endurance out in the field. A hobbyist should also decide whether a strong manufacturer’s warranty is important. Quality control in some Chinese factories has been lacking, and some of the China-brand radio sellers offer only exchanges—after you pay to ship the defective model back to China. Purchasers should not assume that Western concepts of reliability and refunds apply in China, because in many cases they do not. When purchasing these radios a DXer should try to purchase through a reputable seller offering a meaningful warranty—preferably in their own home country.
One of the unique advantages of Ultralight Radio DXing is the opportunity to sample the latest in innovative technology at a very reasonable cost—and the five pocket radio models chosen for this review include some second-generation DSP chip models with astonishing capabilities. Whether your interest is in domestic or split-frequency AM-DXing, FM, Longwave or Shortwave, the pocket radio manufacturers have designed a breakthrough model for you—and you can try out any (or all) of them at a cost far less than that of a single table receiver. So get ready for some exciting introductions… and an even more exciting four band DXing competition!
Many thanks to SWLing Post contributor, Dan Robinson, who shares the following guest post:
Revisiting the XHDATA: What Sangean Should Have Learned from the D-808
by Dan Robinson
Recent additions to the shortwave portable receiver market have been quite impressive, especially considering the continuing decline in the use of shortwave as a transmission method by broadcasters.
In what could be the final models from Tecsun, we saw the PL-330, PL-990x and H-501x all of which bring impressive features and capabilities to the game. Sangean finally introduced its upgraded ATS-909×2 including an early firmware upgrade that was supposed to correct some issues with this receiver.
As I have observed in some recent reviews, the very fact that the listening community still sees any new receivers is reason for gratitude, though we also have opportunities to acquire numerous classic receivers and can still do an excellent job in today’s listening environment.
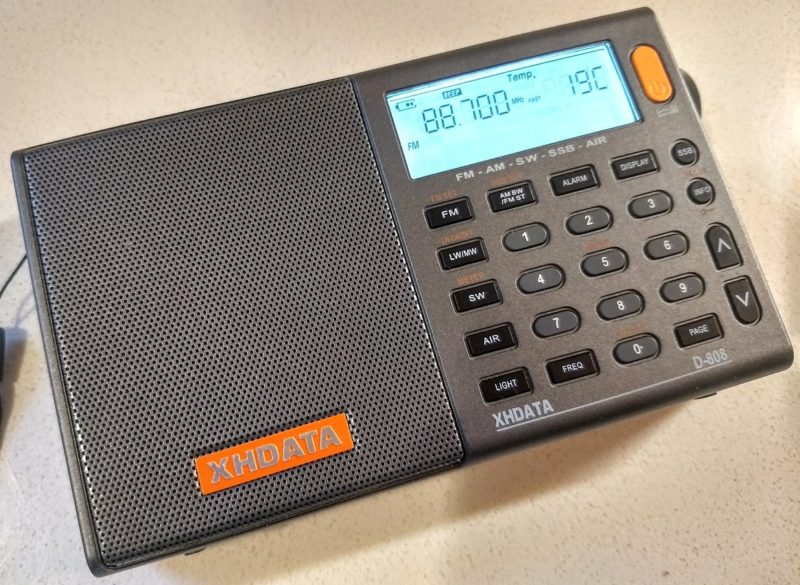
One receiver that emerged a few years ago and which took the listening hobby by storm was the XHDATA D-808. Numerous reviews are online, including ones here on the SWLing Post, and excellent reviews by Gilles Letourneau here and here.
The 808 was and still is compared to the CCrane Skywave SSB, a much smaller and compact receiver. Unfortunately, in my experience both suffer from soft muting.
I obtained a D-808 shortly after it appeared based on early positive reviews. I used it once, at the beach in Florida where reception conditions were superior – comparing it to some older portables in my collection such as the SONY ICF-SW07, ICF-SW55, and the Panasonic RF-B65.
I was impressed with the sensitivity of the 808, large speaker, and inclusion of AIR band, though I noticed some digital artifacts and agree with negatives such as slight soft muting and chuffing, and slowness of the processor.
I boxed the D-808 up and stored it away where it sat until recently when I took it back out after my experience using Sangean’s ATS-909×2 – thus the title of this brief commentary.
Sangean made some basic decisions with the 909×2. Many of them are quite positive over the old 909x. For many users the 909×2 has more than enough features to justify the higher price of the receiver.
I came to a different conclusion after returning my ATS-909×2, and I started thinking about how the D-808 could have informed engineers at Sangean as they considered which features to put in the 909×2. To what extent Sangean designers looked at various other portables, including the D-808, we will probably never know.
D-808 DEMONSTRATES IMPORTANCE AND IMPACT OF BANDWIDTH FILTER CAPABILITY IN SSB
AM bandwidth control on the ATS-909×2 is quite nice. However, what leaps out is the absence of multi-bandwidth capability in SSB mode. It’s baffling that Sangean seems not to have recognized this as a must-have feature.
Tecsun started providing this on small receivers years ago, and in the PL-880, the excellent though flawed portable that also took the listening world by storm, and in the recent 330, 990x and 501x.
Using the D-808 again after a few years reminded me that this little China-made receiver offers no less than SEVEN bandwidths, in AM mode. Let me say that again: SEVEN (7) bandwidths.
You don’t find that kind of selectivity capability even in a Drake R8B. After that, you’re getting into continuously variable bandwidth control found in premium DSP receivers.
So, in AM mode you have: 6 kHz, 4 kHz, 3 kHz, 2.5 kHz, 2.0 kHz, 1.8 kHz, and 1.00 kHz
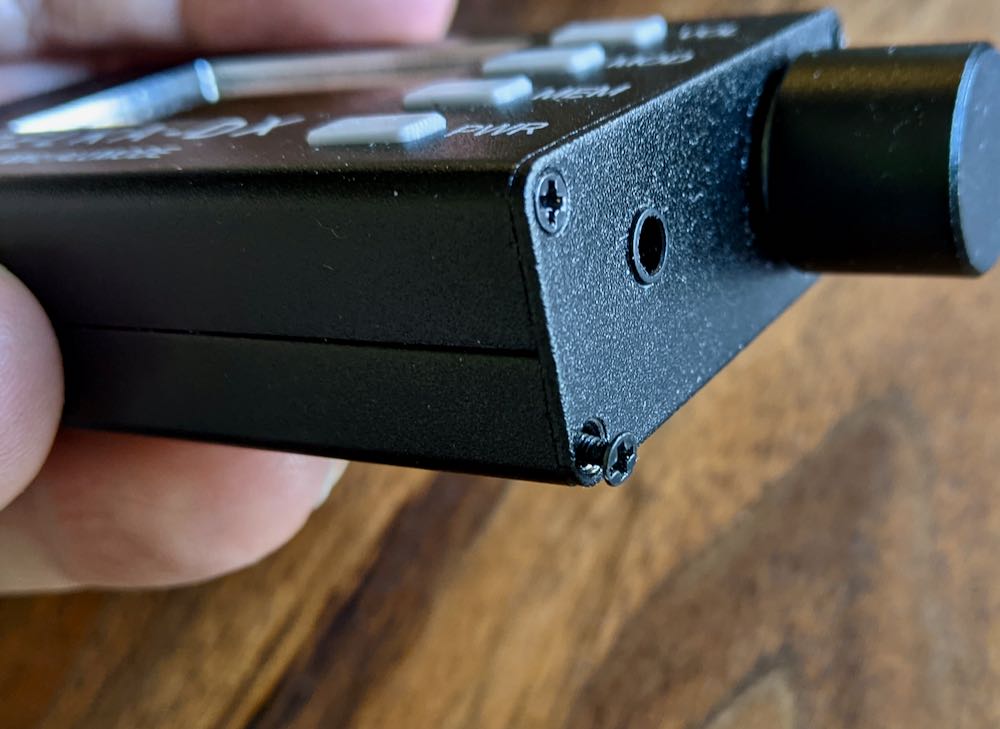
The D-808 also has fine tuning capability. This is not the same as the Tecsuns which actually enable you to re-calibrate, and with adjustment that remains set for both USB and LSB. On the D-808 you fine tune to zero beat, but have to repeat the correction for LSB and USB on the frequency you’re on – it’s a bit more twiddly, but on my 808 the fine tuning is nonetheless very smooth.
Nevertheless, combined with SIX bandwidth options when in SSB, the fine tuning option on the 808 is a superb feature, not to mention that on my particular D-808 there is little to no “warbling” when carrying out the fine tune operation.
So, in SSB on on the D-808 you have: 4.0 kHz, 3.0 kHz, 2.2 kHz, 1.2 kHz, 1.0 kHz, and an amazing .5 kHz ! Imagine that: .5 kHz
I usually remember stuff like this, but when I first tried the D-808 in Florida back in 2018 I was more focused on assessing sensitivity, audio, and issues such as its pretty slow DSP response when changing modes.
So, now you have to pick me up off the floor as I re-visit the D-808 and realize what an amazingly capable little radio it really is – again, see the excellent reviews by Gilles in which he pays a lot of attention to this fact.
Additional years ago, I used receivers such as SONY SW-55s and Panasonic RF-B65s in ocean side DXing. These are fine receivers, but the 55 is limited to two bandwidths, NARROW and WIDE – similar to the SONY 2010 and SW-77, both of which also had effective synchronous detection.
One of my best DX catches at that time was Radio Rwanda on 6,055 kHz just before it’s sign off in the late afternoon eastern timed. Using a Panasonic RF-B65 which had NO bandwidth options, I was able to hear and record a full sign off and ID.
However, had a D-808 existed at that time this would have been much easier because of the multiple bandwidths in both AM and SSB. I imagine a SONY ICF-SW7600GR would have done a good job as well, but it too does not have the multiple bandwidth options that a D-808 has.
These days, with the number of stations on the air reduced even further, examples like this may be fewer and farther between. But one has to observe that for AMATEUR radio listening, the amazing bandwidth capability of a D-808 really sets it apart from the pack.
Am I glad I re-discovered the D-808? You bet. It was on my list of TO SELL receivers. Now, it has a reprieve and is firmly back on my keeper list.
I have to think that it is highly unlikely that there will be a new version of the D-808, unless someone out there has heard something in the receiver rumor mill that I have not. Perhaps the folks at XHDATA/RadioWOW will take this hint.
If XHDATA were to re-design the 808, the most improvements one would hope for are obvious: a newer and faster DSP chip to speed up mode changes, a jack for external recording. A real long shot would be to hope for the same sort of calibration adjustment seen in the Tecsun receivers.
When I really get to dreaming, I think of XHDATA or some other maker designing a portable like the 808 – why not call it the 1000 Super DSP – that actually has continuously adjustable bandwidth control. This will never happen.
It’s doubtful that XHDATA or some other manufacturer will consider competing directly with Tecsun and Sangean. But the D-808 carved out a place for itself in the small portable category, at an extremely competitive price point.
As this was not an exhaustive retro review of the D-808, I have not gone into the various negatives that every D-808 owner knows to exist.
Lack of a RECORD OUT jack is one. A D-808x might implement Bluetooth capability as Tecsun has, and MicroSD recording capability (though that gets into issues that appear to have prevented Tecsun from doing the same). And surely, get rid of the soft muting.
In conclusion, I go back to a question that occurred to me as I used the Sangean ATS-909×2: what Sangean could or should have learned from the D-808.
Here was a small, well-designed DSP radio that burst upon the scene with outstanding capabilities and which even today is prized among those who own it. Need I repeat? SEVEN bandwidths in AM mode, and MW, and SIX in SSB and LW.
Every company that’s still manufacturing receivers makes its own decisions. It’s as important that we voice our gratitude to Sangean for its latest (possibly last) effort to revise the 909xxxx series as it is to Tecsun for offering no fewer than THREE superb world band receivers.
Sangean has received feedback from me and other reviewers about the x2. All of that is aimed at helping the company possibly correct shortcomings in the new receiver. I hope that this commentary is another step in that direction.
Mobimax sent one of these speakers to me to install and evaluate at no cost to me–I received it last week and installed it yesterday.
Installation
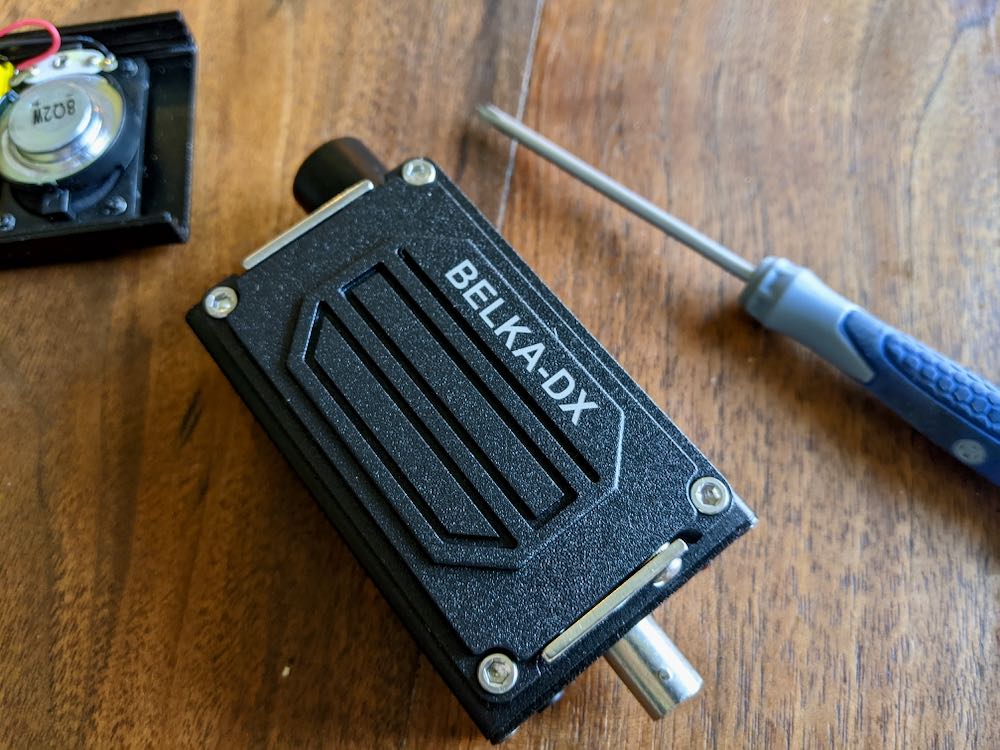
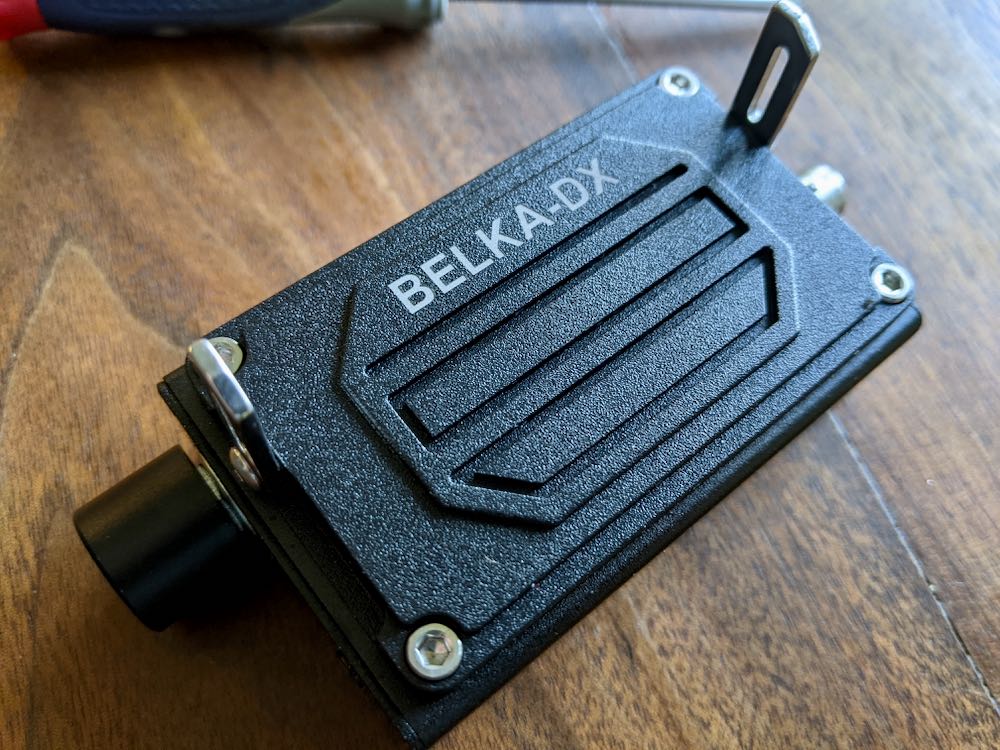
The installation couldn’t have been more simple: the only tool needed is a small Phillips-Head screwdriver. Note that my Belka-DX already had the original speaker option installed.
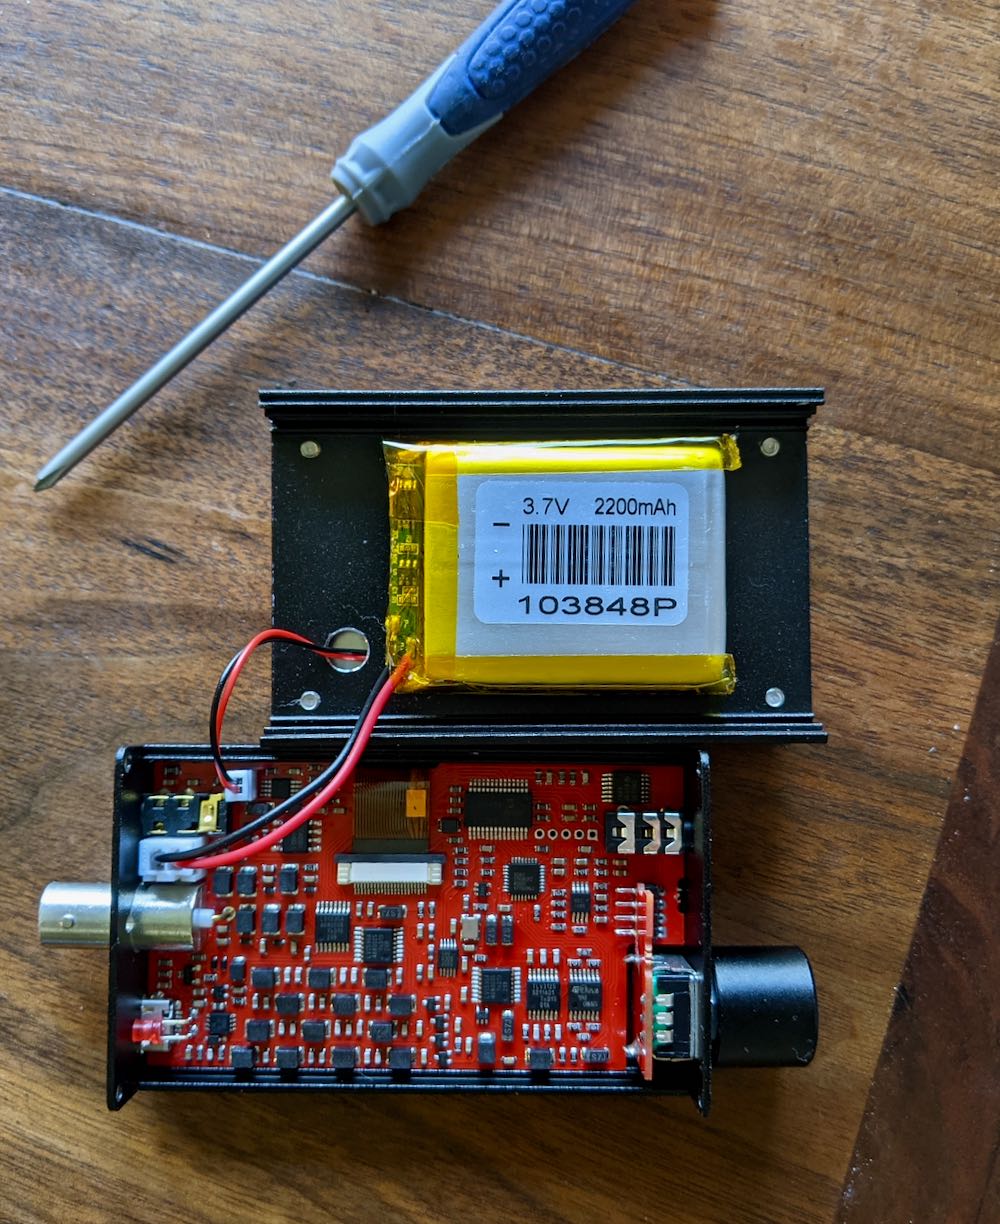
All I needed to do was remove the lower two screws on both sides of the Belka chassis.
After doing this, the bottom section of the chassis simply pulls out (do this slowly since there are both battery and speaker jumpers).
Next, I unplugged the speaker and battery jumpers from the original speaker option.
Installing the new speaker section was simply a matter of plugging in the speaker and battery jumpers (each plug is a different size so they can’t be confused), then attaching the new pack to the back of the Belka-DX using the same four screws that had been removed.
The whole process might have taken four or five minutes (mainly because I took photos!).
How does it play?
Since I can’t really do a side-by-side comparison with the original speaker and this one, I simply listened to the original speaker tuned to WWV, WRMI, and the Voice of Greece for a while before installing the new speaker.
Both speakers are obviously very small as the Belka-DX is the most compact shortwave portable I’ve ever laid hands on.
Audio quality
I believe the original speaker has better audio fidelity, likely due to the fact it uses the body of the Belka-DX as an enclosure or resonance chamber. The new speaker has a dedicated enclosure, but it’s maybe 40% the size of the Belka-DX body.
In the end, though? Neither speaker will give you the audio fidelity of a traditional portable. The original speaker is just slightly better than the new one. With the Belka-DX, I see the speaker as a wonderful convenience, but frankly, I reach for earphones or headphones if I want to do DXing or proper broadcast listening.
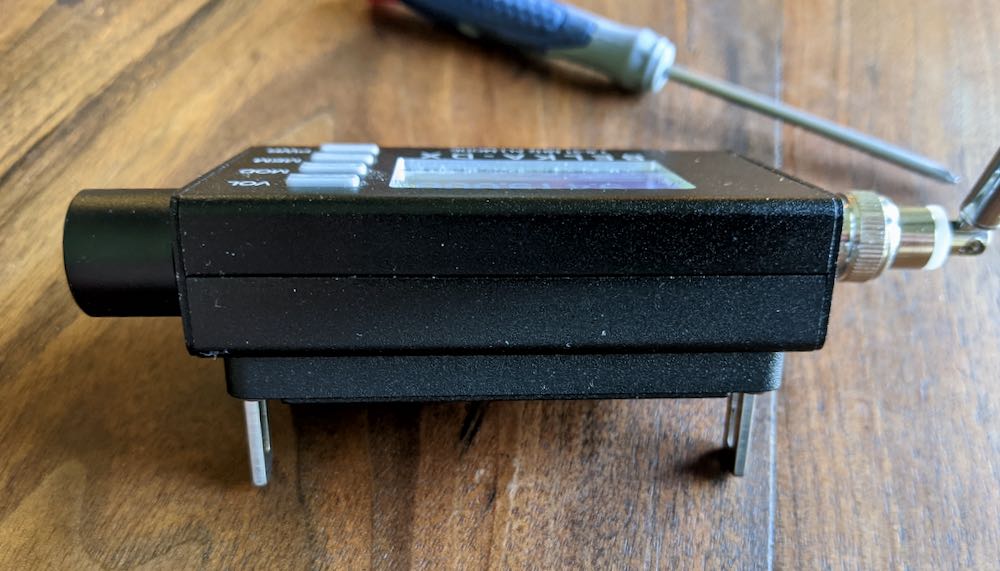
Battery
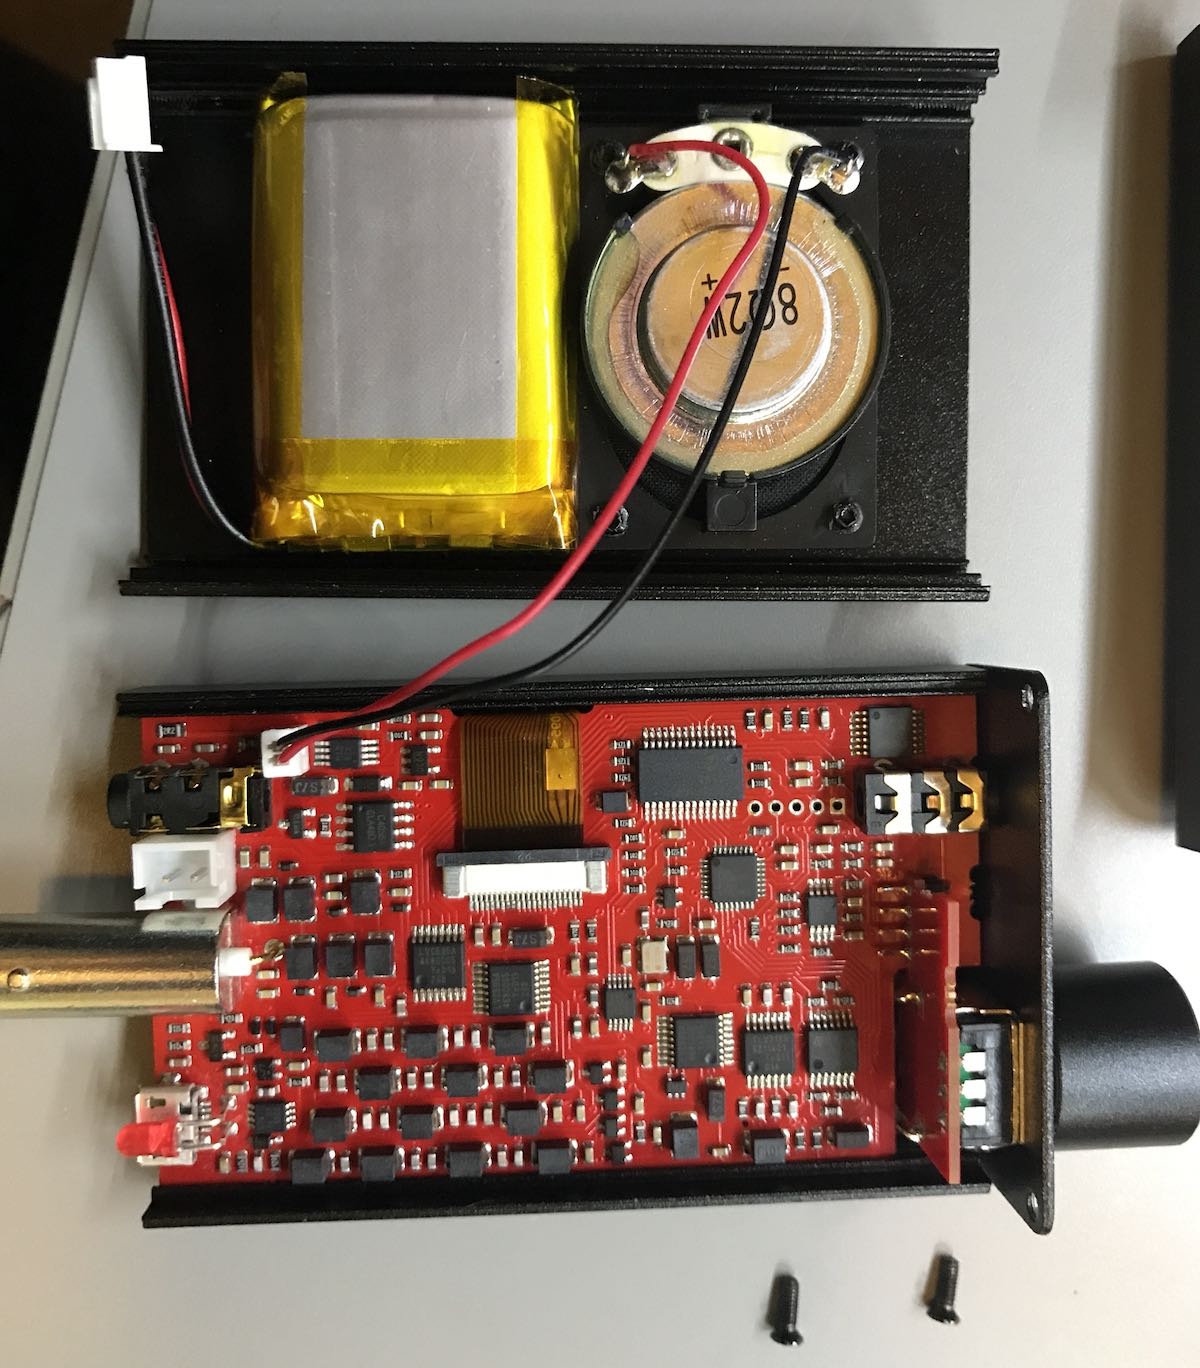
The new speaker option allows for a full size battery pack in the Belka-DX. This is probably the biggest selling point of the new speaker. The original speaker option fits both the speaker and a smaller LiIon battery pack on the bottom plate of the radio.
The original speaker and smaller battery pack (top section of this photo)
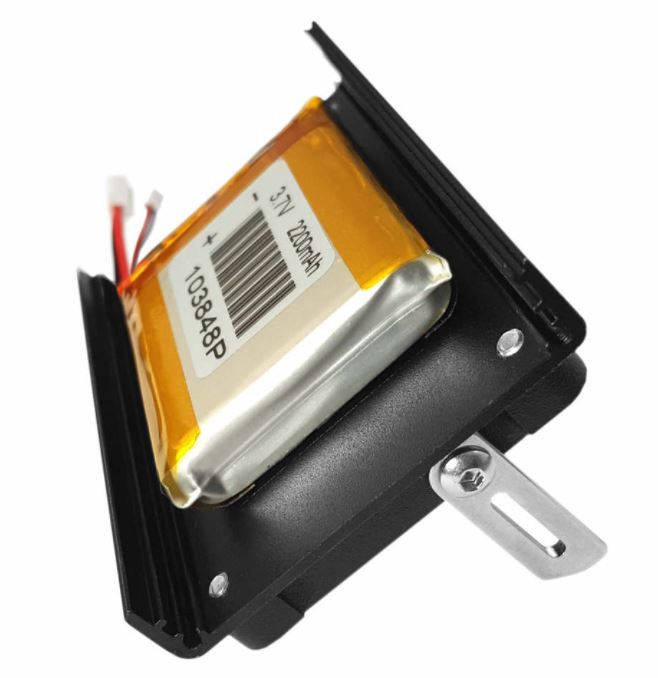
Since the new speaker option adds a dedicated speaker section, it opens up the full real estate of the bottom plate for a full size battery again.
I should also add that the new speaker section matches the original Belka-DX enclosure and speaker in that it’s incredibly durable. Frankly, it feels military-grade and over-engineered. I love it.
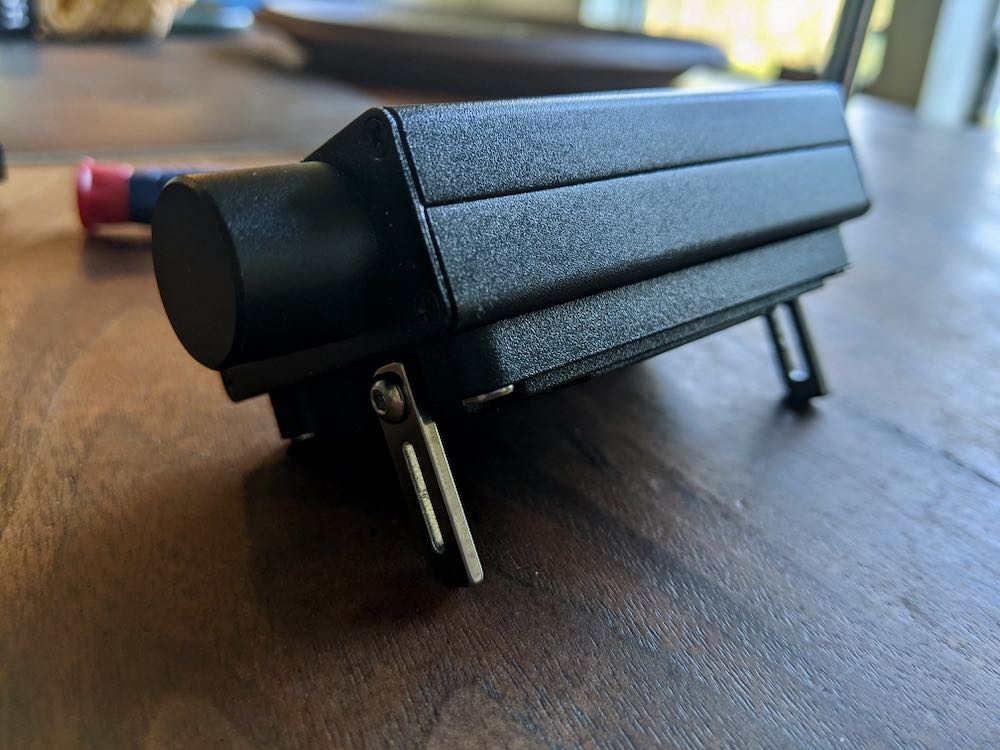
Fold-out legs
I really like the fold-out legs on the new speaker. They actually have two indented sections that click into place as you fold them out. This allows for two different stable viewing angles. I prefer having them folded out all the way.
Size
The new speaker option adds a bit of weight and bulk to the Belka-DX.
Again: we’re talking about a wee little radio here, so I can’t imagine someone complaining about the size or weight. The new speaker makes the radio slightly deeper or thicker if you look at it from the side or profile. Frankly, it’s a negligible amount, but worth noting.
Should you buy it?
In my opinion, the main reasons to buy the new speaker option are to take advantage of the longer play time from the full size internal battery and to gain the two fold-out feet. The Belka-DX is so efficient that even the smaller battery pack in the original speaker option will power this radio for many hours without recharge.
Still, if these two factors are important to you, this is a no-brainer.
I would simply pick the speaker option that best suits your needs.
I must say again that it’s a real pleasure evaluating products that are engineered to the degree of the Belka-DX (and Belka-DSP) and both speaker options. These feel like they’re built to last a lifetime and could really take a beating in my various radio packs and kits.
Many thanks again to Mobimax for dispatching one of these for my evaluation.
Many thanks to SWLing Post contributor, Dan Robinson, for the following guest post and review:
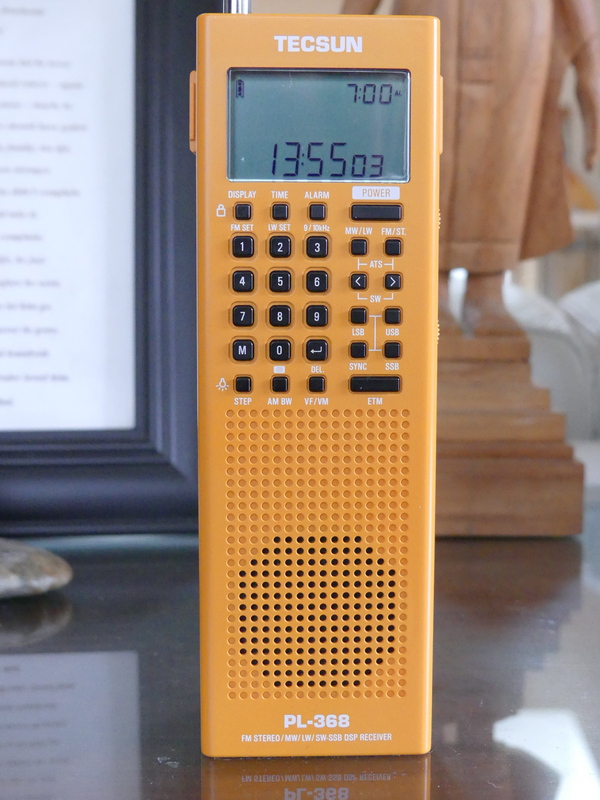
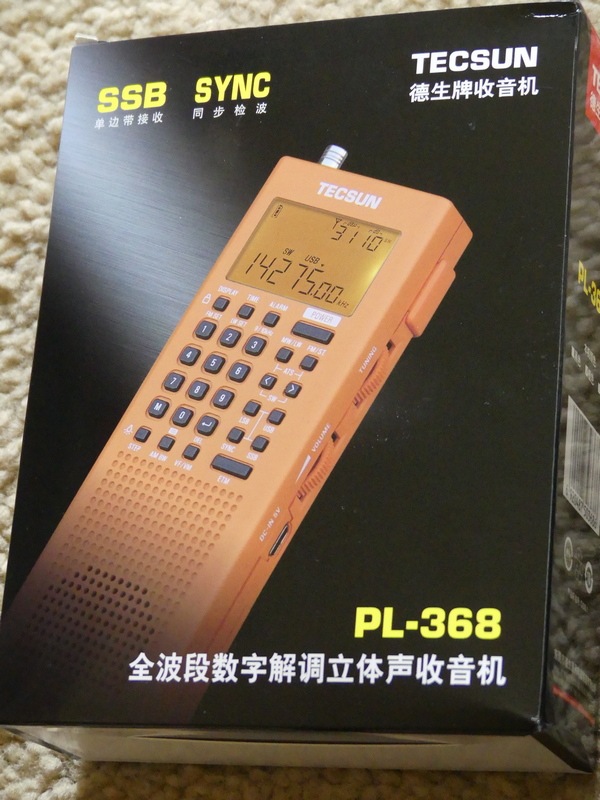
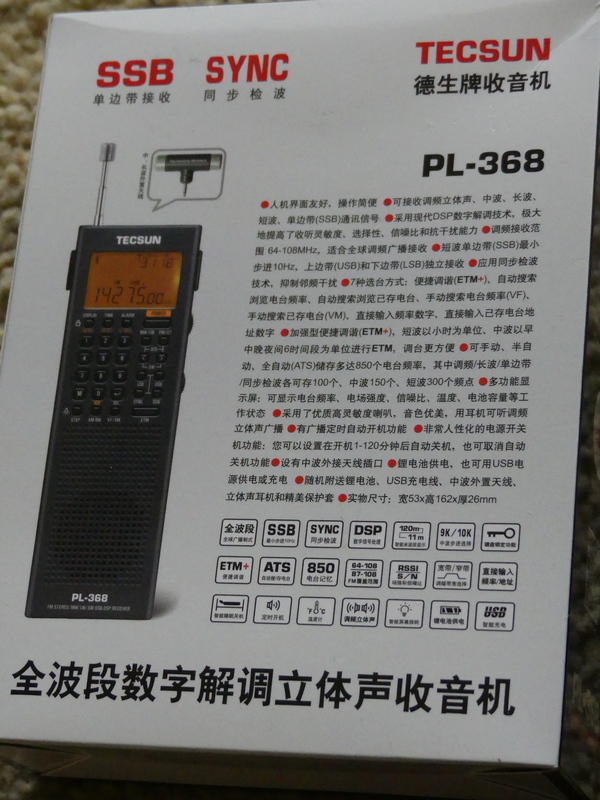
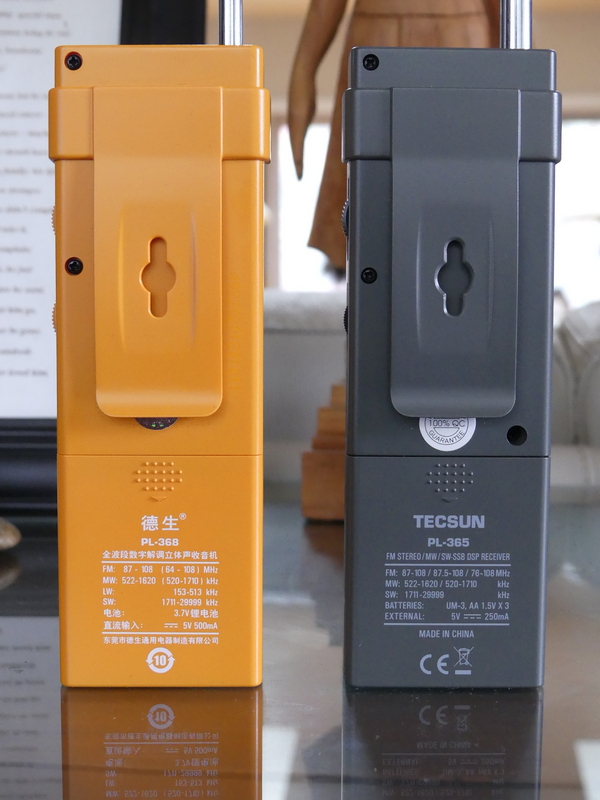
Tecsun PL-368: Large Receiver Features In Smaller Vertical Handheld
by Dan Robinson
It was back in 2020 that the first photos surfaced online of the PL-368 – posted on Facebook by someone attending the electronics fair in Shanghai, China.
Photos showed the successor to the PL-360/365 receivers – and also the PL-990, successor to the PL-880, as well as the new king of the hill for Tecsun, the larger dual speaker H-501.
Things looked promising, and it was pretty exciting. Tecsun designers upgraded the PL-365 which had become a favorite of preppers and SWLs, but which was hobbled by the lack of a keypad, to the re-named PL-368.
The PL-365 and PL-360 before it were plagued by the problem of being overly sensitive to the touch – when holding the radio, reception was fine, but remove your hand and signal levels plummeted. Usually, a full hand grip was necessary to obtain full sensitivity and any variation in grip reduced sensitivity – this was noticed mostly in shortwave mode.
Previous 360/365 models were known for the included small rotatable ferrite
AM amplified antenna which performed miracles in nulling mediumwave stations – for those who still like to listen to the AM band. The 368 also comes with this additional ferrite antenna.
And the 365/360 (which were and still are sold by CountyComm as the GP-5) used AA batteries, making it very easy to find replacements anywhere the radio is being used in the field. Tecsun changed that on the 368.
After the photos appeared, I contacted Benny Zhao, who had posted them on one of the Facebook groups and asked if he could send me a sample of the PL-368. He obliged and a 368 was sent on its way.
The radio was sent without the BL-5C flat lithium battery which was prohibited in postal shipments. It took a long, long time (3 months, apparently the package was sent by snail mail) but it finally arrived here and I have been putting it through some tests.
The PL-368 that I received has the notation “2020.12 VER 1” so it’s clearly a first version from 2020 production.
Like the models before it is a great, handy, portable to grab if you’re going on a trip. It is lighter than the older 360/365s. The change from three AA batteries to the flat BL-5C explains some of that. There is a heft to the older models that the 368 doesn’t have. I am not sure about differences in thickness of the 368 cabinet. Perhaps we will find out more from Tecsun (see notes below regarding issue of tapping the front of the 368 cabinet).
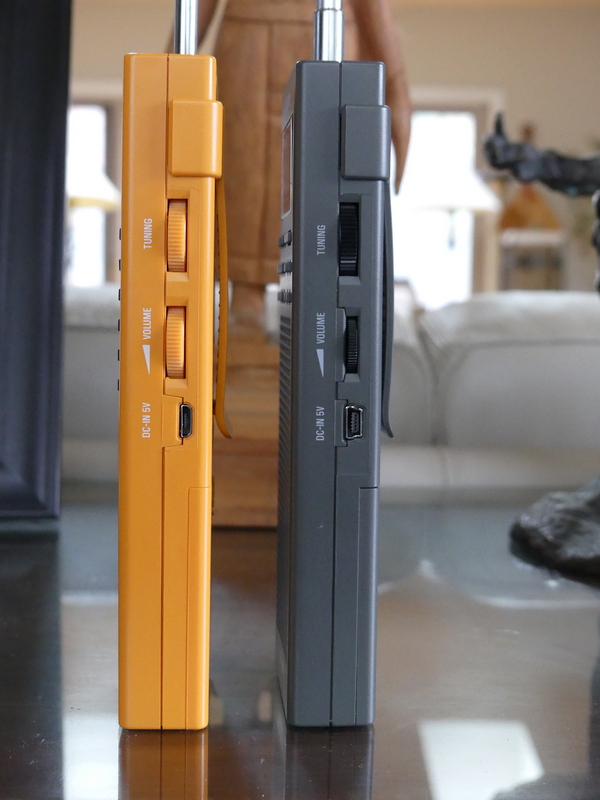
The 368 retains the two multi function adjustment wheels on the right side, one for Volume, the other for Tuning. These are also used for time and bandwidth control.
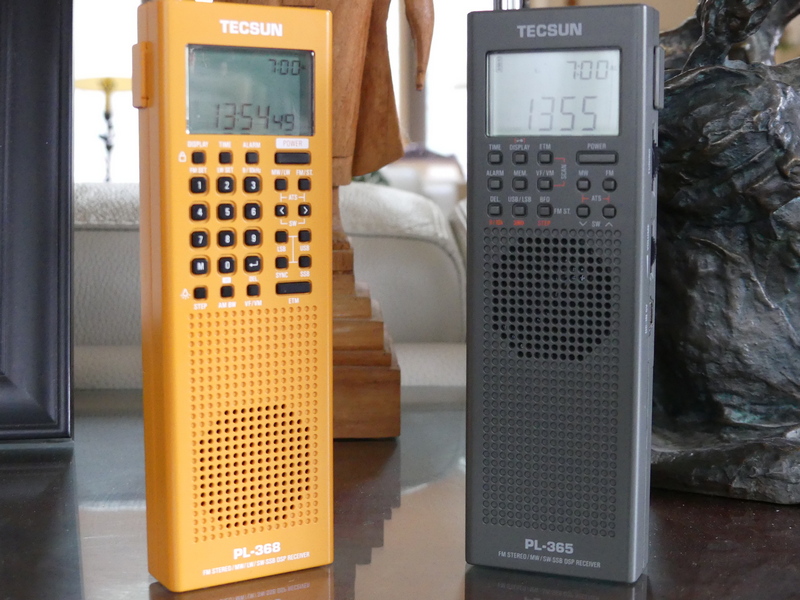
Tecsun PL-368 (left) and PL-365 (right)
On the 360/365 radios, I never found the tuning wheel approach to be particularly efficient since it was limited to a certain number of kHz per turn, either 5 or 1 kHz depending how fast you turned.
On the 368 it appears you can obtain up to 40 kHz from a single turn of the wheel, while on the 360/365 that was limited to 15 to 20 kHz depending on the speed you were turning.
Tecsun PL-368 (left) and PL-365 (right)
The antenna on the 368 is thinner, but 8 inches longer than the 360/365 models, and in the box you will find the included and very effective rotatable ferrite antenna for mediumwave that inserts in a jack on the top.
On the 368 the volume wheel has detents, whereas on the 360/365 the wheel had smooth turning.
We have gone from 14 buttons on the old PL-360/365 models to 28 buttons on the PL-368, including addition of the keypad.
UPGRADES
Tecsun has upgraded the 368 in line with improvements seen in the PL-990x and H-501 receivers. There are now adjustable bandwidths – a particularly useful tool. These bandwidths also operate in SSB, something that the new Sangean ATS-909×2 doesn’t offer. Bandwidths are: LW/MW 2.5, 3.5, 9.0 SW: 2.5, 3.5, and 5.0 SSB: 0.5, 1.2, 2.2, 3.0 and 4.0 kHz
Also in the 368 is now synchronous detection, a feature left off Sangean’s 909×2. And you get the same intelligent tuning features seen in the 909x/501x models as well as the previous PL-880.
Tecsun added a control that enables activation of the light – this is located on the same button as the Step control which adjusts the tuning steps.
The 368 display now has the ability to tune in 10 Hz increments, an overdue upgrade from the 360/365 models.
Charging of the BL-5C battery can be carried out by connecting a DC 5V/0.5A adapter to the micro-USB port on the side of the radio. The English manual notes that when charging, the charging time is displayed at the top right corner of the display while the “Charge” indicator flashes.
Adjustments for 9/10 kHz mediumwave, Longwave, and FM frequency range can be found on the 1, 2 and 3 keys.
The manual notes that in addition to the internal ferrite bar antenna, the external supplied MW/LW ferrite antenna can be connected to the antenna socket on top and rotated to obtain optimum reception.
Addition of the keypad makes the PL-368 far more useful than its predecessors for instantaneous frequency access. This was the major drawback of the 360 and 365 receivers. This can’t be emphasized enough.
This is a day versus night difference and vastly improves the attractiveness of the 368 over previous models.
There are 850 memory presets, 100 for FM/LW, 150 for MW, 300 for SW, and 100 each for SSB and SYNC.
ATS tuning, like the 990x and 501 receivers enables ATS within all meter bands by holding the [<] or within a selected meter band by holding the [>]. The manual also notes the ability to auto scan all stored stations within a frequency band or mode (SYNC/SSB) staying on each station for about 5 seconds before resuming.
The 368 has what Tecsun now calls Enhanced Tuning Mode (ETM+) – as explained in the manual, this allows auto tune and storing of FM, LW, MW and SW stations into ETM memory. Unlike ATS, scanned stations will not be stored into regular memory (VM) – in this way, when in a different city or country, ETM+ can be used to auto search new stations without overwriting any previously stored stations.
FM De-emphasis Time Constant – as explained in the manual, while receiving FM broadcasts, long pressing [4] will adjust the de-emphasis setting for Europe, Australia, Japan (and most other locations), or for Americas and South Korea.
Add Seconds to the Clock – with the device powered off, press and hold [8] to add seconds to the clock.
Sleep Timer – as with its predecessors, the 368 has a Sleep Timer, with an indicator on the LCD display.
Alarm – and like earlier models, there is also an Alarm function, which allows the radio to turn on at a preset time. It’s possible to select a specific frequency to be used with the Alarm.
RE-CALIBRATION – I have not been able to determine yet if the 368 has a re-calibration function as can be found on the PL-330, 909x, and H-501.
PROBLEMS
Let’s get one headline out to start: The 368, as with the 909x and H-501 all have the useful Synchronous Detection mode. However, SYNC continues to be hobbled, showing distortion and loss of lock.
As I have mentioned in reviews of the 330, 990x, and 501x any successful use of SYNC requires a delicate dance involving careful selection of various bandwidths while in SYNC mode and fine tuning.
The 368 manual contains 3 pages of explanation of SYNC noting that it can “eliminate distortion generated in the IF filter due to local fading, slight offset, modulation overshoot, as well as inter-channel interference and cross-talk modulation, and can also reduce noise interference.”
The problem with all of the Tecsun DSP chip receivers after the PL-880, which had a hidden SYNC feature that was the worst of the bunch, is the extent to which SYNC still suffers from distortion and loss of lock that renders the feature far less useful than it could be.
Ideally, one would want SYNC to match the capability achieved in such older receivers as SONY’s ICF-2010, SW-100S, SW-07, 7600GR. You’re not going to get that with Tecsun receivers.
Like its predecessors, the 368 is still sensitive to touch. I noticed this immediately on the old 360/365 receivers, especially when using the radios
at the beach. If I was recording a station on shortwave, and left for a few minutes, I would return to find that sensitivity had dropped because the radio was not still being held in the hand, which rendered the recording useless.
I am continuing testing of the 368 to try to determine if this issue has been reduced to any extent and will update this review with any further findings. This sensitivity issue is not specific to the 368 – it can be seen on other older and newer receivers.
Many older portables (the SONY ICF-SW55 comes to mind) were constructed with robust cabinets that were less sensitive to touch. Touching the whip antennas on some older receivers improved reception, while on others touching the whip antenna actually reduced sensitivity.
URGENT ATTENTION FOR TECSUN: My initial testing of this particular China market unit of the PL-368 – again, it is marked as December 2020 Version 1 production – identified an additional issue.
When in SSB modes or SYNC, tapping on any area of the keypad and LCD display produces a warbling/distortion effect in the audio. One can only surmise that this is attributable to insufficiently robust construction of the PCB board underneath.
(Video shows problem created when physically tapping front of PL-368 cabinet.)
This is NOT a problem seen with my PL-365 when it is in SSB mode.
I hope that Tecsun gives this the attention it needs and corrects the problem in future production runs.
SUMMARY
Were it not for the major problems detailed above, the PL-368 would be an automatic must-buy receiver in my book.
Addition of the keypad is a night and day improvement and when combined with additional features such as multi-bandwidth options and the still-to-be-perfected synchronous detection, the 368 would be a killer portable.
But as with the PL-330, 909x and 501x the problem with SYNC mode is still a major drawback on a feature that is supposed to lift Tecsun receivers out of the pack of portables that are on the market in 2021.
One can live with the issue of cabinet sensitivity – but the additional issue I identified where there is instability introduced when tapping on the front panel/keypad/LCD is a QC problem that simply must be addressed by Tecsun.
But as I have said in reviews of other Tecsun receivers, let’s back up a bit. Imagine if we had had portable receivers with the capabilities that these have, back in the 1960’s or 1970’s.
It’s one of the great ironies of the radio listening hobby, that in 2021 any company is willing to continue producing receivers of this caliber as use of shortwave by major broadcasters continues to decline.
The obvious other killer feature to include in portables such as this would be to somehow integrate DRM into them. However, I have a feeling that will never happen
Many thanks to SWLing Post contributor, Dan Robinson, who shares the following guest post:
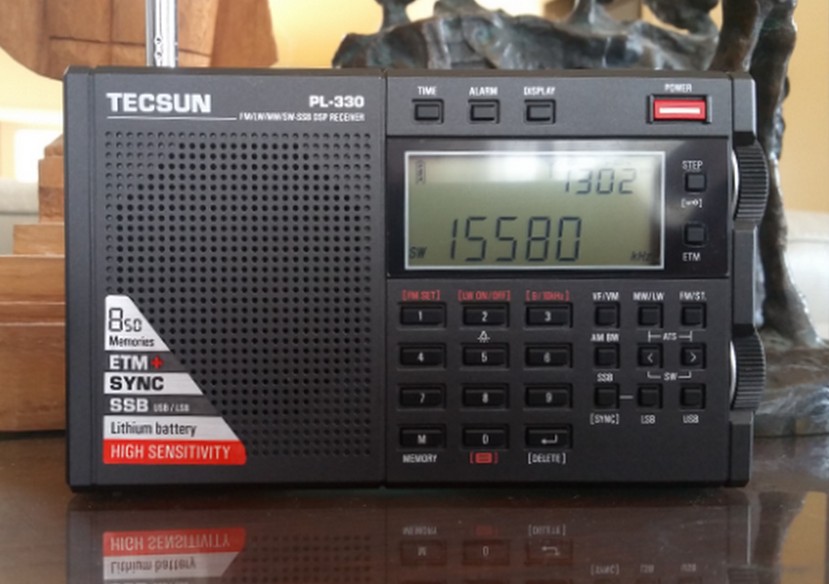
Tecsun PL-330: The Powerful Mini With One Serious Design Issue
by Dan Robinson
As SWLing Post readers know, I have a huge radio collection – including premium receivers and portables, now nearly 100 in all.
So, these days I am hesitant to add too many, but I continue to take interest in what companies such as Tecsun and Sangean are doing in the way of stuffing the latest chip technology and capabilities into portables radios.
The last receivers I reviewed included the Tecsun PL-990x, which has developed quite an enthusiastic following since its consumer version was released in 2020, and the Tecsun S-8800.
Out for some time now is the Tecsun PL-330. By now there are many reviews of it on You Tube and elsewhere.
It’s become a familiar observation for many of us – if this were still the 1960’s and 1970’s – even into the 1980’s, which could be considered the golden days of shortwave and we had receiver technology like this, well what a joy that would have been.
When I traveled around the world both before and after college, and professionally for Voice of America in the 1980s and 1990s, wow what a good time I could have had with today’s portables!
Some world band portables radios back then were superb performers. The Grundig Satellit series 500/700/600/650 come to mind – but these were not exactly what I would call small portables.
Paging through Passport to Worldband Radio from 1990 (wow, that’s 30 years ago!) you see others such as the SONY SW-1, Panasonic RF-B65, and of course, the SONY ICF-2001D/2010 which introduced killer synchronous tuning technology in the 1980s and remains popular today decades after it first appeared.
Also available were the SONY ICF-SW55 and later in competition with the 2010, the SONY ICF-SW77. Today, I have four SW-55s and two SW-77s and still use them regularly.
Tabletop receivers back in the good ol’ days offered multiple selectivity positions. One of those was the Lowe HF-225 (and later Europa version) along with the HF-250, Kenwood R-5000 and R-2000, ICOM IC-R71A, and Yaesu FRG-8800 among many others.
But as far as smaller portables go, features such as synchronous detection and multiple selectivity were still pretty limited, and a number of receivers didn’t offer selectable synchronous as was eventually offered on the Drake R8B and later production of the SW-8.
The RF-B65 by Panasonic – which today remains sought after for its amazing sensitivity – was hobbled by having a single selectivity position. Same with SONY’s SW-1 and SW-100, and 7600GR, though SONY’s PRO-80 had two bandwidths.
Indeed, it wasn’t until Eton brought out the E-1, with its three bandwidths combined with Passband Tuning (though no notch filter) that a portable finally reflected capabilities of some of the better tabletop radios (though lacking a notch filter).
The Grundig Satellit 800 was close in competition with the E-1 (though the earlier Sat 600/650 series also had multiple bandwidths) but was bulky.
Fast forward to 2021 – credit due to Tecsun and more recently to Sangean with its 909X2, for some years now we have enjoyed Asia-originated portables with multiple selectivity and synchronous mode, though sync implementation on some has left much to be desired.
Which is where the PL-330 comes in. When I look at the 330, I am reminded of one of the now ancient SONY portables, the ICF-4920 which was a super small slide-rule receiver that nevertheless was quite sensitive.
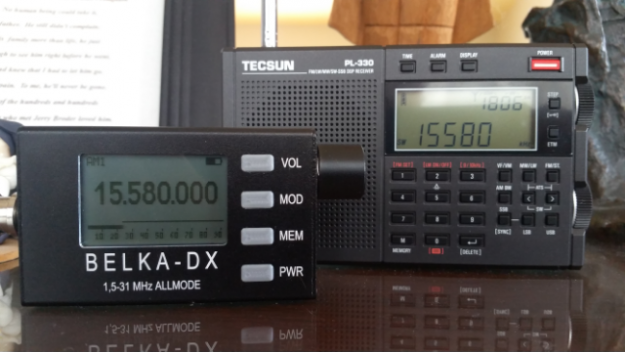
Like the 4920, which you could easily slip in a pocket, the PL-330 is a perfect travel portable. Only the Belka-DX SDR and still wonderful SONY SW-100 compete in terms of performance and size.
The 330 is basically a PL-990x in miniature: smaller speaker obviously, shorter antenna, no bluetooth capability or card slot. But as many people who frequent the Facebook groups have observed, pretty much anything the 990x can do, so can the 330.
This radio has ETM/ATS tuning, synchronous detection, multiple bandwidths in AM, SSB and MW, FM mono-stereo speaker control, alarm/timer functions, external antenna jack, display light, and other features.
Tecsun decided to go with a BL-5C battery here – the same with the new PL-368. I think this is unfortunate, since it requires one to obtain a number of those flat batteries if you want to travel and not have to re-charge. On the other hand, this is not a crippling design decision.
What is an unfortunate design problem, in my view, involves the simple question of tuning the receiver.
The main and fine tuning knobs on the right side of the PL-330 are embedded into the cabinet just far enough as to make easy rapid finger tuning of the radio nearly impossible.
In fact, in my testing it’s impossible to thumb tune the radio more than 10 kHz at a time. The same applies to using the lower knob which controls volume. When in FM mode, this issue make tuning just as frustrating almost forcing one to use rapid scan mode.
Another puzzler: Tecsun limited bandwidths in AM SW to three, while in SSB you have 5 bandwidth options. In AM mode, you have a 9 kHz bandwidth, another puzzling choice. Longwave too is limited to 3 bandwidths.
But overall, none of these problems really knock the PL-330 down very far. This is one mini powerhouse of a radio, one that makes you think “wow, if I had just had this back in 1967 or 1973 or 1982.
Some additional thoughts. My particular PL-330 was supplied by Anon-co but is a pre-production version and so does not have the latest firmware. Thankfully, I have not experienced the issue of SSB tuning running in reverse as others have.
NOTE: As most users know by now, but some newer users may not, you cannot charge one of these radios – whether Tecsun or Sangean – using the mini-USB port and use them at the same time. . . there is just too much noise introduced from the charging process.
This little mentioned feature: just as the Tecsun 909x has a re-calibration function, so does the PL-330. Tecsun itself initially declined to acknowledge this, but finally confirmed through Anon-co.
The procedure: Switch to LSB/USB. If the station is not zero beat, hit STEP button once and then quickly again to move the flashing display down arrow so it’s above the far right digit. Then fine tune the station for zero beat. Hold LSB or USB in for a couple of seconds. The LCD blinks. You then have zero beat – but be sure to repeat the process for LSB and USB.
I should mention that just like on the 990x, the re-calibration process doesn’t mean the receiver is then zeroed up and down the shortwave bands. You will likely have to repeat the process from, say 25 meters, to 19 meters, to 49 meters, etc.
I have come to enjoy using the PL-330 here in my house, though like other portables in my collection I need to position it in one particular corner of my home away from incoming cable TV lines.
The PL-330 and the Belka DX are currently king of the pile when it comes to my smaller travel portables.
I fully expect there will be no further receiver development by Tecsun after the PL-330/990x/H-510 radios – but that company will certainly have left us with some great receivers as the days of shortwave approach an end.
Many thanks to SWLing Post contributor, Jack Dully, who writes:
I am just wondering what portable receivers are more susceptible to overloading with long dipoles, say 60-70 ft.
I regularly use such and I have never noticed anything unusual happening with a Sony ICF-7600GR, Grundig G3, or PL-880 to name a few. I just ordered a Tecsun 680. Perhaps many of the newer radios have better AGC thresholds or more robust front ends but I really don’t know for sure.
[Also] how exactly do you know if your receiver (portable OR not) is being overloaded by too big of an antenna (ie. dipole, inverted V and the like) and will it damage your receiver? Is there still a way of using a large antenna to capture more distant stations safely, especially with good quality portables?
Thank you for sharing this question, Jack, and my hope is that SWLing Post readers can chime in with details and advice in the comments section of this post.
These are deep topics, but I’ll try to answer a few of your questions…
First of all, you definitely can harm a portable radio by hooking it up to a large antenna. Many portables have no means of protecting themselves from ESD (Electrostatic Discharge). By hooking a portable up to a long wire antenna, you can expose it to ESD which will essentially deafen your radio until you’re able to repair it. Indeed, this reminds me of an article from our archives regarding a Tecsun PL-600 ESD repair. Some radios do have built-in ESD protection (like the PL-680), but I’m not entirely sure it would offer protection from a particularly strong ESD pulse.
Symptoms of overloading can vary. Sometimes overloading can sound like background splatter and even popping. Sometimes you’ll hear “images” of broadcasters across the bands; muffled audio of a blowtorch station. Another sign of overload is when your signal meter jumps at the same time your receiver goes deaf. It’s as if your radio is simply overwhelmed by strong signals and it can manifest itself in odd ways especially since the AGC usually falls apart.
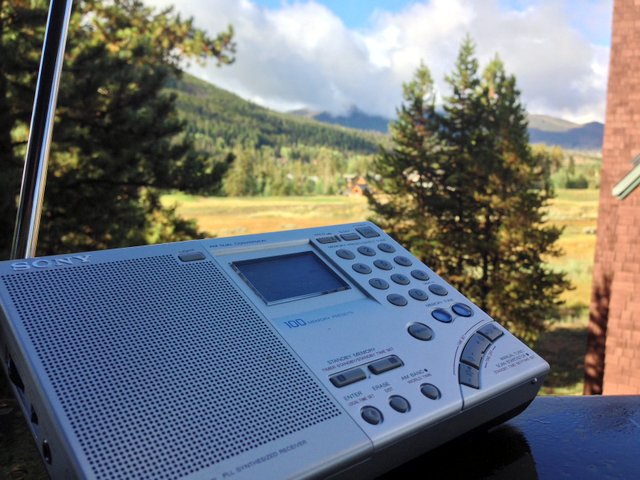
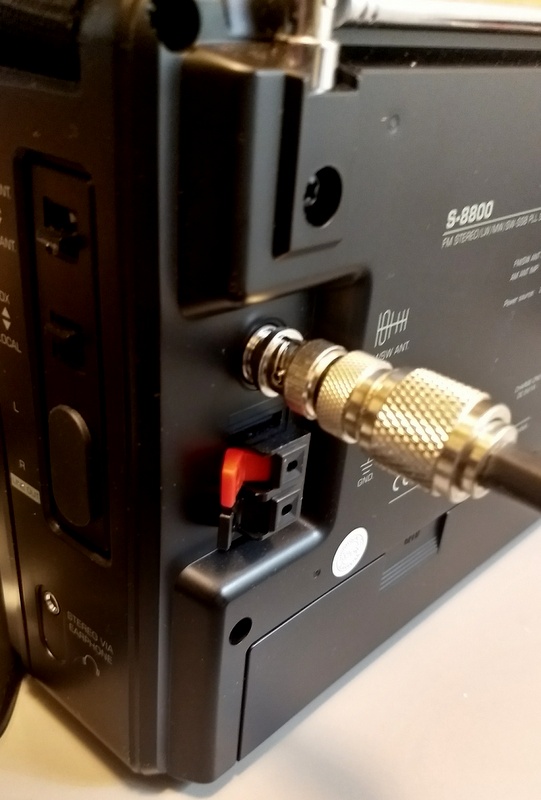
Like you, I’ve found that my Sony ICF-7600GR seems to be able to handle large wire antennas with no discernible overload. Also, the Tecsun S-8800 (above) is well-equipped to handle larger external antennas and even sports a proper antenna port on the back. I know Sangean ATS-909X owners who only use their radio with an external wire antenna and have excellent results.
Some portable radios are very sensitive with the built-in whip antenna, but fall apart if attached to a long wire antenna.
In general, the cheaper the radio, the less likely it has a front end and filtering that can cope with overloading.
Overloading advice?
Please comment with your experience regarding overloading. Have you found some radio models better than others at coping with blowtorch stations, for example? What do you do to protect your receivers from electrostatic discharge when hooked up to large antennas? Please comment!