By Jock Elliott, KB2GOM
This particular adventure began about three weeks ago with an email from CCrane. “Timeless, Easy to Use with Long Range Radio Reception” the headline read. Further, the accompanying text promised: Comes with needle and dial tuning, one button for power, one button for a bright display light, and has no clock or alarm. The radio in question was the C.Crane CCRadio-EP PRO.
The “Long Range Radio Reception” initially caught my eye, but the simplicity of an old-fashioned “needle and dial” – what I call “slide rule” – tuning” also appealed to me, so I emailed CCrane, asked them if they would like to send me one for review, which they did, without charge.
While waiting for the EP PRO to arrive, I examined the photos of the EP PRO on the CCrane website, and I noticed something peculiar: a switch on back for choosing between 9 kHz tuning steps and 10 kHz tuning steps. Whaaat?! Why in the world would you need such a thing on a radio with needle and dial tuning?
We’ll get to the answer to that question shortly, but first let’s take a tour of the CCrane EP PRO.
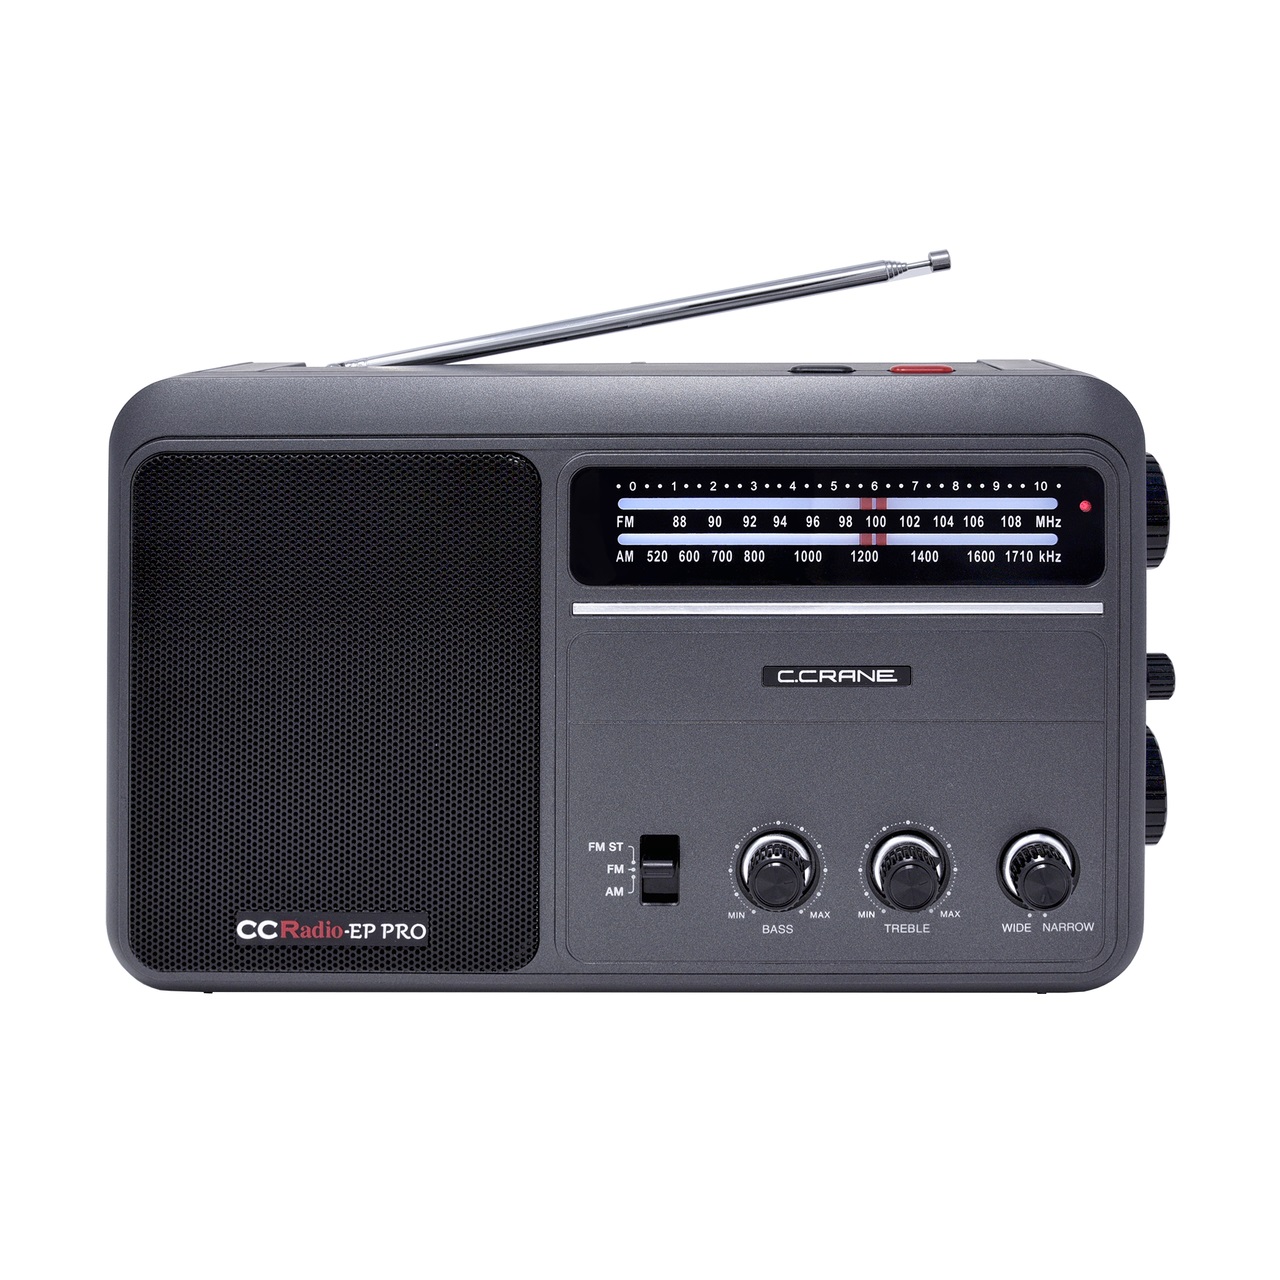
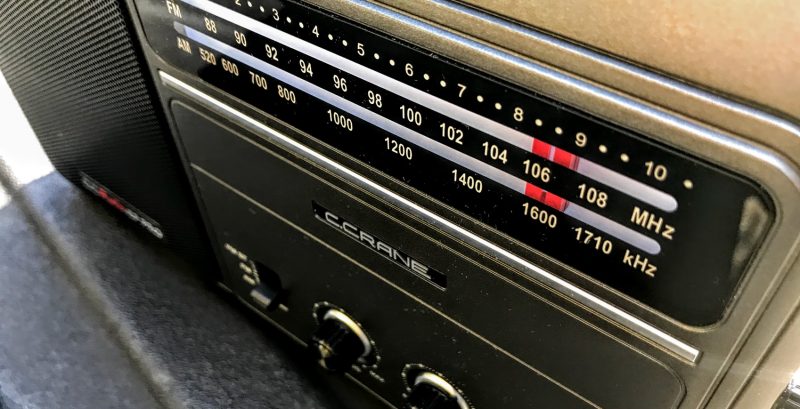
The case is a rectangle with rounded corners that measures 11.4″ W x 7.3″ H (8.4″ H with handle) x 2.75″ D and weighs 4.5 pounds without batteries. Starting on the left front panel, you’ll find a 5-inch speaker. To the right of that, there is the slide rule (needle and dial) tuning setup, with a small red light on the right side that illuminates when a station is found. Below that is a CCrane logo and further below is a switch for selecting AM (520 – 1710 kHz, 10 kHz steps; 522 – 1620 kHz, 9 kHz steps), FM (87.5 – 108 MHz), or FM stereo; a knob for adjusting bass, a knob for adjusting treble, and a knob for choosing between narrow (2.5 kHz) and wide (6 kHz) filter bandwidths.
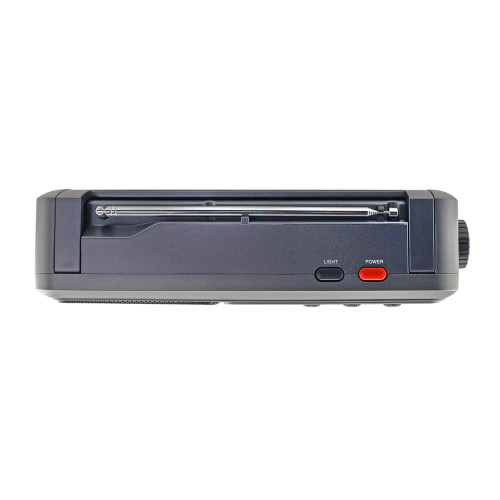 On top of the EP PRO are a red POWER button, a black button for lighting the tuning dial, a flip-up carry handle, and a 36-inch telescoping antenna for FM reception. (Inside the case is a ferrite bar antenna – 12mm x 200mm (7.9″) long with CCrane’s Twin Coil Ferrite® technology.)
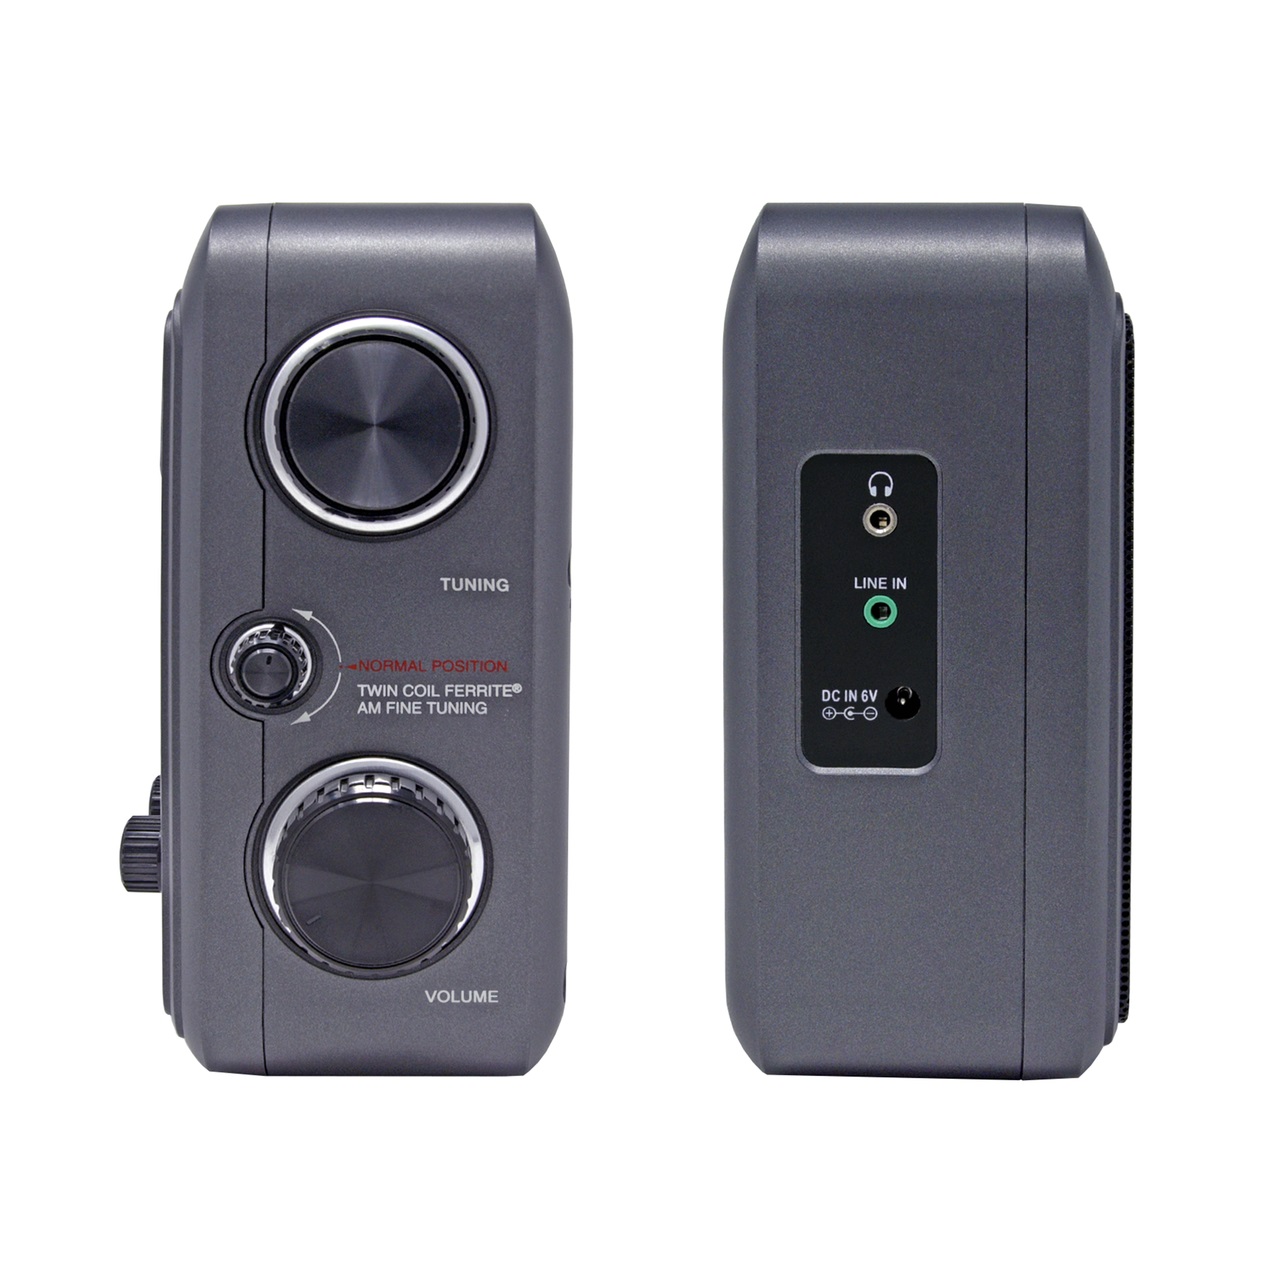
On the right side of the case at top is the tuning knob, below that a knob for fine-tuning the internal antenna for AM reception, and at the bottom a knob for volume. On the left side of the case, you’ll find a 1/8” stereo headphone jack, a line-in jack, and a socket for plugging in an external 6-volt AC adaptor which is provided with the EP PRO.
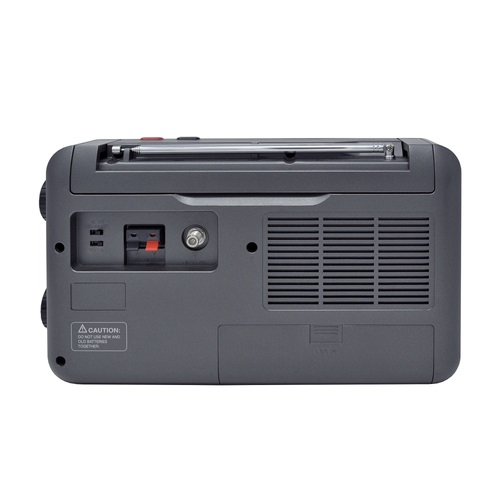
On the back of the radio is a hatch for installing four D-cell batteries (CCrane says it will run for about 175 hours at moderate volume with the dial light off), external antenna connections: spring loaded for AM and “F” connector for FM, a switch for selecting internal or external AM antenna, and the switch for selecting 9 or 10 kHz tuning steps.
That’s it. The EP PRO is almost Zen-like in its simplicity. There are no seek buttons, no automatic storage functions, no memories, no key pad. And there is a darn good reason for that. It turns out that the immediate predecessor of the EP PRO, the CCrane EP, was created by Bob Crane because his mother wanted a very simple radio that was easy to operate. The CCrane EP, a true needle and dial analog radio, was the result.
Bob believed that, besides his mother, there was a market for such a radio, and there was. Unfortunately, after a time, the analog chips necessary to build the CCrane EP became unavailable. As a result, the radio was redesigned internally using modern digital chips (essentially the same as those in CCrane’s model 2E and 3 radios) while keeping it simple and easy to operate. So inside what looks like an old-fashioned analog radio beats the heart of a high-performance digital radio that combines the high sensitivity needed to hear distant stations with excellent selectivity to block signals from the side.
In my view, the EP PRO is great fun to operate. In the predawn hours on a weekend morning with the rain falling softly outside, I started tuning slowly across the AM dial with the EP PRO in my lap. Near the bottom end, a couple of sports mavens were chatting about a pitcher who had a couple of rough two initial outings and then had “settled in.”
A bit further up the dial Dionne Warwick was telling me to “walk on by.” Then I ran into a music station competing with a talk show considering “the Bible, angels, and UFOs.”
Up the dial some more, apparently a good deal on a high performance car could be had at a dealership in Connecticut; then an air quality report for New York City, a female voice delivering a long discourse in French and so on up the dial.
I was impressed at the number of stations that the EP PRO was pulling in, and it brought me back to the simple joy of tuning around to see what’s on the air.
Each time a discernible station appeared, the red tuning LED would light up. As needed, I used the antenna tuning knob and the bandwidth selection switch to tweak the signal. The needle and dial tuning gives an approximate indication of where on the band the radio is tuned, so if you want a positive ID, you need to listen for a station ID or some other clue to the station’s location.
At one point I jumped to the FM dial and found I could easily pick up many FM stations even with the whip antenna collapsed. In all, I am of the opinion that both the AM and FM sides of the receiver are pretty “hot,” and at no time did I find myself wishing for an auxiliary antenna for more signal. Further, the sound through headphones or the speaker is very pleasant indeed. In my mind, the relatively unadorned exterior of the EP PRO belies its outstanding performance. To stretch an analogy, it’s a nitro-burning funny car in the body of a Honda Civic, and you don’t have to be a genius to drive it.
If you’re looking for a high-performance radio that is easy to use and sounds good through speaker or headphones, the CCRadio EP PRO delivers the goods. For a content DXer like me, the EP PRO encourages me to tune around and discover the magic of radio all over again.
CCRadio-EP Pro Retailers:
- C.Crane
- Amazon.com (SWLing Post affiliate link)