Tag Archives: Airspy

Guest Post: Tom takes the AirSpy HF+ and YouLoop to the field!

Many thanks to SWLing Post contributor, TomL, who shares the following guest post:


YouLoop Picnic Table Report

by TomL

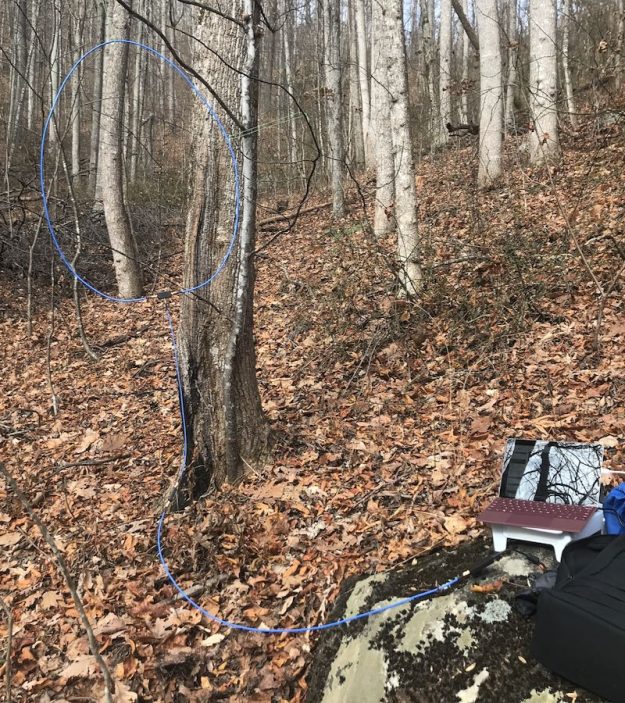
So, I finally got around to testing my Airspy YouLoop after the long shipping delay from China.  It is simple in concept and will not repeat what others have written about it in previous articles.  I find it a useful loop antenna for portable operations and sometimes for noisy home use.  This report is focused on my usual field location from a Northern Illinois county park picnic table.

Setup

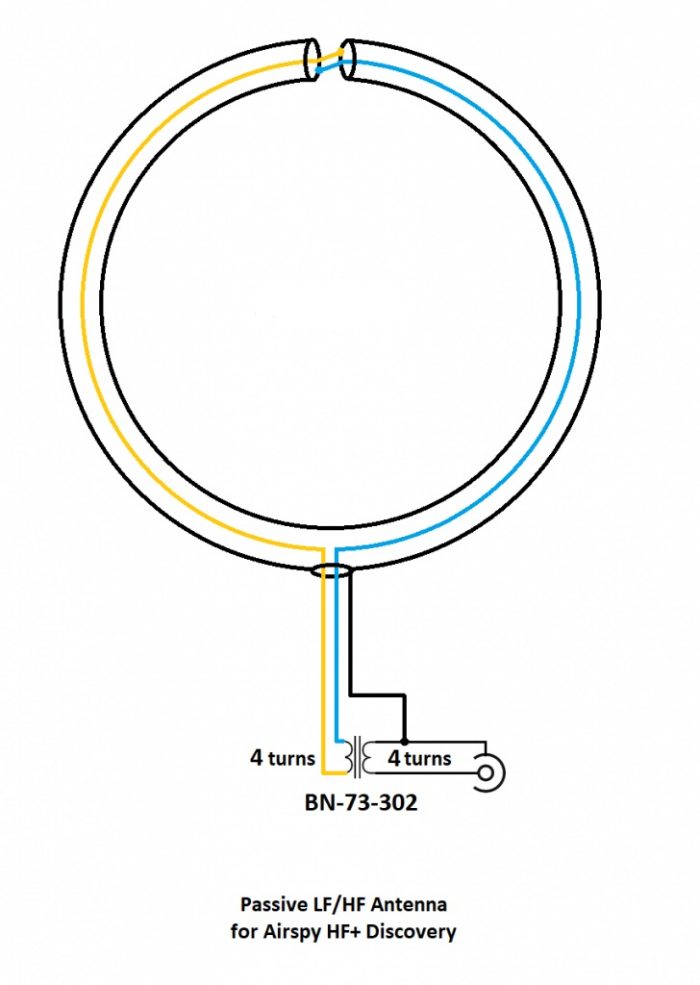
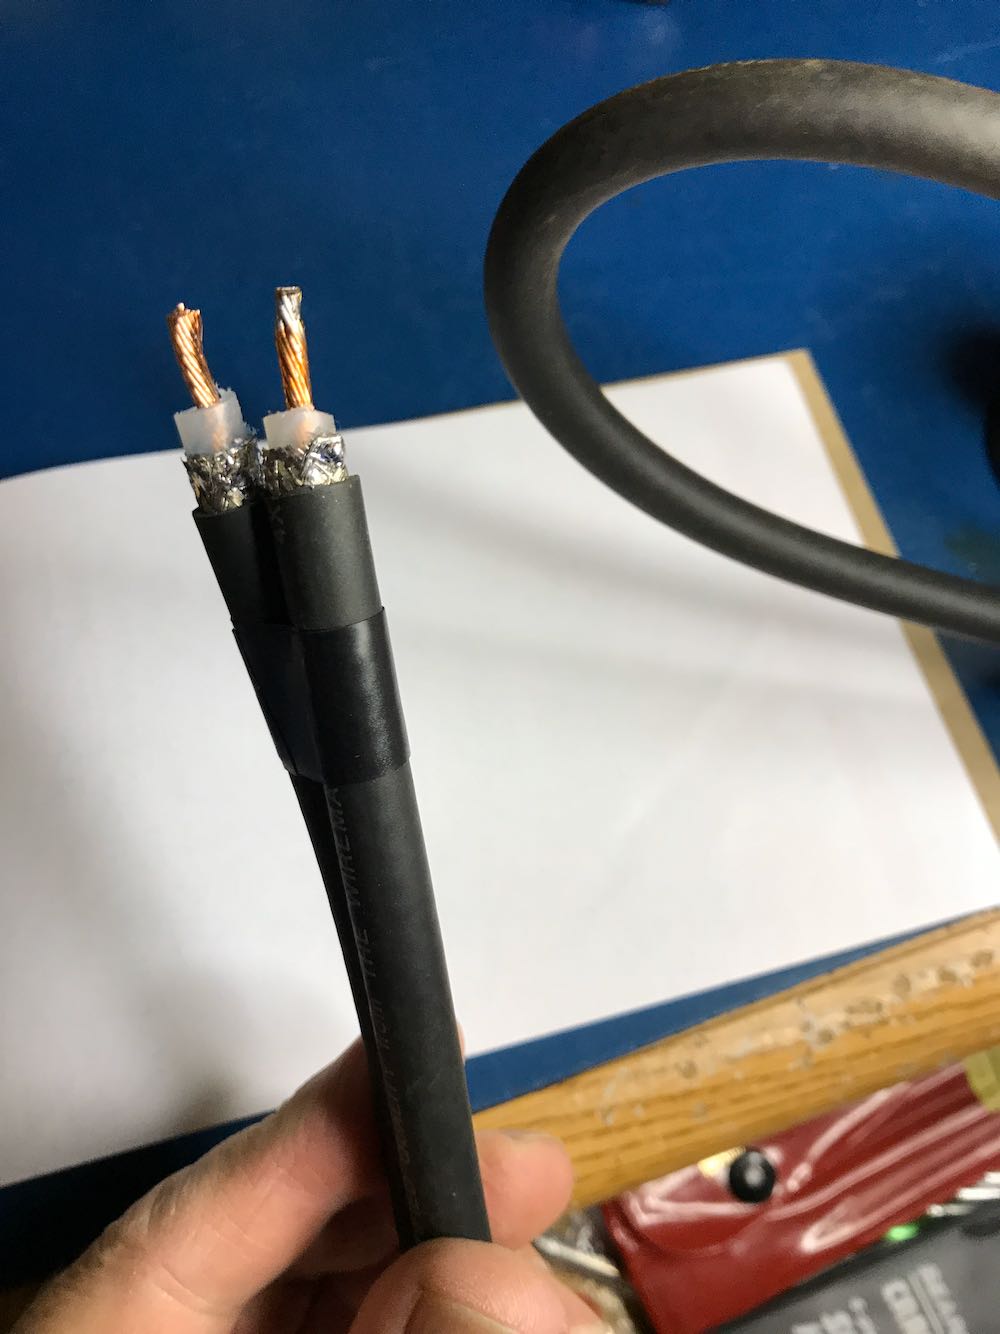
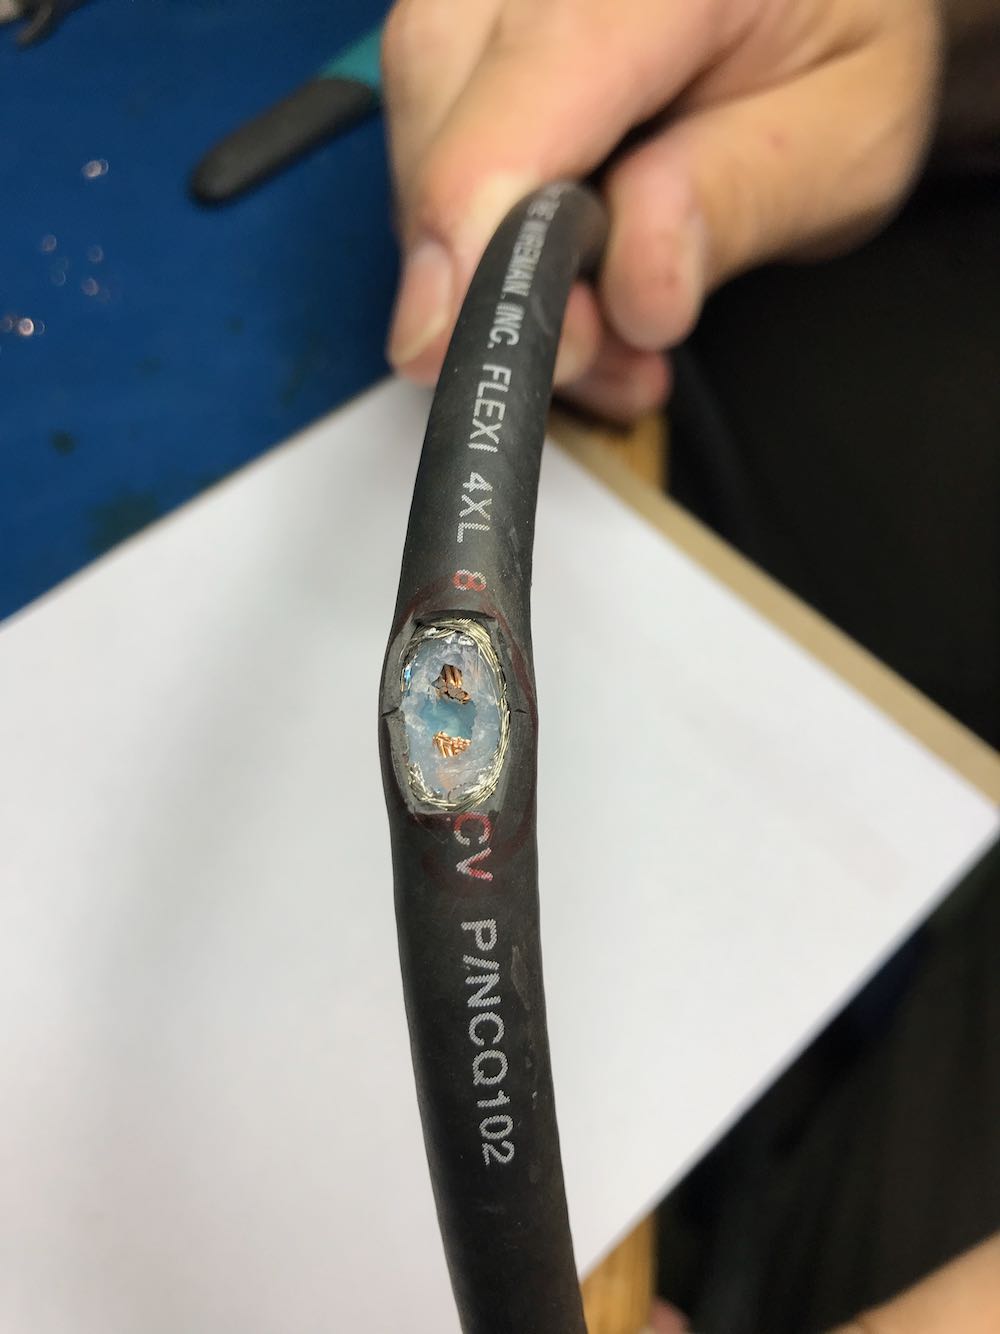
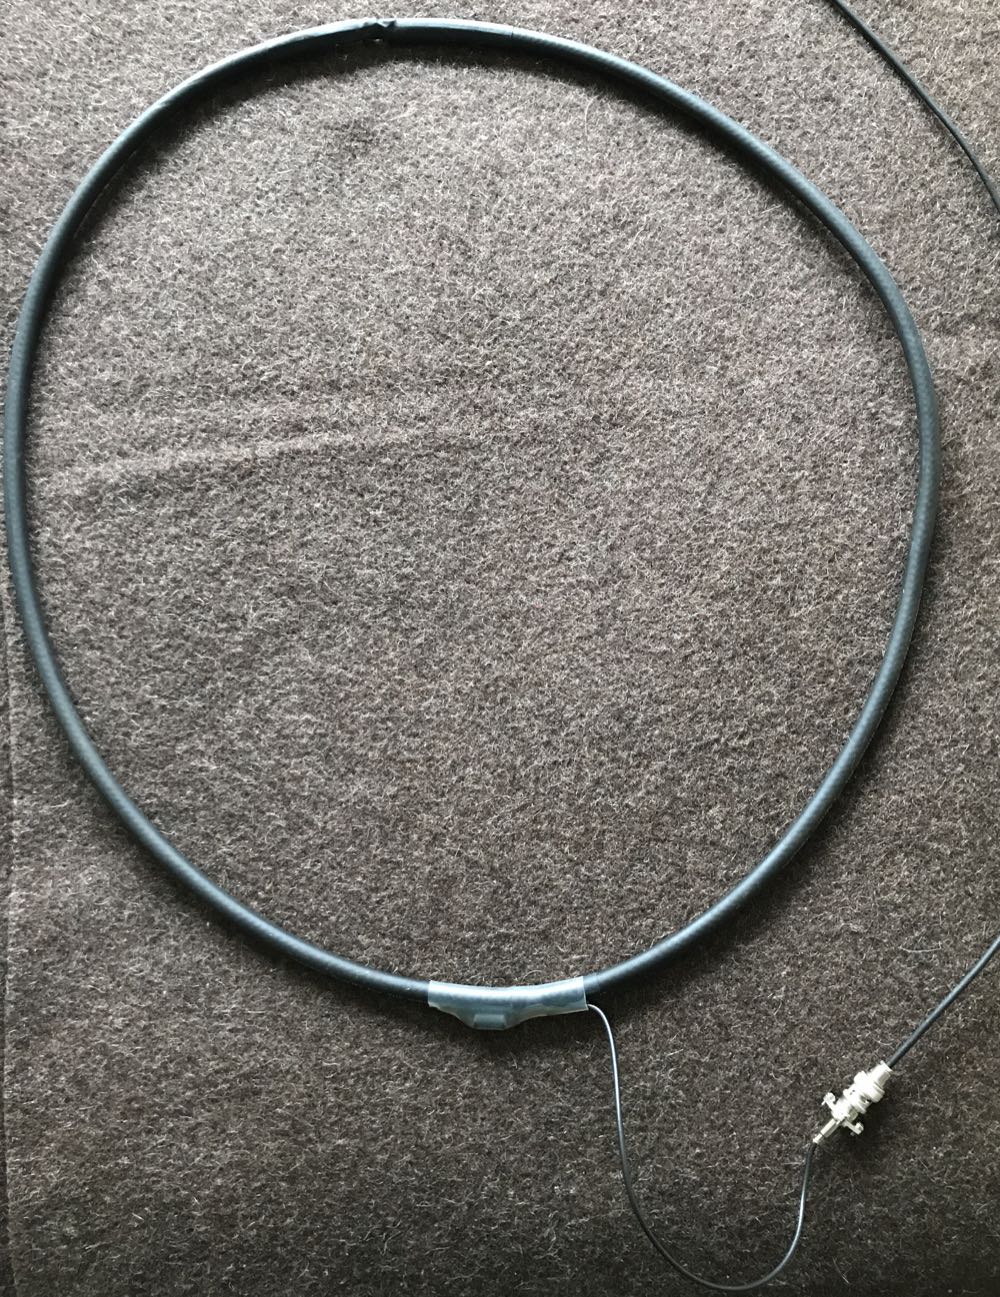
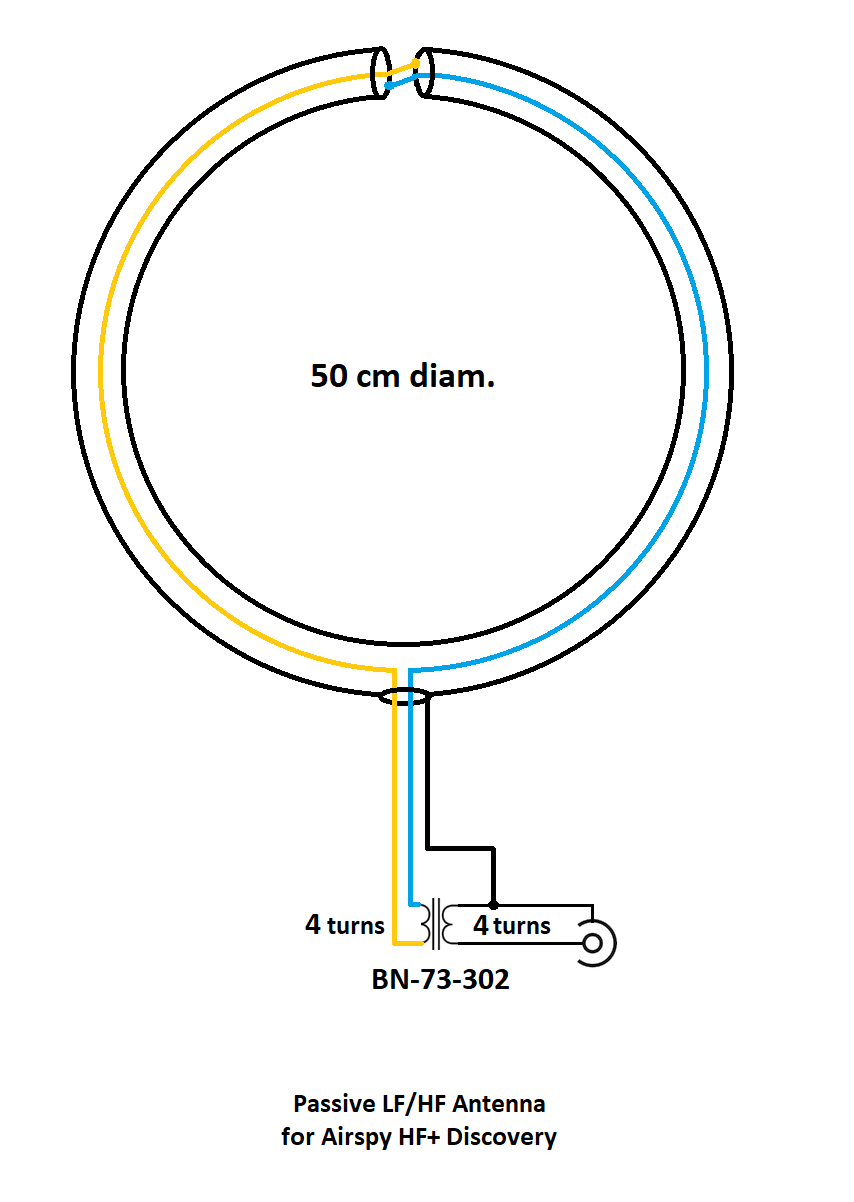
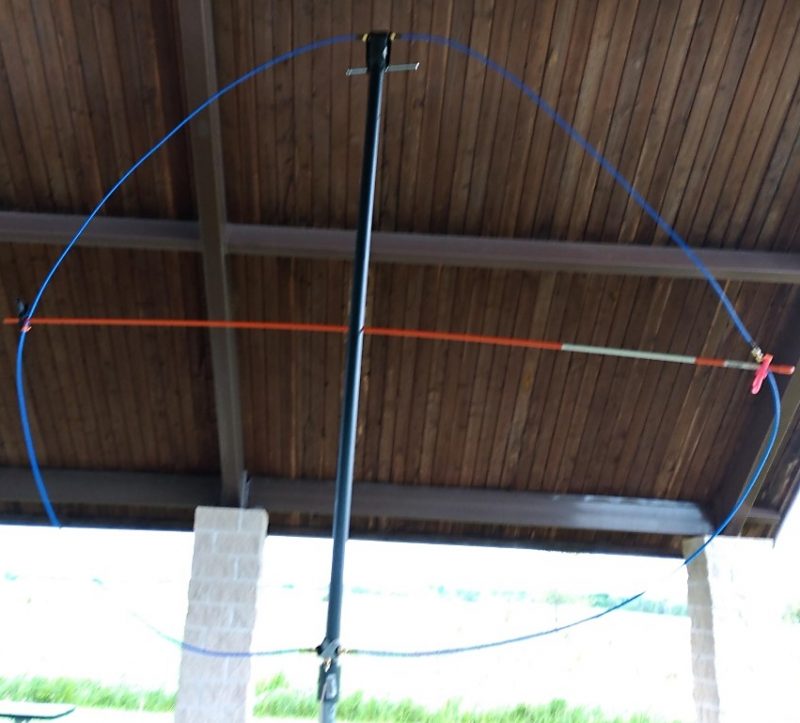
As you can see from the setup photo, it all fits into a backpack except for the two PVC pipes and crossbar which are easy carried.  I modified my YouLoop to use the 2 meter transmission line as one half of the loop.  The other half consists of the two shorter wires connected with a simple female-to-female SMA connector.  This doubles the circumference of the loop and gives it a bigger capture area.

Crossbar

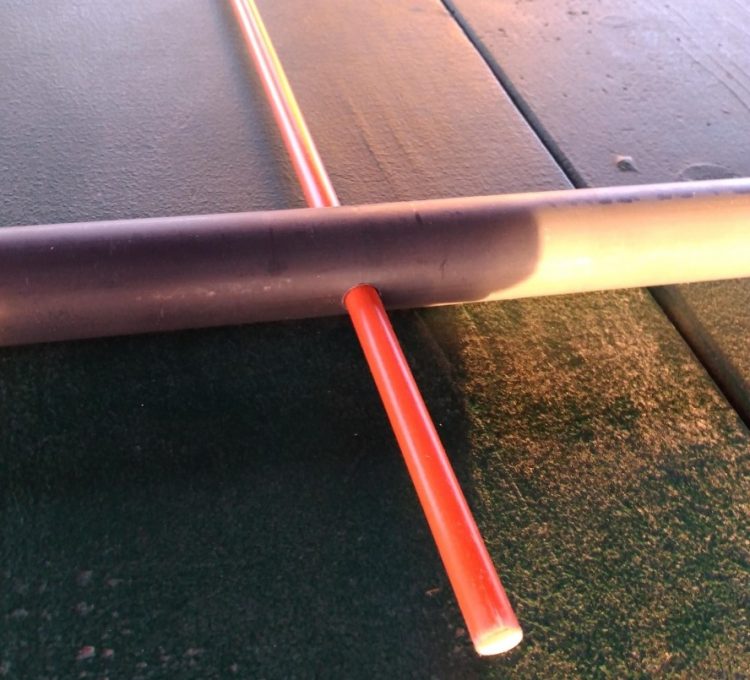
Because my setup is bigger than usual, I had to find a lightweight cross member to aid the solid conductor wire from sagging. I found just the thing in a larger-than-normal 6 foot fiberglass driveway snow marking stick sold at the local hardware store.  I cut the tip off to make it 5 feet (Because, the loop as I configured it is 4 meters circumference, so, 4*39.37/Pi = Diameter in inches). I then drilled a 5/16th’s inch hole through the middle of the ¾ inch PVC threaded pipe I had from a previous project and fit the fiberglass stick through it as the crossbar. This is a special PVC 4 foot nipple pipe I had special ordered a long time ago when mounting a previous (heavy) Ferrite-Sleeve loop antenna.
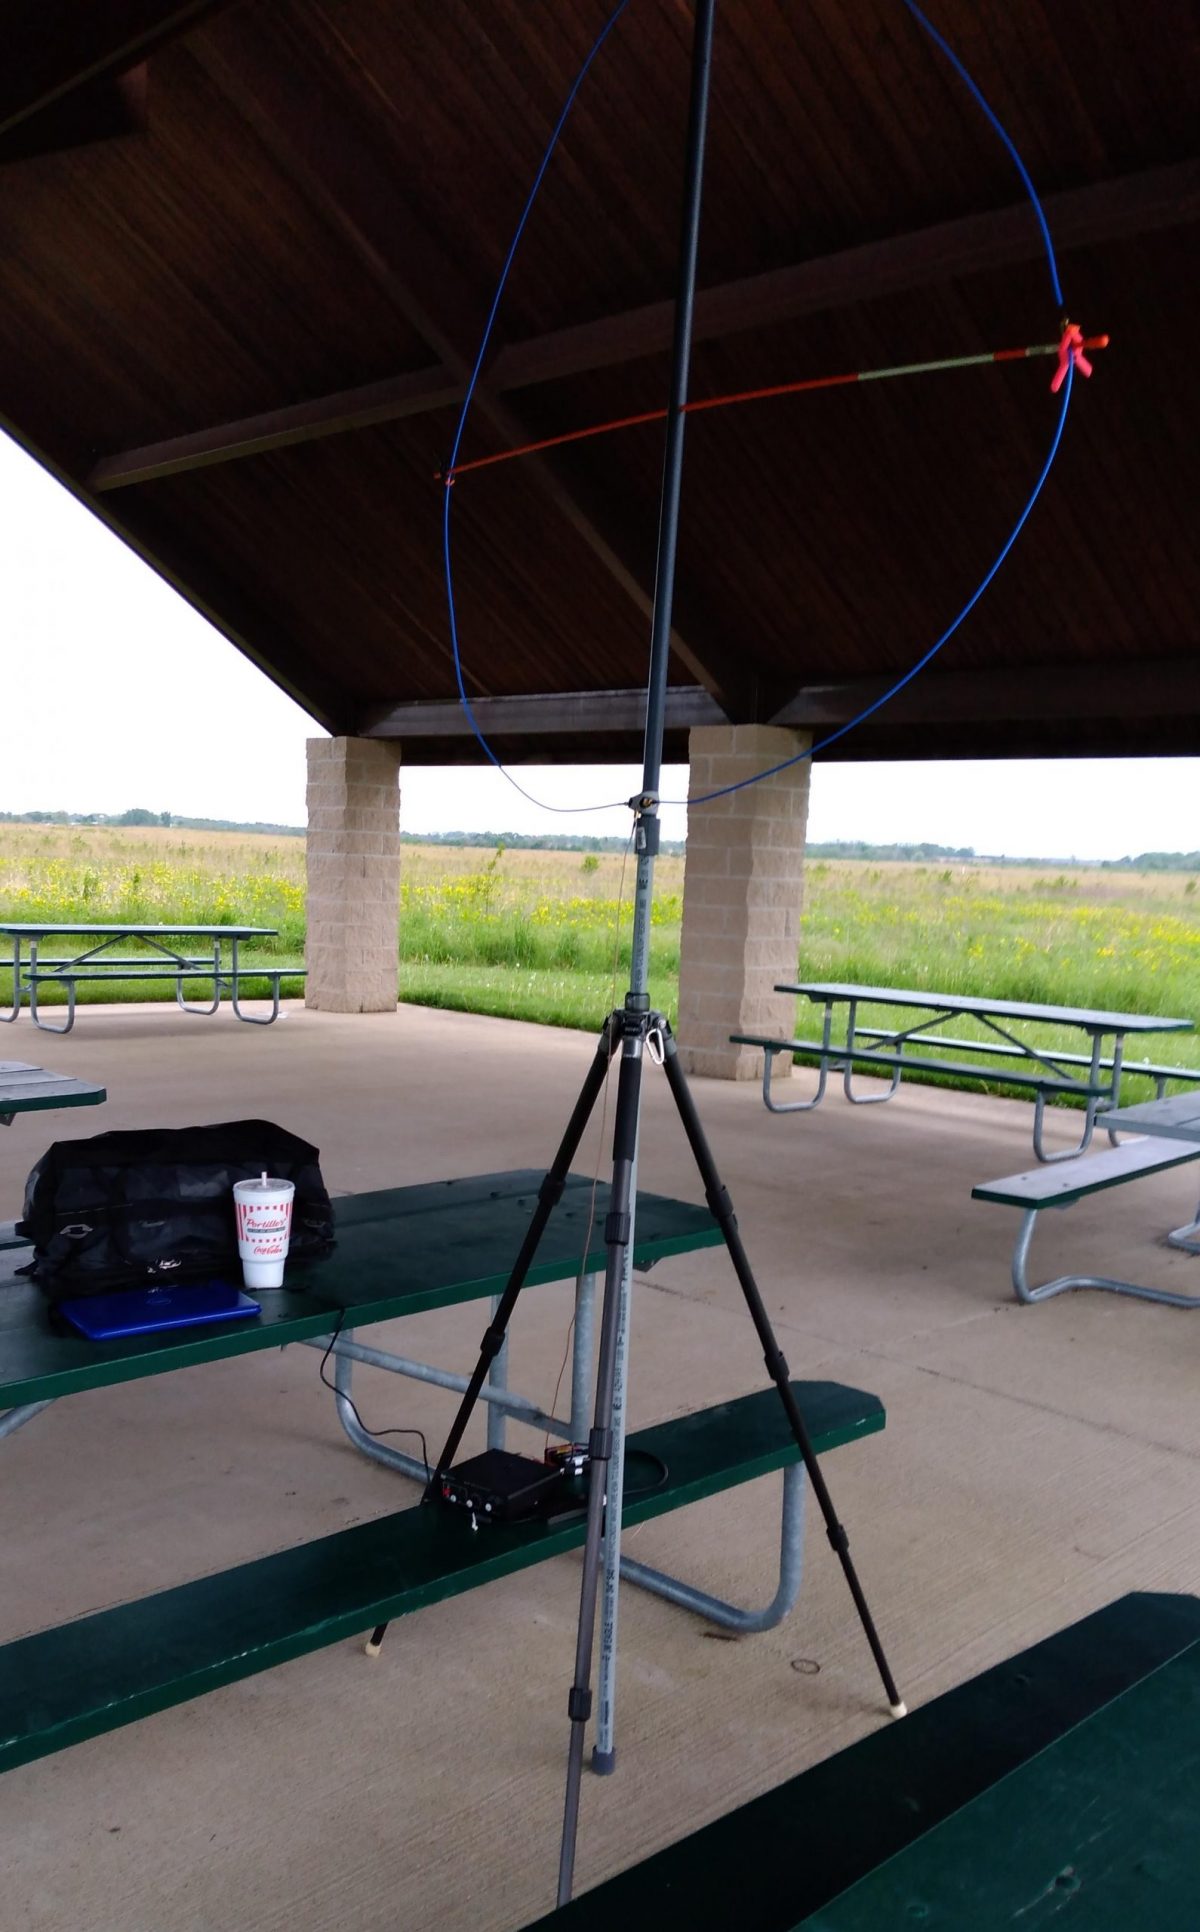
Loop Mounting

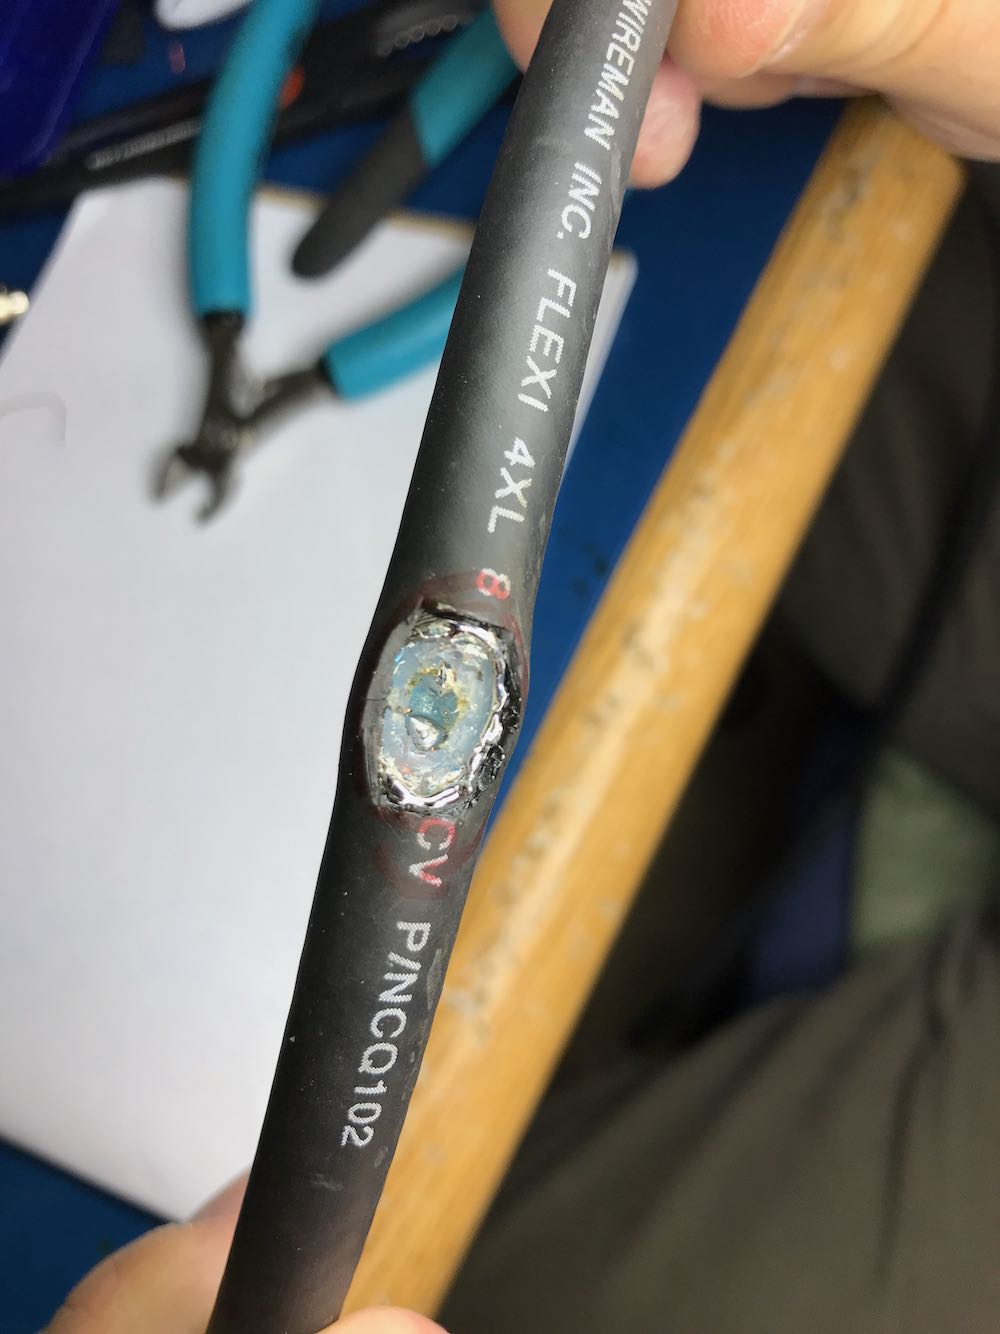
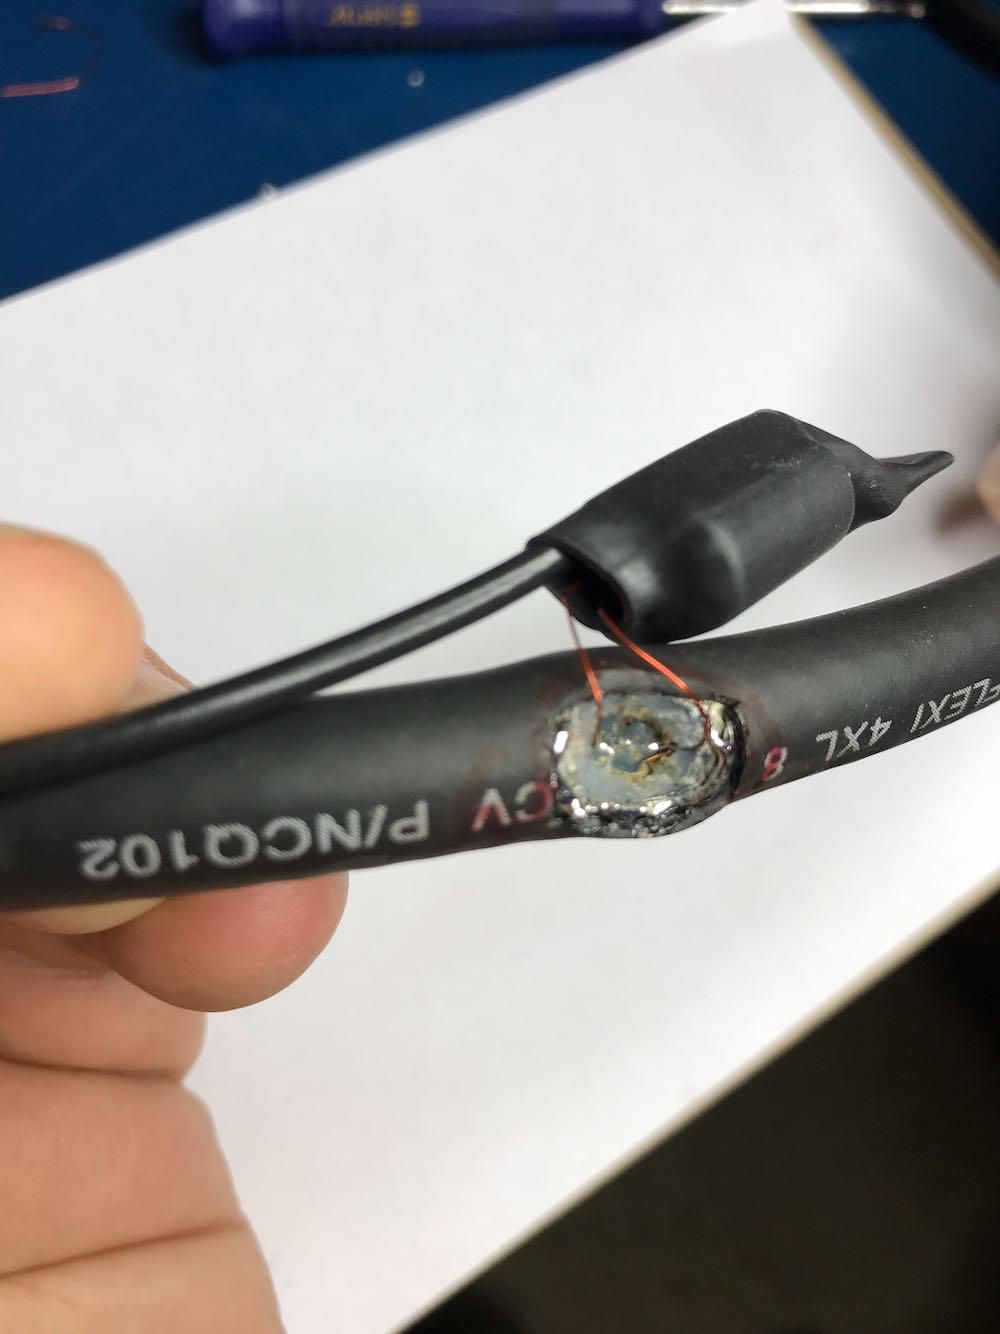
Screwed onto both ends of the 4 foot nipple are threaded-to-coupler adapters also found at the hardware store.  The adapter allows me to attach easily to the ¾ inch 5 foot long PVC pipe held by my trusty carbon fiber tripod below.  This 5 foot pipe is held loosely by the tripod so I can grab the pipe and turn the whole loop mounted above.  The result is not perfectly circular and there is room for improvement.  I find it to be highly directional nonetheless and easy to turn. The phasing connector of the YouLoop mounts at the top and for now I am just using two medium sized cable ties to a long screw near the top for tension.  I do not want to glue the connector to the top since this YouLoop may get used in other configurations in the future.

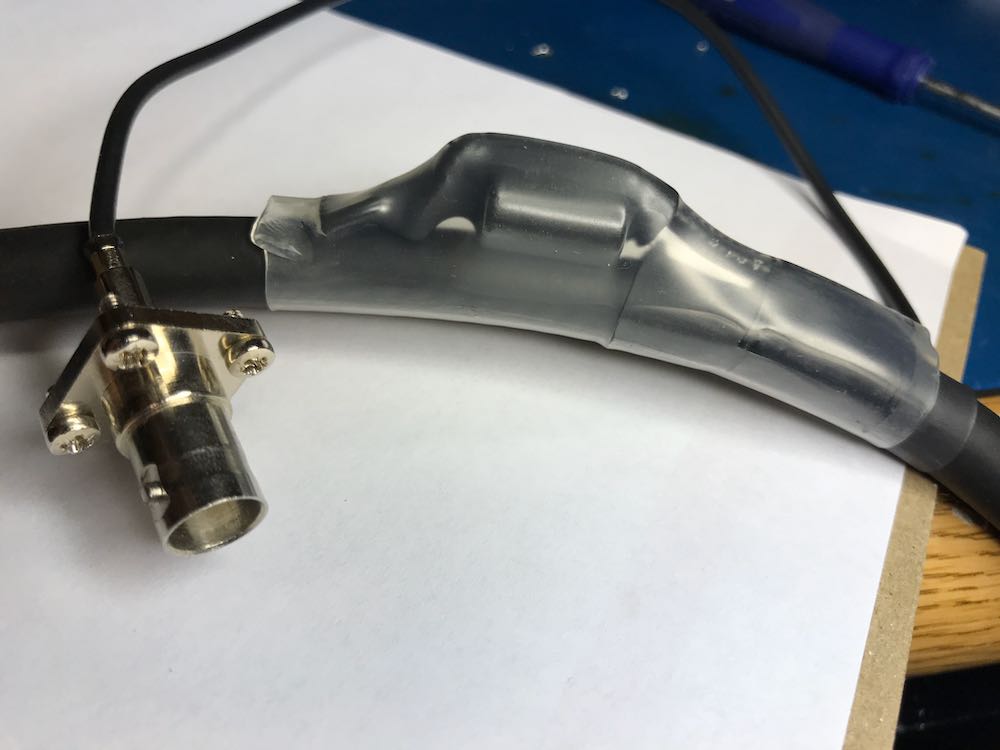
The Bottom connector for the radio input is held nicely with a couple of velcro wraps.

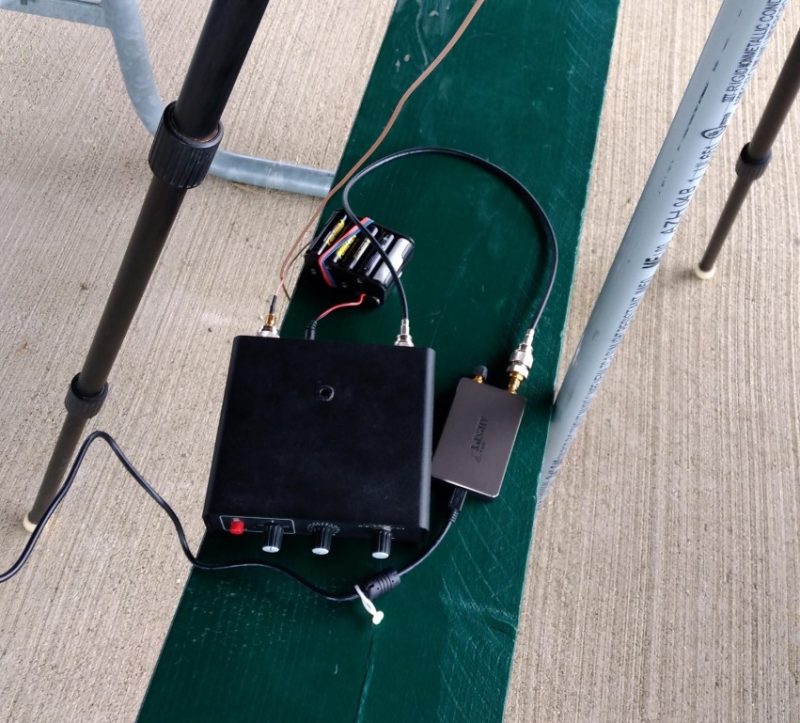
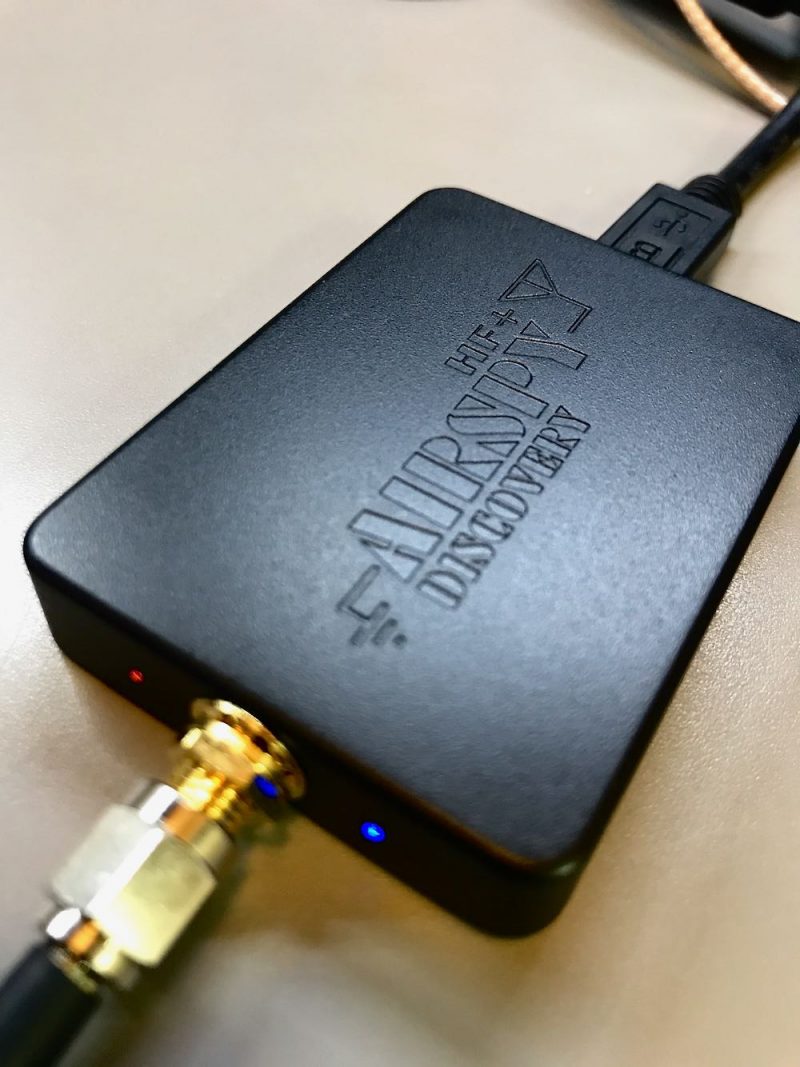
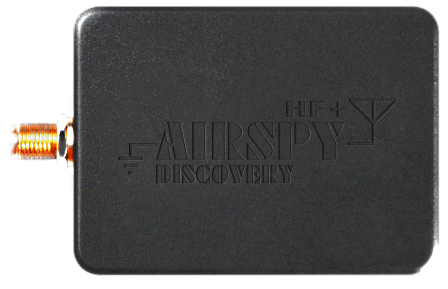
The wire from there goes to the usual setup of Palstar amplified preselector with battery pack and Airspy HF+, which goes into the USB port on the small Dell laptop.  After some initial problems with a non-functioning HF+ and rebooting a few times, I was finally able to get a signal.  At first I thought it was the antenna but the error condition acted the same way whether the antenna was connected or not.  It could be that my HF+ is starting to exhibit the first signs of failure, which I have read about from complaints on the internet about the reliability of SDR’s used in the field.  I may have to bring along my SDRPlay SDR2 just in case!  In other words, don’t depend on computer hardware and software to work (especially if you happen to go on vacation and have no backup radio!!).  I also have a couple of portable non-SDR radios I could bring with me as well.  Enough said.

Using It

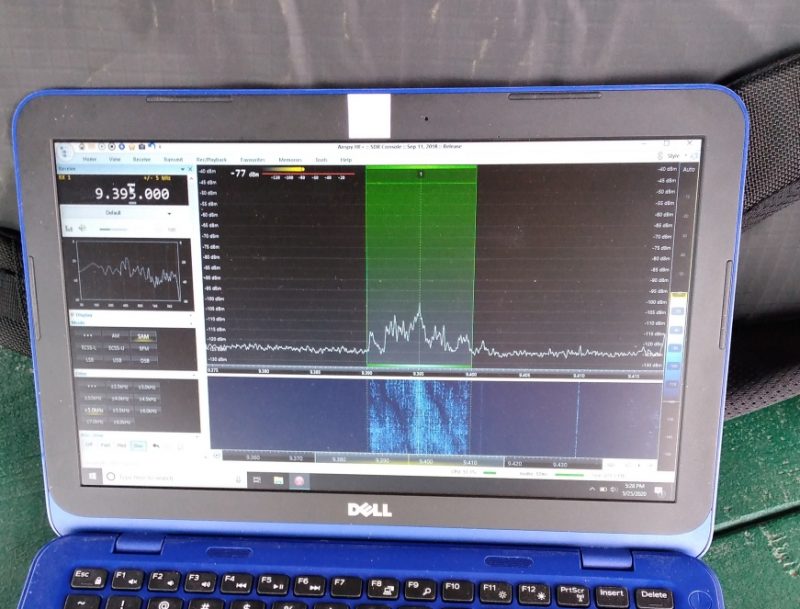
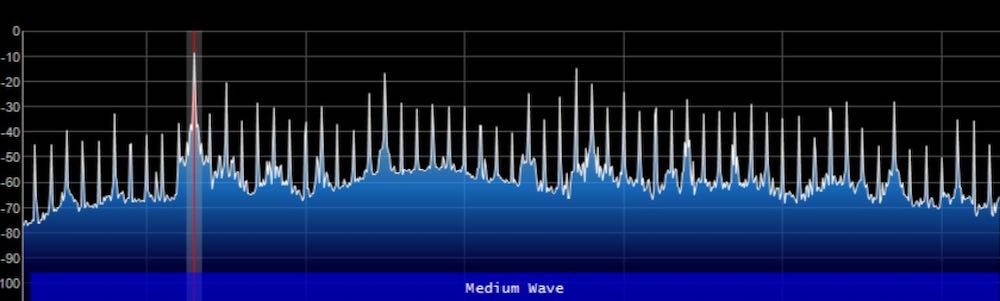
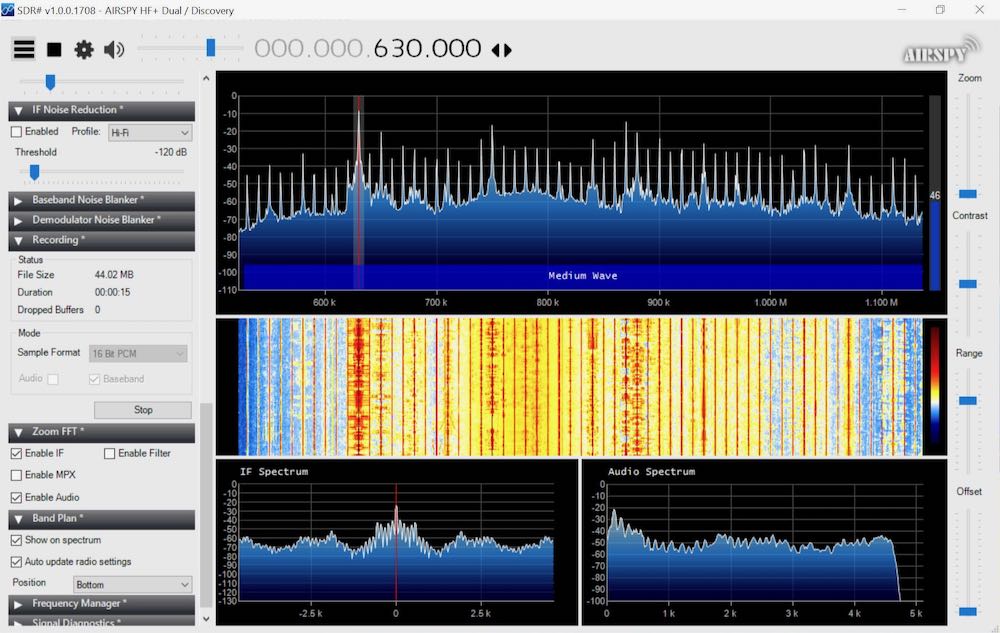
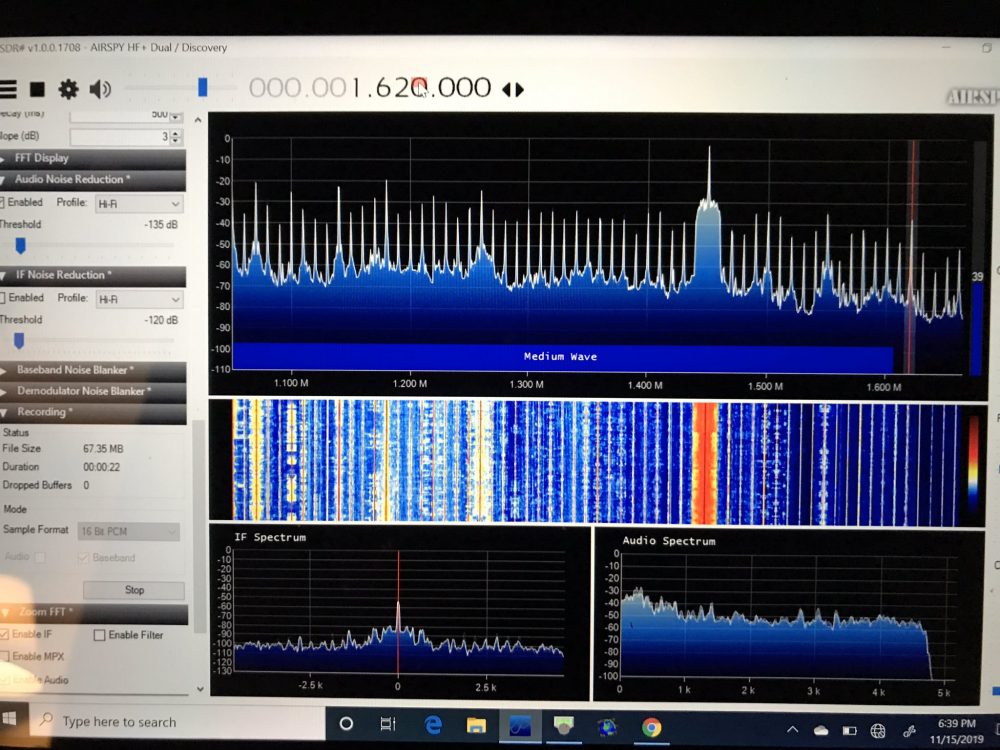
The screen of the laptop shows a very nice black background, very quiet, and a moderate signal level of WRMI on the 31 meter band.  I did not have the time or processing power for real Data captures, so all I have to share are less optimal MP3 files.  The signal level is somewhat low. I think this is typical for a single-wire loop antenna and seems adequate. I did have to crank my Palstar preamp to maximum the whole time while on shortwave (my Wellbrook amp would probably work slightly better).  On mediumwave, the gain seemed more than adequate (I don’t have any recordings of that band at this time, maybe a future article).

Directionality is very good and usable across a very wide range of frequencies!  It certainly worked well up to the 25 meter band where I started to notice a drop off of nulling ability.  And this is good despite my lack of perfect circular mounting of the wire. Even though my county park is a “Forest Preserve” and not meant to have any development, there is increasing noise in the neighborhood and I find the loop to be very useful in cleaning up some background noise (as well as noise coming from the laptop!).  This is especially seen with the Voice of Iran broadcast in French. The weak signal was aided by moving the loop to balance the signal level to local noise.

The loop is a bit flimsy using it this large.  Keeping the connectors tight may be a problem in the future if subject to a lot of wind.  I think you will find the smaller (usual) setup in the instructions to be less of a problem.  My plastic clips at the sides of the crossbar and the plastic tie downs at the top are not optimal and will need something better (in other words, it would help if I had a better mounting for the wires).  Also, the tripod definitely wanted to tip over as a storm blew past, so I need to make sure I tie down one or more legs to the picnic table in the future!!

Final Thoughts

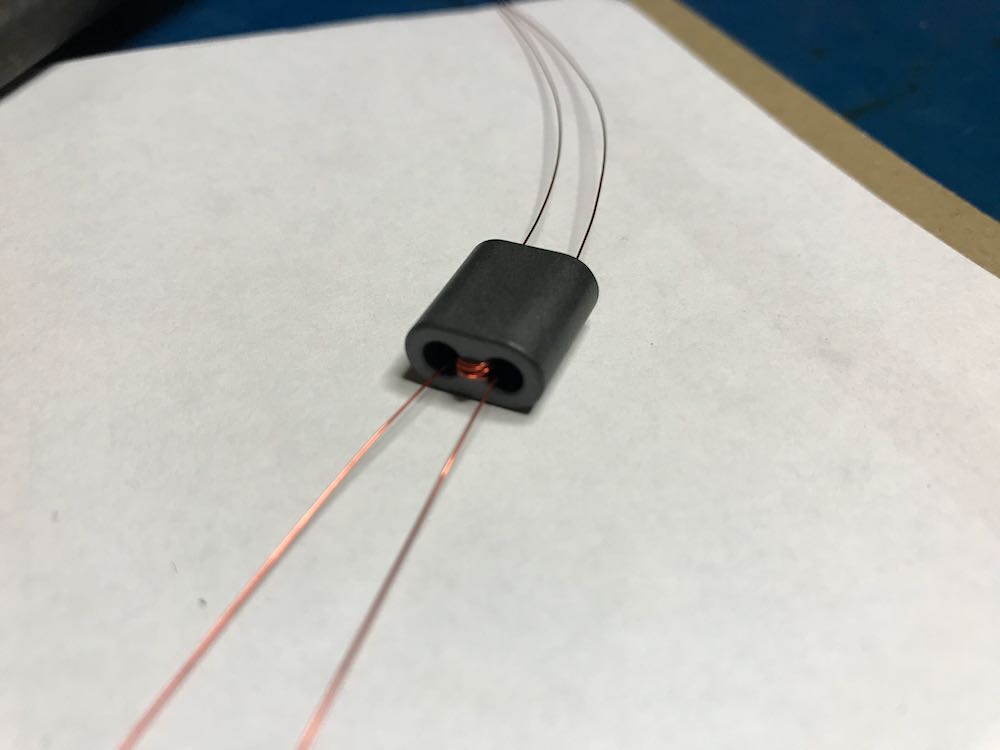
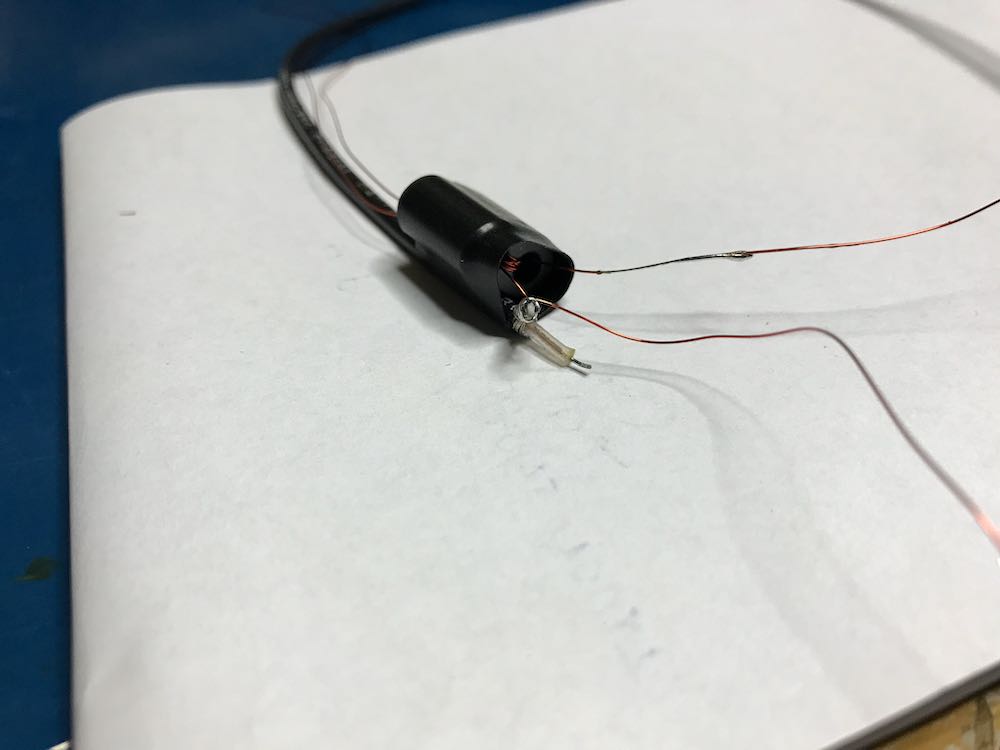
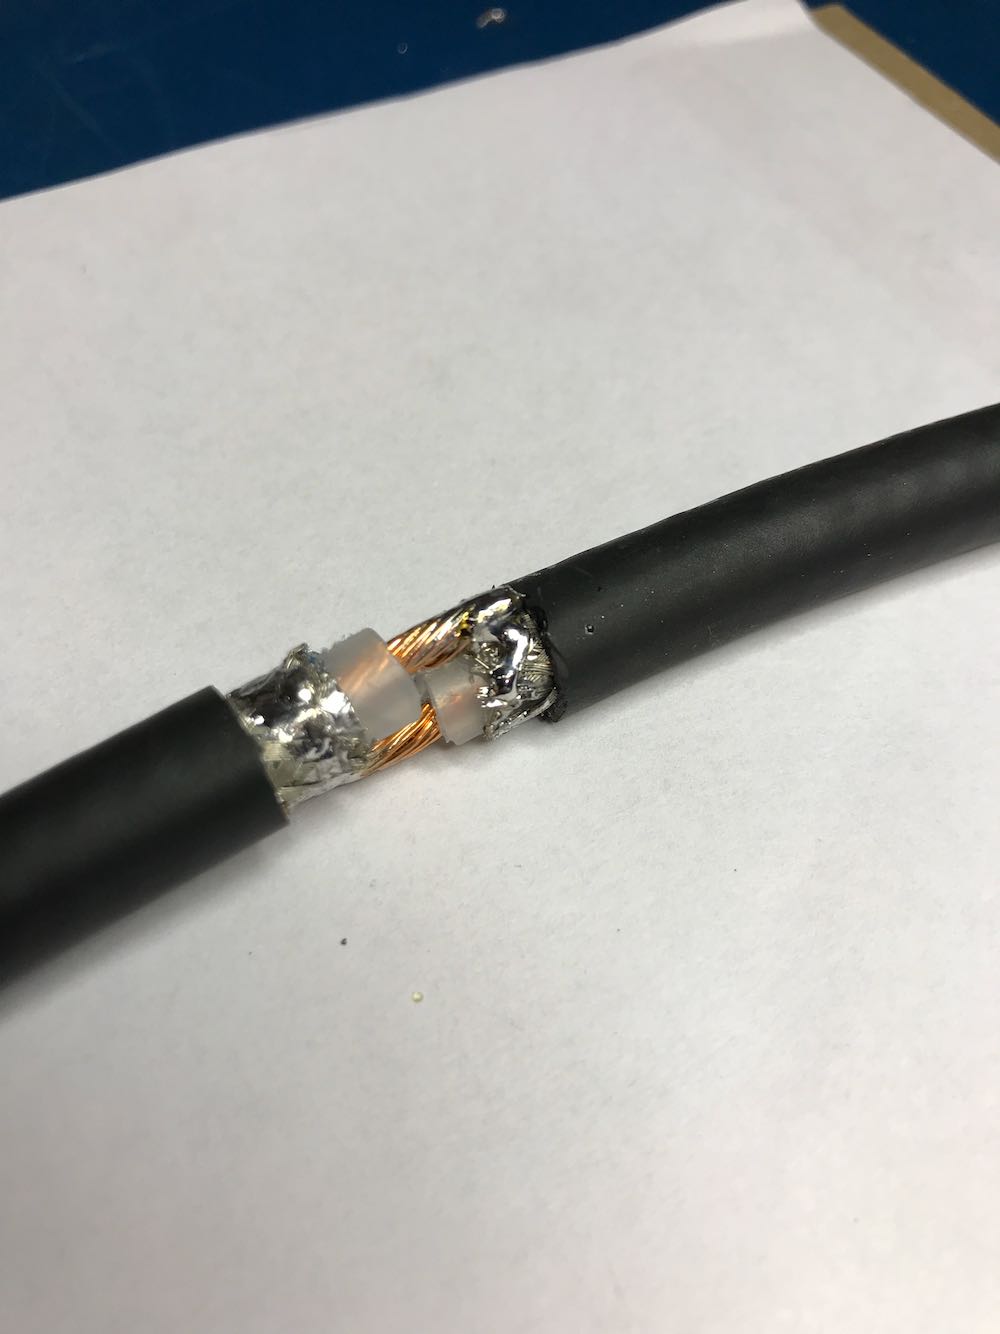
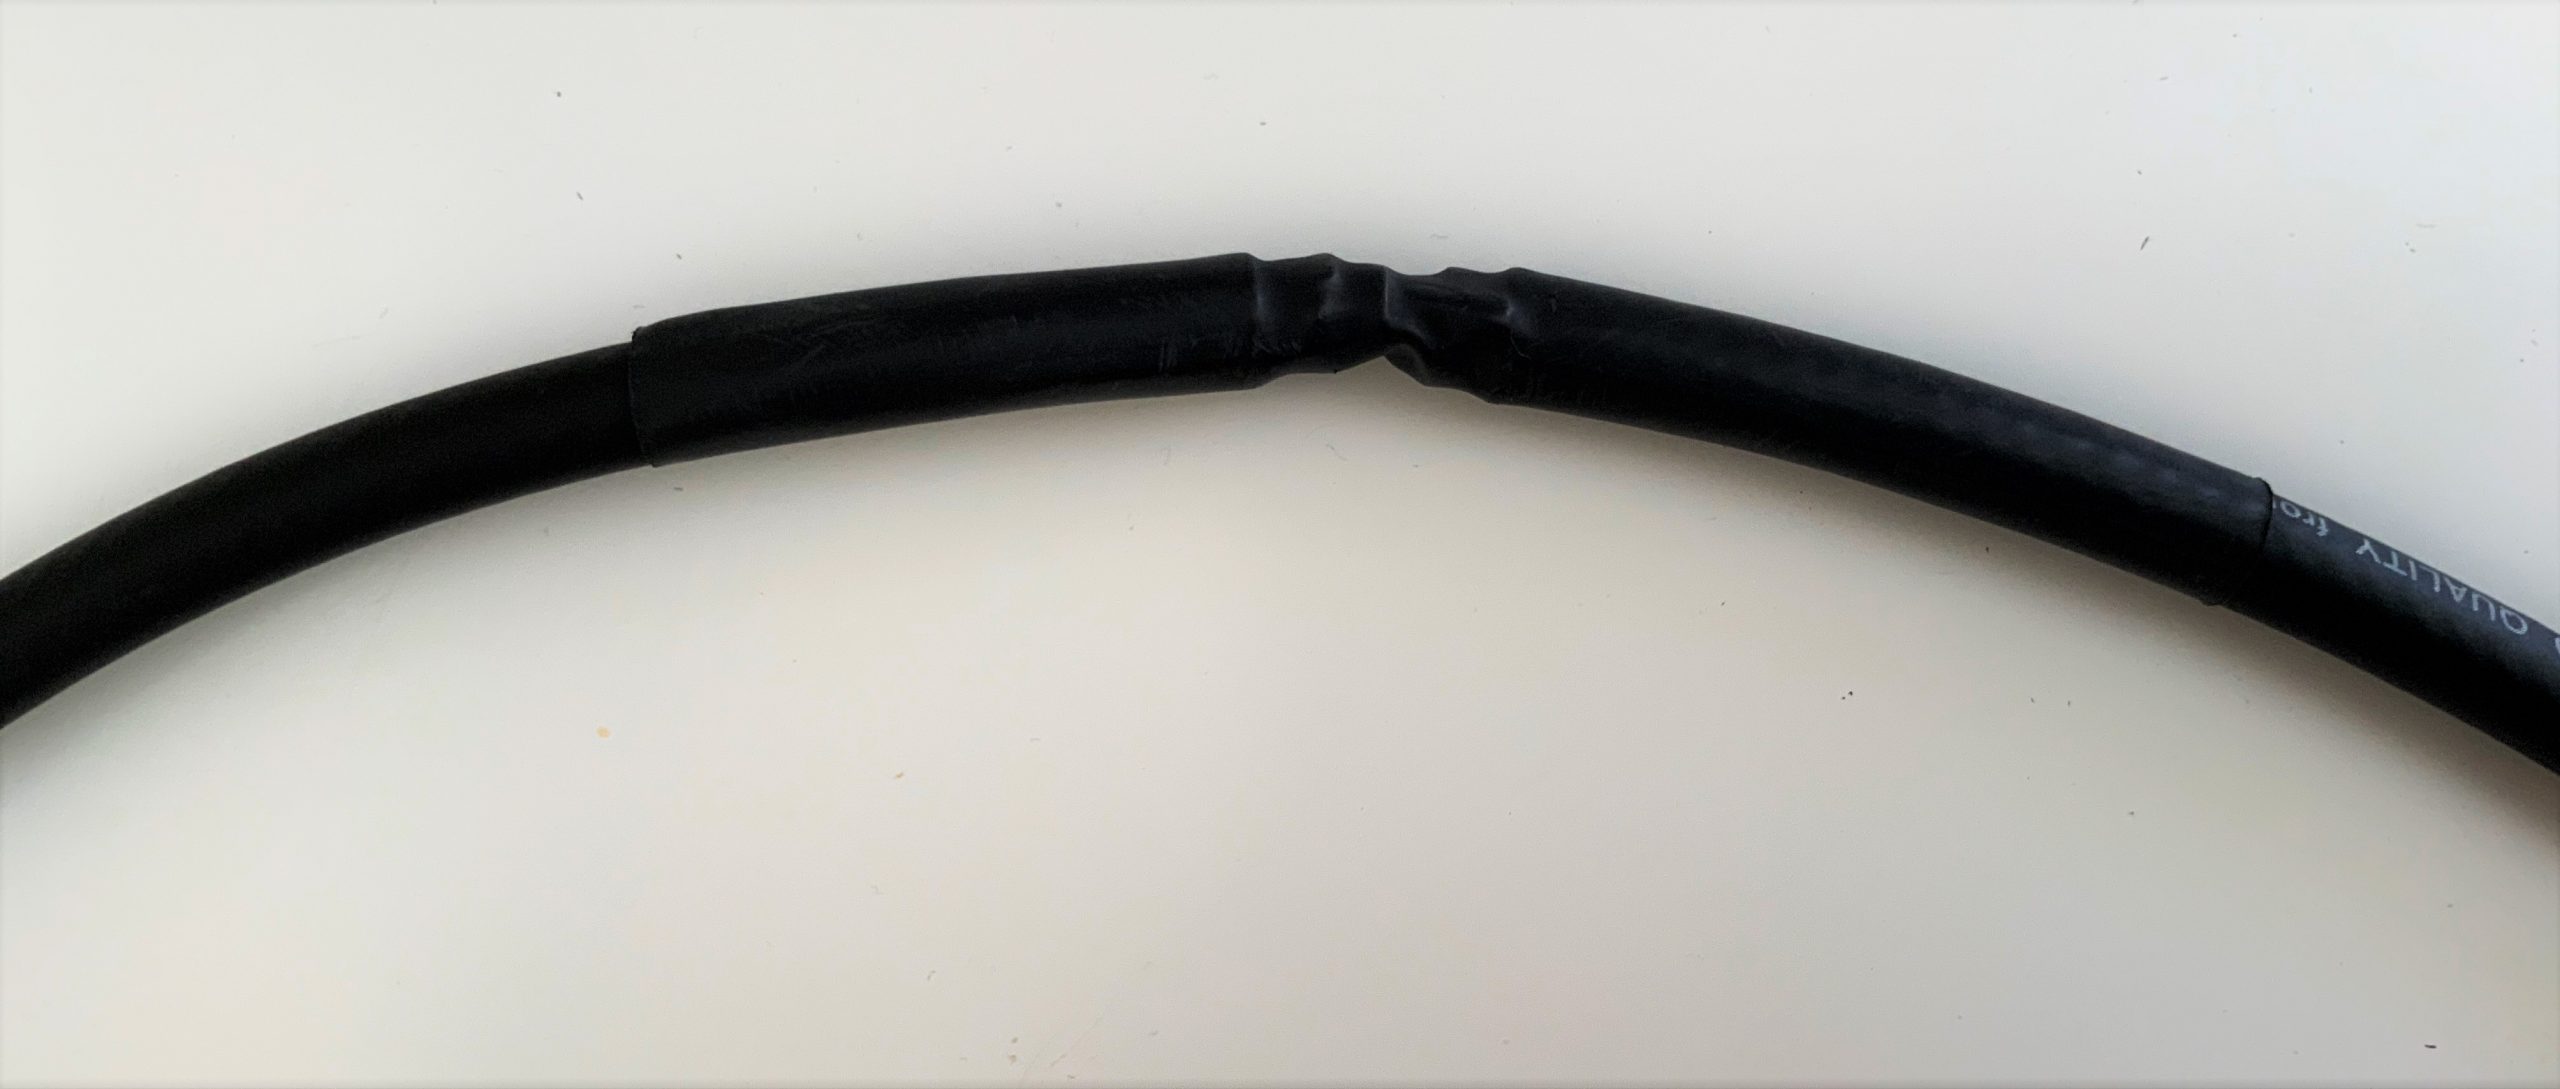
In summary, this is a very useful loop for portable operations since it fits easily into a backpack. Mounting it in a repeatable manner will need some experimentation.  Performance is good with usable nulling at a wide range of frequencies. Signal strength is moderate, so a good preamp is necessary in order to boost the signal into the sweet spot of your receiver RF stage.  Parts quality is good, but the wire is thin solid conductor, so do not kink/fold it!.  The connectors and housing for the phase change and balun are very small, with non-waterproof plastic housings that can be easily abused, so take care of them. The whole kit is small to pack and lends itself to experimentation.  Highly recommended given its limitations.

Furthermore, I feel my old, original 14-inch “crossed-parallel loop” did as good a job as this larger diameter YouLoop.  I wonder how the YouLoop can be modified to create a larger gain using, say, two or more wires in parallel (perhaps a future article!)?  Generally, the deeper the loop design, the higher the gain.  The YouLoop potentially could be a better performing, more portable version if I can replicate using more turns of wire.  Although it is in disrepair now, pictures of my old 14-inch loop are found here, and also here.

Sample Recordings

Here are a bunch of sample recordings to enjoy, some of which are unique to shortwave radio and found no where else:

9830 kHz, Voice of Turkey

10000 kHz, WWV

9395 kHz, WRMI

9420 kHz, Voice of Greece

11760 kHz, Radio Habana Cuba

11780 kHz, Radio Nacional Brazilia

11940 kHz, Radio Nationale Espana

7193 kHz, W3M – special Amateur Radio event to celebrate the birthplace of Memorial Day (Boalsburg, Pennsylvania) 

7230 kHz, Voice of Iran (French)

7315 kHz, Voice of Vietnam, from WHRI-1 transmitter

7350 kHz, Radio China International, in English from Kashi PRC

7375 kHz, Radio Romania booming in from Romania

7490 kHz, WBCQ (Spanish) from Monticello ME (guide says only 50 kw but sounded more than that)

6180 kHz, Radio Nacional Brazilia

6070 kHz, CFRX Toronto – discussion about some people with ashes of relatives in the home

6115 kHz, WWCR Nashville TN – discussion about Jesus saving a young woman from Satanic ritual abuse as a child

5850 kHz, Radio Slovakia International from WRMI booming in as usual

73’s & Happy Listening,

TomL


Thank you, Tom, for sharing your field-portable SDR setup! I like how you’ve made an inexpensive and packable support system for the larger diameter YouLoop. While I’ve yet to design a similar system around the YouLoop, I really should. I’ve always believed that for both SWL and ham radio field-portable operations, a self-supporting antenna system is a must as it gives you ultimate flexibility to cope with variable site conditions.

Click here to check out Tom’s previous guest posts and portable adventures!

Spread the radio love

DIY: How to build a Noise-Cancelling Passive Loop (NCPL) antenna

I’ve gotten an number of inquiries from SWLing Post readers asking for a step-by-step guide to building the passive loop antenna I’ve mentioned in a number of previous posts. This antenna is the homebrew version of the commercially-available  Airspy Youloop.

It works a treat. And, yes, folks…it’s fun to build.

There are a number of loop designs out there, and to distinguish this one, I’m going to henceforth refer to this loop as in the title above:  the Noise-Cancelling Passive Loop (NCPL) antenna.

Before we start building, a little antenna theory…

I’m neither an engineer nor am I an antenna expert, so I actually turned to Airspy president and engineer, Youssef Touil, to learn how, exactly, this passive loop works. Youssef was the guy who experimented with several loop designs and ultimately inspired me to build this loop to pair with his HF+ Discovery SDR and the SDRplay RSPdx. “The main characteristic of this loop,” Youssef notes,  “is its ability to cancel the electric noise much better than simpler loop designs.” Got that!  [See loop diagram below]

“The second characteristic of this loop antenna is that it is a high impedance loop, which might appear counterintuitive. This means it can work directly with many receivers that have a low noise figure, in order to mitigate the impedance mismatch loss.

Note the resonance lobe near 4MHz. The resonance frequency is controlled by the diameter of the loop, the parasitic capacitance of the cable, and the loading from the transformer. It happens to be located right where we need it the most.

The transformer is basically a 1:1 BALUN that covers the entire HF band with minimal loss. Our BALUN has typically 0.28 dB loss.

[…]By connecting the center of this outer shield to the ground of the transmission line, you effectively cancel all the electric noise. The BALUN is required for balancing the electric noise, not for adapting the impedance.

[…]If you want to boost the performance in VLF, LW and MW, you can try a different impedance ratio, but this will kill the higher bands.”

What makes this loop so appealing (to me) is that it can be built with very few and common parts–indeed, many of us have all of the items in our junk boxes already. As the name implies, it is a passive design, so it requires no power source which is incredibly handy when you’re operating portable.

When paired with a high-dynamic range SDR like the Airspy HF+ Discovery or SDRplay RSPdx, you’ll be pleased with the wide bandwidth of this antenna and noise-cancelling properties.

If you don’t care to build this antenna, Airspy sells their own version of this loop for a modest $35 USD.

But building an antenna is fun and you can tweak the design to customize performance, so let’s get started:

Parts list

  • A length* of coaxial cable for the loop (see notes below regarding length)
  • Another length of cable terminated on one end with a connector of your choice as a feed line
  • A BN-73-302 Wideband 2-hole Ferrite Core
  • Enough coated magnet wire for a total of eight turns on the BN-73-302
  • Heat-shrink tubing or some other means to enclose and secure the cable cross-over point and balun. (You may be able to enclose these connection points with PVC or small electrical box enclosures, for example)
  • Electrical tape

Tools

  • A cable stripper, knife, and/or box-cutter
  • Soldering iron and solder
  • A heat gun (if using heat shrink)
  • Some patience 

*A note about loop cable length: Vlado and I made a loop with 1.5 meters of cable. The Airspy Youloop ships with two 1 meter legs that combine to give you an overall loop diameter of about 63.6 cm.

Step-by-step guide

When I first decided to build this loop, it was only a day prior to a trip to the South Carolina coast where I planned to do a little DXing. I didn’t have all of the components, so I popped by to see my buddy Valdo (N3CZ). Vlado, fortunately, had all of the components and was eager to help build this loop. As I’ve mentioned in previous posts, Vlado is an amazing engineer and repair technician, so when I say “we” built it, what I really mean is, Vlado did!  But I could’ve done it myself.

This is actually a very simple build––something even a beginner can do, as long as they’re okay with using a soldering iron. It does take patience preparing the loop cable properly. Take your time as you start, and you’ll be on the air in an hour or two.

1. Strip the ends of the loop cable.

Although your cable type and diameter may vary, strip back the cable ends roughly like this.
To make finding the middle of the cable easier, we taped off the ends.

2. Make an opening in the middle of the cable to attach Balun leads to center conductor.

This is the trickiest part of the whole operation. The goal is to create an opening to tap into the center conductor of the cable.

You need to open a hole in the middle of the cable by

1 cutting away a portion of the outer jacket;

2 carefully separating and opening the shielding;

3 digging through the dielectric core, and finally

4 exposing the center conductor of the cable

Try to make an opening just large enough to gain access to the cable’s center conductor, but no bigger. Don’t allow any piece of the shielding to touch the center conductor.

When you reach the center conductor, expose enough of it so that you can clip it in the middle and create an opening to solder your balun leads to both conductor ends.

Once you’ve finished with this step, your cable should look something like this…

In the photo above, note that the shielding is completely pulled away, the dielectric core has been cut through, and we’ve clipped the center conductor, leaving a gap large enough to solder.

3.  Make a 1:1 Balun

Grab your BN-73-302, and with the coated magnet wire, make four windings on one side, and four on the other. It should look like this:

Don’t have a binocular ferrite core like the one above? If you have a broken cable with ferrite cores, you can hack one! Click here to learn more.

4. Connect the Balun to a feed line.

Vlado just happened to have a BNC pigtail in his shack (he’s that kind of guy), so we cut and stripped one end, then connected the center conductor and shield to one side of the balun. We then enclosed the balun in heat shrink tubing to make it a little easier to attach to the loop later:

Of course, you could also create this junction in a small enclosure box or short cross-section of PVC. There are a number of ways you could secure this.

Youssef also added the following note about the feedline:

To use the NCPL antenna without a preamp, it is recommended to keep the length of the cable below 10 meters. The supplied Youloop 2 meter cable [for example] is sufficient to keep the antenna away from the magnetic interference of a computer or a tablet, and has very low loss and parasitic capacitance.

5. Connect Balun to the coaxial loop.

To make a solid connection, tin both sides of the center conductor. Next, attach the other end of the balun leads to each portion of the center conductor, as seen below:

Update: Note in the loop diagram near the top of the page that the ground wire on the output connector connects to the loop coax shielding on the primary side of the balun. I don’t recall that we did this in the build, but I would encourage you to do so. This should result in even lower noise, although admittedly, I’m very impressed with the performance of ours without this connection. Thanks to those of you who pointed out this discrepancy!

6. Secure the Balun/Coax junction.

Since this loop is intended to be handled quite a lot in the field, make sure the junction point of the balun and coax loop is secure. Again, we used several layers of heat shrink tubing since we had some in the shack.

7. Solder and secure the cross-over point.

Next, create the cross-over point of the loop by simply attaching the center conductor of one end of the cable to the shielding on the other end…and vice versa.

Before you grab the soldering iron, howeverif, like we did, you’re using heat shrink tubing to secure the cross-over point of the loop in the next step, you’ll first need to slide a length of tubing onto the coax before you solder the ends together. Vlado, of course, thought of this in advance…I’m not so certain I would have!

Take your time soldering this connection and making it as solid as you can. If you solder it correctly, and you’re using a high-quality cable as we did, the cross-over point will be surprisingly durable. If you’re using a thinner cable, simply make sure the connection is solid, then use something to make the junction less prone to breaking––for example, consider sealing a length of semi-rigid tubing around this point.

Vlado cleverly added heat shrink tubing around the cross-over point to protect and secure it.

You’re done!

That’s all, folks! Now you’re ready to put your loop on the air.

Depending on what type of cable you used for this loop, you might require or prefer some sort of dielectric structure to support the loop so that it maintains the ideal round shape. My loop maintains its integrity pretty well without supports. I’ve supported it a number of times with fishing line/filament from two sides (tying on at 10 and 2 o’clock on the loop). That seems to work rather well.

In this setup, I simply used the back of a rocking chair to hold the antenna. As you can see, the loop maintained its shape rather well.

If you’d like to see and hear how this antenna performed on its first outing, check out this post.

Show the Post your loop!

If you build a NCPL antenna, please consider sharing your design here on the SWLing Post! Considering that there are a number of ways this loop can be built, and likely even more optimizations to improve it or make its construction even easier, we’d love to see your designs and/or construction methods. Please comment or, if you prefer, contact me.

And many thanks to my good friend Vlado (N3CZ)  for helping me with this project and allowing me to document the process to share it here on the Post. Got a radio in need? Vlado’s the doctor!


Enjoying the SWLing Post?

Please consider supporting us via Patreon or our Coffee Fund!

Your support makes articles like this one possible. Thank you!

Spread the radio love

The Airspy Youloop is a freaking brilliant passive loop antenna

Before I start talking Youloop, I have a little confession to make up front:

At the Winter SWL Fest when I gave a presentation about Portable SDR DXing, not only did I give attendees the wrong name of the Airspy Youloop antenna, but I also configured it incorrectly, hence the poor performance via my Miscrosoft Surface Go tablet PC.

I had assumed the the crossover component of the antenna was the transformer component. I realized the mistake I made when I saw some of the first promotional photos of the Youloop antenna a few weeks ago.

The crossover connects both sides of the loop while the tee junction contains the transformer.

Doh! I’m trying to forgive myself for making such an obvious mistake, but in my defence–and in the spirit of full disclosure–my antenna was a very early sample prototype without instructions, diagrams, etc. so I set it up imagining it being similar to the homebrew loop Vlado and I built. (FYI: When I say “Vlado and I built” it, I really mean, “Vlado built it.”) 

So obviously I made a poor assumption.

Once I assembled the antenna correctly? Wow. Just. Wow!

Youloop: The ideal travel antenna for high dynamic range SDRs

The Youloop, Airspy HF+ Discovery, SDRplay RSPdx, and all cables easily fit in my Red Oxx Lil Roy pack.

The Youloop is truly the travel antenna I’ve always wanted for portable SDR DXing. Here’s why:

  • It’s incredibly portable and can be rolled up to fit in a small travel pouch
  • It has all of the low-noise characteristics of other magnetic loop antennas
  • It’s wideband unlike many passive loop designs
  • It requires no variable capacitor or tuner
  • It’s made of quality components
  • It requires no external amplifier nor power source
  • It takes one minute to assemble
  • It’s affordable (~$35 USD shipped)

The only caveat? To take advantage of the Youloop, you must use a high dynamic range receiver.

Airspy HF+ Discovery SDR

I can verify that this antenna works brilliantly with the Airspy HF+ Discovery.

The AirSpy HF+ SDR

It will also pair well with the Airspy HF+  if you shortcut R3 via the R3 modification.

SDRplay RSPdx SDR

I’ve also used it numerous times with the new SDRplay RSPdx while using SDRuno in High Dynamic Range (HDR) mode. With the RSPdx, I can make spectrum recordings of the entire AM broadcast band. Note that HDR mode is only available on the RSPdx at 2 MHz and below, using the SDRuno app.

I have not tested the Youloop with other SDRs yet. I will soon test it with my WinRadio Excalibur.

So how well does the Youloop perform?

Listen for yourself!

I’m doing a little cargiving family members today. Their home is swimming in RFI (radio interference/noise). In the past, I’ve struggled to make good mediumwave recordings at their home–certainly an ideal situation for a mag loop antenna.

This morning, I wanted to record one of my favorite local AM stations (WAIZ at 630 kHz), so I set up the Youloop in the middle of a bedroom, hanging off a large bookshelf set against an interior wall. In other words: not an ideal situation.

When I plugged in the Airspy HF+ Discovery and loaded the Airspy SDR application, I fully expected to see a spectrum display full of broadband noise.

Instead, I saw signals. Lots of signals:

Sure, there’s some noise in there, but it’s low enough I could even do proper mediumwave DXing on most of the band if I wished.

In fact, if you’d like to experience the HF+ Discovery/Youloop pairing in this compromised, less-than-ideal DXing setup, why not tune through one of the spectrum recordings I made?

Click here to download the spectrum file [885.7MB .wav].

The recording was made on March 30, 2020 starting around 10:50 UTC. You’ll need to open this file in AirSpy’s free application SDR# or a third party SDR app that can read AirSpy .wav files.

I can’t wait to try the Youloop in other locations. Since we’re in lock-down due to Covid-19, I won’t be able to try the Youloop in a hotel any time soon. Almost all of my 2020 travel plans have been canceled.

Highly recommend

If you have one of the SDRs mentioned above, go grab a Youloop. At $35 USD, it’s a fantastic deal.

Click here to check out the YouLoop at the RTL-SDR.com store ($34.95 USD shipped).

Click here to check out the YouLoop at Airspy.US ($29.95 + shipping).

Click here to search for AirSpy distributors in your region/country.

If you don’t have a high dynamic range receiver, note that Airspy is exploring the idea of making a pre-amp for the Youloop. If interested, you might drop them a note of encouragement!

Do you have a Youloop? Please share your comments!


Do you enjoy the SWLing Post?

Please consider supporting us via Patreon or our Coffee Fund!

Your support makes articles like this one possible. Thank you!

Spread the radio love

AirSpy YouLoop passive magnetic loop antenna now shipping

Many thanks to SWLing Post contributor, Michael Agner (KA3JJZ), who notes that AirSpy  now has the YouLoop passive mag loop antenna posted on their retail websites.  You can grab one for $30 – $35 US, depending on your location. That’s a fantastic deal in my book.

Click here to check out the YouLoop at Airspy.com.

Click here to check out the YouLoop at Airspy.US ($29.95 + shipping).

Click here to search for other AirSpy distributors.

Note that the YouLoop only works well with high dynamic range SDRs and receivers like the AirSpy HF+ Discovery.

Spread the radio love

Airspy Youloop and Homebrew Passive Loop Antenna designs

Almost two weeks ago, at the 2020 Winter SWL Fest, I gave a presentation called “A New Era in Portable SDR DXing.

The presentation was essentially an in-depth version of an article I published in the January 2020 issue of The Spectrum Monitor magazine (see cover above).

I devoted a good portion of the presentation describing how to build a passive loop antenna design by Airspy’s engineer and president, Youssef Touil. This passive mag loop takes advantage of the Airspy HF+ Discovery‘s exceptionally high dynamic range and is an impressive performer.

The homebrew loop on the balcony of a hotel.

You may recall, I posted a short article about this loop in November after enjoying a little coastal DXing.

In short? This passive loop antenna pairs beautifully with the Airspy HF+ Discovery. I’ve also been very pleased with results using the new SDRplay RSPdx on the mediumwave band where the receiver now sports a high dynamic range mode.

Overdue corrections…

After returning from the Winter SWL Fest last week, I was hit with an upper respiratory bug. No doubt, a souvenir of my travels!  It wasn’t the flu (I was tested), nor COVID-19, but it did knock me off my feet for a few days with fever, coughing, and headaches. You might have noticed a lot less posts last week and almost no replies from me via email. I’m only now feeling totally human again and trying to catch up with my backlog.

Shortly after my SWL Fest presentation, I realized I made (at least!) two mistakes. I had planned to post corrections here on the SWLing Post last week, but the bug delayed all of that, so here you go:

#1 Schematic of my homebrew passive loop antenna

When Youssef started experimenting with passive loop antenna designs, he posted a few schematics of at least three build options.

Although I described how to build my passive loop antenna, I grabbed the wrong schematic for my presentation slides. Many thanks to those attendees who noticed this.

Here is the schematic I should have shared:

Note that the transformer has four turns on both sides (the one in the presentation had 4:2).

Again, apologies for any confusion.

#2 The Airspy Youloop passive loop antenna

If you’re not inclined to build your own passive loop antenna per the diagram above, Airspy is planning to manufacture and sell a lightweight, high-performance loop of a similar design.

Prototype of the Airspy Youloop in the field (note bright blue cable jacket)

During the presentation, I called the future AirSpy antenna, the “Spytenna.” I was incorrect. (Turns out, I got this name from an early antenna schematic and somehow it stuck in my head!)

Airspy is calling their passive loop antenna the Youloop. Youssef posted the following note in the Airspy email discussion group:

We are currently arranging the shipping of the affordable passive version to Airspy.us and RTLSDR Blog.

Btw, It’s called “Youloop”

Many thanks to Richard Langley and a number of other readers who pointed this out last week.

I’ve had a prototype of the Youloop since November and brought it to the SWL Fest and presentation. It’s a quality antenna and incredibly compact when disassembled and rolled up.

When the Youloop is available to order, we’ll post links here on the SWLing Post.

More to come!

Once I catch up here at SWLing Post HQ, I plan to publish detailed construction photos of the homebrew loop antenna.

Many of you have questions about how to tap into the center conductor at the mid-point of the loop. These photos should help guide you.

Stay tuned!


Do you enjoy the SWLing Post?

Please consider supporting us via Patreon or our Coffee Fund!

Your support makes articles like this one possible. Thank you!

Spread the radio love

Coastal DXing with the AirSpy HF+ Discovery and a homebrew passive loop antenna

Last week, we packed the car and headed to coast of South Carolina.

The trip was a bit impromptu but through the creative use of hotel points, we scored a two bedroom ocean front unit with a fantastic little balcony.

The vacation gave me an excuse to test the new passive loop antenna my buddy Vlado (N3CZ) helped me build recently.

The loop design came from AirSpy’s engineer and president, Youssef Touil.

This passive mag loop takes advantage of the new AirSpy HF+ Discovery‘s exceptionally high dynamic range. Youssef had reported impressive results, so I had to build one.

Vlado had a length of Wireman Flexi 4XL that was ideal for this project. The only tricky part was penetrating the shielding and dielectric core at the bottom of the loop, then tapping into both sides of the center conductor for the balun connections.  Being Vlado, he used several lengths of heat shrink tubing to make a nice, clean and snag-free design.

The results were truly exceptional. I spent most of my time on mediumwave from the hotel balcony because I was determined to catch a transatlantic signal.

Check out the spectrum display from my Microsoft Surface Go tablet:

Our ocean front hotel was inundated with noise, but I still managed to null out most of it and maximize reception using the passive loop. I simply suspended the loop on the balcony rocking chair–not ideal, but effective and low-profile.

Want to take a test drive?

If you’d like to experience this portable SDR setup, why not tune through one of the spectrum recordings I made?

Click here to download the spectrum file [1.7GB .wav].

The recording was made on November 17, 2019 starting around 01:55 UTC–I chose it at random and have yet to listen to it myself. You’ll need to open this file in AirSpy’s application SDR# or a third party SDR app that can read AirSpy .wav files.

Stay tuned…

I’m writing an in-depth report of the HF+ Discovery, my experiments with this setup and AirSpy’s soon-to-be-released passive loop antenna for the January 2020 issue The Spectrum Monitor magazine. Spoiler alert: I am truly impressed with the wee little AirSpy HF+ Discovery. It’s a powerhouse!


Do you enjoy the SWLing Post?

Please consider supporting us via Patreon or our Coffee Fund!

Your support makes articles like this one possible. Thank you!

Spread the radio love

AirSpy HF+ Discovery: First Impressions on Medium Wave vs. Elad FDM-DUOr

The highly anticipated AirSpy HF+ Discovery SDR has been in the hands of early adopters for about two weeks–and I’ve seen nothing but positive comments!

After a long run (2007-2013) with a Microtelecom Perseus, my SDR of choice became the Elad FDM-S2, and more recently an Elad FDM-DUOr “hybrid” SDR receiver. The two Elads have the same core processing components and identical performance when the DUOr is connected via SDR software.

This week I’ve compared the HF+ Discovery ($169) against the FDM-DUOr ($899) using Studio 1 software and identical modes & settings. The following video features the radios’ performance on a crowded daytime medium wave band from suburban Seattle-Tacoma USA.

Click here to view on YouTube.

Notes:

  • Software used is two “instances” of Studio 1, version 1.06e
  • Antenna is an east-west oriented Wellbrook ALA1530LNP Imperium loop
  • Mode, filter bandwidth, AGC, etc. are the same for each radio
  • 768 kHz sampling bandwidth used for both receivers

Stations tuned are:

  • 1320 KXRO Aberdeen WA, 74 miles @ 5 kW (in-line with antenna)
  • 1110 Oak Harbor WA, 78 miles @ 500 watts (in antenna’s null)
  • 1040 CKST Vancouver BC, 147 miles @ 50 kW (in antenna’s null)
  • 1430 KBRC Mt. Vernon WA, 85 miles @ 5 kW (in antenna’s null)
  • 750 KXTG Portland OR, 118 miles @ 50 kW (in antenna’s null)

I purposely sought out signals difficult to hear in the presence of powerhouse stations. Only 1320 kXRO (in-line with my antenna) and 750 KXTG are what you might consider average or fair quality signals. Headphones are recommended for most of these, particularly 1040 kHz.

You’ll note that the pass band has been “pulled” over the edge of the carrier frequency by a few hundred Hertz. This is an excellent trick that can often reduce noise and/or improve intelligibility. It’s a feature unique to Perseus, Studio 1, and SDRuno software; it works in sideband modes and in selectable sideband Sync AM (SAM) mode.

After listening to the signal comparisons, what are your thoughts on the HF+ Discovery? Please leave your comments below.

Guy Atkins is a Sr. Graphic Designer for T-Mobile and lives near Seattle, Washington.  He’s a regular contributor to the SWLing Post.

Spread the radio love