 Many thanks to SWLing Post contributor, Kim Elliott, who shares this link to a French company called a.bsolument who specializes in converting vintage valve radios into hi-fidelity Bluetooth-connected audio devices.
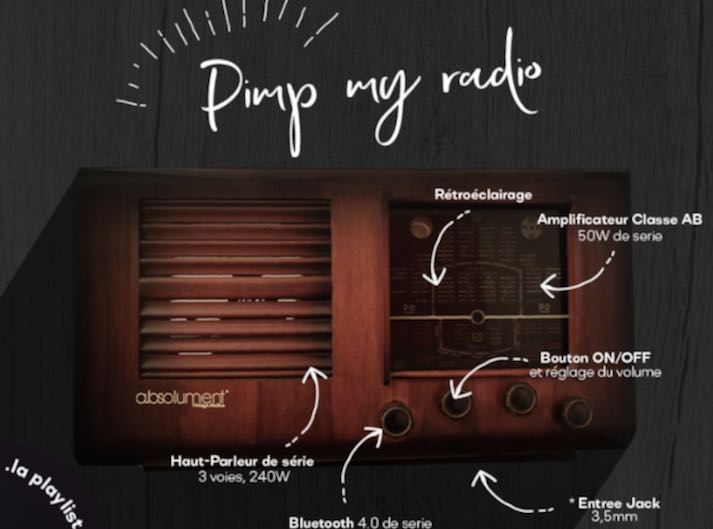
According to a.solument’s introduction video, they take vintage radios in disrepair, gut the insides and replace the components with modern hardware which includes Bluetooth 4.0 and aux-in capabilities:
https://vimeo.com/87657532
While I LOVE vintage radios, I have conflicting feelings about this process.
I take pride in keeping my vintage gear in proper working order (through the help of a mentor). Something that simply cannot be replicated with digital hardware is the sound and warm fidelity of AM audio emanating from a valve classic. At home, I have the option of feeding all of my vintage gear Bluetooth and wireless connectivity via an AM transmitter. This allows me to play any digital content while preserving the original audio fidelity (and warming my radio room with those glowing tubes!).
With that said, I’m very much aware that it’s becoming increasingly difficult for the average consumer to find a technician who can repair tube gear affordably. Indeed, some feel it’s impossible thus toss their family radio in the trash.
If a.bsolument is giving vintage beauties–that would otherwise be in a landfill–a new lease on life, then I’m all for it!
What do you think? Please comment!