 SWLing Post contributor, Mike Ladd, is an avid SDR enthusiast and an administrator of the SDRplay Facebook group. Mike contacted me about special pricing he has arranged for low and high pass filters through Rescue Electronics. Mike explains:
These filters retail for $70.00 each. I spoke to the builder. I told him who I was and what I do and got him to make a deal for anyone in the United States with these filters and a direct link to his site. I make zero dollars on this. I always try to give back to the hobby and the community any way possible.
You have 3 choices: a high pass filter, a low pass filter, or a combo package.
These are hand built one at a time by Paul W1VLF with your choice of SO-239 or BNC connections. Full details are below:
High pass filter $55 shipped anywhere in the USA
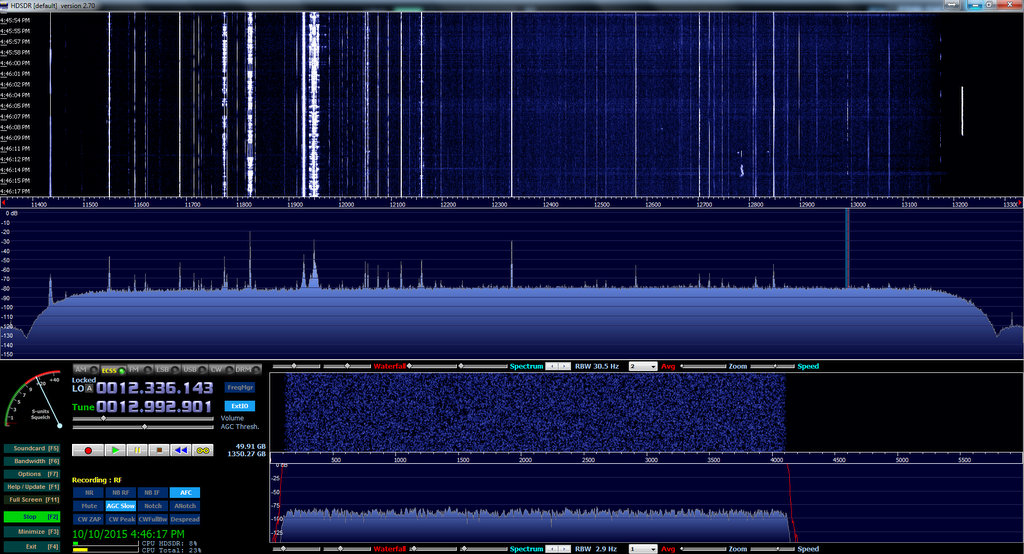
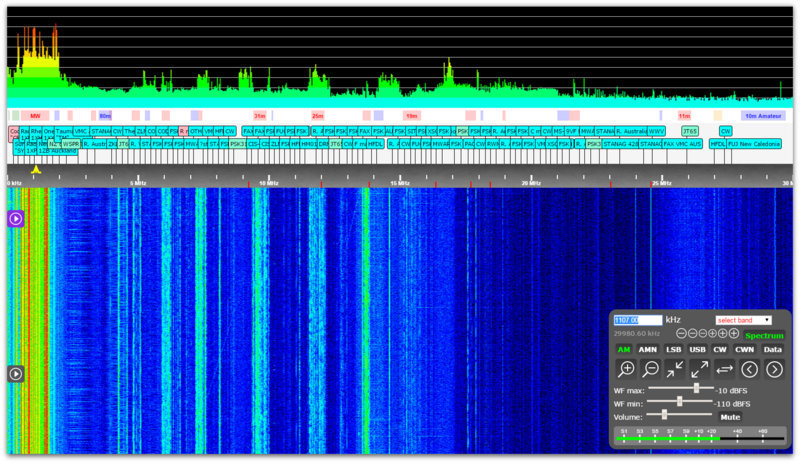
This filter will begin attacking the AM band at 1770 Khz and increase attenuation as frequency decreases.
You can see this in the screen capture of the swept filter below.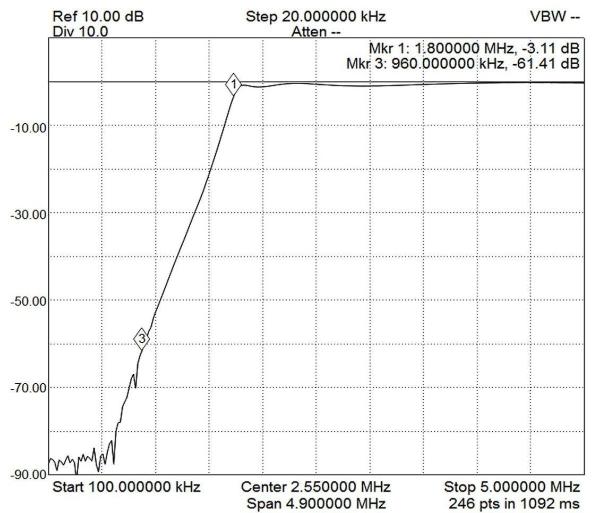
160 Meters and above is virtually left untouched, but below that is where the attenuation takes place.
The filter has attenuated 60 db by 960 KHz.
The AM band has some very large signals that can mix in the front end of your. A lot of these spurious frequencies can land in 160 meter band or above.
For instance, I have a big signal at 1080 Khz and another at 770 Khz, add these 2 together and you get a spur that falls at 1850 Khz
Picture this happening at multiple frequencies with multiple mixes and you have a raised noise floor in the 160 Meter band.
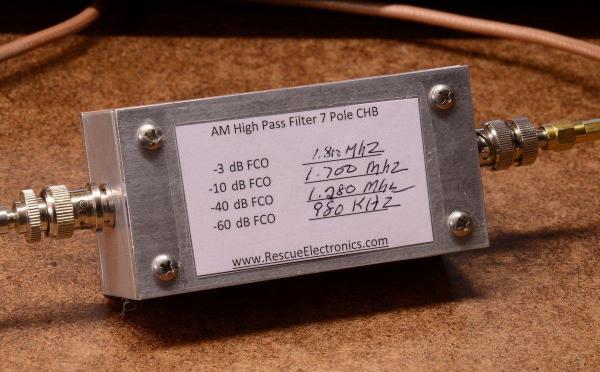
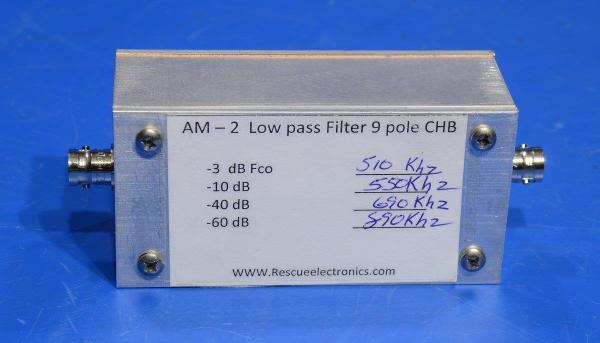
The filter is built into a 2″ x 4″ 1.25″ 1/8″ wall aluminum enclosure for excellent RF shielding
Low pass filter $55 shipped anywhere in the USA
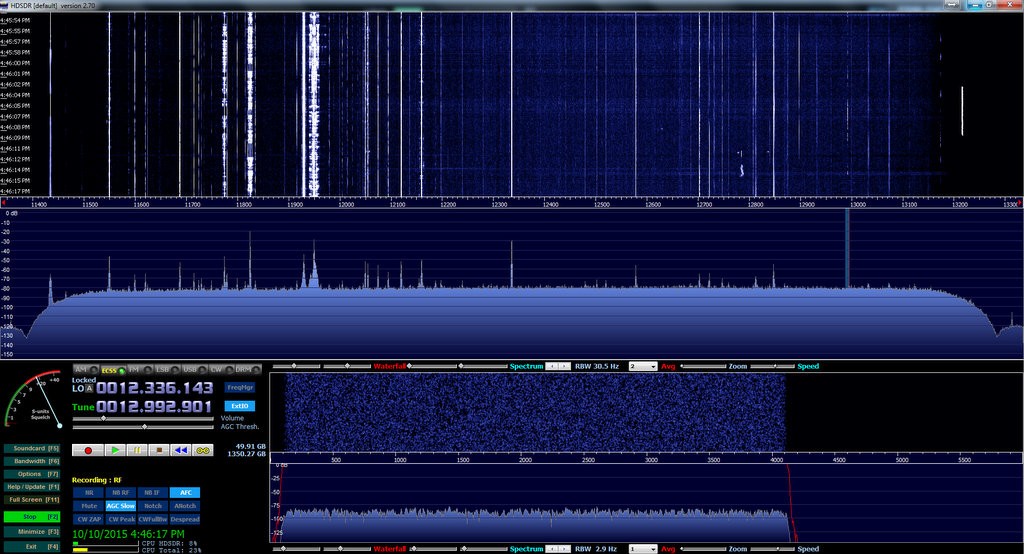
The AM-2 filter has a cutoff at 520 KHz.
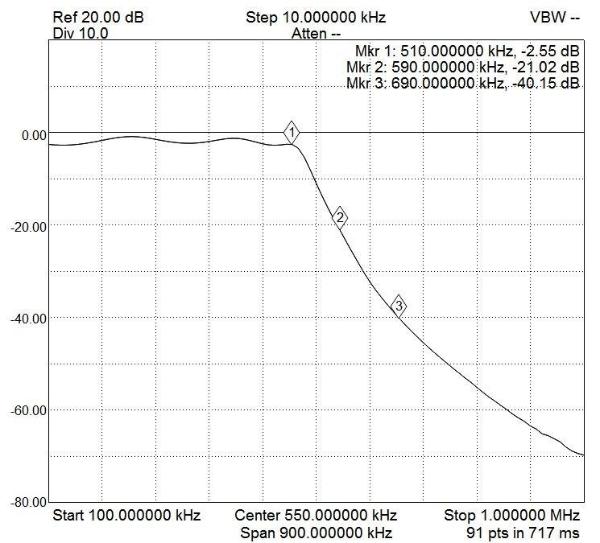 Then, and without a lot of fanfare it begins the attack on the MW band.
Purchase this filter if you are into NDB, DX’ing, Maritime Mobile, Navetex, FCC Part 5 600 Meter band.
Each filter is handmade and swept in my lab.
The AM -2 Low pass is equipped with BNC connectors.
The filter begins to roll off at 520 Khz and gives an ultimate rejection of around 80 Db.
The filter is built into a 2″ x 4″ 1.25″ 1/8″ wall aluminum enclosure for excellent RF shielding
Combo deal for both $100 shipped anywhere in the USA
Click here to view/purchase via Mike Ladd’s promotional page at Rescue Electronics.
Many thanks for sharing this Mike! During my presentation at the Winter SWL Fest last week, I spoke about the need for high/low pass filters for listeners who live in the presence of strong broadcasters and interference. Many of the inexpensive SDRs on the market do not have built-in filters and preselectors thus can overload under these conditions.
While filters can be homebrewed or built from kits, these filters seem to be a good deal for a quality shielded and tested product. Thanks for arranging this, Mike!