 Many thanks to SWLing Post contributor, James Surprenant (AB1DQ), who shares this review and photos of the new Heathkit Explorer Jr. TRF AM radio receiver kit:
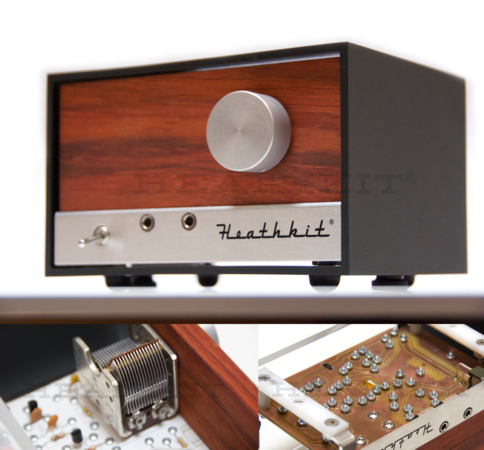
Heathkit Explorer Jr. Review
I received this Heathkit kit for Xmas from dear old Dad.
The Explorer Jr. manual is very nicely done, spiral-bound, and very reminiscent of the old Heathkit manuals in terms of lay-out and detail.
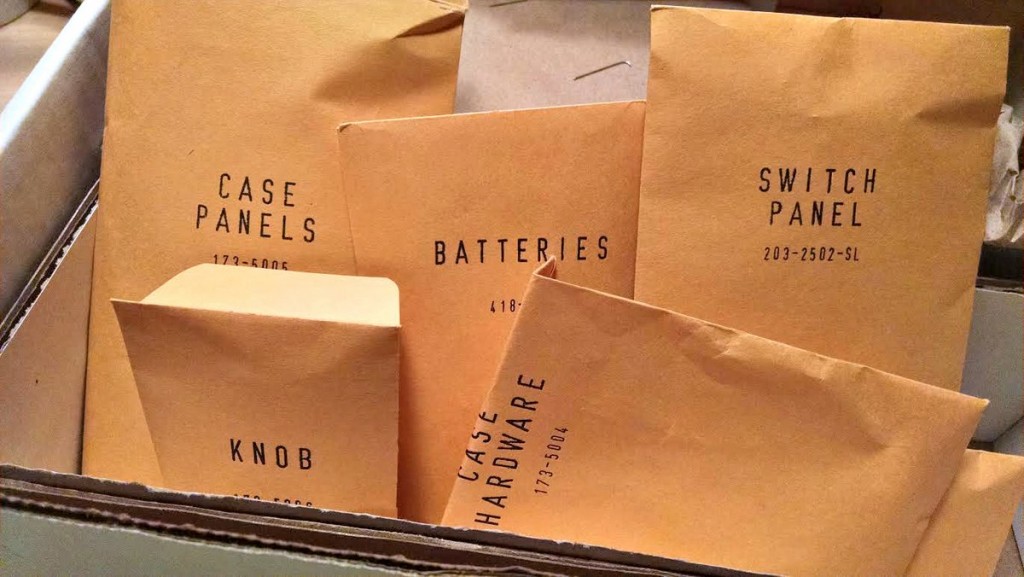
The packaging of the parts is also reminiscent of the old Heathkits with parts grouped into envelopes by phase, ie. “Active Components,” “Passive Components,” “Small Parts,” “Knobs,” etc.
The first night, I worked through completion of the circuit board attaching all electronic components and stopped at the step for winding the coil. I thought it would make sense to start fresh on that step since winding coils is generally a pain.
Even on the first night, I had a few criticisms:
- A couple of the envelopes were ripped open when I unpacked the kit. There were nuts, bolts, spacers and an Allen wrench loose in the outer box. That said, no parts were missing.
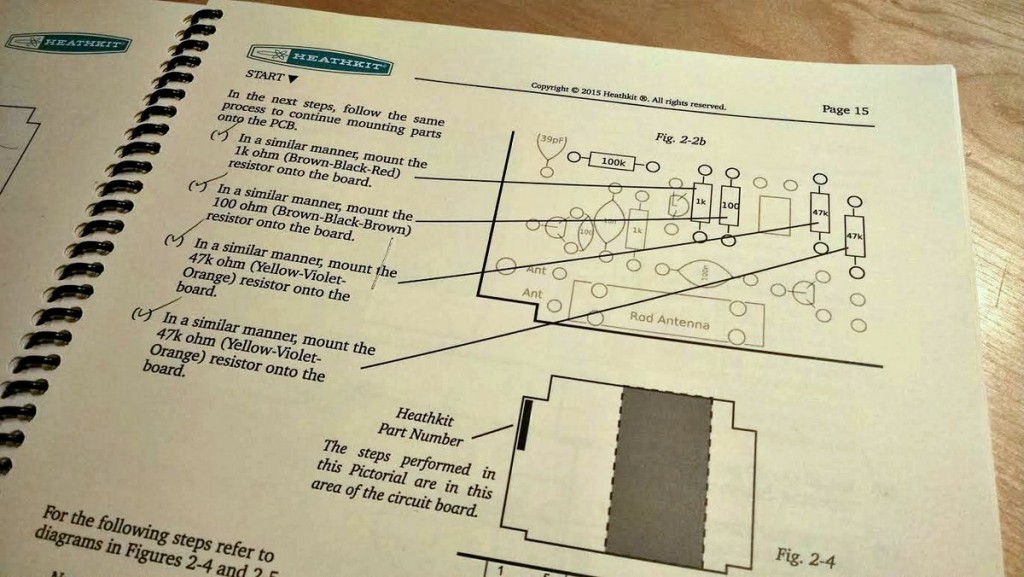
- I found two errors in the manual:
- The color code for one of the resistors was incorrect in the manual. With my aging eyes, and the miniaturization of components today, I always use an ohm meter to test all resistors before attaching them to the PCB when I build a kit.
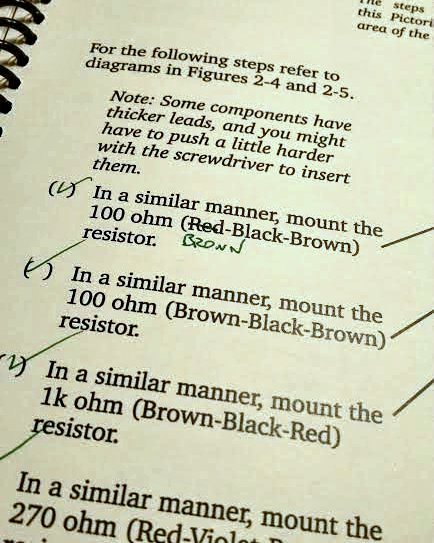
Incorrect color code in manual.
- The circuit contains 10 resistors and all 10 were included in the kit. But one was completely missing from the step-by-step instructions. After I finished attaching all active and passive components, I had one resistor left over and fortunately there was a matching empty space on the circuit board for the same value resistor. I double and triple checked the instruction manual and I can not find where it calls for this resistor to be attached.
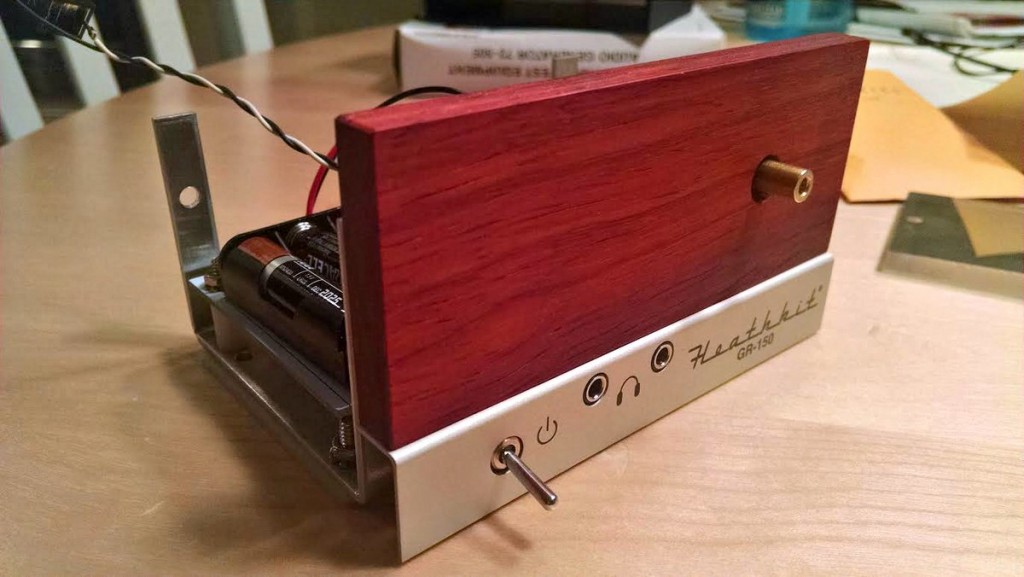
- My biggest criticism so far is the fact that this kit is “solder-less.” All components are attached to the PCB with screws, lock washers and a nut. You insert the leads for each component through the over-size pass-through holes on the PCB, and bend the leads tight against the edge. Then you insert a screw in from the topside, place a lock washer on the bottom side and fasten with a bolt.
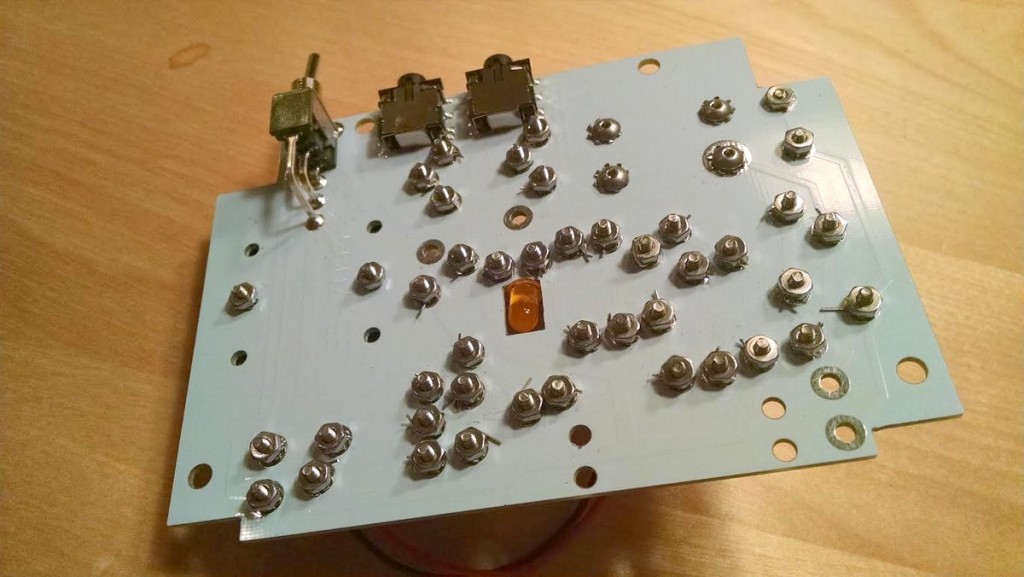
Bottom of the PCB board
On the upside, the fact I didn’t need to work with a hot solder iron meant I felt comfortable building the kit at the kitchen table. (My XYL would not be pleased if she found burn marks on the table!) So I had a nicer environment to work in than the basement work bench.
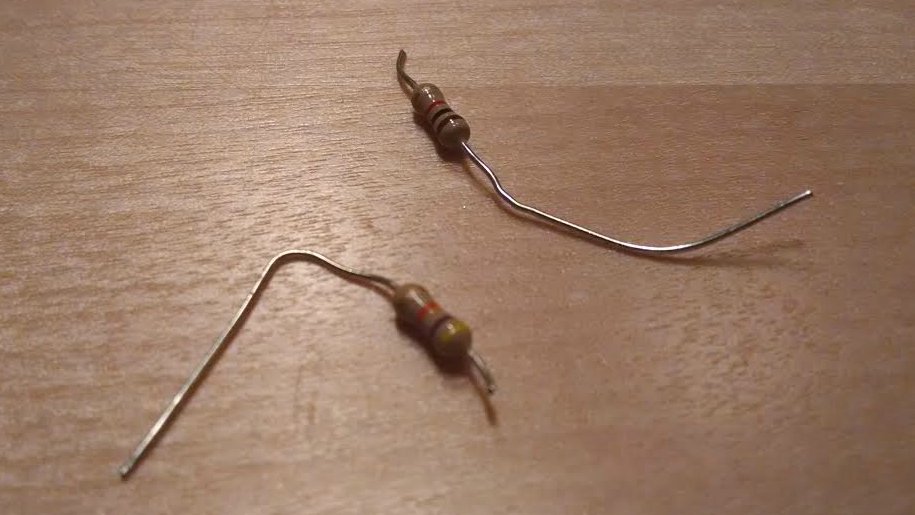 On the downside, I managed to sheer off the leads on TWO resistors when tightening the screws. Fortunately I was able to replace the busted resistors from my on-hand stock.
The other odd thing about this method of attaching components is that Heathkit included a nifty screwdriver in the kit, but leaves it up to the kit builder to provide a small socket wrench or pliers to hold the nut in place while tightening the screw.
Finally, the instructions call for the kit builder to ‘bend the excess leads back and forth’ until they snap off, rather than instructing the kit builder to snip off the excess leads with nippers. That seemed really strange to me.
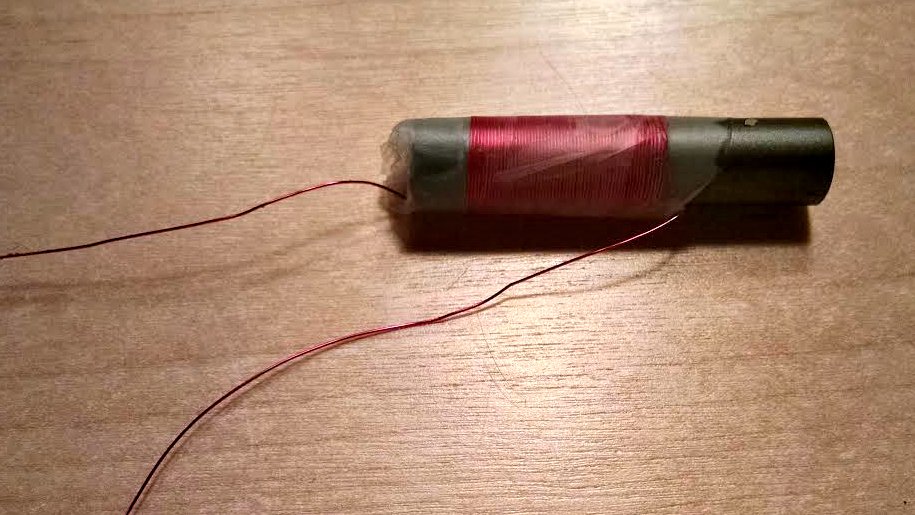
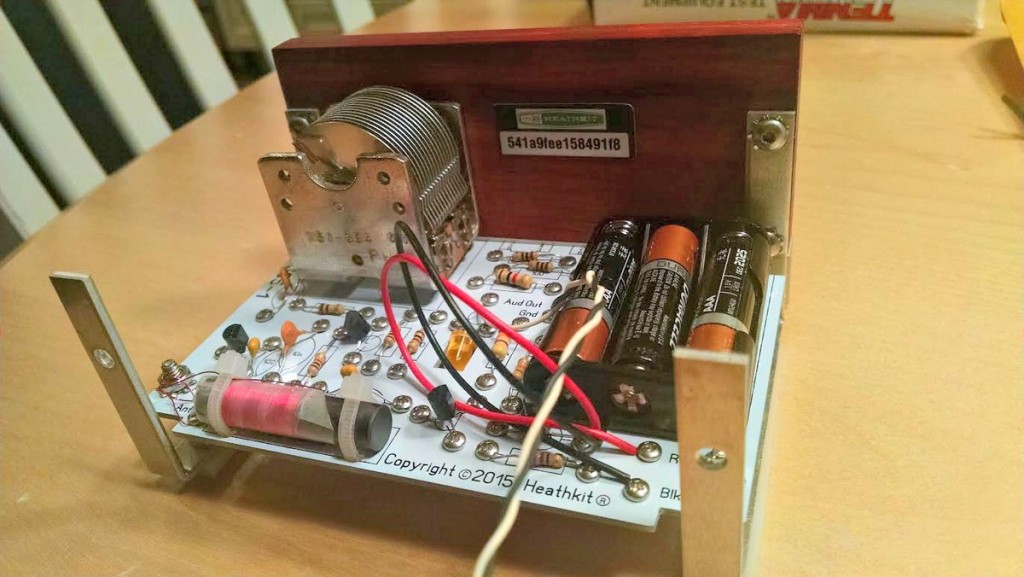
I completed my build of the GR-150 Explorer TRF radio this past weekend. I had no difficulty winding the coil, which involved 56 turns of magnet wire around a ferite core and securing it with transparent tape.
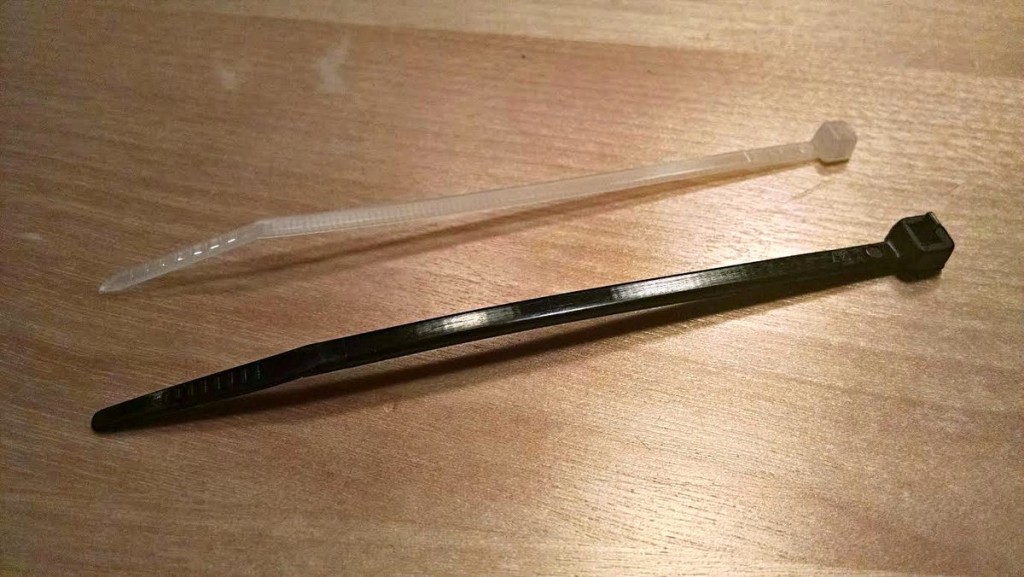
Heathkit provided the black ties, which were too large.
The next problem I encountered was attaching the wound coil to the PCB. The kit came with two zip cords to use as fasteners, but the zip cords were much much too large to fit through the holes drilled in the PCB. So this required a trip to the hardware store.
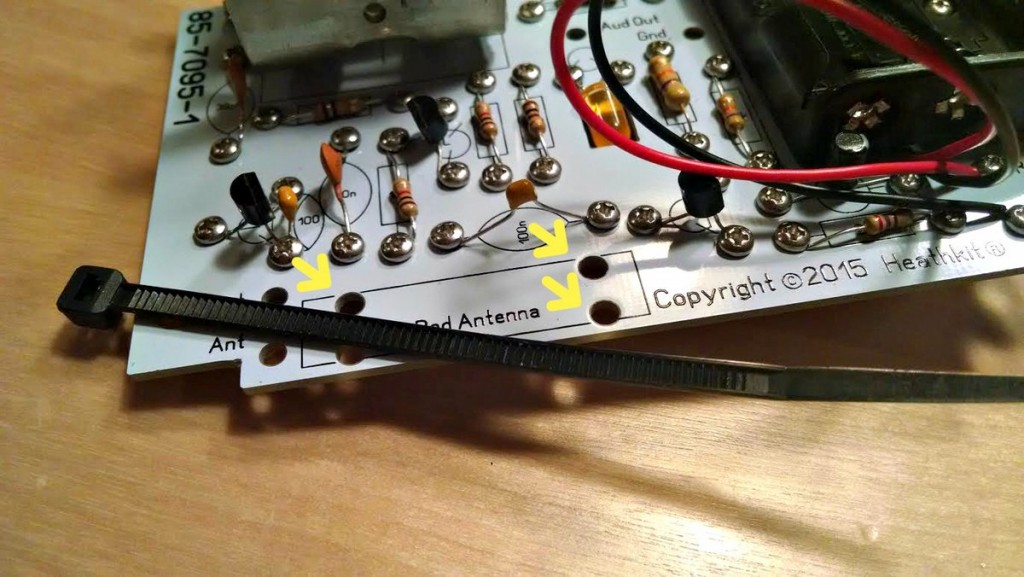
You can clearly see that the holes are too small for the black cable ties.
Once I had the coil mounted, I encountered the problem again with the bolts and nuts shearing off the leads – this time, it took me about 4 tries to attach the thin fragile coil wires to the PCB. It’s a very fragile process that again had me wishing this was a solder kit.
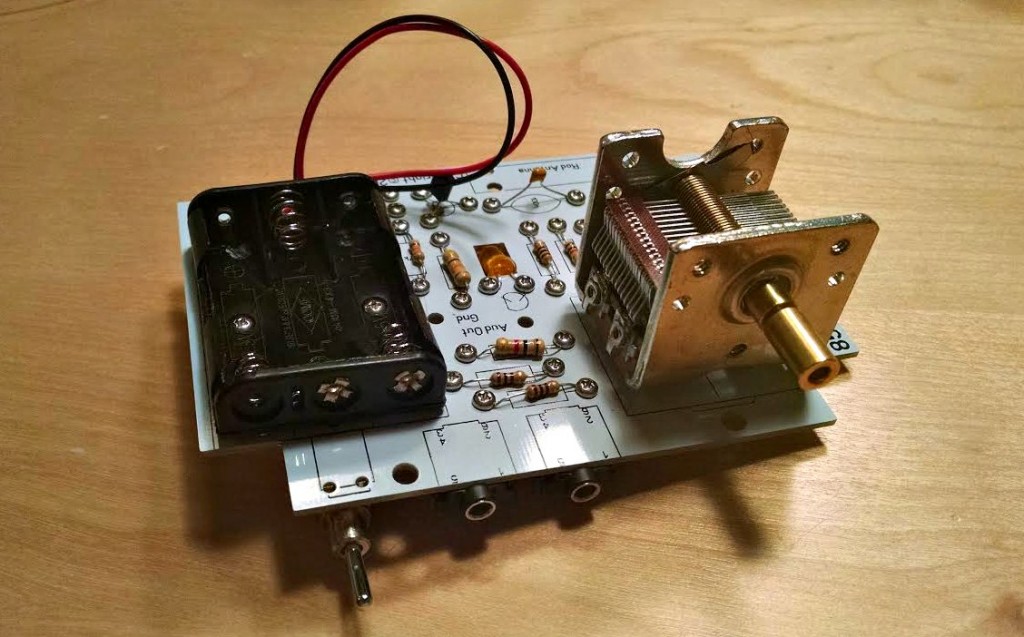
The rest of the assembly went well. The only other glitch I encountered was in assembling the cabinet, the kit came with six locking star washers for the cabinet, in fact the parts list indicates that six should have been included in the kit. But then the actual assembly called for 10 star washers.
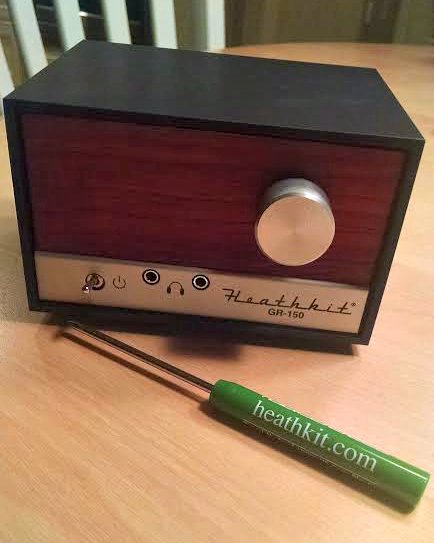
So, how did the radio perform? About as expected. It is a single stage TRF receiver without a proper audio amplifier. The instructions say you should use earbuds to listen to the radio, but I found that my standard stereo earbuds to be off too low an impedance for while the radio worked, all stations heard were very faint – about as strong as you’d hear from a typical crystal radio kit.
I hooked the radio up to a set of PC speakers which helped – a lot. Once I could hear the audio output, I was very pleased with the radio’s performance. The tuning cap is geared and it takes a good five turns of the tuning knob to cover the entire broadcast band. The radio was fairly sensitive and not too selective – again, as you’d expect.
So, was it worth it? For me, sure… but it depends on what you are looking for.
It’s a bit pricey for what you get, but if you want to support Heathkit as it attempts to rise from the ashes, and if you have the $$$ to ‘donate’ towards the cause, it may be worth it.
Here is my take:
The good
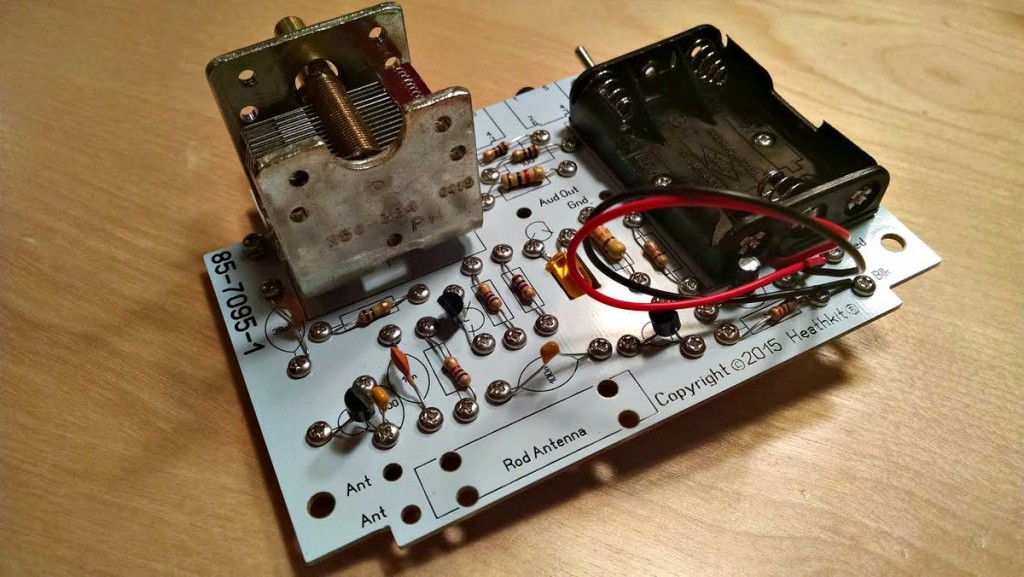
- Very nice quality materials….the PCB, tuning cap, and cabinet were of a quality you don’t often see in kits.
- Nostalgia factor–from the packing to the manuals, the kit really does capture some of the Heath nostalgia.
- Level of detail in the step-by-step instructions.
- Documentation. The manual ends with a very nice feature on radio theory and theory of the different stages of the TRF and how to read a schematic. It’s clearly written for a youngster as it’s complete with drawings of smiley-faced electrons moving through the components and circuits.
- The radio does work and is a joy to tune across the dial.
The bad
- Quality control is lacking. It’s hard to imagine a kit ever leaving Benton Harbor back in the day with such glaring errors in the manual (wrong color code, missing steps), or with the wrong size zip ties, etc.
- Price. Even though the materials are high-end, the retail price seems a bit high.
The ugly
- I really wish Heathkit had included either a built in audio amp circuit (there is plenty of room in the cabinet to add a simple IC-based amp), or would have marketed a separate audio amp kit. Having an amplified speaker would add a lot in terms of pleasure from the completed kit. Another kit vendor, Peebles Originals, peeblesoriginals.com, sells a nice little audio amplifier kit for use with their regen radio kits. I’ve built it, and it’s a simple straight forward kit. Heathkit could have done this and it would have made a big difference. (I think I’ll try my Peebles amp with the Explorer!)
Overall, I really enjoyed the build and I like the radio. I’m looking forward to see what the ‘new” Heathkit does next.
I applaud Heathkit for making a go at a come-back and will continue to support their efforts by buying and building their pricey stuff – yeah, I’m that guy.
73 de AB1DQ
James
James, thank you for not only sharing your experience–along with errors and omissions–but providing excellent, detailed photos. I can’t tell you how many times I’ve been confused by kit instructions and turned to Google to help me find photos and notes from other builders. Your details will help others attempting to build the Heathkit GR-150.

 This article from Electronics Weekly just popped up in my news feed: