 Many thanks to SWLing Post contributor Dan Greenall, who writes:
I have lived in southern Ontario, Canada my entire life, have been DXing since the late 1960’s and have held the amateur radio call sign VE3HLC for over 50 years. Most of this area’s AM broadcast stations had been considered “pests” over the years as I searched for more distant targets, until recently, when many of these began quietly slipping from the airwaves. While this opened up some new frequencies to DX, I soon began to feel that I had lost some old friends, many that I had known since childhood.
When I retired in 2018, I decided to spend a little time trying to preserve some radio history of stations in southern Ontario communities that have played a part in my life. This might include audio clips, QSLs, station booklets, and other types of ephemera, and I would try to place this information where it could be easily accessed by future historians or anyone else who is interested. In the end, I chose to use the Internet Archive (archive.org), where most uploaded information can be viewed (or heard) and downloaded for free.
CFPL, London, Ontario 980 kHz (still on the air)
“Communications in the Community” is a hardcover limited edition (2000 copies) souvenir book printed in 1966 by the Special Printing Unit of The London Free Press in London, Ontario, Canada. It includes historical information about the London Free Press (newspaper) and CFPL radio and television. I was lucky to find this item at a church rummage sale nearly 20 years ago.
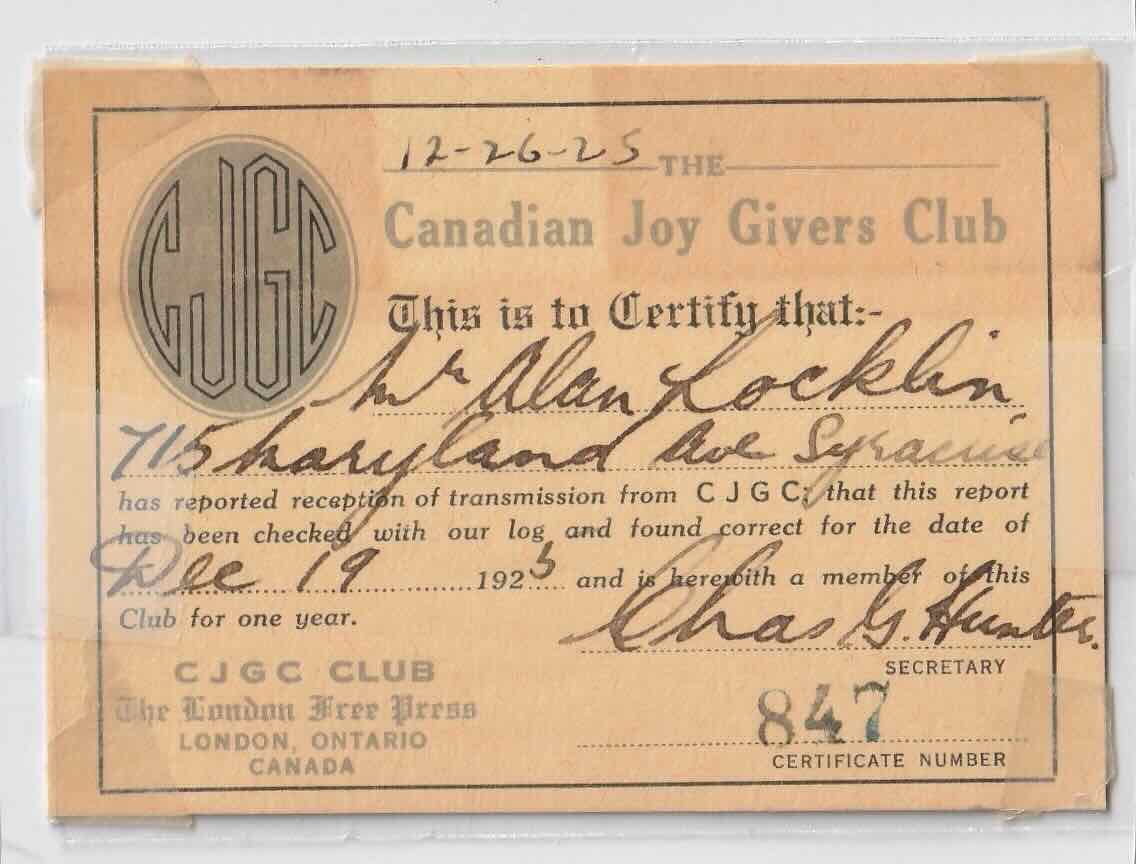
CFPL began its life as CJGC in 1922. I acquired one of their QSL cards from 1925 through an eBay purchase a few years ago.
The above and more can be found by clicking on this link.
https://archive.org/details/page-16
CKOC, Hamilton, Ontario 1150 kHz (still on the air)
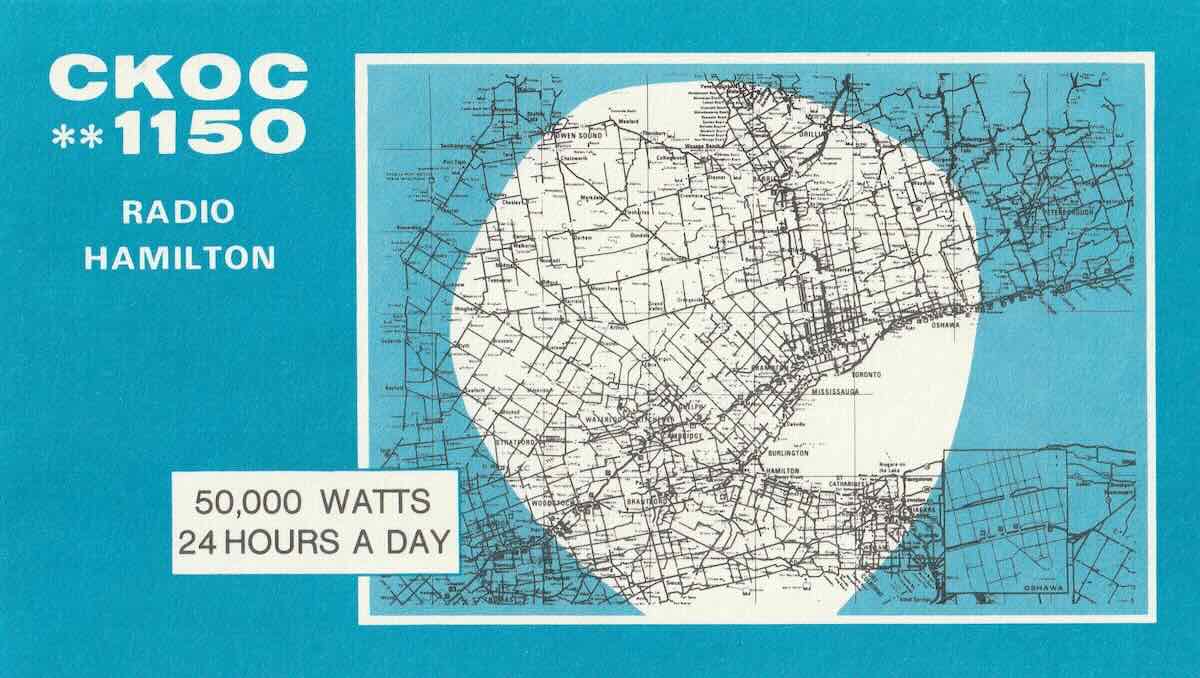 CKOC radio in Hamilton also started up in 1922. My parents met while working at the station in the late 1940’s. My brother and I (both radio amateurs), along with a few friends were given permission to operate on “Field Day” weekend in 1985 from their old abandoned transmitter site at Elfrida, Ontario.
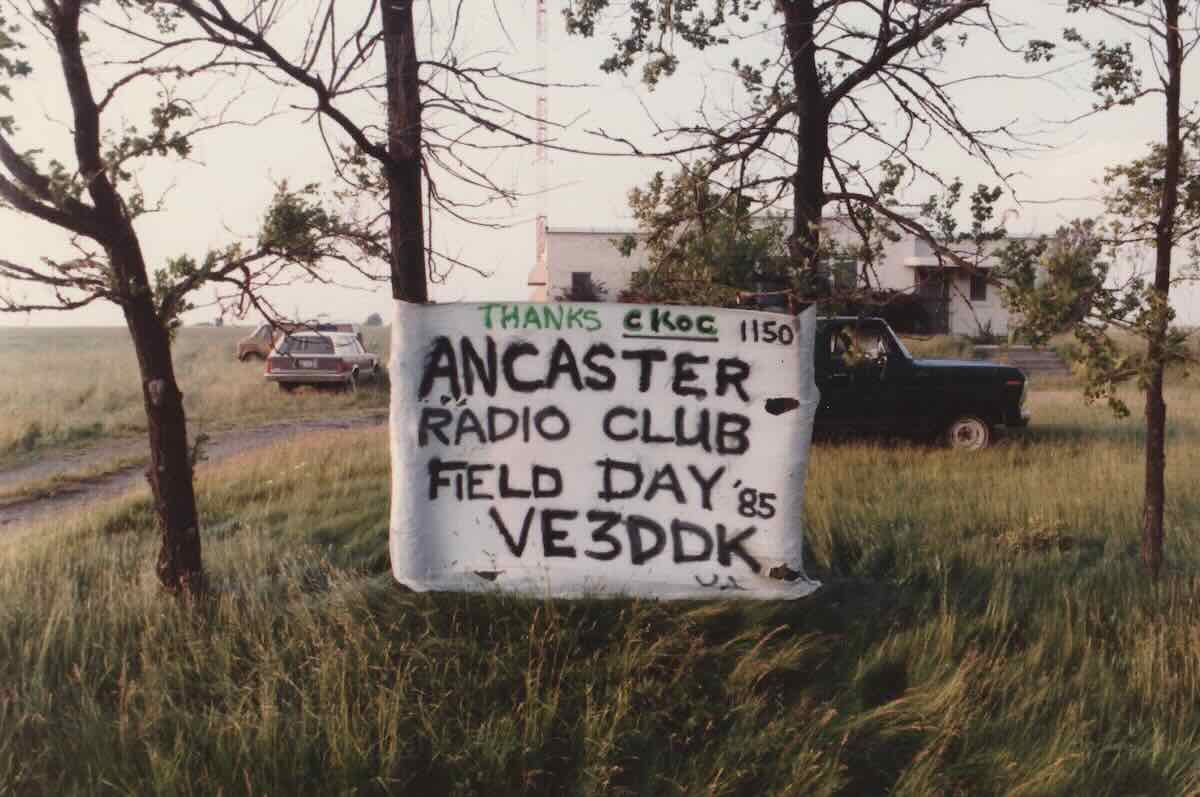 This area has long since been developed to build homes and shopping areas.
 “This is Hamilton, Ontario and the story of broadcasting station CKOC” is an undated booklet (I am guessing circa 1950) that I was able to purchase on eBay. Also found on eBay were two verifications, one from 1931 and the other from 1983.
You can find these scans and more by following this link.
https://archive.org/details/page-13_202209
CKNX, Wingham, Ontario 920 kHz (still on the air)
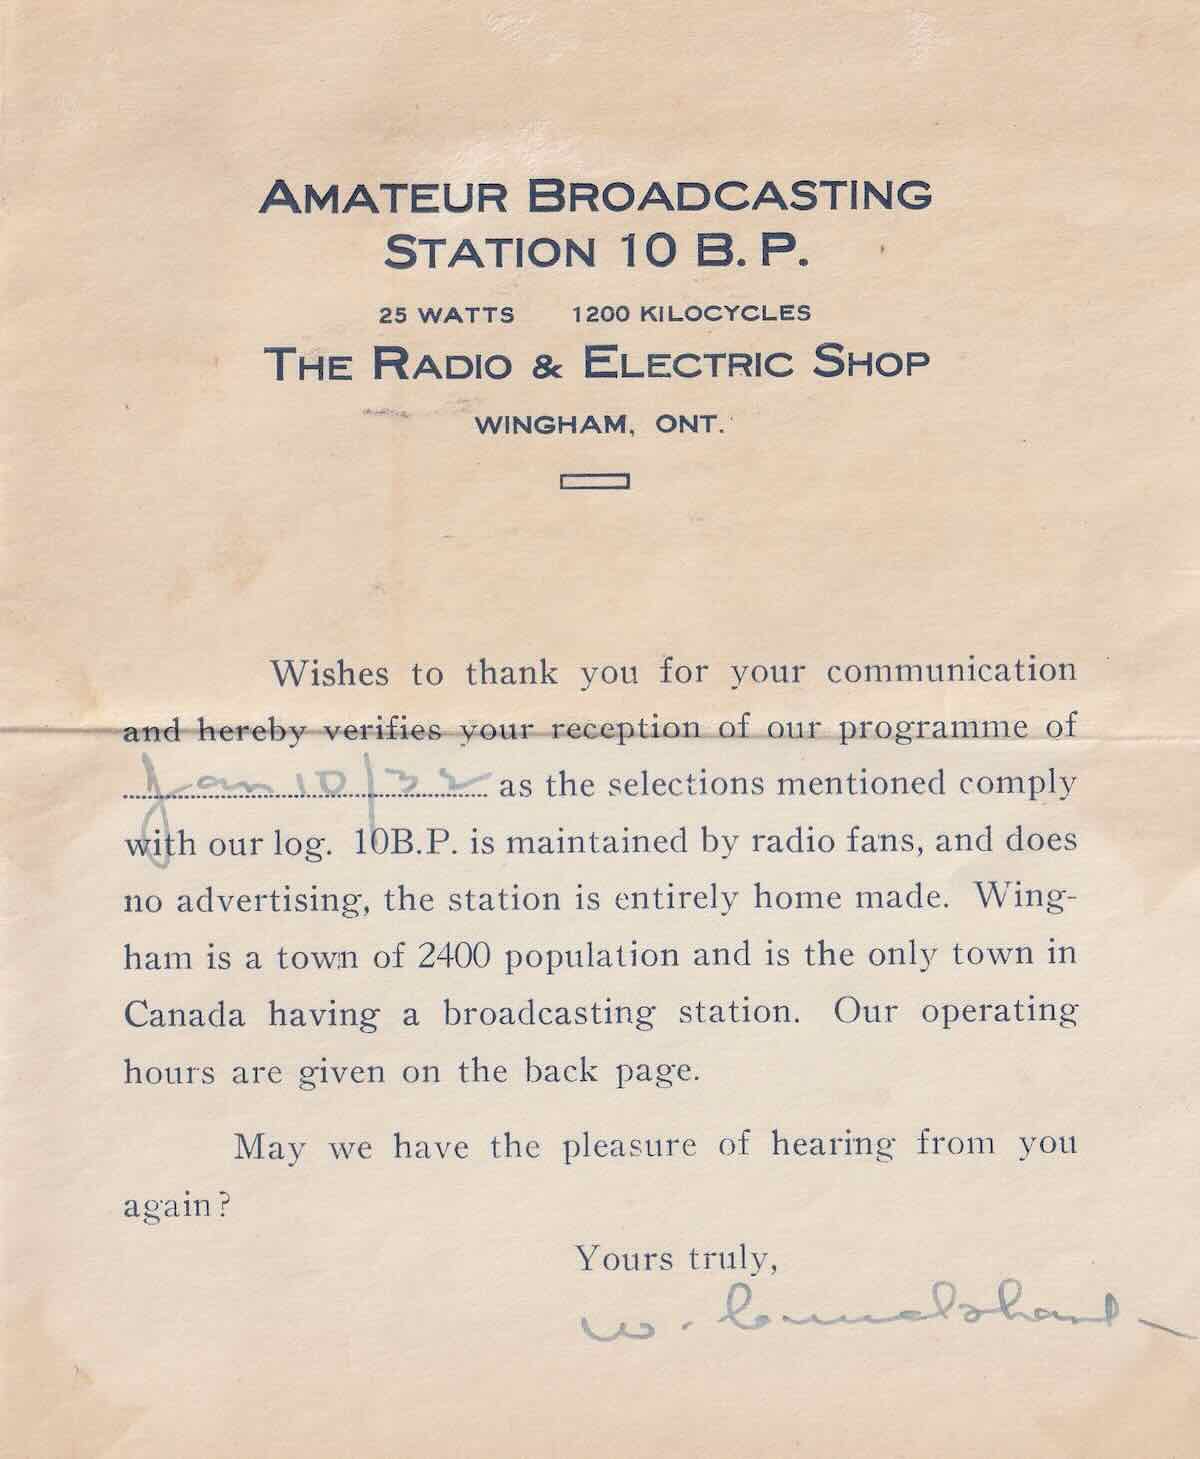 This station began in 1926 using the unusual call sign 10BP. It would remain that way until 1935. I managed to secure this QSL from 1932 through eBay, signed by its founder W.T. “Doc” Cruickshank.
Interesting stories of how the station began can be found at this link.
https://www.communitystories.ca/v1/pm_v2.php?id=story_line&lg=English&fl=0&ex=386&sl=2541&pos=1&pf=1
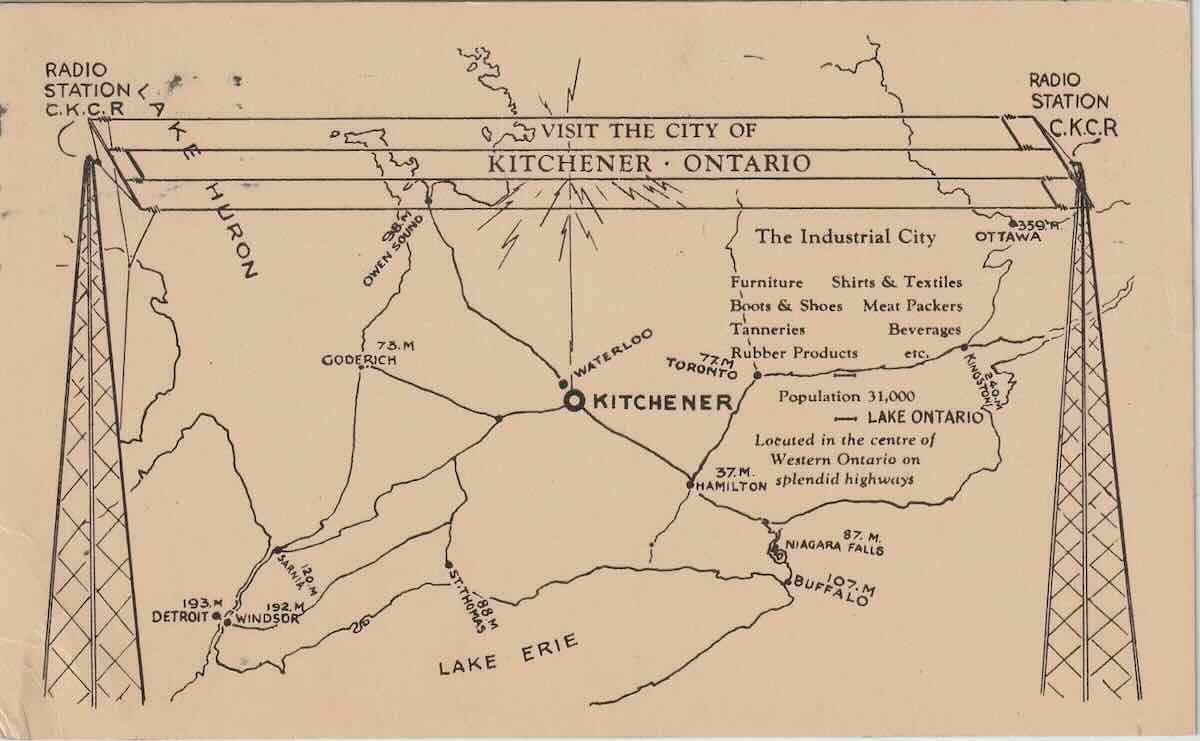
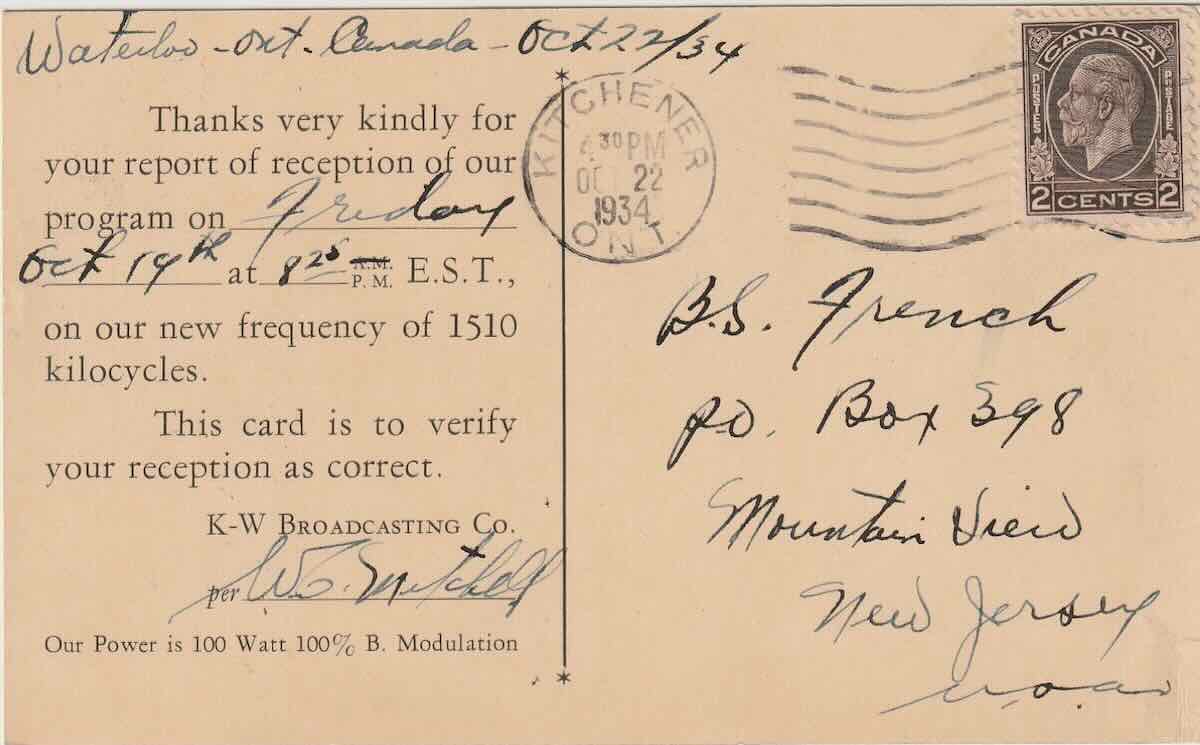
CKCR, Kitchener-Waterloo, Ontario 1510 kHz (no longer on the air)
In 1924, this station began briefly in nearby Brantford, Ontario. It quickly moved to Kitchener-Waterloo and existed until 1965 when it became CKGL. The CKCR call sign was picked up later in 1965 by a station in Revelstoke, BC.
Another eBay purchase, I found this QSL with a not-to-scale map of southern Ontario from 1934.
More Ontario QSL’s can be found in my broadcast band gallery at this link: https://archive.org/details/ckoc-hamilton-on-1983
I would encourage others to save parts of the local radio history in their city, state, province or country and give back to the hobby that we have enjoyed for so many years. I would also be happy to hear about any efforts you have made!