Many thanks to SWLing Post contributor, Dan Robinson, for the following guest post and review:
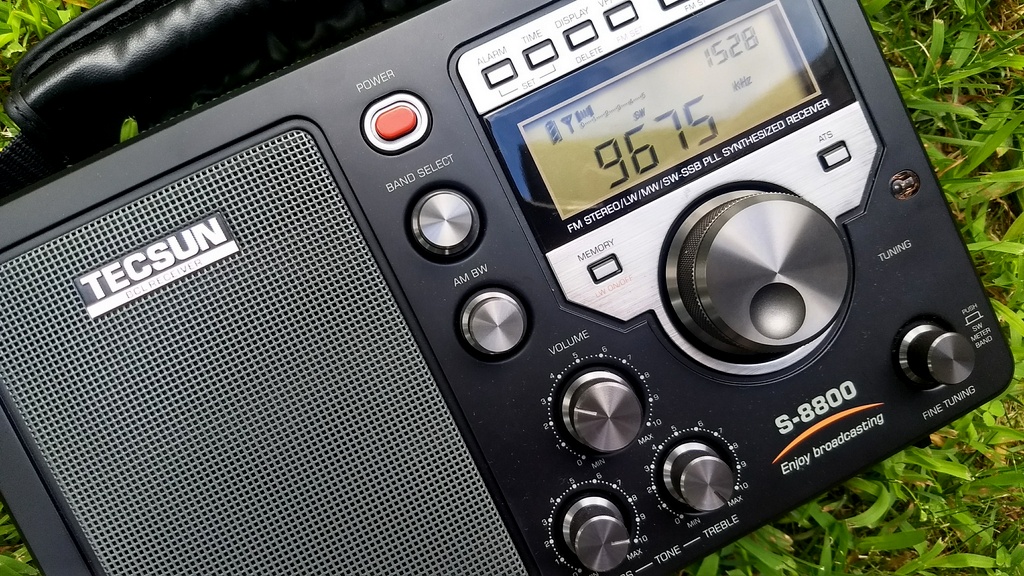
Tecsun’s S-8800: Is This All The Radio You Will Ever Need?
These days, we who still derive enjoyment from listening to shortwave broadcasts, be they larger international broadcasters or smaller stations that remain on the air against all odds in the Internet age, also enjoy using the many types of radio receivers that enable this activity.
One of the cruel ironies is that today’s technological advances have made possible the kind of worldband radios (the term that first came into wide use way back in the 1980’s) that years ago we could only dream of, be they full communications receivers or portable receivers.
Having begun my own DXing/SWL career in the late 1960’s, and pretty much maintained my hobby activities over the decades, I have used pretty much every receiver that ever existed, from tube radios to today’s latest DSP wonders.
I have a soft spot for classics from SONY — my list of portables today includes the fantastic SONY ICF-SW77, SW-07, SW-55s and SW-100. Panasonic is represented in my portable collection by the wonderful RF-B65.
Only in recent years did I decide to test the main higher end portable offerings from Tecsun: the PL-660/680, and PL-880. What I discovered, as have most people who own the Tecsuns, and similar receivers such as the XHDATA D-808, are the wonders of DSP chips and the great flexibility they provide, such as multiple selectivity options, along with excellent sensitivity.
Though it’s been on the market for going on three years now, one of the receivers I had not been able to test was the Tecsun S-8800. There are quite a few reviews already online. Some go into extensive detail in describing the plus and minus points of the radio.
With so many people having already assessed the radio — and most of them in fairly glowing terms — I won’t repeat a long list of technical specs, as you can find those in other reviews, and on the site of Hong Kong-based Anon-co, which is probably the main seller of the S-8800.
Headline
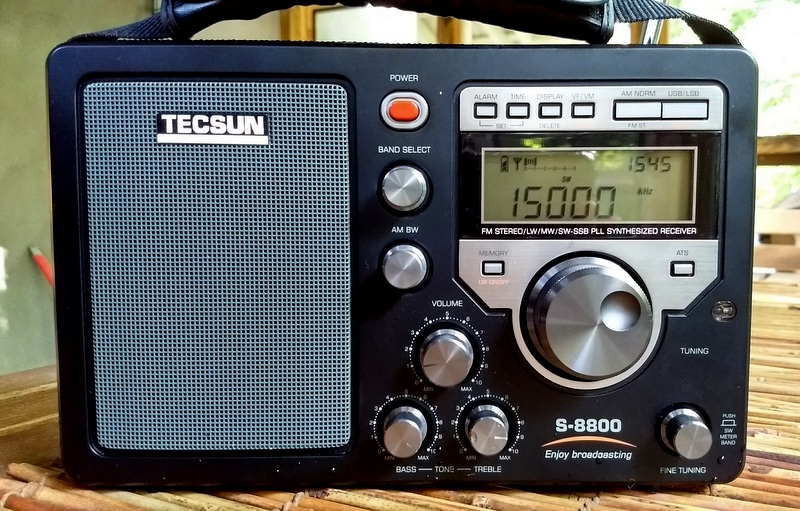
The S-8800 is arguably the best multi band radio portable among portable category offerings on the market today. It combines superior audio delivered from its superb front-firing speaker, with equally superb sensitivity (triple conversion), and multiple selectivity options, with an amazingly professionally-executed remote control.
I used the S-8800 in a number of physical locations, from public parks where I hoped to avoid high noise levels, to my back yard where noise levels are, unfortunately, quite high. I have compared the S-8800 to a number of portables in my collection, including: SONY ICF-2010, SW-77, SW-55, along with Tecsun’s 660 and 880, Grundig SAT-500.
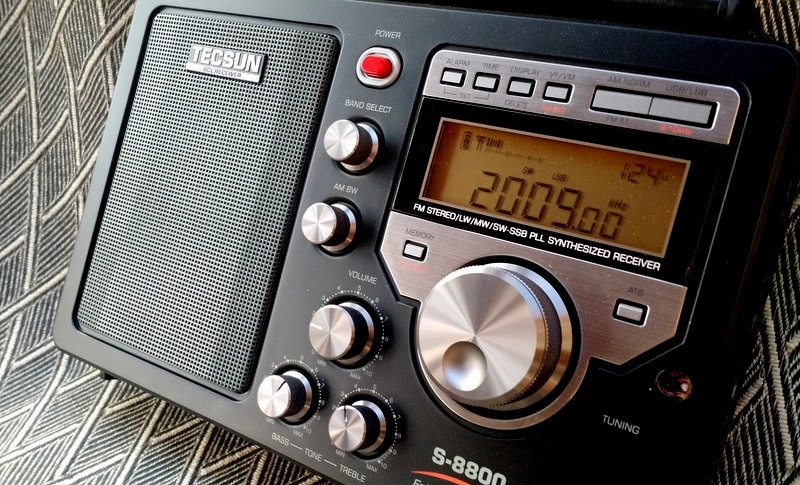
Audio

Hands down, the S-8800 wins the audio competition when compared to pretty much every other radio. Where the competition gets tight is with receivers such as the classic Grundig Satellit 500, and Tecsun’s PL-880.
Sensitivity
This is a TRIPLE conversion radio. As everyone knows by now, Tecsun did not merely adopt the cabinet of the old Eton S350 but basically stuffed a hot rod racer into the cabinet of what was previously a mediocre radio at best.
Selectivity
Widely used in a number of radios these days, the S-8800 uses a DSP chip that is seen in a number of other receivers. The best description I have seen so far is in the review by Jay Allen who notes that Tecsun “decided to utilize a combination of DSP (Digital Signal Processing) circuits along with traditional analog circuits . . .most of the AM/SW circuitry is PLL/analog along with the 1st and 2nd IF’s, while the 3rd IF is DSP.” It appears that after a bit of a rocky period in the beginning when initial units suffered from images and birdies, Tecsun got it right.
Ergonomics
Much has been said about the fact that Tecsun decided not to include a keypad on the radio itself. I too was skeptical. We have all become accustomed to keypads as standard equipment on portables.
Personally, I do a lot of my listening on the beach during vacations, and am used to being able to hold and operate the radio in such situations, so the thought of having to carry a remote control seemed uncomfortable at best.
However, the reality is that it’s still possible to navigate the shortwave, AM, and FM bands easily even without the remote — call me old fashioned, but I am from a group of older listeners who have most frequencies memorized anyway, so I know where I want to go to hear certain stations.
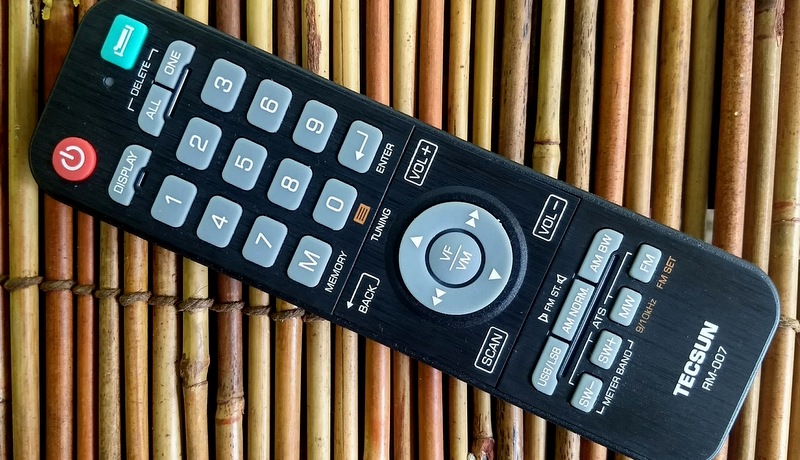
Tecsun hit it out the ballpark with the remote supplied with the S-8800. It looks like something you would find with high end stereo equipment and clearly much thought went into making sure it can control every aspect of the receiver, from SW band slewing to selectivity, volume, readout — everything except BASS and TREBLE control, Timer/Alarm, and master volume (i.e. as other reviewers note, you have to set the on-radio master volume to a high enough level first, then use the remote to vary).
Power
The radio requires two 18650 lithium (Li-ion) rechargeable batteries, with individual indicator LEDS inside the battery compartment. This choice is perhaps one of the most controversial aspects of the 8800. Among other things, 18650s usually receive more attention from airport security personnel if one is taking the radio on a trip — this is something everyone should keep in mind. Any radio being transported on a flight these days is going to be subjected to added scrutiny, simply because almost no one uses radios anymore.
As for the power needs of the receiver, the 18650s seem to do a good job and last quite a long time, even days. Included in the box is one of those white USB charger blocks — quite small and convenient. I usually travel with separate 18650 chargers, the kind used with high end flashlights, so having spare sets of charged batteries is not a problem. But if both 18650’s in the Tecsun are drained, the radio definitely needs to re-charge to a minimum level required for operation.
As I write this, I plugged the S-8800 into a wall outlet (a blue LED indicator on front indicates charging mode) and I was unable to use the radio as the battery level had completely zeroed out. Also keep in mind that the USB charging brick throws off EMI to other radios in the vicinity, and makes it impossible to use the S-8800 itself — there is just too much interference from the charging process to the radio’s receiving circuitry.
Comparisons
As mentioned, I compared the S-8800 with a number of other portables in my collection. Each of these other radios, including the classics from SONY such as the SW-55 or SW77 have their strengths. For example, the SW77 has the best implemented synchronous reception of any portable since the ICF-2010 along with superb sensitivity. However, even the large speaker on the SW-77 was unable to compete with the S-8800. Only radios such as the older Grundig SAT 500/700 had the advantage when compared to the S-8800’s speaker, with the Tecsun PL-8800 close behind.
Receiving Comparisons
I decided to take the S-8800 out to my back yard for a receiving comparison with the receiver I consider to be among the top five best in what I call the small portable category (which is above the mini-portable category in which we find the SONY SW-100 and SW-07 and similar size radios).
In intensive use over the years, I have concluded that the Panasonic RF-B65 is probably among the hottest small portables. With its famous amplified whip antenna, the 65 time after time succeeds in allowing me to hear stations that other portables struggle with (see this 3 radio comparison I posted a few years ago in which the B65 outguns the Sangean 909X and SONY SW-07).
Rather than produce several separate videos, I have combined one listening session comparing the S-8800 with the RF-B65. It’s a bit long, so my apologies, but gives you an idea of how these two fine portables did going head to head.
Click here to view on YouTube.
Leaving aside the obvious superiority of the Tecsun where audio is concerned, the S-8800 competes well with the Pan RF-B65, often superior to the smaller radio, but sometimes inferior in one respect.
While there was nothing the S-8800 could hear that the Panasonic could not, signals seem to jump out of the S-8800 in a way that they did not with the smaller radio. However, there appeared to be an interesting difference when it came to the ability of each radio to deal with interfering stations 5 kHz above or below.
As shown in the video, the Panasonic was able to distinguish more clearly between a station on 9,650 kHz (Guinea) and a station 5 kHz above (in this case, Algeria via France, using 9,655 kHz) than the Tecsun, which seemed to struggle. Indeed, at one point I was forced to attempt ECSS (Exalted Carrier SSB) mode to separate the two stations, whereas on the Panasonic, being the older and simpler radio design was an advantage in that the RF-B65 was actually able to more clearly separate the two stations by “de-tuning” from the center frequency.
One huge advantage of the S-8800 by the way is that there is a hidden software change that enables one to adjust SSB zero beat to zero or near zero. This means that in theory using LSB/USB to improve reception is possible, though keep in mind that there may be some variation from unit to unit. So far, after performing the so-called ‘secret’ fix (among a list of tweaks discovered so far) my particular S-8800 appears to be able to zero beat LSB/USB with little or no variation between the side bands, pretty much up and down the SW bands.
Conclusions
For me, the S-8800 has turned out to be the biggest surprise of the last several years. Coming seemingly out of nowhere, packaged in the cabinet of a receiver that was seen as mediocre at best, we have a triple conversion beauty (it seems to weigh almost nothing by the way) that provides pretty much every tool required these days to tackle what is left of shortwave broadcast reception. It has superior audio, unless one compares to older Grundig and similar sets.
Drawbacks are quite few to be honest. A case can definitely be made that using 18650 batteries was a poor choice by Tecsun. This means, for example, that if you’re out on the beach or elsewhere for many hours, the only way to charge up the radio would be to use a separate phone battery charger rather than simply be able to slip in regular alkalines. But then, I carry separate battery charge units already for my phone.
The big criticism that synchronous reception could have been included is also valid. The same was said about the SONY ICF-SW55 — with synchronous reception, and a bit more careful design of the tuning circuit, that radio could have been a heavier hitter, a mini-ICF 2010, something the much more expensive SW-77 was designed to improve upon.
However, so far radios utilizing DSP chips have struggled when it comes to synchronous reception capability. Indeed, the feature has ended up being discovered only as one of a number of ‘secret’ features. Only the PL-660 has a decent synchronous feature, but that radio is hobbled by limited selectivity options, while sync on the PL-880 is pretty much useless.
Finally, I have to say thank you to Tecsun for doing everything possible to avoid the dreaded ‘MUTING’ problem that has been seen on so many small portables.
As I found to my disappointment when using even the much-praised Eton Grundig Satellit, and even the C Crane Skywave SSB, this problem can be a killer for those of us who consider it absolutely critical to be able to hear EVERYTHING on and between frequencies.
So, the big question — would I recommend the S-8800? As with almost everything, the answer to that is, it depends on what kind of a listener you are, and expectations.
From a performance perspective, if you are like me, a die-hard DX’er at heart who gets a kick out of searching for the last Peruvians on the air, the S-8800 should be more than sufficient. If you’re both a die-hard DX’er and enjoy FM and AM, the 8800 should also be a perfect selection, since it’s been reviewed quite well in terms of medium wave and FM capability.
A personal note — for me, part of the fun of shortwave portables has been their ‘cool factor’. I’m just one of those who likes to carry around complicated looking radios with lots of buttons. The SONY 2010, SW-55, SW-77s, older Grundigs all fit the bill.
I never thought the S-8800 or radios similar to it in appearance would. So, for me it’s going to require a bit of a change, since the S-8800 looks like, well . . . it looks like a ‘toy radio’!
But it’s one hell of a toy-looking radio. It’s a triple conversion monster packed in the frame of something that, at one point in the past, you might have considered getting for your kids (if they even knew or know what a radio is!).
As many of us are at this point in our lives, I am also thinking ahead — to the day when my numerous premium Watkins Johnson and JRC radios, and a few boatanchors hanging around, will have to go because of downsizing.
When I’m 65, as the Beatles song goes — or more likely 85 or 90 — what will I be able to fit on a bedside dresser and use easily to tune in whatever is left on shortwave (if anything)?
The answer to that question is a radio that’s small enough and enough of a performer, preferably with a well-designed remote, to bring in anything that’s still on HF, MW, and FM. With those needs in mind, the answer is already here, in the Tecsun S-8800.
[I want to express sincere thanks to Anna at Anon-co who responded quickly when I proposed a review of the S-8800 and supplied the receiver on which this article is based. Anna was patient as my original plan to have a review in by September was delayed by unavoidable personal matters. Thanks also to Tom Witherspoon for getting the review up so quickly].
Click here to check out the Tecsun S-8800 at Anon-Co’s website and here via the Anon-Co eBay store.
Do you enjoy the SWLing Post?
Please consider supporting us via Patreon or our Coffee Fund!
Your support makes articles like this one possible. Thank you!