Shortwave listening and everything radio including reviews, broadcasting, ham radio, field operation, DXing, maker kits, travel, emergency gear, events, and more
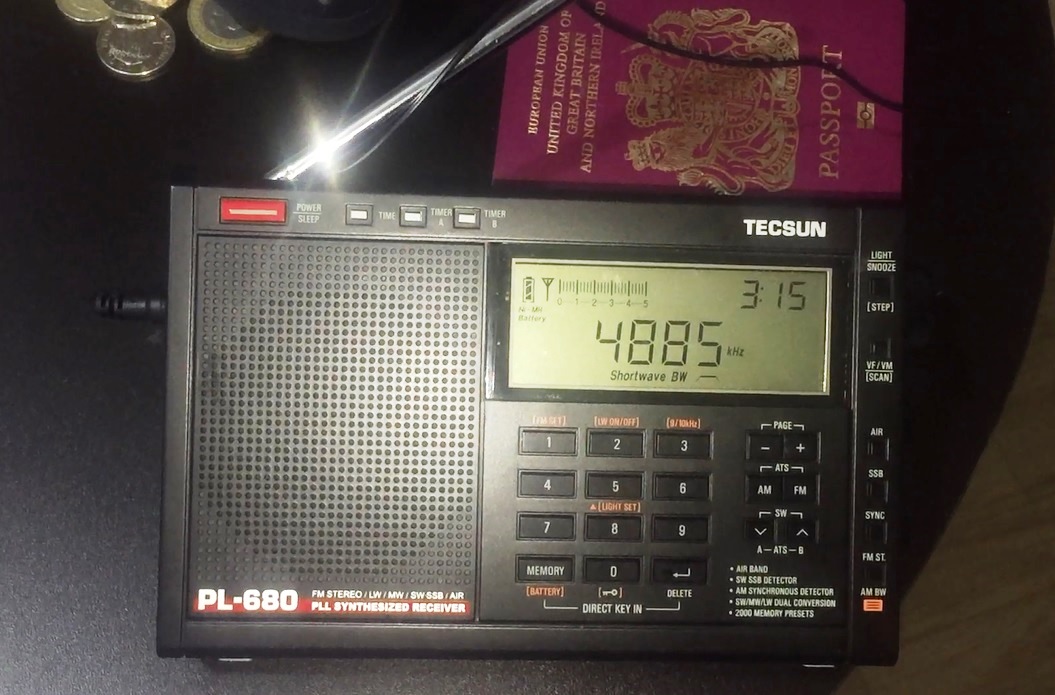
Hi there, here is part 2 of my reception videos taken in the tropical rainforest of Pará, Northern Brazil. As I mentioned in my previous post, I took a Tecsun PL-680 with me on the trip because I didn’t want to risk losing or trashing one of my precious vintage portables but also because of the following:
It can handle a longwire very well without overloading (I actually only used a 5 metre wire)
An excellent synchronous detection circuit and audio bandwidth filtering options
Excellent sensitivity, as demonstrated by the many DX reception videos on YouTube
If it got lost or damaged it would be a pain, but not difficult to replace
So, what can you hear in the jungle? Part 2 of my group of reception videos follow below – I hope you enjoy them.
Clint Gouveia is the author of this post and a regular contributor to the SWLing Post. Clint actively publishes videos of his shortwave radio excursions on his YouTube channel: Oxford Shortwave Log. Clint is based in Oxfordshire, England.
Hi there, I was fortunate enough recently for my work to take me to a very remote area of tropical rainforest in Pará, Northern Brazil and of course, I travelled with a shortwave radio. In fact I take a portable with me everywhere – even to work – just in case. During this trip I was using a Tecsun PL-680, for very specific reasons:
It can handle a longwire very well without overloading (I actually only used a 5 metre wire)
An excellent synchronous detection circuit and audio bandwidth filtering options
Excellent sensitivity, as demonstrating by the many DX reception videos on YouTube
If it got lost or damaged it would be a pain of course, but not difficult to replace
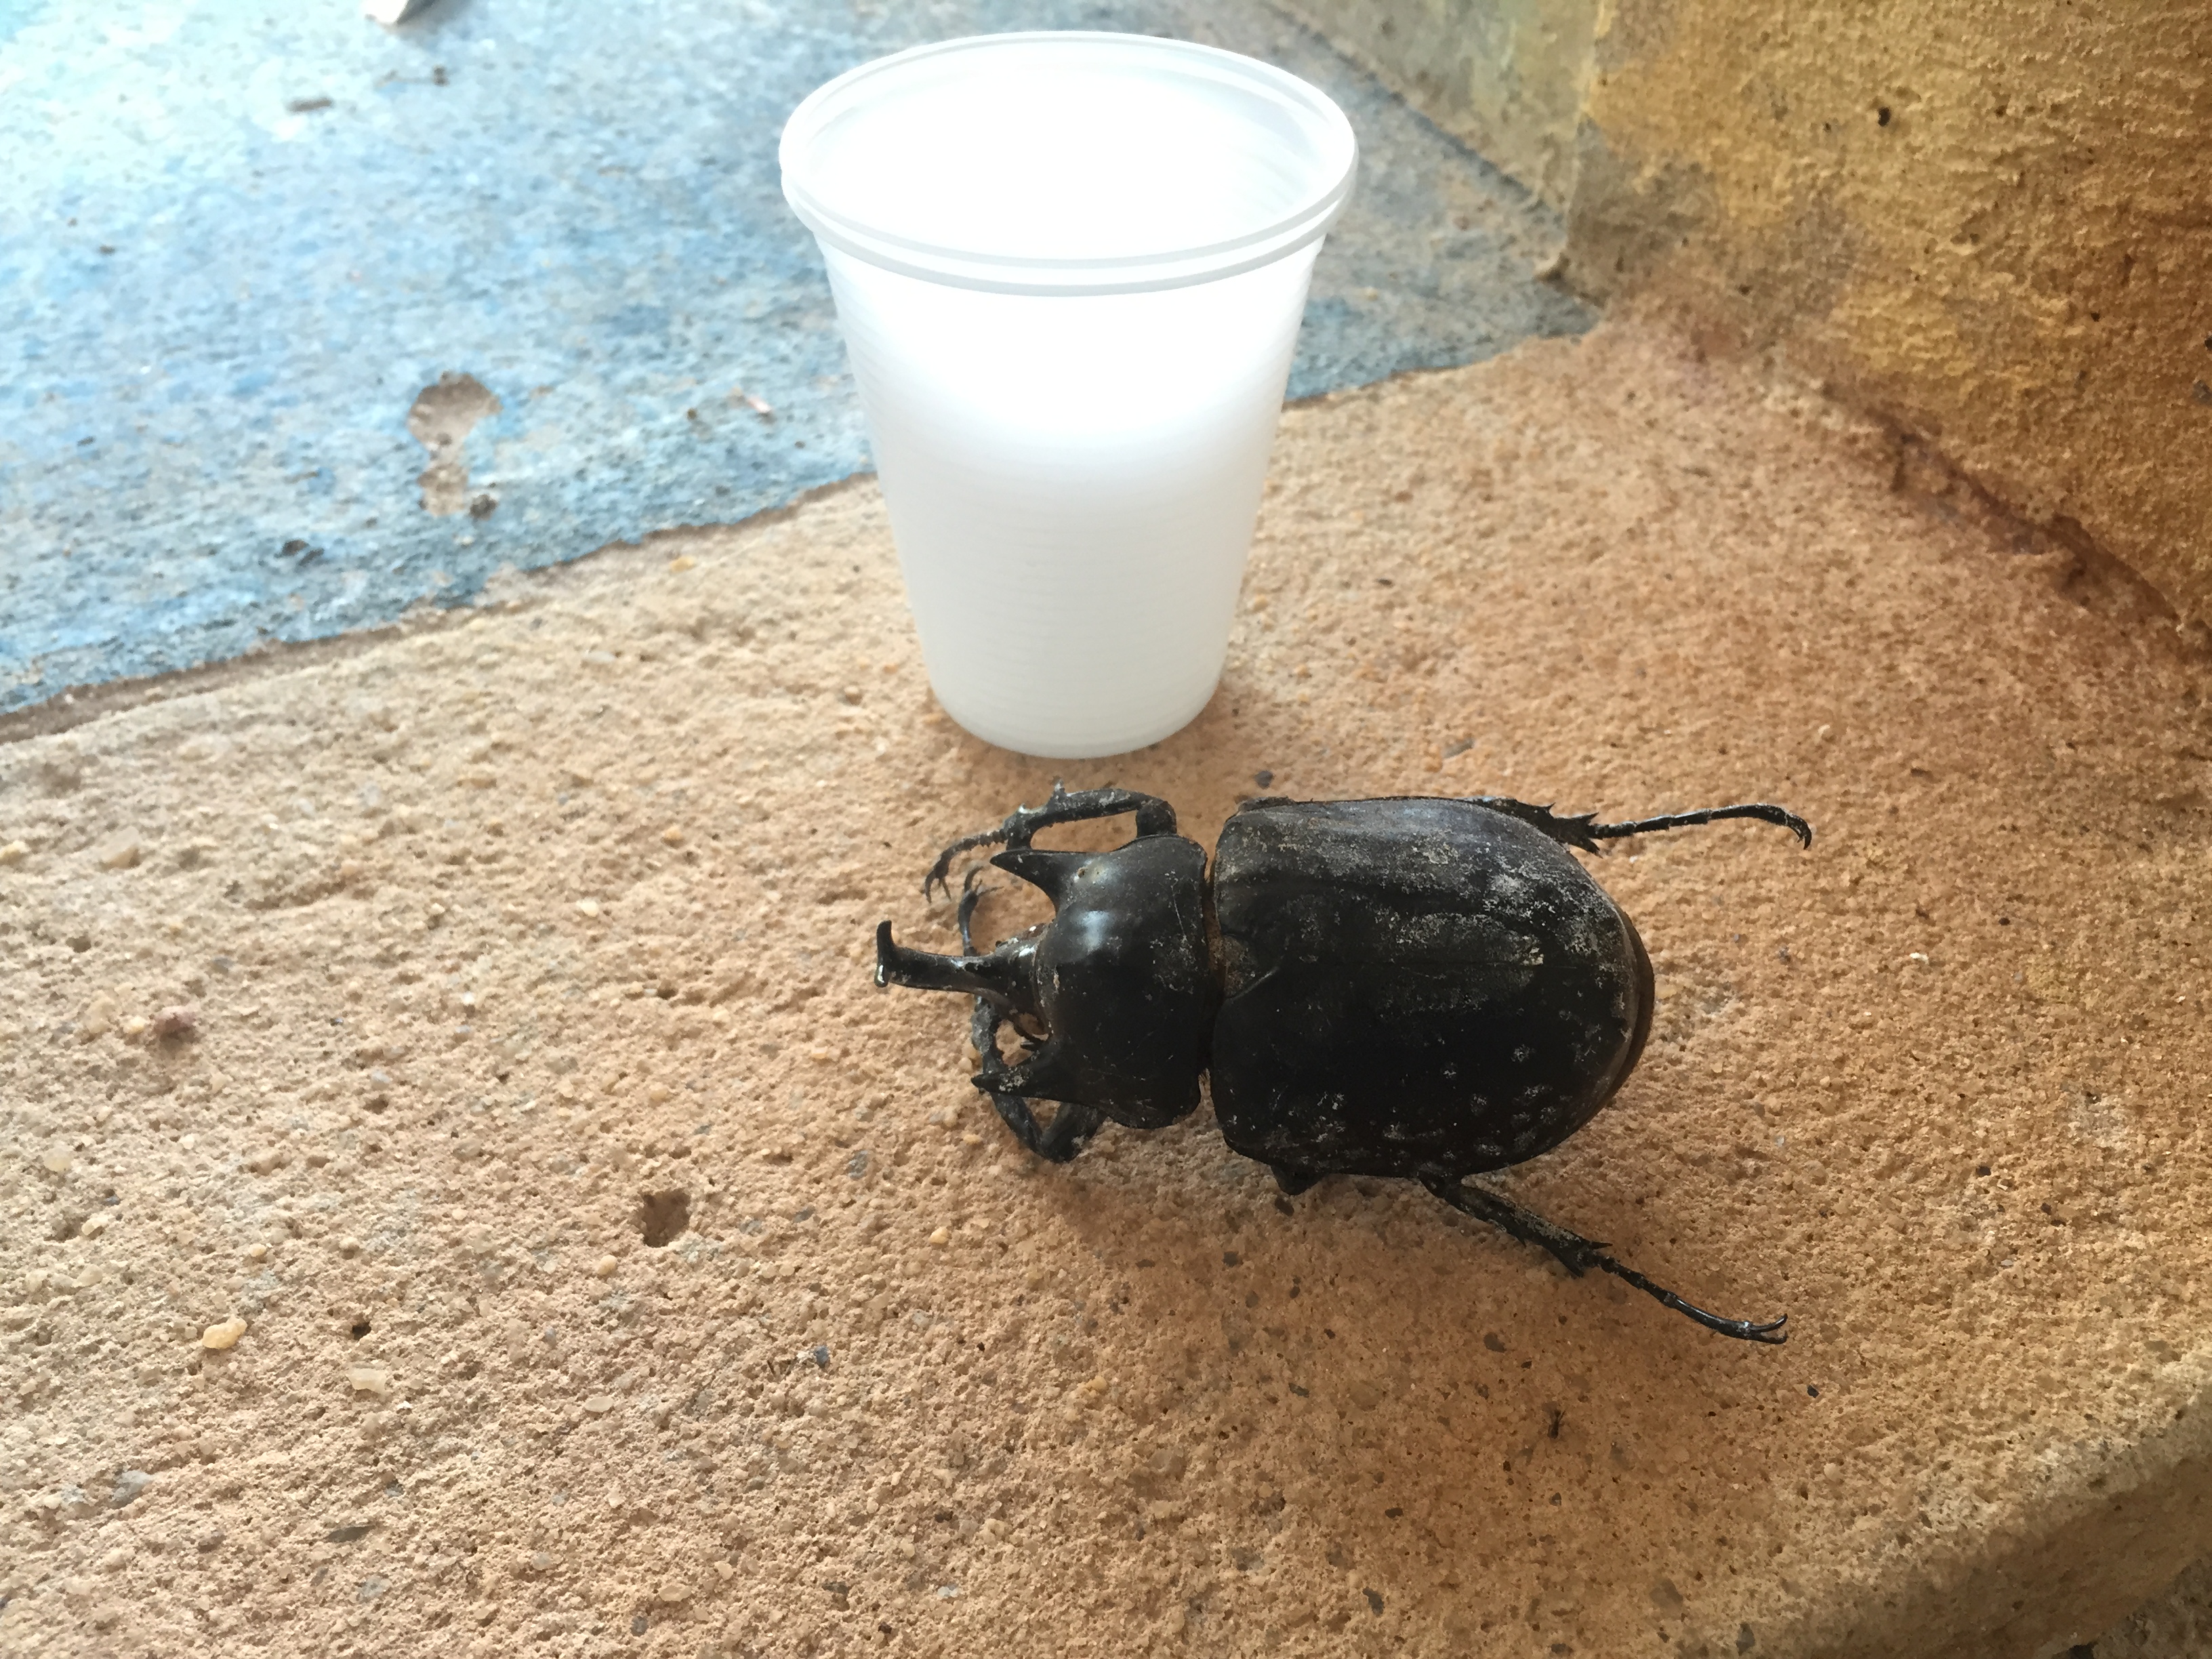
Although effectively travelling on business, I was hoping to find the time for a DXing session because I felt it would be really interesting to find out what could be heard on shortwave (and medium wave for that matter) out in the jungle, in the middle of nowhere! The environment was challenging – around 37/38 degrees C during the day and still 33 degrees C at 2 am, all day and night, every day and night! Furthermore, as you might imagine for a tropical location, the place was crawling with bugs lol, including mosquitos and thus a number of vaccinations were necessary, prior to the trip. Several days after arriving, I eventually managed to find the time for a DXing session in the jungle (with another the following week in Barcarena, on the coast).
So, what can you hear in the jungle? Part 1 of my group of reception videos follow below – I hope you enjoy them.
Clint Gouveia is the author of this post and a regular contributor to the SWLing Post. Clint actively publishes videos of his shortwave radio excursions on his YouTube channel: Oxford Shortwave Log. Clint is based in Oxfordshire, England.
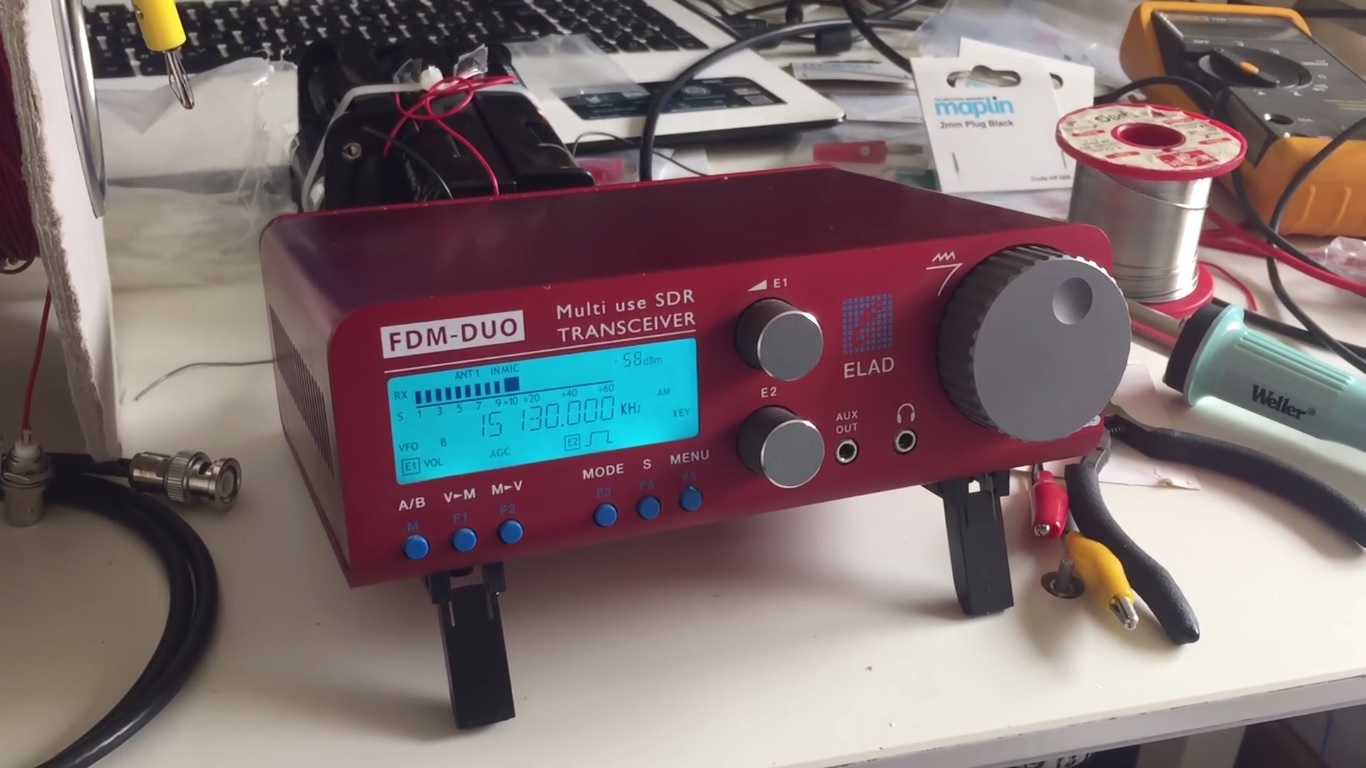
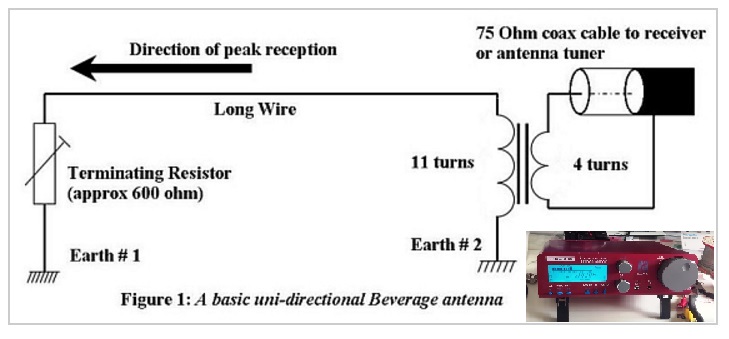
Hi there, further to my previous post regarding the initial testing of the Medium Wave Circle-design 200 metre Beverage antenna at the woods in Oxford, UK, I am pleased to share further reception videos for both the medium wave and shortwave bands. For medium wave, I operated the FDM DUO via a laptop and the FDN-SW2 software, recorded the entire band at the top of the hour and retrospectiively analysed the signals. For shortwave I utillised the FDM DUO as a standalone receiver, routing the audio via the excellent Bose Soundlink Mini 2 speaker.
As a quick recap, the antenna was terminated at the ‘front end’ with a 650 Ohm resistor into a 1 metre-long, permanent copper earthing rod that I had previously driven into the ground, away from the route taken by the general public. The actual wire was orientated in a generally westerly direction, and thus nulling signals propagating from the east. At the receiver end, I utillised my self-built transformer, wound for a 50 Ohm input impedance (14 turns on the primary), thus making the entire set-up suitable for the Elad FDM DUO. It was quite a pain to set up, taking over an hour to deploy, however, the results were very promising. A scematic diagram follows below.
Links to the next group of reception videos follow:
The reception from VOCM St. Johns, Newfoundland & Labrador and WRCA Waltham, Massachusetts was unprecidented and another indication that the 200 metre Beverage configuration is demonstrating excellent SNR performance. Similarly, the reception of Radio Nacional Brazilia was an improvement on any signal I’d previously recorded with any receiver or antenna. Finally, the signal received from Radio Huanta 2000 – one of the more exotic stations on the Tropical Band and rarely heard in Europe – delivered discernible audio with this set-up, whereas previously I had only ever observed a carrier. All-in-all a very pleasing result, with more reception videos using this antenna set-up to follow in the coming weeks.
Right now I’m uploading SW and MW reception videos to my YouTube channel, recorded during my two week trip to Pará in Northern Brazil – it was really interesting to check out what can be heard on the radio in the middle of what is a very remote area of tropical rainforest. I hope you find the time to take a look. In the meantime, thank you for watching/ listening and I wish you all good DX.
Clint Gouveia is the author of this post and a regular contributor to the SWLing Post. Clint actively publishes videos of his shortwave radio excursions on his YouTube channel: Oxford Shortwave Log. Clint is based in Oxfordshire, England.
Anyone who knows me knows that since I was licensed nearly twenty years ago, I’ve been a fan of low-power (QRP) operations. There’s just something inexplicably fun in being able to talk to the other side of the world using very low wattage. In a sense, I’ve always felt that, in the world of ham radio, QRP is truly the province of the magician.
It’s for this reason that I’ve owned, operated, reviewed, and beta-tested a number of QRP transceivers over the years. What I look for in a QRP transceiver is quite different than what I’d look for in, say, a base station or mobile transceiver. The glory of QRP gear is that it’s more portable than its “full gallon” cousins in the transceiver world, allowing for radio communications on the go. QRP rigs tend to be more compact, lighter in weight, easier on batteries, less expensive, and provide built-in features to support field operation–even winter glove operation.
Of course, however, there’s typically compromise in smaller packages; neither would I expect a modest QRP transceiver to perform like a full-size base station. But I do expect it to perform well enough to satisfy my needs in the field or the shack.
Introducing the LD-11
LnR Precision, Inc., is a North Carolina-based company that specializes in antennas, straight-keys, and last but not least, QRP transceivers. The company has produced a number of innovative QRP transceivers over the years, and for many of these years, I’ve been admiring these from afar. But earlier this year when the company announced their latest QRP transceiver, the LD-11, I was especially intrigued.
What really caught my attention this time is that this little transceiver is based on the architecture of their popular LD-5–a five-band, stand-alone direct conversion transceiver. Yet the LD-11 is actually an upgrade on that model, in that it supports 160-10 meter operation with all modes (SSB, CW, CW-R, Digi, AM and FM). Curiosity got the best of me: I had to see this for myself. I contacted LnR Precision, who kindly loaned me a transceiver for review.
Overview
The left side sports the key and mic ports, headphone jack, a line in/out jack and a side tone adjustment.
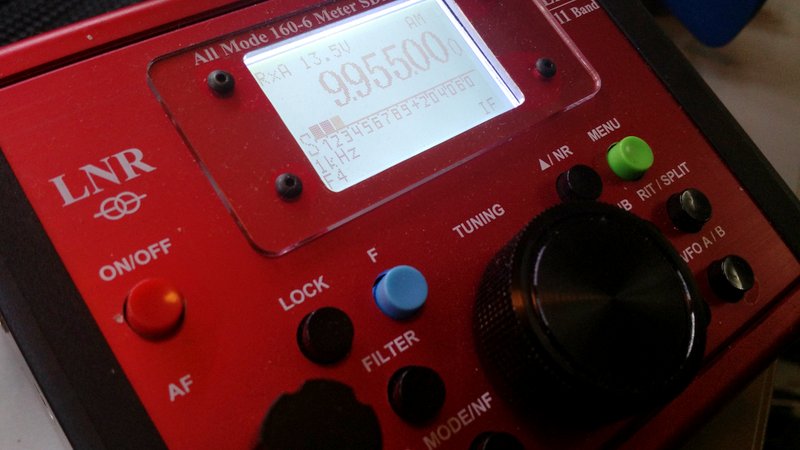
The first thing that catches your eye is the unusual color of the LD-11: it is red. Very red. Though opinions will surely vary, I rather dig the hot-rod red aluminum chassis of this little rig. The red faceplate makes the buttons quite visible as well as giving the radio a unique and vivid appearance.
The backlit LCD display, meanwhile, is crisp and easy to read. It’s large enough that all of the pertinent information (frequency, voltage, mode, filter selection, and tuning step) can be displayed at once. When in transmit, there’s a meter below the frequency that displays either a bar scale or numbers for SWR or Power; when in receive mode, it displays the “S” meter.
The LD-11’s buttons have a tactile, responsive, and smooth action. The tuning knob, while lacking a finger dimple, rotates easily with an appropriate amount of brake.
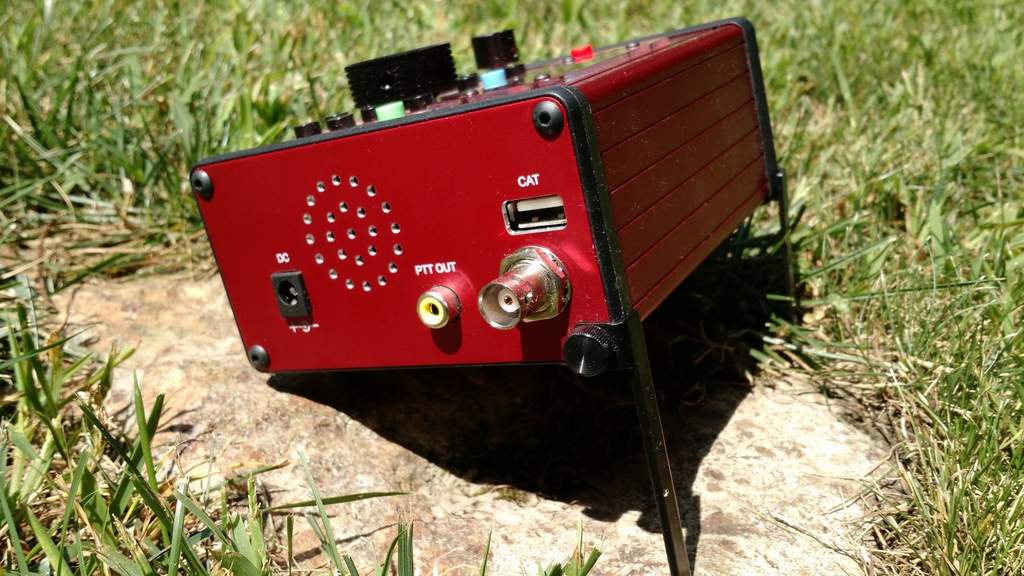
You’ll find the DC port, PTT out, CAT port and Antenna input on the right side of the LD-11.
LD-11 operation is really very simple. I was probably on the air for hours before I ever needed to reference the owner’s manual for functions. LnR has done a great job giving the LD-11 a logical menu layout and intuitive front panel functions.
The radio’s front panel allows you to do the following:
turn the radio on/off,
tune with the encoder,
adjust AF gain,
key lock the front panel,
toggle the panadapter display,
toggle pre-amp and attenuator,
change tuning steps,
change mode,
move between bands,
turn on noise blanker and noise reduction
operate RIT and set-up split,
toggle VFOs, and
enter menu functions.
The menu functions give you control of still more settings, such as AGC settings, CW configuration, mic/voice transmit configuration, notch filter settings, NB/NR settings, meter display, transmit power, backlight settings, squelch, digital gain, and AM/FM mode enable/disable, among others. So this little transceiver is feature-rich.
Moreover, most menu items can be changed while you’re transmitting. While on the air, for example, I regularly toggle the transmit meter display between power out and SWR while calling CQ. Very handy.
Again, operation is straightforward and simple, especially good because at time of publishing this review, the LD-11 owner’s manual is still quite basic (click here to download PDF version).
On the air
Unlike most of my review radios, which spend a great deal of time in the shack during the evaluation period, the LD-11 spent most of its time in the field–in several US states, as well as in a couple of Canadian provinces. I even used the LD-11 for two weeks in an off-grid cabin on Prince Edward Island, Canada.
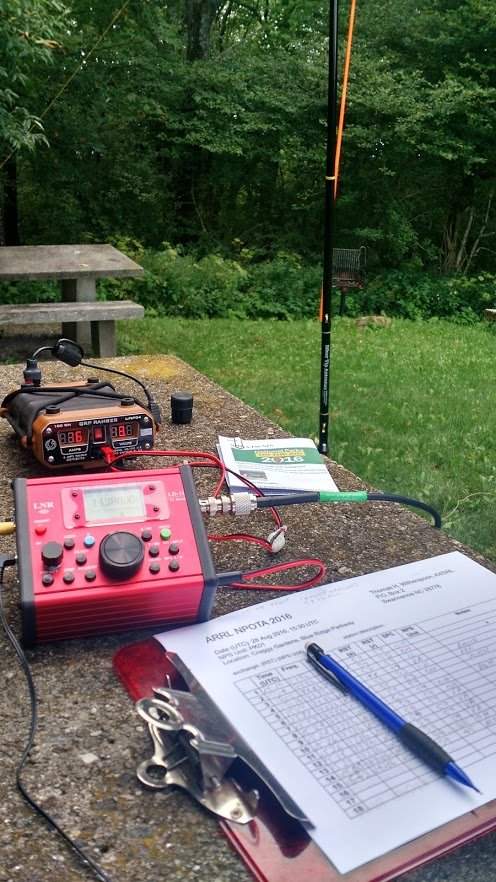
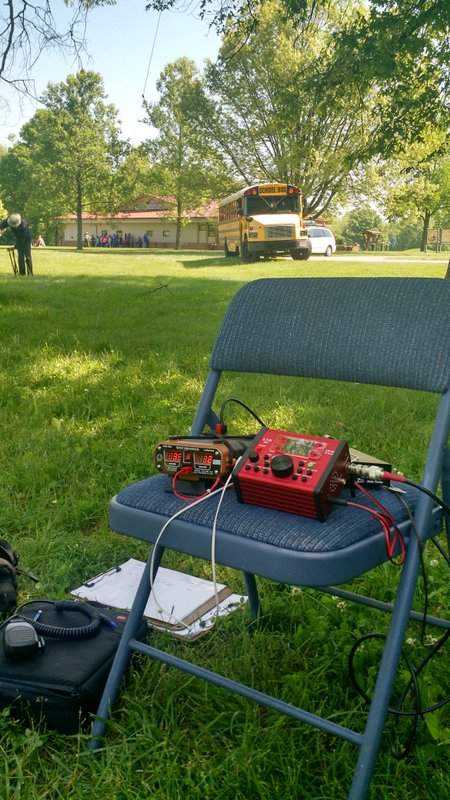
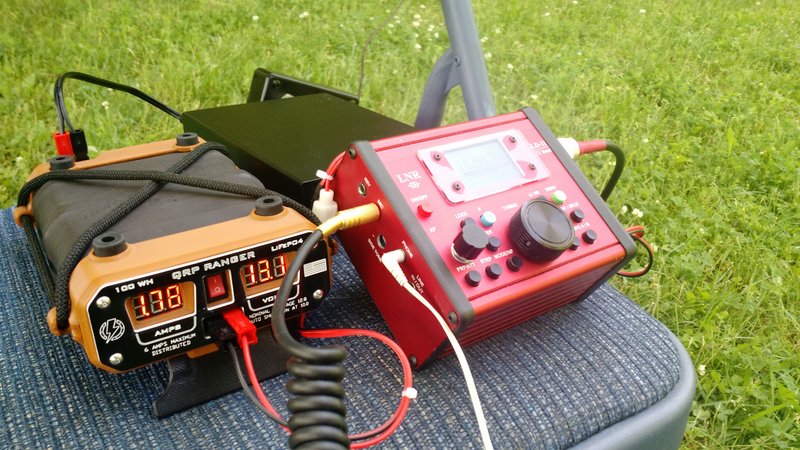
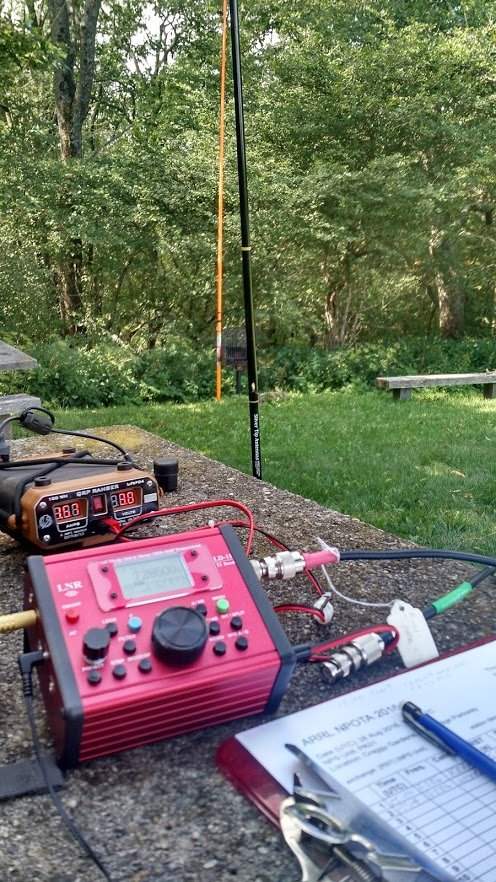
The LD-11, QRP Ranger, and Z-11 auto-tuner at the Hopewell Culture Park NPOTA activation.
We had a tight schedule for our NPOTA activations, so I couldn’t spend a great deal of time setting up my equipment. So on that day, I paired the LD-11 with Eric’s Z-11 auto tuner and a homebrew 40-meter doublet suspended from a tree. I powered the LD-11 with my Hardened Power Systems QRP Ranger battery pack.
And this combo worked brilliantly. At Hopewell, for example, I made twelve contacts, in short order, running SSB with just 8-10 watts output, and received positive audio reports.
Also that day, I discovered how exceptionally easy it is to operate the LD-11 in the field. When packing in, I appreciated how lightweight and compact it is, and that fire-engine red chassis meant there was no way I’d overlook it or forget it on the ground.
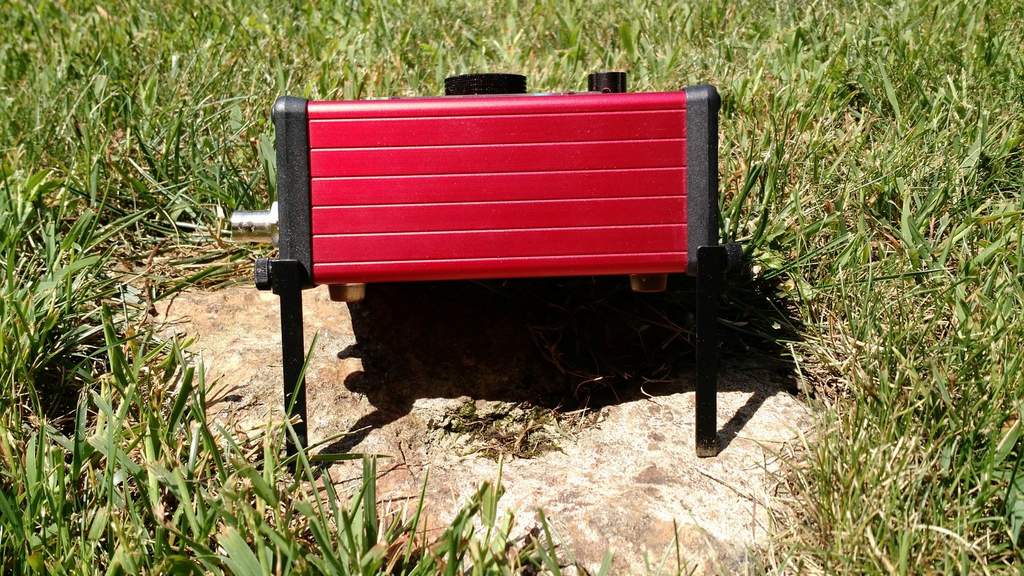
The LD-11 has two fold-down feet to support it on the shack table or in the field.
Two missing features, however, might make the LD-11 even more portable: these are an internal battery pack and an internal ATU. Unfortunately, there are no options for these at present (LnR, take note).
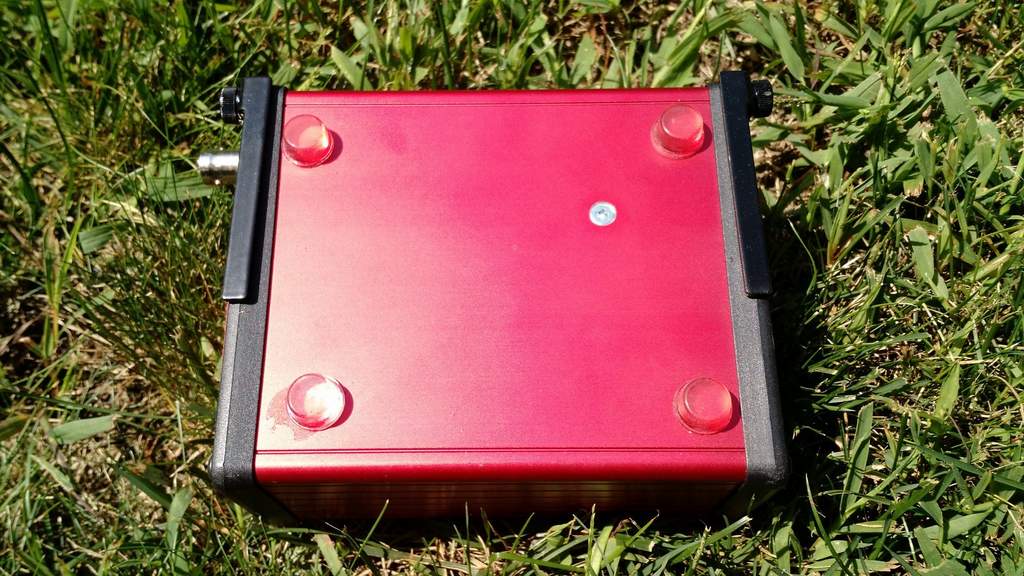
The LD-11 feet fold neatly under the chassis.
The external ATU, meanwhile, adds several extra items to manage: the ATU unit, the power cord, and an extra patch cable. Sure, if you’re operating all day from one location, none of that really matters. But when you’re doing quick deployments, every bit of kit that doesn’t require packing and unpacking also saves time and potential frustration. But I cheerfully used the above combo the rest of the day, logging even more contacts.
The EFT Trail-Friendly Antenna
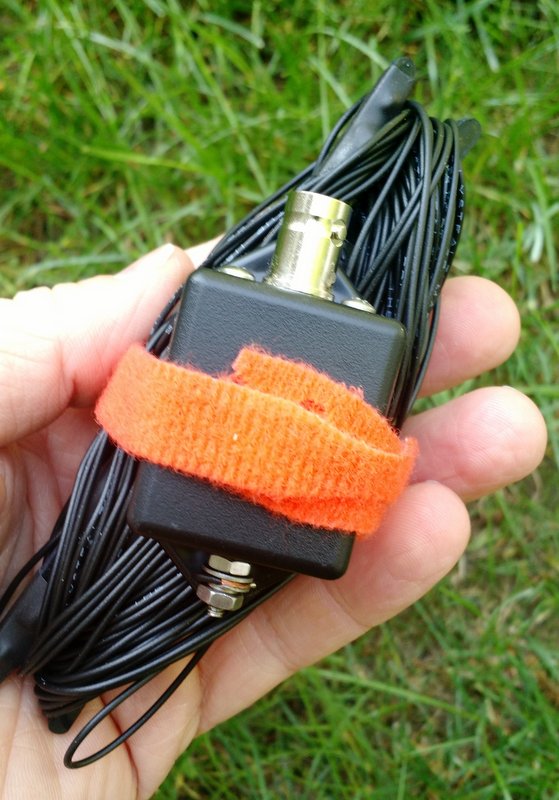
At the Dayton Hamvention, I decided that one way to avoid taking an ATU to the field was to use a multi-band resonant portable antenna. I was quite busy at the Hamvention and didn’t want to spend time building one, so I decided to take the quick route and simply buy one. I visited a few vendors in Hara Arena and was impressed with the selection of field-portable antennas available. In the end, I was taken by the compact and easy-to-deploy design of LnR Precision’s EFT Trail-Friendly antenna,and purchased one on the spot. As many potential LD-11 owners might purchase the same antenna, I decided it might help to review it, too.
The EFT Trail-Friendly antenna is incredibly compact and quite easy to deploy.
I bought a version of the EFT antenna that is resonant on 40, 20, and 10 meters. I like that band combo for NPOTA and SOTA activations, because I like operating on both the 40 and 20 meter bands. What’s especially brilliant about the EFT end-fed design is that you only need to suspend one side of the antenna: simply launch a line over a tree branch, and hoist the business end of the antenna up, and, snap–you’re ready to go. When wound up for transport, it’s also lightweight and takes up very little space in a kit bag.
On the way home from the Hamvention, we activated the same four parks yet again. Eric and I tuned the EFT antenna before its initial use, and it was then ready to go.
Eliminating the need for an external tuner and adding the simple EFT antenna to the mix meant that I could set up and take down my entire station in a matter of minutes.
The only thing that took time at all was finding a tree branch to hoist the end of the antenna–usually not a problem, especially in our Eastern US parks. Moreover, the transceiver-plus-antenna team was quite effective: I easily logged all the contacts needed for all four sites in the one-hour time slots we allotted.
LD-11 Performance
The QRP Ranger (left) and LNR Precision LD-11 transceiver (right)
In brief, I’ve been very pleased with the LD-11’s performance on the air.
The LD-11 receiver is both sensitive and selective. Though I didn’t have the chance to test it in the RF-dense environment of Field Day, it never overloaded in the areas where I’ve operated.
Through my headphones, the LD-11’s noise floor is impressively low and the receive audio is excellent. At first, I was a bit disappointed that the LD-11 doesn’t have an RF Gain control–something I frequently use to mitigate background noise–but fortunately the noise floor is low enough, and the DSP architecture seems adaptive enough, that I’ve never needed to reach for an RF gain control so far.
Nonetheless, LnR: I do hope you’ll consider making RF Gain a future firmware update!
Modes
The LD-11 is jam-packed with modes: USB, LSB, CW, CW-R, AM, and FM.
The LD-11 can also handle a host of digital modes, and there’s the choice of two models to connect to your PC: one LD-11 model with the Prolific USB Adapter Chipset ($739), and another model with the more-universal FTDI chipset ($789). It’s outside the scope of this review to test the LD-11 on digital modes, but note that I plan to do so in the coming months. The modes I’ve tested thus far are SSB, CW, and AM.
When I operated SSB, I found the default filters quite effective and the receive audio pleasant. On transmit, I received a number of positive reports on the LD-11’s audio. What’s more, through a menu option you can can adjust the transmit audio equalization (three defaults) to better match your voice.
On CW, the LD-11 was equally as pleasant. On-board filtering is quite effective and audio well-balanced.
On transmit, there is one negative worth noting for the CW operator: the LD-11 does not have full break-in QSK.
While this isn’t a problem for me, because I find hearing signals between the dits and dahs I send rather distracting, I know many CW ops that don’t like using a delay on transmit, preferring instead a full break-in. LnR notes that the LD-11’s “maximum switching delay is 12mS and digital delay is 47mS.” If you set the LD-11 for the quickest response time, you can hear between most characters, but the relay clicking can be distracting. For all of my CW operations, I set the response time to 500ms.
The first time the LD-11 was operated in CW it was with my buddy Mike Hansgen (K8RAT). Later, I asked this experienced operator how the LD-11 sounded on the other end? His reply:
“The LD-11 put out a sweet, musical note that was very pleasant and reminiscent of the note of a valve transmitter. The LD-11 sounded better than any silicon transceiver I had heard in a long time.”
Wow…high praise, indeed. For those who don’t know him, Hansgen has high standards, and doesn’t hand out such compliments readily.
AM mode (and general coverage)
Though the LD-11 isn’t advertised as having a general-coverage receiver, it will, in fact, tune the entire HF band.
You initiate this broad-spectrum tuning by entering the LD-11’s administration mode. In the admin panel, you’ll find functions that allow you to set the band edges on each amateur radio band. LnR describes this process in the LD-11 product manual, but suggests you contact them for support the first time you do so.
For a preliminary test of broadcast reception, I moved the lower band edge of the 30 meter ham radio band to 8.2 MHz.
After saving the settings and re-starting the LD-11 in normal operation mode, I could then tune the entire 31-meter broadcast band on the LD-11.
Hypothetically, you could either widen each amateur radio band to include adjacent broadcast bands, or you could simply set one of the ham bands to include the entire HF spectrum. To make it easier to navigate and tune through the bands, I prefer the former method.
Since the LD-11 has a proper AM mode, broadcasts sound great–especially via headphones! Better yet, the AM filter width can be widened to an impressive 9.6 kHz–! When listening to a blowtorch signal, audio fidelity is most impressive.
The LD-11 has four filter slots: F1, F2, F3, and F4. The F1-F3 slots can be set to a fixed user-defined widths (common widths are default).
The F4 position can be altered to any available filter width without having to enter the admin mode of the transceiver. Simply press the “F” (blue function button) and the FILTER button simultaneously, and use the encoder/tuning knob to specify the filter width in .1 kHz steps. Pressing the F and FILTER button, again simultaneously, will save your filter width for the F4 position.
I’ve been using the F4 filter position for widths between approximately 8.2 and 9.6 kHz in AM.
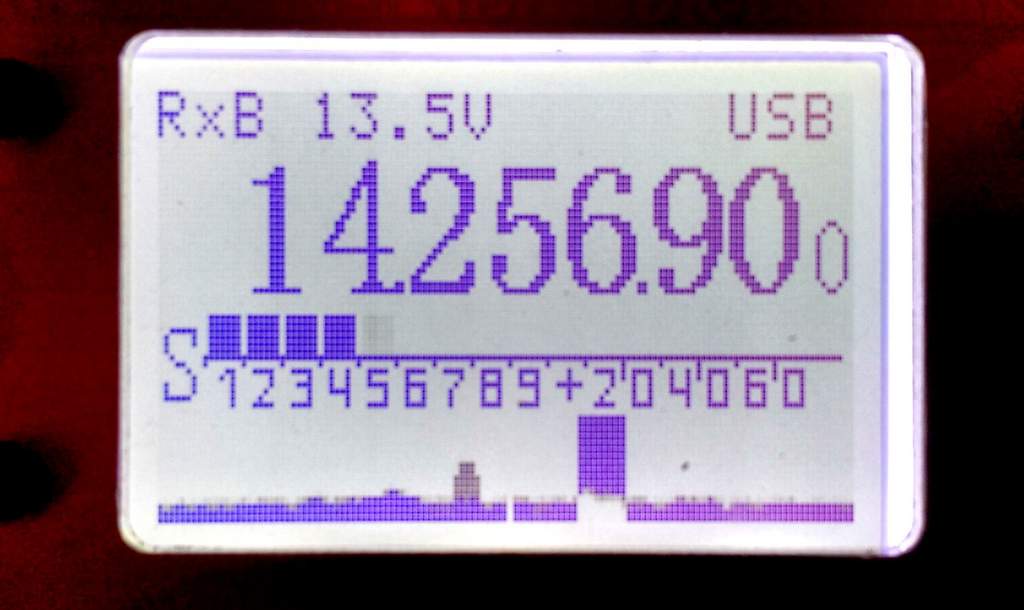
A panadapter
One final unique feature of the LD-11 is a built-in, simple panadapter. By pressing the F (function) and VFO buttons simultaneously, it will engage the panadapter which lines the bottom of the display.
The panadapter display is found at the bottom of the LD-11’s backlit display.
To be clear, the panadapter is very basic–it doesn’t include frequency markers, it’s monochrome, and it’s not very tall (height/depth helps to discern weak signals along the spectrum). In fact, when I first turned it on, I truly doubted its utility.
Yet after having used the LD-11 for several months, I can say that one of the first steps I now take when putting the rig on the air is to engage the panadapter. Though it’s quite simple, I find it a useful tool for chasing signals on bands, whether SSB, CW, or even AM broadcasters. It’s also very responsive and fluid, which helps make up for the fact that it’s solid in color and rather flat.
For example, the weekend before finishing this review, I activated PK01 (the Blue Ridge Parkway) for NPOTA. When I switched to 20 meters, the noise floor was so low that, when I first started calling CQ, I assumed that either the band was dead or the antenna wasn’t working. One look at the panadapter, however, showed me that there were some strong SSB signals on either side of my frequency. So I didn’t tune around, but simply continued to call CQ, which soon rewarded me with excellent catches (more on that below).
Summary
Invariably, all radios have strengths and weaknesses; here is a list of these from the moment I put the LD-11 on the air:
Pros:
Lightweight, compact size
Excellent ergonomics and simple menu-driven functions
Built-in, simple panadapter
Low current drain on receiver (….ma)
General coverage receiver
Low noise floor
Variable filter bandwidths
Rugged hand mic
Most menu items can be changed while operating PTT or CW
Headphone amplifier drives larger headsets
Internal speaker (see con)
Excellent CW transmit audio reports
Good LnR Precision customer service
Cons:
No internal ATU option
No internal battery option
No RF gain control (see noise floor pro)
CW operation is not full break-in QSK, some relay noise
No voice or CW memory keyers
Very basic owner’s manual
Occasional audio “pops” when tuning rapidly through a band
While the LD-11 lacks some of the portability of those rigs (specifically, options for an internal battery and ATU–again, please take note, LnR), its performance-for-price-point is right, in my opinion.
If you take the LD-11 to the field with a resonant antenna, as I have, all you need is a power source to be on the air in moments. If you pair the LD-11 with a simple ATU like the Emtech ZM-2 or the even smaller Elecraft T1, you’ll be able to tune wires to your heart’s content, and you won’t need extra power cables.
Oh, yes…there’s one more thing I must mention about the LD-11: this rig has, for lack of a better word, a “fun” factor. It reminds me of one of my favorite QRP radios from days gone by, the Index Labs QRP Plus. The QRP Plus had many performance shortcomings and wasn’t nearly as full-featured, as lightweight, or as small as the LD-11, but it was a fun radio due to its dead-simple controls, nice display, prominent tuning knob, and good ergonomics generally, making it a breeze to operate.
The LD-11 feels like what the QRP Plus should have been: a fun rig that delivers serious performance.
The LD-11 is also easy to use, and that certainly contributes to its sense of fun. Operation has clearly been well thought through by the LnR developers. Only a few days before capping off this review, I took the LD-11 to the field for its 6th National Parks On The Air activation. With eight watts in SSB and a 20 meter vertical, I worked Rhode Island, Texas, Montana, Manitoba, California, and Slovenia from a picnic table on the Blue Ridge Parkway. And it was great fun, underscoring the reason I get such a kick out of HF and QRP in the first place.
Of course, that’s the magic and the mystery of radio. But tools like the LD-11 make it all the more accessible. LnR Precision, I must say: pretty good trick. From your proverbial hat, you’ve produced the handiest little QRP rig I’ve seen in years.
The following review originally appeared in the SEptember 2016 issue of The Spectrum Monitor magazine.
Over the past year, I’ve received a number of inquiries from readers who are considering purchasing a handheld wideband receiver. This is a market I’ve never truly explored because, to be honest, I’m partial to the HF part of the spectrum, and wideband receivers have always seemed more akin scanners than to shortwave receivers.
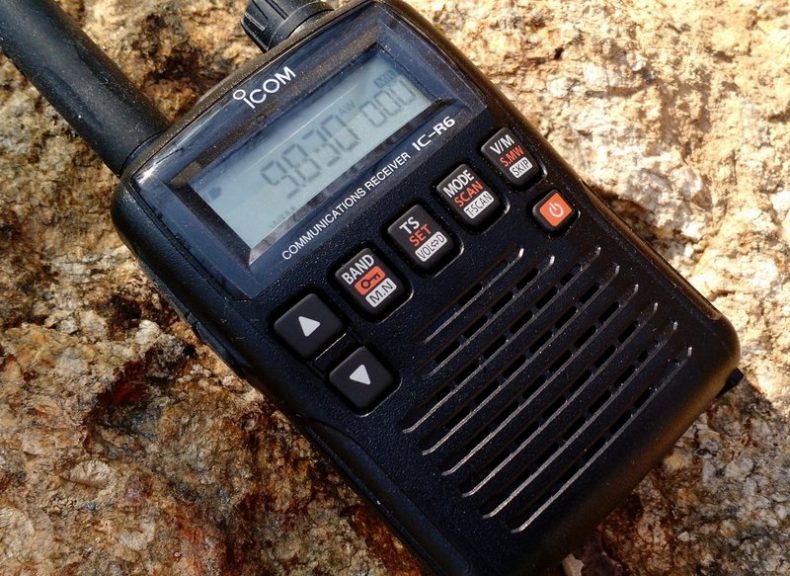
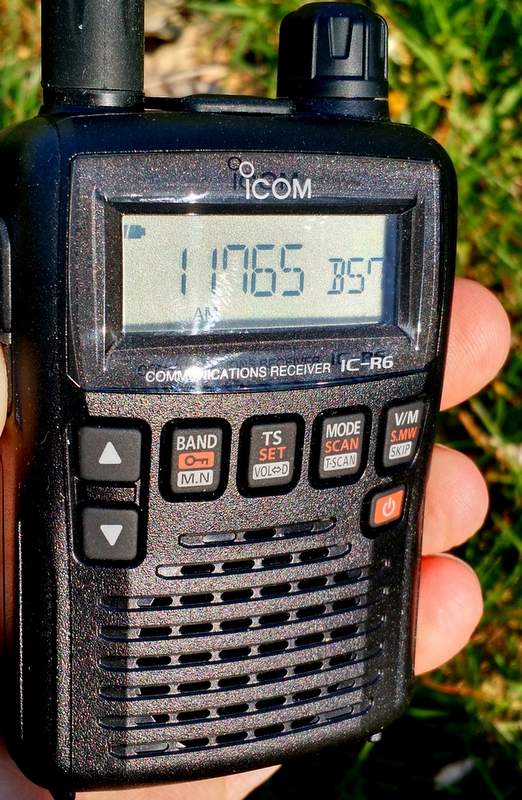
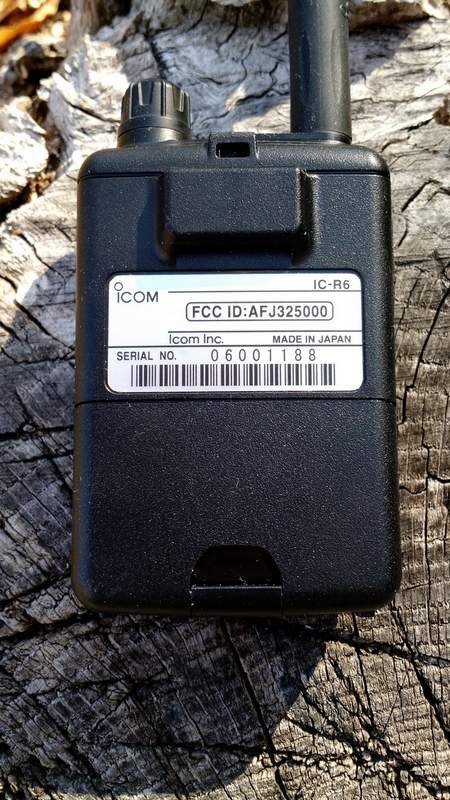
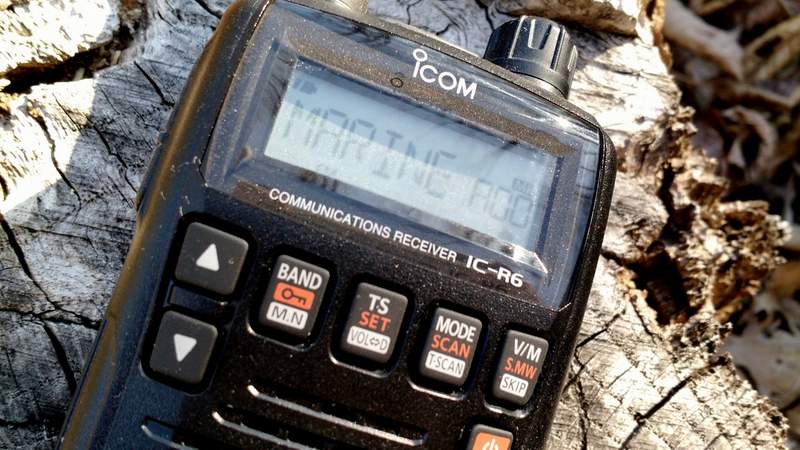
But lately, readers have specifically asked about the Icom IC-R6, a compact handheld receiver that covers from 100 kHz to 1309.995 MHz. What makes the IC-R6 appealing is that––at just $175 US––it is one of the least expensive wideband handhelds/scanners on the market that not only covers the shortwave bands, but also the AM broadcast, Longwave, FM broadcast, & NOAA weather frequencies.
Over the years I’ve read numerous reviews of the IC-R6 and other wideband receivers. Reviewers of this handheld receivers typically gloss over shortwave and mediumwave reception, and for good reason––it’s generally known that you just can’t have the best of both worlds in the sub-$300 price range. This makes sense, as there are invariably performance compromises when you pack wideband reception into such a tiny package: manufacturers usually put a performance emphasis on the VHF/UHF bands rather than on HF or mediumwave.
Still, I was curious enough about the IC-R6 to want to put it through its paces on shortwave and mediumwave, so I contacted Icom, who generously sent me an IC-R6 on extended loan for the purpose of this review
Usability/Ergonomics
Here I need to throw out a disclaimer: I’m not a fan of handheld radio (Handy Talky) ergonomics.
The IC-R6, like most other tiny handhelds, has a spartan array of buttons, all of which have multiple functions. Like its compact competitors, it also lacks a direct entry keypad-––after all, there’s simply no room for a keypad, and if there was one, it would obviously be too small to use.
That being said, however, I must say that Icom has done a surprisingly good job of making the IC-R6 usable in the field.
If, like me, you’re the type of person who typically ignores the owner’s manual when you first receive a new radio, the IC-R6 may prove frustrating. Fortunately, the Icom user manual is superb, and well worth the read. It’s very well written, and takes you through each function step by step. The 80-page manual is entirely in English (the US version, at least) and even has a cut-out pocket guide in the end. Brilliant!
Once I spent a few minutes reading through the IC-R6 manual’s outline of its basic functions, I found most operations are simple and relatively easy to remember.
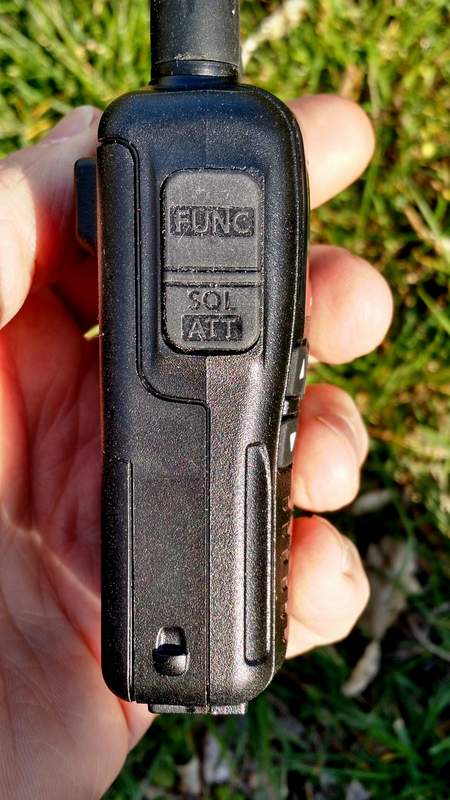
What makes each operation handy is that the Function key––which helps toggle the four multi-function buttons––is located where the PTT (push to talk) button would be on an amateur handheld transceiver. It’s actually a great location for the button because it allows one hand to hold the radio and push the function button, permitting the other hand to push a front panel button. Though I initially felt I was keying up to “transmit” on an HT, it soon became apparent that this is a very logical key placement.
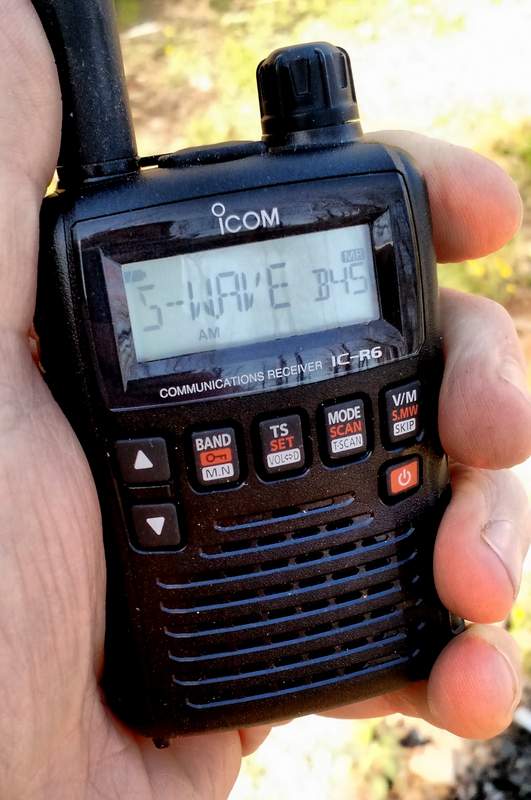
Tuning
Tuning with the IC-R6 is relatively easy and straightforward.
Simply select a band with the BAND button. Next, adjust the volume with the UP/DOWN arrow buttons, and the squelch (if needed) by holding the squelch button and turning the tuning knob. Then you may use the tuning knob to tune up and down the band.
If you want to quickly skip to another part of the bands, hold down the function key while turning the tuning knob, and the R6 will tune in 1 MHz steps. I’ve found that this helps to move across the spectrum quite quickly and compensates for the lack of a direct entry keypad.
You can also easily change the tuning steps by pressing the TS button and using the tuning knob to cycle through selections (a total of fourteen possible step selections are available between 5 kHz and 100 kHz).
Over the course of a few months of using the IC-R6, I’ve learned a couple of methods to adapt to its lack of a direct-frequency entry keypad:
using the 1 MHz tuning steps, as mentioned above
loading the memory channels with band edges and your favorite frequencies (with 1300+ memory slots, there are many ways to manage your tuning)
Mediumwave/AM Broadcast Band Performance
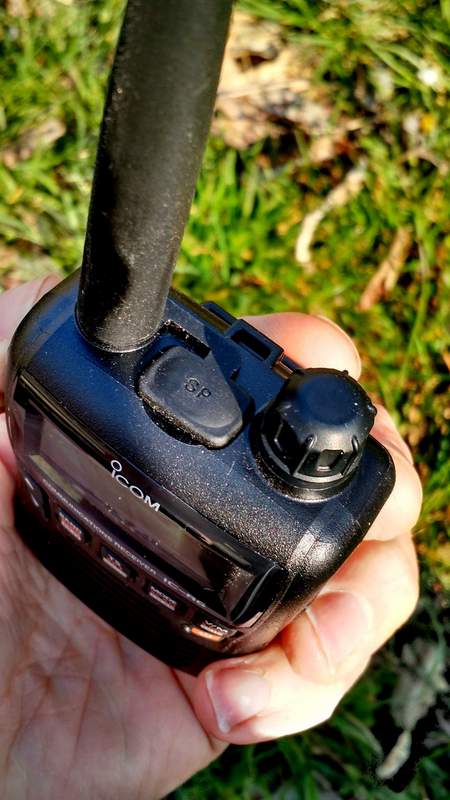
Surprisingly, the IC-R6 has a tiny internal ferrite bar antenna for mediumwave/AM broadcast band reception. This is a welcome feature because there’s no need to remove the supplied rubber-duck antenna to connect an external antenna for broadcast listening.
In terms of AM performance, I was happy with the IC-R6. I’m able to receive all of my local AM broadcasters with decent signal strength. I’m even able to reliably receive one 25-mile-distant daytime broadcaster; this truly surprised me, especially since the internal antenna must be minuscule.
Is the IC-R6 a good choice for a mediumwave DXer? Unfortunately, no. The AGC struggles with weak nighttime conditions, and frankly, with such a small ferrite bar antenna, nulling capabilities are minimal. If you’re a MW DXer, I would suggest carrying a small ultralight portable along with the IC-R6.
The IC-R6 also covers the longwave bands, but I would never use it even for casual longwave listening as the tuning steps are limited to 5 kHz increments.
Still: to have a respectable little AM receiver in a handheld scanner––? It’s great!
Shortwave Performance: Sensitivity
As I said, most reviewers gloss over shortwave reception on handhelds. I thought I’d put the IC-R6 through a more thorough test.
Note that, being fully aware of its limitations, I never used the stock rubber-duck antenna to test shortwave reception; instead, I used a long piece of thin co-ax attached to five- and ten-foot sections of wire. I tried longer and shorter pieces of wire, as well, but found that 5-10’ seemed to hit the sweet spot in terms of sensitivity.
To be honest, I had fairly low expectations of the IC-R6. I knew that the shortwave/HF bands are truly just an added feature on this rig, and realized that the R6 is more akin to a scanner rather than a shortwave radio. But in terms of sensitivity, I found I was rather impressed with the IC-R6.
The first morning I tested shortwave reception, propagation was, at best, mediocre. Yet I was able to copy WWV on 10 and 15 MHz without much trouble. I could receive all of the strong North American private broadcasters, like WTWW, WRMI and, of course, most frequencies occupied by Radio Havana Cuba and China Radio International––all of these are broadcasters that my shortwave portables can readily receive here in my region. Moreover, in the mornings, I’ve also been able to receive one of my staple shortwave broadcasters on the R6: Radio Australia. It’s nice to imagine that if I were camping, the little R6 could serve up my morning dose of news from Down Under.
All in all, I’m fairly pleased––and surprised!––by the IC-R6’s sensitivity.
Here’s an example of reception when tuned to WRMI, a strong station in my region. [Fun side note: I had no idea that, as I was recording, I would hear my buddies Mark Fahey and Jeff White on the air!]
Shortwave Performance: Selectivity
On the flip side, the IC-R6’s selectivity is unfortunately quite poor. I anticipated this.
Almost any of the strong signals I receive can be heard with equal fidelity when tuned off-frequency 5 kHz to either side of the carrier. You can pretty much forget discerning between two adjacent signals that are only spaced 5-10 kHz apart.
And yet while this would be a deal-breaker for me on a dedicated shortwave portable, this wouldn’t stop me from purchasing the IC-R6. Since we don’t have the crowded shortwave landscape we used to, selectivity is much less of an issue these days.
So, for some casual SWLing while say, backpacking? The IC-R6 does the trick!
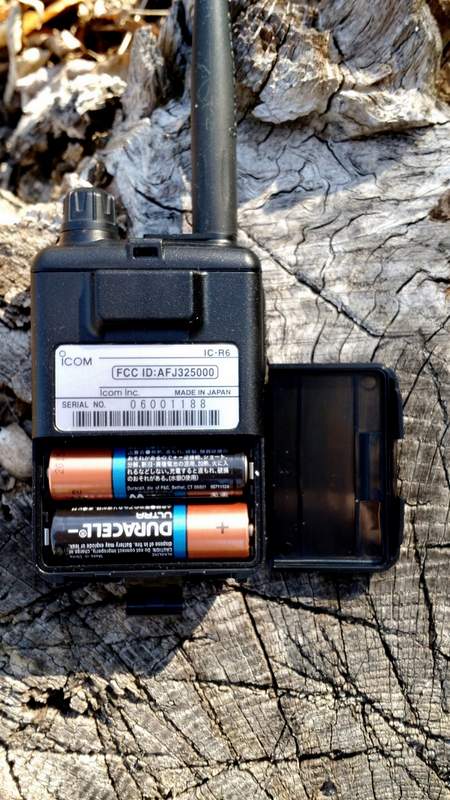
The IC-R6 runs efficiently on a set of two standard AA cells.
I should note here that I never connected the IC-R6 to any of my large outdoor antennas. First of all, I didn’t want to risk damaging the front end of the receiver (especially since this is a loaner), and secondly, I knew the IC-R6’s poor selectivity would only be exacerbated if gain were significantly increased. I also want to caution readers from doing this, as I suspect the IC-R6’s front end will seriously overload on a large antenna.
Auto-Memory Write Function
The IC-R6 has a very cool scanning function similar to the ETM auto-scan on Tecsun portables, known as the “auto-memory write function.” Here’s how it works:
Simply select the band you wish to scan.
Set squelch level.
Select the scanning range. There are several options here:
Full scan, which scans the entire frequency range of the IC-R6 (you’ll want to grab a cuppa coffee, as this will take a while)
Selected Band Scan, which only scans all of the frequencies with the band’s edges
Programmed Scan, which scans between two user-programmed frequencies
Finally, press the SCAN/MODE button to start the scan and the V/M button to engage the auto-memory write function..
The radio will then scan according to your selected scan mode, pausing for an interval of about five seconds on each signal it finds, and writing it to one of the auto-memory write channel groups (000-999) for your convenient access.
To recall the auto-memories once scanning ends, simply press the V/M button to enter the memory mode, select the band with the BAND button, then use the tuning knob to scan through the signal catches.
Once you’ve experimented with this process a couple of times, it becomes second nature, and is very handy.
One negative: since the IC-R6’s HF selectivity is lacking, you could possibly get double or triple auto-memory writes for really strong broadcasters.
Programming software and cable
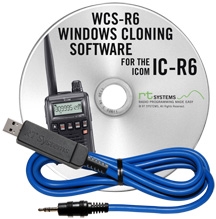
I’ll be frank here: if you plan to purchase an IC-R6 and load it with memory channels, you’ll be well-served to purchase programming software and a cable as well. Entering frequencies by hand is tedious, especially if you want alpha-numeric labels.
I’m very partial to the cables and software offered by RT Systems. Besides having the most user-friendly programming software I’ve personally used, RT Systems also offers consistency in terms of set-up and application user-interface across their whole product line. For example, I own a Yaesu VX-3R which I’ve programmed with the RT Systems software; when I want to import all of my VX-3R frequencies into the IC-R6, it’s a simple process with the aid of RT Systems software.
RT Systems supports almost all programmable amateur radio transceivers and receivers on the market, which means that it makes for a great cross-manufacturer link between all of your gear.
Summary
Invariably, all radios have strengths and weaknesses; here’s a list of my notes from the moment I put the Icom IC-R6 on the air:
Pros:
Very compact, handy size with respectable ergonomics
Scanning
Frequency/Memory scanning very fast
Quickly scans AM/SW/FM/VHF/UHF bands
Acceptable shortwave sensitivity for most regionally-strong broadcasters (see selectivity con)
Great Auto Squelch function that seems to be effective even on the HF bands
Attenuation setting which helps the front end from overloading
Wide array of scanning options
Long operating time with AA batteries
Cons:
User interface
Very difficult programming without external software/programming cable
No keypad for frequency direct entry
Audio, via built-in speaker, is tinny; headphones help, but audio output is mono
Almost non-existent shortwave selectivity (see sensitivity pro)
Tuning steps are limited to 5 kHz increments, which may be insufficient on SW/MW and LW
No SSB mode (though no other wideband receiver in the under-$300 price range offers SSB)
Conclusion
The Icom IC-R6 is one little powerhouse receiver with many, many listening possibilities. With this one radio, you can listen to everything from local VHF/UHF repeaters, to local law enforcement and emergency services, aviation frequencies, NOAA weather radio, the FM broadcast band, AM broadcast band––and, yes, even shortwave.
If you’re looking for an all-in-one receiver to take on hikes, to put in your 72-hour emergency (BOB) bag, to carry in your briefcase, or even to simply carry in your pocket, the IC-R6 is a great choice. Remember, if you do invest in one, you should also invest in programming cable and software to help you along.
This review focuses on broadcast listening with the IC-R6. While I didn’t cover traditional scanner functionality, I should note that the IC-R6 is not a trunking scanner. If you live in one of the many cities, counties or even even entire states/provinces in the U.S. and Canada that employ “trunking” radio systems for public safety communications, you’ll need a different receiver for this purpose.
Additionally, if you’re looking for a top-notch shortwave portable, you’ll want to buy a dedicated shortwave receiver, instead: they’re built with only HF reception in mind and will cost you much less, for better overall performance and more modes (SSB).
Of course, the IC-R6 is so modestly-sized that you could always carry it plus an inexpensive compact shortwave receiver (like the Tecsun PL-310ET, or the PL-380), and then…well, you’ll suddenly have the best of both worlds!
In a previous guest post, SWLing Post contributor TomL, shared his “Evolving, Morphing, SW Listening Station” where he detailed the many ways he’s trying to fight heavy radio interference at his listening post. The following post is TomL’s update:
More Anti-Noise Ideas
(Continuing the hunt for better reception in a foul RFI environment)
by TomL
I have made the following changes:
Created a prototype mini-loop based on a crossed-parallel idea from VE1ZAC (Jeff).
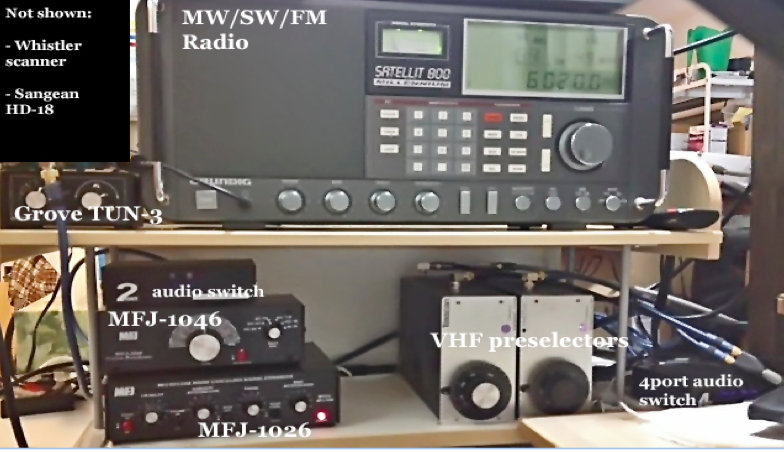
Added 2 preselectors, an old Grove TUN-3 connected to the main loop feed and an MFJ-1046 connected to the ground connection of the balun. Both feeds go into the MFJ-1026.
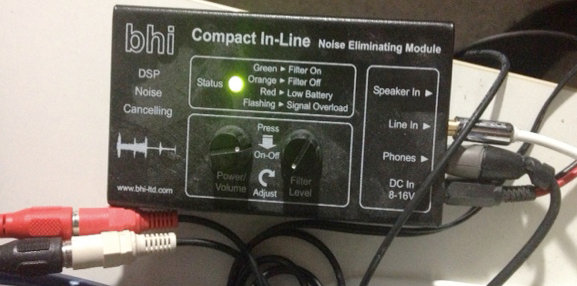
Added a medium wave noise canceling unit that I have not figured out how to use yet. (Quantum Phaser). The MFJ unit does not work on medium wave without modification.
Purchased from eBay a used Grundig Satellit 800, a somewhat more robust fixed-station receiver to replace my aging Sony ICF-2010.
Other non-related (not shown): Whistler digital scanner + UHF over-the-air TV + FM broadcasts + an AM/FM HD digital radio + high pass filters from MiniCircuits.com – (audio from all these sources is passed to an existing high fidelity stereo power amp and NHT Super One speakers on the computer desk for near-field monitoring). Associated antennas are also hidden on the outside deck (shhhhh!).
Large charge card balance!!
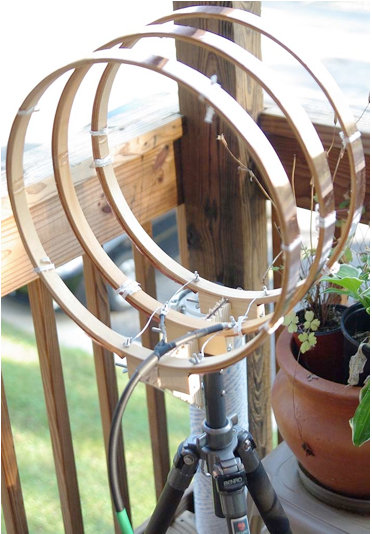
So, here are some pics for the crossed-parallel loop. VE1ZAC web site has all the references if you want to explore further or google him. Mine is purely a prototype and not finished. And should eventually be placed on a rotor (but how to keep my Nazi-like condo association from finding out?!?!?!?).
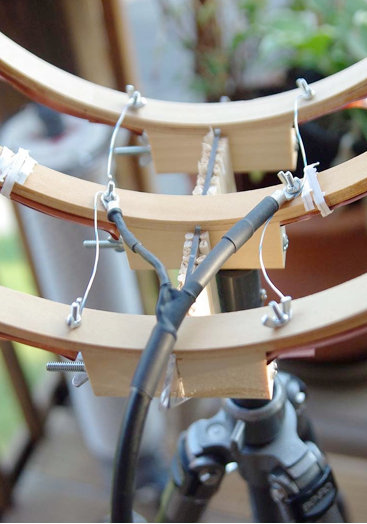
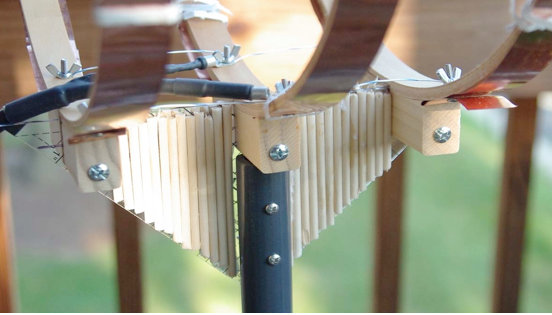
It is three 14 inch quilters hoops from Joann Stores plus some 1-inch copper strips cut from a small 2 meter roll of thin copper from eBay. Then, it is wired in parallel with silver-plated aviation wire on each side with a feed in the middle. Not an optimal placement of the feed, (should go straight down along the pipe). Will fix things up whenever I get some more time.
Seems to be an efficient way to prototype small loops. It is now mounted on a short ¾” inside diameter PVC pipe into a cheap plastic sand-filled deck-umbrella stand. Loops are light and somewhat flimsy, so I mounted the three loops on a plastic triangle ruler and dowel sticks glued to the sides for some extra strength. Good enough for now.
The EF-SWL balun is also in an experimental configuration. Since I read somewhere that loop antennas have a very low impedance at the feed point (like, 10 ohms or lower), I thought I might try a balun that is meant to lower the impedance and mount it backwards. I don’t have a picture of it but the SO-239 output is facing the loop and the screw terminals are facing the direction of the radio. My feeble brain thinks since it is a passive device of coils on ferrite, it should work bidirectionally for receive only applications like this. It seems to work but I have the excuse that I really don’t know what I am doing! 🙂
BHI unit in action.
The BHI DSP filter is useful in some circumstances but I find it fatiguing to listen to. The audio from the Sattelit 800 is so nice, I mostly like it without the DSP. The DSP narrows the bandwidth significantly, somewhere around 4 kHz or less from my hearing. I like that the Grundig has two tone controls. And it also has a stable SSB and on very strong signals with clear audio, I like to listen with SSB lower or upper sideband. But the DSP is useful at times for hash-like noisy signals; it is not quite as good on buzzing noise and I wish the Satellit 800 had a noise blanker, but that would have been a more costly purchase, like a Drake R8A.
So, in a nutshell, I have a discovery about noise here: it is all around me and ubiquitous, like the air I breathe!
I find it hard to null and also worry about peaking a station signal at the same time. However, I do have a lower noise floor with the experimental loop sitting outdoors, especially on medium wave (the Wellbrook amp + loop works great on the lower frequencies – am able to get eight different medium wave stations carrying Major League Baseball games at night – it would be nine to get WFAN for the New York Mets but the local Chicago Cubs station covers the adjacent frequency with horrible digital hash! ***Bleeping*** digital junk!).
Also, the signal level is noticeably lower using the loop. Then, add in the effect of the MFJ Noise Canceling unit, the usable signal gets even weaker.
The bottom line is, I can now finally enjoy listening to many SW broadcasts, BUT only the strongest signals. Anything else is still hopelessly lost in the noise. So, gains are limited.
On the other hand, and something else I learned by doing is that, any 1 or 2 dB signal/noise ratio improvement will help with the final audio output in the end product. Using low-noise amps, loops, noise canceler, preselectors, grounded connections, ground isolators at the input of every receiver, high quality stereo amplifier and speakers, tone controls, SSB vs. AM Sync, weird antenna configurations, etc, etc. It all helps in the end to some degree.
Tinkering is an art that involves a lot of thinking/doing iterations! And high quality parts must be used all along the chain or it could degrade the signal.
Below are some audio samples, not very well recorded, but can give some idea of the incremental improvement with each enhancement (turn up the volume). NOTE: other people may get better or worse results depending upon individual situations, type of antennas used, etc, etc.
Recording 1: R. Marti. First 10 seconds an indoor antenna with no noise reduction, second 10 seconds the outdoor loop without the MFJ-1026, the third 10 seconds with the MFJ-1026, then switched off and on to hear the difference.
Recording 2: R. Marti. MFJ -1026 is ON. Last 15 seconds is SSB, very thin sounding. Really only good for strongest signals. I liked the AM Sync better (Satellit 800 is really a Drake SW8 in disguise with a quality AM Sync). But, SSB can sound excellent with very clear voices with a steady and strong signal (The Satellit 800 does NOT have IF-shift or a BFO to fine tune an SSB reception, so the station must be exactly transmitting on the kHz mark, which most are nowadays).
Recording 3: R. Marti. MFJ-1026 is ON. Last 20 seconds you hear me switch in the two audio switches and the BHI DSP is on its lowest setting. Narrower and clearer with some reduction of background noise. I find I only like going up to about 4 on the DSP dial, after that the audio fidelity starts getting more choppy with digital artifacts that sound like dripping water. I tend to like higher fidelity. One nice thing about the BHI DSP is a faux-stereo that helps a little with voice intelligibility by helping the brain naturally filter the noise. Faux-stereo is ON even when the noise reduction circuit is manually turned off (power must be on and bandwidth still sounds narrowed).
Recording 4: R. Nacional Brazilia. First without MFJ-1026, then ON, then OFF, then ON, then with the BHI kicked for the last 20 seconds.
Recording 5: Greece. Switching the MFJ-1026 on and off every 5 seconds. In this particular case, the signal was weak and fading a lot. The MFJ OFF was also weaker than with it turned ON. That is interesting behavior, usually it is opposite. It pays to play with the settings a little. At other times, and less frequently, the MFJ unit turned OFF sometimes sounds better than with it ON and tuned for less noise. Go figure!
After all the tweaking is done, and I cannot get any more performance out of this, I will probably have to move to a nice, quiet neighborhood and setup a nice antenna farm!!
In the meantime, I do enjoy listening to the stronger stations from North America, Cuba, Brazil, Europe, and Australia with less noise than before.
73’s
TomL from NOIZEY Illinoiz
Once again, Tom, thanks for sharing your RFI elimination journey!
I love how you take on this noisy problem by experimenting and seeing it more as a challenge than an obstacle to enjoying your hobby. Great job!
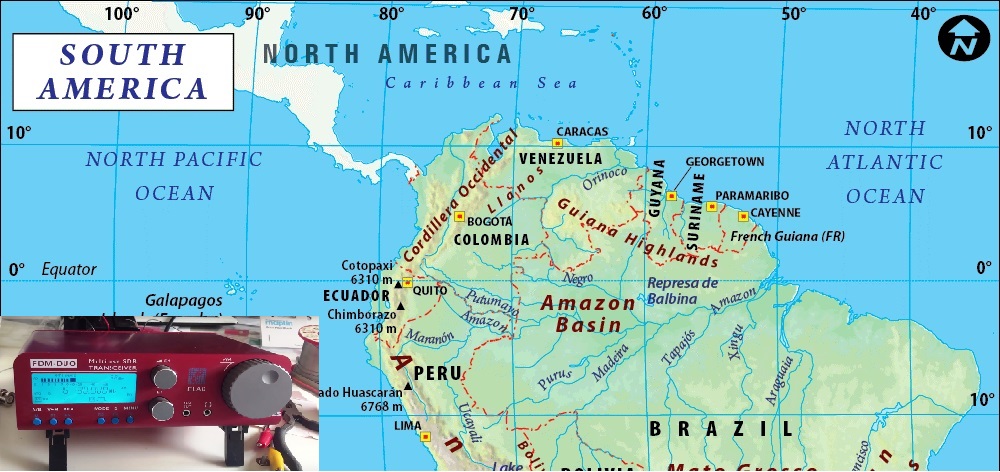
Hi there, I thought I would share a few recent medium wave DX catches from South America. In the past month or so, I’ve managed to record signals from Colombia, Peru, Venezuela and one that I’m particularly happy about – Ecuador, which is rarely reported in Europe. All catches were obtained with my usual indoor home set-up – the brilliant little Elad FDM DUO coupled to the equally brilliant Wellbrook ALA1530 active loop antenna. I have started to take the Elad on DXpeditions now, having constructed a battery pack for it, but the results I’m yielding outdoors are so far mainly with shortwave reception, where the improvement in SNR is quite obvious in the size of the carriers I’m observing and much improved modulation/ audio clarity on the Tropical Band. Hopefully in time, similar results will yield on medium wave. In the meantime, Im very happy with the indoor performance and these catches demonstrate that. There are many more reception videos on my YouTube channel Oxford Shortwave Log, including a large number of signals recorded from North America on medium wave. Direct links follow below and further down, embedded reception videos. Thanks very much for watching, listening and I will you all excellent DX.
Clint Gouveia is the author of this post and a regular contributor to the SWLing Post. Clint actively publishes videos of his shortwave radio excursions on his YouTube channel: Oxford Shortwave Log. Clint is based in Oxfordshire, England.
Please support this website by adding us to your whitelist in your ad blocker. Ads are what helps us bring you premium content! Thank you!


 Anyone who knows me knows that since I was licensed nearly twenty years ago, I’ve been a fan of low-power (QRP) operations. There’s just something inexplicably fun in being able to talk to the other side of the world using very low wattage. In a sense, I’ve always felt that, in the world of ham radio, QRP is truly the province of the magician.
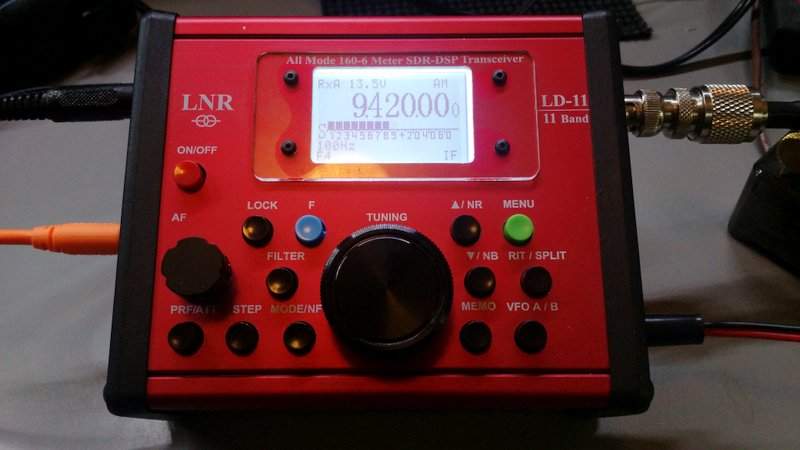

 I’m very partial to the cables and software