Shortwave listening and everything radio including reviews, broadcasting, ham radio, field operation, DXing, maker kits, travel, emergency gear, events, and more
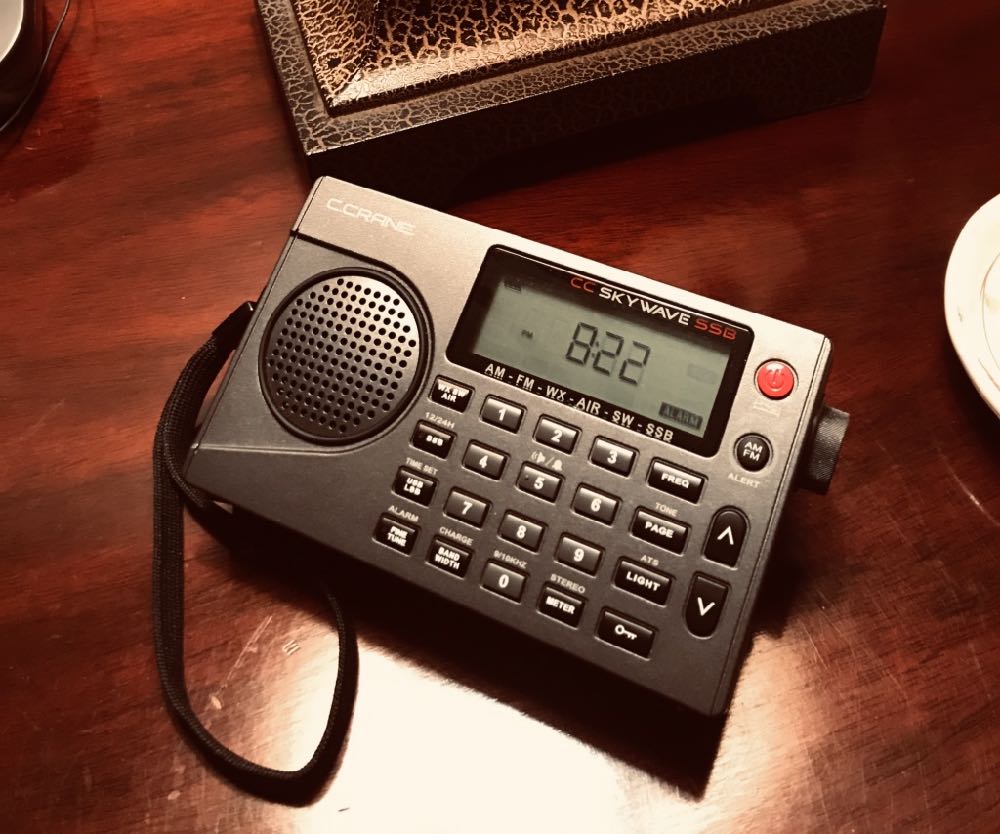
The CC Skywave SSB is set to wake me at 3:30 to catch a 5:30 flight.
I have a pretty accurate body clock. Regardless of when I doze off, I always wake up at the same time.
When I’m at home on my regular schedule, I trust my “internal chronometer” so much, I haven’t set an alarm in years.
When I travel, it’s a completely different story…
It’s a rare occurrence when a flight, train, or even road trip allow me to wake up at my normal time, so I rely on an alarm clock.
In fact, I’ll let you in on a little secret: I’m a nervous Nellie when I’m forced to break my sleep cycle to catch an early flight. My fear of missing a flight may even border on paranoia–I’ll wake up multiple times during the night in a panic unless I feel completely at ease that there’s an alarm system in place to wake me no matter what.
I recently told a friend about this fear and he asked, “Why not just set the alarm on your phone?!”
Simple answer: I don’t trust smart phones and tablets. They’re too complicated with so many nighttime settings, alarm/alert volume levels, short battery life, etc. etc.
Case in point…
Earlier this year, I had to catch an early flight and needed to wake up at 4:00 AM, so I scheduled my iPhone and iPad to alarm at 4:00. (When at home, I try to have my iPhone/iPad wake me first, because the alarm is very gradual and doesn’t disturb my wife.) Of course, I also set my travel radio’s alarm clock for 4:10, as a fail safe.
Knowing I had a total of three(!!!) alarm clocks set, I slept like a baby.
At 4:10 AM, my travel radio alarm started beeping. The iPhone and iPad were completely silent.
Turns out, the iPad decided to do an operating system update during the night. For some reason, after rebooting, it simply forgot about the alarm. (Thanks, iPad!) And the iPhone? I’m still not sure how/why, but the mute switch on the side of the phone was engaged and if it vibrated to wake me, I never heard it rumbling on the night stand.
Thank goodness the travel radio had my back, else I would have missed that flight.
Travel radios: Never leave home without one!
I like to be a self-sufficient traveler even though I only travel with one bag and pack very lightly. I never rely on my destination to have a functioning alarm clock (with battery backup, of course) or effective wake up call service. Regardless of how minimally I pack, I always take a travel radio.
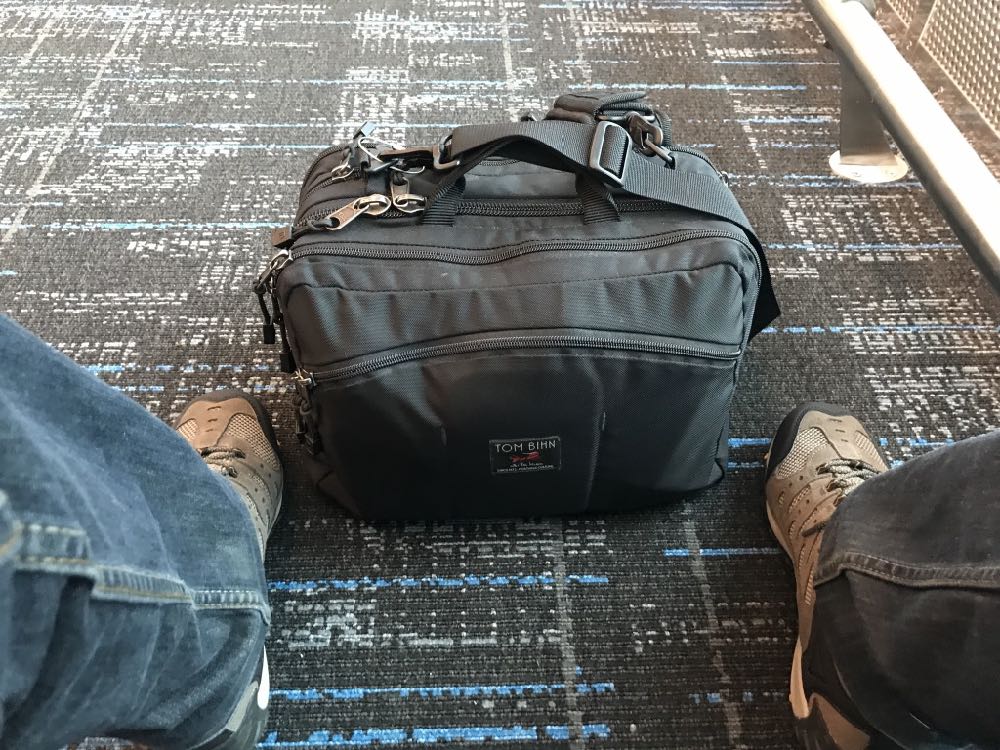
In February, for example, I travelled to Philadelphia for the Winter SWL Fest. Even though my trip was nearly a week long, to keep from paying a carry-on fee with Frontier airlines, I packed everything in a bag that met their strict “personal carry-on” bag size.
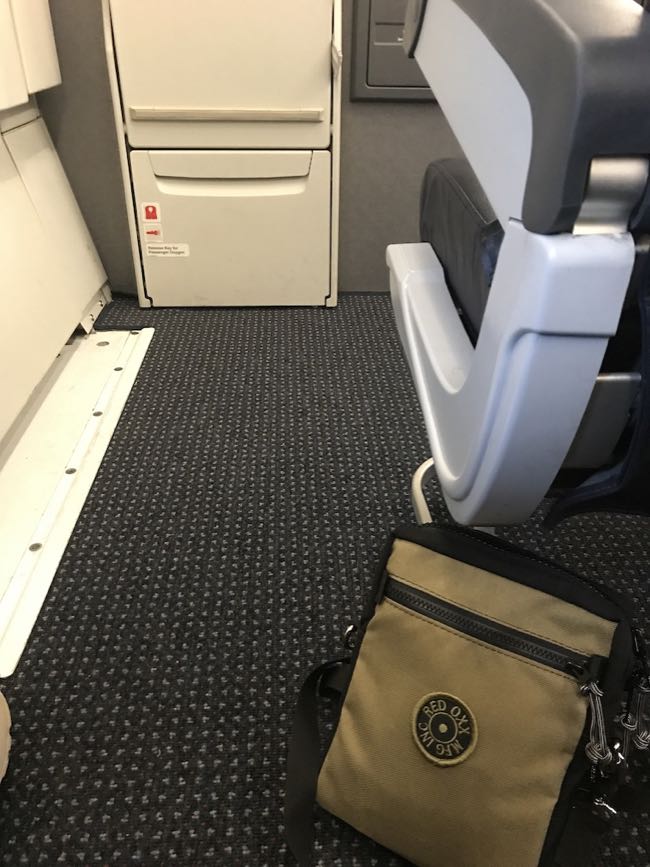
Regular readers know I’m a bit of a pack geek, so my bag of choice was the Tom Bihn Stowaway. Here’s the bag fully packed out at my feet in the airport:
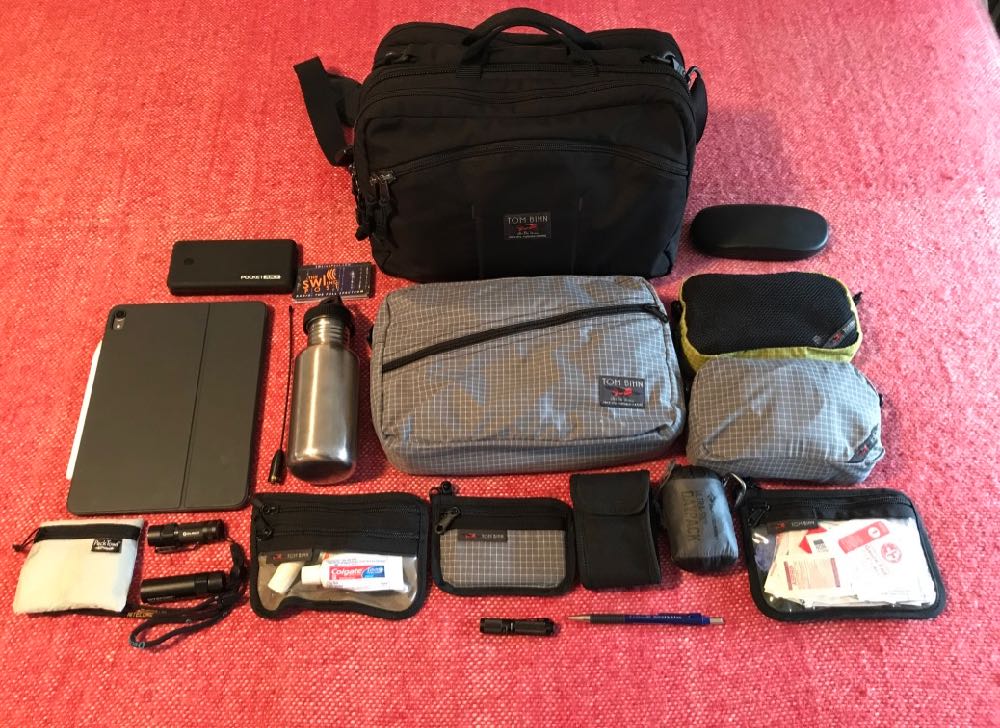
Here’s a photo of everything I packed in the Stowaway for that trip:
This particular trip really pushed the limits on my minimalist travel philosophy. Honestly? It was a fun challenge! I had to hone my pack contents down to only the essentials (don’t make fun of me for believing three flashlights were essential–the previous year, our hotel was without power for several days).
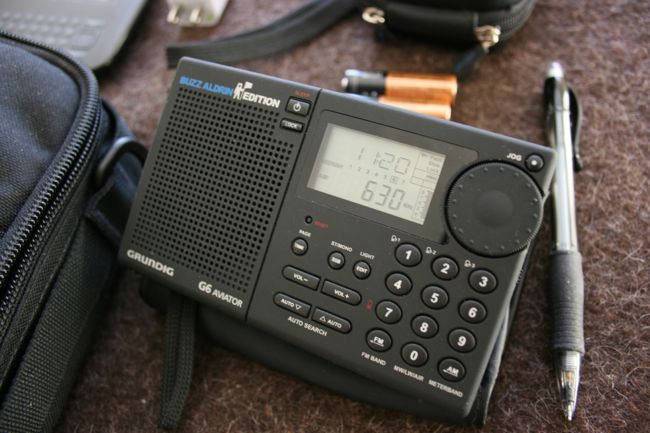
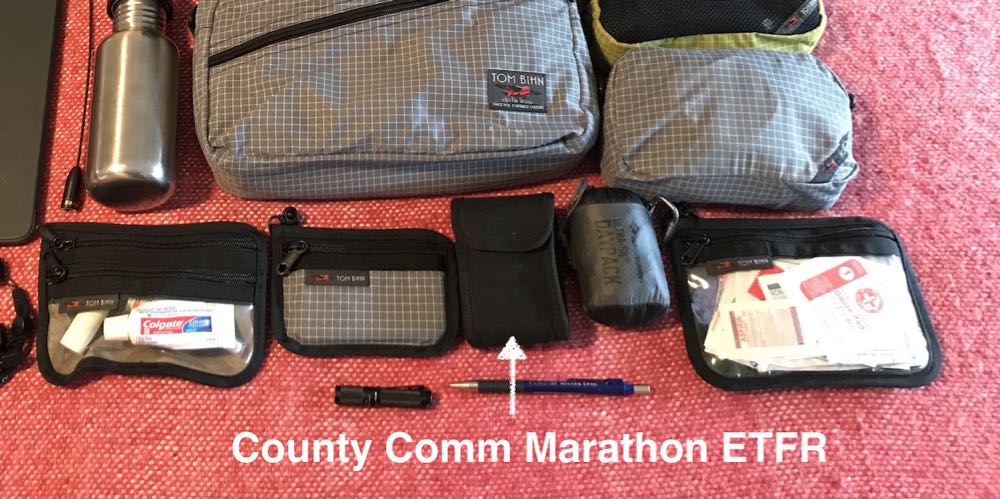
Still, I made room for one of the smallest travel radios in my arsenal: the County Comm Marathon ETFR:
I chose the ETFR because it has a custom case that could attach to my belt or pack strap if interior space became too tight. The ETFR radio hasn’t been in production for a decade, but it’s an effective radio companion and the alarm works without fail.
Choosing a travel radio
Most modern digital portables are based on DSP chips that have clock and alarm functions, so you might already own an effective travel radio.
With that said, I always prioritize radio features that benefit a traveler, of course; here are some that I look for:
Small size: Naturally, it’s sensible to look for a travel radio that’s small for its receiver class for ease in packing.
Overall sturdy chassis: Any travel radio should have a sturdy body case that can withstand the rigors of travel.
Built-in Alarm/Sleep Timer functions: We’ve already exhausted this topic, right?.
Powered by AA batteries: While the newer lithium ion battery packs are fairly efficient, I still prefer the AA battery standard, which allows me to obtain batteries as needed in most settings; a fresh set of alkaline (or freshly-charged) batteries will power most portables for hours on end.
Standard USB charging cable: If I can charge batteries internally, a USB charging cable can simply plug into my smart phone’s USB power adapter or the USB port on my laptop; no extra “wall wart” equals less weight and less annoyance.
ETM: Many new digital portables have an ETM function which allow auto-scanning of a radio band (AM/FM/SW), saving what it finds in temporary memory locations–a great way to get a quick overview of stations. (As this function typically takes several minutes to complete on shortwave, I usually set it before unpacking or taking a shower. When I return to my radio, it’s ready to browse.)
Single-Side Band: While I rarely listen to SSB broadcasts when traveling, I still like to pack an SSB-capable receiver–especially for longer trips.
RDS: Though an RDS (Radio Data System) is FM-only, it’s a great feature for identifying station call signs and genre (i.e., public radio, rock, pop, country, jazz, classical, etc.)
External antenna jack: I like to carry a reel-type or clip-on wire external antenna if I plan to spend serious time SWLing. Having a built-in external jack means that the connection is easy, no need to bother with wire and an alligator clip to the telescoping whip.
Tuning wheel/knob: Since I spend a lot of time band-scanning while travelling, I prefer a tactile wheel or knob for tuning my travel radio.
Key lock: Most radios have a key lock to prevent accidentally turning a radio on in transit–but with a travel radio, it’s especially important to have a key lock that can’t be accidentally disengaged.
LED flashlight: Very few radios have this, but it’s handy to have when travelling. Note that the County Comm ETFR (above) does!
Temperature display: Many DSP-based radios have a built-in thermometer and temperature display; I like this when I travel anytime, but especially when I’m camping.
While I don’t have a portable that meets 100% of the above travel radio wish-list, I do have several that score very highly.
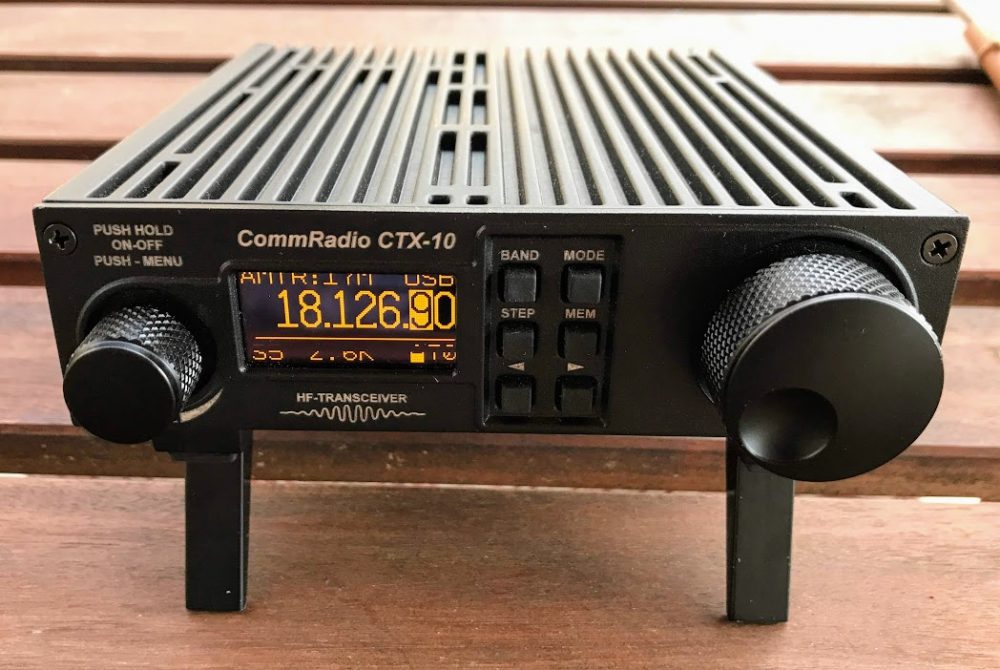
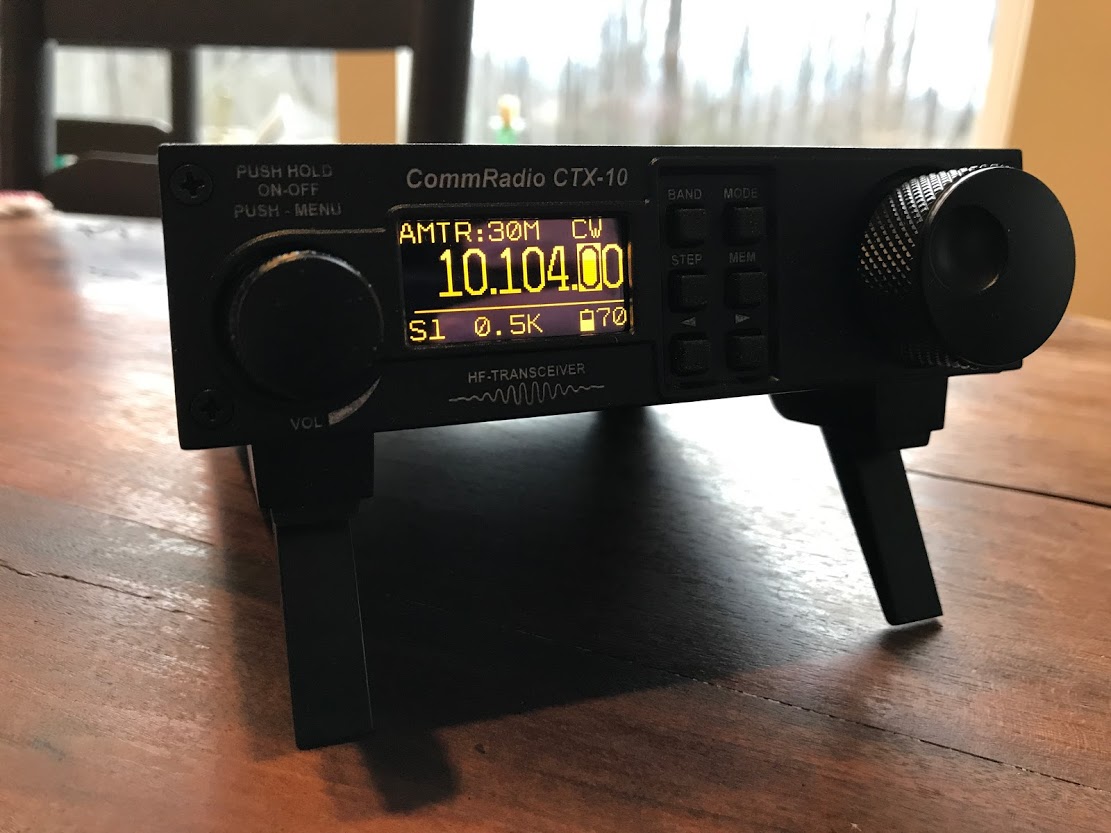
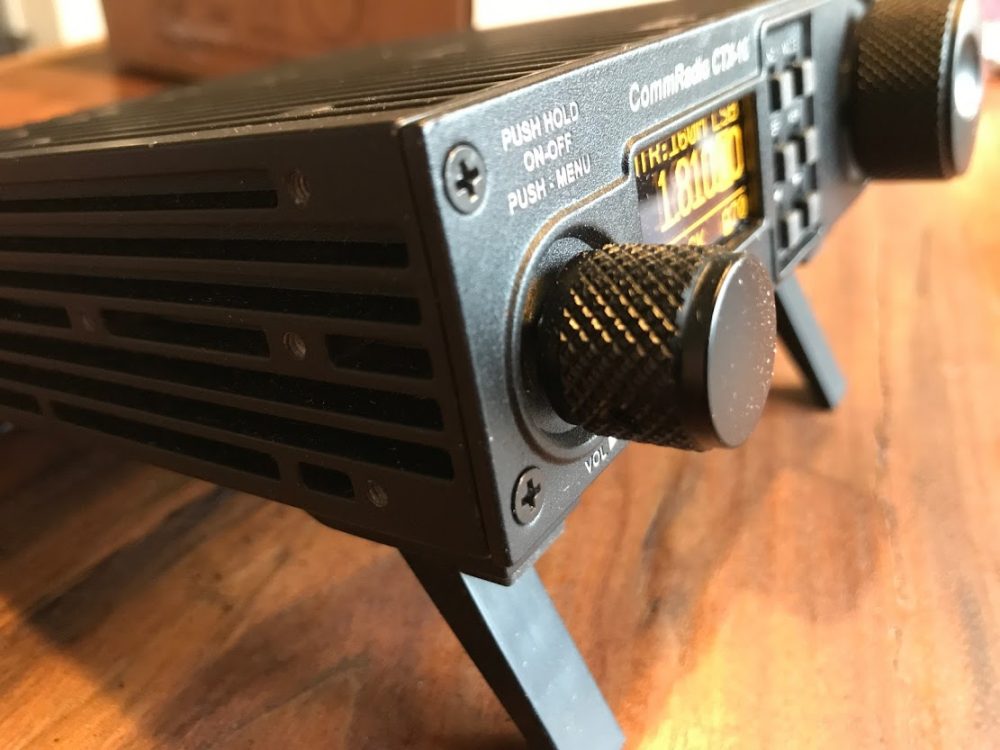
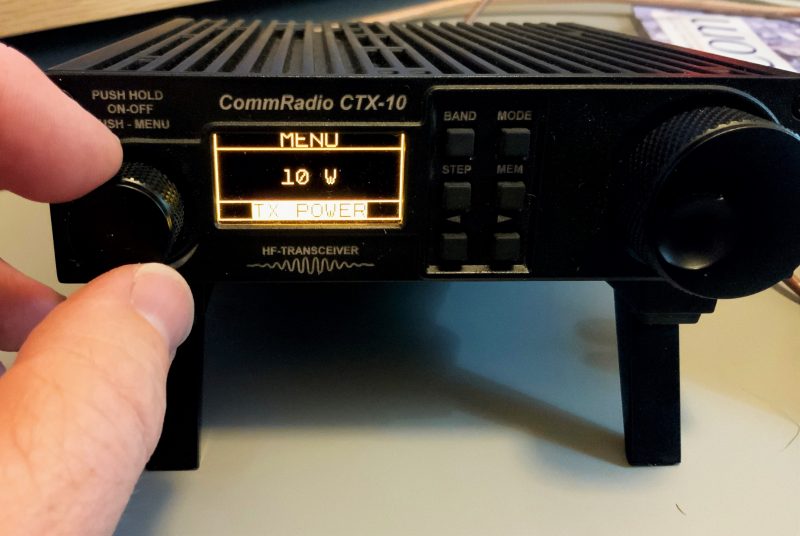
Earlier this year I published what I called an “initial” review of the CommRadio CTX-10 QRP transceiver, promising an eventual final review. The reason for this is that I sensed there were important CTX-10 updates on the horizon, and I wanted to re-evaluate the rig once the upgrades had been implemented through firmware.
I’ve been very pleased with the attention CommRadio has paid to their customer feedback on some of the most important requests.
Instead of reiterating what I wrote in the initial review, I’ll jump straight into the upgrades.
Operating split
At time of posting my initial review, the CTX-10 didn’t have A/B VFOs. This was my primary gripe about the CTX-10, because without A/B VFOs, there was no way to operate split, which meant that you could not work DX stations that use split to manage large pileups. This is actually a really important feature for a QRP radio because during split operation, a pileup is pulled apart across a few kHz of bandwidth, thus giving a 10-watt signal a better chance of being heard through a collection of legal-limit signals.
On June 10, 2019, CommRadio released a firmware package that added A/B VFOs and the ability to operate split to the CTX-10.
Even though there are only a limited number of buttons on the front panel, it’s incredibly simple to enter into split mode:
Chose the frequency and mode;
Hold the STEP button for one second or more, then release. You’ll then see a split display indicating the TX and RX frequencies.
Use the left arrow key [<] to toggle between them.
I do like the clear TX and RX lines, which leave no doubt in the user’s mind what the frequency used for transmitting and receiving is. On some radios, this can be a bit confusing.
Split operation is simple and effective, thus I consider this issue fully resolved.
ATU flexibility
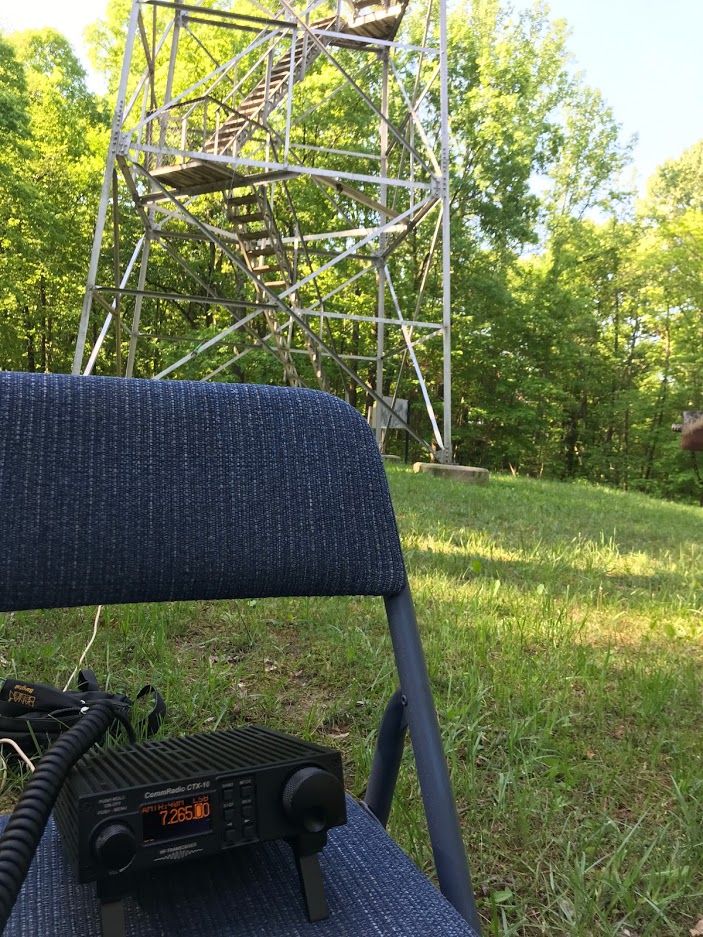
In my initial review, I noted that the CTX-10 ATU needed near-resonant antennas for the ATU to make a strong 1:1 match. Indeed, a number of times I actually used a near-resonant antenna in the field––the EFT Trail-Friendly, for example––and the ATU couldn’t get below a 3:1 match. For what it’s worth, CommRadio states that the CTX-10 can easily handle 3:1.
Making a Parks On The Air activation at Tar Hollow in Ohio.
CommRadio has made modifications to the ATU function, improving the performance of the antenna-tuner algorithm, which had a significant impact on 80 and 60 meters. I’ve also had better luck with a number of field antennas I’ve tried on 40 and 20 meters. Is it as good as the Elecraft KX-series ATUs? No.
Having a built-in ATU on the CTX-10 is certainly a valuable feature in the field. When I need to match a challenging antenna with the CTX-10, I bring my Emtech ZM-2 manual tuner along for the ride.
SSB operation?
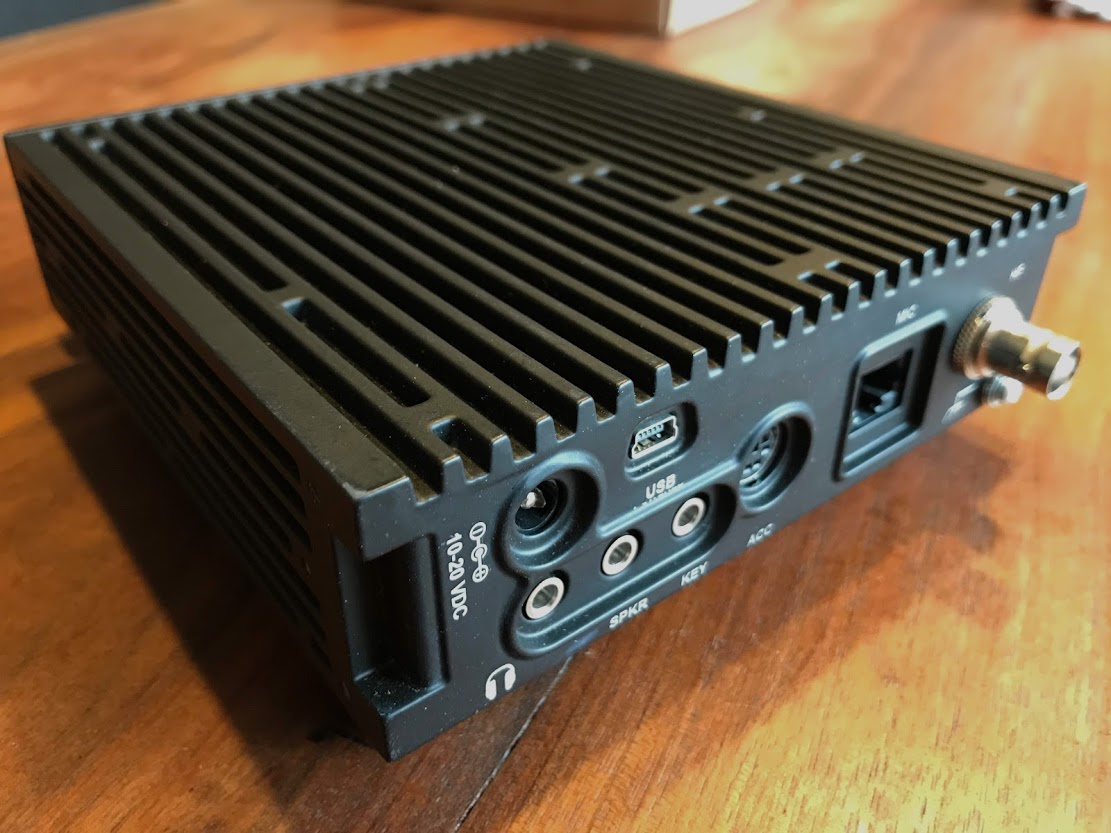
There still is no way to adjust the microphone gain control nor microphone compression on the CTX-10. Much like a military or commercial radio, the CTX-10 is optimized for just one style of mic: in its case, the modular MFJ-290MY or Yaesu MH-31A8J handheld mic.
The CTX-10 microphone input has a limiting pre-amplifier with built-in compressor and ambient noise gate–in short, the CTX-10 handles all microphone settings automatically.
Through firmware updates, a number of positive adjustments have been made to the microphone settings:
the microphone-decay timer has been tweaked so that audio clipping is less of a concern
audio clarity and gain have been improved
audio power has been improved resulting in .5 to .75 watts of additional peak power
microphone audio leveling has been improved
VOX attack and decay timing has been improved
These are all welcome adjustments.
I would note here, though, that if you plan to use a mic other than the MFJ-290MY or Yaesu MH-31A8J handheld mics, you will have a limited means of adjusting the mic parameters unless you have an external mic EQ. A number of readers, for example, have asked about using their Heil boom headset with the AD-1-YM cable adapter on the CTX-10. Boom headsets are a wonderful tool for field operation because they free your hands to log contacts. As for using boom headsets on the CTX-10, since I don’t have the appropriate adapter, I can’t speak to this. But since you can’t control mic gain, it might take time to learn how to position the boom mic and adjust your voice level for optimum performance.
CW operation
As mentioned in our initial review, the CTX-10 does not support QSK/full break-in operation. Rather, the CTX-10 uses a traditional relay for switching between transmit and receive. During CW operations, you’ll hear a relay click when switching from TX to RX and back again.
The CW hang time delay on the CTX-10 is not currently adjustable. For high-speed CW ops that prefer a faster relay recovery, I suspect this could be an annoyance.
There have been recent CTX-10 firmware upgrades that have helped solve issues found with CW keyer timing in early units. I found the timing issues were mainly present while sending high-speed CW (25 WPM+). My buddy Vlado (N3CZ) put the CTX-10 through some high speed tests, and was pleased with the results overall.
I will reiterate here that the CTX-10 lacks other controls many CW operators appreciate. Currently, the CTX-10 lacks a sidetone control; as a result, you cannot change the sidetone volume/tone, nor can you turn it off. I continue to hope that CommRadio will fix this quirk via a future firmware upgrade.
The CTX-10’s built-in CW keyer does not currently support iambic keying. Meaning, when both levers of a dual paddle are closed simultaneously (squeezed), it will not send a series of alternating dots and dashes. I imagine this could be addressed in a future firmware update.
Additionally, without re-wiring your paddle, you can’t change which side of your paddle sends ‘dits’ and which sends ‘dahs.’ A minor con, for sure–still, most modern QRP transceivers allow you this flexibility.
Revisiting the basic feature set
Let’s be clear: as I stated at length in my initial review, the CommRadio CTX-10 was designed around simple operation, like one might expect from a military or commercial channelized radio. I know ham radio operators and preparedness enthusiasts who prefer this approach to gear design, and they will appreciate this CTX-10 design philosophy.
Still, the CTX-10 lacks many of the features and adjustments you’d typically find on a QRP transceiver in its price class. Instead, the CTX-10 was designed to handle many of these adjustments automatically.
The CTX-10 still has no separate RF gain control. The CTX-10’s RF gain is directly tied to the three AGC settings (slow, medium, and fast). While I believe it does a fine job of adjusting RF gain, I do ride an RF gain control a lot during noisy summer conditions, and miss this feature.
The CTX-10 still has no passband (PBT) control, notch filter, or noise blanker––all features I’d normally expect in a QRP radio at this price level.
There are no CW (os SSB) memory keyers. I wouldn’t expect these, as I believe only the Elecraft KX2 and KX3 sport this feature in this price class of QRP radios.
Also, the ARRL lab reports of the CTX-10 are found in the July 2019 issue of QST (Bob Allison, WB1GCM) noted:
Though adequately sensitive, its third-order IMD and blocking gain compression dynamic ranges, as measured in our laboratory, are more suited to casual operation with antennas of modest gain.
Even with the AGC disabled, one or more strong, adjacent signals will result in the reduction of speaker volume, and I was unable to measure the reciprocal mixing dynamic range (RMDR).
The dynamic range was reported as 58 dB, which is a very low number. Blocking was 65 dB.
Out of his comprehensive table which includes vintage radios, the CTX-10 scored the lowest of all of them sorted by third-order dynamic range narrow spaced. It is literally at the bottom of his list: at time of posting, number 146 out of 146 tested radios. Rob concluded that an out-of-passband signal that is approximately S9 will start blocking the radio. Click here for his full notes (PDF).
The CTX-10 doesn’t really have the tool set or receiver performance to cope well with contests or DX conditions.
Please note: as with most firmware-based radios, some missing features could potentially be added in future firmware upgrades. If one of these items is keeping you from purchasing the CTX-10, please contact CommRadio and inquire.
Is the CTX-10 for you?
The CTX-10 on air at the W4DXCC conference
With the most recent upgrades, CommRadio has solved the major issues that kept me from recommending it in my initial review. I still feel there are more capable portable transceivers for the $1,000 US price.
The addition of split operation was especially key for me, as I do operate split. The more nuanced adjustments to the CW keyer, an extra feature to prevent the radio from accidentally turning on while in transit, and the adjustments to the mic algorithm, all make this radio more pleasant to operate at home or (especially) in the field.
As I mentioned in the initial review, the CTX-10 owner is one who operates casually and values averysimple, straightforward radio. Those who want a sturdy, no-frills, set-it-and-forget-it rig. If that’s you, take a closer look at the CTX-10: it may just suit your needs if you’re not planning on using it on Field Day or during RF-dense contest environments.
If, however, you’re looking for a full-featured QRP radio with many of the features and nuanced adjustments you’d expect in the shack, check out the Yaesu FT-818, Elecraft KX2, Elecraft KX3, lab599 TX-500, or the Icom IC-705. All of these rigs are excellent.
The two major advantages of the CTX-10 over competitors are:
the ability to charge the internal batteries from almost any voltage source, and
a higher TX duty cycle (without needing to add external heat sinks).
I believe the CTX-10 will have appeal for radio enthusiasts who value these characteristics:
All-in-one-box portability with no extra wired accessory components
Best-in-class internal battery life
Best-in-class intelligent battery charging
Digital modes like FT-8 and the ability to operate them in the field from internal batteries for extended periods of time
Very few manual adjustments
Broadcast listening, as the CTX-10 is also a broadcast receiver
Best-in-class hardware
The CTX-10’s overall construction and components are, as I’ve said, near mil-spec. While the CTX-10 isn’t weatherized or waterproof––no more than any of its current competitors (save the TX-500)––the construction is top-shelf, for sure. It should run for decades without need of repair.
Although I can’t recommend to the CTX-10 for serious radio operators, it is built like a tank, and has a simple feature set for field operation. It’s also designed and manufactured right here in the USA. All the better.
Long-time SWLing Post readers know that I geek out about a number of things: radio, of course, but also travel and packs. No doubt my love of backpacks and carry bags stems from my love of travel…and the need to have a radio or two along. In the past, I’ve reviewed a number of backpacks, travel pouches and cases. What follows is a new pack review.
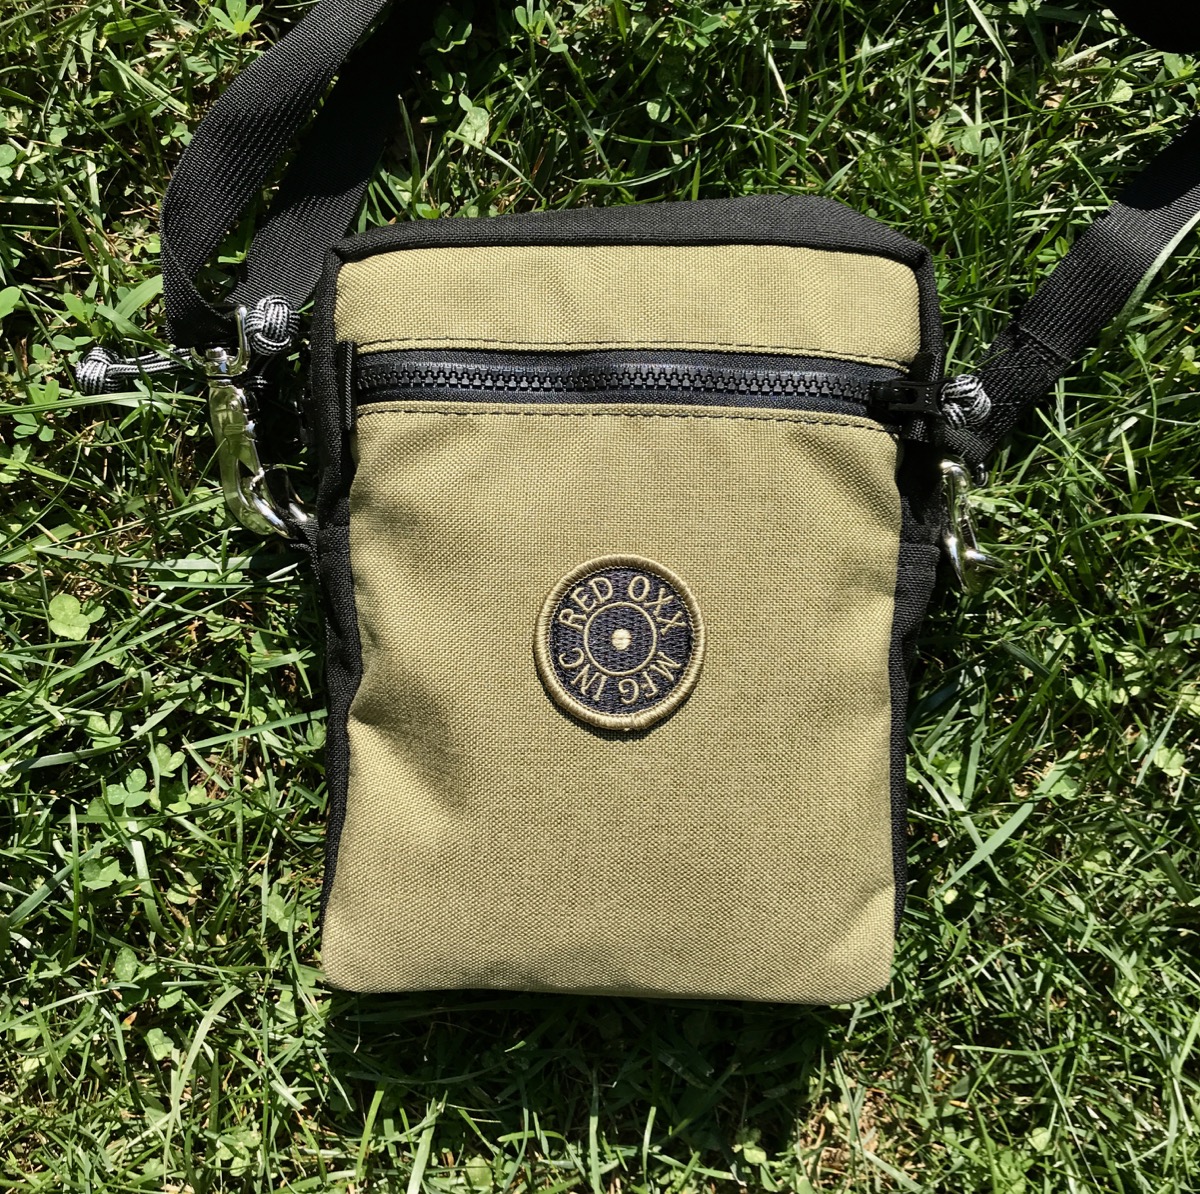
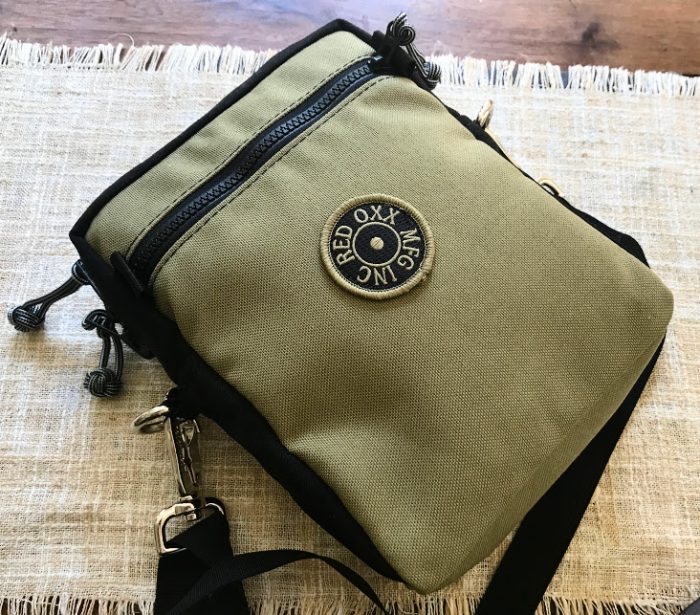
Introducing the Red Oxx Hound
Last month, Montana-based company Red Oxx sent me their latest small carry bag for evaluation and review. This small crossbody bag, affectionately known as The Hound, is made to stay by your side and carry your important gear––just as you’d expect of man’s (or woman’s) best friend.
Red Oxx is not a new name here on the SWLing Post. In the past, I’ve reviewed the Red Oxx Lil’ Roy and helped Red Oxx evaluate and review their first-generation Micro Manager pack. I also travel frequently with my Red Oxx Mini Boss, one of my favorite one-bag travel packs. I have several other Red Oxx brand accessories and travel cubes. All of which hold up very well, indeed.
Hazel thinking, “Seriously? Another pack?…Okay, I like the name, but are there any treats in there?”
In the spirit of full disclosure, this pre-production pack was sent to me at no cost for comment, evaluation, and eventual review, assuming no design changes are made before production.
So what is the Hound? I would describe it as a small padded EDC pack with a carry strap, designed to be a stand-alone, to function as a travel pouch––and/or to moonlight as a packing cube, since it easily fits inside another travel pack.
In terms of size, the Hound is somewhere between the Red Oxx Lil’ Roy and Micro Manager. It’s roughly 9” tall, 7” wide, and 3” deep, by my measurements. It’s not quite big enough to hold my Microsoft Surface Go tablet, but it holds my eReader and my wife’s iPad Mini with room to spare.
On the front exterior panel, you’ll find a zippered pocket. While this pocket isn’t pleated, the pack is forgiving and flexible, so it’ll easily hold a thick paperback book as long as the main compartment isn’t packed out densely.
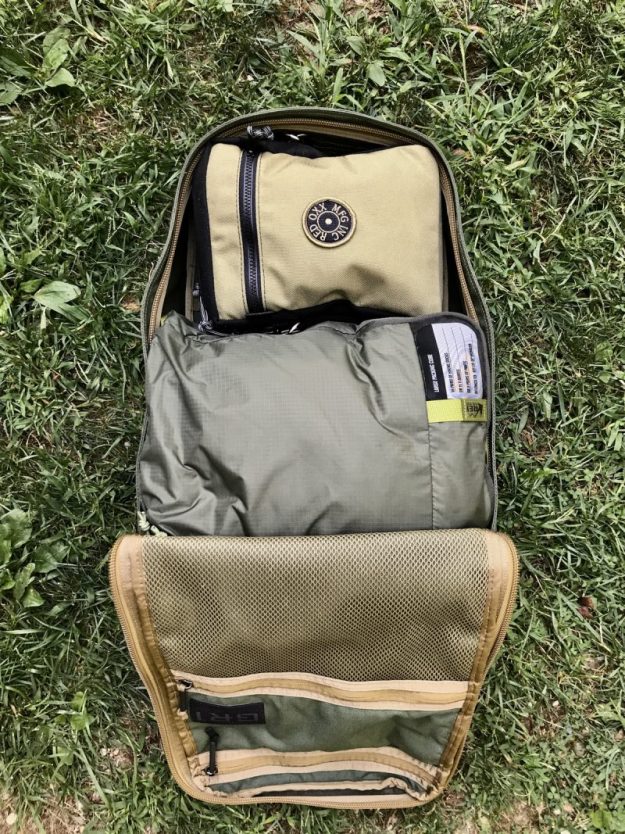
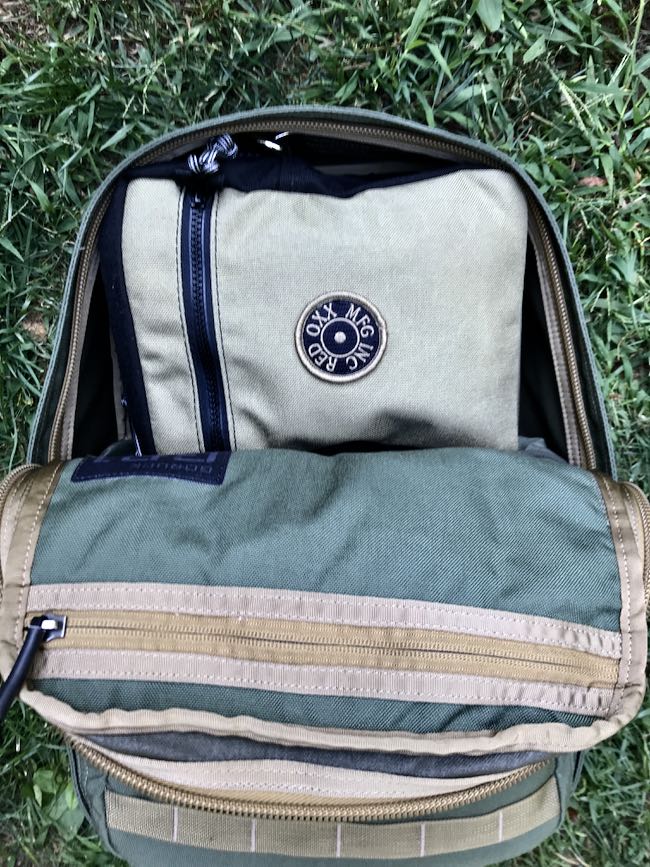
On the inside of the Hound, you’ll find one main compartment with one open pocket opposite the side panel of the external pocket.
The floor and two 7”x 9” side panels are padded and do a great job protecting contents. I like the new super-thin Hyper-Cel padding Red Oxx uses for the Hound because it gives the bag’s contents padded protection without making it too rigid, thick, or unforgiving, if you want to cram a little something extra in.
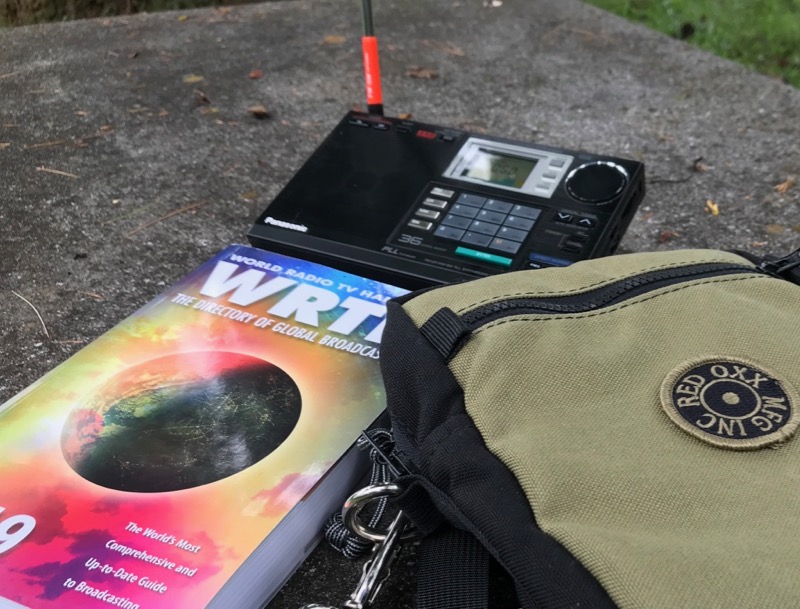
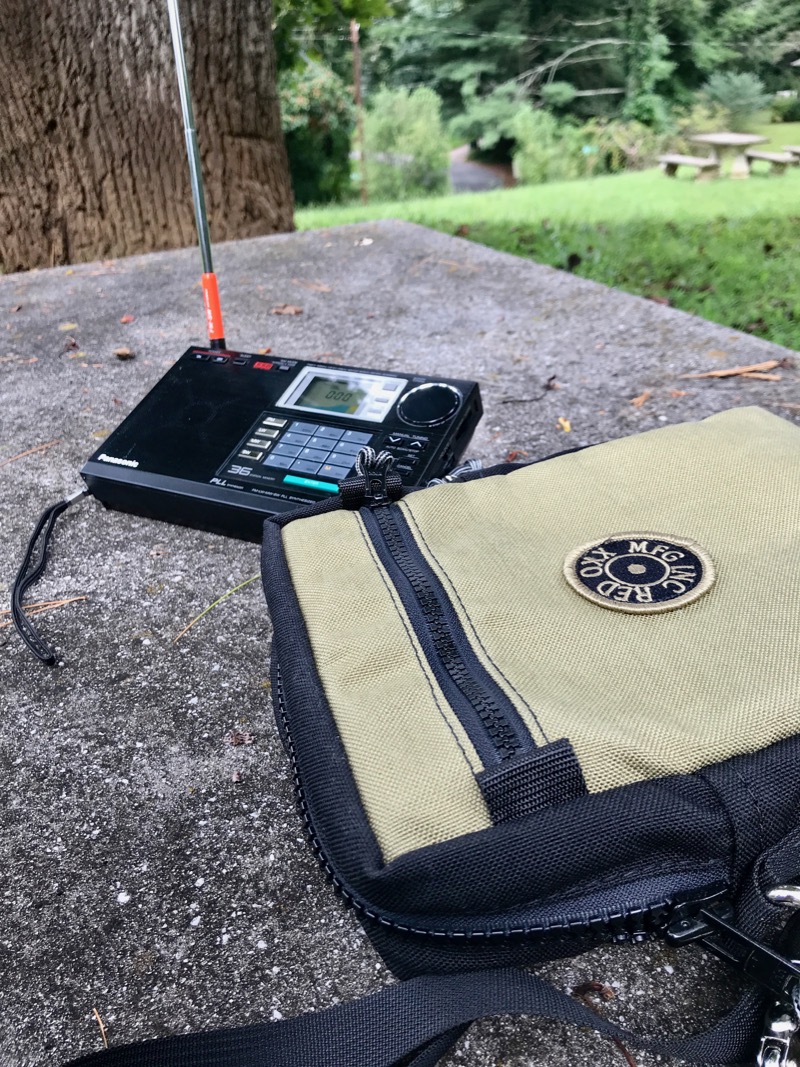
I posted a small teaser a few weeks ago when I took one of my favorite radios (the Panasonic RF-B65) and a copy of the WRTH to a local park for some relaxed radio listening. Both the Panasonic and WRTH fit inside with just a little room to spare for small accessories like earbuds, spare batteries, a wire antenna, and a snack. The radio fits perfectly in the interior open pocket and is essentially protected on all sides, save the top, which is no problem if you’re carrying it with the strap.
Like all Red Oxx packs, the Hound’s exterior sports 1000-weight Cordura nylon material that’s available in twelve solid color combos (plus 4 extra “Red Eye” colors for a limited time) . This is a proven, incredibly durable material that will surely outlast this bag hauler’s handling.
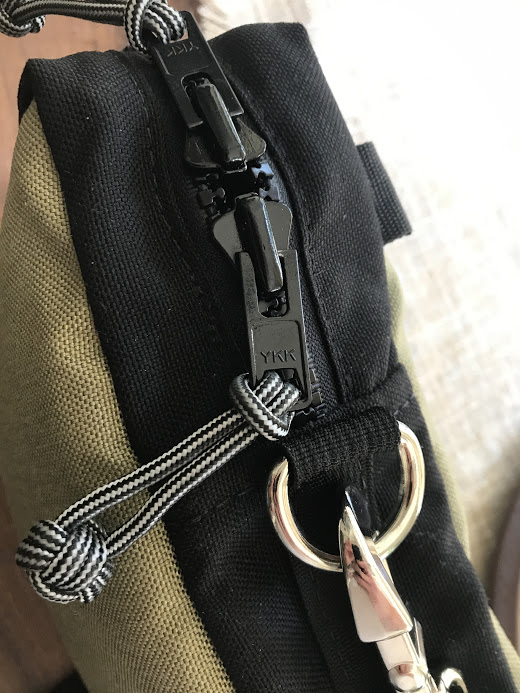
The Hound also features the Red Oxx standard #10 YKK Vislon zipper on the main compartment, and a #5 zipper on the front pocket. These beefy zipper pulls also have attached “monkey fist” knots made from nylon cording that permit easy zipper operation. The Hound is designed for and ships with a shoulder strap made of durable webbing. Two D-rings on opposite sides of the main zipper insure balance on the shoulder.
Taking the Hound for a walk
The Hound makes for a great bag to protect your portable tech, but also accommodates other items in your everyday carry (EDC).
In fact, if you’re a bit of an EDC minimalist (ahem…not quite me) you likely don’t want a full backpack or shoulder bag to carry your gear. Something the size of the Hound would make for an ideal lightweight carry companion.
Red Oxx went through a couple iterations of this bag before adopting its current dimensions; the result is an incredibly useful and accommodating pack.
The Hound packed in the top of my GR1
One function I find the Hound ideally suited for is as an in-flight kit bag. Being a one-bag traveler when I fly, I only carry one main travel pack that can fit under the seat in front of me. Having this flexibility means that I don’t have to worry about being first during a boarding call to grab that limited overhead bin space, because I know I’ll always have space for my bag.
Thing is, when my bag is stowed under the seat in front of me or especially in an overhead bin, the last thing I want to do is reach for it during a flight to grab a book, protein bar, water bottle, and the like. That’s why I always pre-pack a removable bag for the flight. When I get on the aircraft, first thing I do is open my backpack, pull out my in-flight bag, stow the pack, and keep the in-flight bag at my seat.
On a recent cross-country trip I packed out my GoRuck GR1 backpack and left room at the top to stow the Hound. The Hound made for an ideal in-flight pack. It carried my reading glasses, a book, a Kleen Kanteen water bottle, granola bars, pencil, pen, paper, earphones, adapters, my iPhone, a small battery pack, and an assortment of cables. And there was room to spare.
The Hound taking its inaugural flight on an Airbus A321!
Another benefit of carrying a bag-within-a-bag? Say you buy your kiddos or spouse some gifts, or someone gives you a cool item that you plan to carry back home––let’s say, a shortwave radio. By having a separate pack, you can always carry the Hound outside your pack freeing up capacity for the new item(s) in your pack. Since the Hound is designed to be carried over the shoulder, your hands are still free.
You could even use the strap to tie the Hound to your main bag. Since the Hound is so small, you won’t get charged extra, even by unforgiving low-cost carriers.
If you’re into radio gear, then the Hound should easily accommodate most full-featured portable radios (like the Grundig G3, G5, Satellite, Sony ICF-SW7600GR, Tecsun PL-660, etc.) It’s also large enough to hold any HT (handy talkie) on the market, although you might remove long antennas unless you close the zippers around it. No worries, no antenna will poke through this bullet-proof fabric.
And of course, women readers: the Hound would also make a great casual crossbody purse that would be as comfortable on a hike as touring a European city. In fact, after I received the Hound, my wife nearly walked off with it. I could tell, she was already mentally sorting out how all her gear would fit inside. Likely the only thing keeping her from declaring this one hers is the fact that this bag is khaki––if it were her favorite shade of Red Oxx red, I’d likely have already been forced to surrender it!
Is the Hound for you?
If this simple, super-sturdy bag is the size and configuration you’ve been looking for to haul your radios and other EDC (or, let’s face it, dog owners: biscuits and baggies) around with you, then I can recommend it without reservation.
While I truly enjoy doing product evaluations, beta testing and reviews, my time is very limited. I’m picky about what I choose to invest my time in. When Red Oxx contacts me about gear evaluations, I make time. Why? Because their products have never disappointed me.
Red Oxx build and materials quality is second to none. All their gear is designed and manufactured in Billings, Montana––yep, in the good ol’ US of A–– and will last a lifetime. Or potentially longer.
Plus: in the unlikely event your Red Oxx gear is damaged due to rough treatment (or even neglect), Red Oxx will fix it. For free…and for life! Their “No Matter What” warranty requires no receipt and no explanations. No doubt, this is one of the reasons why used Red Oxx gear appears on sites like eBay with prices near what you’d pay for it, brand new. These bags not only hold your gear, but they also hold their value: a bit of a rarity in today’s disposable world.
This top-notch workmanship comes at what most of us would consider a premium, when compared with mass-produced gear you’ll find on Amazon or a big-box store. But for me, I still find incredible investment value in Red Oxx gear. On top of that, I feel like I’m supporting a company that takes pride in their their simple-but smart innovations, their good work, and their hard-working employees who do it.
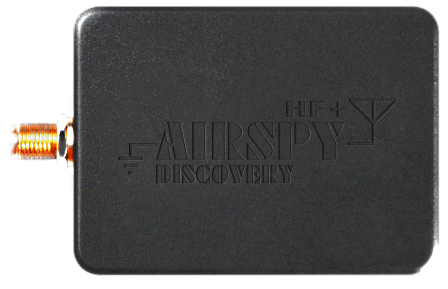
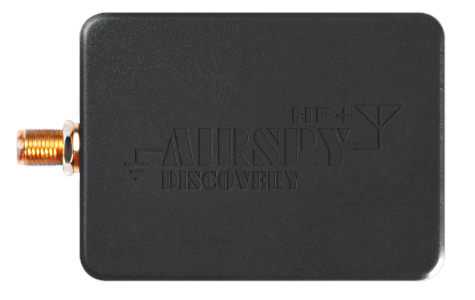
The highly anticipated AirSpy HF+ Discovery SDR has been in the hands of early adopters for about two weeks–and I’ve seen nothing but positive comments!
After a long run (2007-2013) with a Microtelecom Perseus, my SDR of choice became the Elad FDM-S2, and more recently an Elad FDM-DUOr “hybrid” SDR receiver. The two Elads have the same core processing components and identical performance when the DUOr is connected via SDR software.
This week I’ve compared the HF+ Discovery ($169) against the FDM-DUOr ($899) using Studio 1 software and identical modes & settings. The following video features the radios’ performance on a crowded daytime medium wave band from suburban Seattle-Tacoma USA.
Mode, filter bandwidth, AGC, etc. are the same for each radio
768 kHz sampling bandwidth used for both receivers
Stations tuned are:
1320 KXRO Aberdeen WA, 74 miles @ 5 kW (in-line with antenna)
1110 Oak Harbor WA, 78 miles @ 500 watts (in antenna’s null)
1040 CKST Vancouver BC, 147 miles @ 50 kW (in antenna’s null)
1430 KBRC Mt. Vernon WA, 85 miles @ 5 kW (in antenna’s null)
750 KXTG Portland OR, 118 miles @ 50 kW (in antenna’s null)
I purposely sought out signals difficult to hear in the presence of powerhouse stations. Only 1320 kXRO (in-line with my antenna) and 750 KXTG are what you might consider average or fair quality signals. Headphones are recommended for most of these, particularly 1040 kHz.
You’ll note that the pass band has been “pulled” over the edge of the carrier frequency by a few hundred Hertz. This is an excellent trick that can often reduce noise and/or improve intelligibility. It’s a feature unique to Perseus, Studio 1, and SDRuno software; it works in sideband modes and in selectable sideband Sync AM (SAM) mode.
After listening to the signal comparisons, what are your thoughts on the HF+ Discovery? Please leave your comments below.
Guy Atkins is a Sr. Graphic Designer for T-Mobile and lives near Seattle, Washington. He’s a regular contributor to the SWLing Post.
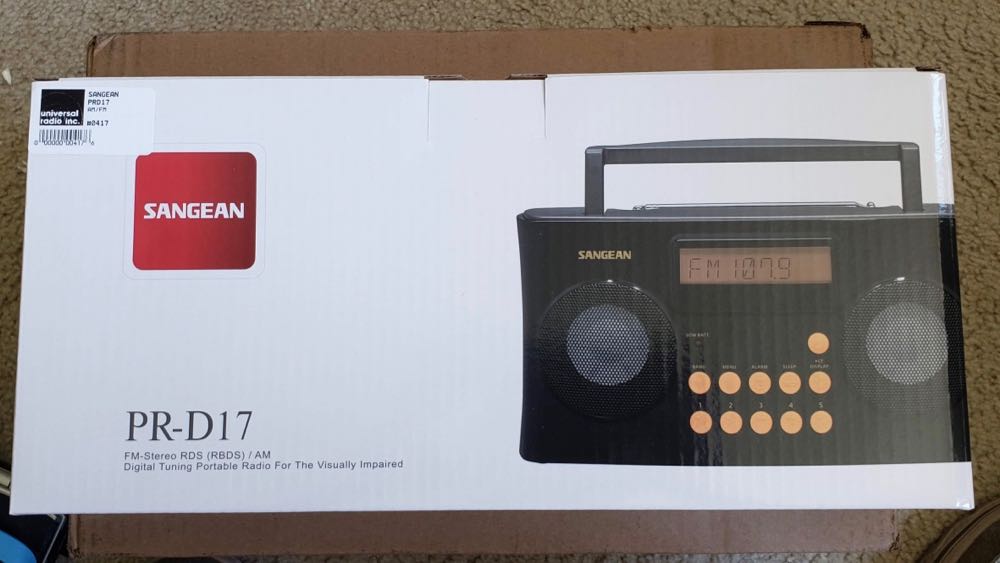
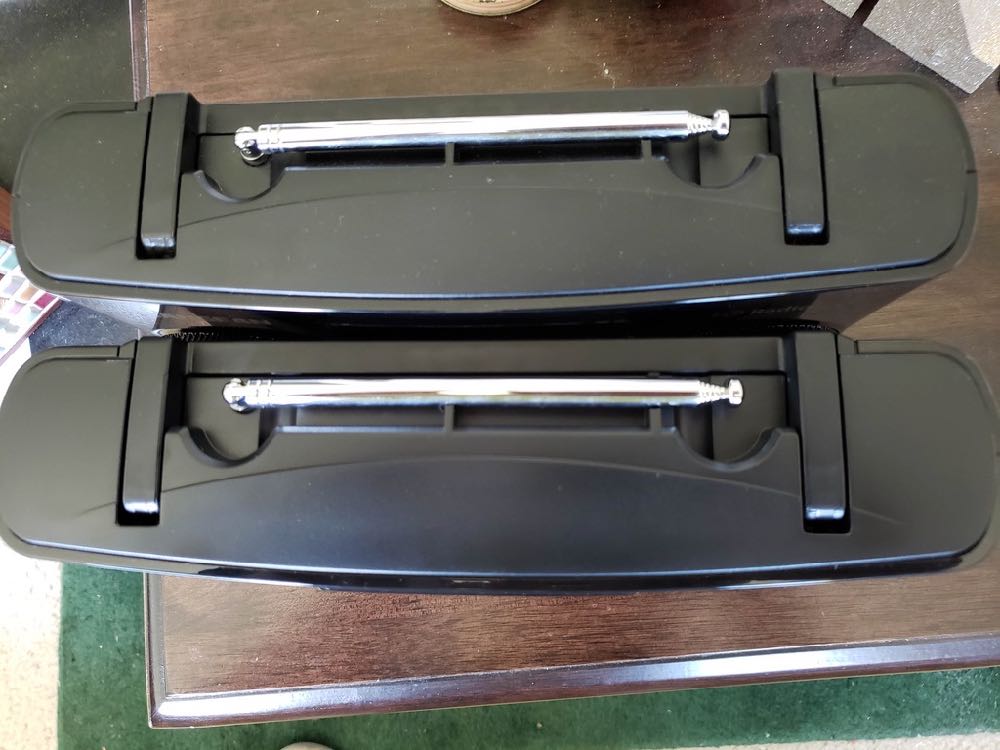
Many thanks to SWLing Post contributor and producer, Peter Atkinson, who shares the following review of the new Sangean PR-D17 AM/FM radio:
Sangean PR-D17 review
by Peter Atkinson
I’ve been visually impaired all my life and a radio enthusiast for over 40 years. I was intrigued when I learned that Sangean was offering a radio for the visually impaired. I purchased one, and wanted to share my thoughts about the Sangean PR-D17 from the perspective of a visually impaired listener.
For those readers who are mainly interested in the performance of this radio, please stay tuned, while I talk a moment about the features geared to the visually impaired.
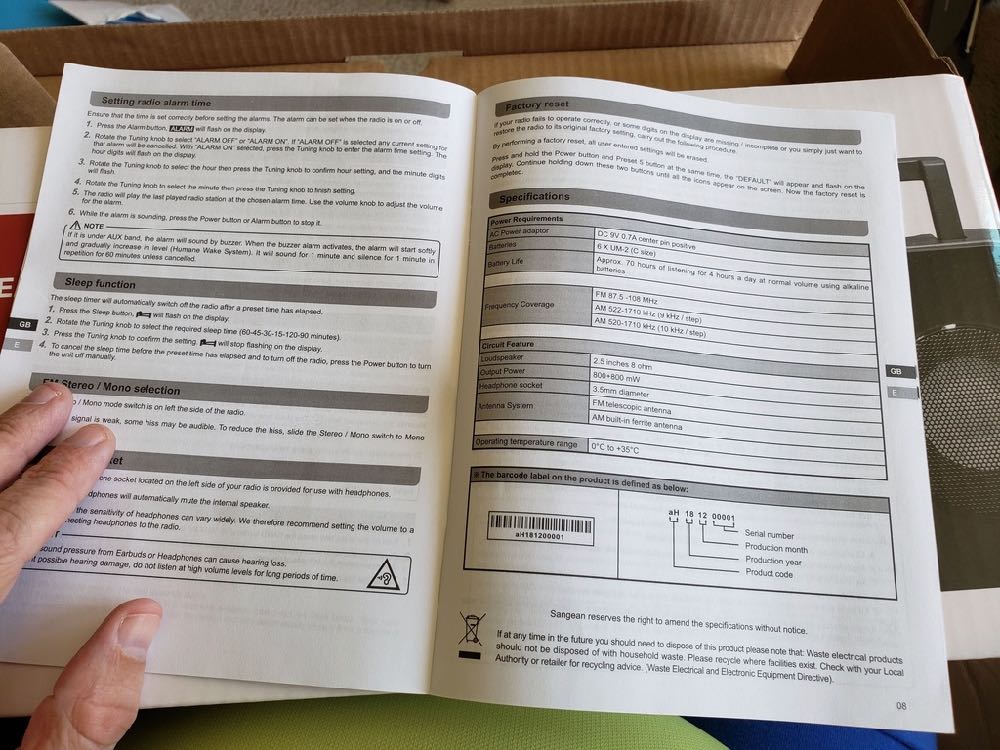
First of all: the manual, [see photo above] while it is comprehensive (as most from Sangean are), it is odd that it’s printed in the smallest type I’ve seen from this manufacturer.
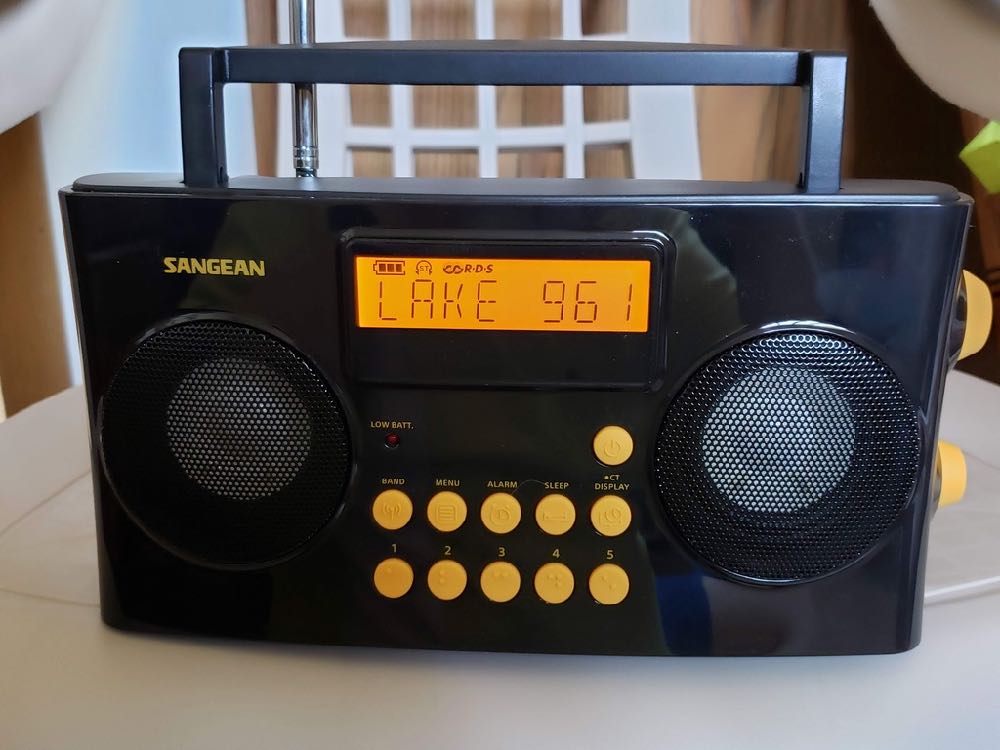
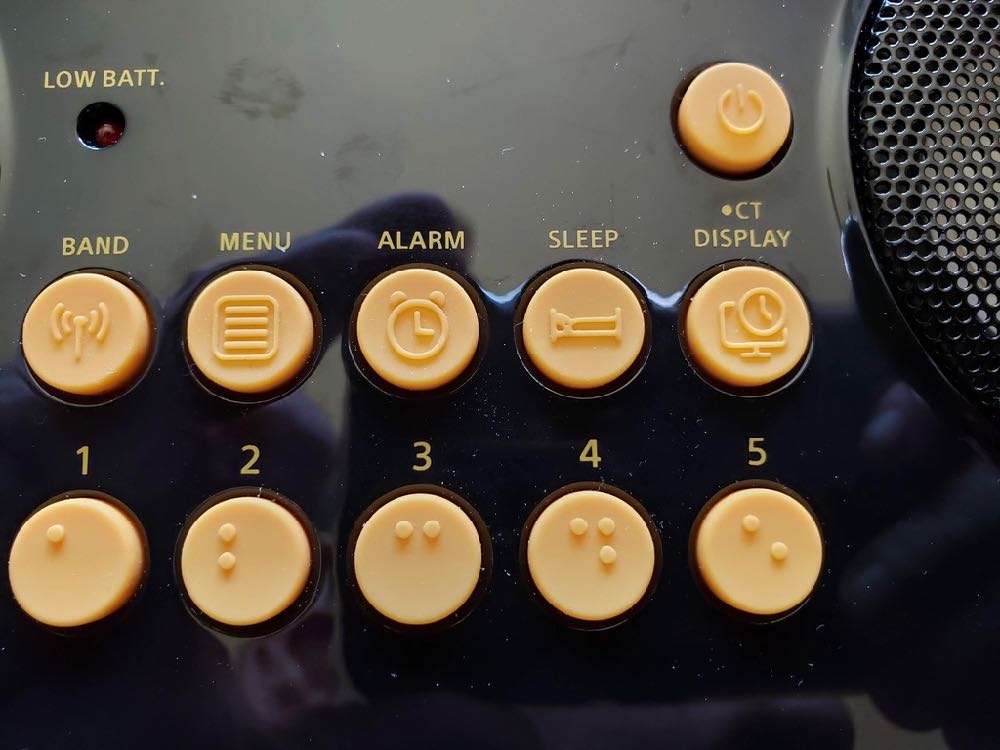
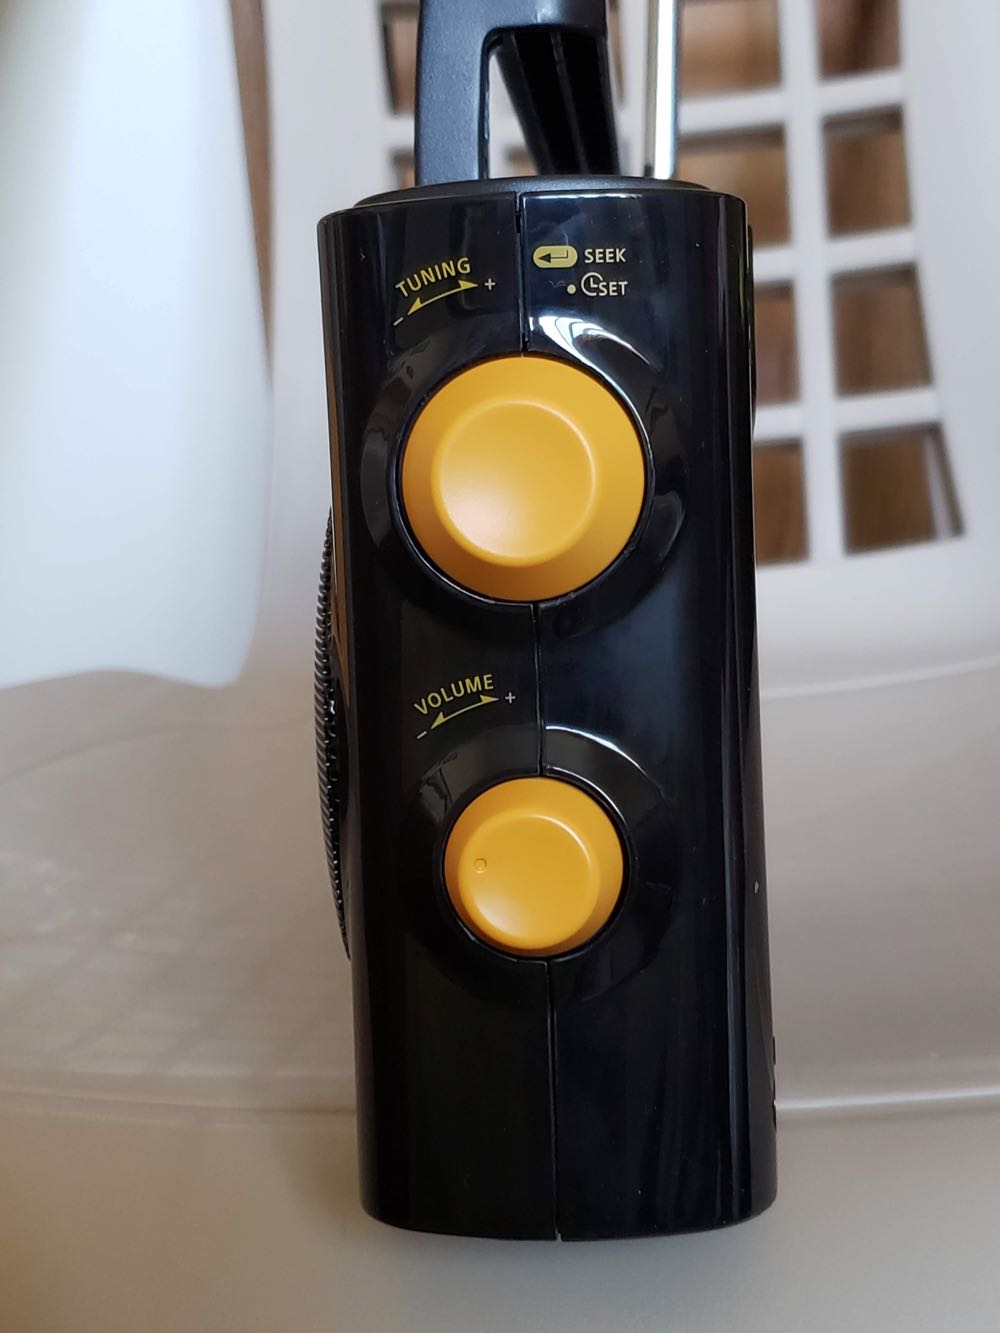
The yellow controls on a black radio are easily seen. I like that the preset buttons on the bottom row of the front panel, are in Braille. The raised symbols, however, on the upper row, may be too complicated to be easily discerned by touch alone. The yellow-on-black motif, is reminiscent of my Sangean HDR-16.
When the 6 C batteries are first inserted, or AC power is connected, the radio announces that it has entered the setup menu. The voice prompt menus (whose volume can be adjusted independently of the radios’ main volume but cannot be disabled) make setting up this radio somewhat straightforward. The setup might have been easier, if the clock setting function was available as part of the menu system. The voice prompts are surprisingly comprehensive. The voice not only speaks the frequency, time & menu options, but will also tell you when something is connected to (or disconnected from) the AC input, headphone or AUX-IN jacks.
When the radio is turned on, it announces that the radio is on, the battery level & the frequency to which it is tuned.
When tuning, the voice gives the frequency at each change. It’s especially helpful when using the seek function, knowing where the next station was found.
The same information is given when recalling a preset. One quirk of the voice prompt, is that when announcing the time, it speaks full numbers (e.g. “twelve thirty-seven’), but when giving the frequency, each digit is spoken (e.g. “one two three zero” or “nine six point one”).
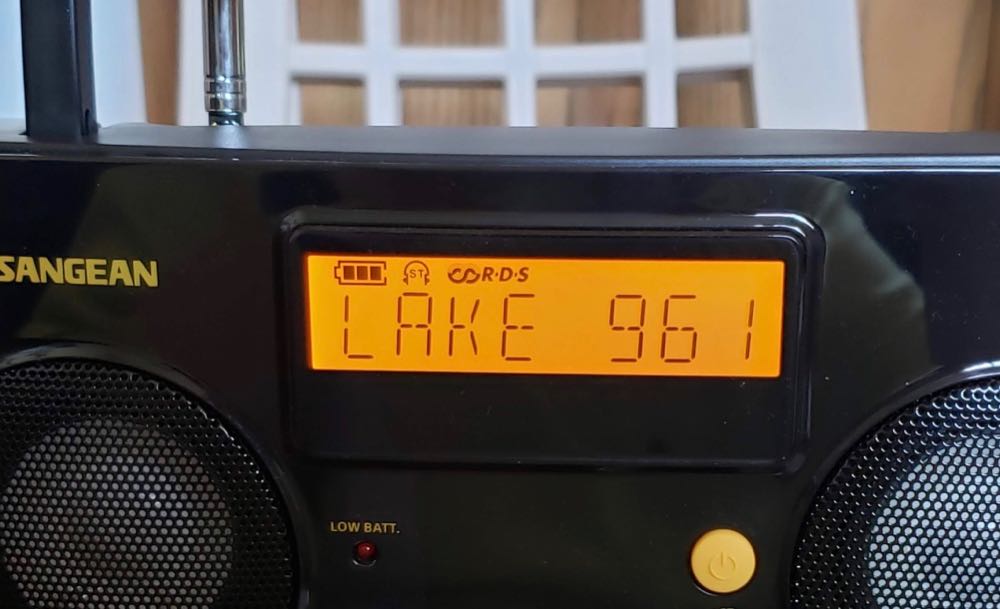
This radio is the same cabinet as the HDR-16. Aside from the voice prompts, it operates similar to the PR-D5. Therefore, I’m comparing its performance to that model. Like the PR-D5, the AM tuning steps can be set for 9 or 10KHz, but the FM tuning steps are fixed at 100KHz (0.1MHz).
There are 5 presets per band. The display also shows RDS information for any FM station that transmits RDS. The clock can be set from the RDS signal, as well. I’ve found several stations, in my area, that are sending the wrong time.
Audio
The sound from the twin 2-1/2” speakers is very balanced. The bass is substantial, but not overpowering. The highs are good for definition, without being too brassy. There are no provisions for customization, though.
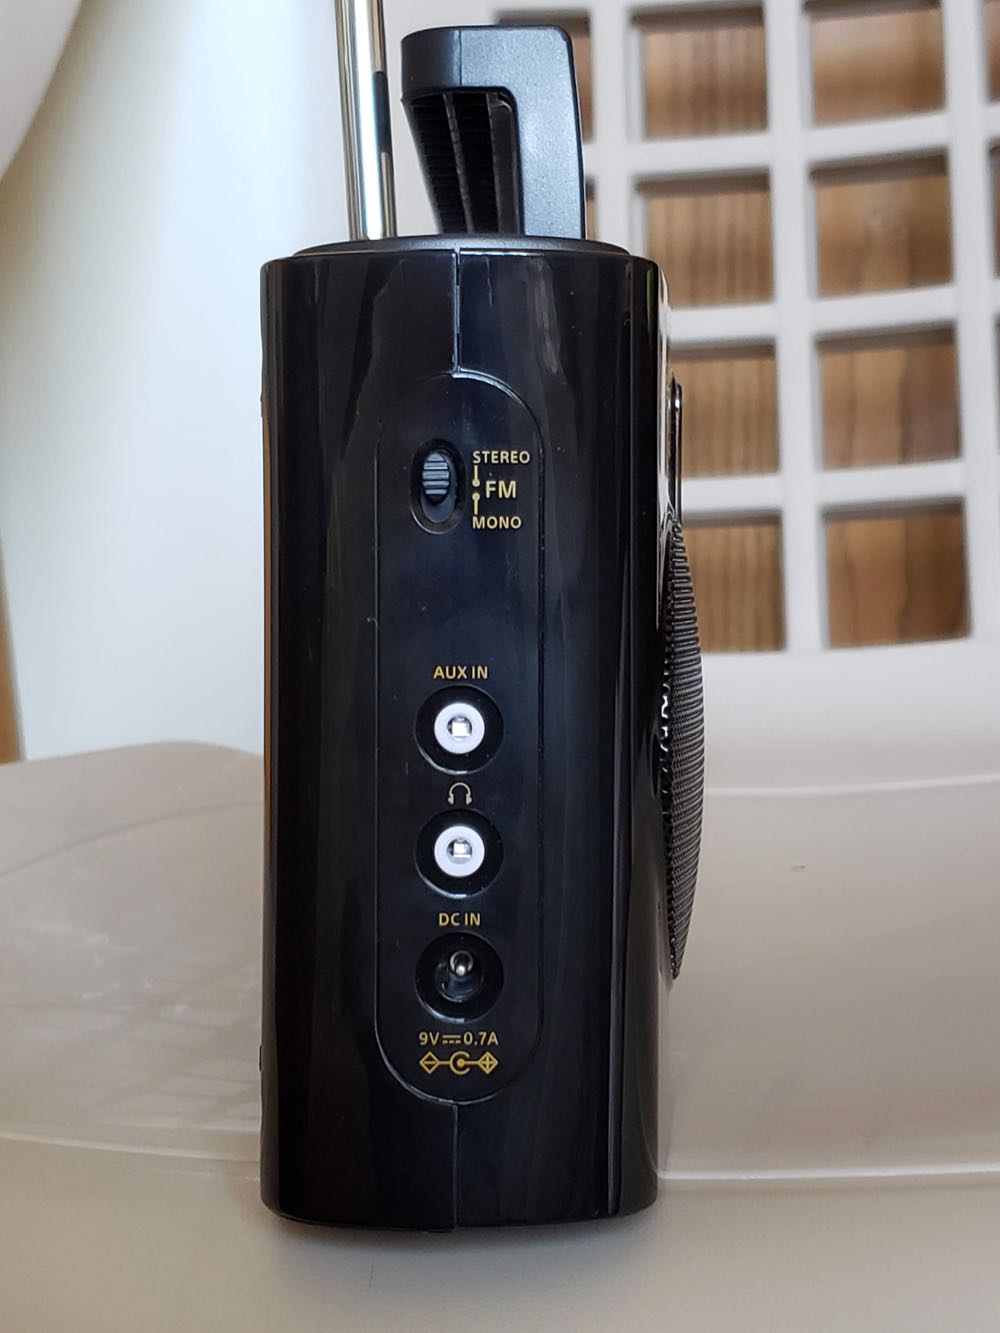
There is a 3.5mm AUX-IN jack for connecting an external sound source, such as an MP3 player or smartphone.
AM
While the AM sound is a bit muffled for my taste (the bandwidth cannot be changed) it makes for excellent selectivity. There was no hint of my nearby 50KW 620, on 610 or 630. Like many Sangean radios, the noise floor is very quiet. The long 200mm internal ferrite bar antenna does a superb job at snagging those weak stations. I was able to get a noisy, but readable signal on a 50KW station on 700, at 350 miles, during the day. That one is my benchmark for a great DX machine. The top end of the band is no slouch, either. Another benchmark station (10KW 1690 at 75 miles) came in loud and clear. The long ferrite antenna also helps to better null unwanted signals. This is a greater benefit for nighttime DXing.
FM
The PR-D17’s performance on FM is stellar. It has shown to be very sensitive, pulling in stations as well as my PR-D5 & PR-D9W. I easily hear FMs at 60 miles. The selectivity is also amazing. I can listen to stations on 95.9 & 96.3, with a 6KW station on 96.1 less than 10 blocks from my window. Even though the PR-D17 pulls in those weak stations with ease, it requires a stronger signal to receive stereo.
The RDS is quick to display station information. It starts off by showing the 8-character PS information of the RDS signal, then switches to the scrolling display of the RT segment.
Summary
Overall, I am very happy with the Sangean PR-D17. It is a superior radio, now with the added benefit of voice prompts. Hopefully, this will alleviate some of the annoyances visually impaired listeners may have with operating a digitally-tuned radio.
Thank you so much for sharing your review, Peter and thank you for being an SWLing Post producer!
It looks like the Sangean PR-D17 is an excellent choice for those radio listeners who would appreciate voice prompts, high contrast controls and tactile keys. I’m also happy to hear you rate AM selectivity as excellent. When radios only have one chosen bandwidth, I’d rather give priority to selectivity than audio fidelity for the purposes of nighttime AM DXing.
Fernando Duarte of Fenu-Radio has just posted his review of the AirSpy HF+ Discovery SDR prototype. I trust Fenu’s reviews because they’re always thorough and based on actual listening sessions.
In short, he’s quite impressed with the prototype. In many instances the Discovery outperformed his benchmark Winradio G33DDC Excalibur Pro. Quite an accomplishment for a $169 SDR!
I will evaluate a first production run AirSpy HF+ Discovery. Since it’s incredibly lightweight and compact, I believe I’ll try to even build a small portable SDR station around it. Stay tuned.
Many thanks to SWLing Post contributor, 13dka, who shares the following guest post and review:
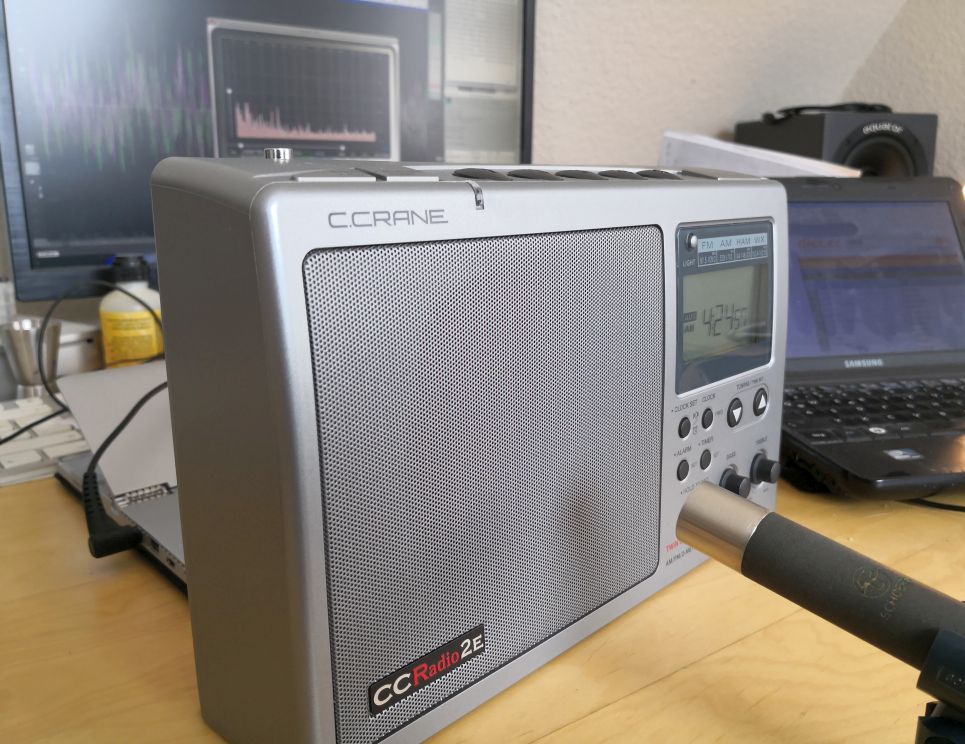
Do I really need this radio? A very belated review of the C.Crane CCRadio 2E
by 13dka
Ever since my relapse into radioholism a few years ago, I had a craving for a top-notch medium wave radio. This became even more of an urge when Germany abandoned the AM BC band just like many other European countries, leaving a band full of new opportunities but little left to receive during the day, at least with all the average portables I own. When checking the options, there’s no way around Jay Allen’s website if you want to know what’s best on MW, and I learned how little choices there are on the summit of the “5-star”-radios. Over the years I kept looking for an RF-2200/DR-22 et al but they are few and far between over here, and buying a dusty old radio with an unknown history, likely in need of repairs, restoration and alignment, for an insane premium price (up to 400€!) from a stranger was not exactly a pleasant prospect for me.
The CC Radio 2E and its predecessors, successors and siblings are the only radios in the topmost 5-star bunch that can be bought new and at a reasonable price. Sadly, the best product for the European market is only a 4 1/2 star radio and I realized that I have to buy a radio clearly made for the USA only, and accept the parts that don’t make any sense over here (120V, 10kHz AM spacing only, WX band). The problem: getting one shipped to Germany was rather complicated until Amazon.com made that much easier last year.
Performance comparisons
AM Broadcast Band
After 2 weeks of gleeful anticipation it finally arrived last month and I rushed to the mall to buy plenty of ‘D’-cells, then to the dike to answer my own, most pressing question: “how much better is a top tier Jay-Allen-5-star radio than my average 3-star radios anyway?”. I wasn’t sure what to expect from the 2E, partly because the videos I could find compared it with other good AM radios, or they didn’t compare it at all and sometimes the radio didn’t even get turned on. Nothing really related to the radios I have, after all they represent a whole bunch of popular radios people currently own with a similar (around average) AM performance, like the Tecsun PL-nnn, Eton Executive Satellit or Field, or ICF-7600, Zenith TO/R-7000 to name a few older types – and I was looking forward to fill that gap!
Sensitivity
Spoiler alert: the CCR2E’s sensitivity obviously bests all of my other portables. Duh! It should, because my example of the PL-660 isn’t good on AM at all, the XHDATA D-808 [read my full review here] is a 2-1/2 star radio and the Tecsun S-8800 [read my full review here] is a 3-star radio on the “Jay Allen rating scale”, even though I’d rate my examples of these radios the other way around – my D-808 has a tiny sensitivity edge over my S-8800.
So how much better is it? Here’s a cellphone video letting the radios speak for themselves, alas with plenty of wind noise (sorry, it’s usually windy here at the coast!). Make sure you watch it past the somewhat unspectacular first minute:
I hope you’ll agree that this is pretty impressive, and that’s the kind of results I was hoping for. There’s also a simple way of quantifying how much better it is in numbers: if I tune across the band in the afternoon and note all frequencies that clearly show signs of a station (not counting how well it comes in, just the pure existence of some signal that can be identified as “broadcast station”), the D-808 has 11 frequencies populated, the CCR2E has 25. That’s more than twice as much, the 2E has twice as many stars, sounds about right. Let’s also keep in mind that the XHDATA or the Tecsun represent “average”, “serviceable” or “decent” AM radios that are quite satisfactory for most people, and yet there is apparently a whole world between an average radio and the top of the heap. To be honest, I didn’t expect how dramatic the difference would turn out.
That made me curious how my battered old Grundig Satellit 400 would do, after all it was always a tad better than the other portables I have (Jay Allen might rate it 3-1/2 stars), and MW is the only thing in it that still really works. I decided to buy it the last bunch of batteries of its life and took it to the dike:
Evidently the Grundig is a bit more sensitive than my other average radios but without much benefit. Stations with some appreciable level turn out a bit better but it fails at the same stations as the other radios and the C.Crane unsurprisingly runs circles around the Grundig as well. The first and the last station recorded in this video demonstrate that nicely – my favorite low power benchmark station (1602 kHz) transmitting with 100W from a moored old pirate radio ship was just making it over the noise on the S-8800 in the previous video. The Satellit picks it up OK but with more noise. The last station is the BBC transmitter in Redmoss (Aberdeen, Scotland), which is pretty crystal clear on the CCR2E while the Satellit has only little remnants of modulation and the D-808 is at least on par with the Satellit there. That station pretty much didn’t exist on the S-8800 in the previous video either and I wish I’d know why this example turns out so extreme, why the 2E and that station like each other so much.
The closest stations in these videos are in The Netherlands, 150+ miles away and have only 100W, most of the UK stations are between 350 and 420 miles away (most of them not very powerful either), Scottish stations are around 500 miles from here and the Redmoss 2kW BBC transmitter on 1449 kHz with its beautiful signal is 490 miles. Given that this is daytime groundwave reception with no help from an external antenna, I consider this pretty darn impressive. But keep in mind that a part of the impressive results is due to the low noise location and the conductive North Sea water being only 50m from my position behind the dike, then stretching most, sometimes all of the distance between the radio and the transmitters, which definitely helps groundwave propagation a lot.
To put the benefit in some more practical metrics – my average radios pick up at most 3-4 stations in a halfway sufficient quality for continuous listening during the day, the 2E makes that at least 8-10 stations. While sensitivity is playing a somewhat lesser role at night, it’s pure fun to browse the band and discover stations that didn’t stick out of the noise enough in the past. It is undeniably an exceptionally sensitive and stunning AM receiver.
Selectivity, overloading resilience
The 2E has a wisely chosen single bandwidth more on the narrow side. Given the intended purpose of this radio, I think one can live very well with the “one size fits all” setting and the intelligibility remains excellent. At night when the band is getting crowded even over here, the 2E has absolutely no trouble separating the channels.
Other reviews mentioned that its dynamic range may not be sufficient to cope with local blowtorches and I’m sure that this is true. I don’t have local blowtorches, but I tried coupling wire fences between 200 and 1000m (600-3,000′) to the loopstick antenna, and it could cope with those arrangements better than the S-8800 and the D-808: at night, both of the latter present some roar between the stations on the lower end of the band (which is of course mostly intermodulation products). Both radios then need some looser coupling from the coupling coil, on the the S-8800 I can also lose the preamp stage (“local” switch) to mitigate this, the D-808 can’t do that and has the most problems with images, for example clearly discernible images from the top of the NDB band just 100 kHz lower in the same band.
The CCR2E stays pretty quiet on the few frequencies the fence antennas leave unpopulated. In other words, its frontend may not be as good as the one in some vintage receivers, but it still takes more of a beating than e.g. the Tecsun S-8800 with its improved (over the PL-880) frontend.
AGC
Lacking really strong signals, I can’t comment much on all of the AGC action but I too think it doesn’t pull up weak signals as much as other radios. That makes the 2E appear even less noisy between stations, but being desperate to catch some transatlantic DX before sunrise (yawn!) despite the season being over, I found myself a few times with the volume knob turned up all the way to the right stop on some quiet channels, while the band was filled elsewhere with considerable signals from that 3,000′ fence. The time constants are more on the slow-ish side, thunderstorm impulses make the signal dive away for half a second and it seems to struggle with weaker stations that come with a fast fading. SDRs with fully adjustable AGC characteristics sure have spoiled me.
FM Broadcast Band
Sensitivity
FM sensitivity is excellent in all of the portables I have (S-8800, D-808, PL-660) and the CCR2E can match their performance, there are generally only very little differences between all those. As mentioned in my S-8800 review, I found its sensitivity can’t fully match the PL-660 and the D-808, even though it employs the same DSP chip type as the D-808. I briefly compared the CCR2E with the S-8800 on FM (simply because both are big radios, and I guess I wanted the 2E to win this too).
Comparing portables on FM is a bit of hit and miss though – you need to find borderline weak stations to begin with, and then you have to make sure each radio’s whip antenna is adjusted for maximum signal, and you need to put one radio at a time on the table, because otherwise the whip antennas can interact with each other and make it hard to find the optimal antenna postion/tilt/rotation. When I tried the CCR2E at the dike, a complete lack of tropo conditions limited the number of test stations a lot, and the remaining stations were not really weak enough to find a clear winner among the two. Both radios were on par most times, sometimes it felt like once the 2E gets a bit of signal it will present it a tad less noisy than the S-8800.
But then a very borderline faint Dutch station on 88.1 MHz made it over the North Sea with much noise on the S-8800. No matter what I tried with the 2E (antenna gymnastics, raising, repositioning, lifting up and tilting the whole radio and swearing at it), it picked up nothing at all. That looked much like the 2E is actually less sensitive than I thought, but as it turned out later there is a much happier explanation for this:
Selectivity
Since the day I got it, I had the impression that the 2E has a narrower FM filter than my other radios. Tuning 50 kHz next to a weak station makes it almost disappear and 200 kHz off a local station gave me much hope for letting a weaker station pass unharmed. Now when I checked the station listings for my Dutch mystery station on 88.1 MHz it turned out to be very unlikely that I received the station listed there for 88.1 – “Radio 10” in Hilversum has only 3 kW and is a bit too far away, without any tropo help anyway. What’s way more likely is that I actually heard the much closer 60 kW “NPO 2” transmitter in Smilde on 88.0, that is, its upper sideband on 88.1. To understand this you need to know that Dutch (and AFAIK French) FM stations like to plow their channels with some rather hefty FM deviation unknown in Germany. The wider filter of the S-8800 picked up so much of that extra-wide deviation that I could identify the language. I could not hear the station on its actual frequency 88.0 MHz either, because a much stronger local station on 87.9 was whacking it.
The CCR2E just didn’t pick up any of the surplus deviation from 100 kHz lower, which is a quite striking evidence for a narrower filter (<200kHz), and this might also explain why it appears more sensitive when it picks up some weak station – a narrower filter means a better SNR on FM. I did not read Jay Allen’s “FM shootout” (where the 2E is the topmost radio as well) before tried the radio and I’m not sure yet if I’d put it above all other radios too. But it’s very safe to say that the 2E is likely about as sensitive as all of the contenders in the very crowded 5-star class in the “FM shootout” and its selectivity might be giving it an advantage over other radios. Too bad such a good performer on such a short antenna doesn’t have an external FM antenna input and RD(B)S.
2 Meter – VHF and Weather Band, SSI
Short story, there is no NOAA WX band in Europe, and my local 2m repeaters don’t even seem to transmit their ID every 10 minutes anymore like they were supposed to do in ye olde days, maybe they’re gone. Analog VHF ham radio has ceased to exist around here and if we’d have some catastrophic event, all a 2m receiver could do to help you is emitting some soothing white noise.
I will use this section to talk about the signal strength indicator on the CCR2E instead. With 12 discrete bars it has a better resolution than e.g. average portables, which often try to look like they had even more bars but actually have 5 sections of 4-bar groups, in other words they just have 5 real bars. The better resolution of the 2E is certainly helpful, for example when you pair it up with some kind of tuned external antenna – but it seems to indicate levels with some delayed response and that ruins it a bit.
Sound
The 2E has a quite satisfying bass and treble response for music listening on FM (if you turn up the controls). It has the biggest speaker of all of my portables and creates some audio that rather reminds me of a small home stereo than a portable radio. However it doesn’t have the power to really do “loud” and the bass may run out of breath and distort pretty soon on some music styles.
For a few days I couldn’t quite put my finger on why it didn’t put that much of a smile in my face like the S-8800 or my old Satellit 400 do, and I remembered the quite controversial ratings of the 2E’s sound I had read. I felt that it doesn’t have that special “big portable” in-your-face bass sound my other big radios have, a sound that was burned into my eardrums by all the big Grundigs and Nordmendes I had since when I was a teenager.
The answer might be quite simple though: the 2E has a much wider frequency response than those radios, it actually reaches down lower and the treble range is also extended. What we (OK, at least I) perceive as that “warm” and “big” sound in those old portables is actually “pseudo-bass”. Pseudo-bass is a psychoacoustic effect that tricks our brain to perceive louder and fuller bass when actually only the first harmonics (typically one octave higher) of bass instruments are heard, for example because the speaker is too small to actually render the fundamentals, with the “bass” tone control boosting the harmonics instead. The 2E sounds more like a small 2-way hi-fi speaker and tries to do “real bass” rather than pseudo-bass, which is much more demanding in many ways. Pseudo-bass is also much less depending on automatic loudness correction at low volumes, so the 2E seems to lack bass at “bedroom” volumes sometimes, compared to the Tecsun or the Grundig. Though once a station plays the right music and the 2E is turned up a bit, it’s getting quite obvious that it can sound even bigger than those other radios.
On AM the CCR2E can even produce too much bass that needs to be dialed back: like talk radio dominates the US AM band, its EU pendant is still reigned by pop/rock stations (usually employing lots of signal processing for extra-fat sound). On those stations, the CCR2E can be bassy to a degree where the bass is almost sounding detached from the rest of the signal, as if it’s coming from a different, stronger station. It’s a more boomy, “wet” or maybe a hint less “musical” bass sound, this is rather a wordy description of impressions and not a complaint though. It just doesn’t massage my auditory cortex the same way the other radios do, which is of course a matter of taste and “getting used to it”.
The tone controls are modern and efficient like the ones you find on the S-8800 – compared to my old Satellit, they have a steeper roll-off at well-chosen cutoff frequencies so you can eliminate just the hissy top end in the treble range or remove all that rumble below 200Hz, leaving the midrange in between untouched. On the positive end of the knob range, they just add deep bass and a nice clarity on the top, as if the 2E had a tweeter.
So it does sound great and I can see now why the successor radio, the C.Crane Radio 3 got upgraded with Bluetooth. But the 2E is a great powered speaker as well, it has an AUX input radio nuts can use to boost the audio of an SDR connected to a laptop or a small SW portable to the same level of fidelity. The manual claims that the 2E has a battery endurance of 250 hours, which would mean it should serve all day for at least a whole week as an awesome powered speaker for your other radios out in the woods, and it even might become the best speaker (with very useful tone controls!) in your home shack. This works so well that I deem this a serious (and perhaps often unconsidered) asset.
Quirks
One thing I don’t like a bit is a strange scratchy narrowband distortion that seems to come up within a certain level range. It’s independent from the station, the frequency or the noise on it (and not to be confused with multipath distortion), it’s showing up across the band and is solely depending on the input signal as it seems. It doesn’t affect stronger signals (so there shouldn’t be anything overloading) but if a station hits a certain low signal level it’s quite permanent and also quite disturbing, if there’s fading the noise will come and go when it passes through that level range. The only way to mitigate that prickly “frying pan” sound is turning the treble knob all the way down. I don’t know if that’s a bad case of demodulator distortion or some AGC related malfunction and for some reason beyond my understanding (strong out-of-band signals playing a role maybe?) this does not always happen. Still a bit of a fly in the ointment.
A rather harmless little quirk I (among others) found is happening when I recall preset stations on AM: under unknown circumstances the 2E will not tune the antenna properly so I need to change the frequency and tune back to get full signal. I assume that the coil tuner setting is saved with the preset, and when the environment of the loopstick changes (like when you saved the preset at a different place), the saved tuner setting does not fit anymore. Retuning, then saving the preset again should fix that.
Rather fast fading can have a similar effect on the tuning process, if I tune and retune to such a station, I may end up with different signal meter readings and volume every time – it seems that the integration time window used to automatically tune to peak signal can be too short in relation to the fading speed and that may lead to a less than optimal match of the coil. Admittedly, tuning to peak signal on fickle stations like that is just as hard for a human being. Since the tuner seems to rely much on locking onto a carrier, offset tuning (e.g. like DXers often do to optimize reception of a station with a strong channel neighbor) may not work as well as with regular receivers, signal and volume can drop quite dramatically when tuning 1 kHz to the side, and it sounds like this is bad for the SNR too.
My example of the 2E has a “birdie” between 99.7 and 100.0 MHz, which luckily doesn’t make any noise on FM. It doesn’t seem to harm reception much (if at all), I can still get a rather weak Danish station on 99.9 MHz but I can’t tell what effect it has on stations on the other affected frequencies.
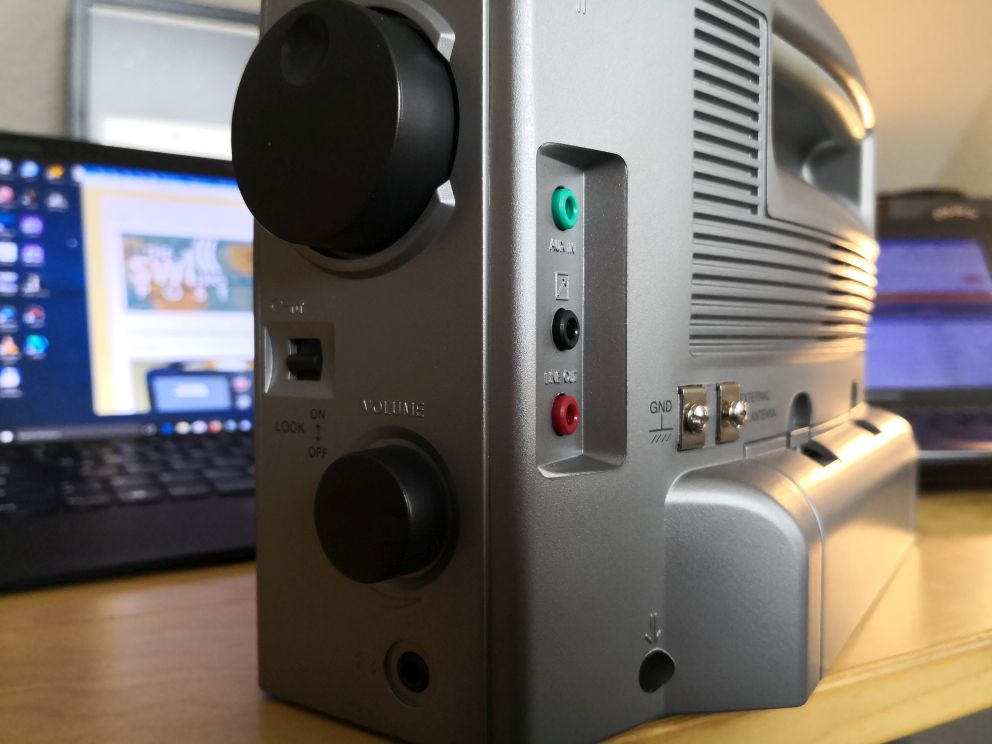
External AM antennas
This is not a quirk, it’s rather a design decision I deem not working anymore in many (if not most) of today’s homes, or simply an oversight: the CCR2E is yet another radio that has screw terminals for an external AM antenna but no means to take the internal loopstick out of the circuit. This is not a problem as long you are using radio and antenna in an electrically quiet and interference-free environment, in which you may not even need an external antenna because the CCR2E is such a good performer. If you want to use one anyway, the 2E will benefit only from antennas with considerable gain, very lossy designs that trade gain for low noise and high SNR (like BOG, LOG, EWE…) may not even leave a clue of their existence on the 2E.
If you live in the city, in an apartment building, a crowded neighborhood or just a modern home and want to let your family use computers, appliances, switching-type wall warts and so on while you listen to distant stations, an external antenna may be the only way to enjoy the radio’s performance but even an antenna with lots of gain will not help getting rid of the hash and noise of the digital world. It may increase the signal a bit to improve the SNR, but the noise level will stay the same because it’s being picked up and added back by the internal loopstick. I think that any ambitious modern receiver should take the ever-worsening noise situation into consideration. Paradoxically, back in the 50s and 60s local noise was much less of an issue but a lot of radios had switchable loopsticks. They were all tabletops though and to be fair, I know only one portable radio with that feature (and that’s a scanner which sucks on AM).
The hardware
First off, using this radio is generally very straightforward. The only thing I needed to learn from the manual was how to keep the frequency on display, which is only possible with newer versions of the firmware. My radio was manufactured in January 2018 and it has this option, plus an updated version of the printed manual, now describing that (and the antenna calibration) procedure. (Just hold the “Clock” button, then immediately hit the ‘1’ memory button on top. The radio should emit a beep and from then on the display will show the frequency.)
You may want to think twice about buying the “Titanium” version of the radio. The product photos on Amazon were showing the radio with somewhat different and darker hues between grey and champaign, so I spontaneously decided to not buy yet another black radio. What I pulled out of the box was blindingly silvery and yelling “plastic” though, so don’t let any pics fool you – “Titanium” is just a fancy name for the same old standard “light grey-ish/silvery plastic” seen on a billion products from the Far East in the past 50 years. A matter of taste of course.
If it wasn’t obvious to everyone already – this bulky radio is more like a “portable tabletop”, it’s only little more “portable” than a big old Transoceanic or Grundig Satellit with a broken handle. New radios get lighter and lighter even when they get big (like the S-8800), the CCR2E brings gravity back into the game, so on the plus side it will stay put on the table when you push a button, or when there’s an earthquake.
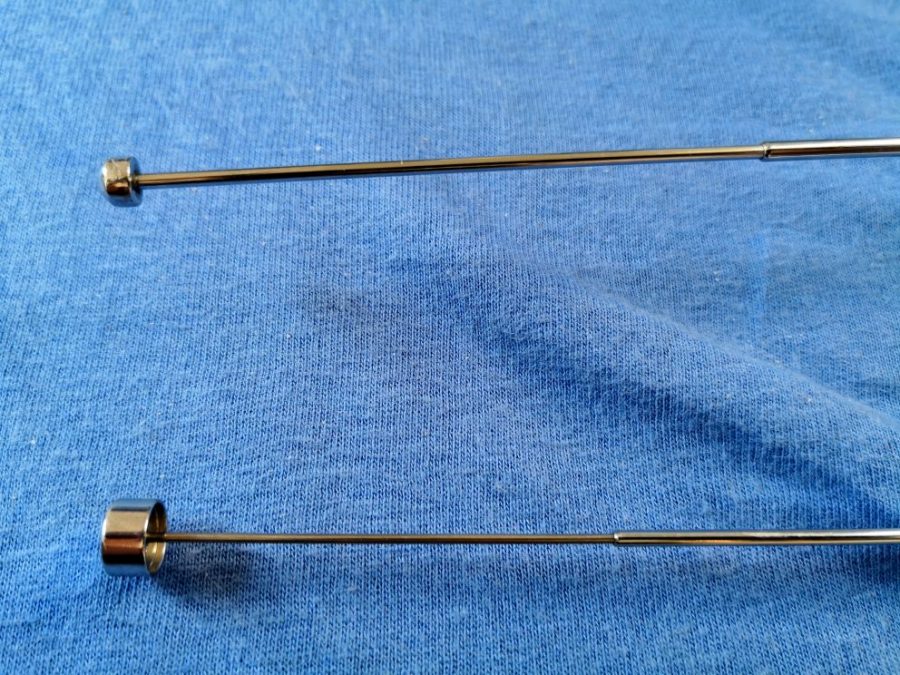
While it does radiate some quality feel (nothing is loose, wobbly or rattling), the tuning knob is the exception: it has a tiny bit of play and it feels and sounds like it had a former life as a hairspray can cap. The stepping/rasterization of the encoder resonates in that cap and if you want to tune to a distant frequency on the dial you just need to say “rien ne vas plus” before you turn the knob to create a great acoustic impression of a roulette table. On the other hand, the solid steps of the encoder causing that sound are very precise and the sound helps me counting the 9 steps I need for hitting the next channel in the European AM BC band. Some reviews also complained about the flimsy FM whip and I used to think the D-808’s whip is flimsy, but this one has a top segment with a diameter of one millimeter, the antenna is the shortest of all my radios and looks exactly like the whips I’ve seen on most of the cheapest (<$20) radios I came across. But that doesn’t affect its function of course – that is, while it lasts.
Now that’s even more a matter of taste, but I just can’t leave the design uncommented. I’m still undecided whether it looks more like a hi-tech humidifier than a radio or not, luckily it says “Radio” in red letters on the speaker grille but still… I don’t know if it’s the complete lack of “retro style” and its sober, “senior-friendly” approach or just the color – whichever way I look at it, it ain’t the most handsome radio of the pack. I think I can get over it, provided I never watch any of Thomas’ videos featuring his gorgeous RF-2200s again. So all it can do to win my heart is working well, that is, very, very well. Let’s see if it succeeded:
Summary/Verdict
The C.Crane CC Radio 2E is an extraordinarily sensitive radio on AM and certainly among the best on FM. It puts some effort in picking up AM stations that most other portables won’t and that’s what it really does as advertised. Like any other radio (so that’s not Bob Crane’s fault like some disappointed Amazon reviews allude), it will not be able to do that in noisy, interference-infested environments and not even an external antenna might help much with that, because the internal loopstick stays on. In an electrically quiet environment though, it’s nothing short of marvelous.
It has a great sound and to my own surprise, I found its qualities as a powered (also long-lasting battery-powered) speaker for other radios a serious asset. It’s simple and easy to use but that also means it lacks all advanced features that would help in difficult, “hardcore DX” reception cases. With its bulky form factor, the built-in power supply, the 4 D-cells, the weight that all brings and the lack of a proper handle, it might not fit into everyone’s understanding of “portable” and its specs are rather meant to cater the needs of American homes. However, importing it to Europe can make sense even with the extra taxes and shipping (which means a 40% markup in Germany), at least for AM radio lovers who want top performance and avoid the problems vintage portables can bring. It’s at any rate a sensible choice if your favorite station is somewhat beyond the range of average radios, if you just want more stations to choose from, or if you enjoy general daytime groundwave DX, all without making an external antenna a necessity.
Of course the CCR2E is not the mythical “perfect radio” either. The muting and automatic loop-tuning when browsing the band isn’t great, it has a few quirks, a flimsy whip antenna and a tuning knob with a cheap feel to it but then again, it’s not an overly expensive radio either and its price/performance ratio is certainly appropriate and attractive. It may not be much to look at but I like it anyway because – among all the all-rounder radios I have – it’s the specialist doing that one thing really well: making AM radio feel like it used to be.
So do I really need this radio? Maybe I don’t, but now that I’ve learned how excellent it really is, I know that I really, really wanted it!
Wow! What a brilliant review! I absolutely love the details you fit into your evaluation and your wit, too (especially that bit about the tuning knob possibly having “a former life as a hairspray can cap”–!). Ha ha!
No doubt the CCRadio 2E is a solid performer and among the best AM portables currently available. While the CCRadio 2E has been replaced by the CCRadio 3, many 2E models can still be found on Amazon (note this is an affiliate link), and eBay (partner link).


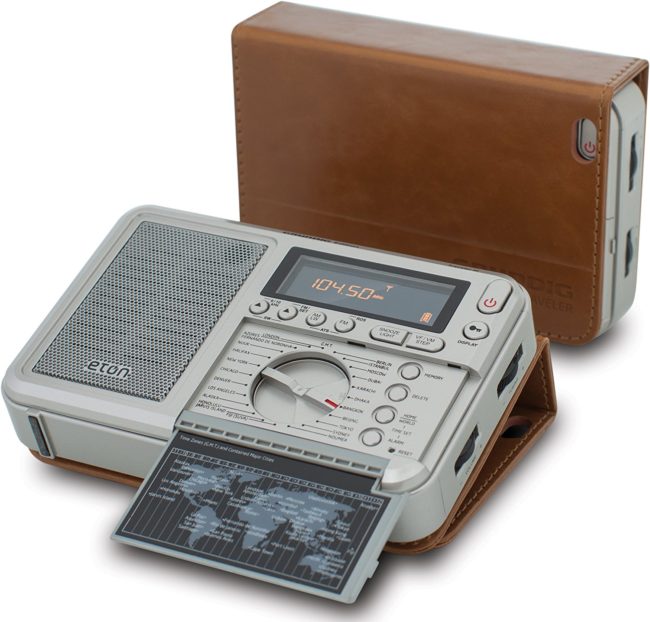 I should also mention that one great deal at time of posting is the Eton Executive Traveler.