Category Archives: Shortwave Radio Reviews

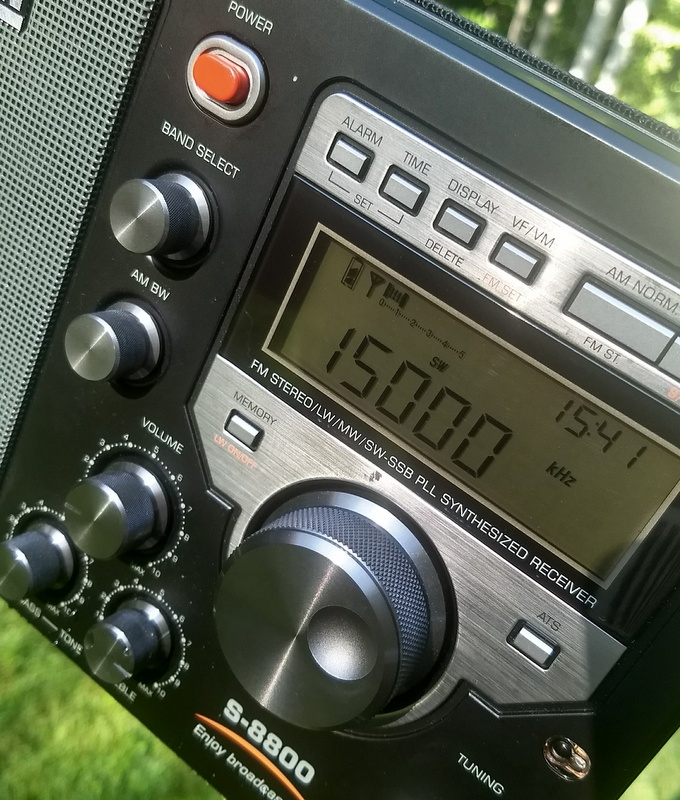
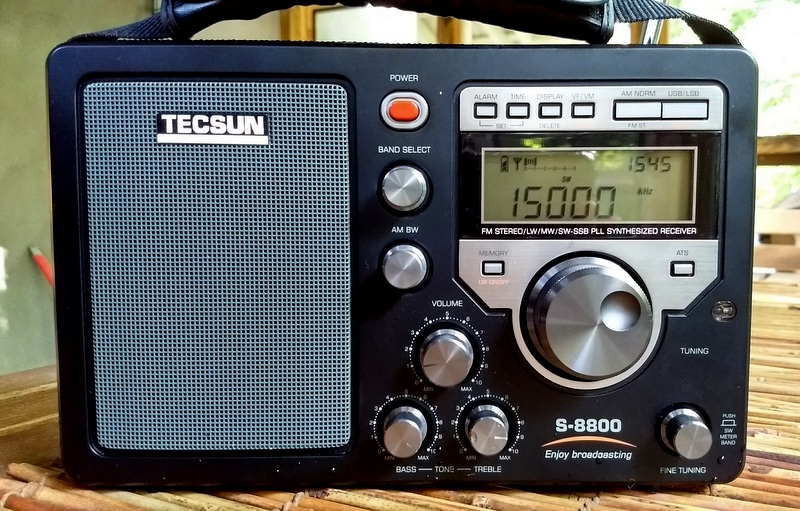
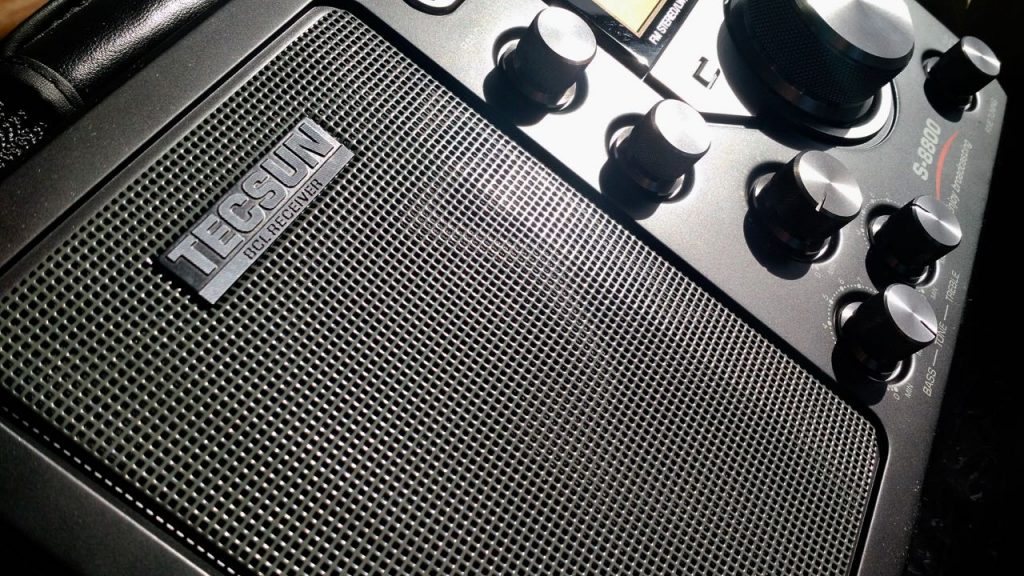
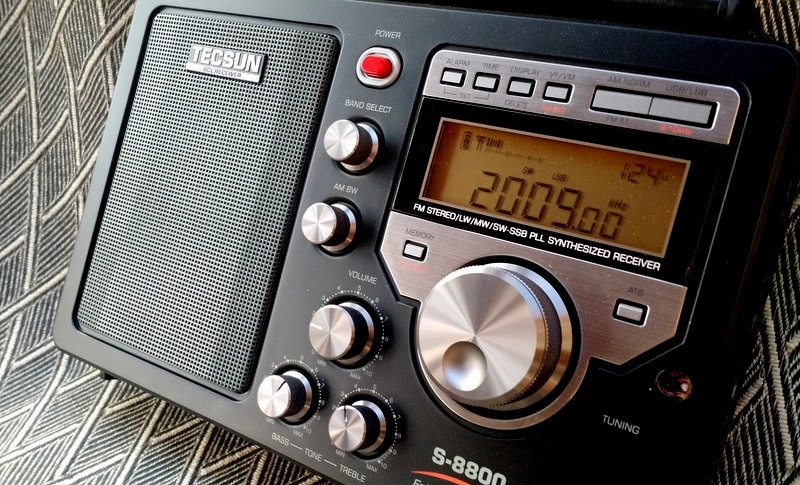
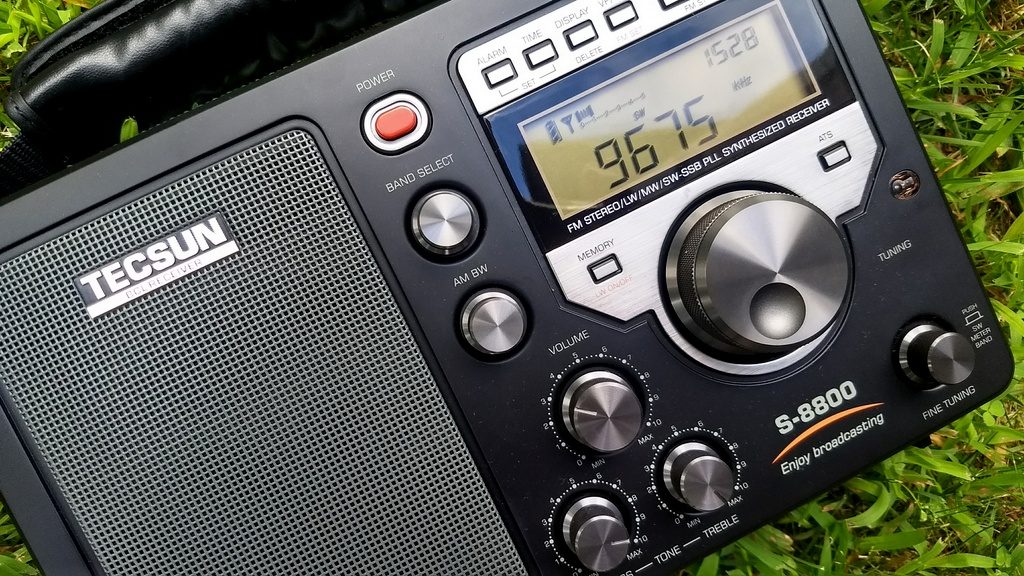
Dan compares and reviews the Tecsun S-8800 portable AM/FM/shortwave receiver

Many thanks to SWLing Post contributor, Dan Robinson, for the following guest post and review:


Tecsun’s S-8800:  Is This All The Radio You Will Ever Need?

These days, we who still derive enjoyment from listening to shortwave broadcasts, be they larger international broadcasters or smaller stations that remain on the air against all odds in the Internet age, also enjoy using the many types of radio receivers that enable this activity.

One of the cruel ironies is that today’s technological advances have made possible the kind of worldband radios (the term that first came into wide use way back in the 1980’s) that years ago we could only dream of, be they full communications receivers or portable receivers.

Having begun my own DXing/SWL career in the late 1960’s, and pretty much maintained my hobby activities over the decades, I have used pretty much every receiver that ever existed, from tube radios to today’s latest DSP wonders.

I have a soft spot for classics from SONY — my list of portables today includes the fantastic SONY ICF-SW77, SW-07, SW-55s and SW-100.  Panasonic is represented in my portable collection by the wonderful RF-B65.

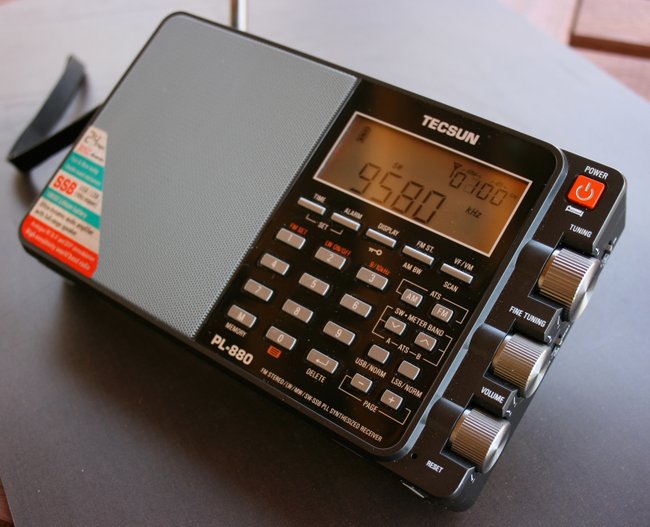
Only in recent years did I decide to test the main higher end portable offerings from Tecsun:  the PL-660/680, and PL-880. What I discovered, as have most people who own the Tecsuns, and similar receivers such as the XHDATA D-808, are the wonders of DSP chips and the great flexibility they provide, such as multiple selectivity options, along with excellent sensitivity.

Though it’s been on the market for going on three years now, one of the receivers I had not been able to test was the Tecsun S-8800.  There are quite a few reviews already online. Some go into extensive detail in describing the plus and minus points of the radio.

With so many people having already assessed the radio — and most of them in fairly glowing terms — I won’t repeat a long list of technical specs, as you can find those in other reviews, and on the site of Hong Kong-based Anon-co, which is probably the main seller of the S-8800.

Headline

The S-8800 is arguably the best multi band radio portable among portable category offerings on the market today.  It combines superior audio delivered from its superb front-firing speaker, with equally superb sensitivity (triple conversion), and multiple selectivity options, with an amazingly professionally-executed remote control.

I used the S-8800 in a number of physical locations, from public parks where I hoped to avoid high noise levels, to my back yard where noise levels are, unfortunately, quite high.  I have compared the S-8800 to a number of portables in my collection, including: SONY ICF-2010, SW-77, SW-55, along with Tecsun’s 660 and 880, Grundig SAT-500.

Audio

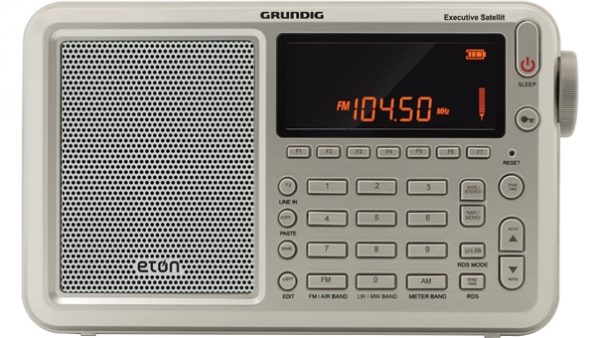
Hands down, the S-8800 wins the audio competition when compared to pretty much every other radio.  Where the competition gets tight is with receivers such as the classic Grundig Satellit 500, and Tecsun’s PL-880.

Sensitivity

This is a TRIPLE conversion radio.  As everyone knows by now, Tecsun did not merely adopt the cabinet of the old Eton S350 but basically stuffed a hot rod racer into the cabinet of what was previously a mediocre radio at best.

Selectivity

Widely used in a number of radios these days, the S-8800 uses a DSP chip that is seen in a number of other receivers.  The best description I have seen so far is in the review by Jay Allen who notes that Tecsun “decided to utilize a combination of DSP (Digital Signal Processing) circuits along with traditional analog circuits . . .most of the AM/SW circuitry is PLL/analog along with the 1st and 2nd IF’s, while the 3rd IF is DSP.”  It appears that after a bit of a rocky period in the beginning when initial units suffered from images and birdies, Tecsun got it right.

Ergonomics

Much has been said about the fact that Tecsun decided not to include a keypad on the radio itself.  I too was skeptical. We have all become accustomed to keypads as standard equipment on portables.

Personally, I do a lot of my listening on the beach during vacations, and am used to being able to hold and operate the radio in such situations, so the thought of having to carry a remote control seemed uncomfortable at best.

However, the reality is that it’s still possible to navigate the shortwave, AM, and FM bands easily even without the remote — call me old fashioned, but I am from a group of older listeners who have most frequencies memorized anyway, so I know where I want to go to hear certain stations.

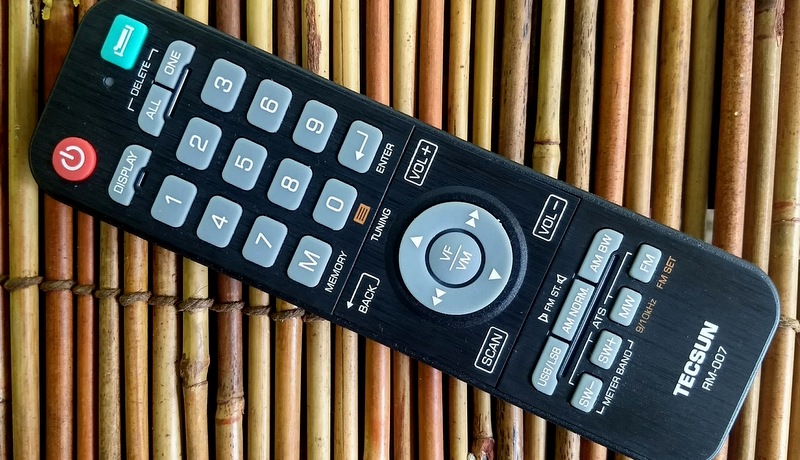
Tecsun hit it out the ballpark with the remote supplied with the S-8800.  It looks like something you would find with high end stereo equipment and clearly much thought went into making sure it can control every aspect of the receiver, from SW band slewing to selectivity, volume, readout — everything except BASS and TREBLE control, Timer/Alarm, and master volume (i.e. as other reviewers note, you have to set the on-radio master volume to a high enough level first, then use the remote to vary).

Power

The radio requires two 18650 lithium (Li-ion) rechargeable batteries, with individual indicator LEDS inside the battery compartment.  This choice is perhaps one of the most controversial aspects of the 8800. Among other things, 18650s usually receive more attention from airport security personnel if one is taking the radio on a trip — this is something everyone should keep in mind.  Any radio being transported on a flight these days is going to be subjected to added scrutiny, simply because almost no one uses radios anymore.

As for the power needs of the receiver, the 18650s seem to do a good job and last quite a long time, even days.  Included in the box is one of those white USB charger blocks — quite small and convenient. I usually travel with separate 18650 chargers, the kind used with high end flashlights, so having spare sets of charged batteries is not a problem.  But if both 18650’s in the Tecsun are drained, the radio definitely needs to re-charge to a minimum level required for operation.

As I write this, I plugged the S-8800 into a wall outlet (a blue LED indicator on front indicates charging mode) and I was unable to use the radio as the battery level had completely zeroed out.  Also keep in mind that the USB charging brick throws off EMI to other radios in the vicinity, and makes it impossible to use the S-8800 itself — there is just too much interference from the charging process to the radio’s receiving circuitry.

Comparisons

As mentioned, I compared the S-8800 with a number of other portables in my collection.  Each of these other radios, including the classics from SONY such as the SW-55 or SW77 have their strengths.  For example, the SW77 has the best implemented synchronous reception of any portable since the ICF-2010 along with superb sensitivity.  However, even the large speaker on the SW-77 was unable to compete with the S-8800. Only radios such as the older Grundig SAT 500/700 had the advantage when compared to the S-8800’s speaker, with the Tecsun PL-8800 close behind.

Receiving Comparisons

I decided to take the S-8800 out to my back yard for a receiving comparison with the receiver I consider to be among the top five best in what I call the small portable category (which is above the mini-portable category in which we find the SONY SW-100 and SW-07 and similar size radios).

In intensive use over the years, I have concluded that the Panasonic RF-B65 is probably among the hottest small portables.  With its famous amplified whip antenna, the 65 time after time succeeds in allowing me to hear stations that other portables struggle with (see this 3 radio comparison I posted a few years ago in which the B65 outguns the Sangean 909X and SONY SW-07).

Rather than produce several separate videos, I have combined one listening session comparing the S-8800 with the RF-B65.  It’s a bit long, so my apologies, but gives you an idea of how these two fine portables did going head to head.

Click here to view on YouTube.

Leaving aside the obvious superiority of the Tecsun where audio is concerned, the S-8800 competes well with the Pan RF-B65, often superior to the smaller radio, but sometimes inferior in one respect.

While there was nothing the S-8800 could hear that the Panasonic could not, signals seem to jump out of the S-8800 in a way that they did not with the smaller radio. However, there appeared to be an interesting difference when it came to the ability of each radio to deal with interfering stations 5 kHz above or below.

As shown in the video, the Panasonic was able to distinguish more clearly between a station on 9,650 kHz (Guinea) and a station 5 kHz above (in this case, Algeria via France, using 9,655 kHz) than the Tecsun, which seemed to struggle.  Indeed, at one point I was forced to attempt ECSS (Exalted Carrier SSB) mode to separate the two stations, whereas on the Panasonic, being the older and simpler radio design was an advantage in that the RF-B65 was actually able to more clearly separate the two stations by “de-tuning” from the center frequency.

One huge advantage of the S-8800 by the way is that there is a hidden software change that enables one to adjust SSB zero beat to zero or near zero.  This means that in theory using LSB/USB to improve reception is possible, though keep in mind that there may be some variation from unit to unit. So far, after performing the so-called ‘secret’ fix (among a list of tweaks discovered so far) my particular S-8800 appears to be able to zero beat LSB/USB with little or no variation between the side bands, pretty much up and down the SW bands.

Conclusions

For me, the S-8800 has turned out to be the biggest surprise of the last several years.  Coming seemingly out of nowhere, packaged in the cabinet of a receiver that was seen as mediocre at best, we have a triple conversion beauty (it seems to weigh almost nothing by the way) that provides pretty much every tool required these days to tackle what is left of shortwave broadcast reception.  It has superior audio, unless one compares to older Grundig and similar sets.

Drawbacks are quite few to be honest.  A case can definitely be made that using 18650 batteries was a poor choice by Tecsun.  This means, for example, that if you’re out on the beach or elsewhere for many hours, the only way to charge up the radio would be to use a separate phone battery charger rather than simply be able to slip in regular alkalines.  But then, I carry separate battery charge units already for my phone.

The big criticism that synchronous reception could have been included is also valid.  The same was said about the SONY ICF-SW55 — with synchronous reception, and a bit more careful design of the tuning circuit, that radio could have been a heavier hitter, a mini-ICF 2010, something the much more expensive SW-77 was designed to improve upon.

However, so far radios utilizing DSP chips have struggled when it comes to synchronous reception capability.  Indeed, the feature has ended up being discovered only as one of a number of ‘secret’ features. Only the PL-660 has a decent synchronous feature, but that radio is hobbled by limited selectivity options, while sync on the PL-880 is pretty much useless.

Finally, I have to say thank you to Tecsun for doing everything possible to avoid the dreaded ‘MUTING’ problem that has been seen on so many small portables.

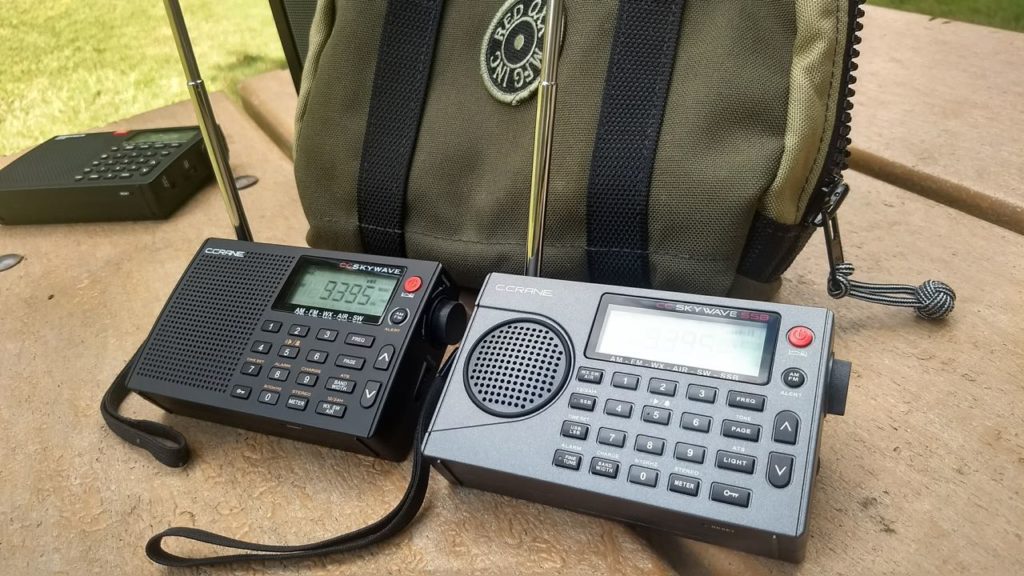
As I found to my disappointment when using even the much-praised Eton Grundig Satellit, and even the C Crane Skywave SSB, this problem can be a killer for those of us who consider it absolutely critical to be able to hear EVERYTHING on and between frequencies.

So, the big question — would I recommend the S-8800?  As with almost everything, the answer to that is, it depends on what kind of a listener you are, and expectations.

From a performance perspective, if you are like me, a die-hard DX’er at heart who gets a kick out of searching for the last Peruvians on the air, the S-8800 should be more than sufficient.  If you’re both a die-hard DX’er and enjoy FM and AM, the 8800 should also be a perfect selection, since it’s been reviewed quite well in terms of medium wave and FM capability.

A personal note — for me, part of the fun of shortwave portables has been their ‘cool factor’.  I’m just one of those who likes to carry around complicated looking radios with lots of buttons. The SONY 2010, SW-55, SW-77s, older Grundigs all fit the bill.

I never thought the S-8800 or radios similar to it in appearance would.  So, for me it’s going to require a bit of a change, since the S-8800 looks like, well . . . it looks like a ‘toy radio’!

But it’s one hell of a toy-looking radio.  It’s a triple conversion monster packed in the frame of something that, at one point in the past, you might have considered getting for your kids (if they even knew or know what a radio is!).

As many of us are at this point in our lives, I am also thinking ahead — to the day when my numerous premium Watkins Johnson and JRC radios, and a few boatanchors hanging around, will have to go because of downsizing.

When I’m 65, as the Beatles song goes — or more likely 85 or 90 — what will I be able to fit on a bedside dresser and use easily to tune in whatever is left on shortwave (if anything)?

The answer to that question is a radio that’s small enough and enough of a performer, preferably with a well-designed remote, to bring in anything that’s still on HF, MW, and FM.  With those needs in mind, the answer is already here, in the Tecsun S-8800.

[I want to express sincere thanks to Anna at Anon-co who responded quickly when I proposed a review of the S-8800 and supplied the receiver on which this article is based.  Anna was patient as my original plan to have a review in by September was delayed by unavoidable personal matters. Thanks also to Tom Witherspoon for getting the review up so quickly].

Click here to check out the Tecsun S-8800 at Anon-Co’s website and here via the Anon-Co eBay store.


Do you enjoy the SWLing Post?

Please consider supporting us via Patreon or our Coffee Fund!

Your support makes articles like this one possible. Thank you!

Spread the radio love

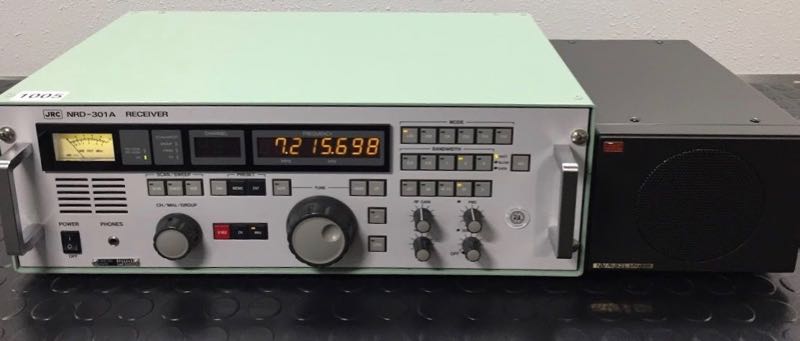
Dave’s review of the JRC NRD-301A

Many thanks to SWLing Post contributor, Dave Zantow, who shares the following comment regarding our recent post that highlighted the JRC NRD-301A:

Please note that my JRC NRD-301A review can still be found on my web page.

Excellent construction, but we found it not so great in other area’s. For the big money it was a disappointment (especially when compared to todays technology).

http://n9ewo.angelfire.com/nrd301a.html

Many thanks, Dave!

Spread the radio love

SDR Primer Part 3: From High-End SDR Receivers to SDR Transceivers

The following article originally appeared in the October 2018 issue of The Spectrum Monitor magazine:


Welcome back to the world of SDRs once again

In September we began of our three-part Primer on Software-Defined Radios (SDRs). Part One (September) focused on the nomenclature and components of a functioning SDR system; Part Two (October) took a look at some affordable SDR station options that will propel you into the world of SDRs for less than $200 US. This month, in Part Three––our final installation––we’ll dive a little deeper into the SDR rabbit hole, and investigate higher-end SDRs as well as ham radio transceivers with embedded SDRs.

Investing in SDR hardware

As we mentioned in Part 2 of our primer, gaining entry into the world of SDRs can be quite affordable. With merely $200 or less, you can fully explore the radio spectrum with an SDR that has truly excellent performance characteristics.

So, why would you pay more?

Let’s consider this.  If, say, you happen to live in an RF-dense environment, such as a busy city, if you live near strong broadcaster(s), and/or if you’re a DXer who’s seeking benchmark performance, then you might wish to devote a little more of your cash to your SDR hardware.

When you pay more for an SDR, the additional cost is typically going toward the hardware rather than the software. Indeed, my favorite SDR (software) applications are absolutely free, and pair with a number of benchmark SDRs. But good hardware is vital to performance. The lineup of SDRs––that is, the receiver hardware––discussed below typically has better filtering, preselectors, shielding, and receiver architecture focused on HF performance. They also tend to offer a more robust front end, lower noise floor, and better dynamic range. All of this, of course, results in better performance overall. Some of these SDRs also offer unique specialty features, like built-in web servers.

The following SDRs are carefully hand selected, and in my view, represent a balance between price and performance. And again, this is by no means a comprehensive list; it’s simply a selection of what you’ll find currently available on the SDR market.

So, without further ado, we’ll begin our discussion with “black box” SDRs, then move on to  SDR transceivers and transceivers with embedded SDRs.

SDRplay RSPduo

The SDRplay RSPduo

In May of this year (2018), the UK-based SDR designer and manufacturer SDRplay released their latest receiver: the SDRplay RSPduo.

What sets this little black box apart from the competition is just what its name implies:  the duo is a dual tuner SDR.  In other words, it’s two independent SDRs rolled into one.

Being the price leader in the world of SDRs, SDRplay retails the RSPduo for $279.95. And, I must add, it’s a true bargain for a feature-packed 14-bit high-performance device.

The RSPduo’s tuners can operate individually, anywhere between 1kHz and 2GHz, with up to 10MHz of working bandwidth. You could also set up the RSPduo so that both tuners can operate simultaneously, again between 1kHz and 2GHz, with up to 2MHz of bandwidth per tuner. The RSPduo has a high-stability reference along with external clocking features which makes this SDR an affordable option for industrial, scientific, as well as educational applications. It’s housed in a quality steel enclosure.

SDRplay’s development team is already working on new features such as true diversity reception, which will be included as a free upgrade to their popular SDRuno proprietary application.

To be clear, there is no other sub-$300 SDR on the market that currently has true dual-tuner functionality. Thus, the RSPduo is a good value, in my opinion––and an inexpensive upgrade to a proper dual-receiver SDR––so if this is something you’d like to add to your shack, go ahead!  Bite the bullet, and acquire an RSPduo. Likely you won’t regret it.

Check out the RSPduo via:

KiwiSDR

Photo by Mark Fahey

Like the RSPduo, the KiwiSDR has a unique feature that makes it stand out among the other receivers mentioned here: it is designed to be fully controlled via a web-browser-based SDR application. Not only can you use your KiwiSDR locally, but you can share it with the world via the KiwiSDR network. You can configure the KiwiSDR to allow up to eight simultaneous guest users, assuming only that you have access to the modest amount of Internet bandwidth this requires.

The KiwiSDR ships as a simple modular kit, and requires no special tools to assemble: the SDR is a custom circuit board (known as a “cape”) that you connect to BeagleBone Green or BeagleBone Black mini computer. (Click here to learn more about the BeagleBone).

The KiwiSDR is available in two versions: the SDR cape, alone, and a more complete version which includes the SDR cape, BeagleBone computer, enclosure, and GPS antenna. Both versions include all SDR software loaded on a micro-SD card.

Although the KiwiSDR might sound like an experimenter’s receiver since it requires a degree of assembly and configuration––at least, a bit more so than the other units I review here––it’s actually fairly simple to assemble, install, and put on the air. In fact, the only challenge that you might face is that of setting up your router for global access to your KiwiSDR. It does require either a static IP address or (more commonly) an IP address forwarding service. Check out the support documentation in advance to make sure your Internet connection will work.

The KiwiSDR covers from 10 kHz to 30 MHz, thus is not a wideband receiver like the SDRduo. Like the SDRs that follow, it focuses its performance on HF and lower bands.

I find it incredible that for just $299 US, you can purchase the full KiwiSDR kit––one that includes everything you need to put your SDR on the air and online. Because of this, I believe the KiwiSDR has become the dominant web SDR platform currently on the market. Perhaps this remarkable fact overshadows the fact that the KiwiSDR is also a superb performer, touting a brilliant dynamic range as well as overall excellent sensitivity and selectivity.

As my friend and fellow radio listener Mark Fahey, an early adopter of the KiwiSDR, is quick to point out, the KIwiSDR is unique in that it doesn’t connect to a PC or other computer to operate. It’s a stand-alone:  just connect an antenna, DC supply, and network cable, then you’re ready to go. All of the “work” is delivered by the piggyback BeagleBone CPU.

What’s not to love? While the web-based SDR application is full-featured, it does lack spectrum recording and some other advanced controls. This is due to the relatively modest processing power of the onboard CPU. That said, The KiwiSDR application does contain features/functionality via extensions that are fairly impressive.

Additionally, when updates are rolled out for the KiwiSDr application, these take effect globally. Only recently, for example, audio recording and amazing TDoA (Time Distance of Arrival) functionality were added.

Oh, and one more thing before we move on: the KiwiSDR is the only SDR I know that is exclusively controlled by a web-based SDR application for both the online guest and the local user/owner. There is no separate downloadable application.  Thus, whether you’re using your own local KiwiSDR or an online SDR, the user experience is exactly the same. It’s seamless and user-friendly…just as it should be.

Want to try the KiwiSDR before purchasing? Easy! You can browse and select any one of two hundred KiwiSDRs online on SDR.hu.

Check out the KiwiSDR via:

ELAD FDM-S2/FDM-S3

Italian-based SDR manufacturer, ELAD, has built a solid reputation over the years for truly pushing the SDR performance envelope in the $500-$1000 market.

I have owned their Elad FDM-S2 for four years now (check out my full review in the November 2014 issue of The Spectrum Monitor). The FDM-S2 continues to impress and to hold its own among more recent competitors––a true indication of excellent engineering and hardware.

The FDM-S2’s frequency coverage is 9 kHz-52 MHz, 74-108 MHz, and 135-160 MHz. I should note here that besides being a great HF and mediumwave performer, the FDM-S2 is an FM DXer’s choice receiver; FM performance on this rig is just superb.

ELAD supports all of their SDRs with their own proprietary application which, of course, is designed to take full advantage of the SDR’s available performance. The ELAD application is feature-packed and even includes built-in DRM decoding. Interestingly, it will allow the FDM-S2 to be used as two completely independent tuners in “double DDC mode”––the working bandwidth of each tuner, in this case, is 384 kHz, and each can be placed within one of the FDM-S2’s input ranges.

In truth, I like pairing my FDM-S2 with the excellent (and free) SDR Console SDR application; I prefer its user interface and recording functionality over the ELAD application.

If you live in an RF-dense area, you might consider one of ELADs external pre-selection filter systems to keep the FDM-S2 from overloading in the presence of very strong signals.

The FDM-S2 is currently priced at $529 US.

Photo of the new ELAD FDM-S3 from the 2018 Hamvention

Note that ELAD will soon be releasing the newest addition to their product line: the FDM-S3. I know very little about the FDM-S3, but I do know ELAD is promising groundbreaking performance and dynamic range, setting a new benchmark for the $1000 price bracket. We do know the FDM-S3’s processing bandwidth is an impressive 24.576 MHz––wide enough to include the entire FM broadcast band!

I’m not sure if FM DXers will be able to take advantage of spectrum recording at a 24 MHz bandwidth, because I suspect it could push 24GB of data per minute. The FDM-S3 may well keep up, but I’m not sure the typical computer hardware can handle that kind of data transfer…it may be likened to, in radio terms, drinking from the proverbial fire hose!

However: ELAD will be sending me a loaner FDM-S3 to review in the coming months, so stay tuned for more on this DXer’s dream rig!

The current FDM-S3 price, by the way, is 949.90 EUR.

WinRadio Excalibur

The WinRadio Excalibur

My first foray into the world of benchmark SDRs was made with the Australian-made WinRadio WR-G31DDC Excalibur. And although this SDR has been on the market for the better part of a decade, it still outperforms many of its competitors.The Excalibur’s frequency range is 9 kHz to 49.995 MHz, providing absolutely stellar performance across the spectrum.

It’s a favorite SDR in my radio shack, despite the fact that it can only be fully controlled by WinRadio’s own proprietary SDR application (at least, I know of no other compatible applications). On the plus side, the WinRadio application is one of my favorites.

The application’s file size is extremely compact––only a 9MB download. The user interface is logical, ergonomic, and responsive. Other than SDR Console, it has some of the best recording functionality available today.

I’ve logged more airtime with the Excalibur than with any other SDR I own, mainly because of its superb overall performance, responsive application, and recording functionality. I use the Excalibur as a benchmark for receiver evaluations and find that very few can match its solid performance.

The WinRadio Excalibur can be purchased through a number of distributors worldwide for about $950.

Enablia TitanSDR Pro

The Enablia Titan SDR Pro is an outlier product in our SDR Primer series, in that it retails in excess of $2,000. However, it’s the highest performing SDR I’ve ever tested. Serious weak-signal DXers will likely be quite pleased with this rig.

And speaking as a radio archivist, the Titan has the most powerful set of audio and spectrum recording features I’ve used, to date. Selectable spectrum recordings can be made from within the wide working bandwidth, and it can run up to four fully-independent SDR receivers, simultaneously.

The Titan comes with 16 frequency preselectors onboard, and a 9 kHz to 32 MHz frequency coverage. Its front end is simply bullet-proof, and thus could be operated in a demanding RF environment.

The TitanSDR ships with a brilliant proprietary application. It’s designed to make managing the Titan’s multiple virtual receivers and four independent SDR receivers as straightforward (and easy!) as possible. As I said in my review, Enablia engineers quite successfully accomplished this. The only downside is that only the TitanSDR application can run only the TitanSDR; no other third-party apps work with it. In addition, when making spectrum recordings, the file format is unique and the header information is actually stored in a separate file. This means when you are transferring a set of spectrum recordings, the header file must also be accounted for.

Of course, there is the daunting price tag of the TitanSDR, which makes it clear that this was a receiver designed for government and commercial use, in particular, for signal intelligence.  Thus it’s likely no surprise that the basic version of the TitanSDR retails for 1380 EUR, the TitanSDR Pro for an even heftier 1970 EUR.

To be fair, there are not many readers who would consider the TitanSDR Pro, but I thought it worth mentioning as it demonstrates a clear case of hardware becoming an innovation’s primary focus.

Enablia’s website is quite basic, so I would recommend you contact them directly to ask for a price quote if you’re interested in one of their TitanSDRs.

Other SDRs

The SDRs above represent merely a small slice of SDR market availability. There are several other notable manufacturers and SDRs worth considering, thus worth noting.

The Bonito Radiojet 1309 Plus

Germany-based Bonito manufactures a number of SDRs, antennas and components that are highly regarded among DXers. Bonito’s “hybrid” SDRs pack a lot of performance yet require very little in terms of computer resources.  Their latest SDR, the Bonito RadioJet 1309 Plus covers 0.02 MHz to 1600 MHz with a spectrum display that can be widened to 3.2 MHz. I have not personally evaluated the RadioJet 1309 Plus, but I did review an early version of the RadioJet (the 1102S) that lacked the additional IQ-receiver of the 1309. I found it an impressively sensitive and selective receiver with excellent audio characteristics. Click here to read that review.

The RFspace Cloud-IQ

RF Space has been manufacturing SDRs longer than many other manufacturers, and the company offers a number of products, including the SDR-IQ, the NetSDR+, the Cloud-IQ, and––soon to come––the CloudSDR.

In Part 2 of our primer, we mentioned the AirSpy HF+ which packs impressive HF performance. Airspy also manufactures the Airspy R2 and Spyverter R2–this $218 US combination produces a compact SDR package with excellent dynamic range and superb frequency stability.

I’m also fond of the classic Microtelecom Perseus SDR, which I’ve seen sold used for approximately $700 US. WinRadio, too, offers higher-end SDRs with a wider frequency range and working bandwidth than the Excalibur––so if your budget allows, you might consider these.

Regardless, keep in mind that if you want to use your monetary resources efficiently, there is no need to splurge for higher-end SDRs unless your use and application demands increased performance. Before you pull the trigger to buy such a rig, I would simply take into consideration the unit’s frequency range, working bandwidth, and performance characteristics, as well as taking the time to read plenty of user reviews. This increases the odds that you’ll get just what you want.

SDR Transceivers

So far, I’ve only mentioned SDR receivers in this primer, but there is a healthy selection of “black box” type SDR transceivers on the market, as well. By “black box,” I mean the transceiver itself (all of the hardware) housed in a box––with, of course, the relevant ports for antennas, data, power, mics, CW keys, and a number of peripherals. These SDRs almost always require a computer for operation, although lately manufacturers are beginning to offer optional touch-screen front panels which can bypass the need for external computer operation.

Unlike the world of tabletop radios, where it might be less expensive to invest in a general coverage transceiver rather than a dedicated receiver, SDR transceivers almost always cost more than an equivalent SDR receiver.

Also note that SDR transceiver applications do not always include audio and spectrum recording functions.  In addition, their working bandwidth might be more narrow that other receive-only SDRs, although they may offer more virtual receivers and spectrum “slices.”

Finally, SDR transceiver applications tend to be proprietary; when you purchase the transceiver, you’re also likely receiving the only SDR application that will interface with it. Hypothetically, if you purchase an SDR transceiver and the company that produced it goes under, you might have issues when the application is no longer updated with operating system upgrades and iterations.  The lesson here is that I believe you should try to stick with the healthiest companies and those with solid, large user bases. This increases the likelihood that the application will be supported in the future.

Low-cost, low power SDRs for the experimenter

We’ll start with the least expensive SDR transceivers designed with the experimenter in mind, that can, with a little adaptation, also be employed by ham radio operators as very low-power transceivers.

The HackRF One ($299) by Great Scott Gadgets is an excellent SDR. It has an incredibly wide frequency range (1 MHz to 6 GHz), and can transmit anywhere from 3 mW to 30 mW depending on the frequency. That’s flea power, true, but if your goal is to experiment in your local surroundings, it’s typically more than enough output. The HackRF is open-source and sports a large user community that have employed it in dozens of applications. The HackRF was one of the first SDRs to really give experimenters a full tool set to manipulate the world of wireless.

Check out the HackRF One via:

The LimeSDR board

The LimeSDR ($299) is another crowd-funded project that has been incredibly popular.  Like the HackRF, it is a low-cost, open-source SDR platform that can be used to support just about any type of wireless communication standard. What makes the LimeSDR unique is that it is integrated with a Snappy Ubuntu Core, which means users can simply install applications from an app store to increase functionality. As LimeSDR states, their platform “gives students, inventors, and developers an intelligent and flexible device for manipulating wireless signals, so they can learn, experiment, and develop with freedom from limited functionality and expensive proprietary devices.

Again, only consider the HackRF of LimeSDR if your main goal is to experiment with the world of wireless. If you’re looking for a full-featured SDR transceiver intended for ham radio, read on.

Ham Radio SDR Transceivers

The Flex Radio booth at the 2018 Hamvention.

Without a doubt, the dominant name in the world of US ham radio transceivers is Texas-based Flex Radio.  Flex has been around since the very earliest days of SDR transceivers and has produced a wide variety of high-performance rigs. In recent years, their product development and production has focused on higher-end transceivers with the discerning DXer and contester in mind. Their signature series SDRs pack incredible performance, yet can be operated from modest PCs since most of the processing horsepower and hardware are all within the radio chassis. Flex has also developed a fully wireless touch-screen Maestro Control Console that can be used over a local network, or even the Internet, to seamlessly control a remotely-connected Flex SDR. Flex Radio SDRs can cost anywhere from $2,000 – $7,500 US.

The Flex-6600

Gary Wise (W4EEY), my go-to guy for all things Flex Radio, also notes:

“One of Flex’s newest models, the Flex-6600, includes 7th Order Contest Band Bandpass Filters and dual Analog to Digital Converters. Which means that, using this radio, one can listen on one band while transmitting on another. Contesters call this ‘Single Operator Two Radio’ operation, and if you can do it successfully, it leads to big contest scores. Having this functionality in one box, without additional controllers and interfaces, is remarkable.”

Indeed.

Two other SDR transceiver manufacturers with large user bases are the Sweden-based SunSDR and India-based Apache Labs. Both companies produce high-performance SDRs and, like Flex, set benchmarks in terms of transceiver performance. I will not comment at length about either company because I’ve not had the opportunity of personally testing their products, but I encourage you to search online reviews about their products.

Tabletop SDR transceivers

The Elad FDM-DUO transceiver is both a stand-alone tabletop and fully-functioning SDR when paired with a PC.

There are a number of full-featured tabletop SDR transceivers on the market. One of the first SDR manufacturers to build a fully self-contained tabletop model with PC integration was ELAD, with their FDM-DUO QRP transceiver. Tabletop SDRs at the time of the FDM-DUO’s release were very limited in their functionality when connected to a PC. Some of them had stripped-down applications and lacked features like spectrum recording and multiple virtual receivers. The FDM-DUO, when connected to a PC running ELAD’s software, gives the user full control of the SDR.  Indeed, the experience is identical to that of using the FDM-S2 mentioned above, however the DUO is also a transceiver. Since the DUO’s release, other SDR manufacturers have designed models with full SDR application integration.

The Flex 6600M is a handsome standalone SDR transceiver.

Recently, Flex Radio introduced their Flex “M” Signature Series SDR Transceiver. These tabletop SDRs can be configured with most of the SDR receivers Flex currently produces. Their displays are impressive and useful; indeed, the spectrum waterfall resolution and size is one of the best I’ve seen on a tabletop transceiver.  The front panel is large and sports a number of controls, the design harkening back to large contest-grade transceivers like the Ten-Tec OMNI VII and Orion series.

The SunSDR MB1 at the 2018 Hamvention.

This year at the Hamvention in Xenia, OH, I had a chance to check out the SunSDR MB1. Like the Flex M series, the MB1 sports a comprehensive front panel and an amazing assortment of connections on the back panel. As I took a tour of this radio––and it really did require a tour, it’s so densely feature-packed––I was most impressed by the thought that went into this stand-alone SDR transceiver. I love the front panel display, graphics, and overall ergonomics. I understand it will also deliver benchmark performance; indeed with prices starting at a steep $7,000 US, I would expect nothing less!

SDR transceiver summary

As we’ve pointed out in this part of our primer, pure SDR transceivers are a product for radio operators willing to invest more financially in order to take advantage of the advanced functionality and performance a true SDR can provide. At present there are surprisingly few players in the pure SDR transceiver market; this is a product category ripe for expansion. And as more manufacturers get into the game, I believe competition will direct prices into even more affordable territory.

Transceivers based upon SDR technology

The final category we’ll discuss is transceivers based upon SDR technology.  It’s a sign of the times, indicating the direction that all enthusiast-grade transceivers and receivers are likely heading.

The Icom IC-7300 transceiver

Because the fact is, whether or not you feel inclined to embrace SDRs in your radio world, you may be surprised that you already have: for many years now, radio manufacturers have built their transceivers and receivers on SDR and I/Q quadrature down-sampling technology. All of the transceivers introduced in the past few years that sport on-board spectrum displays––like the Icom-IC7300, Icom IC-7610, and the new Yaesu FT-DX101D––are, of course, based on SDR technology.

Many others, like the Elecraft KX3 and KX2, which look much more like a traditional radio, are also based on SDR architecture. Indeed, almost all of the major manufacturers implement SDR technology in their current product lines. Manufacturers have caught on, learning how to leverage SDR technology in a way that maximizes receiver performance while keeping the overall price more affordable than comparably-performing legacy radios of former days.

Yet while these radios are SDRs at their core, they often are limited in their functionality when connected to a PC; most can be completely controlled by a PC and many can even export their I/Q data, but usually they won’t offer the working bandwidth and the advanced functionality of a true SDR transceiver.

Conclusion

If I’ve piqued your curiosity about the world of SDRs, and have yet to add one to your shack, I would encourage you to invest in an SDR receiver––at the very least, in one of the affordable rigs mentioned in Part 2 of this series.

Speaking for myself, I was once a “knobs and buttons” radio operator who thought I’d never want to control a radio through a computer and monitor. But when I hesitantly invested in my first SDR, I found it eye-opening––not to mention somewhat democratizing, in that it sets all radio listeners on the same level, as the spectrum becomes visually understandable, and thus accessible, to all who encounter it. I found that if you love to listen, also being able to look at your audio, especially when editing or archiving, but any time you’re tuning around through the spectrum,  just clarifies and enhances your overall radio experience. I soon became hooked…and have never looked back.

Now, I can assure you, I’ll never again be without an SDR. The ability to visualize our radio spectrum via SDR’s virtual window is truly illuminative.  What’s more, I’d even venture to speculate that you may share in finding the experience, if you’ll forgive the colloquialism, pretty darn cool.

Do you enjoy the SWLing Post?

Please consider supporting us via Patreon or our Coffee Fund!

Your support makes articles like this one possible. Thank you!

Spread the radio love

SDR Primer Part 2: Exploring the world of SDRs for $200 or less

The $22 RTL-SDR paired with a Raspberry Pi and employed as an ADS-B receiver/feeder.

The following article originally appeared in the July 2018 issue of The Spectrum Monitor magazine:


Welcome back to the world of SDRs

Last month we covered Part One of our three-part primer on software-defined radios (SDRs). While last month’s Part One focused on the nomenclature and components of a functioning SDR system, Part Two will take a look at some affordable SDR station options that will propel you into the world of SDRs for less than $200 US. We’ll cover Part Three in November, and we’ll dive a little deeper into the rabbit hole and cover higher-end SDRs and ham radio transceivers with embedded SDRs.

SDRs are affordable

Photo by Kody Gautier

If there’s one thing I’d like you to take away from this part of our primer, it’s that SDRs are truly affordable. For less than the price of a typical full-featured shortwave portable, you can own an SDR that covers almost all of the listening spectrum, and that does so with excellent performance characteristics.

We’re lucky to live in a time of phenomenal radio innovation. When I first jumped into the world of SDRs, the least expensive SDR that covered any of the bands below 20 MHz was about $500. That was only a few years ago, in 2010 or so.

Yet in the past three years, affordable SDRs have become the dominant radio product on the market.  And these modestly-priced products have made the barrier of entry into the SDR world crumble overnight.

Today, even a $100 SDR has more features, more frequency range, and more functionality than a $1000 SDR from just a decade ago.  Times have changed dramatically; indeed, the pace of innovation in this craft is simply amazing.

Before we begin looking at some choice sub-$200 SDRs, I’d just like to direct your attention to the first part of our SDR Primer (click here to read). Specifically, I’d like you to note one element I discussed in that article:  the vital importance identifying your goals as an SDR owner. In other words, how do you plan to use your SDR? If you’re only seeking an SDR to listen to local ham radio repeaters, track cubesat satellites, or gather ADS-B information from aircraft, a $25 SDR will more than suffice. If you wish to use the SDR as a transceiver panadapter, or you wish to chase weak signal DX on the HF bands, then I’d suggest you invest a bit more.

I’d also like to remind you, as I noted in the previous article, that this primer will be limited in the SDRs I highlight. The reason for this is simple:  there now exists a vast ocean of SDRs on the market (just search eBay for “SDR” and you’ll quickly see what I mean) so all models simply can’t be included in this introductory foray. I’ll be focusing here on several SDRs that cover the HF spectrum and above. I’ll also focus on SDRs with which I have personal experience, and which I consider to be “enthusiast” grade among a healthy community of users. Of course, this part of the primer will only include HF-capable receivers that cost a total of $200 or less.

Let’s take a look at what’s on the market in order of price, starting with the most affordable.

$10-$25: The RTL-SDR dongle

No doubt, many of you reading this primer have purchased an RTL-SDR dongle. Over the years, I’ve owned three or four of them and have even purchased them for friends. These dongles originally appeared on the market many years ago as mass-produced DVB-T TV tuner dongles based on the RTL2832U chipset. Very soon, users discovered that with just a little hacking, the dongle was capable of much, much more than its original intended purpose.

The dongle resembles a USB memory stick. On one end, you’ll find a standard USB connector.  On the other, you’ll find an antenna port, typically SMA, to which one connects an antenna. Although it goes without saying, here’s a friendly reminder: make sure you’re choosing an antenna to match the frequency range you’re exploring!

I’ve seen this older model of RTL-SDR being sold for $9 at Hamvention.

Early RTL-SDR dongles couldn’t cover the HF bands or lower, but many models can now cover a gapless 500 kHz all the way to 1.75 GHz.

So, what can you do with an RTL-SDR dongle?  In short, quite a lot! Here are a few of this simple device’s many applications and uses in our hobby.  It can:

  • become a police radio scanner
  • monitor aircraft and ATC communications
  • track aircraft with ADS-B decoding and read ACARS short messages
  • scan trunking radio conversations.
  • decode unencrypted digital voice transmissions such as P25/DMR/D-STAR.
  • track maritime boat positions like a radar with AIS decoding.
  • track and receive weather balloon data
  • connect to VHF amateur radio
  • decode APRS packets
  • receive and decode GPS signals
  • utilize its rtl-sdr as a spectrum analyzer
  • receive NOAA weather satellite images
  • and so much more––! This list is not fully comprehensive by any means.  Check out this list of projects at RTL-SDR.com.

And, of course, you can listen to any signals between 500 kHz up to 1.75 GHz––essentially, most of the radio listening landscape.

Is $25 still a little high for your budget? RTL-SDR dongles can be found for as low as $10 US, shipped, on eBay. While the cheapest of these dongles may suffice for some radio applications, I’m partial to the dongle produced by RTL-SDR.com, since they’re built in a tough metal enclosure, have thermal pad cooling, as well as extra ESD protection. Amazon has an RTL-SDR.com dongle starter package with antenna options for about $26. That’s, what, the price of three hamburgers? Two orders of fish and chips? And worth it.

Many third-party SDR applications support the RTL-SDR dongle, but my favorite is SDR# (click here to download).

So, the major pros of this little SDR are 1) obviously, the price; 2) many, many uses; and 3) the fact that it’s the most popular SDR on the market, with a massive online user base.

What about negatives? Well, to be frank––aside from the dongle’s budget-busting versatility––the fact is that “you pay for what you get.” You’re investing just $10-$27 in this receiver, so don’t expect exceptional performance especially on anything lower than 50 MHz. On HF, for example, the RTL-SDR could easily overload unless you employ external filtering.

Indeed, I’ve never used the RTL-SDR for HF DXing, but I currently have three dongles in service 24/7:  two as ADS-B receivers, and one as a receiver for the LiveATC network. And these work hard. Indeed, It’s a workhorse of a device!

I suggest you grab an RTL-SDR and use it as an accessible step into the world of SDRs, and as an affordable single-purpose tool to unlock the RF spectrum!

Click here to check out the RTL-SDR blog SDR dongle via Amazon (affiliate link).

$99: The SDRplay RSP1A

When you invest a modest $99 US (or $120 shipped), and purchase the RSP1A, you take a major step forward in the SDR world.

UK-based SDRplay is an SDR designer and manufacturer that focuses on enthusiast-grade, budget wideband SDRs. SDRplay designs and manufactures all of their SDRs in the United Kingdom, and over the past few years, they’ve developed a robust user community, extensive documentation, and, in my humble opinion, some of the best tutorial videos on the market.

SDRuno windows can be arranged a number of ways on your monitor.

Although the RSP series SDRs are supported by most third-party SDR applications, SDRplay has their own app: SDRuno. Moreover, SDRuno is a full-featured, customizable application that takes advantages of all of this SDR’s performance potential and features. I should mention that installing the RSP1A and SDRuno is a pure plug-and-play experience:  just download and install the application, plug in the RSP1A to your computer, wait for the USB driver to automatically install, then start SDRuno. Simplicity itself.

While the RSP1A is SDRplay’s entry-level wideband SDR, it nonetheless plays like a pro receiver and truly pushes the envelope of performance-for-price, and for other SDR manufacturers, sets the bar quite high. The RSP1A is a wideband receiver that covers from 1 kHz all the way to 2 GHz; equally pleasing the longwave DXer, HF hound, tropo-scatter hunter, and even radio astronomer. This affordable SDR really covers the spectrum, quite literally. Not only does the RSP1A cover a vast frequency range, but its working bandwidth can be an impressive 10 MHz wide and via SDRuno, the RSP1A will support up to 16 individual receivers in any 10 MHz slice of spectrum. All this for $99? Seriously? I assure you, yes.

Think of the RSP1A as the sporty-but-affordable compact car of the SDR world. It delivers performance well above its comparatively modest price, and is fun to operate. In terms of DX, it gets you from point A to point B very comfortably, and is a capable receiver which will help you work even weak signals––and very reasonably!

If you’re looking to explore the world of SDRs, would like a capable receiver with great LW/MW/HF reception to do it with, but also want to keep your budget in check, you simply can’t go wrong with the RSP1A.

Check out the RSP1A via:

$167 US (125 GBP): FUNcube Dongle Pro+

Many years ago when I ventured into the world of SDRs, one of the only affordable SDRs which covered the HF bands was the FUNcube Dongle Pro+.

The Funcube Dongle Pro+, which resembles the RTL-SDR “stick” type dongle, was originally designed as a ground receiver for the FUNcube Satellite (cubesat) project initially made possible by AMSAT-UK and the Radio Communications Foundation (RCF). The original Funcube dongle did not cover any frequencies below 64 MHz, but the Funcube Dongle Pro+ added coverage from 150 kHz to 1.9 GHz with a gap between 240 MHz and 420 MHz.

In full disclosure, I’ve never owned a FUNcube Dongle Pro+, but I have used them on several occasions. I believe you would find that it is prone to overloading if you use a longwire antenna that’s not isolated from the dongle. In other words, during such use it seems to be subject to internally-generated noise. In my experience, the Pro+ worked best when hooked up to an external antenna fed by a proper coaxial cable.

To be clear, with the advent of SDRplay and AirSpy SDRs, the FUNcube Dongle Pro+ is no longer the budget SDR I would most readily recommend.

Still, the Pro+ is a very compact dongle that has a great history, and around 2012 really pushed the performance-for-price envelope. It still has many dedicated fans. No doubt, this product has had a huge influence on all of the sub $200 SDRs currently on the market, thus we owe it a debt of gratitude.

Click here to check out the FUNcube Dongle Pro+.

$169 US: SDRplay RSP2 & RSP2 Pro ($199):

The SDRplay RSP2 Pro

In 2016, after the remarkable success of the original RSP, SDRplay introduced the RSP2 and RSP2 Pro SDRs. The RSP2 is housed in an RF-shielded robust plastic case and the RSP2 Pro is enclosed in a rugged black painted steel case. In terms of receivers and features, the RSP2 and RSP2 Pro are otherwise identical

The RSP2 and RSP2 Pro provide excellent performance, three software-selectable antenna inputs, and clocking features, all of which lend it to amateur radio, industrial, scientific, and educational applications; it is a sweet SDR for $169 or $199 (Pro version). I know of no other SDRs with this set of features at this price point.

The RSP2 series has the same frequency coverage as the RSP1A. Of course, to most of us, the big upgrade from the SDRplay RSP1A is the RSP2’s multiple antenna ports:  2 x 50-Ohms and one High-Z port for lower frequencies.

The SDRplay RSP2 with plastic enclosure.

As with all of SDRplay’s SDRs, their own application, SDRuno, will support up to 16 individual receivers in any 10 MHz slice of spectrum.

Bottom line? Since the RSP2 has multiple antenna ports––and two antenna options for HF frequencies and below–the RSP2 is my choice sub-$200 SDR to use as a transceiver panadapter. (Spoiler alert: you’ll also want to check out our summary of the recently released $279 RSPduo from SDRplay in this review or in Part 3 of our primer before pulling the trigger on the purchase of an RSP2 or, especially, an RSP2 Pro!)

Check out the RSP2 via:

$199 US: AirSpy HF+

Sometimes big surprises come in small packages. That pretty much sums up the imminently pocketable AirSpy HF+ SDR.

The HF+ has the footprint of a typical business card, and is about as thick as a smartphone. Despite this, it’s a heavy little receiver––no doubt due to its metal alloy case/enclosure.

AirSpy’s HF+ was introduced late 2017. Don’t be surprised by its footprint which is similar to a standard business card to its left, this SDR is performance-packed!

Not to dwell on its size, but other than my RTL-SDR dongle, it’s by far the smallest SDR I’ve ever tested. Yet it sports two SMA antenna inputs: one for HF, one for VHF.

The HF port is labeled as “H” and the VHF port as “V”

When I first put it on the air, my expectations were low.  But I quickly discovered that the HF+ belies its size, and is truly one of the hottest sub $500 receivers on the market! Its HF performance is nothing short of phenomenal.

The HF+ is not a wideband receiver like the FunCube Dongle Pro+ or RSP series by SDRplay. Rather, the HF+ covers between 9 kHz to 31 MHz and from 60 to 260 MHz only; while this is a relatively small portion of the spectrum when compared with its competitors, this was a strategic choice by AirSpy. As AirSpy’s president, Youssef Touil, told me,“The main purpose of the HF+ is [to have] the best possible performance on HF at an affordable price.”

Mission accomplished.  Like other SDRs, the HF+ uses high dynamic range ADCs and front-ends but enhances the receiver’s frequency agility by using high-performance passive mixers with a robust polyphase harmonic rejection structure.  The HF+ was designed for a high dynamic range, thus it is the best sub-$200 I’ve tested for strong signal handling capability on the HF bands.

You can very easily experiment and customize the HF+ as well; easy access to the R3 position on the circuit board allows you to make one of several published modifications. “During the early phases of the design,” Yousef explains, “R3 was a placeholder for a 0 ohms resistor that allows experimenters to customize the input impedance.” He goes on to provide in-depth clarification about these mods:

“For example:

  • A 300 pF capacitor will naturally filter the LW/MW bands for better performance in the HAM bands
  • A 10µH inductor would allow the use of electrically short antennas (E-Field probes) for MW and LW
  • A short (or high value capacitor) would get you the nominal 50 ohms impedance over the entire band, but then it’s the responsibility of the user to make sure his antenna has the right gain at the right band
  • A custom filter can also be inserted between the SMA and the tuner block if so desired.”

Since the introduction of the HF+, it has been my recommended sub-$200 receiver for HF enthusiasts. If you want to explore frequencies higher than 260 MHz, you’ll have to look elsewhere. Also, note that longwave reception is not the HF+’s strong suit––although modifications to R3 and future firmware upgrades might help with this! Additionally, the HF+’s working bandwidth is 660 kHz; quite narrow, when compared with the RSP series, which can be widened to 10 MHz.

AirSpy also designed the free application SDR# to take full advantage of their receivers’ features and performance.

The AirSpy application (a.k.a. SDR#)

Installing the HF+ and getting it on the air is pure plug-and-play. While SDR# is a powerful and fluid SDR application, I actually use SDR Console more often, as it supports most of my other SDRs as well, and offers advanced virtual receiver and recording functionality.

If you’re an HF guy like me, the HF+ will be a welcome addition to your receiver arsenal. It’s a steal at $200.

Click here for a full list of AirSpy distributors.

Conclusion

If you haven’t gathered this already, it’s simply a brilliant time to be a budget-minded radio enthusiast. Only a few years ago, there were few, if any, enthusiast-grade sub-$200 SDR options on the market.  Now there are quite a number, and their performance characteristics are likely to impress even the hardest-core weak-signal DXer.

Still, some hams and SW listeners reading this article will no doubt live in a tougher RF environment where built-in hardware filters are requisite to prevent your receiver from overloading. Or perhaps you desire truly uncompromising benchmark performance from your SDR. If either is the case, you may need to invest a little more of your radio funds in an SDR to get exactly what you want…and that’s exactly where I’ll take you November in the final Part Three of this SDR primer series.  Stay tuned!

Stay tuned for more in Part Three (November). I’ll add links here after publication.

Do you enjoy the SWLing Post?

Please consider supporting us via Patreon or our Coffee Fund!

Your support makes articles like this one possible. Thank you!
Spread the radio love

Software Defined Radio Primer Part 1: Introduction to SDRs and SDR applications

The new ELAD FDM-S3.

The following article originally appeared in the June 2018 issue of The Spectrum Monitor magazine:


SDR Primer Part 1: Introduction to SDRs and SDR applications

I author a radio blog known as the SWLing Post; as a result, I receive radio-related queries from my readers on a daily basis.  Among the most common questions are these:

“So, what is an SDR, exactly? Are these better than regular radios?”

and/or,

“I think I’d like to buy an SDR. Which one do you recommend?”

Great questions, both! But, before I address them, I must let the reader know that they are also “loaded” questions: simple enough to ask, but quite nuanced when it comes to the answers.

No worries, though; the following three-part primer sets out to address these questions (and many more) as thoroughly as possible. This first part of the primer will focus on the basic components of an SDR system. In part two, next month, we’ll look at affordable SDRs: those costing less than $200 US. In part three, we’ll take a look at pricier models and even include a few transceivers that are based on embedded SDRs.

But before we begin, let’s start with the most basic question: What is a Software Defined Radio (SDR), exactly?

Not your grandpa’s radio

Here’s how Wikipedia defines SDR:

“Software-defined radio (SDR) is a radio communication system where components that have been traditionally implemented in hardware (e.g. mixers, filters, amplifiers, modulators/demodulators, detectors, etc.) are instead implemented by means of software on a personal computer or embedded system.”

Whereas your grandpa’s radio was all hardware––in the form of filters, mixers, amplifiers, and the like––SDRs are a mix of hardware and software. With the exception of tabletop transceivers and receivers with embedded software and systems (which we’ll discuss in part three of our investigation), SDRs typically take on a “black box” appearance: in other words, the radio looks like a simple piece of hardware with a minimum of an antenna port, a data port and many times there’s also some sort of LED or light to let you know when the unit is in operation. On some models of SDRs, there is a separate power port, additional antenna connections, power switch, and possibly some other features; however, “black box” SDRs often look like a nondescript piece of portable computer hardware––something like an external portable hard drive.

Why would you want an SDR?

Many of us have made it through life thus far without an SDR…so, why in the world should we want the use of one?  Below, I’ll list some of the most appealing reasons:

Bang-for-buck

The Airspy HF+ (top) and FDM-S2 (bottom). Photo by Guy Atkins.

By and large, SDRs are quite a value when compared to legacy all-hardware radios. For example, I wouldn’t hesitate to pit my SDRs––such as the $500 Elad FDM-S2 or $900 WinRadio Excalibur––against legacy receivers that cost two to three times their price. Indeed, my $200 AirSpy HF+ SDR will give many DX-grade ham radio general coverage receivers a real run for their money. They’re that good.

Spectrum display

SDR applications have a spectrum display which gives you a real-time view of a broad swath of the radio dial. Whereas you can tune to and listen to one frequency at a time with legacy receivers, SDRs allow you to view, say, the entire 31 meter band. With the spectrum display, you can see when signals come on or go off the air without actually being tuned in to them. You can tell what signal might be causing interference because you can see the outline of its carrier. Spectrum displays are truly a window––a visual representation––of what’s on the radio. Using legacy receivers now often makes me feel like I’m cruising the bands with blinders on. After becoming accustomed to having a spectrum display, there’s simply no way I’d want to be without at least one SDR in my shack.

Powerful tools

I like how clean the user interface is for this SDR application (SDRuno) window that controls the SDR’s frequency, mode, filters and notch.

SDRs usually afford access to a dizzying array of customizable filters, gain controls, noise blankers, digital signal processing (DSP), audio controls, and more. Being able to customize the SDR’s performance and listening experience is simply unsurpassed. In fact, it’s almost a curse for SDR reviewers like me––comparing two SDRs is problematic because each can be altered so much that identifying the best performance characteristics of one or the other becomes a real challenge. In other words, comparing SDRs is almost like comparing apples to oranges: even using a different application can enhance and thus alter the performance characteristics of an SDR.

Multiple virtual receivers

SDR Console makes managing multiple virtual receivers a breeze.

Whereas most legacy tabletop receivers allow you to switch between two VFOs (VFO A and B) some modern SDR applications allow for multiple independent virtual receivers––in essence, multiple sub-receivers. On my WinRadio Excalibur, for example, I can run three fully-functional and independent virtual receivers within a 2 MHz span. On receiver 1, I might be recording a shortwave broadcaster on 7490 kHz. On receiver 2, I might be recording a different broadcaster on 6100 kHz, and following a 40 meter ham radio net on 7200 kHz in the lower sideband.

Recording tools

SDR applications, more often than not, have functionality for making audio recordings of what you receive. Some, like the WinRadio Excalibur and SDR Console, actually allow for multiple simultaneous recordings on all of their virtual receivers.

SDR Console recording dialog box

Most SDR applications also allow you to make spectrum recordings, that is, to record not just one individual broadcast from one radio station at a time, but to record an entire broadcast band, all at once. Each recording can easily contain dozens of stations broadcasting simultaneously. Later, you open the recording and play it back through the SDR application. Recordings can be tuned and listened to as if they were live. Indeed, to the SDR application, there is no difference in using an antenna or using a recorded spectrum file; the tuning experience to the listener is also identical.

So imagine that propagation is stellar one evening, or there’s a global pirate radio event just when you’re going to be away from home: simply trigger a spectrum recording and do a little radio time travel tuning later. It’s that easy.

Constant upgrades

Both SDR applications and SDR firmware are upgradable from most manufacturers. In fact, I’ve found that the most affordable SDRs tend to have the most frequent upgrades and updates. Updates can have a positive impact on an SDR’s performance, can add new features, such as the ability to expand the frequency range or more filters or embed time stamps in the spectrum waterfall. It could be pretty much anything and that’s what’s so brilliant. As a user you can make requests; your SDR’s developers might, if they like the idea, be able to implement it.

So, what’s not to love?

Looking at all of these advantages of SDRs over legacy radios, it sounds like SDRs should truly suit everyone. But the reality is, they don’t. For some radio enthusiasts, SDRs do have some unfortunate disadvantages:

First, if you’re primarily a Mac OS or Linux user, and/or prefer one of these platforms, you’ll find you have much less selection in terms of SDRs and applications. While there are a few good applications for each, there are many more SDR applications for PCs operating Windows. Until I moved into the world of SDRs, in fact, I was a Mac OS user outside of work. At the time, there were only one or two SDR applications that ran on the Mac OS––and neither was particularly good. I considered purchasing a copy of Windows for my MacBook, but decided to invest in a tower PC, instead.

Second, one of the great things about legacy radios is that with just a radio, a power source, and an antenna, you’re good to go; travel, field operations, and DXpeditions are quite simple and straightforward. SDRs, on the other hand, require a computer of some sort; when traveling, this is typically a laptop. I’ve spent several summers in an off-grid cabin in Prince Edward Island, Canada. My spot is superb for catching DX, and there’s no RF interference, so I love making spectrum recordings I can listen to later. Problem is, powering so many devices while off-grid is an art. Normally, my laptop can run off of battery power for hours, but when the laptop also provides power to an SDR and portable hard drive, it drains the battery two to three times faster.

The ELAD FDM-DUOr (receiver).

With this said, keep in mind that there are fully functional tabletop radios (like the Elad FDM-DUO and FDM-DUOr) that are actually SDRs, providing an easy way to bypass this concern.

Finally, there are simply some people who do not care to mix PCs and radio. I’ve a friend who’s a programmer, and when he comes home to play radio and relax, the last thing he wants to do is turn on a computer. I get it––as a former programmer, I used to feel that way myself.  But the world of SDRs lured me in…and now I’m a convert.

Scope of this primer series

The world of SDRs is the fastest growing, most dynamic aspect of the radio world. Because of this, I simply can’t include all SDRs currently on the market in this primer.  Let’s face it: there are just too many, and it is beyond the scope of this article to try to cover them all. Instead, I’ve curated my list, by no means comprehensive, to include a selection of the most popular and widely-used models.

I’ll be focusing on SDR receivers unless otherwise noted. In Part Three, I’ll call out some popular SDR transceivers. Additionally, I’ll bring my attention to bear on the “black box” variety of SDRs.

This primer is long overdue on my part, so I’ll provide answers to the most frequent questions I receive. But though this primer is in three parts, it barely scratches the surface of the vast world of SDRs.

Thus far we’ve defined an SDR and discussed its advantages and disadvantages.

Now, let’s take a closer look at what you’ll need to build a station around an SDR.

Assembling an SDR station

Guy Atkins’ laptop running HDSDR software in his SUV; the receiver is an Elad FDM-S2. (Photo: Guy Atkins)

In truth, most of you reading this primer will already have everything you need to build a listening post around an SDR. Understanding the components of the system in advance, however, will put you in a better position to get on the air quickly with an SDR that suits your needs best. Let’s discuss this component by component.

A computer

By virtue of reading this primer now being displayed on your screen, unless you’ve printed it out, I’m guessing you have access to a computer of some sort.

SDRs are really quite flexible in terms of computer requirements. SDRs are compatible with:

  • A desktop PC running the Windows operating system
  • A laptop PC running the Windows operating system
  • A desktop Apple computer running MacOS and/or Windows
  • A laptop Apple computer running MacOS and/or Windows
  • A tablet or smartphone computer running Android or Windows
  • A Raspberry Pi/Beaglebone (or similar budget computer) running a Linux distribution

If SDRs are compatible with so many computer operating systems and configurations, then why would you worry about which ones to choose?

As I mentioned earlier most, but not all, of the SDR applications on the market are only compatible with the Windows operating system. If you want the most out-of-the-box, plug-and-play SDR options, then you should plan to use a Windows PC. If you’re a MacOS user, fear not. Modern Apple computers can support Windows—you simply purchase a copy of Windows and set your system to boot as a Windows machine (assuming you have the storage space for a dual boot).

Secondly, processing speed is certainly a factor: the faster, the better. While you can use an Android/Windows tablet or a Raspberry Pi to run an SDR, they often don’t have features like multiple virtual receivers, wideband spectrum recording capabilities, and large fluid waterfall displays due to the simple lack of processing power. My guess is that by 2023, however, tablets and budget computers will have ample processing power to handle most, if not all, SDR functions.

Finally, if you plan to make spectrum recordings, especially wideband ones (2 MHz, plus), you need both a snappy processor and a high-capacity hard drive with a decent write speed. This is the reason I now have a desktop PC at home for spectrum recordings: I can use a very affordable SATA drive as a storage device, and the write speed is always more than adequate. My OS and SDR applications run on an SSD (solid state drive) which is very fast.  All of my recordings are saved to internal and external 4TB+ hard drives. Happily, I’ve never had a hiccup with this system.

An SDR application

SDRuno has an attractive user interface comprised of multiple adjustable windows.

Wait a minute…am I suggesting you choose an SDR application before you choose an SDR?  Why, yes, I am! You cannot use an SDR without an SDR application, but, with only a few exceptions, you certainly can use an SDR application without an SDR attached.

Unlike a legacy hardware radio, you can essentially test drive an SDR by downloading an application (almost always free) and then downloading a test spectrum file. Most SDR manufacturers will have all of this on their download page. Simply install the application, open the spectrum file, et voila! You’re now test driving the SDR. Your experience will be identical to the person who originally made the spectrum recording.

The WinRadio Excalibur application also includes a waterfall display which represents the entire HF band (selectable 30 MHz or 50 MHz in width)

I always suggest test driving an application prior to purchasing an SDR.

While all SDR applications have their own unique layout and menu structure, almost all have the same components, as follows:

  • a spectrum display, which gives you real-time information about all of the signals within the SDR’s frequency range;
  • a waterfall display, which is a graphical representation of the signals amplitude or strength across the SDR’s frequency range displayed over time;
  • filter controls, which help you adjust both audio and signal widths;
  • mode selections, which allow you to change between modes such as AM, SSB, FM, and digital;
  • a signal meter, which is typically calibrated and resembles a traditional receiver’s “S” meter;
  • a frequency display for the active frequency;
  • VFOs/virtual receivers, which may have real estate allocated on the display;
  • a clock, which displays the time, possibly as both UTC and local time (note that many SDR apps also embed time code in waterfall display);
  • memories, where you can store a near-infinite number of frequencies (and some SDR applications allow you to import full-frequency databases); as well as
  • other controls, such as squelch, gain, noise blanker, DSP, notch,etc.

After you’ve become comfortable with one SDR application, moving to another can be a little disorienting at first, but the learning curve is fairly short simply because most have the same components.

Types of SDR applications

SDR applications usually fit one of three categories: proprietary app, free third-party apps, paid third-party apps, and web browser based apps. (Assume each application runs on Windows unless otherwise noted.) Let’s take a look at each.

Proprietary SDR applications

Proprietary apps are those that are designed by the SDR manufacturer and provide native plug-and-play support for the SDR you choose. Proprietary apps give priority support to their own SDR, but some are compatible with other SDRs––or can, at least, read spectrum recordings from other SDRs. Most popular SDRs have a proprietary application. Here are examples of a few proprietary apps:

  • WinRadio App for the WinRadio/Radixon line of SDRs
  • Perseus Software Package for the Microtelecom Perseus
  • SDR# App for the AirSpy line of SDRs
  • SDRuno App for the SDRplay series of SDRs
  • FDM-SW2 App for Elad SDRs
  • SpectraVue App for the RFSpace line of SDRs
  • SmartSDR App for FlexRadio SDR transceivers

Free third party SDR applications

Free third party applications are incredibly popular and some even offer performance and feature advantages over proprietary applications. Third party apps tend not to be associated with any one particular manufacturer––SDR# being a noted exception––and tend to support multiple SDRs. I’m a firm believer in supporting these SDR developers with an appropriate donation if you enjoy using their applications.

  • HDSDR is a very popular application that supports multiple SDRs and spectrum file formats. The layout is simple and operation straightforward.
  • SDR Console is a very powerful and popular application. Like HDSDR, it supports multiple popular SDRs. It is my SDR application of choice for making audio and spectrum recordings.
  • SDR# runs AirSpy SDRs natively, but also supports a number of other receivers including the venerable RTL-SDR dongle.
  • Linrad (Linux)
  • SdrDx (MacOS and Windows)
  • Gqrx SDR (Linux)
  • SDR Touch is a popular SDR application for Android devices (Android)
  • iSDR is one of the only SDR applications currently available for iOS devices. Its functionality is somewhat limited. There are other SDR applications in the works, but at the moment these are in development stages only. (iOS)

Paid third-party apps

Paid third-party apps represent a tiny fraction of the SDR applications available on the market. Indeed, at time of posting, the only one I know about that’s currently on the market is Studio 1, which has been the choice for those looking for an alternative application to the Microtelecom Perseus Software Package.

Web browser-based  SDR applications

The KiwiSDR browser-based application

This is, perhaps, one of the newest forms of SDR applications. While a number of SDR applications (like SDR#, SDR Console and the Perseus Software package) allow for remote control of the SDR via the Internet, there are actually few applications that are purely web browser-based. At the time of this writing, the only one with which I’m familiar is the KiwiSDR application, which allows both the SDR owner and (if set up to do so) anyone else in the world to operate the SDR as if they are at the SDR’s location. In fact, the KiwiSDR only has a web browser-based application, there is no downloadable application. It will allow up to four simultaneous users, and the experience of using a KiwiSDR locally or globally is nearly identical. If you would like to use a KiwiSDR, simply visit http://SDR.hu or https://sdr.hu/map and choose a remote location.

[Note that if you like web-based SDRs, I highly recommend checking out the University Twente WebSDR located in the Netherlands.]

Choosing an SDR

In Parts Two and Three of this primer, we’ll take a closer look at some of the SDRs currently on the market; prices range anywhere from $15 to $6,000. As you can imagine from such a price range, these are not all created equally.

But first, ask yourself what your goal is with your SDR. Do you want to monitor ham radio traffic? How about aviation communications? Follow pirate radio? Listen to a range of broadcasters? Pursue radio astronomy? Is your dream to set up a remote receiver?

Whatever your flavor of radio, you’ll want to keep some of these needs in mind as you explore the SDR options available to you.

Budget

Photo by Kody Gautier

Be honest with yourself: how much are you willing to spend on an SDR? While entry-level SDRs can be found for anywhere from $15-50 US, a big leap in performance happens around the $100 mark. If you’re looking for benchmark performance, you may need to appropriate $500 or more. Whatever you choose, keep in mind that SDRs are only as good as the antennas you hook up to them. Set aside some of your budget to purchase––or build––an antenna.

Compatible applications

As mentioned above, not all SDRs are compatible with anything beyond the OEM/proprietary application. If you have a choice third-party application in mind, make sure the SDR you choose is compatible with it.

Frequency range

If you want an SDR that covers everything from VLF/longwave up to the microwave frequencies, then you’ll need to seek a wideband SDR. Each SDR manufacturer lists the frequency ranges in their specifications sheet. It’s typically one of the top items listed. Modern wideband SDRs can be pretty phenomenal, but if you never plan to listen to anything above 30 or 50 MHz, for example, then I would advise investing in an SDR that puts an emphasis on HF performance. Check both specifications and user reviews that specifically address performance on the frequencies where you plan to spend the bulk of your time.

Recording and processing bandwidth

The new SDRplay RSPduo can display up to 10MHz visible bandwidth (single tuner mode) or 2 slices of 2MHz spectrum (dual tuner mode)

If you plan to make either audio or spectrum recordings, or if you plan to monitor multiple virtual receivers, pay careful attention to an SDR’s maximum recording and processing bandwidth. This bandwidth figure is essentially your active window on the spectrum being monitored. Your active virtual receiver frequencies will have to fall within this window, if you’re making simultaneous recordings. In addition, this figure will determine the maximum bandwidth of spectrum recordings. Some budget SDRs are limited to a small window––say 96 kHz or less––while others, like the Elad FDM-S3, can widen enough to include the entire FM broadcast band, roughly 20 MHz!

Portability

AirSpy’s HF+ was introduced late 2017. Don’t be surprised by its footprint which is similar to a standard business card to its left–this SDR packs serious performance!

If you plan to take your SDR to the field or travel with it, you’ll probably want to choose one that doesn’t require an external power supply. Most late-model SDRs use the USB data cable to power the unit.  This means you won’t need to lug an additional power plug/adapter or battery. Still, many professional grade SDRs require an external power supply.

Recording features

If you plan to make spectrum recordings, determine whether you have many options to set the unit’s processing bandwidth. Some SDR applications have robust recording functionality that allows for both spectrum and audio recordings, including advanced scheduling. Some applications don’t even have audio recording or spectrum recording capabilities. Test drive the application in advance to check out their recording functionality. Of course, if recording is your main interest, you’ll also want to set aside some of your budget for digital storage.

Know your goal!

If your goals are somewhat modest––perhaps your budget is quite low, you simply want to familiarize yourself with SDR operation prior to making a bigger purchase, or you only want to build an ADS-B receiver––then you might be able to get by with a $25 SDR dongle. If you plan to use your SDR as a transceiver panadapter during contesting, then you’ll want to invest in a unit that can handle RF-dense environments.

Identify exactly what you’d like out of your SDR, and do your research in advance. Note, too, that many popular SDR models have excellent online forums where you can pitch specific questions about them.

Scoping out the world of SDRs

Three benchmark receivers in one corner of my radio table: The Airspy HF+ (top), Elad FDM-S2 (middle) and WinRadio Excalibur (bottom).

Now that we have a basic grasp on what SDRs are, what components are needed, and what we should research in advance, we’ll look next at some of the SDR options available to us. In Part Two, we’ll look at budget SDRs; those under $200 US in price. In Part Three, we’ll survey higher-end SDR packages.

Stay tuned for more in Part Two (October–click here to read) and Part Three (November–click here to read)I’ll add links here after publication.

Do you enjoy the SWLing Post?

Please consider supporting us via Patreon or our Coffee Fund!

Your support makes articles like this one possible. Thank you!
Spread the radio love

A review of the Tecsun R-9012 shortwave radio


Many thanks to SWLing Post contributor, Laurence Neils, who shares the following guest post:


A review of the Tecsun R-9012

by Laurence Neils

I have cheap radios. I can’t really justify buying more expensive ones given how much time (not all that much) I spend listening to the short wave broadcasters. The consequence of this is that, when I do listen to shortwave stations, I have the rather standard ultraportables to listen on.

My go-to radio is the Tivdio V-115, which has pulled out quite nice reception for me, and offers several functions I like a lot. However, it was missing one that interested me the most: analog or analog-like tuning. If I want to listen to something, I either have to know its frequency and try it, or I have to let the radio do an automatic scan. While it’s quite good at pulling out stations and letting me hear them, it can take a few minutes to do a full scan, and canceling it doesn’t result in the part scanned so far to be stored. Very few stations I am interested in hearing are convenient to jump into several minutes after they start (my interest is in spoken content rather than music, and neither news nor stories make a ton of sense if the introductory information was not heard).

From a recommendation here on the SWLing Post, I chose to purchase a Tecsun R-9012 radio to help me do a convenient scan, which is useful because it allows me to find stations without knowing their frequency, and leaves me to not remember all seventy frequencies a certain broadcaster is using this year.

Physical Description

When I bought my Tecsun R9012, it arrived quite quickly from Amazon. It included a short manual, whose contents could be loosely paraphrased as “insert batteries and turn on”. Other than that, the radio is all that’s there.

The R9012 is relatively small, but not as thin or compact as the Tivdio, which will be my main comparison unit for this review. It is your basic rectangle form factor, and about the size of the small tape recorders that were the last to be phased out for portable recorders. It would be easy enough to put this in a backpack, jacket pocket, or glove compartment, but you have no chance comfortably fitting it into a standard pocket. On the back, there is a flip-out kickstand that can hold the radio at about thirty degrees from horizontal and the battery compartment. This radio is powered from two AA batteries.

The right side of the R9012 contains the analog tuning knob, which I will discuss quite a bit later, and the power switch, which is not connected to anything else (not integrated into the volume knob or mode selector).

The left side gives you a 3.5mm audio out jack. This supports all the headphone types I’ve tried. One benefit of this radio is that headphones with integrated microphones, such as the ones that come with the iPhone as well as various sets that are intended for phone use, will work with it. Some other radios won’t work well with that type of headset. The Tivdio, for example, will play through the headphones but forgets to turn off the speaker if there is a microphone on them, making the headphones pretty much pointless.

Next to that jack is a power port, supposedly to recharge the batteries. A connector for this is not included, nor do they seem to sell one. I suppose the theory is that you might already have a suitable one in that box of old cables we all have, but I can’t see this as a particularly useful feature given the RFI you’ll get if you connect a radio directly to the mains to recharge. Above the ports is the volume knob, which is a very basic analog one, and then the wrist strap, which is integrated into the case. There doesn’t seem to be a way to remove or change it, should you desire that.

On the front of the radio, the speaker takes up the left half. This is fine for standard listening, but don’t expect wonders of audio fidelity. On the right half, there is the twelve-position mode switch (from left to right, FM, MW, SW from low to high frequency) and the tuning display.

FM performance

The Tecsun has a standard FM function, with stated coverage from 76 to 108 MHz. This is the leftmost position on the mode selector. The band is not divided into multiple switch positions, meaning that stations will be relatively packed into dialing space when compared to shortwave, which is spread across ten bands.

I didn’t buy this radio to use it for FM. I have very little interest tuning for FM stations. Some people may enjoy the experience of manual tuning for a station they can locate quickly, but I’m not one. I can easily type the frequency I want on my Tivdio, and I intend to keep doing that for FM. I mostly intended to test FM performance on the R9012 because I was curious to see whether there would be anything audible in the 76-87 MHz section. I know that our TV standards have switched off using analog audio, so I assumed there would be nothing, but I’d never formally put that to the test.

FM on the R9012 has problems. In fact, it has a lot of problems. Among other things, the FM process on this radio doesn’t seem to have a very good idea where things are. I’d be tuning through looking for some station and I’d find it…only to see that I was in a completely foreign part of the spectrum where that station had no business being. It seems that, unless you’re very focused in on a station, the R9012 is liable to pick up some other broadcast and layer them on top of each other. Never mind that the broadcasts have nothing to do with each other and aren’t anywhere near each other on the band. If you have a specific station you want, you can tune to it and have no problems. If you want to see what’s there, you’ll have a very fun time listening to stations that you might want to listen to, only to find that that was an image, you’ve lost it now, and you can’t find it again.

Sometimes, I managed to find a part of the spectrum that gave me three different images simultaneously. Ironically, the broadcast I intended to use as my landmark, the local classical music broadcast, which is located very close to the middle of the FM spectrum, was strong enough or at a coincidental frequency that I identified images of it at six different places on the scan, in addition to where it should be. So I got my answer about 76-87 MHZ. According to the R9012, there’s a lot of signal there. It’s just coincidence that it sounds exactly the same as standard FM broadcasts with extra static.

FM performance gets worse: this radio is extremely sensitive to location.

In order to get nice reception, you have to have the radio in a good position. This seems to be completely random. Standing up so the antenna lies flat on the top, but is not extended produces almost silence. Lying down so the antenna is touching the table (not a metal table) or chair (not a metal chair) causes most signals and images to come through quite clearly. Extending the antenna to medium length helps reception. Extending it all the way introduces a lot of interference. On FM, volume also changes a lot. We may reasonably expect for the signal to change if we connect something conductive to the antenna by, say, touching it with our conductive fingers. Maybe reception will get more static, or maybe it will in fact improve. What we don’t expect is for the broadcast to switch from comfortable volume to let’s see if we can get you some tinnitus volume. Unfortunately, that’s sometimes what happens on FM if you touch the R9012’s antenna. Or tilt it a bit in the wrong direction. This doesn’t seem to happen much if it is tuned onto a station, but if it is anywhere in the middle or if there’s some static, the volume change is very noticeable, in that it makes you want to get the radio off as soon as possible.

In summary, this radio just can’t really do FM. If your other radios are broken, you’ll be fine by using this, but don’t buy it if you intend to do FM things.

Mediumwave performance

The MW frequencies are mostly there, with stated specs including from 525 to 1610 kHz. While there are broadcasts between 1610 and 1710 KHZ, that’s not a ton of the spectrum. I don’t have much interest in MW. I tested the radio’s performance, and it seems fine. Strong stations come in loud and clear. Stations that have low broadcast powers are easy to tune in. I was able to get some skywave MW in here as well, but I really don’t have any interest in that. I was able to verify, however, that the terrible effects that plague FM performance don’t appear on MW. I got no images of distant stations, no rapid volume switches, and the position of the radio doesn’t seem to affect MW reception all that much. Perhaps this is due to the different antenna that most radios employ in tuning MW. However, the manual doesn’t say whether this radio has such an alternative antenna and I haven’t gone to the effort of disassembling it to find out.

Shortwave performance

Once again, the crazy stuff seen on the FM band doesn’t appear during shortwave listening. I was able to tune in quite a few stations, although this probably isn’t a DX-capable device unless you’re willing to go out into RFI-free areas. That sounds enjoyable, but it’s not really my thing. When I got signal, it came in quite clearly. I got very little interference from the device itself, although it does seem quite susceptible to RFI from power lines. Of course, so is everything else, but if you put its antenna closer to a line, you’d know it.

Frequency coverage

Shortwave is covered in ten bands that allow access to the more populated areas of the spectrum, but have many gaps. Certain descriptions claim that the radio has coverage from 3.90 to 21.85 MHz. This is so misleading I’d be willing to call it a lie. The actual ranges are as follows:

  • SW1: 3.7 – 4.10Mhz
  • SW2: 4.75 – 5.06Mhz
  • SW3: 5.95 – 6.20Mhz
  • SW4: 7.10 – 7.30Mhz
  • SW5: 9.50 – 9.90Mhz
  • SW6: 11.65 – 12.05Mhz
  • SW7: 13.60 – 13.80Mhz
  • SW8: 15.10 – 15.60Mhz
  • SW9: 17.55 – 17.90Mhz
  • SW10: 21.45 – 21.85Mhz

So what if most signals are in there somewhere? Those gaps are very large. For example, the only broadcast frequency for WWV that would be covered on this set is the 5MHZ one. 10, 15, and 20MHZ are all located in various gaps on the bands.

This turned out to be quite annoying. I know that these are standard areas of the spectrum, in which people place a preponderance of broadcasts, but the fact remains that a lot of broadcasts occur between the bands on this set. I checked the A18 shortwave schedule to identify how crazy I was. Of the 5530 broadcasts that were listed between the limits of 3.90 to 21.85 MHZ, 1870 of them or 33.8% of the total, are outside the range of this set.

It strikes me that the largest band on this radio covers only 500 kHz of space, whereas the smallest gap between bands covers 750 kHz. In many cases, bands cover only 100 kHz of bandwidth. While I guess it’s better that they’re there rather than their being completely absent, perhaps some effort could have been done to open that up a bit more. I quickly analyzed where missing signals were, and if Tecsun could extend the 5.95-6.20 MHz band down to 5.8 MHz, 7.10-7.30 up to 7.60 MHz, expand the 9.5-9.9 band, and give an extra 50 kHz to the 11.65-12.05 band, most of the missing spectrum, nearly a thousand broadcasts, would be brought back into coverage. This could be done and still keep the maximum band width at 500 kHz. Therefore, as they didn’t seem to feel this an important issue, it falls to me to consider it so.

Manual tuning

So I bought this to tune manually. It stands to reason that I should review how well it does that.

The analog dial is on the right, and protrudes outward. Once again, the knob does its job, but not all that well. It was very easy to use this to pan through the spectrum and pick up stations, but the wheel doesn’t make it all that easy to do so quickly. You have to turn it by grasping, as the wheel has a fair bit of resistance. I don’t doubt that this feature helps to keep from knocking it off frequency, but you have to use two fingers to rotate freely, and that slows the process down. Meanwhile, the wheel has a rather disconcerting way of stopping, where the wheel seems to have hit an obstruction. However, this essentially increases the resistance, rather than feeling like a barrier. It’s noticeable, but it feels like something’s blocking the turning mechanism, rather than that the mechanism has reached its limit. Actually, it is possible to keep turning the dial, which I assume will eventually damage something, but if you’re not used to how it feels, you may do so without realizing that you’re not actually going anywhere.

The wheel has quite a bit of travel. On my set, it will rotate about three full turns. I believe this is necessary because all of FM, including the standard and Japanese bands, is in one section. Therefore, the wheel needs to be able to turn a lot in order to separate those stations. However, this means that panning over a shortwave band that covers at most 500 kHz of spectrum includes a great deal of panning over static. This works to scan quickly, but there are undoubtedly even faster ways to do so.

Conclusions

It’s a radio. It will pick up stations and make noise. In that, it works. However, this isn’t exactly a great set. The $22 price tag may forgive some of its flaws but not all of them.

Radios like the Tivdio models cost similar amounts and cover the spectrum more fully with some extra features. When I purchased this model, I expected the lack of features to be made up by convenient scanning over shortwave, relatively good sound, and relative disposability. I got enough for me to keep the set, but nothing more.

Pros:

  • Mediumwave is rather sensitive for those who enjoy listening to those signals.
  • Radio has a kickstand and the antenna can be rotated freely.
  • Radio supports headphones with inline microphone.

Cons:

  • FM is plagued by images of other stations that should not be there. This is rather bad.
  • FM is far too sensitive to antenna position.
  • Shortwave coverage, while it includes most of the spectrum in use, has big gaps that are actually being used by a lot of broadcasters.
  • Analog tuning works, but not really well. The knob can turn but does so with effort.

Would I recommend people to purchase this? Probably not.

Those who have higher-priced devices will get nothing from this. Those getting into the hobby aren’t going to get a ton of benefit from this, because tuning on shortwave requires enough familiarity with dial position that they may spend too long figuring it out. It would be useful on FM only if most other radios have been broken. It’s not even that good as an emergency set because of the FM sensitivity problem.

If all you want is analog tuning over the bands that are provided, the radio will do it for you. If you want more, buy something else.


Thanks for sharing your evaluation Laurence. Thanks for focusing on one of the points that is often overlooked with analog radios: the frequency coverage on various shortwave bands. The R-9012 does seem particularly segmented. 

Tecsun R-9012 retailers:

Post readers: Do you own the R-9012? What are your thoughts? Please comment!

Do you like the SWLing Post? Consider supporting us via Patreon or our Coffee Fund! Thank you!
Spread the radio love

Dave reviews the Icom IC-R30 Handheld Wide Band Receiver

The new Icom IC-R30 handheld wideband receiver at the 2018 Hamvention.

Many thanks to SWLing Post contributor, Dave Zantow (N9EWO), who notes that he has published his comprehensive review of the Icom IC-R30 handheld wideband receiver.

Click here to check out Dave’s review.

Based on Dave’s evaluation, it sounds like this is one of the better wideband radios, although like similar models, its utility in the HF and mediumwave bands is somewhat limited. He gives the R30 good marks for AGC and notes a lack of spurious emissions on MW. Unlike other wideband handhelds, he noted no mediumwave stations overloading the HF bands. With the unit connected to an external HF antenna however, intense overloading occurred on these bands.

As I tell anyone considering a wideband handheld, don’t buy it with the intention of logging weak signal DX on the HF bands–it’s just not a great receiver for this. It shines on those higher frequencies starting in the VHF band and moving up.

Thanks for sharing your review, Dave!
Spread the radio love