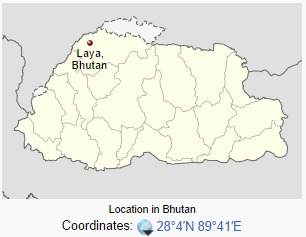
Three weeks ago, I posted a virtual challenge for SWLing Post readers: your opportunity to piece together the best, innovative $1200 (US) radio kit you might pack for two years in the remote off-grid village of Laya, Bhutan.
You were tasked to track down a radio kit that would keep you in touch with the world, and potentially afford you some very unique DX. [If you haven’t read the full virtual radio challenge, including all of the limitations you might face, I encourage you to check out this post before continuing.]
Your Reader Responses
And, wow, what excellent responses–! First, I want to thank all who participated in this challenge. Much like the results from our first Reader Challenge, no two responses were identical. I sincerely hope you enjoyed this exercise as much as I enjoyed reading what you’ve sent to the SWLing Post!
Below you will find responses from readers, representing remarkable diversity in radio set-ups. Note that my comments follow; they are italicized and in bold.
Now, with no further ado…I welcome you to radio DX in Laya, Bhutan!
from Frank Holden
 I would take along two radios:
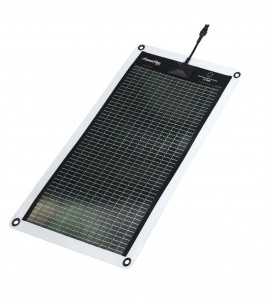 To run this for two years off the grid I would buy a PowerFilm R15 foldable Solar panel ($130) and a charging regulator kit for about $18.
These two items would keep me supplied with plenty of power for the job at hand.
I assume that a computer is already owned, mine is a Mac Powerbook…
so I would include in my kit a 12V/18V dc-dc convertor for $60.
This can be adjusted to provide the correct charge voltage for my computer. I would also get the small enclosure for it. Say $70
I would need to source a bare ended power cable for the computer from somewhere, cost unknown. My present one came from my scrap box.
I would also buy a fuse block to help keep all the wiring tidy. ($47)
Also a flush mount USB socket for my radio charging cables about $30.
I would set up all this gear either on a panel or in a small box for the sake of tidiness. This, involving crimping kit, crimps and wire, could be done before departure. Say $20 for the bits.
Job just about done but not quite…. solar panels only provide power when the sun is out… need a biggish battery to accept the solar charge during the day and give it back at night.
A nice wet cell 12 volt battery will do the job but that won’t be allowed on the ‘plane..what to do??
After flying into Bhutan at Paro and busing to Thimphu I would take time out to buy a 12V automotive battery. At first I considered a couple of 6V motorbike batteries but have been advised that motorbikes are uncommon in Bhutan but cars and trucks aren’t. No probs on-carrying that by truck, horse and porter so thats the 12V storage sorted.
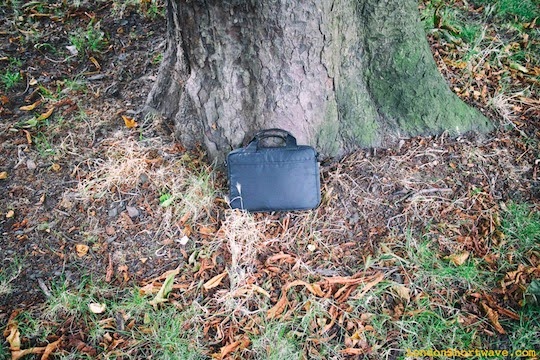
Connect solar panel to charge regulator to my battery to my computer power supply and radio charging cables . Throw my wire antennas over the handy tree, pour single malt, put feet up……
Total cost excluded the 12 volt battery … about $600… Oh and must not forget to replace the supplied AA’s in the PL-660 with Sanyo Eneloops and also a few extra sets as spare…. and a copy of WRTH.
I must admit a bit of an advantage with this…. my boat is an off-grid installation and my wife was in Bhutan a few years ago.
Frank, I love how simple you’ve kept this set up. You are very wise to acquire a 12V auto battery locally, when you arrive in Thimpu. While Bhutan isn’t as commercially “developed” as many other countries, you can find basics like batteries, connectors, fuses and accessories in the capital city of Thimpu. Your experience off-grid on the open sea and with Bhutan, in general, have served you well. Thanks for your entry!
from Tim Rahto
[Note: Tim was so enthusiastic about this challenge that he proposed three different kits: one with a transceiver and two receive-only.]
Your radio challenge inspired me to ignore everything else I have to do today and write you up a response. [You’re welcome, Tim!]
I know your contest refers to shortwave listening and not ham radio, but we are talking about Bhutan here. According to QRZ, there’s only 9 callsigns in the entire country, with three of those belonging to radio clubs, special event stations, or DXpeditions. With that in mind, I put my station together with transmitting as well as receiving in mind.
Option 1: Yaesu FT-857D
 RADIO
RADIO
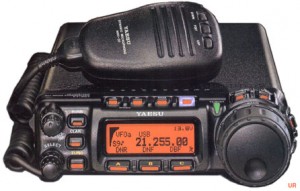
For a radio, I chose the Yaesu FT-857D. I have one in my truck, and it’s survived four years of mobile operation without a hiccup. About the only knock I have on this radio is that the AM bandwidth is pretty wide for shortwave listening, but you can always put it into sideband if needed. It’s small, portable, and puts out 100 watts. Perfect!
Used on eBay for $780.
BATTERY
Since I just blew half of my money on a transceiver, I needed something fairly light and inexpensive for a battery. With that in mind, I was very happy to find a 7 amp hour motorcycle battery for $39 from Batterystuff.com. Sold!
 POWER
POWER
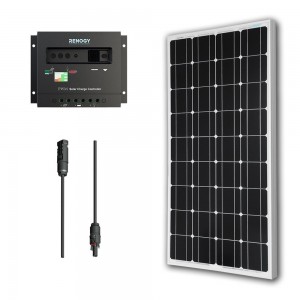
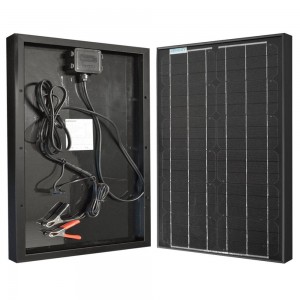
Now that I have a battery, I needed some way to keep it charged to keep me on the air. That’s where this 100w solar panel and charge controller combo I found on Amazon comes in. Hard to go wrong for the price too. $164.99 seems like a pretty good deal to me.
ANTENNA
Some would say I cut corners on the antenna, but I don’t think so. Considering the remote nature of the location and the need to keep things light and mobile, I went with a simple dipole. Easy to build, simple to repair, and works pretty well. I went the ‘roll your own’ approach and bought an Alpha-Delta dipole kit and wire for the antenna, and 100′ of coax to feed it all.
Alpha Delta Delta C kit: $29.95
150′ Copper Antenna Wire: $26.99
100′ RG-8X: $24.95
 TUNER
TUNER
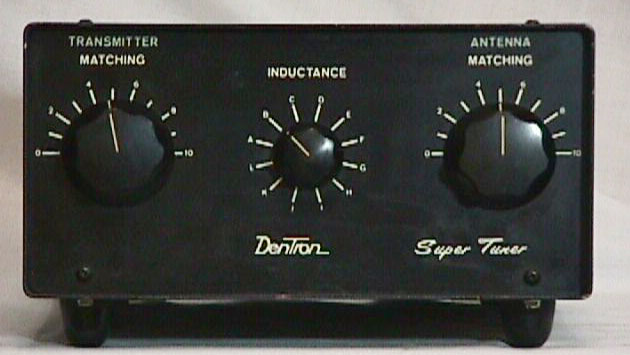
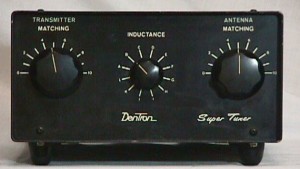
While I have enough wire to make an 80m antenna, I’d like to use it on other bands as well, so a tuner is a must. And since I’d like the ability to trim the antenna for the shortwave as well as amateur bands, I went with an older manual tuning Dentron Super Tuner that I found used on eBay. It’s going for $100 with no bids at the moment, so if it doesn’t go up I should be able to pick it up for the original asking price. It’s not the smallest unit in the world, but they’re not very heavy either.
That leaves me with $12.13 left to buy a log book and some pencils. What about the shipping and handling you ask? Why I went and picked it all up myself of course. 😉
Here’s a quick itemized list of gear:
- FT-857D – $780
- Battery – $39
- 100′ coax – $39.95
- 3′ coax jumper – $6.99
- solar panel/charge controller – $164.99
- dipole kit – $29.95
- 150′ antenna wire – $26.99
- Antenna tuner – $100
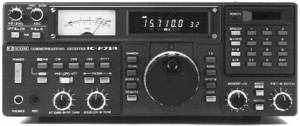
Option 2: Icom R71a
 RADIO
RADIO
Icom R71a – $260 on eBay.
ANTENNA
ArraySolutions shared Apex Loop Array SAL-20 – $795
COAX
100 ft RG-6 – $15.04
 BATTERIES
Quantity of 2, 12v 7 Amp Hour alarm batteries – $30.58 ($15.29 each)
POWER
30w solar powered battery charger – $88.91
GRAND TOTAL: $1189.53 BOOM!
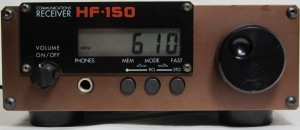
Option 3: Lowe HF-150
 RADIO
RADIO
Lowe HF-150: A lot of radio in a small package. $489.95
ANTENNA
4 unterminated beverages. This will give you all eight points of the compass, all be it two at a time.
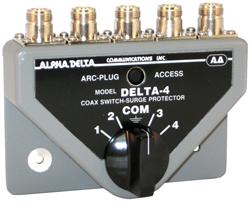 ANTENNA SWITCH
4 position Alpha Delta N connector switch from Universal Radio, $94.95
COAX
2 100 ft RG-6 – $60.16 ($15.08 each)
BATTERIES
Quantity 2: 12v 7 Amp Hour alarm batteries – $30.58 ($15.29 each)
POWER
30w solar powered battery charger – $88.91
Tim, no doubt you had a lot of fun piecing together your radio kits! In each case you chose quality components–a smart decision since you want longevity and reliability in the field. I think there would actually be enough financial flexibility in each case to include a small back-up portable like the Tecsun PL-380 or similar. As you must know, the Lowe HF-150 is a surprisingly small tabletop radio with excellent performance; it would be easy to slip in a backpack or suitcase. Thanks for your entries!
from Rex B
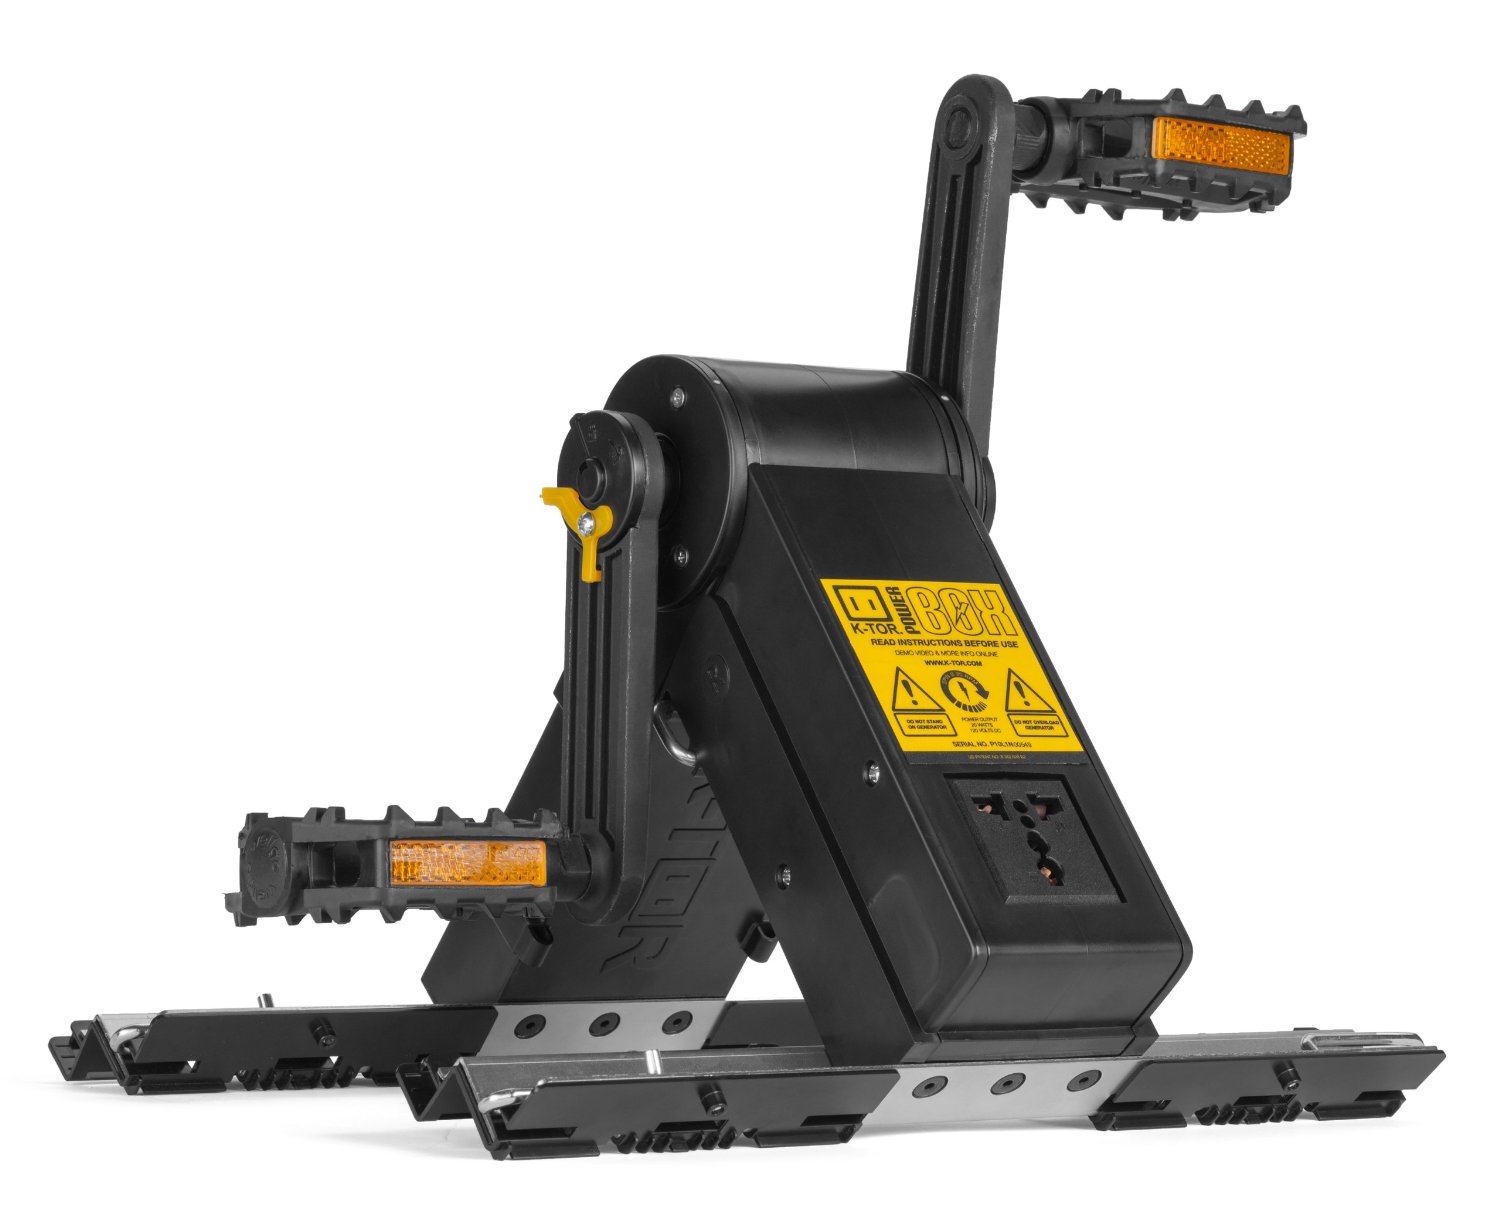
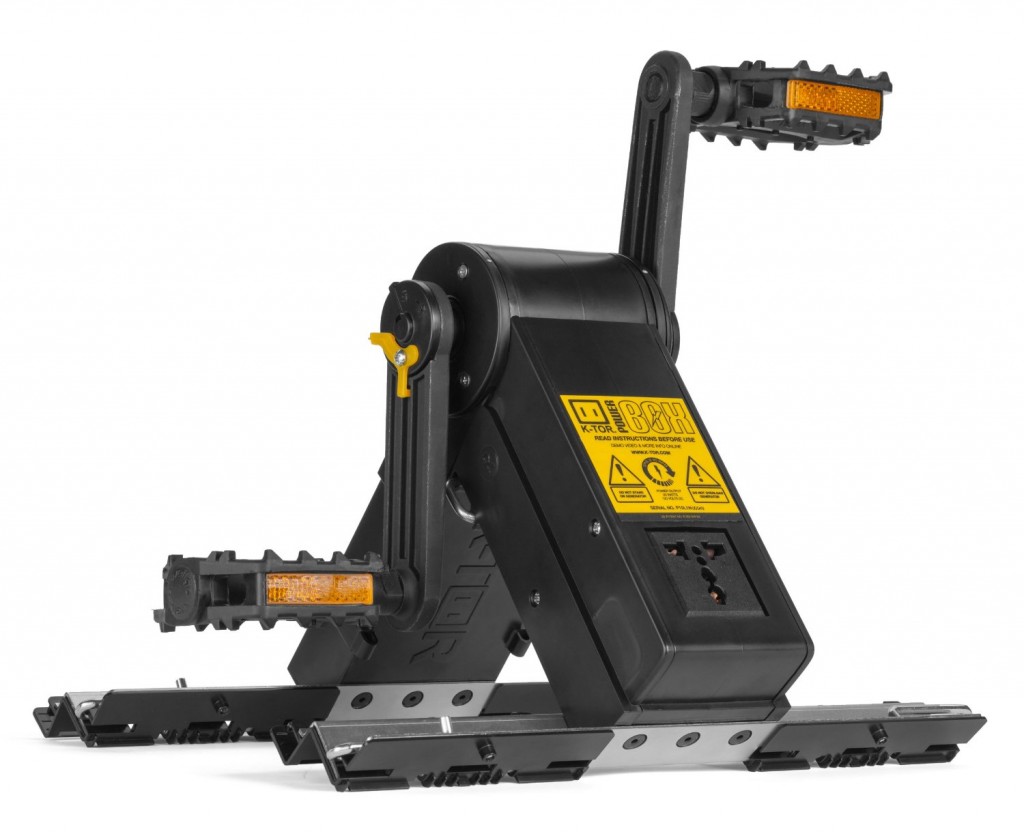 For power I’d get a couple solar panels, maybe the 75-watt ALEKO panels Amazon has for $110. Also a $200 K-Tor pedal power-box as a backup in bad weather, or similar device.
For power storage, I’d go with sufficient numbers of AA size LSD NiMH batteries to be wired up into several 12V battery packs for solar charging… heavier than Li-Ion, but considerably cheaper, more durable, and should easily last through 2-years, where li-ion wouldn’t.
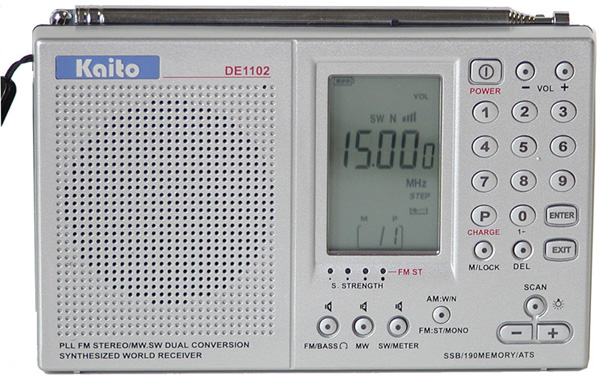 Probably throw a $100 Kaito KA1102 radio in there. The 1103 is infuriating. A long, long spool of wire for use as antenna once setup. And other bits and pieces.
Amazon says I’m $600, or $800 including the netbook, without really trying to find good deals. Lots and lots of accessories still needed, like 12V cell phone chargers, diodes and/or solar charge controller. I’d also throw-in other comforts, like plenty of different LED flashlights and lanterns, good external speakers and headphones. Plus lots of USB thumb drives just loaded up with movies and TV.
Rex, I like the idea of the KTOR pedal power when solar conditions are not favorable. in truth, using solar requires a little pre-meditation whereas pedal power could work anytime. Thanks for your entry!
from Timothy Johnson
Hi! This is a great challenge. I would take my Tecsun PL 660 and buy a solar AA charger. (And maybe $400 worth of AA duracells!) And for my backup……My Grundig FR200!
 What? No gazillion dollar receiver with a four mile wire strung up?
Correct! It’s a fun challenge in a great location. I want to use the radio I use now to see what I can pick up. It’s a good location to pick up stations from the otherside of the world that I normally can’t get, but dream about what it would be like. The PL 660 isn’t a slouch when it comes to receiving, and it has SSB and the Airband! This is a fun challenge and it’s a great time to enjoy listening to the shows, not just seeing what I can get. Up in the mountians, I would need to rely on my shortwave for news around the world. I mean, what day is complete without Radio Havana Cuba’s slant on the news? I would hope over there I could get Iran’s Voice of Justice!
The FR-200 would be my back up to use if the solar charger breaks, or it’s cloudy for awhile. It’s a great portable with a built in dynamo. Plus its fun to use. Scanning the dial on an analog dial makes for relaxed listening. Kick back, pour whatever the locals drink, and see what comes in!
As an english/science teacher, I could introduce the students to the world and improve their english skills, while they teach me some of their language.
Anyway, great challenge!
Timothy Johnson
I have had a lot of experience with the Grundig FR200. Unfortunately, it’s no longer available new from Grundig, but the same model is available from sellers on eBay as the Tecsun Green 88. Not only does it work well from the hand crank (2 minutes of cranking yeilds 40+ minutes of listening), but it also runs for 80+ hours on a set of AA batteries. It’s a durable radio as well. Thanks for your entry!
from Ashok
1) Asus EEE-PC $100 from ebay.com
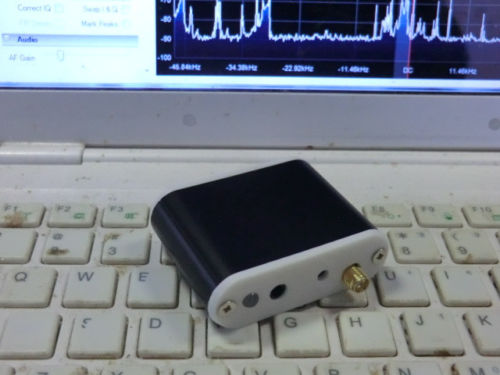
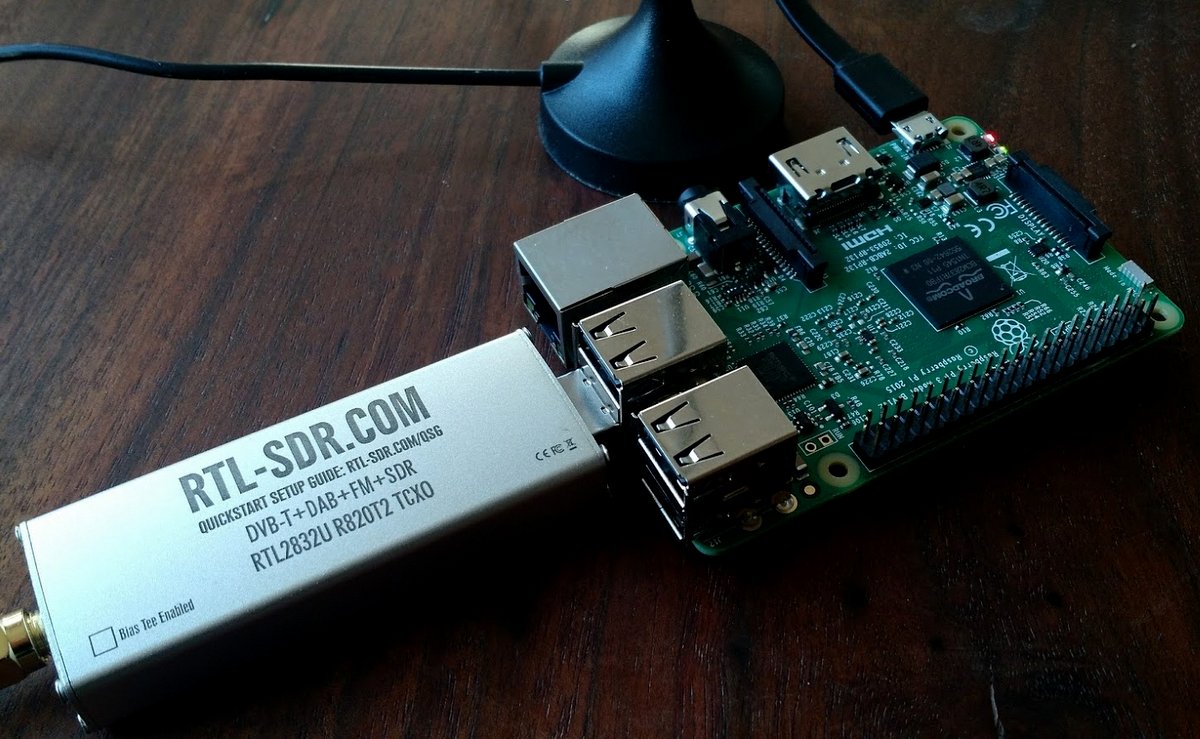
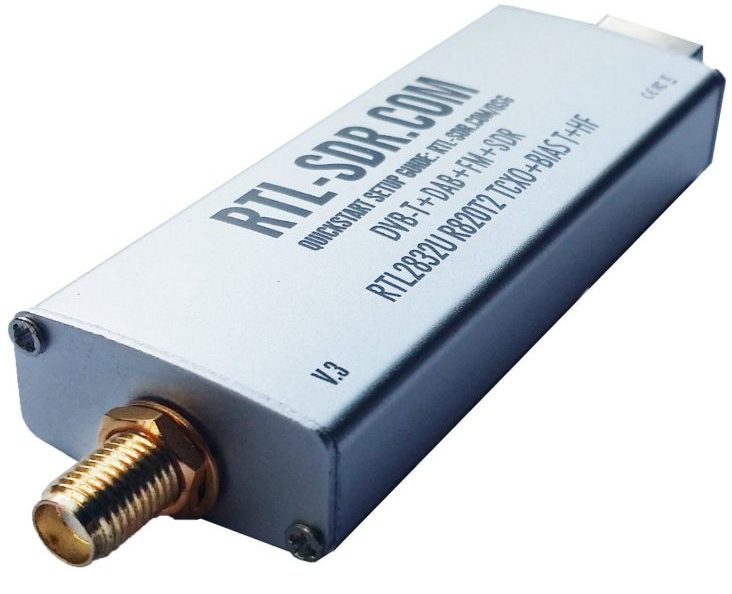
2) Soft66RTL-HF-VHF-SDR including RTL2832u-R820T with upconverter ($52 ebay)
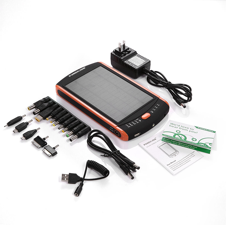
3) 23000 mAh Portable External Battery Solar Power Charger for LAPTOP 12V 16V 19V ($109 ebay) it has multiple pin configuration and also a LED torch.
4) Single core Electrical wire 100 feet for antenna (INR 300 = 5 $ in india)
5) Nylon thread/Rope (INR 50 = 0.9 $ in india)
6) 30 feet Coaxial cable (RG56 ???) INR 80 = 1.3 $
a) Install Linux (Fedora), GNU Radio, and other software for RTL SDR.
b) additionally install fldigi, multimode, HFfax software, NOAA weather decoder
c) make a QFH (Quadri Fillar Helix Antenna) for 137MHz NOAA satellite reception also usefull for VHF 2m reception, upon arrival at the destination. The wooden stick and batten used for it can be available free at the destination.
Total expences = 100+52+109+5+1.3 = 267.3 $
Still one have 1200 – 267.3 = $932.70
That’s an innovative SDR kit and certainly well within budget. In fact, you would have over $900 to purchase a backup radio, batteries, power generation and antenna accessories! Thanks for your entry!
from Cap Tux
Cap’s Virtual Radio Challenge Submission
As the challenges main objective is to listen to international broadcasters and DXing you only need a small portable receiver with very little power consumption. There are a lot of very capable receivers on the market now to fit the bill.
Remember, lugging a big receiver to the other side of the world is not going to be fun (and risk it being damaged en-route).
As the village is completely off the power grid I propose to use a small portable receiver & power source with a fairly good storage capacity i.e. at least 5 good charges from a fully charged source should give you a good few weeks of heavy usage.
 Receiver:
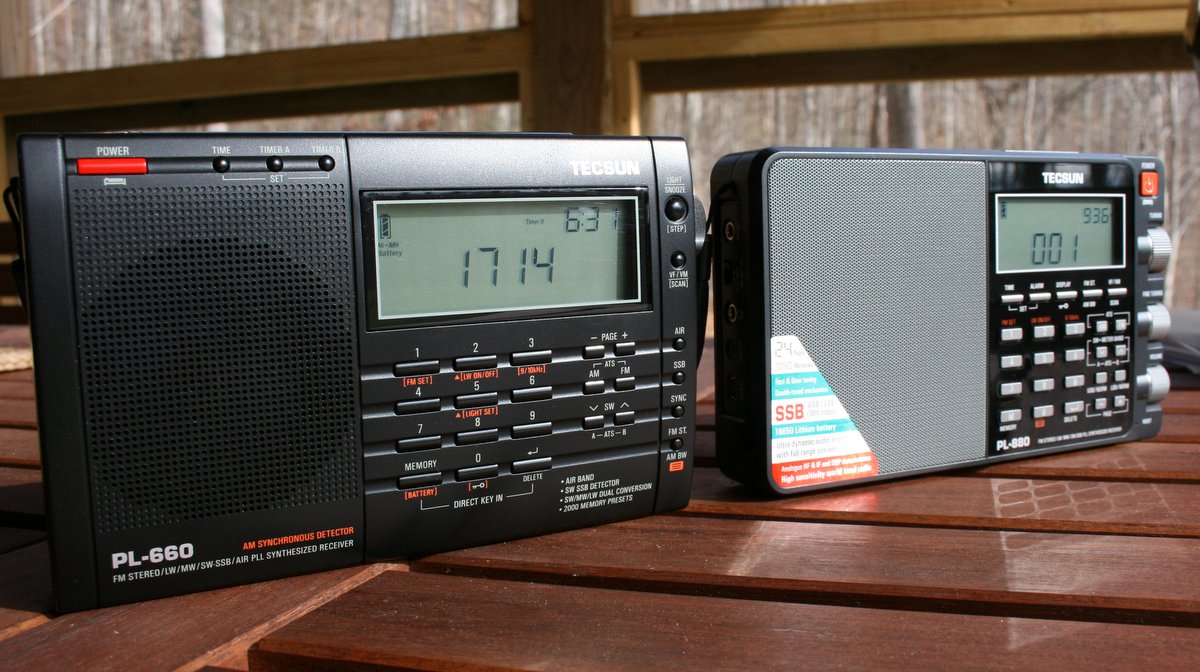
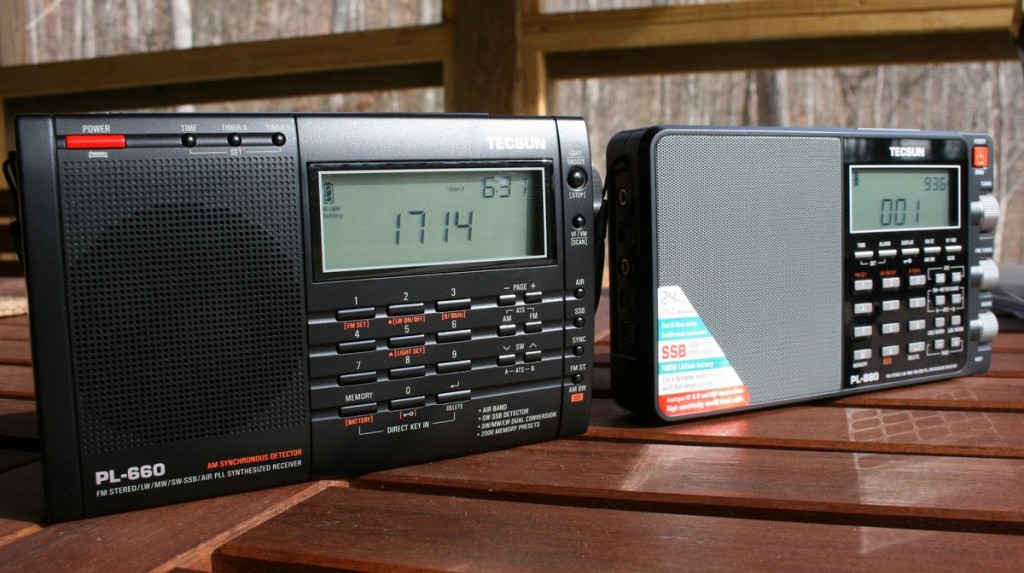
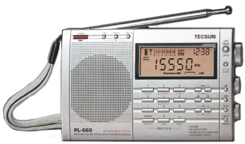
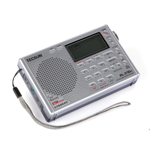
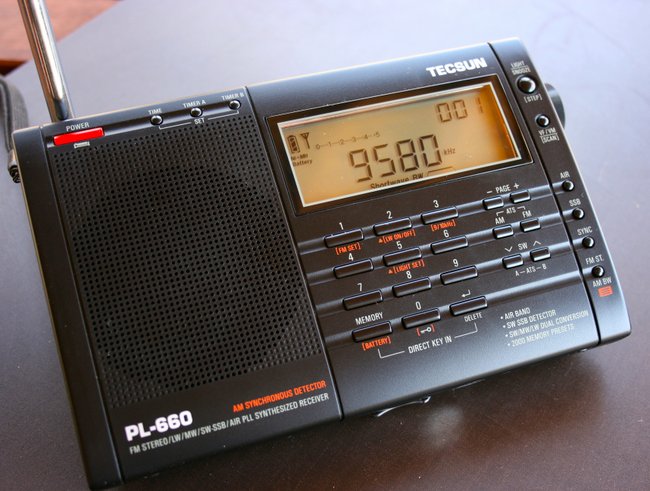
Tecsun PL-660 Receiver – A very capable shortwave receiver with MW/LW/FM with SSB and runs from 4 x AA rechargeable 1.2v Ni-Mh batteries.
This receiver is also capable of running/charging from a sustainable USB power source.
The PL-660 also has an auto scan and store that will sweep shortwave and store any stations it finds into memory, saves you tuning about.
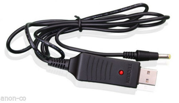
You can charge this using a USB Charger for the Tecsun PL-660.
 FM Reception:
You may be lucky and have FM reception within range (unlikely, but possible), a general coverage receiver in most cases is not equipped with VHF BCB FM reception i.e. NRD-525, IC-R75 are not equipped with VHF FM.
FM in Bhutan: http://www.unesco-ci.org/ipdcprojects/content/expanding-public-service-fm-radio-rural-communities
Broadcast schedules:
In order to know what frequencies you need to tune into, realistically you will only have the first season i.e. A15 shortwave schedules for your target shortwave broadcasters.
You will not know the next seasons frequencies, you will need to listen into your favourite broadcaster nearer the time to get next seasons frequencies. Load the current seasons frequencies onto your laptop, or print them off.
Antenna:
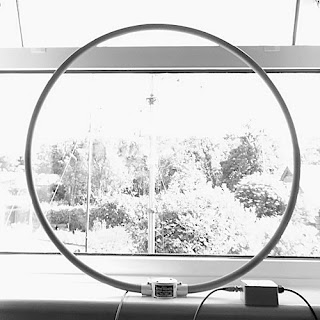
The PL-660 has an external antenna socket by way of a 3.5mm socket, a long wire can be used. Personally, I would take my home-brew passive Mag Loop antenna which can fold up easily, why? in case of thunderstorms that could send static down an external long wire to the receiver, rendering it unusable.
You could always hang the long wire around your room to minimise static from thunderstorms. You get a long wire bundled with the PL-660, no need to buy another,
 Sustainable charging power source for the receiver:
23000mAh Li-Po battery pack with solar panel (USB port & various outlets for laptop charging).
Technically you could ditch the 3 x AA internal batteries and power the Tecsun direct from the battery pack via the mini USB cable, however, assume you would want to run it autonomously from the charger or go out and about for a spot of Dxing. I propose purchasing 12 x 2400mAh rechargeable Ni-Mh batteries.
Netbook
 A phone or tablet is going to be a liability if dropped, a small netbook is going to be more robust for travelling and will have a longer running time from each charge.
I would also charge the laptop from my solar charger as it has a 19.5v option for charging. The MSI Wind U180 gives around 7.5 hours on a full charge (Loads of options for a netbook though).
The stock battery is about 7200mAh which the solar charger is more than capable of fully charging.
Shopping list:
Total: £318.28 ($517.06)
As this is well within budget you could buy two of everything for redundancy.
 Honourable mention:
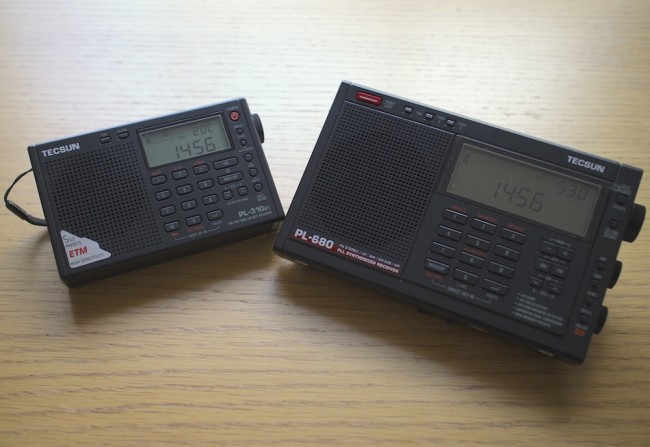
If AM BCB is your only concern a Tecsun PL-310ET will fit the bill, very small/light and cheap at around £32. There is also less chance of a small £32 radio being stolen.
In the end, I would probably take both my PL-660 & PL-310 as the PL-310 will give me the flexibility when out hiking or travelling within Bhutan and also acts as a backup radio.
Cap, I’m impressed with how frugal and portable you’ve kept your radio kit. Adding the Tecsun PL-310ET is a great idea. I imagine there would be superb opportunities to do mediumwave DXing with the ‘310. As a bonus, when traveling within the country, the PL-310ET would be easy to carry and use en route. Thanks for your entry!
from London Shortwave
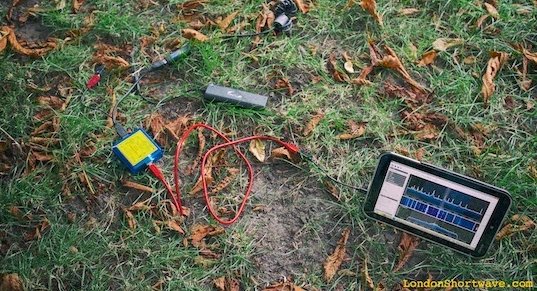
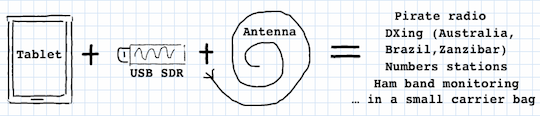
My solution is to fuse my two previous submissions to The Post – my response to the shortwave listening challenge for the remote Atlantic island of Tristan Da Cunha and my portable SDR design – and to add solar power.
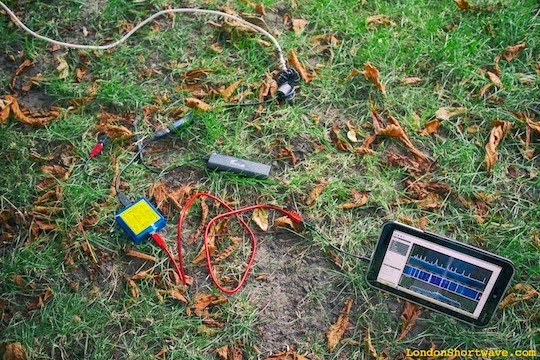
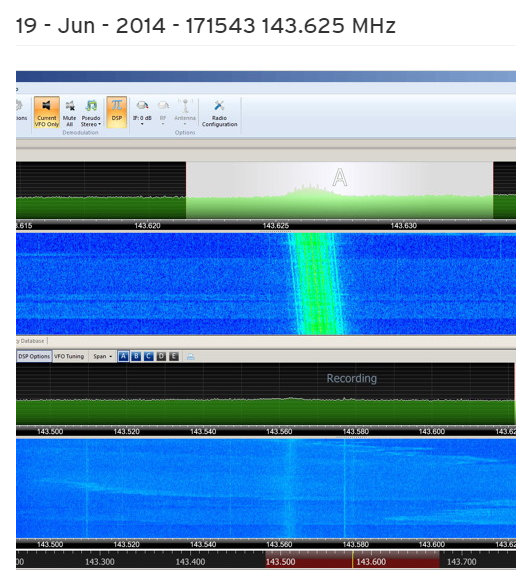
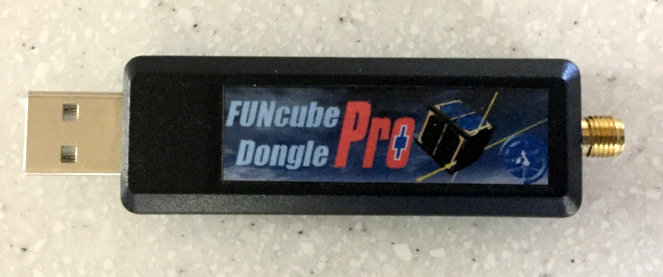
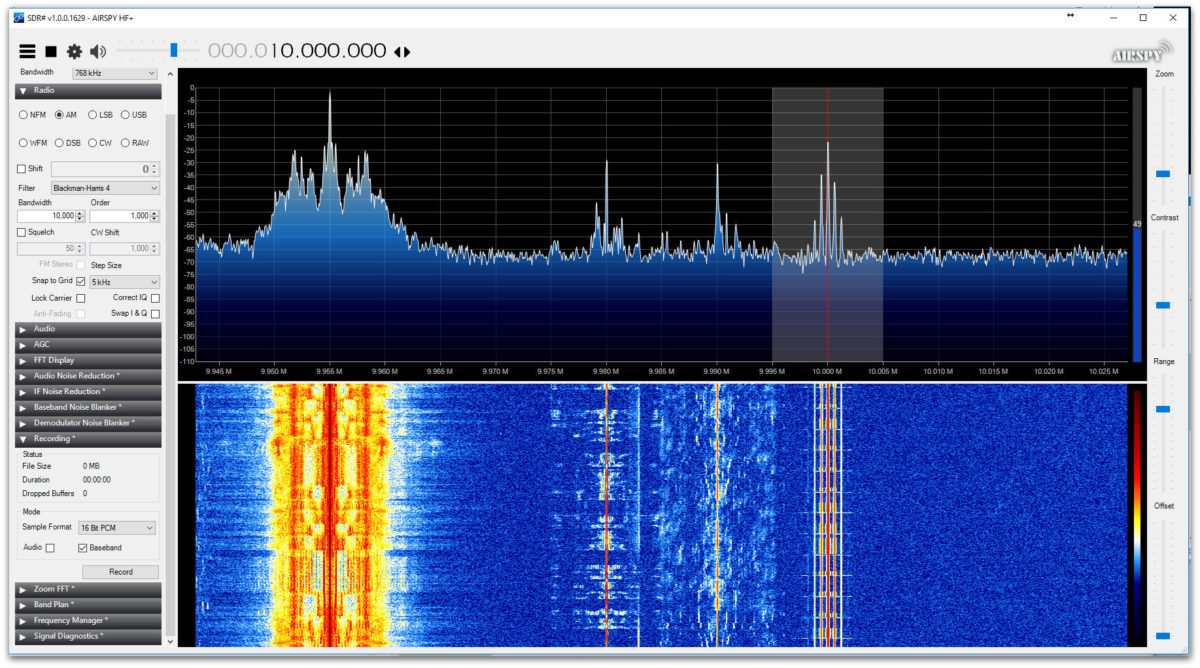
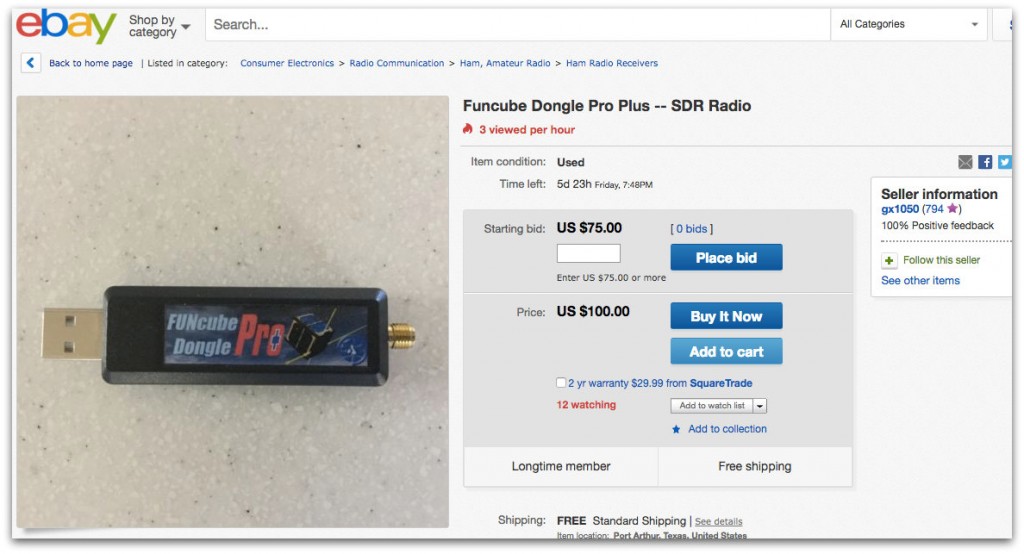
FunCube Dongle Pro+ and Toshiba Encore 8″ running SDR# in a London park
To recap, the tablet-based SDR set-up costs $643. My experiments with FunCube Dongle Pro+ and SDR# software have convinced me that this combination makes for one of the best shortwave listening experiences in its price range. Here are a few reasons why:
– FunCube Dongle Pro+ is a sensitive SDR.
– SDR# has an excellent noise reduction algorithm that often turns laborious DXing into comfortable listening. It also has a robust synchronous detector, which, combined with its passband tuning and noise reduction algorithms can unbury almost any station from the surrounding co-channel interference.
However, given the remoteness of the location and the fact that there is no reliable electricity grid to speak of, we need a few extras:
Solar Power
You may recall that in my portable SDR solution there are two sets of batteries that need to be recharged:
– Toshiba’s built in Lithium Ion battery (via its USB port)
– 4xAA batteries for the Gomadic 5V Power Pack (used for supplying extra power to the SDR)
First, let’s get a compact, foldable solar panel:
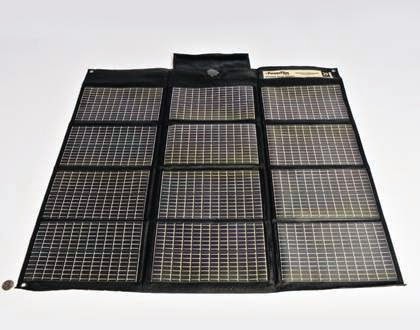
1. Powerfilm F16-1200 20W foldable solar panel
I would go with Powerfilm F16-1200 20W foldable solar panel (buy it here for $210.99). Disclaimer: although I’ve never used any of the PowerFilm products or accessories, I have read good reviews of them from other radio enthusiasts. When folded, this solar panel measures merely 27.9cm x 16.5 cm – slightly smaller than an A4 notepad. Once fully opened, however, it can deliver 20W of power (15.4V, 1.2A), enough to charge the Toshiba tablet and 4xAA rechargeable batteries simultaneously.
To charge the AA cells, I would go with the Powerfilm RA-3b – 12V Battery Charger Pack for AA and AAA (buy here for $54.41) and the Powerfilm RA-2 12V Female Power Port Adapter (already included with F16-1200).
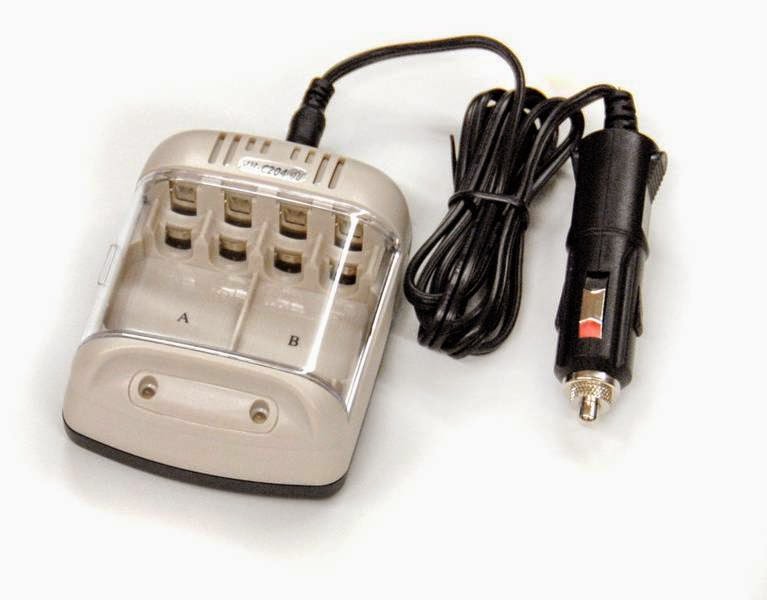
2. RA-3b – 12V Battery Charger Pack for AA and AAA
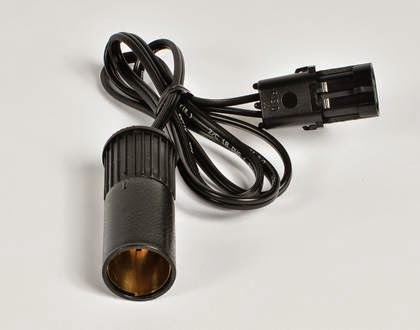
3. RA-2 12V Female Power Port Adapter
Although we only need 4 AA batteries for the Gomadic USB Power Pack, it’s always nice to have some spare ones, just in case. I would throw in a pack of 12 Panasonic Eneloop AA 2100 Cycle Ni-MH Pre-Charged Rechargeable Batteries for $26.95.
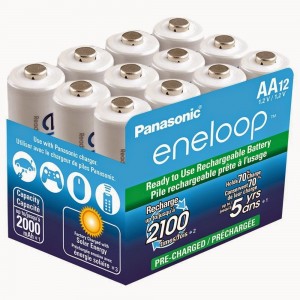
4. 12 Panasonic Eneloop Rechargeable Batteries
The spares can be used in the following ways:
– To power the backup portable shortwave radio
– To have another batch ready when the batteries insde the Gomadic USB Power Pack run out.
– Using Gomadic, to charge the tablet outside daylight hours, for more daytime listening.
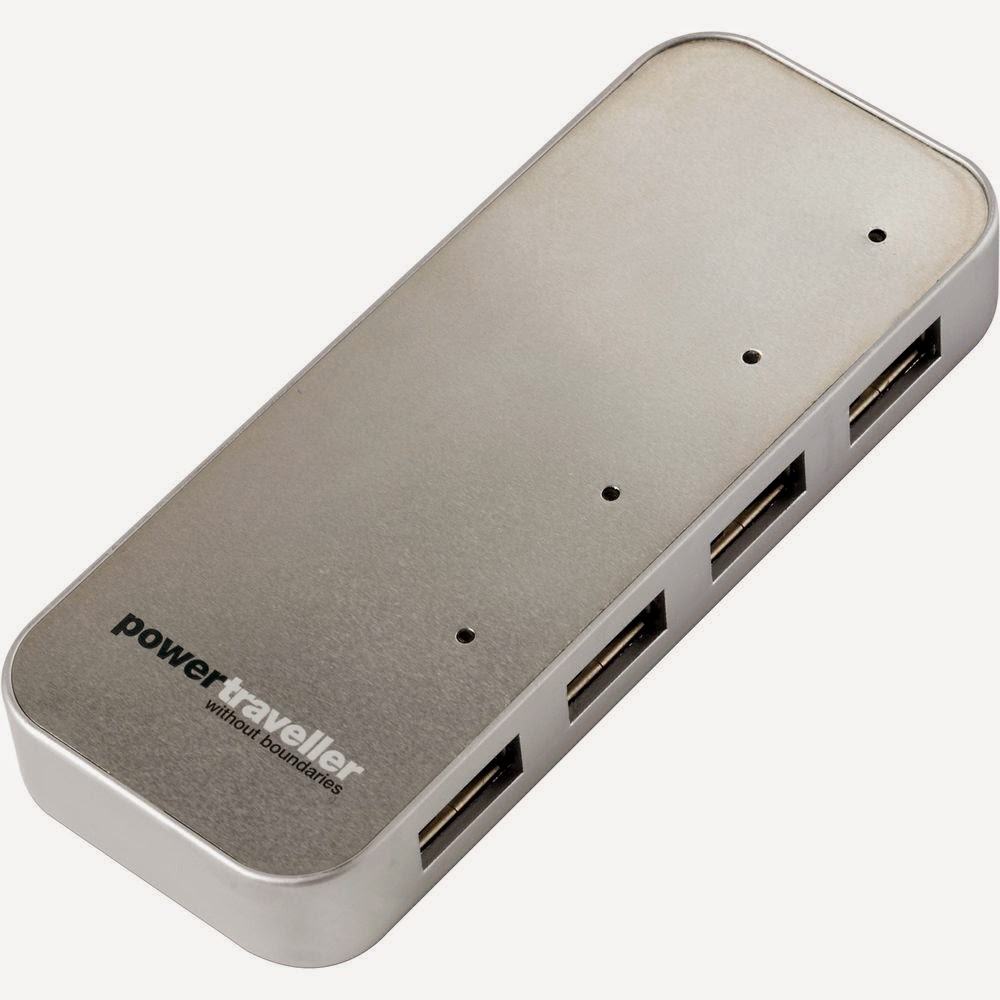
Now onto charging the tablet itself. For this I would use the Powertraveller Spidermonkey 4-Port USB Charger Hub at $38.76. Again, I haven’t used this product, but according to the specifications it can charge up to 4 USB devices and accepts input power between 5V and 30V. The reviews are largely positive, so it seems like a safe choice.

5. Powertraveller Spidermonkey 4-Port USB Charger Hub
To connect the Spidermonkey hub to the solar panel we’ll need the Powerfilm RA-16 – 3ft. Extension Adapter with 4.75mm Barrel cable (available here for $9.98)
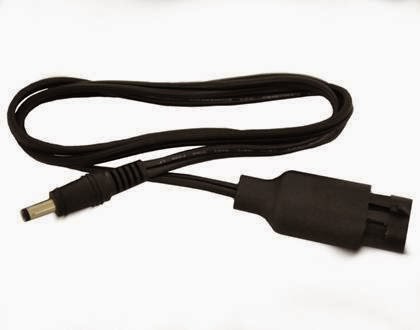
6. RA-16 – 3ft. Extension Adapter with 4.75mm Barrel
If we want to charge both the tablet and the AA batteries simultaneously, the Powerfilm PP-7 – Multiple Device Charger Cable accessory will come in handy (here for $24.99)
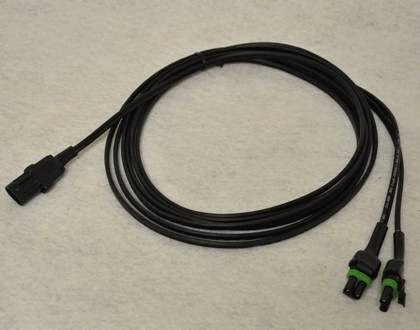
7. PP-7 – Multiple Device Charger Cable
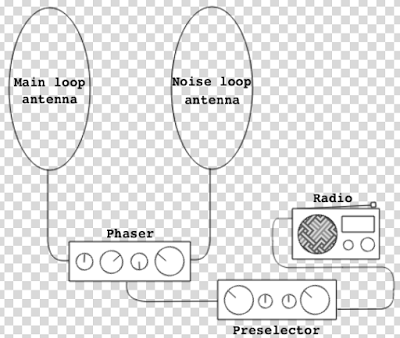
Antenna Extras
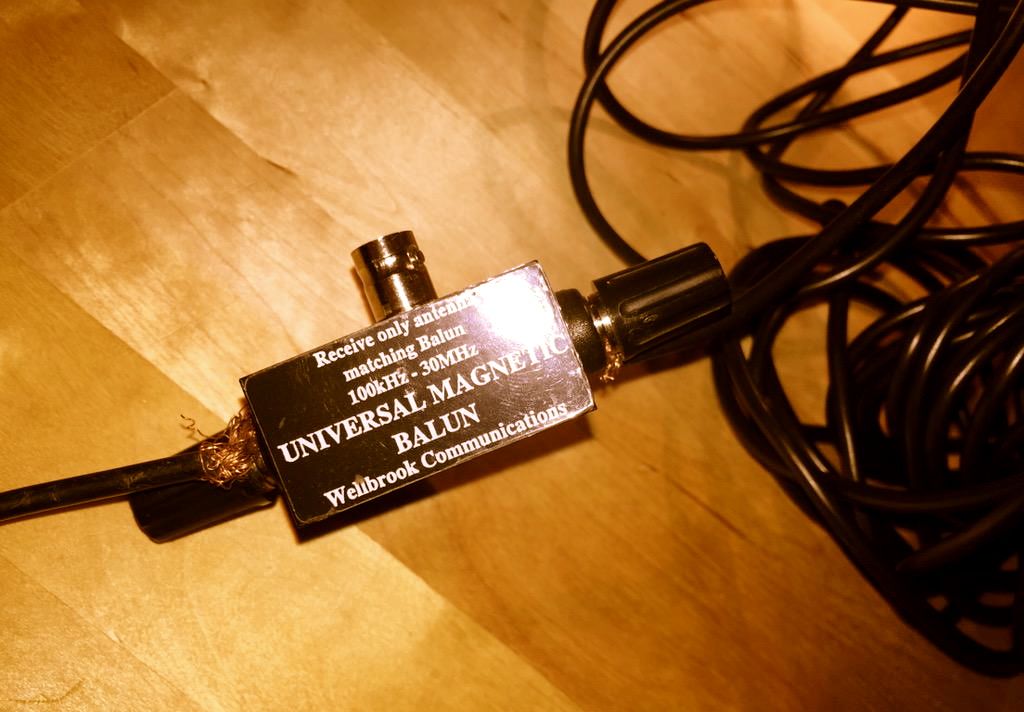
Living off the grid has the advantage of there being minimal man-made radio interference. For this reason we can use a larger antenna than in my original proposal. I suggest buying 40m of POLYS18 Copper-Clad Steel Antenna Wire from Universal Radio (the total comes to $31.44), cutting it halfway, and attaching each half to one of the two antenna terminals on the Wellbrook HF Balun, mentioned in my previous article, thus creating a dipole.
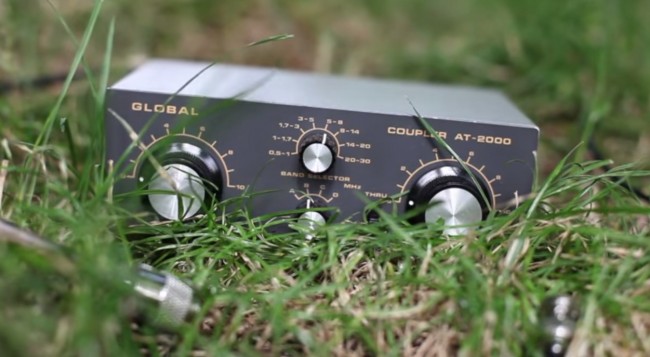
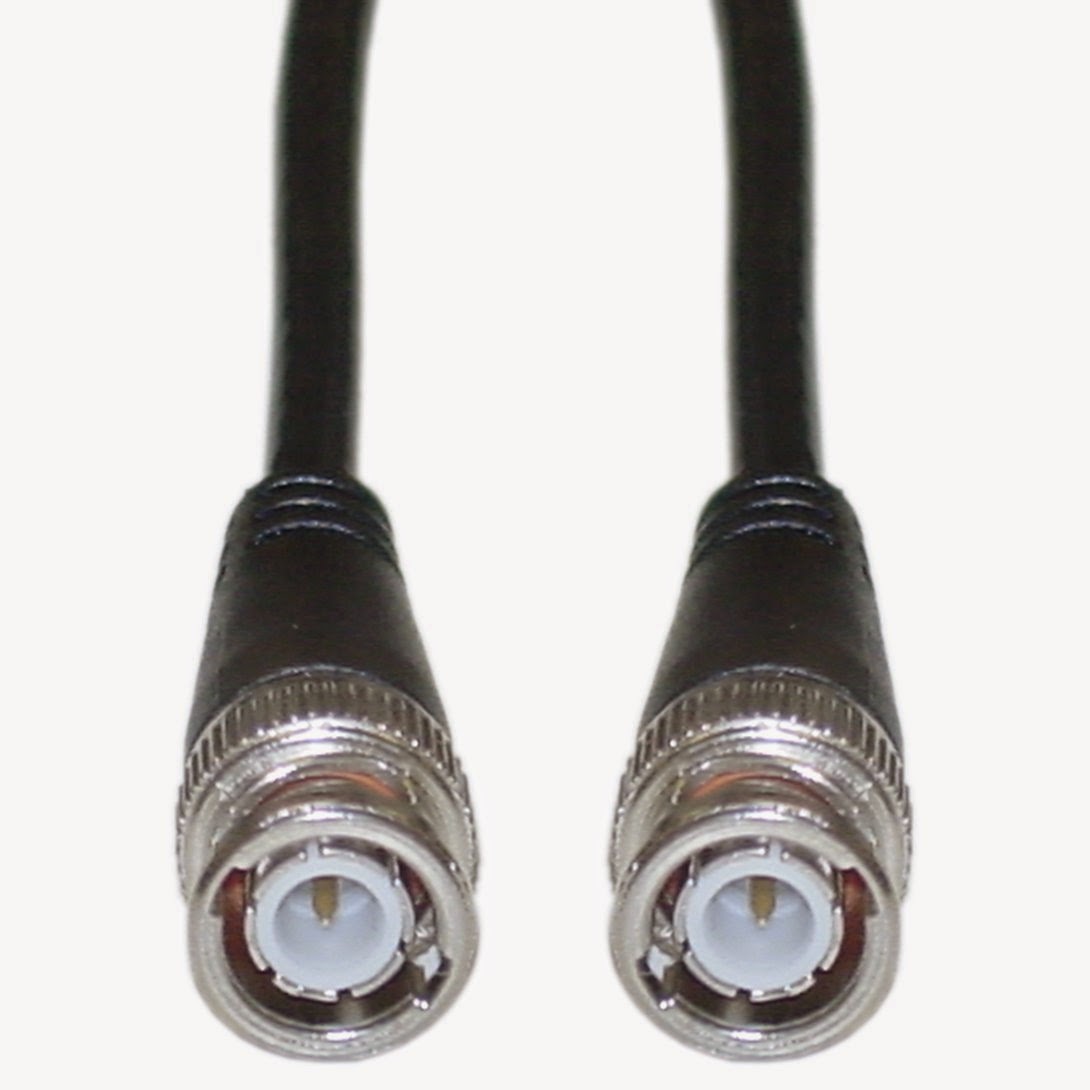
Of course, this makes for a rather powerful shortwave receiving antenna that can easily overload the radio. We can solve this problem by connecting the balun’s feedline output to the antenna terminal on the Global AT-2000 Antenna Tuner, $85 via 25 feet of GadKo BNC Male Copper Stranded Center Conductor Cable , $16.90. We should then connect the radio terminal to the short feedline cable of the FunCube Dongle Pro+ SDR, with the ferrite chokes left in place. We will need 2 x BNC female to PL259 Adapters, $6.49, to connect the BNC cables to Global’s PL259 female sockets.
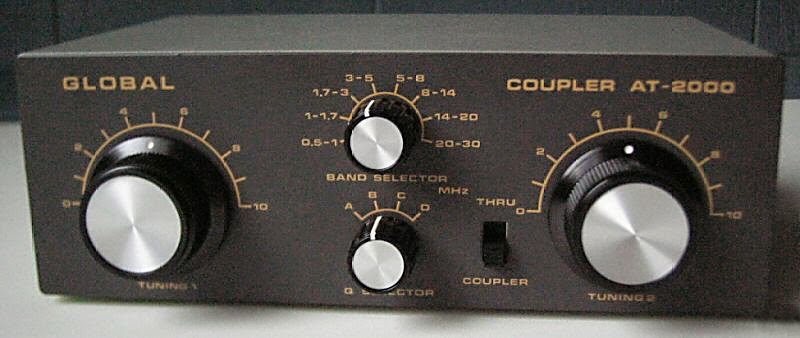
8. Global AT-2000 Antenna Tuner
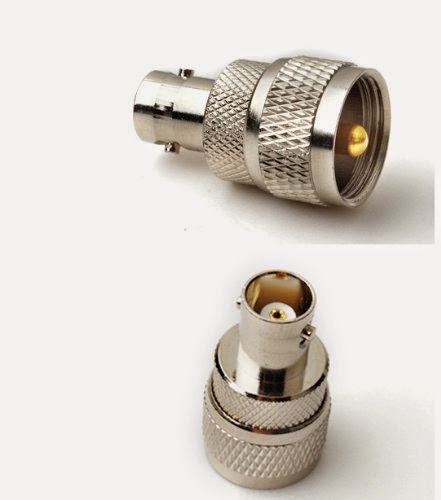
9. 2 x BNC female to PL259 Adapters

10. GadKo BNC Male Copper Stranded Center Conductor Cable
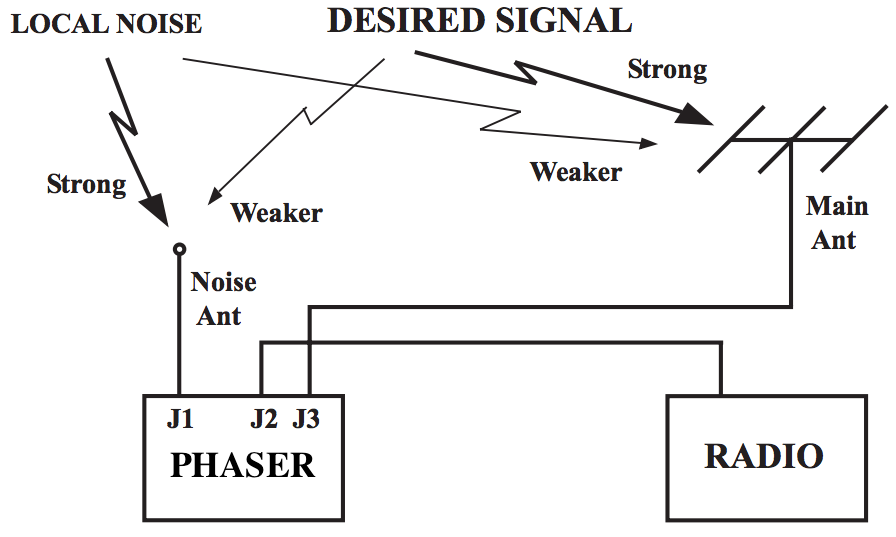
Finally, here’s a simple schematic diagram of how the antenna parts should be wired together:
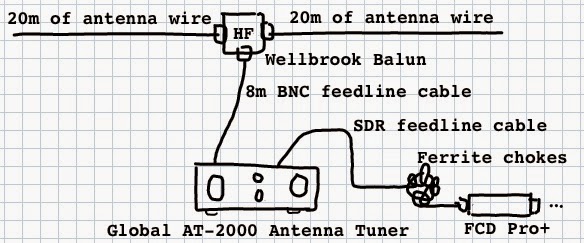
Connecting all the antenna bits together
Backup Radio
The challenge article mentions that a back-up radio would be desirable in the event of other equipment failing. I suggest Tecsun PL-310 ET, available for $48.79 from Amazon. It’s a very similar radio to the excellent Tecsun PL-380 (they use the same Silicon Labs chipset), but it has one notable advantage: an external antenna input! It takes a 3.5mm jack plug, so we’ll need a BNC Socket to Composite 3.5mm Male Jack Plug Adapter, $2.01.
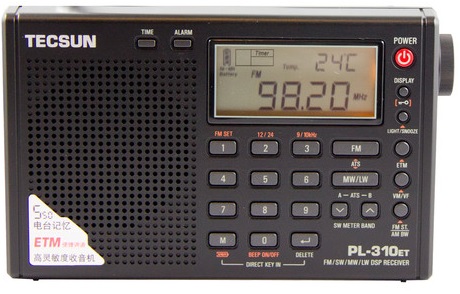
11. Tecsun PL-310 ET
12. BNC Socket to Composite 3.5mm Male Jack Plug Adapter
The subtotal for all of the above comes to $556.71. Adding on $643 for the tablet-based SDR solution brings the total to $1199.71, just 29 cents below the budget limit!
London Shortwave: since you frequently take this same portable SDR kit to the field, I have no doubt that it would perform well in rural Bhutan. Using a PL-310ET as a backup and even thinking to bring a couple antenna accessories shows how thoroughly you thought through this exercise. Knowing the copious amounts of radio noise (QRM) you deal with in London, you might decide to stay in RF quiet Laya after your assignment is over! Thanks for your entry! Readers: check out London Shortwave’s blog for more portable SDR fun.
from “Broad Wing”
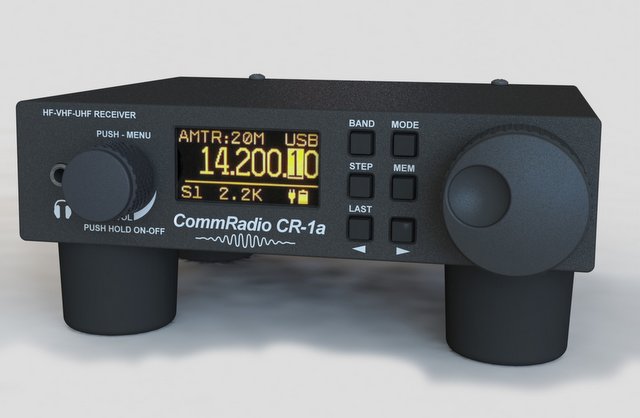
Primary Radio – Comm Radio CR 1A ($614.95)
(Radio is light weight and very durable. It also picks up SSB etc. Even though it used up half the budget I figured it would be the best to have. It has an internal rechargeable battery. I can be charged with Goal Ten Battery Pack or Solar Panels)
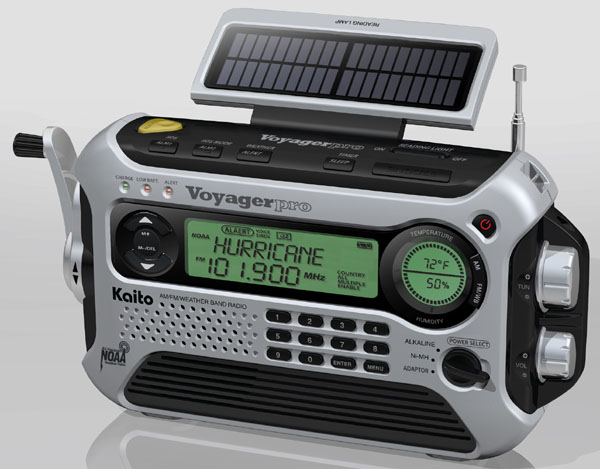
Secondary Radio-Kaito KA-600 Voyager ($60.00)
(This radio is my back up as it has several ways to charge the batteries, solar crank, and electric when I can get to a city that has electricity. it should also be dependable. It also has a built in flashlight. This antenna uses AA rechargeable batteries.)
ANTENNAS
Primary Antenna– Super Sloper all SW Band Antenna ($91.49)
(I have used this antenna and find it to be very durable and a very good DX antenna for shortwave. It is made by a gentleman called Low Bander on e-bay.)
Secondary Antenna – Tinatena All Band Active ($32.90)
(I thought that if in the dead of winter, my primary antenna broke, and there were a couple feet of snow outside, I could use this one for a backup and not have to go out in the snow or storm. This antenna uses 9 Volt batteries.)
ANTENNA SUPPLIES
Antenna wire 12 gauge 50 feet ($27.94)
(Wire would be used to build a long wire antenna if needed or for repairs of the Super Sloper Antenna. Wire will also be used to hook up 2- 12 Volt sealed batteries to primary radio.)
Battery operated solder gun with solder and magnifying glass/helper ($26.26)
BATTERIES/CHARGER
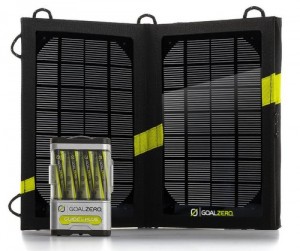 Goal Zero Solar charger kit with solar panel and Goal 10 charger with 4 AA Batteries. ($99.00)
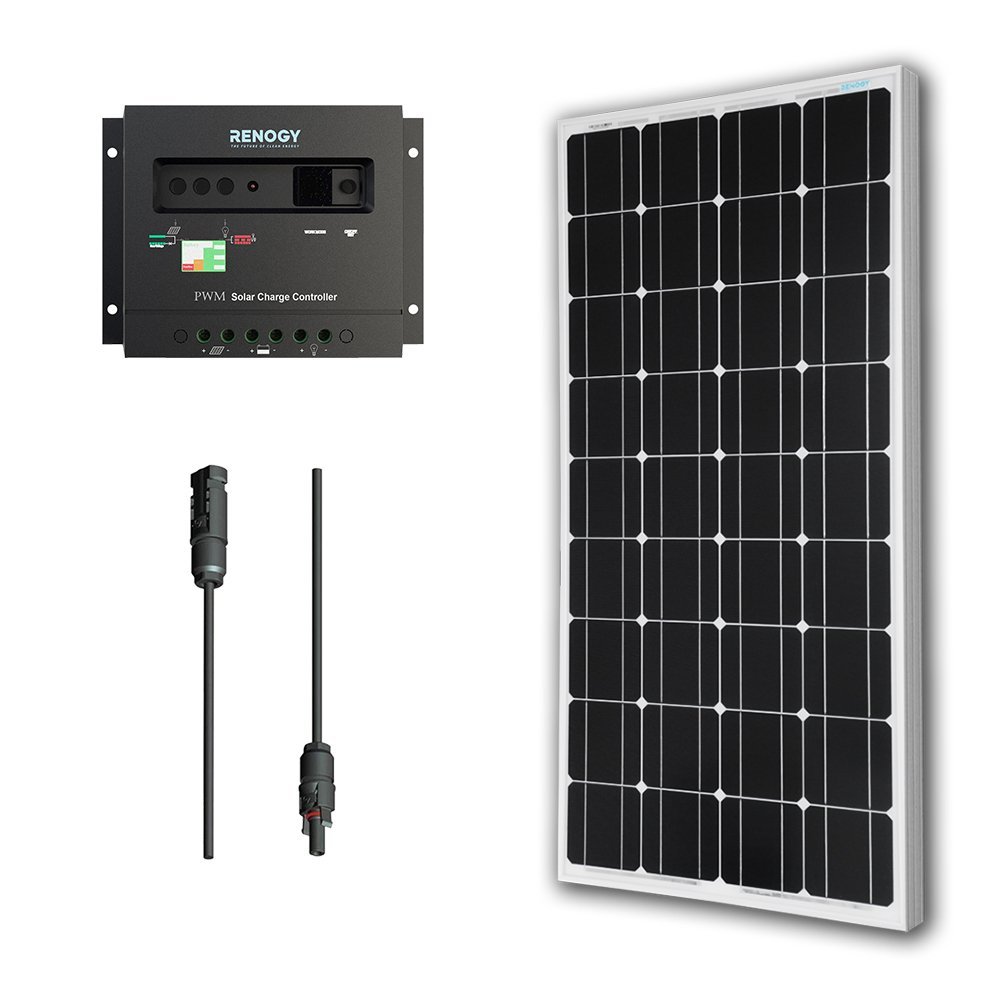
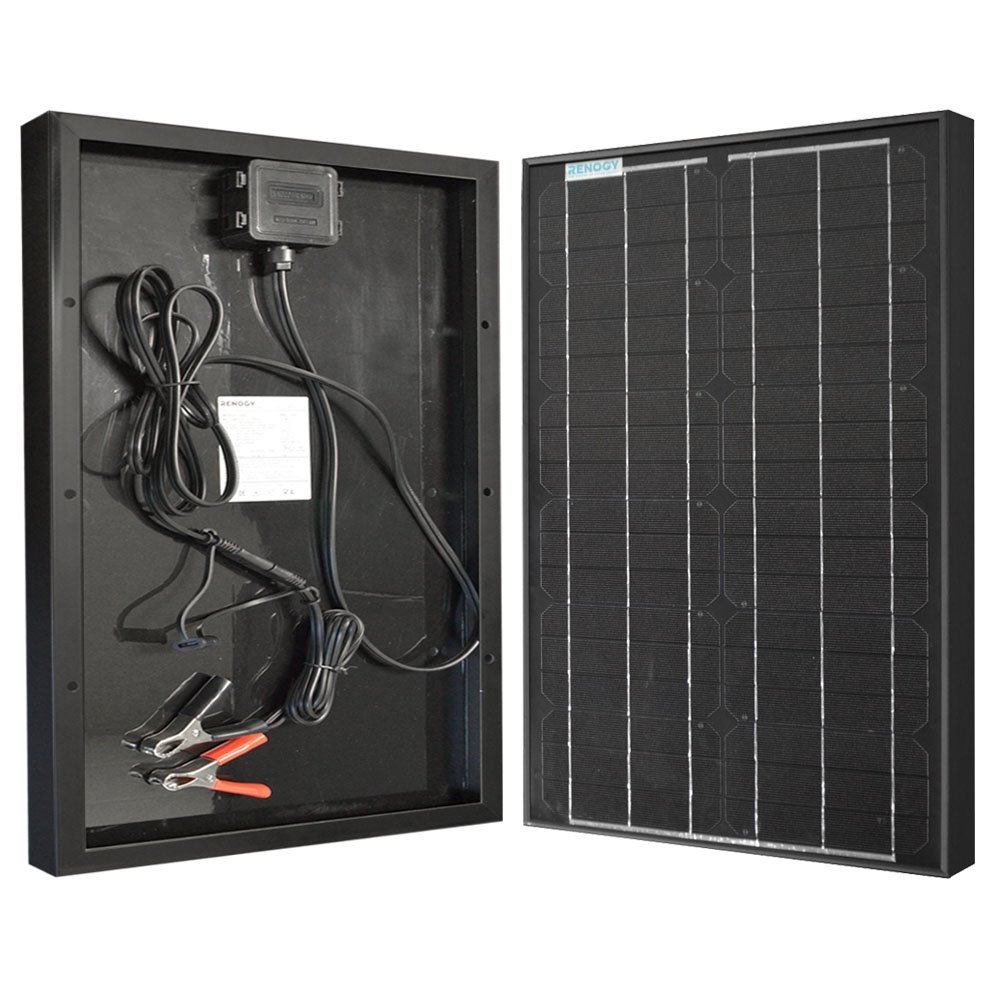
Additional Solar Panel – Renogy 100W Solar Panel ($132.90)
40 foot solar panel extension cable MC4 converter ($22.99)
(This kit and the extra solar panel should charge up my batteries if the weather permits. The solar panel can be hooked up in tandem to provide quicker charging times or used on separate equipment. The Goal 10 charger will charge my Comm Radio when the power is low, and I can connect the radio to the kit when the sun is out just to recharge. When the sun is not out, or I have a long time without sun, I can use the Secondary Radio to conserve batteries.)
BATTERIES
Set of batteries sold with 24 AA 2000 mAh, NiMH Batteries low discharge ($42.34)
9 Volt batteries, 4 pack ($15.96)
2- 12Volt 7ah sealed lead acid rechargeable batteries ($32.00)
Total Cost: $1198.73 -$ I200.00= $1.27 under budget. Good for a pack of crackers to take on the plane to munch on.
I am not buying any connectors as the primary antenna comes with coax and connector. All prices include shipping and handling charges and can be received in 7-10 days. In two years I will report back to you and tell you how the trip went.
I think choosing the CommRadio CR-1a as the centerpiece of your set up is wise. The CR-1a is very rugged and engineered to last. Most importantly, you can power and charge it on a wide range of voltages (6-18 VDC). That’s power flexibility! Thanks for your entry!
from Eric McFadden (WD8RIF)
What a fun thought-experiment!
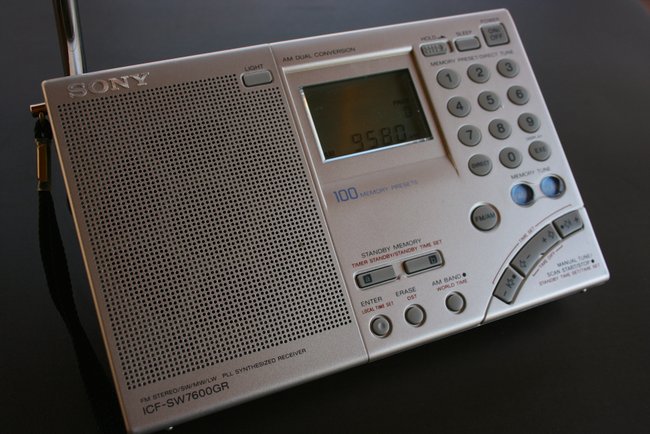
For the shortwave listening station radio, I’d buy a Sony ICF-SW7600GR portable shortwave receiver. It’s stable, sensitive, selective, provides SSB and synchronous-detector, and runs on common AA cells. It’s available for about $132 on Amazon but I’d probably buy from Universal Radio.
To fashion the the antenna, I’d take a 100′ spool of 18AWG stranded, insulated (black), wire ($16 at Jameco). I’d string as much as I could between my room and the tree. (I’d think about taking an MFJ-1910 33′ telescoping fiberglass mast (4′ collapsed, $90) in case the tree is too close to the house or not tall but I haven’t flown commercially in many years and don’t know if traveling with the mast would be a problematic.)
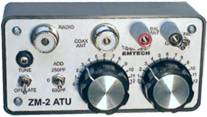
Emtech ZM-2
I’d buy an Emtech ZM-2 “z-match” tuner ($65 in kit form, $90 built, direct from Emtech) to use between the Sony and the random-length wire antenna; I’d adjust the tuner’s two knobs for maximum noise in the receiver. A 3′ RG-8X coax BNC-to-BNC jumper ($6 at Universal Radio) plus a BNC-female to 3.5mm-male adapter (#4546, $3 at Universal Radio) would be used to connect the Sony to the tuner; the wire antenna would connect directly to the tuner’s binding post. A short length of wire could be used as a ground-connection or counterpoise, if desired. I’d also take a pair of solder-less alligator clips (less than $1 each, many sources) and a solder-less 3.5mm plug (I have one of these but haven’t yet found a source for a new one; I might have to make one) in case I would want to (or need to) use the random-wire antenna without the z-match tuner.
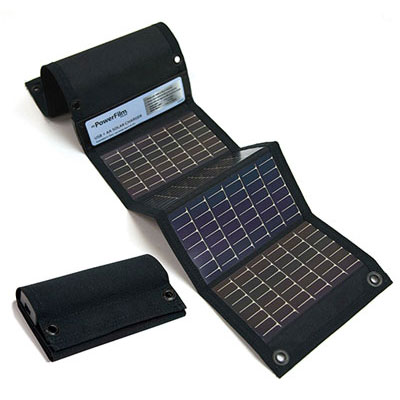 To power the Sony receiver, I’d use Eneloop AA cells and two Powerfilm “AA Battery Foldable Solar Panel” (3.6v x 0.6A, $85 at Jameco) to charge them. Fortuitously, the Powerfilm panels come with four Eneloop cells each. I’d buy an additional 8-pack of 2000mAh Eneloop cells ($25 on eBay).
The receiver uses for four cells; one of the panels could (probably) charge a set of four cells each day and the Eneloop chemistry would allow the charged batteries to remain charged while not in use. The second 8-pack of Eneloops and the second Powerfilm solar-charger provide redundancy. It’s unlikely that one evening’s listening on the Sony would discharge a set of cells so it wouldn’t be a problem if the solar panel needs more than one day to fully charge a set of four cells.
To know where and when to listen, I’d take a copy of WRTH 2014 ($30 at Universal Radio).
If I choose the kit version of the z-match tuner and don’t buy an MFJ-1910 mast, the total comes to $449.
I am an amateur radio operator and would want to take along some sort of transceiver. Given my druthers, I’d take my Elecraft KX3 and forget about the ICF-SW-17600GB but that’s against the rules of this Challenge.
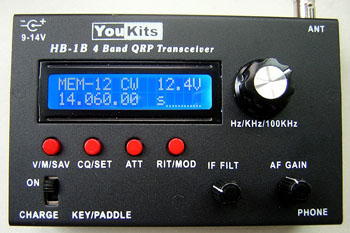
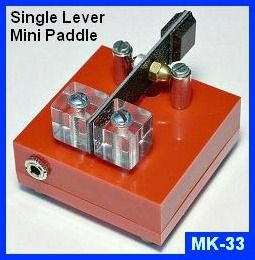 Since I can’t take my existing KX3, I’d buy a YouKits HB1B Four Band CW QRP Transceiver (80/40/30/20m, $300 from YouKits), a Whiterock MK-33 single-lever CW paddle ($30 from Electronics USA), two pairs of inexpensive over-the-head stereo earphones (~$10/ea), a ten-cell AA holder (#10AAT, $7 at Batteries America), and another set of 2000mAh AA Eneloop cells. I’d use the same random-wire antenna I deployed for the listening post, and the same Emtech ZM-2 z-match tuner to match the transceiver to the random-wire. The 8-pack of Eneloops plus two cells “borrowed” from the extra set purchased for the listening post would be used to make a 10-cell battery-pack for the transceiver. Using both Powerfilm chargers would probably allow me to fully-charge ten cells in a two-day period. I’d have to balance the charging needs of the listening post and the ham station but I think it wouldbe workable.
The cost of the ham station comes to $382.
The rules of the Challenge were unclear about whether the cost of a tablet/smartphone/PC was to come from the $1200. Either way, I’d probably limit myself to a 7″ tablet such as the Nexus 7 I bought myself last year for $150. A Powefilm USB + AA Foldable Solar Panel ($80 from Amazon) could be used to charge such a 7″ tablet. (And the same panel could be used to charge cells 9 and 10 of my 10-cell ham radio battery pack, allowing me to charge the ten-pack in a single day instead of needing two days.)
The grand-total of all of this stuff comes to $1,061, leaving enough to purchase a second ICF-SW7600GR to take as a spare.
I know this is just a mind-experiment but I’d love to hear what the HF bands sound like so many miles from any RFI sources!
Eric, WD8RIF
Eric, I like how you’ve balanced your ham radio and shortwave listening needs in this kit. While there was no restrictions to keep you from using a KX3 (both a superb transceiver and general coverage receiver), your set up allowed for more extras and back-up supplies. Since a basic kit version of the KX3 costs about $930 (shipped) it would have eaten up much of your budget. Since I own a KX3, my first inclination was to design a kit around the KX3 as well (if the budget would have even been $100 more, I probably would have). With your kit, you have a little money to spare, plenty of antenna-making supplies, a fantastic antenna tuner for both SWLing and QRP, a benchmark portable receiver and a capable four band QRP CW transceiver as well. Great job! (Readers, Eric has an excellent website devoted to ham radio and QRP–his projects are beautifully documented.)
from RS Wood
By the sound of it, this is a Peace Corps assignment. May as well ask a former Peace Corps volunteer!
I’d personally recommend you keep a low profile: traditional peoples like those you find in Bhutan will see your fancy antenna on the roof and assume you’re a spy or something. I’d go for a portable shortwave – something in the $150-$300 range from Sangean or Tecsun, as well as a $35 indoor, powered antenna (they run on AAA batteries). Buy a second radio as backup.
For internet use, assume you’re going to be offline for long periods of time. Get a netbook, not a tablet/smartphone, and one or two USB hard drives for storing your stuff. Ditch gmail/hotmail and get an account from which you can download email and store locally when you’re in town (fastmail.fm, toast.net) – look for POP3, not IMAP. Idea is: you go into town, plug in somewhere, download and store your stuff locally, and can use your machine at your house, with no connection to the internet, to write. You might be able to get a GSM modem if service extends to your post; that’s another reason to have a machine with USB slots into which you can stick a USB modem (yes, dialup) or GSM (cellphone) modem. Used netbook on ebay should run you $200; add another $200 for external harddrives you bring stocked with stuff (ebooks, etc.).
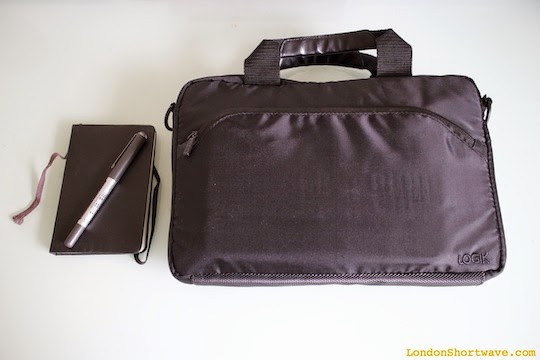
Lastly, bring as many notebooks, pens, and books as you can. Speaking from experience, you’ll find yourself doing more reading and writing, and less internet. And I repeat: keep your radio low-profile. Whip out the huge radio and antenna and your neighbors will distrust you, seriously.
Good cultural points! This is true. In the past, I have given this same advice to aid workers traveling to impoverished urban areas. Not only does a conspicuous setup attract attention, but also (sadly) theft–not just of your radio, but anything else in your house. Fortunately, I have only heard positive reports from Bhutan–houses without locks, that sort of thing. Thanks for your entry!
from Ariel Jacala (NY4G)
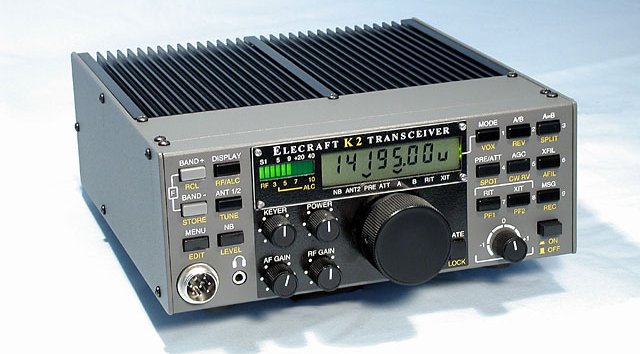
For starters – I would either build from scratch or buy a new Elecraft K2. Since I would be on assignment for 2 years, I would need to be able to repair my gear. A K2 is built from through hole components so it is repairable. All I would need are some spare parts for the components that are known to be failure prone – mostly diodes. I would consult with W3FPR for his recommended list of spare components from his experience of repairing hundreds of K2s. If I can find a used one with a SSB module, so much the better. I would volunteer to build one for someone else just to get the build experience.
Elecraft K2 – from the Elecraft reflector $600
Next I would invest in at least a 20 watt solar panel. Price per watt is ever changing for the better. One is available from Amazon for $109 for 27 watt panel weighing 3 pounds.
Next are batteries.
One 30 amp hour SLA for $80 dollars at Batteries Plus.
 The next thing is toss up. Cabelas sells 500 watt generator for $350 dollars or do I get a small amp. Provided I can get gasoline from the villagers, the generator will make living here at least bearable – for lights, charging batteries and another power source other than the sun. The amp goes for $300 – a Hardrock50 which I have built. Is it worth the extra 6 or 7 dB from 10 watts? You bet. In an emergency I can use the extra 40 watts or for a long overdue ragchew in English.
There you go
Transceiver, batteries, solar panel with money to spare. – about $350 left.
Ariel NY4G
Ariel: Very smart of you to consult Don Wilhelm (W3FPR) as he is the most knowledgeable source of info about the K2 and any weaknesses it may have. I have a K2 and completely agree–it’s probably the most capable transceiver that can be field serviced. The only weakness of the K2 (for this hypothetical trip) is the fact that it does not have a general coverage transceiver. For any broadcast listening, you’d want to use some of that $350 surplus for a portable receiver–easily accommodated in your budget! I know you Ariel, and am willing to bet that most of your radio time would be in the ham bands! Thanks for your entry!
from Anil Raj
Spend two years in Bhutan, off-grid and with no internet… Wow! That is probably the most extreme scenario one can think of! However, not completely alien to me as I work in the energy business setting up power plants in off-grid areas http://www.omcpower.com/
These are my thoughts:
POWER SOURCE

Click to enlarge.
Clearly, the single largest limitation is going to be the availability of reliable power. A quick look at a solar insolation map for the region makes it clear that solar which would normally be the most convenient source of power cannot be relied upon in this case.
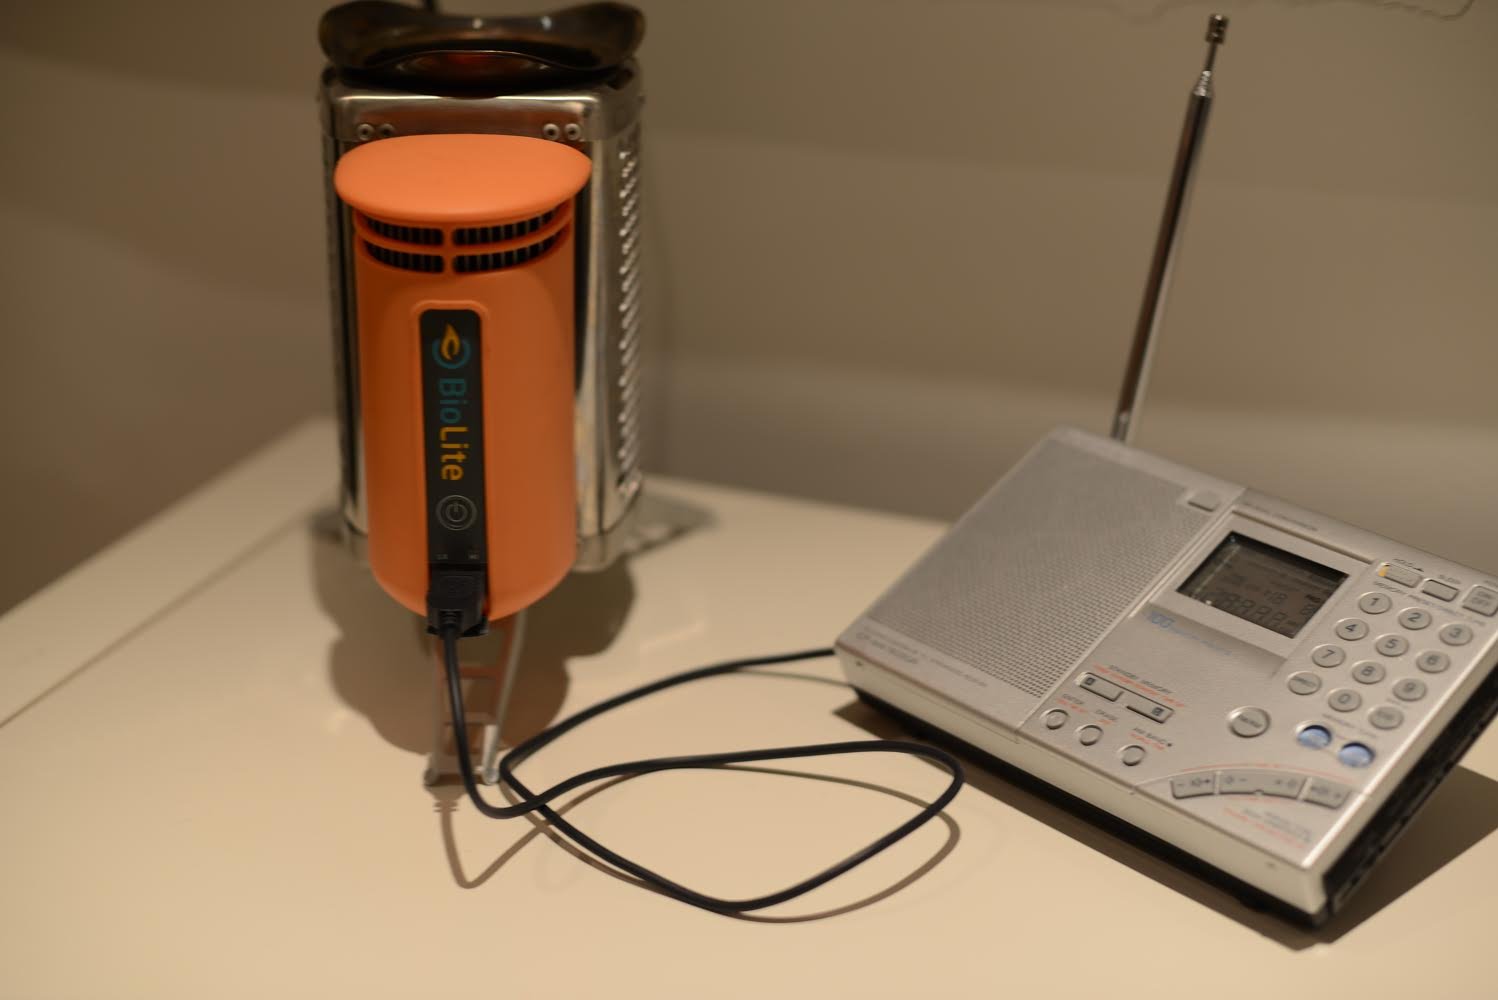
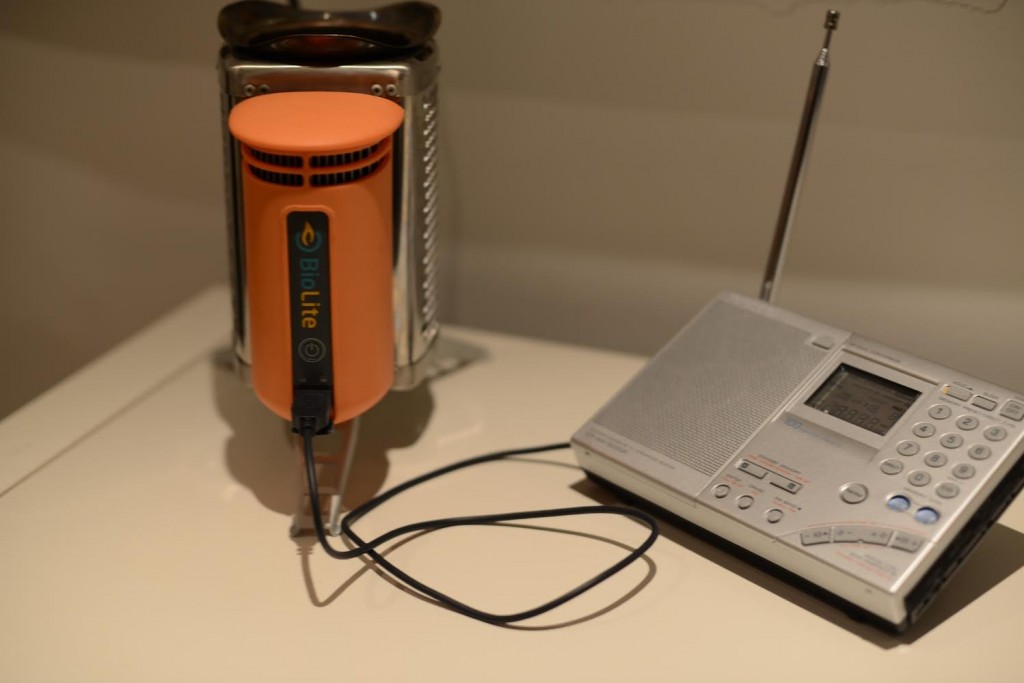
My choice for reliable power would be a combination of a solar charger with a set of Eneloops and the BioLite stove since all it needs to generate useful power are twigs and sticks. It generates about 3 – 4 Watts which can comfortably power a small radio. I’m pretty sure the stove would come in handy in the winter to keep warm as well! The daily ritual of lighting a small wood fire to listen to the radio might eventually become a meditative experience… Price $ 118.00 + $130.00 + $20.00
RADIO RECEIVER
My choice here is the Sony 7600GR. It is time tested having been on the market for over a decade. In my opinion it has by far the most robust build quality in it’s price range. SSB is a must, and the Sony performs well in this department, and the AM sync is a bonus feature. The main reason for my choice however, is the frugal power consumption – about 50 mA. The Sony also happily runs off a 5 V supply like a USB charger which simplifies the power issue significantly. Price $ 130.00 on Ebay
HEADPHONES

Headphones are a must to keep power consumption low and my choice here are the “Sleep Phones” http://www.sleepphones.com/ The fantastic thing is that these also keep your ears warm (Himalayan winters) and of course you can use them in bed without the discomfort normal headphones or earbuds usually give. Price $ 40.00
TRANSCEIVER

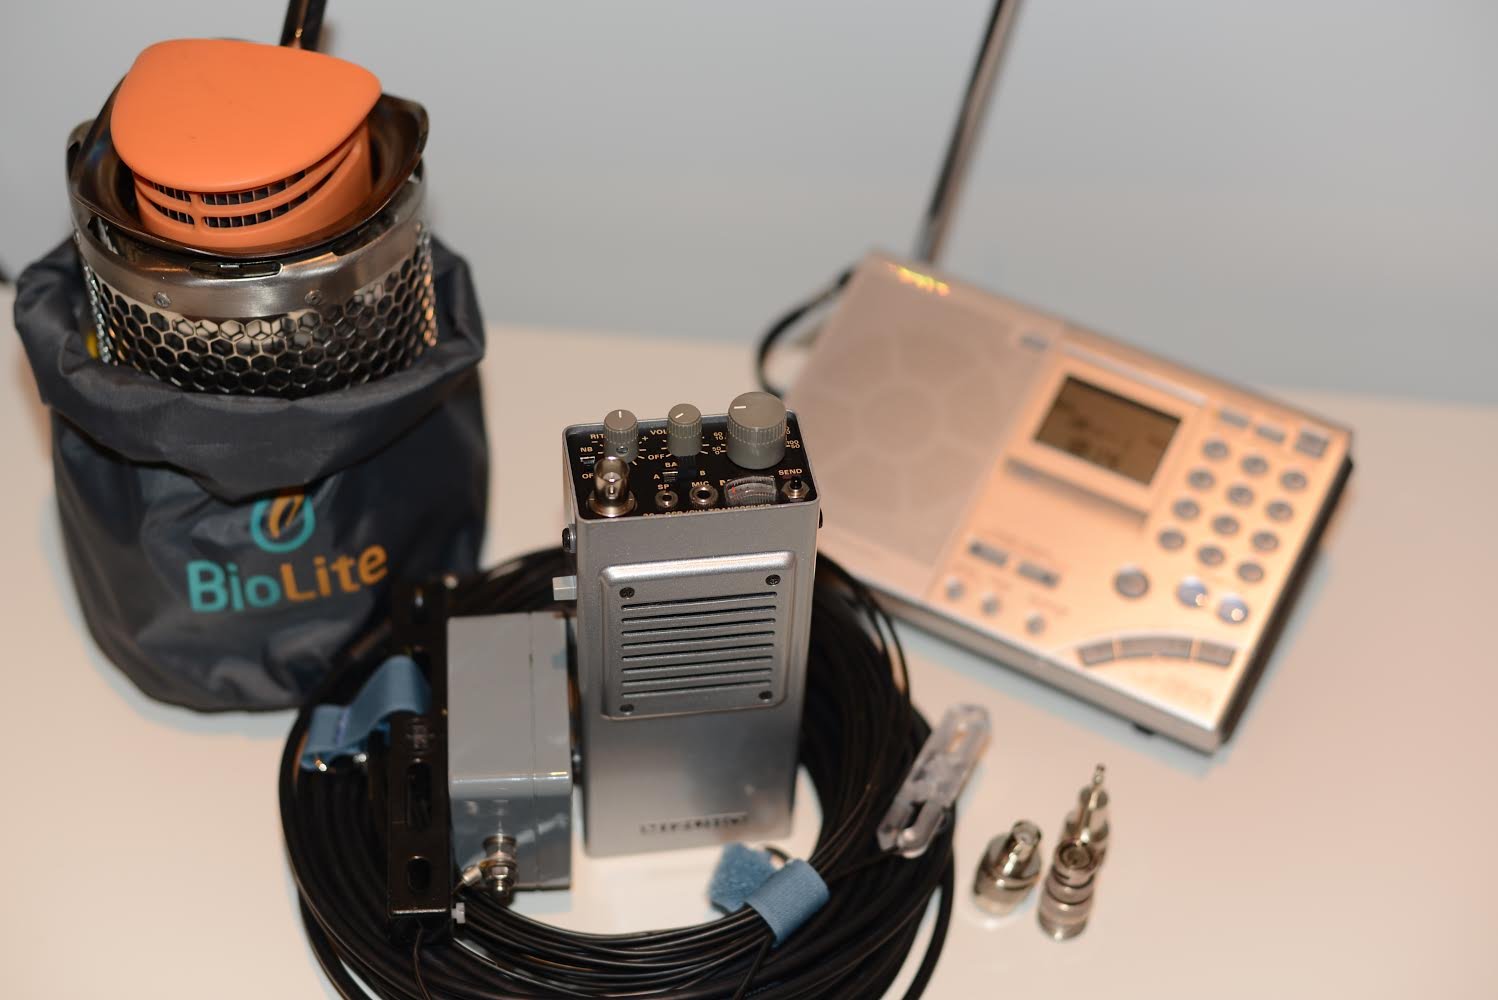
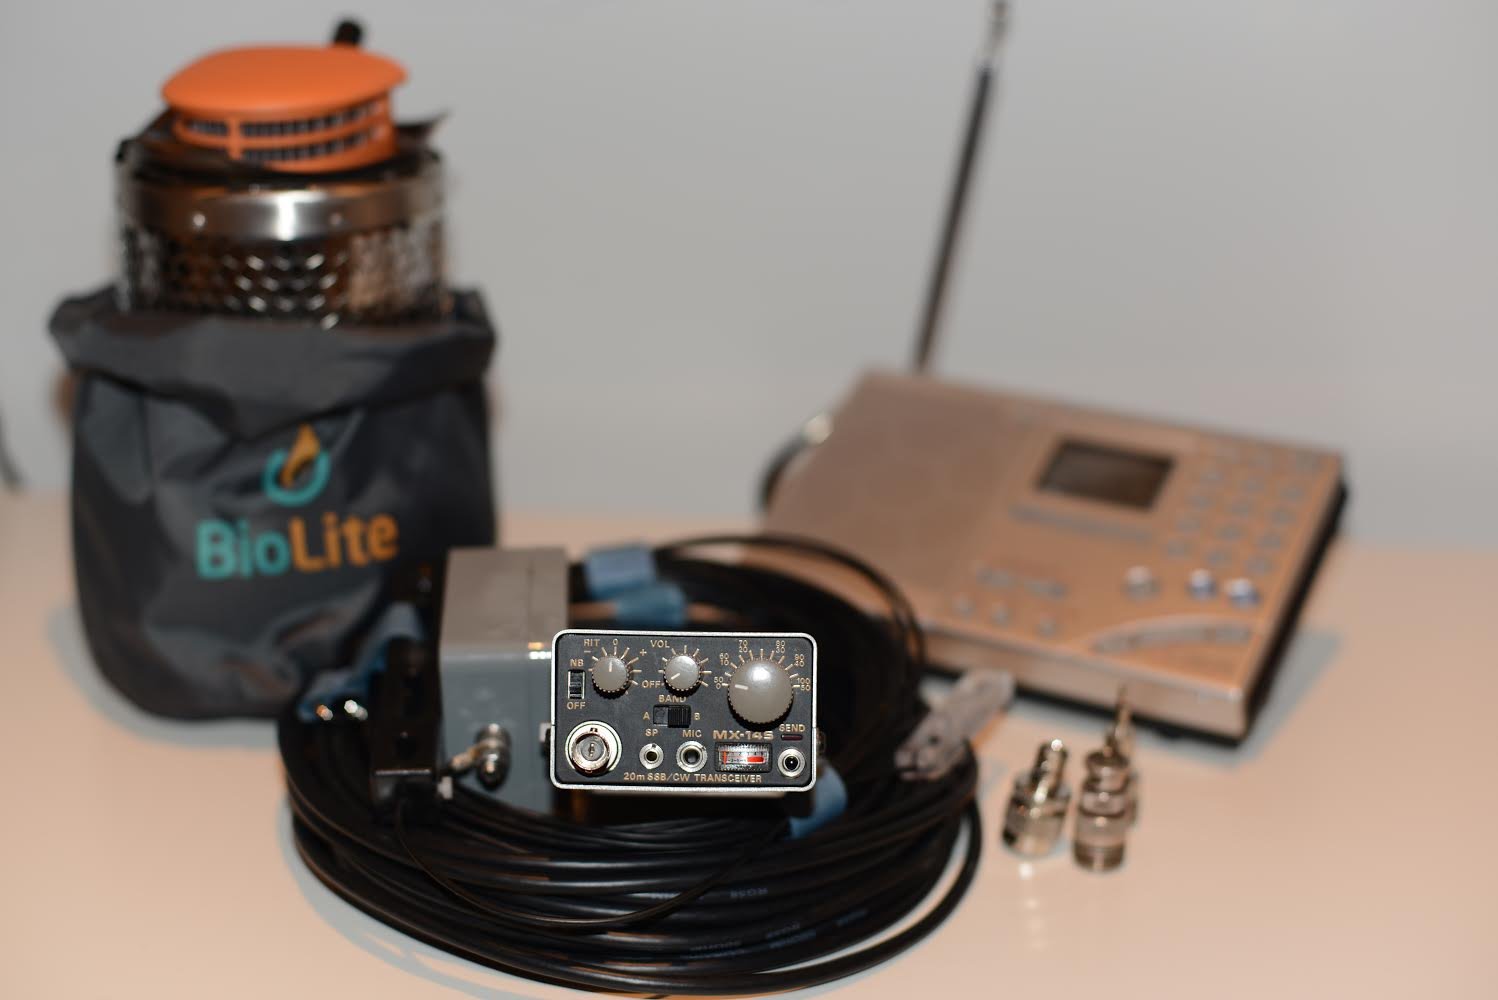
Being a ham, it is obvious that a transceiver will have to be a part of the plan. Any of the traditional general coverage transceivers available today would immediately break the energy budget and not be viable for more than a couple of weeks. Here my choice is the Mizuho MX-14s handheld. This tiny rugged 20 M transceiver puts out 2 W on SSB and CW, fits in my pocket and hardly draws any power. My plan would be to keep it for emergency use only in case a license is not possible. I have used one of these for several years and know what is possible with 2 Watts and a good antenna. Power is from a set of Energizer AA lithium batteries which can hold a charge for up 20 years.
The MX-14s turns up regularly on Ebay for around $ 300.00 or more depending on the physical condition. Price $ 350.00
ANTENNA
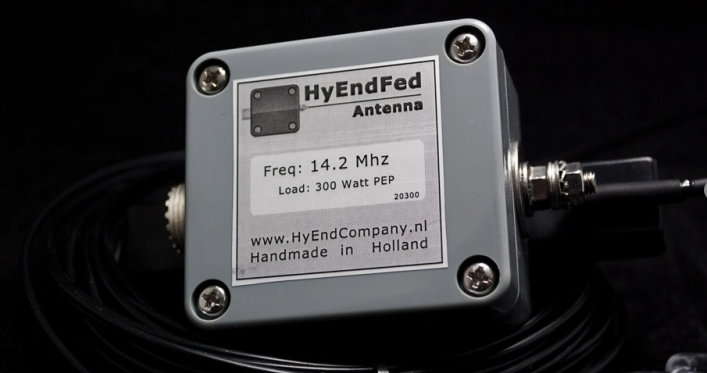
My choice would be the HyEndFed antennas EFHW and the most suitable would be the 20 M version which would work fine as a random wire for the Sony receiver as well as and End Fed Half Wave for the transceiver. These antennas are built to a very high spec with silver plated wire with teflon insulation etc. Price including feeder and adapters $ 120.00
SUMMARY

So, all the bits and pieces together add up to about $ 1000.00 which is comfortably inside the budget. I would definitely spend the rest on woollen socks!
73s
Anil
Anil, this is brilliant! What I like best is that your kit is based on your experience both with alternative energy and the equipment you’d plan to use. Having built a solar house myself, I also consulted a solar isolation map when first tackling this Bhutanese challenge. You’re right: unless you have a semi-permanent PV system to trickle charge a battery anytime you have solar gain, you could be disappointed if relying on portable solar alone. Though I had heard about the BioLite, I’ve never used one. I’m very tempted to buy one now. I see where it could provide two important resources at once: heat and power. I also love the idea of the Mizuho MX-14s HT transceiver; though it’s limited to 20 meters, that would be one of the best and most useful bands if you decided to get on the air. I’ve read that the Mizuho is nearly bullet-proof. Still, like Ariel with the K2, I would consult Mizuho MX-14s users in advance of the trip and perhaps stock up on components that commonly fail. Looks like they would be relatively easy to replace in the field (with an inexpensive battery-powered soldering iron). Thanks for your thoughtful entry!
What fun! Thank you all…
I know this sort of challenge may not appeal to everyone, but I really enjoy it. This sort of exercise forces you (though safely) outside the comfort-zone of a home radio set-up. Your responses are truly innovative.
Thanks, again, for your participation! If your response wasn’t included above, or I didn’t respond to you directly, please let me know: it’s possible I skipped over yours by mistake as there were quite a few responses to collate, and my email is managed by a rather discriminating SPAM filter.
Meanwhile, if you think of an alternative set-up–or would like to add your own to this post–please comment below!
I already have more than six future reader challenges waiting in the wings: all based on real inquiries from readers. I hope to post another in the near future.


 Sean Gilbert, WRTH’s International Editor, recently shared this audio he originally recorded on June 19, 2014. Sean writes: