Many thanks to SWLing Post contributor, Aaron Kuhn, who shares the following guest post:
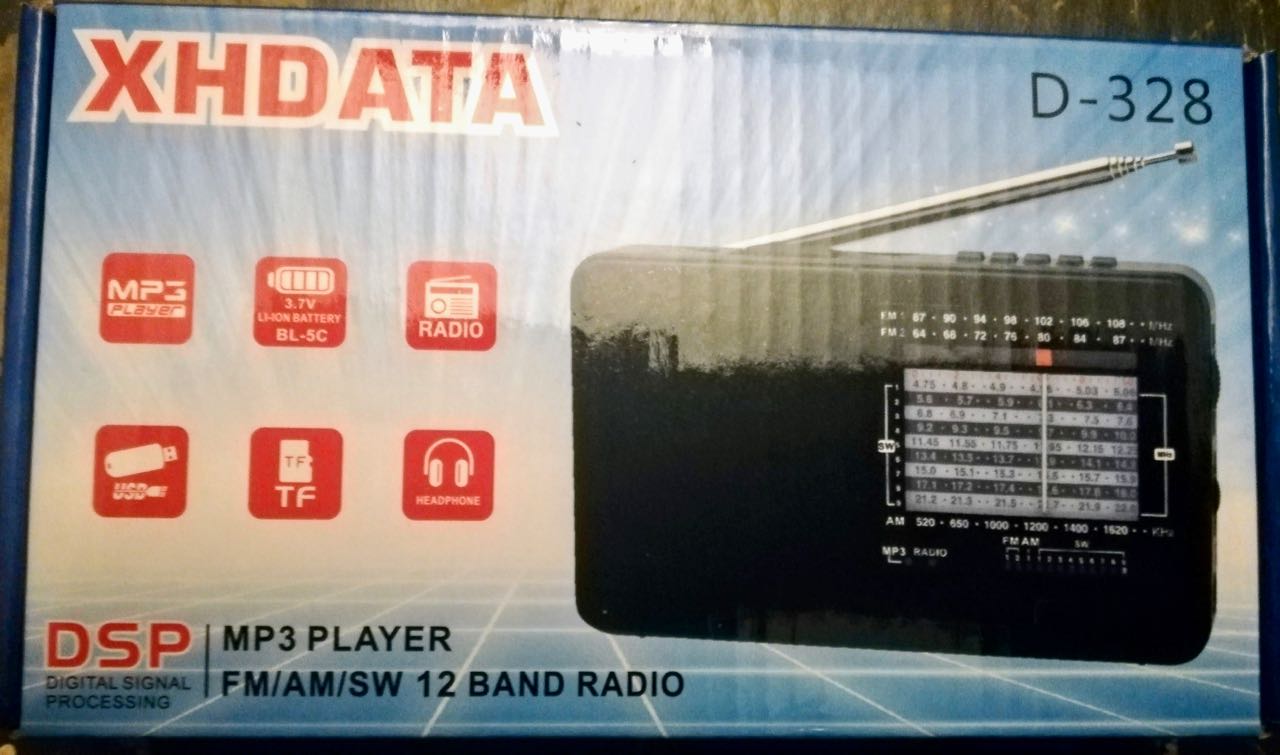
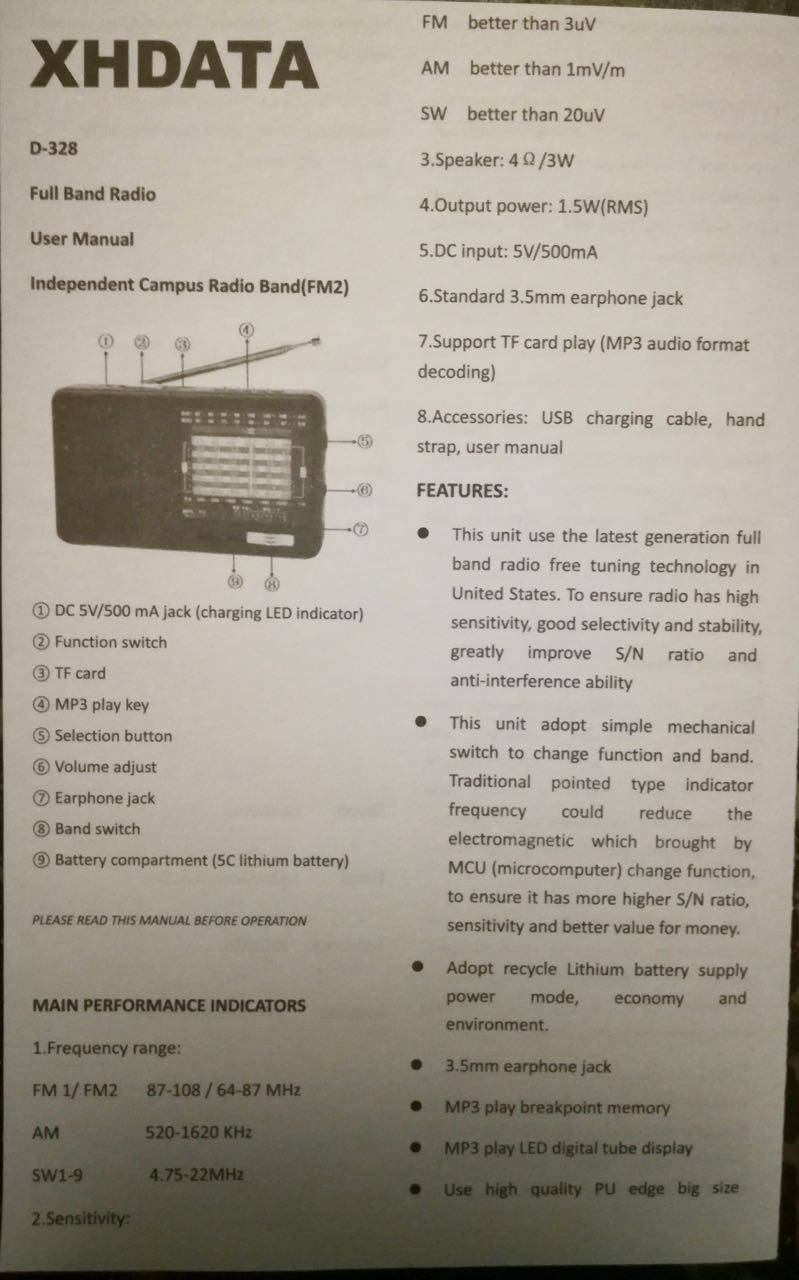
XHDATA D-328 Radio Review
by Aaron Kuhn
Disclosure: This radio was supplied at a 99% discount by the manufacturer, costing me only $0.15.
About Me
I live in the Philadelphia Suburbs, where there’s ample FM Stations, good AM Coverage, and also a lot of noise when it comes to Shortwave. I’m mostly an AM/FM listener, who occasionally likes to dabble in Shortwave. My idea of a good radio is something I can turn on, put up the antenna, and it just works.
Initial Impressions
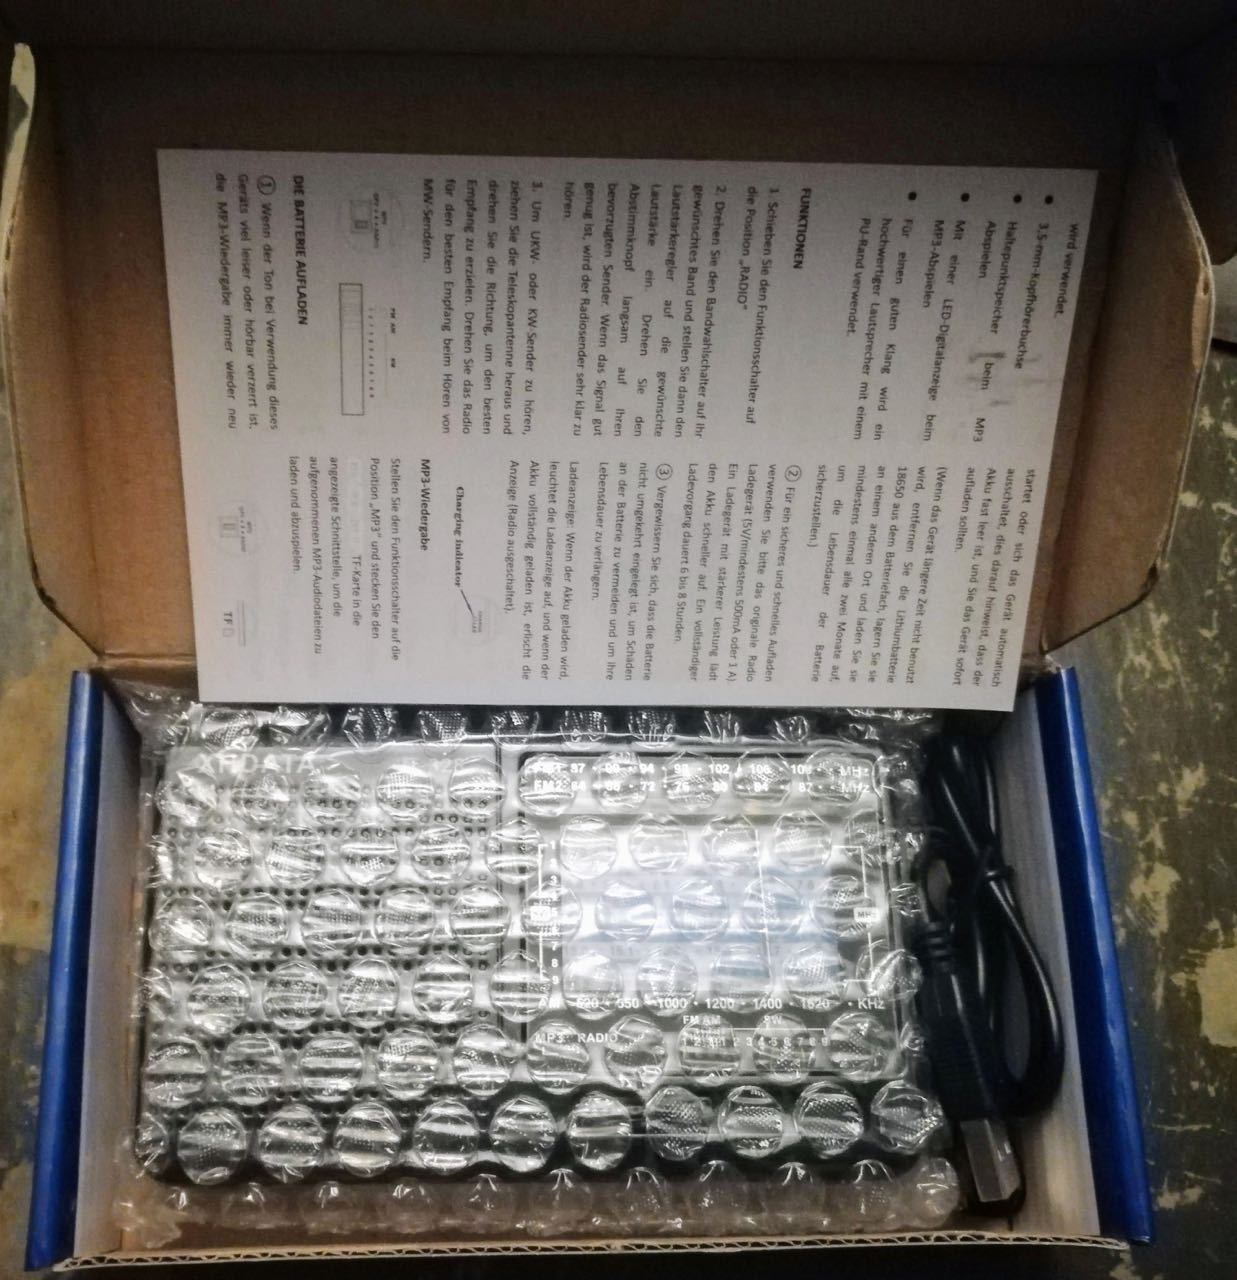
The Radio is boxed simply enough in a cardboard box, with a small amount of bubble wrap inside, manual, Mini-USB Cable. The Lithium-Ion Battery comes pre-installed.
Operation of the radio is mostly straight-forward, and I doubt you’ll need the manual for anything. The manual itself contains your normal badly-translated English phrases and doesn’t make sense in a lot of places (did you know this radio uses high quality PU edge big size?)
Two curious notes about the manual:
- It mentions you should remove the “18650 Lithium Ion Battery”, but this radio doesn’t use an 18650 battery. Instead, this radio uses a “BL-5C” Battery, which based on my research looks like it was pretty common on Nokia phones around 2004.
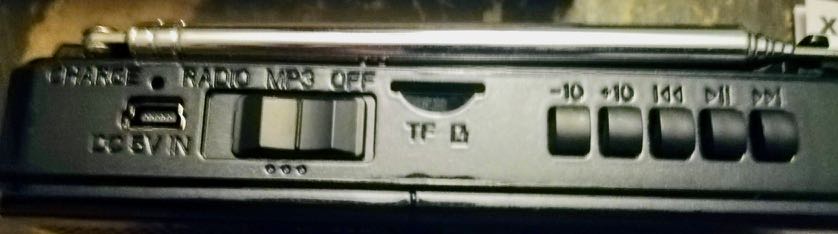
- Someone took white-out to the manual where it says “Set the function switch to the “MP3” position and insert the USB Stick or TF Card, with “USB stick” covered in white out.
The radio itself is made of a slippery, glossy plastic that doesn’t inspire confidence, but also seems to have enough structural stability it doesn’t worry me. I’d guess this radio could take a moderate drop and bounce and be OK, but it’d probably crack if dropped from above waist level.
I ran into a somewhat funny problem trying to insert the included wrist strap into the hole in the back of the radio. Unlike most radios with a wrist strap hole that’s closed off, the wrist strap instead continued down into the radio. That is, the wrist strap “loop” molded in the plastic is actually a hole into the radio. This doesn’t bode well for dirt or other junk getting pushed into the radio accidentally. I was able to eventually get the wrist strap on the loop, but it was far harder than it should have been.
Design
The Lithium Ion battery comes pre-installed in the radio, and the battery door it’s behind seems sturdy enough. Fortunately, there’s really no reason you should ever have to pull the battery out of this radio unless you need to replace it. Running the Battery model # across Google and other sites shows this should be a very cheap battery for you to replace at between $1 and $3.
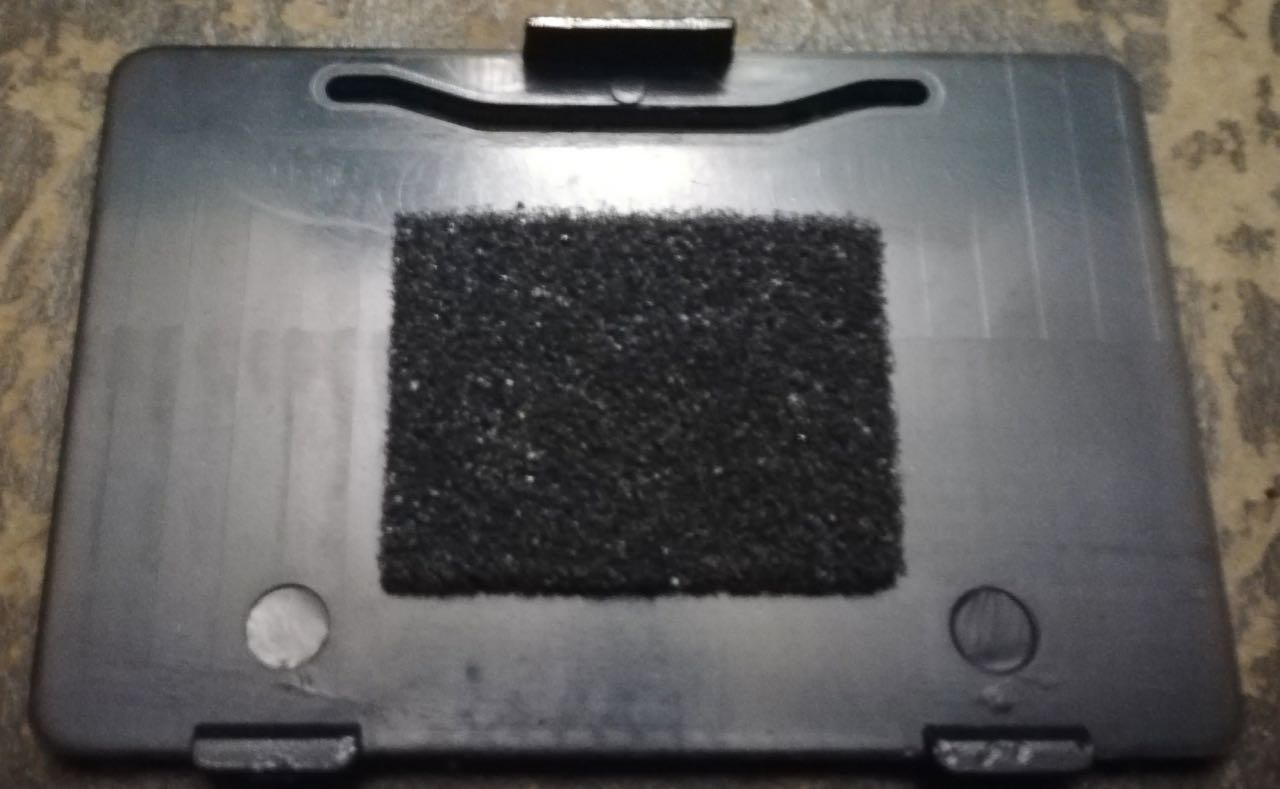
Battery Door
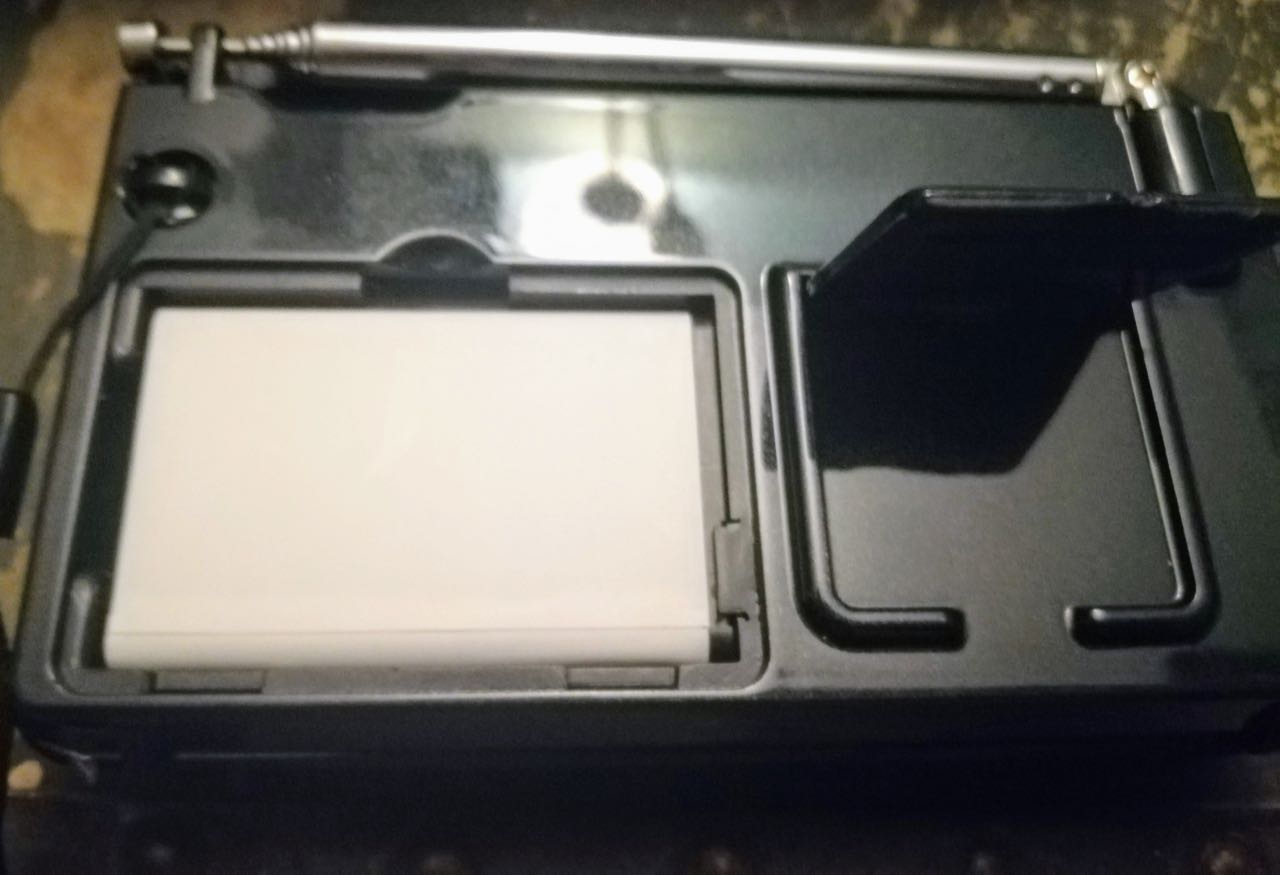
Kickstand deployed with battery door open
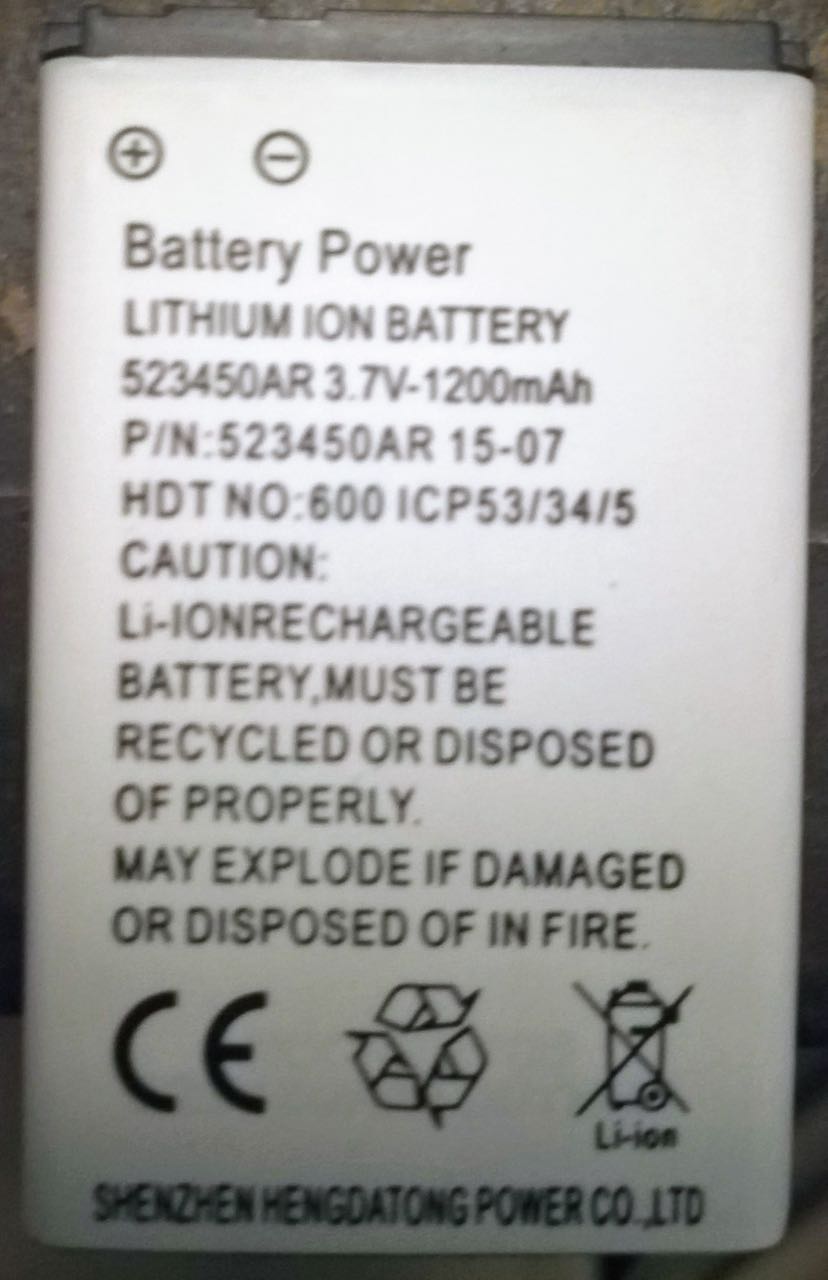
Li-Ion “BL-5C” Battery
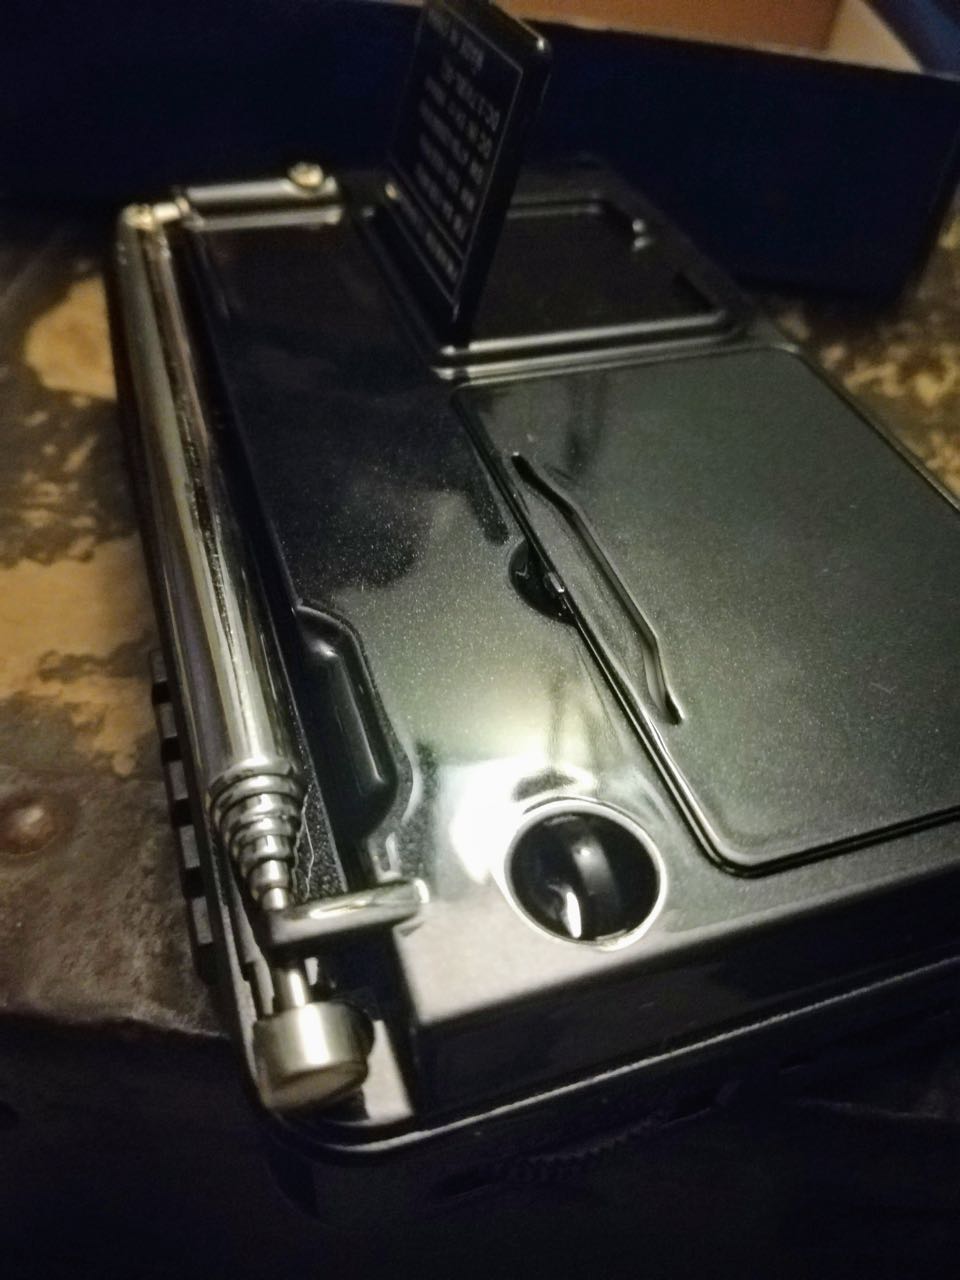
I very quickly noticed a big glaring design flaw on this radio with the poorly designed, super small kickstand located next to the battery compartment. This small, off to the left kickstand works fine if the radio is on a perfectly level surface like a nightstand, but causes the radio to tilt over if you try to place it on a soft surface like a bed or a pillow. I would have liked to see just one large combination battery door/kickstand if possible across the back of the entire radio.
Design problem number two with the radio became very apparent when trying to extend the telescoping antenna. The antenna butts up against the plastic molding on the back of the radio, meaning you cannot prop the antenna up “Straight” when using the kickstand. This results in the antenna having to angle off at around 45 degrees, which is a bit annoying. My Tecsun PL-310ET doesn’t have this problem due to having a cut-out notch to allow the antenna to be in a more upright position.
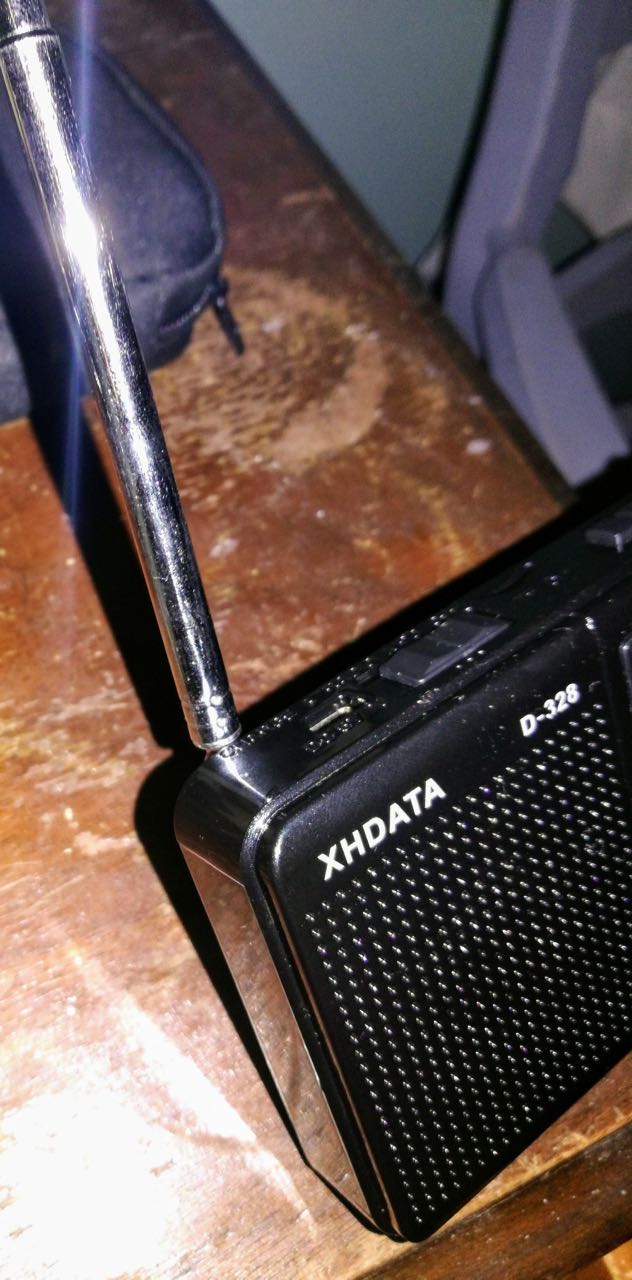
“Upright” Antenna trouble

Tecsun PL-310ET for Comparison
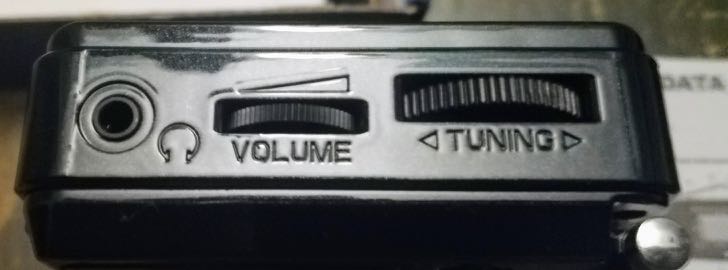
The tuning knob has a satisfying amount of resistance to it, and doesn’t spin too quickly or too slow. The volume knob, while smaller, spins freely and also feels solid.
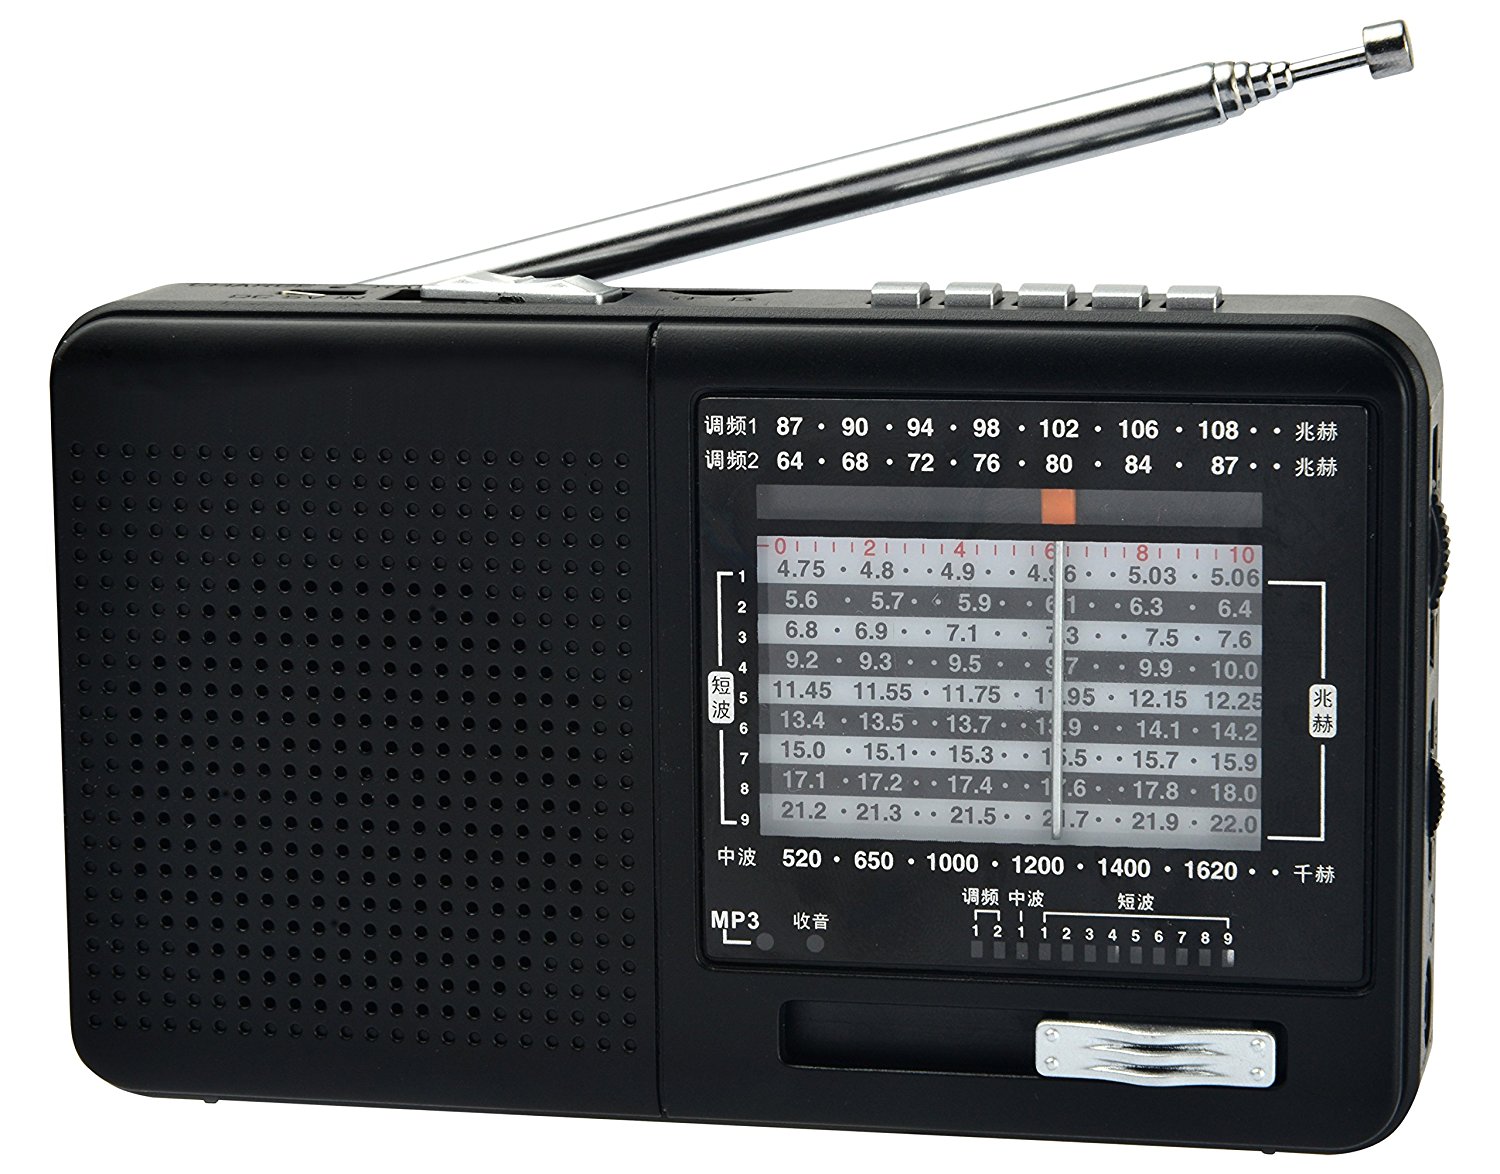
The band selector selects between FM1-2, AM, and SW 1 through 9. The switch to move between these bands has a satisfying amount of click and feedback to it, and isn’t mushy and you likely won’t pick the wrong band. The small window displayed below each band number fills with a small, mechanical, plastic bar attached to the switch. The window and bar were slightly misaligned, making it difficult to tell at a glance which band I had selected.
The tuning bar itself moves smoothly across the band, but the metal extension piece running down the shortwave part of the spectrum tuning was not vertically straight and had a noticeable bend to the lower right.
Weight – this radio is INCREDIBLY light! The choice of a Li-Ion rechargeable battery pays off here, and when I weighed the radio it came in at exactly 160 Grams / 5.7 Ounces. The compact size of this radio and the weight would cause it to easily disappear into a coat pocket and I’d forget I was carrying it. This definitely qualifies as super-portable in my book.
The choice to use Mini-USB instead of Micro-USB on the charging is a questionable one. Micro-USB is the much more common connector you’ll recognize if you’ve bought a Smartphone in the last 3 years, or any other consumer device with a USB connector. Based on my short research, Micro-USB despite being smaller than Mini-USB, offers a number of benefits including increased cycle-count on the number of plugs/unplugs before the connector wears out. I don’t know why XHDATA went with Mini-USB on this, and I’d suggest they move to Micro-USB for future revisions. The Mini-USB, other than being slightly easier to plug in, seems to offer no benefit and is obsolete compared to Micro-USB.
Audio Quality
Wow! While I may have had some hesitations about the radio’s design, I was incredibly surprised by both the loudness and fidelity of the speaker on this radio. The volume was incredibly loud, and the audio did not distort even when I turned this to the highest setting. While a mono speaker, voices on AM were quite clear and nice to listen to, and music on FM Sounded way better than it deserved to sound coming out of a $14 radio.
Plugging in a pair of earbuds (not included) also produced crisp, loud audio, with no noticeable whine or hiss. Volume levels should be more than adequate. Audio came in through both Left and Right earbuds, but I was unable to tell if the output was actually Stereo when listening on FM. The word “stereo” is not mentioned anywhere in documentation, so I would not be surprised to learn this radio is mono-only.
Tuning

I don’t normally use analog radios, so tuning the D-328 was a bit of a challenge. The cramped display provided little feedback, and the crooked tuning bar didn’t help either. FM Stations seemed to be needed to be tuned “high” About 1MHz from where I thought they should be, and AM Stations about 50 KH above where I thought they should land. Tuning Shortwave seemed like a total crapshoot, being fairly imprecise.
I’m mostly an FM/AM Radio listener, and all the usual local suspects popped right in and tuned easily for me. Static between stations is kept very low, and when a station locks in on FM it pops in very clearly. Selectivity between close adjacent stations can be challenging due to the small tuning dial and skewed visual feedback, but I was able to tune in every FM Station I tried.
I am located in the Philadelphia Suburbs, so my usual station for tuning in a weak signal is WPRB 103.9 out of Princeton. I’m happy to report it came in just as clear as it did on my Tecsun PL-310ET, with no trouble finding it.
AM was more of a mixed bag with tuning. Stations I did not expect to come in clearly seemed to pop in with strong signal strength, while the “go-to” AM Test station of KYW 1060 proved surprisingly difficult to locate on the dial. Audio levels on AM were noticeably wider in variance of signal, with some stations proving almost too quiet to listen to.
I’m honestly not much of a Shortwave listener most of the time, so I’m sure some other reviewers will go into much more detail on the Shortwave performance of this radio then I will. My experience tuning around on Shortwave with the D-328 was similar to AM, in that I had a lot of unexpected surprises in strong signals between 6900KHz and 9300KHz. My shortwave listening usually takes place on digital tuning with the Tecsun PL-310ET, so it’s hard to compare analog listening for something I don’t do that often. Tuning was surprisingly easy on the shortwave bands, but seemed frustratingly random where stations would show up.
MP3
Let’s get this out of the way immediately – this radio does not record MP3 files. Instead, sliding the mode selector to “MP3” will let you play files off a “TransFlash” (MicroSD) Card.
I’ll be up front here – this radio is a functional, but not fun to use MP3 player. I tested the MP3 player by loading up a 2GB MicroSD Card I had laying around with some files in a structure similar to the following:
* Root
** File1
** File2
** Folder1
*** Subfolder 1
*** File 3
*** File 4
** Folder2
** File 5
** File 6
** File 7
The first thing you’ll notice when playing MP3s is the “MP3” Light that is Red. And blinks. And blinks. Yes, the red light blinks continuously while playing an MP3 file and you can’t turn it off. This right here would annoy me to no end if I wanted to use this feature
My second problem with using MP3 functionality is that playback without a screen is a throwback to the days of the iPod Shuffle. And if this radio had “shuffle mode”, I’d be OK with that, heck that would even be fun – but there’s no shuffle here, only sequential play.
This radio does seem to follow the expected order of my files in playing them sequentially 1 through 7 across subfolders, but the lack of visual feedback makes it very easy to forget where you’re at and what you’re playing. Pressing and holding the fast forward button does work to fast forward, and rewind through individual mp3 files.
If you want to load up a MicroSD card with some old time radio episodes and play them back – this might be great. But I’d probably ask you why you’d ever want to play MP3 files on this thing. I mean, the feature is there…. But why? There’s much better devices and experiences out there for MP3 Playback rather than loading files onto a MicroSD card to play on a device with no screen. I imagine this might have some utility usages for playing MP3’s when you don’t want to sacrifice more expensive hardware, but I personally can’t see myself getting much usage out of the feature.
Conclusion
At the end of the day I have to ask myself – who exactly is this radio for? The price point and feature set seems to pit this against the very low-end of the AM/FM/SW Market such as the Analog Tecsun R-9012 at $22, and Tivdio Digital tuning units around $18. The inclusion of Shortwave, Mp3 Playback, and USB rechargeable battery gives this a leg up over budget AM/FM units, as well as the competitors mentioned.
Is the DX/radio hobbyist the target market for this radio? I don’t think so. While cheap (and we Shortwave/HAMs are a cheap bunch!), this radio lacks the sophistication or features a DX’er would want.
Is this a good “throw-away” radio for when you don’t want to risk your “Good” Radio? Absolutely. I would not hesitate to toss this in a coat pocket, keep it out in the garage / workshop, or give it away to a friend. My personal use case for this radio will probably end up being I’ll take it to Baseball games to listen to the game on AM / FM while watching the game. If it breaks, I wouldn’t be too sad and would likely shell out another $14 without hesitation for a replacement.
Is this radio for kids? I don’t think so. Given the poor build quality of this, I can’t imagine this lasting very long in a youngsters hands and surviving more than a drop or two. Analog tuning is likely to prove incredibly frustrating to a youngster, and I can’t see anyone but the geekiest of little geeks making use of the MP3 player function.
Would I use this as an emergency radio, shoved in “go-bag” or kept around for winter storms / hurricanes? Probably not. The build quality and lack of standardized AA-Batteries would give me concerns over my ability to power it (though it did work great from a USB PowerBank when I tested) More concerning is I don’t know if I would trust this to still be working when I need it in a stressful situation.
So who is this for? This radio seems more destined / designed for the low-income international market. The price point on this radio is certainly attractive to North American buyers, but I just don’t think the average American radio buyer really wants or needs MP3 MicroSD Playback or Shortwave functionality.
For $14 XHDATA has made good, but not great, little radio. My future suggestions would be:
- Ditch the MP3 functionality – it’s of marginal usefulness
- Seal off the wrist-strap loop hole better
- Fix the case design so the antenna can sit more “upright”, and swing more freely.
- Re-design the kickstand to run the entire length of the radio, possibly doubling up as the battery door if somehow possible
- Switch from Mini-USB, to Micro-USB connector
- The BL-5C Battery is an …. Interesting choice. It sure seems to help with weight, but I think I’d rather see a single 18650 Cell as hinted by the manual or AA’s.
Many thanks, Aaron, for sharing your fine evaluation of the XHDATA D-328! I couldn’t agree with you more regarding your “future suggestions”–sounds like the MP3 functionality has marginal utility and the chassis design could use some tweaks. I’m very surprised a radio made in 2018 still uses a Mini-USB port. And that kickstand? I don’t think I’ve ever seen one more off-center!
But as you conclude, for $13.80 US (Amazon affiliate link), it is a very inexpensive unit. Not one for the radio enthusiast, but one that could please the casual radio listener. It sounds like the audio is surprisingly robust.
Thanks again for your fine review, Aaron!