Shortwave listening and everything radio including reviews, broadcasting, ham radio, field operation, DXing, maker kits, travel, emergency gear, events, and more
Many thanks to SWLing Post contributor, Steve Lekuecher, who writes:
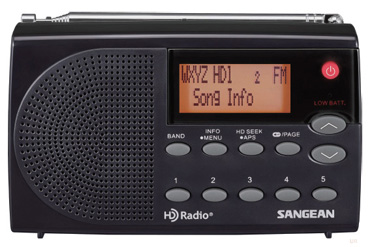
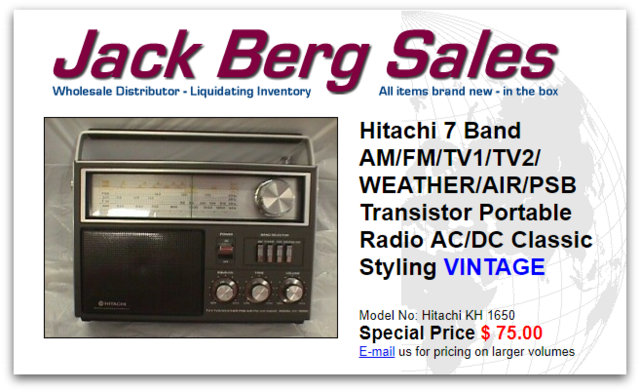
A technology forum friend recently noticed Universal Radio listed a new Sangean HD portable (HDR-14) on their website which is very similar in form to the Sangean DPR-65 and I was curious if you are considering reviewing it.
Thanks for the tip, Steve! Yes, I’ll certainly review the HDR-14!
I was unaware the HDR-14 was in the works, so I reached out to Sangean who supplied a little more detail.
The Sangean HDR-16 sports stereo speakers, but it limited to five presets per band.
It sounds, of course, like the HDR-14 will retail at a lower price than the larger HDR-16 (which is currently down to $99.99 shipped on Amazon).
I’ve been evaluating the HDR-16 this fall and have been favorably impressed overall.
I expect to post my review of the HDR-16 within the next two weeks.
Sangean plans to start shipping the HDR-14 mid to late January 2018. I’ll order it as soon as it’s on the market. I’m intrigued by the HDR-14 because of its size–very compact. I’m very curious, though, if it can match its larger brother (the HDR-16) in terms of sensitivity and overall performance. We’ll soon see.
Thanks again, Steve, for the tip!
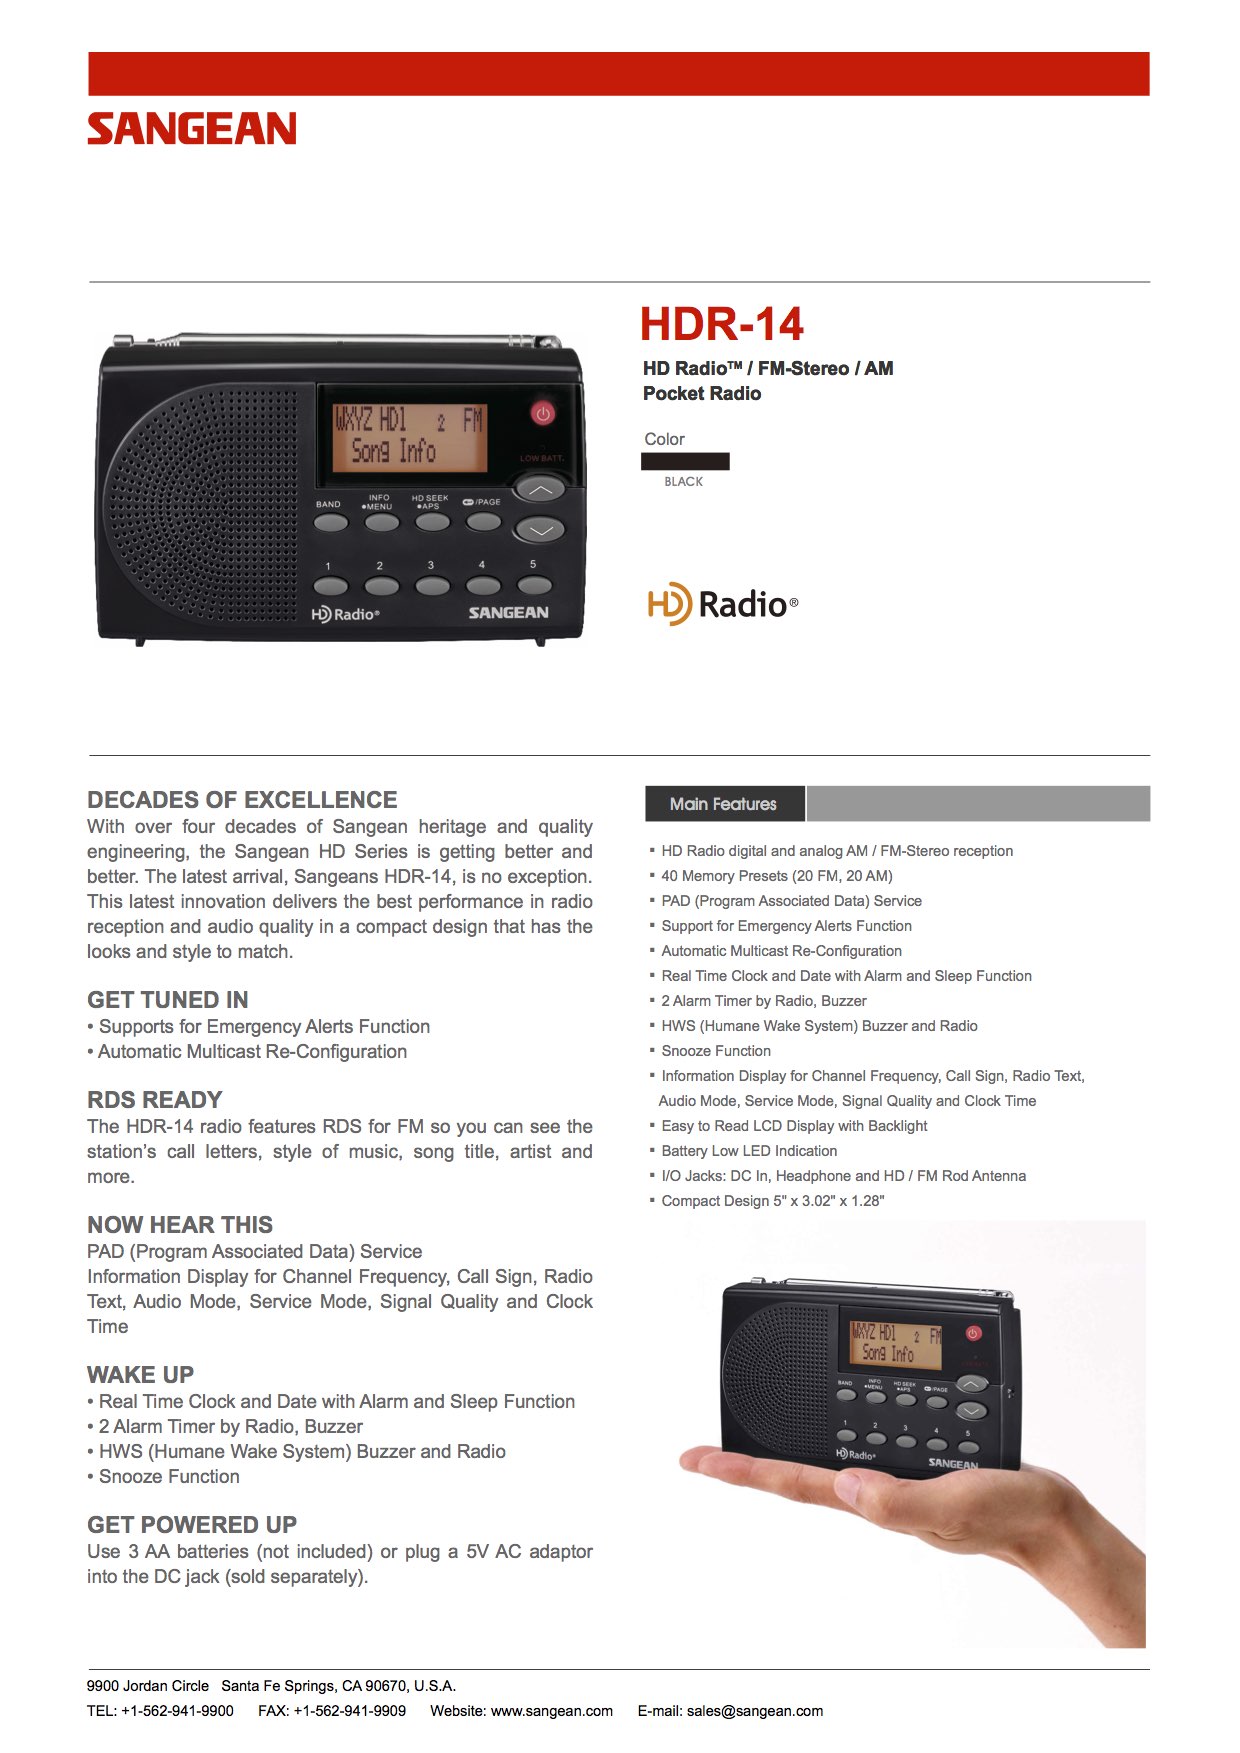
I’ve posted an image of the sales flyer below. Click on the image to enlarge:
The following review first appeared in the October 2017 issue of The Spectrum Monitor magazine.
Earlier this year one of my readers in Australia noted the addition of the Digitech AR-1780 to the product offerings of the Australia and New Zealand-based retailer Jaycar.
One thing I’ve learned over the years is that there are few in-country sources of shortwave radios in both Australia and (especially) New Zealand. Jaycar, in a sense, represents what RadioShackand The Source have offered in the US and Canada––a more accessible electronics retailer with some shortwave radio selection.
The Jaycar models are either very cheap sub-$30AUD digital portables, or pricier large portables with a form factor similar to the Grundig S350DL and S450DLX, or the C.Crane CCRadio-SW. The new AR1780 fits somewhere between––a compact portable that promises a compliment of features tailored for the radio enthusiast.
In this review, we’ll take a close look at the AR1780, starting with its feature set.
Features
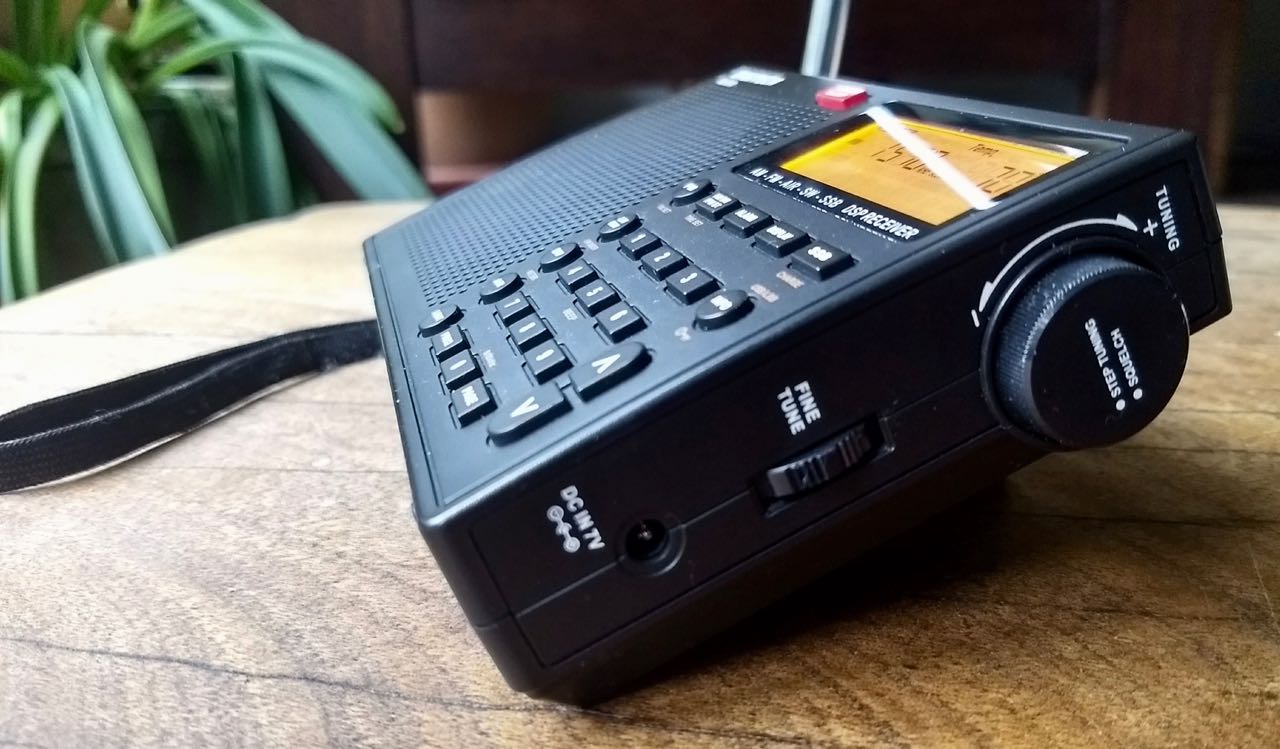
What appeals to me about the Digitech AR1780 is the amount of features provided by such a compact, traveller-friendly form factor.
Here’s a comprehensive list of the AR1780’s features and specs:
Frequency coverage:
FM 87.5 – 108 MHz
MW 522 – 1620 kHz or 520 – 1710 kHz
SW 1711 – 29,999 kHz
LW 150 – 450 kHz
AIR 118 – 137 MHz
Modes:
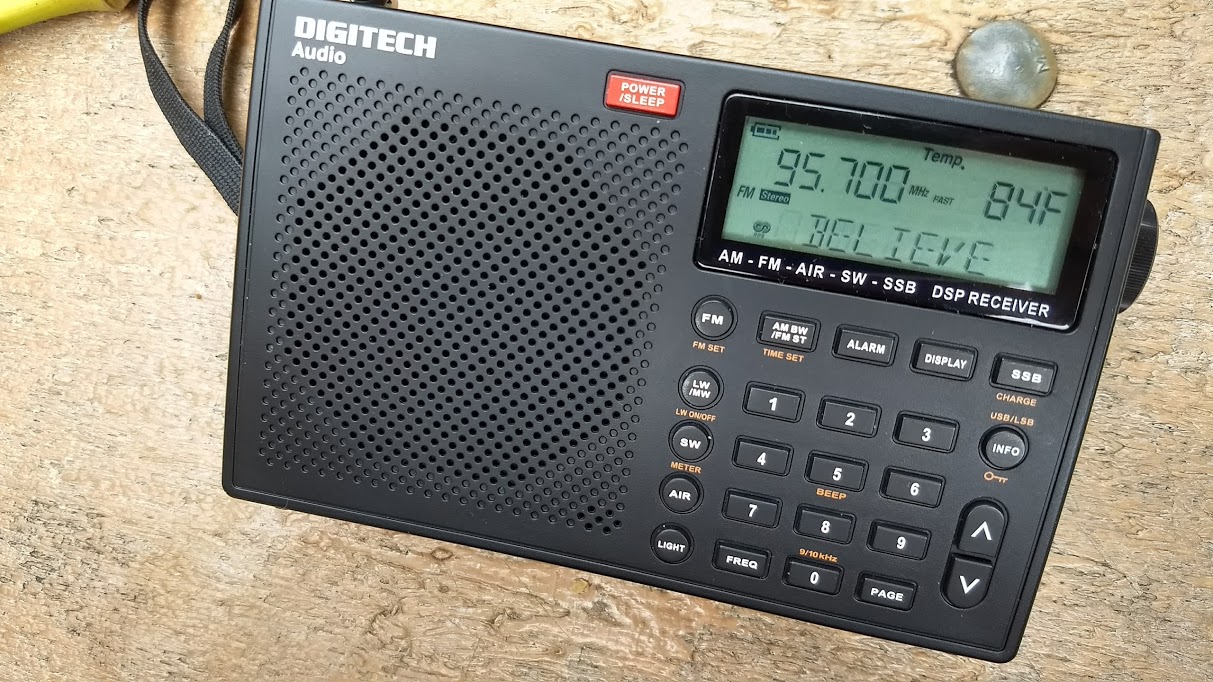
FM (including RDS)
AM
Single Sideband
Selectable Bandwidths:
AM mode: 6, 4, 3, 2.5, 2, & 1.81 kHz)
SSB mode: (4, 3, 2.2, 1.2, 1 & 0.5 kHz)
Convenient features:
Sleep timer
Clock/Alarm
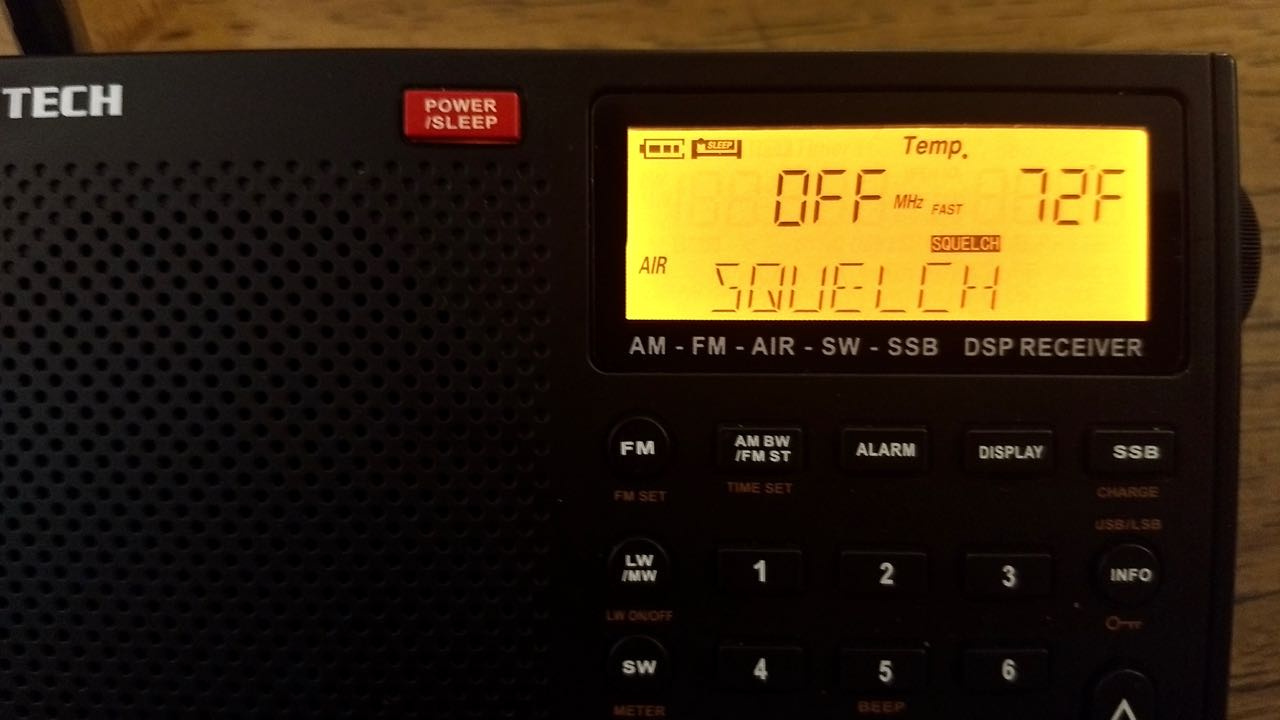
Thermometer
Signal strength meter
Squelch control
Voice/Music selectable audio filter
Dedicated fine tune control
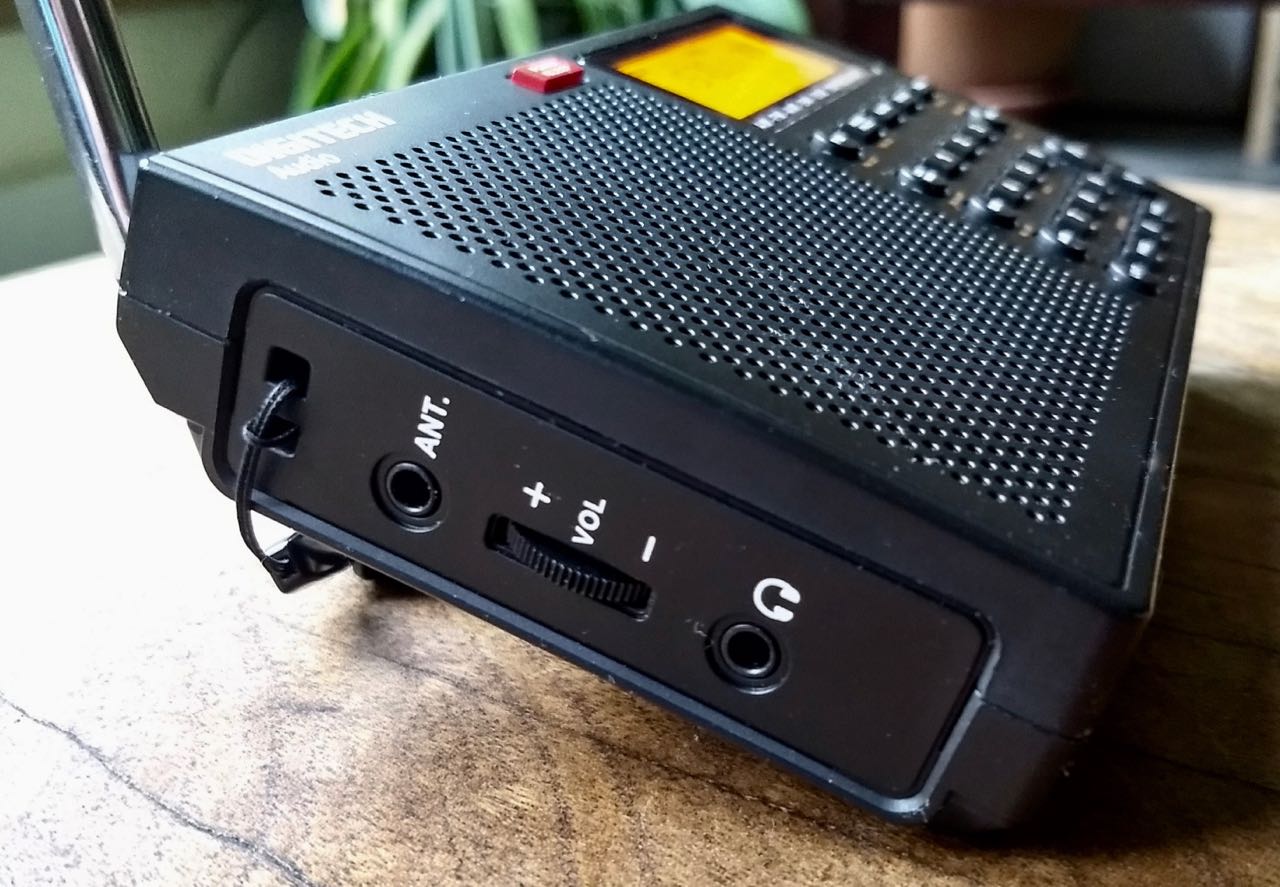
Headphone jack (3.5 mm)
Key lock button
Key beep on/off
Tuning knob and tuning step up/down buttons
Display button cycles through alarm, time, temperature, and signal strength
FM mono/stereo selection
Backlight button
Selectable 9/10 kHz regional MW tuning steps
Flip-out backstand
Power source: 7 VDC or 4 x AA cells (not included, can be internally charged if NiMH cells)
Antenna: Built-in telescopic and 3.5mm socket for external antenna
Weight: 253g/0.56 lbs (excluding batteries)
Dimensions: 150(W) x 95(H) x 30(D)mm
Operation Manual
The Digitech AR1780 ships with a small user manual. In fact, other than the hand strap, the user manual is the only additional item in the box besides the radio itself.
The manual is quite thin––slightly smaller in height and width than the AR1780––and only contains about eight front-and-back mini pages. Although readable, it’s littered with grammatical and punctuation errors. While a manual is certainly a welcome reference item with this feature-packed radio, this manual comes up short, lacking detailed explanations of features and even leaving some out altogether: it does not, for example, offer any explanation on the use of the excellent squelch control, nor does it fully explain the station memory set on multiple memory pages––! Rather unfortunate, as these features deserve a clear explanation.
First impressions
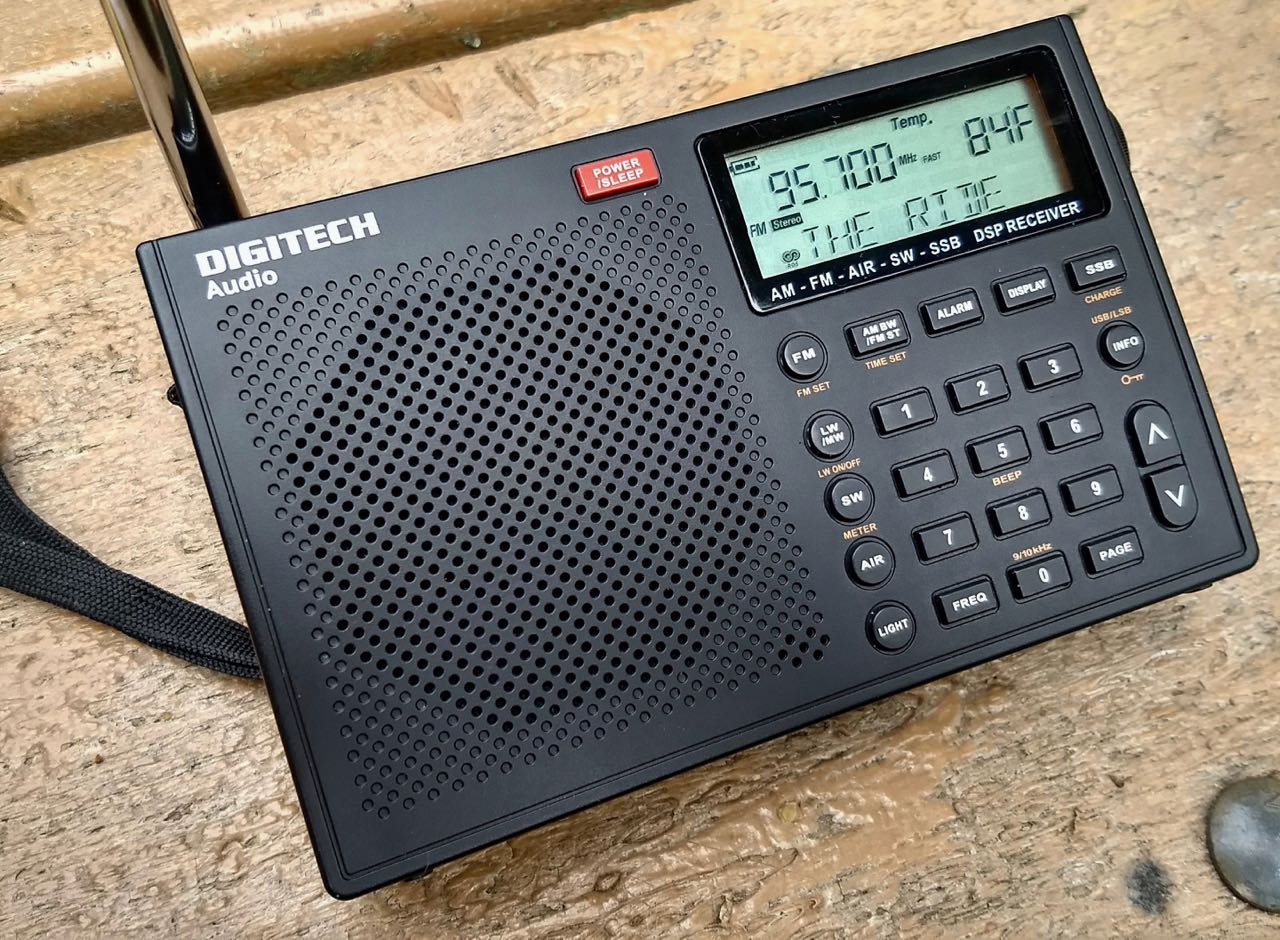
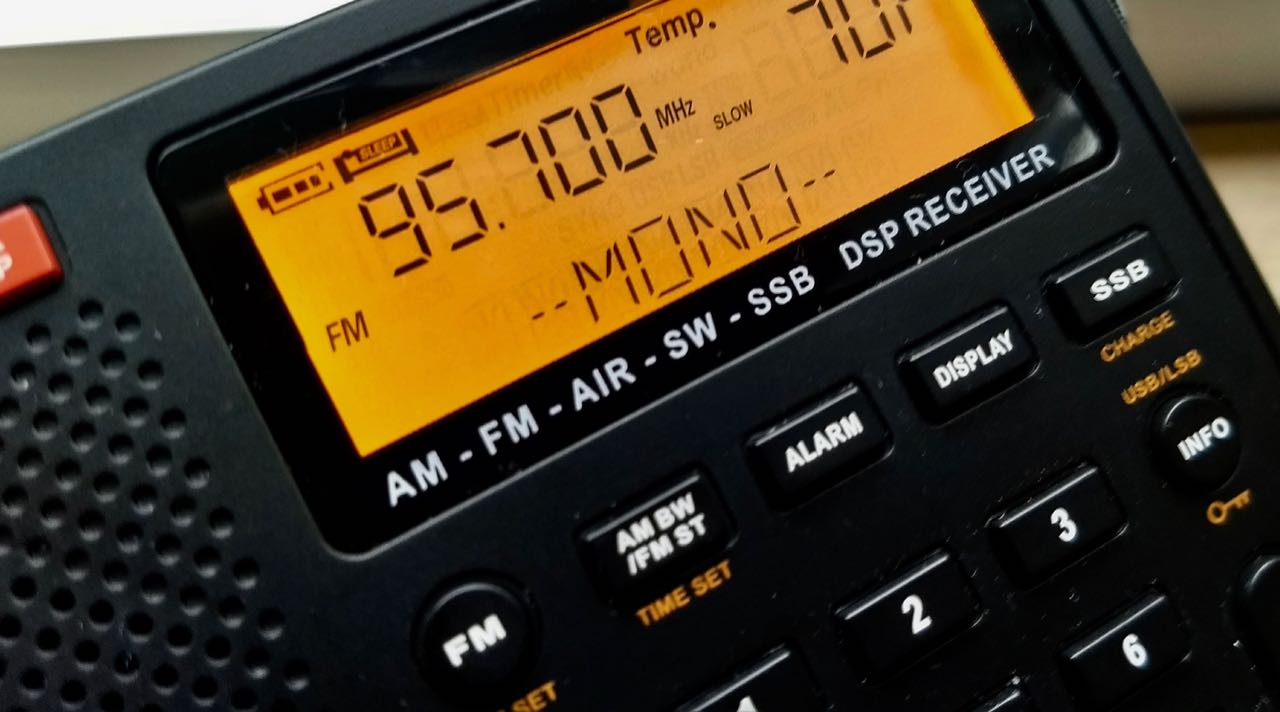
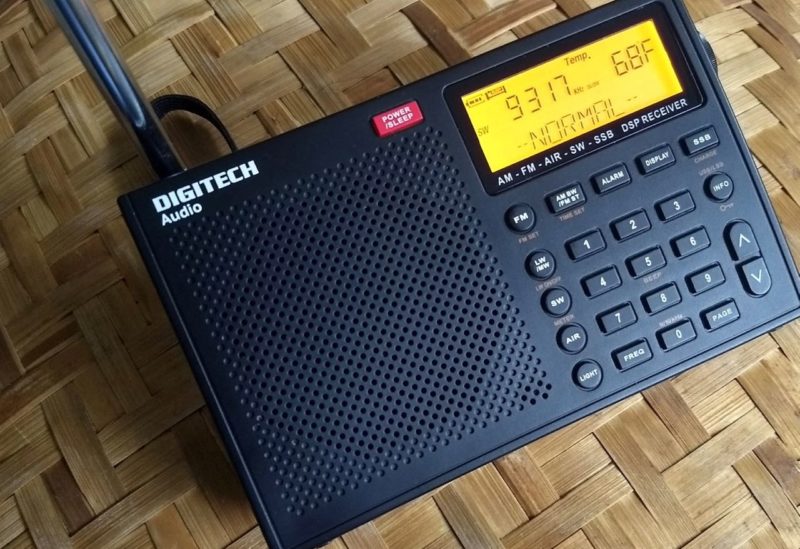
The Digitech AR-1780, like many DSP-based portables, includes a handy temperature display which can be toggled for Celsius or Fahrenheit.
I really appreciate the modest, portable form factor of the AR1780, so it had that going for it before I even opened the box. I travel with portable radios a lot, so the compact body of the AR1780 is very appealing. It’s not as compact as the C. Crane CC Skywave series, or the Grundig G6, but is much smaller than my Tecsun PL-660 and PL-880, or my Sony ICF-SW7600GR.
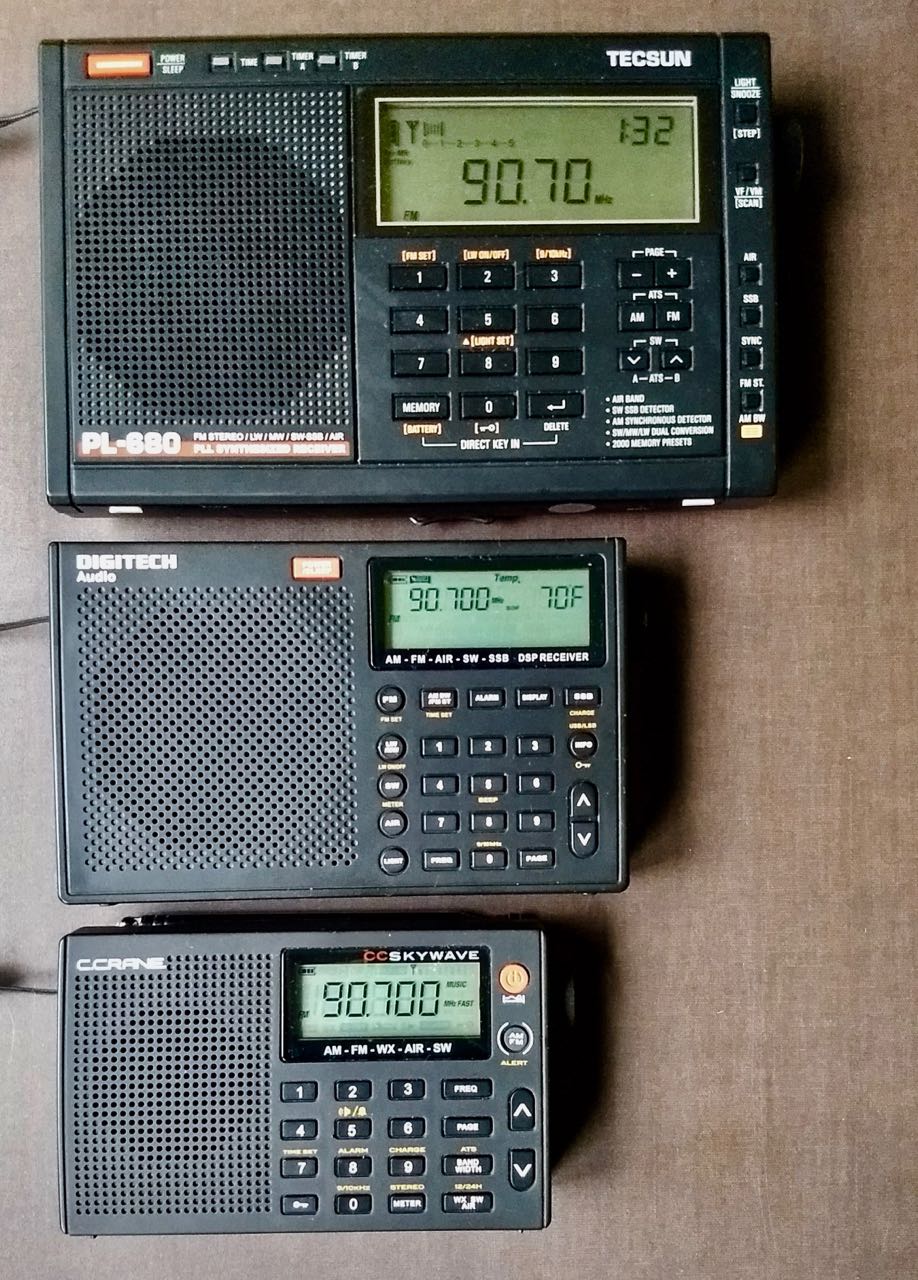
Comparing size: The Tecsun PL-680 (top), Digitech AR1780 (middle), and the C. Crane CC Skywave (bottom)
Unlike the radios mentioned above, the AR1780 does not include some sort of protective case or bag. I believe this is an omission for a radio aimed squarely at the traveler.
Fortunately, the plastic chassis of the AR1780 feels substantial enough. With the key lock engaged, the only likely problem that could arise from having no protective case is damage to the display, such as scratching.
The buttons all have a tactile feedback and seem to respond quickly enough, save powering up the radio, engaging the SSB mode, or changing bands, each of which takes a couple of seconds to engage.
I especially like the fact the AR1780 has, on the right, a dedicated multi-function tuning knob. One can turn the tuning knob to scan frequencies or press it to cycle through fast or slow tuning steps (or to turn off this knob’s function entirely).
The AR1780 also has a dedicated fine tune control––a tuning wheel just beneath the main tuning knob also on the right side of the radio (see image above). The only odd quirk about this is that this is where most radios have a volume control. Being a creature of habit, many times I’ve inadvertently shifted frequencies when I simply wanted to turn up or down the volume! The volume control, meanwhile, is in the same position on the left side panel of the radio between the antenna and earphone jack.
Speaking of volume, the AR1780 can provide plenty of it-––almost room-filling audio––via the internal speaker. Best yet, I like its balanced fidelity: mellow, with notes of bass, but ample treble when listening at moderate volume. The audio response curve is almost ideal for such a small package.
Something else worth noting: the AR1780 fits nicely in the hand. In general, it’s a great size for portable listening.
Major bonus for a travel radio: the AR-1780 is powered by standard, accessible AA cells. Note that the frequency range information silk-screened on the back stand is incorrect–shortwave coverage extends up to 29,999 kHz.
On the downside, however, one negative I noted shortly after beginning use: muting between frequency steps. In AM mode, this is not as distracting as in SSB mode. Muting makes band scanning a more tedious and fatiguing experience. Unfortunately, in this era of DSP-chip-based receivers, it seems muting has resurfaced.
Also, as with many other DSP portables, you can often hear “input” noise when pressing buttons. In other words, if while listening to one frequency I decide to key in another, I’ll hear a little clicking or buzz in the audio as each button is pressed. This is a very minor annoyance since it only happens when buttons are pressed, nonetheless, I thought it worth mentioning. I often wonder if it’s a result of poor shielding, something from which similar models suffer.
Performance
Over the past two weeks, I’ve had the AR1780 on the air almost every day. I’ve compared it with a number of receivers, but mainly The C. Crane CC Skywave, The CountyComm GP5-SSB, and even the Grundig G6. Below, I break down my notes by band.
AIR band
Let’s start with the “bonus” band: the VHF aviation band.
I’m sure there a number of readers who’ll never use this band, but I am not one of them. Personally, I really enjoy listening to aviation traffic, especially when I travel by air. Since the advent of the AIR band on ultra-compact radios, I no longer feel like I have to lug an additional scanner or receiver just to listen to the local air traffic control; that’s a plus.
Performance-wise, the AR1780 seems to be equal with the CC Skywave on the AIR band. Like the CC Skywave, the AR1780 has a squelch control––a fantastic feature, indeed. Simply tune the radio to your favorite aviation frequency, press and hold in the tuning knob on the side, and then use the tuning knob to adjust the squelch level. I find level 3 or 4 works well.
Note that unlike the squelch on the CC Skywave, the squelch control on the AR1780 actually carries over to the shortwave band. If you have squelch set on the AIR band, then switch to another band where squelch isn’t needed, you will need to turn it off. I never use squelch on the shortwave or mediumwave/AM broadcast bands; normal fading (QSB) can trick the squelch to open and close while tuned to a frequency.
Another convenient feature: press and hold the AIR button to start an automatic scan of the entire band. It’ll run through the AIR band once, saving any active frequencies. This is an ATS feature, so only makes one pass. I wish you could set it to continuously scan the aviation band in a loop, much as a traditional scanner would.
FM
The AR1780 does a fine job on the FM band. It easily received my benchmark FM stations and even decoded the RDS from one broadcaster about 110 miles from my home base.
When listening to marginal FM signals, the AR1780 can be set to mono mode instead of default stereo mode.
What’s more, the internal speaker is exceptional at handling music––reasonably full fidelity given the limitations of the speaker size.
Longwave/Mediumwave
I’ll be the first to admit that longwave is not an easy band for me to evaluate. Here in North America, there are so few opportunities in the summer to log trans-Atlantic longwave stations. Indeed, unless I’m travelling to New England or the Canadian Maritime provinces, I never try to do so on a portable. I leave TA longwave DXing to my SDRs and tabletops back home where I can listen with the assistance of a large antenna.
But when I travel to Europe, longwave is a must, so my travel radio needs this capability. Based on my ability to receive benchmark LW airport beacons, I’m going to assume the AR1780 will do a fine job receiving European longwave stations while in Europe.
Likewise, the AR1780 should serve you well for both daytime and nighttime reception on mediumwave. Fortunately, switching between 10 and 9 kHz steps is simple: with the radio powered off, simply press and hold the “0” button to toggle between these steps.
On longwave and mediumwave, you can also use SSB mode (both upper and lower sideband). This could come in handy to reject adjacent signal interference on MW.
Likely an oversight on the part of the manufacturer, you can even engage the squelch feature, though why you would on LW and MW, I’m not sure.
Of course, with the fine-tuning control, you can navigate both bands in 1 kHz steps should you desire.
In short: the AR1780 is adequately sensitive on mediumwave and likely on longwave, as well. I wouldn’t rely on it for any serious DXing, but for a travel radio, it will serve you well.
Shortwave
Being first and foremost an avid shortwave listener, I spent the bulk of my AR1780 evaluation time on the shortwave bands and I’m overall very pleased with its performance.
In almost all of my comparisons on the shortwave bands, the AR1780 had a slight edge over its competition, namely, the CountyComm GP5-SSB, the Grundig G6, and the C. Crane CC Skywave.
To be clear, though, it was a very slight performance edge which I think may be attributed to the fact the AR1780’s telescopic antenna is longer, giving it a bit of gain over its competitors. For example, the AR1780’s antenna is about 17.7 cm (7 inches) longer than that of the smaller CC Skywave.
Still, placed on a table and not held in the hand, the AR1780 was able to pull in weak signals better than its competitors. I also compared it with the the Tecsun PL-680––one of my most sensitive shortwave portables––and, not surprisingly, the PL-680 outperformed the AR1780.
Again, I should stress that the sound from the AR1780’s internal speaker is more pleasant to listen to for extended periods than that of its smaller competitors.
SSB
Single sideband reception on the AR1780 is pretty impressive for a radio in this price class. On my particular unit, I found that the fine-tuning control was almost always needed to budge the frequency a few tenths of a kilohertz, even when I knew a particular signal was exactly on frequency. My Grundig G6 always had the same problem––indeed, sometimes in SSB mode, I had to listen “up” as much as 2 kHz on the G6.
The fine-tuning control works very effectively in SSB mode, nonetheless. Audio is quite pleasant, although the noise floor is not quite as low as it is on my larger portables like the Tecsun PL-680, PL-880, and the new S-8800. In my comparison tests, the AR1780 was slightly more sensitive than the CountyComm GP5-SSB, and about equal to that of the Grundig G6.
In short? SSB is a welcome, capable addition on this compact portable.
Summary
Every radio has its pros and cons, of course. When I begin a review of a radio, I take notes from the very beginning so that I don’t forget my initial impressions. Following is the list I’ve formed over the time I’ve been evaluating the Digitech AR1780:
Pros:
Display is clear and easy to read
Time is always present via display button
RDS info scrolls on lower line
Backlit display easy to read
Viewing angle good, save from top
Dedicated fine-tuning control (even on FM)
External antenna jack
9/10 kHz selectable MW steps
Time set is simple
Adjustable bandwidth in AM and SSB
Decent battery life from four standard AA cells
Audio from the built-in speaker has better fidelity than other radios in this size
Cons:
No bag or carry case
DC input voltage is an odd 7V
Muting between frequency changes, especially annoying in SSB
Sometimes keylock activates backlit display permanently
Scan function on AIR band doesn’t loop, it’s an ATS pass only
My AR1780 had incorrect information silk-screened on the back regarding frequency coverage
Minor: sluggish response when switching bands or modes
Conclusion
Is the Digitech AR1780 worth the price? I think so. For $129.00 AUD (roughly $103 USD), you’re getting a full-featured radio that is, by and large, a pleasure to operate. It has its quirks, but so do so many ultra-compact portables in this price bracket. It’s certainly worth considering if you live in Australia or New Zealand.
I’d like the AR1780 to be a little more refined:
No muting while band scanning in AM or SSB modes
A proper scan function to accompany squelch on the AIR band
Squelch that doesn’t carry over when bands are switched
What I do think is impressive for this price:
Overall smooth audio from the internal speaker
Dedicated external antenna port
Dedicated tuning and fine-tuning controls
Useful screen which displays time and even RDS information
Sturdy, relatively long telescoping whip antenna
These are features that make the AR1780 stand out among radios in its price class.
Is it a benchmark performer? No. But it does the job rather well for the price, and frankly, I think I’ll use this during travel occasionally, even though I have several other smaller portables.
Why? Well, for one thing, this radio has better audio fidelity from the internal speaker than most of my ultra-compact portables. When I’m in a hotel and listening to a local radio station or even a shortwave broadcaster that’s punching through typical hotel RFI, I’ll appreciate the richer, mellower audio. Many of my smaller portables are lacking in this respect, thus I usually end up listening through headphones.
In fact, the only thing this little receiver lacks for us here in North America is NOAA weather/Environment Canada radio frequencies––but it’s no wonder it’s not included, as it was never intended for this market. But I’m glad the step size on the AM broadcast band can be switched to our 10 kHz spacing, which makes it useful here in North America.
In short, the AR1780 has exceeded my expectations––though admittedly, it may be because it was my first experience with a Digitech radio and I had heard so many lukewarm reviews of previous models.
Regardless, I’m happy I paid a small premium to order this little rig from Down Under.
If you’re a radio enthusiast in Australia or New Zealand who wants the best performance in a portable, and doesn’t mind a larger radio, then do splurge for the Tecsun PL-660, PL-880, or Grundig Satellite. There is a dedicated Tecsun distributor in New South Wales and there are always, of course, retailers on eBay and one of my favorites, Anon-Co in Hong Kong.
I have the Sangean CL-100 and highly recommend the radio for several reasons and in fact I bought several for family members as gifts. The Sangean CL-100 looks like an alarm clock and is what I use as an alarm clock but the CL-100 is a full featured weather radio as well.
The audio quality for general broadcast is excellent for a radio this size and the build quality is very good. I bought mine several years ago and have not had any issues. (About $60.00 from Amazon)
Some of the features I like and why:
S.A.M,E (Specific Area Message Encoding) Alerts only for your county. If a thunderstorm passes through a county next to you at 4:00 AM you will not be woken up. This has happened to me several times with my previous non S.A.M.E radio and I just ended up turning the radio completely off which obviously left me vulnerable to the next event.
Selectable Alerts – disable alerts that you may not care about such as wind advisory. Again I have been woken up with my previous weather radio that didn’t have this feature for a wind advisory early in the morning. Very irritating.
End-of-message (EOM) Radio turns off after alert is given so you don’t have to get out of bed just to turn the alert off.
RBDS (Radio Broadcast Data System) You can set the radios clock as well as the radio will display station ID and song name.
Display is excellent and has a wide viewing angle plus you can adjust the brightness. I do wish the display was a little bigger and mounted on the front of the radio VS the top so it would be easier to see the time if you wake up during the night.
Two separate alarms and can be programed for different days of the week.
Human Wake-up System – Alarm starts at a very low level and gradually builds up in volume. You can set the alarm to buzzer or radio broadcast. I hate being jolted out of bed by a nasty sounding alarm.
The jacks include DC power in, stereo earphone, AM external antenna, FM/weather external antenna, aux-in, external alert and grounding terminal.
Thank you for your review of the CL-100, Steve! I had forgotten about this particular weather radio and didn’t realize it was still on the market. I now recall an earlier post where Jeff McMahon touted the CL-100.
I love the CL-100 display and the fact that it doubles so well as a proper alarm clock. At time of posting, I notice one on eBay for $44 shipped–I hope someone buys it before I do. (Seriously–I’m very tempted.)
Federal regulators have voted to eliminate a longstanding rule covering radio and television stations, in a move that could ultimately reshape the nation’s media landscape.
The regulation, which was first adopted almost 80 years ago, requires broadcasters to have a physical studio in or near the areas where they have a license to transmit TV or radio signals. Known as the “main studio rule,” the regulation ensured that residents of a community could have a say in their local broadcast station’s operations.
Tuesday’s vote by the Federal Communications Commission lifts that requirement. With the rise of social media, the agency said, consumers now have other ways to get in touch with their local broadcasters.
“Additionally, technology allows broadcast stations to produce local news even without a nearby studio,” FCC Chairman Ajit Pai said.
But that same technological capability could prompt large media titans to take over small, local TV and radio stations, turning them into megaphones blasting content developed for a national audience rather than a local one, according to critics.[…]
Many thanks to SWLing Post reader, Jim T, who writes with the following inquiry:
Wondering if you can give me some guidance re: NOAA weather radios.
We’re looking to be better prepared for disasters, bad weather etc. and have narrowed our radio candidates to CC Crane, Sangean and Kaito.
AM/FM would be nice, hand cranking and solar as well, but just want to get NOAA alerts should we have an earthquake here in the NW. Willing to spend $50-100 for something quality with relevant features to it. Your thoughts would be appreciated!
Thanks for your message, Jim. There are dozens of inexpensive weather radio models on the market, but I know a few good options based on my personal experience.
Note that all of these radios work in both the US (via NOAA) and Canada (via Environment Canada)–both countries have been using the S.A.M.E. (Specific Area Message Encoding) weather alert system since 2004.
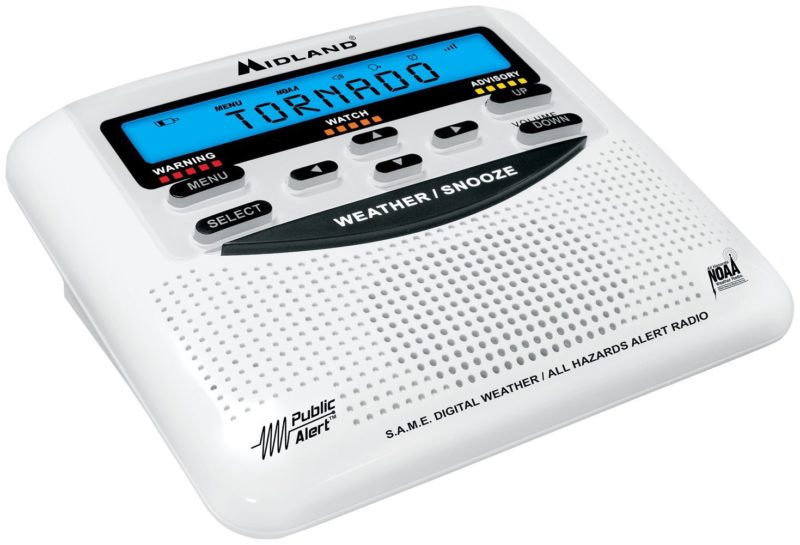
The Midland WR120: A dedicated weather radio
If you’re looking for a weather radio to plug in and continuously monitor weather alerts through the S.A.M.E. system, I recommend a dedicated weather radio like theMidland WR120. These radios don’t typically have AM/FM functions, but are entirely devoted to the seven weather radio frequencies in the US and Canada (162.400, 162.425, 162.450, 162.475, 162.500, 162.525, and 162.550 MHz). They plug into mains power and the better ones have battery backup in case of power outages.
I have family that own the Midland WR120. They’ve used it for years and it’s worked flawlessly. Once you set up the radio with your preferred NOAA frequency and SAME alert regions, it will alarm and automatically play NOAA weather radio alerts when they’re issued for your area. My family use this for tornado and storm alerts.
The Midland WR120 uses three AA alkaline cells for emergency power back-up. It’s very much a “set it and forget it” radio and, in my opinion, a bargain at $29.99.
As with any SAME alert radio, be aware that sometimes the alarm can be annoying. Depending on where you live and how the alert system is set up, you might get notifications for isolated weather events on the other side of your county–the S.A.M.E. system cannot pinpoint your neighborhood.
Still, I believe S.A.M.E. notifications are worth any extra inconvenience, especially if you live in an area prone to sudden storms and earthquakes.
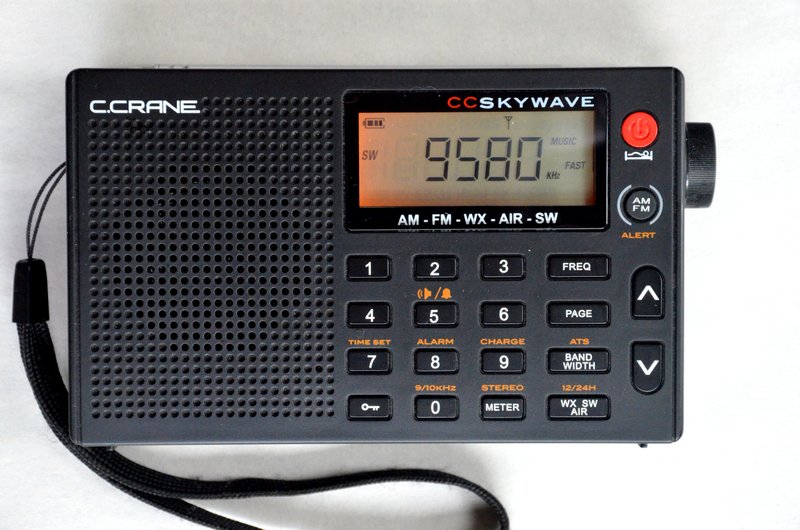
C. Crane CC Skywave: A portable shortwave radio with excellent NOAA weather reception
The C.Crane CC Skywave
If you’re looking for a battery powered radio to use during emergencies that has much more than NOAA weather radio, I’d recommend the C.Crane CC Skywave. Not only is it a full-fledged AM/FM/Shortwave and Air band radio, but it has exceptional NOAA weather radio reception with a weather alert function. The CC Skywave is a great radio to take on travels or keep in the home in case of an emergency. It’ll operate for ages on a set of two AA batteries, though I always keep a pack of four on standby just in case.
C. Crane CC Solar Observer: A self-powered AM/FM NOAA weather radio
There are a number of self-powered NOAA weather radios out there, but frankly, many are very cheap and the mechanical action of the hand crank are prone to fail early.
I believe one of the best is the CC Solar Observer by C. Crane. It’s durable, and can also run on three AA cells, and is an overall great radio in terms of sensitivity on AM/FM as well. Unique in the world of self-powered radios, it also has a backlit display (which can be turned off or on)–a fantastic feature if the power is out.
Like other self-powered analog radios, the CC Solar Observer has no S.A.M.E. alert functionality.
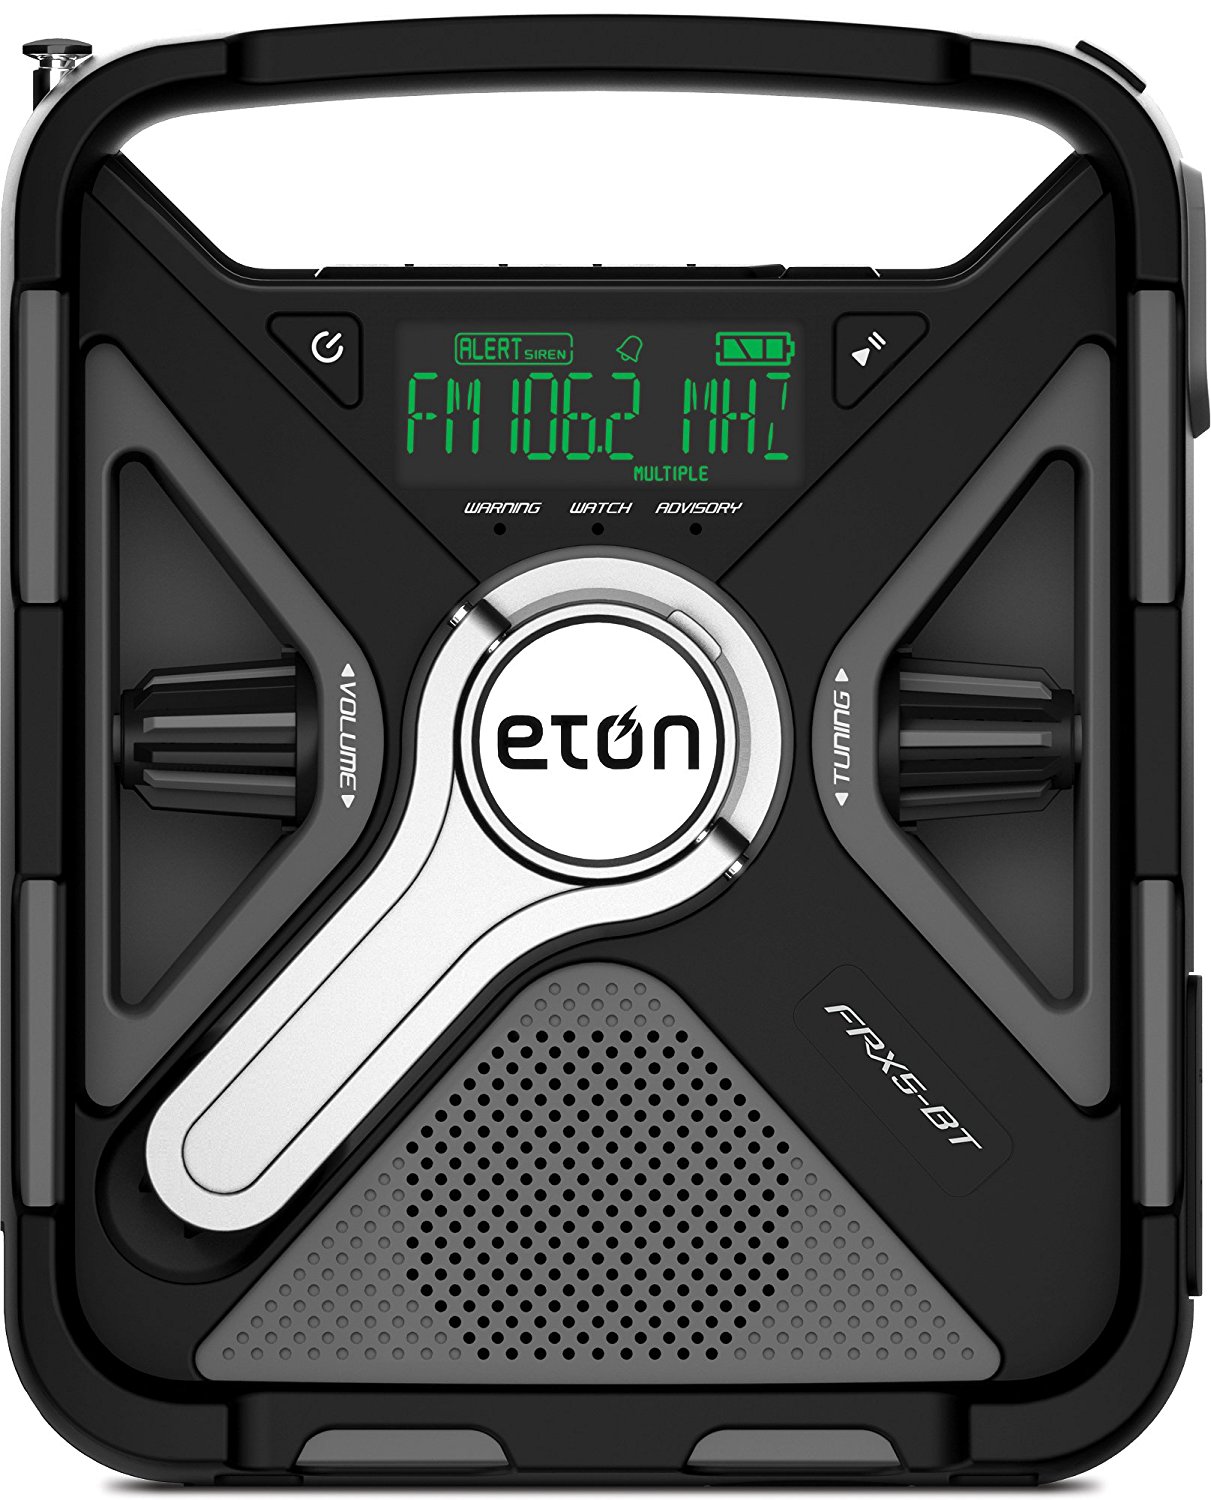
The Eton FRX5 sport weather alert, a digital display and futuristic design.
I would also encourage you to check out the wide selection of self-powered weather radios through Eton Corporation.
Many are digital and even have S.A.M.E. weather alerts. I haven’t commented on performance since I haven’t personally tested the 2016 and later models.
Eton typically packs a lot of features in their self-powered radios–having manufactured them for well over a decade, they’ve implemented iterative improvements along the way.
I have tested previous models extensively.
I particularly like the Eton FRX5 although being a digital radio, you get less play time per hand-powered crank–that’s why I prefer analog self-powered radios. The CC Solar Observer, for example, will yield roughly 40 minutes of listening time (at moderate volume levels) on 2-4 minutes of cranking.
Still, if charged fully in advance, I’m sure the FRX5 will play for hours. Note that using S.A.M.E. functionality in standby mode will deplete batteries more quickly.
Many thanks to SWLing Post contributor, Troy Riedel, for producing this excellent comparison of the Tecsun S-8800 and Grundig Field BT “lunchbox” radios:
The Lunchbox Showdown
by Troy Riedel
I have been watching with interest all of the information & reviews of the new Tecsun S-8800. Frankly, I was especially interested in how it would compare with the other “lunchbox” SW radio – the Eton Grundig Edition Field BT (the Digitech AR-1748 lunchbox radio is also available in AUS for approximately $207US shipped). As I contemplated which lunchbox to purchase, I put together the following Excel comparison table of the S-8800 vs. the Eton Field BT to assist me in making my decision:
Tescun S-8800
Eton Field BT
Price:
$268.00
$129.99
Tuning Methods:
FM / LW / MW / SW
FM / MW / SW
Q.Tune
Q.Tune
Digital tuner, Jog dial manual tuning
Digital tuner, Jog dial manual tuning (Fast, Slow and Hold)
Auto scan tuning with 5 second stop (w/ storage)
Auto scan tuning (no tuning storage)
Direct frequency entry using the remote control
Fine Tuning Knob: SW Meter Band
No soft muting when tuning
“Subtle“ Soft Muting when tuning
Station Storage Methods:
Manual storage: tune into stations manually and store them
Manual storage: tune into stations manually and store them
Semi-auto storage: storing stations during auto scan
Auto Tuning Storage (ATS): automatically tune into and store stations
FM / MW / LW / SW
FM / MW / LW / SW
AM Bandwidth:
Bandwidth selection (2.3, 3.0, 4.0, 6.0)
Narrow & Wide Settings (3.0*, 6.0*) *Reported
SSB:
SSB (USB/LSB)
N/A
SSB tuning steps at 10 Hz / 1 kHz
SSB Bandwidth selection (0.5, 1.2, 2.3, 3.0, 4.0)
N/A
FM with RDS
N/A
Bluetooth
Adjustable shoulder or hand carrying belt
Hand carrying strap
Remote control operation
N/A
SYNC:
N/A
N/A
Gain:
Local / DX antenna gain switch
Local / DX antenna gain switch
SW RF Gain Control
Memories:
650 station memories
50 station memories
Stored stations memory browsing
Auto Sorting Memory
LCD:
Standard Backlight
Orange Backlight
5-seconds or continuous settings
10-seconds or continuous settings
Clock/Alarm Time:
Clock/Alarm time (24H-format)
Clock/Alarm time (12 & 24H-format)
Alarm:
(1) Alarm
(2) Alarms
By radio only
By radio (60-mins) or buzzer (2-mins)
Digital Display:
Frequency & SW meter band
Frequency & Band (e.g. FM, LW, SW1)
Signal strength indicator
Signal strength indicator
Stored station location
Stored station location
Clock & Alarm time
Clock
Volume Level (while using remote)
Battery indicator & charging time
Battery Indicator
Sleep Timer A & B (Selectable)
RDS Info
* No Lock Feature
Display Lock “On”
Tuning Speed (Slow, Fast, Stop)
Sound Tuning:
Bass & Treble
Bass & Treble
Line In:
N/A
3.5mm Stereo Input for mp3 Player
Line Out:
(2) RCA Left & Right Stereo Channel Line Out
(1) 3.5mm Line Out for tape recorder or audio amplifier
Ant Selector:
Int. or Ext. Switch for FM/SW
Int. or Ext. Switch for FM/SW
FM/SW Antenna:
BNC: Low-impedance (50?) FM/SW
Coax: Low-impedance (50-75?)
MW Antenna:
High-impedance (500?) wire clamp terminals
High-impedance (500?) wire clamp terminals
Battery:
2 x 18650 Li-ion Cell
4 x “D” Cell
AC Adapter:
No AC included – does include a USB mini-B charging cable
7v 1200mA DC Neg Center included
Yes, the S-8800 without a doubt has more features than the Field BT. However, the S-8800 is slightly more than twice the price of the Field BT ($268 vs. $130)! Does the performance of the S-8800 equate proportional to the price difference?
Shortly after I made my Excel comparison table, Thomas published video comparisons of the S-8800. I very much appreciated the review and video comparisons that pitted the S-8800 against several popular portables. It gave me a baseline to set my expectations. However, those videos didn’t answer my question: “should I purchase the S-8800 or the Field BT”?
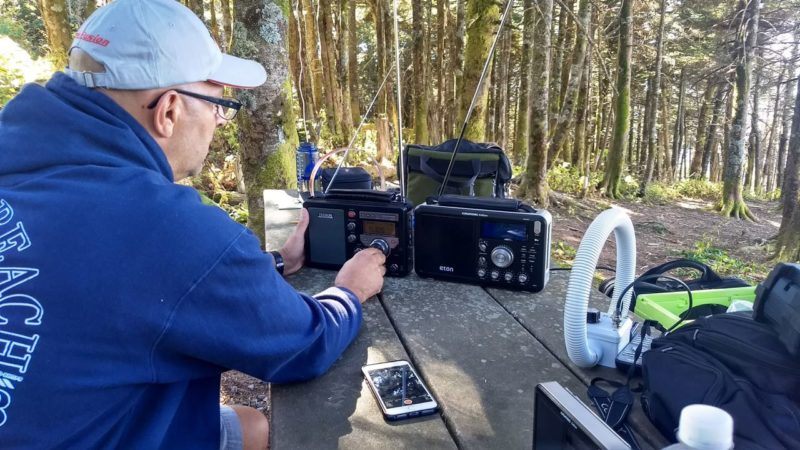
I contacted Thomas and I told him “we need an S-8800 vs. Eton Field BT” video comparison so SWL’ers have a true lunchbox vs. lunchbox comparison! I volunteered to purchase an Eton Field BT and have it delivered to Thomas for him to compare the two (after which he would forward the Field BT to me). After he hesitated, I replied: “what if I buy the Eton and we meet in North Carolina to compare them together”? Fortunately Thomas readily agreed and I made the 6.5-hour journey from Southeast VA to Mount Mitchell State Park for the Lunchbox Showdown (864-miles roundtrip on my odometer)!
Thomas and I had a limited amount of time. I arrived at noon. Thomas and I had 8-hours … and that included time for Thomas’ Parks On The Air (POTA) Activation, our S-8800 vs. Field BT comparison, we had to eat (it was a long drive for me!), and Thomas brought many other toys so we had to carve out time to “play radio” (and I can’t drive 400+ miles to Mount Mitchell and not walk to the summit of the highest point east of the Mississippi River!).
Luckily conditions were as ideal as I have ever seen them (evidenced by the fact Thomas made contacts from TX to the Azores with his Elecraft KX2). So please keep in mind, what follows is in no way a complete comparison. And to be clear, it was never my intention to review either receiver (there are many people more competent than I am that have already done this – Thomas among them!).
My interest re: these two models is primarily limited to each’s shortwave performance (I use a Sangean PR-D15 and a Grundig YB400 for AM DX, I prefer my Sangean PR-D15 for FM and I own 12 shortwave receivers). Thus our goals were to find and compare multiple representative SW signals. Thomas is obviously familiar with local AM stations in the area that he uses in his comparisons, thus we sought out a few AM signals (I recorded one to illustrate one huge difference that we both perceived in the two radios). Due to time, hunger, and eventually darkness we had to call it a day at 8 P.M.
I used my iPhone 6S to record the following comparisons. This was the first time I recorded shortwave signals. In retrospect, I wish I had made the recordings longer but at the time I was unsure of how much memory each recording would used, how much time it would take to upload, etc., so I kept everything at 1-2 minutes. As you will see, I recorded nearly all of the signals with the backlight off. You’ll see me reaching in, on Shootout 5, to tune off frequency – then back on – simply to show how the backlight would/or would not affect the weak signal on the Field BT (you’ll also see that it’s harder, outdoors, to read the Eton display without the backlight vs. the clearer Tecsun S-8880).
The Eton Field BT has its own SW RF Gain (a huge bonus) and you will see me reach into the field of view once or twice to fine tune the Field BT on weaker signals. And if you’ve studied my comparison table, you’ll see that the S-8800 has multiple bandwidth choices whereas the Field BT only has Wide & Narrow settings.
You will see me occasionally change the BW on both. I preferred not to speak during the videos as not to mask the audio of the signal thus I will set-up the specifics of each video with each individual link to my new YouTube Channel, SW Hobbyist, that I set-up to host these (and hopefully many future SW-related videos to include radio recordings & antenna comparisons).
Thomas and I both felt that the AGC of the Tecsun S-8800 was very slightly better (more stable – absolutely no “chug”) than the Eton Field BT (again, a very subtle difference). We both liked the sound of the Eton Field BT much better – it was crisp, full and just seemed to “pop” through its grill (see Shootout #7). The huge thing we both disliked with the Eton Field BT is its tuning dial. Yes, it has Q-Tune so one can jump from 5000, 6000, 7000, etc., with the push of a button but the tuning dial (even in “Fast” mode) is painfully slow and deliberate (dare I say horrible in comparison to the S-8880?). We both love the fact the S-8800 has a remote. But even without the remote, the S-8800 was much more pleasurable to manually tune.
Not to speak for Thomas, but I believe we generally felt [overall] that the SW signals were essentially close enough to call even … the edge to the Tecsun on a couple and the edge to the Field BT on a couple of others (I specifically remember us both commenting on an Arabic language broadcast from Radio Saudi Arabia where we both felt the Field BT was a very clear winner – that was one of the signals that I did not record). The better “sound” of the Field BT’s speaker may have influenced our opinions – a sound that was markedly better on FM, better on AM, but a sound that was much closer on SW.
My final thoughts and conclusion: Radios are like vehicles. No one vehicle is best for everyone. Each vehicle has a specific purpose and each has a subset of features. I own a large travel trailer. I need and thus own a heavy-duty diesel truck to tow it. But I surely wouldn’t recommend my vehicle to somebody who only needs a commuter vehicle. That’s why we have everything from SmartCars, to sedans, to SUVs, to dually diesel trucks. The same goes for radios. Some people will absolutely need SSB, others may demand SYNC (neither of these units has this feature!) while others may choose a radio based on size (compact for travel or larger models with a large, easy-to-read display for desk or tabletop use). Until now, I felt the video comparisons we had for the S-8880 were comparing a truck to an SUV to a sedan. At least now we have a few videos of two lunchbox radios compared side-by-side. True, one (the S-8800) is fully loaded (in vehicle terms: a 4×4 with a touchscreen GPS and DVD entertainment system). But not everyone who requires a truck needs a 4×4 with GPS and DVD entertainment system. Some truck owners prefer the smoother ride from a 4×2 truck. I think that’s the best way to describe these lunchbox receivers.
Am I glad that I bought the Eton Field BT? For me – despite the cumbersome tuning of the Field BT – I feel the S-8800 is not worth 2x the price of the Eton (I got an even sweeter deal for my new, sealed box Field BT off eBay that was well under the $129.99 street price). But you can make your own decision, you can decide which features are must-have, and you can listen to these videos as well as the other videos that Thomas has already posted and determine if one of these lunchbox models are in your future. And because I learned so much regarding the video recording of shortwave signals (I suffered from tunnel vision while recording – not fully aware of what I caught and what I missed), I hope I can meet-up with Thomas again so I can do a better, more thorough job with a “Lunchbox Comparison, Deuxième Partie” (that French was for Thomas – I hope I got that correct!).
Thanks for putting together this comparison, Troy! It was great hanging with you last week on Mt. Mitchell!
If you’re shopping for either of these radios, you have a few options:
The Tecsun S-8800 is only available worldwide via Anon-Co at time of posting. Eventually, they will begin appearing on eBay. There are retailers in Australia and Europe also selling the model (Important: make sure you’re ordering a model from the latest production run which solves the DSP birdie problem in early units).
Many thanks to SWLing Post contributor, Ron, who shares a link to Jack Berg Sales–a company specializing in New In Box (NIB) vintage electronics.
Ron points to one radio example in the Berg inventory, the Americana 10 Transistor AM Portable Pocket Radio:
The price is a very reasonable at $35.00 US plus $8.00 shipping and handling. Click here to view.
Jack Berg has dozens of other radios and electronics, though. It’s like walking through a vintage vault.
As Ron points out, Berg would probably make much more profit posting these vintage gems on eBay, but fortunately for us they do not.
It doesn’t appear Jack Berg does online ordering, which could make purchasing from outside the US quite complicated. In fact, they request a money order or cashier’s check sent to their office in El Paso, Texas.
(Side note: I honestly can’t think of the last time I purchased something from a company by sending in a money order or cashiers check.)
I suppose it would make sense to contact Jack Berg via email or phone (915-532-4519) to make sure your order can be fulfilled.
Additionally, there is no warranty of any sort.
These are NIB units and are untested. There’s a decent chance some radios may not function without replacing a capacitor or two and using a little DeOxit on switches and pots. For me, it’s worth the risk.
Post readers: please comment if you’ve ever purchased from Jack Berg. How was your experience? See any particularly amazing models in the inventory? I bet many of the AM radios have decent ferrite bars inside!