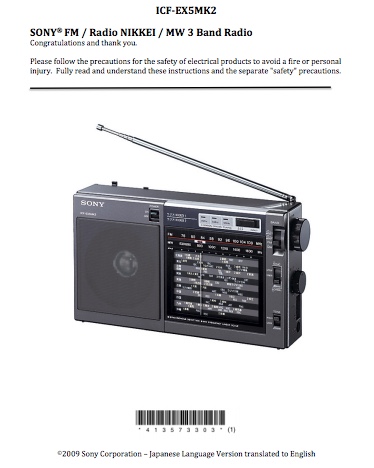
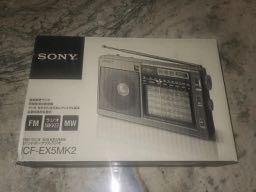
Many thanks to SWLing Post contributor, Troy Riedel, for sharing the following report of his Sony ICF-EX5MK2 analog receiver:
A report on the Sony ICF-EX5MK2
by Troy Riedel
The consensus, ultimate, all-time AM DX radio is the Panasonic RF-2200. I do not nor have I ever owned this radio [yet!]. As such, I do not have that radio as a baseline and I cannot approach my review with that reference radio in mind. I own 10 or 11 portable Shortwave radios. Until now when I would AM DX, I would generally reach for my Grundig Yacht Boy 400 (~5.9” internal ferrite bar antenna). In my experience, the YB400’s Sensitivity is [overall] better than my Sony 7600GR, the Eton E5, and the Grundig G3 (just a few of the SW receivers that I own).
In this Sony review I also mention Tenergy batteries. I have no stake or financial interest in either Sony or Tenergy. I’m just a guy who enjoys SWLing as a secondary hobby – and let’s call AM DXing a tertiary hobby.
Part I: Description & Overall Impressions Prior to Use
History:
The Sony ICF-EX5MK2 is what I would call a legendary AM DX Radio. The radio is manufactured in Japan. It replaced the highly rated Sony ICF-55W (discontinued early-1980s and can command high prices on eBay). The EX5 was originally introduced in 1985 and it has been in continuous production since that year.
I’m not a radio expert, but I am not aware of any other AM receiver that has gone mostly unchanged for 32-years. The EX5MK2 has quite a loyal following among AM DXers. Its following and longevity is what I feel makes this receiver legendary.
The EX5 is smaller, but resembles the iconic Sony ICF-2010 shortwave radio. I do not own the ICF-2010, but it is my understanding that the EX5 shared similar internal circuitry with the 2010 until Sony ran out of component parts in the early 2000s (later versions of the EX5 and the EX5MK2 thus have more differences, under the hood, as compared to the ICF-2010).
The current version of this receiver being sold NEW is a “version II” that carries the model designation EX5MK2. The EX5MK2 was introduced in June 2009. So what are the differences between the EX5 and EX5MK2?
The original EX5 had analog TV Bands. Since Japan (like the USA) migrated to digital TV, the “version II” or EX5MK2 eliminated the TV Band and replaced it with limited shortwave. The shortwave on the current model has 6 crystal-controlled frequencies for the Japanese domestic service of radio Nikkei. As such, unless you live in Japan … or are in an area that might be able to coincidentally receive another SW station on one of those 6 crystal oscillator frequencies, you won’t be able to receive shortwave transmissions on this receiver (radio Nikkei 1: 3.925 MHz, 6.055 MHz, 9.595 MHz; radio Nikkei 2: 3.945 MHz, 6.115 MHz, 9.760 MHz). To be perfectly clear, all six frequencies are accessed via a switch setting to a 1, 2 or 3. There is no SW tuning, thus no other shortwave frequencies other than the six that are programmed into this radio can be accessed! Do not purchase this radio if you desire a shortwave radio!
Additionally, the EX5 & EX5MK2 both have SYNCHRONOUS DETECTION. However it is my understanding that the EX5MK2 has updated or improved this feature (I do not own the former thus I cannot say for sure).
Before Purchase Research:
In my research before purchasing the unit, I relied on an EX5 review by Gary De Bock as well as a review by “RadioJayAllen”.
Before a purchase I will typically download and read a receiver’s user manual. However since this is a radio manufactured for and sold on the Japanese market, the radio’s documentation is only published in Japanese. But this didn’t stop me!
Because my Japanese is not at a level to translate, I relied heavily on online language translation and I painstakingly translated the entire manual in MS Word and then converted it to a PDF (click here to download as a PDF).
Frankly, I found nothing earth-shattering in the manual. The EX5MK2 is an analog receiver with bare-bones features (other than the SYNC – more later). Unless you are unfamiliar with using SYNC and/or you do not know what it means to separate the USB or the LSB of a carrier signal, there is really no need for the manual.
Until recent times, this receiver was only available from Japanese sellers on their retail web sites, and via Japanese sellers on eBay & Amazon. However, Amazon now stocks the EX5MK2 in their US Warehouses and offers free, 2-day Prime Shipping. Amazon Prime is where I purchased my receiver. If one is interested in this receiver, my advice is to shop. I have never seen a receiver in which prices varied so wildly – and I do mean wildly – from approximately $119 to $249 USD! That’s crazy.
Reading reviews on Amazon were also very helpful in my purchasing decision. But I recommend you read individual reviews and not rely solely on the numerical overview. Why? You can tell by the review if the reviewer has knowledge of radios … there are several reviews of people complaining that the “shortwave feature is useless” – and yes, that’s correct (outside of Japan) but one should not buy the EX5MK2 as a general coverage shortwave receiver as it has AM DXing DNA in its core!
Specifications:
The radio is packaged inside a fairly non-descript cardboard box with no accessories other than an old-school carry strap for the radio and a complimentary set of four Sony C/R14 [disposable] batteries. Once these Sony batteries are expended, I will switch to Tenergy Centura “C” Low Self Discharge (LSD) NiMH Rechargeable Batteries. I am an occasional AM DXer and the Tenergy Low Self Discharge batteries keep 85% of their charge after one-year. I keep Tenergy LSD AAs in my infrequently used shortwave radios and I always know they will have a charge no matter how long they sit idle. Tenergy Centura LSDs are very reasonably priced, too.
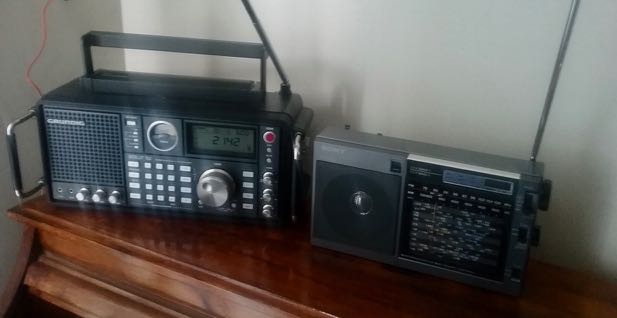
The radio is 10” long/wide (10 3/8” to include the tuning knob on the right-side of the cabinet), 5 9/16” tall, and 2 ¼” deep. With batteries installed, it weighs slightly less than 2.5 lbs.
The optional AC Adapter is the Sony AC-D4L. The adapter, new, is only available in Japan and possibly via a pricey purchase through eBay. There are many listings on eBay and Amazon, of Chinese-made “For Sony AC-D4L” adapters but these are not the recommended Sony-made adapter. The Sony AC-D4L is highly rated and said to be a quiet adapter that does not produce RFI that could be introduced into the radio I do not know how well the aftermarket Chinese adapters function. Also, the EX5MK2 requires a negative center tip. For those of you that own a Sony ICF-7600GR, that radio requires a positive center tip. The AC Adapters for those two radios are – unfortunately – not interchangeable! I note this because at least one vendor that I encountered tried to tell me otherwise (he tried to sell me a positive tip 7600GR adapter and said it was the same adapter used for the EX5MK2 – not so).
Note: During the Field Test I found this receiver to be extremely RFI sensitive. I would only operate this receiver on batteries – but if I had to use an AC Adapter, I would only trust the recommended Sony-branded AC.
The EX5MK2’s analog slide tuning dial is linear, or rather the frequencies are evenly spaced across the dial (a nice feature that makes tuning a bit easier; admittedly I’ve become spoiled by digital tuning and I had to re-develop some patience with analog tuning). An additional, unique feature of this radio is the size of the analog slide dial window. It covers approximately 60% of the radio! The dial is filled with the precise locations of 48 domestic Japanese AM stations (in Japanese characters, of course). Obviously this won’t help anyone outside of Japan (but remember, this is a Japanese radio for the Japanese market thus I’m sure this feature is appreciated in Japan).

The EX5MK2 does not have a lighted dial. That is quite disappointing. The only lighted feature on the receiver is a red LED on the very top of the slide dial that illuminates on strong signals – but not all signals. At this price point, I feel a non-illuminated dial is a huge omission.
I have not opened-up the cabinet of my EX5MK2, but my research indicates this receiver has a 180mm (7.1”) internal ferrite bar antenna (there are photos on multiple Japanese language blogs where owners have opened the case and show the internal ferrite bar antenna next to a tape measure or ruler – you can find these sites via a Google Image search). The FM/limited shortwave whip antenna is 36 ¾”.
Since this is a Japanese market radio, it has FM Coverage from 76 – 108 MHz and AM/MW Coverage from 530 – 1600 kHz. My sample of the EX5MK2 has coverage up to 1650 kHz to the very top end of the tuning slide beyond “1600”. For those who need extended AM beyond 1600, this may not be the receiver for you.
As mentioned earlier, the most important feature of this radio is SYNCHRONOUS DETECTION with SSB that not only SYNCS or “locks on” to a signal, but also has two additional switch settings that allow one to separate the carrier signal in either the Upper Sideband/USB or Lower Sideband/LSB. This means there are three settings: NORMAL SYNC where the signal locks on to the entire signal, as well as a second LSB and a third USB setting that allows you to isolate a Sideband and listen to only the lower or upper parts of the carrier signal. This should help the receiver’s SELECTIVITY – hopefully I’ll find out when I Field Test this unit.
Summary of Part I: Initial Impressions
First, a little disclaimer: I am not a radio expert – not a “radiohead”. I am not an amateur radio operator. I know what I like and I know what works for me.
The radio appears to be well made. It has girth and weight like some receivers I’ve owned in yesteryear – it just feels like one is holding quality. The receiver is analog, not digital, and the tuning is tight and smooth (no slack in the tuning knob like some lesser quality analog receivers and turning the tuning knob results in a proportional movement in the tuning dial). The linear dial – which I found to be extremely accurate on my sample – makes tuning to a precise frequency a bit easier than I had expected. Despite this, I still found myself longing for a digital readout and I frequently used a digital receiver to verify a frequency if I didn’t hear a station I.D. after a reasonable amount of time.
At this price point, it is disappointing there is no illumination of the dial. But I have to remind myself that this receiver is essentially a 1985 model with minimal changes over the past 32-years.

But the big question remains: how does it perform and is it worth its price? Reported excellent AM DX performance – enhanced through the SYNC DETECTION WITH SSB feature – is the reason I chose this model. Was it a wise purchase? I’ll field test it in Part II to answer those questions.
Part II: Field Testing
Field Test Conditions:
Power: Battery, with no external antenna (only the internal ferrite bar antenna) though I did try enhancement through inductive coupling via a Terk Advantage and a Tecsun AN-200 – two very similar AM Loop antennas.
Audio:
I measured the speaker to be 3 ¼” in diameter. Too bad the analog slide tuning dial takes up 60% of the front of the radio because the cabinet size could support much larger speakers (“speakers” plural instead of singular) to produce much better sound. With AM DXing, I’m not interested in high fidelity. However, I found the audio to be good enough to fill the room with a pleasing sound.
There is a TONE switch. I suspect this is really a bandwidth setting as the translated owner’s manual states to leave it on “High” unless there is adjacent station interference (then toggle the switch to “Low”). To me the switch appears to be a wide(r) versus narrow(er) bandwidth – wider for fuller sound and narrower to help eliminate adjacent channel interference. It seems to function as intended.
FM:
The EX5MK2 is not renowned as an FM receiver. However, I was pleasantly surprised. It very easily pulled-in my favorite station about 40-45 miles away. During bandscanning across the dial, the receiver proved itself a decent if not worthy FM radio – not a DX machine, but of a quality where I wouldn’t feel I needed to reach for another receiver that possesses high fidelity audio. For general usage, I was pleased.
AM:
To me, AM performance is the meat and potatoes … AM is the reason this receiver is so popular with a huge following. Unfortunately, mine did not measure up.
To reiterate, I’m not a reviewer. I am not loaned complimentary radios to review. And as a retiree, I am not able to buy multiple samples. I can only evaluate the sample I received and thus I can only assume I have received a representative sample.
I quickly discovered the Sony EX5MK2 is the most RFI sensitive receiver I have ever encountered!
My Listening Post is a sitting room off the 2nd floor master bedroom. It extends outward from the main profile of my house with our breakfast nook underneath. This room has served me well for shortwave listening and AM DXing (AM DXing via several of my shortwave receivers).
However, the EX5MK2 proved to be quite fickle in this location. I was never able to completely eliminate the RFI issue I encountered with this radio. Even a FitBit in its charger created RFI so bad that the only thing heard between booming AM stations was a high-pitched RFI squeal. And this charger is plugged-in for perpetuity and has never cause any hint of an issue with any other radio (while sitting at my Listening Post, I routinely recharge my FitBit while listening to my radios – plural – and until now I had never, ever encountered any such RFI issue with my FitBit on any of my other SW radios). Frankly, I was dumbfounded to discover this.
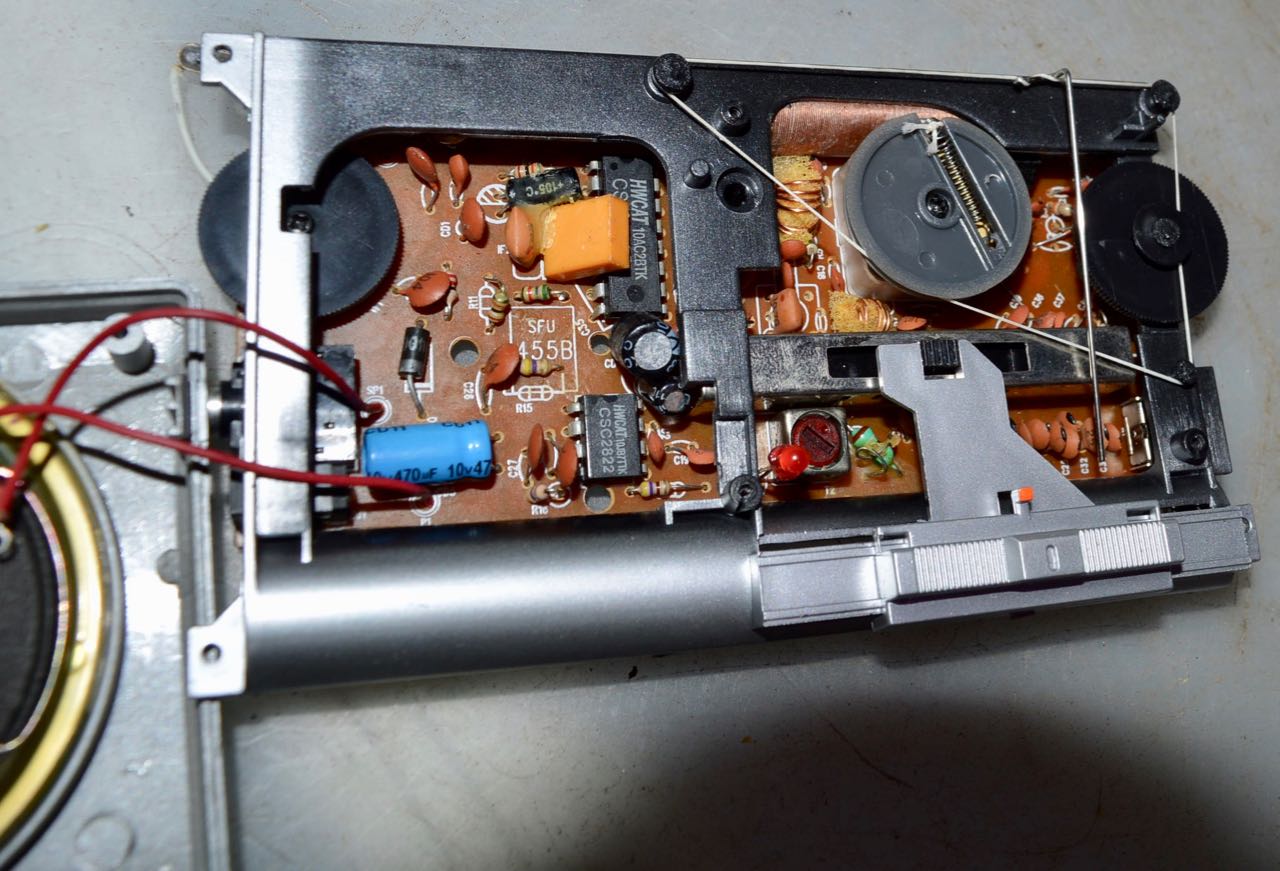
I can only speak for my sample, but prospective buyers should keep RFI sensitivity in mind. Since I have never read any other report of RFI problems, maybe my unit is not properly shielded? Since I’m not a technically savvy “radiohead”, opening up the receiver to look inside would do me no good to evaluate its shielding.
Sensitivity:
I can see why people like the EX5MK2’s sensitivity (or the ability to receive distant AM broadcasts). During its first daytime test, I immediately and easily captured a signal from WWJZ 640AM in Mount Holly, NJ (Metro Philly). That station is approximately 300-miles to my northeast. It operates at 50,000 watts, however it’s not the easiest 50,000 watt station to receive from my location.
But complications from RFI interfered with my Field Testing.
After reasonably eliminating nearby RFI to include unplugging my FitBit, AM bandscanning revealed a horrible RFI hum (more like a shout and not a hum) – the worst of which is below approximately 850 kHz. It seemed the only stations that I was able to receive within this RFI Zone was the WWJZ 50,000 watt station and a couple of local stations. The true “DX Test” type of stations seemed to be buried in the RFI with zero chance of anything being audible. This was quite disappointing to say the least.
I continued with daytime as well as nighttime bandscanning over multiple days, however I found myself frustrated with interference issues. Yes, I easily received WSB AM750 in Atlanta at night (565 miles to my southwest), but again it seemed only the big boomers were receivable below 850 kHz and even some of the more local stations disappeared.
Comparing the EX5MK2 to my Yacht Boy 400 … yes, the YB400 received the same stations the EX5MK2 did, but the EX5MK2 definitely received them louder and more clearly (possibly attributed to the superior SYNC DETECTION of the EX5MK2). But most importantly to me the same interference issues that the EX5MK2 displayed did not plague the YB400.
I must admit, at this point frustration & disappointment out-weighed my planned Field Testing and I lost my desire to continue with rigorous testing.
Some people reading this might be disappointed and may be thinking, “why didn’t you take this outside, or into the countryside away from possible RFI sources?” to finish the testing. That’s not how I use my radios. Nearly all of my listening is from my house. Yes, I may have been able to isolate and better diagnose the interference problems I encountered by going outside my house. But I had already made the decision that this radio was going back to Amazon. In the end, my 1994 Yacht Boy 400 better met my needs than the EX5MK2.
Note:
The SYNC DETECTION feature on the EX5MK2 appeared to justify its hype. Unfortunately due to my RFI issue, I never truly put the USB/LSB feature to a test. Yes, isolating the USB/LSB did help to separate several distant stations on the upper two-thirds of the AM band, but in my opinion a true SELECTIVITY test would be to separate and receive a distant, weak station from the adjacent channel interference of a much stronger station. I never encountered this opportunity, but I must also admit that I essentially abandoned the Field Testing once I decided to return my EX5MK2.
Also, and I don’t know why, inductive coupling with a Tecsun AN-200 enhanced the EX5MK2’s AM reception but the Terk Advantage didn’t yield the same results. They are similar antennas and why the AN-200 was exponentially superior to the Terk Advantage is not something I can answer.
Summary:
Given its reputation, I am sure the EX5MK2 is a good, if not great, receiver. But my sample, for whatever reason, did not measure up.
And please, if you soon see an “open box” EX5MK2 listed on Amazon – it quite possibly will be the one I returned! My recommendation is to pass on that one and purchase a new, sealed box unit.
Many thanks, Troy, for sharing your detailed review/report of the Sony EX5MK2. Thank you, especially, for taking the time to translate the EX5MK2 manual.
As Troy mentions, perhaps he simply received a lemon unit–one that had quality control issues such as possible shielding and/or grounding problems.
I can tell you as a reviewer that there are few things as frustrating as throwing yourself into a highly-anticipated review only to be disappointed by your particular unit’s performance. It’s like buying a new car only to find out it rattles as you drive–!
I am very curious if anyone else has purchased the EX5MK2 from Amazon recently and experienced similar issues? Or, have you found that this analog receiver lives up to its stellar reputation? Please comment!