Tag Archives: XHDATA D-808

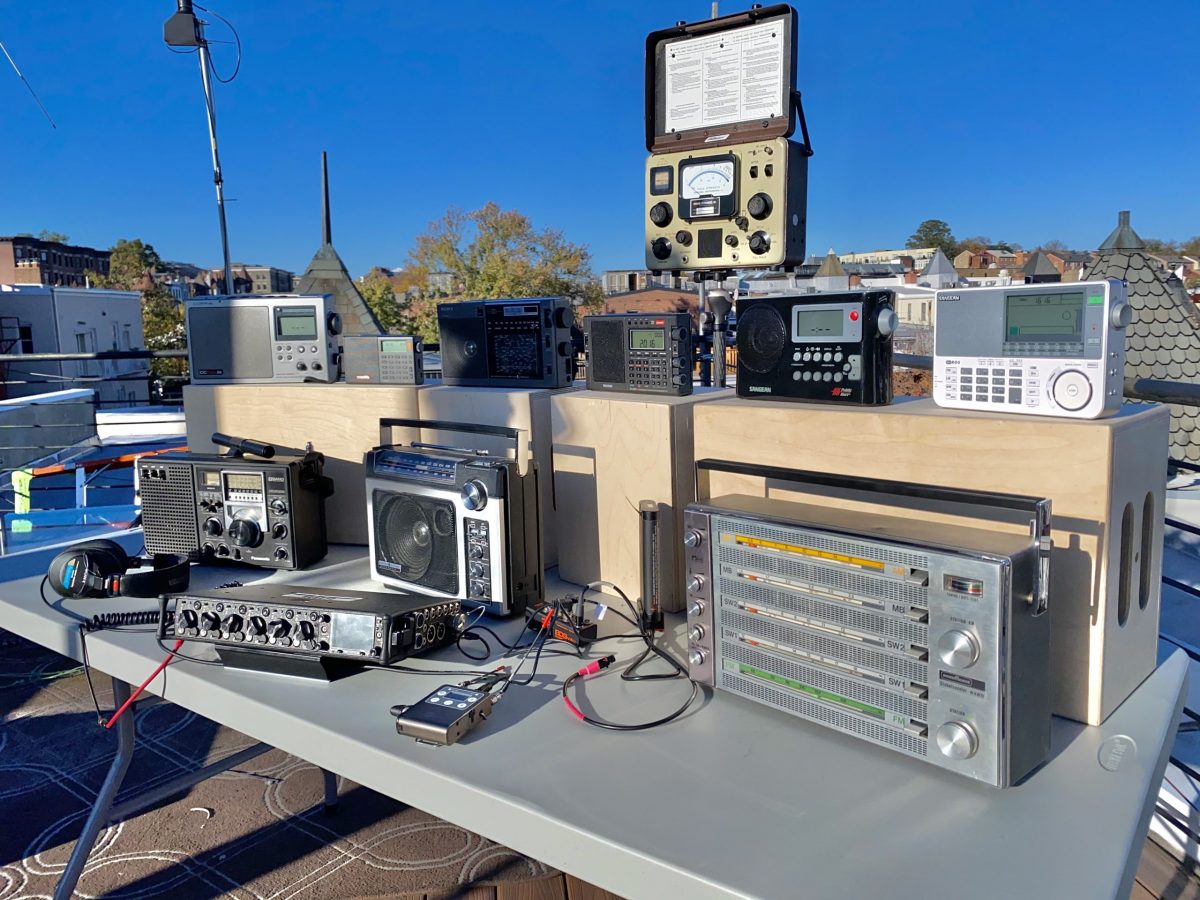
A detailed comparison and review of the C.Crane CCRadio 2E

Many thanks to SWLing Post contributor, 13dka, who shares the following guest post and review:


Do I really need this radio? A very belated review of the C.Crane CCRadio 2E

by 13dka

Ever since my relapse into radioholism a few years ago, I had a craving for a top-notch medium wave radio. This became even more of an urge when Germany abandoned the AM BC band just like many other European countries, leaving a band full of new opportunities but little left to receive during the day, at least with all the average portables I own. When checking the options, there’s no way around Jay Allen’s website if you want to know what’s best on MW, and I learned how little choices there are on the summit of the “5-star”-radios. Over the years I kept looking for an RF-2200/DR-22 et al but they are few and far between over here, and buying a dusty old radio with an unknown history, likely in need of repairs, restoration and alignment, for an insane premium price (up to 400€!) from a stranger was not exactly a pleasant prospect for me.

The CC Radio 2E and its predecessors, successors and siblings are the only radios in the topmost 5-star bunch that can be bought new and at a reasonable price. Sadly, the best product for the European market is only a 4 1/2 star radio and I realized that I have to buy a radio clearly made for the USA only, and accept the parts that don’t make any sense over here (120V, 10kHz AM spacing only, WX band). The problem: getting one shipped to Germany was rather complicated until Amazon.com made that much easier last year.

Performance comparisons

AM Broadcast Band

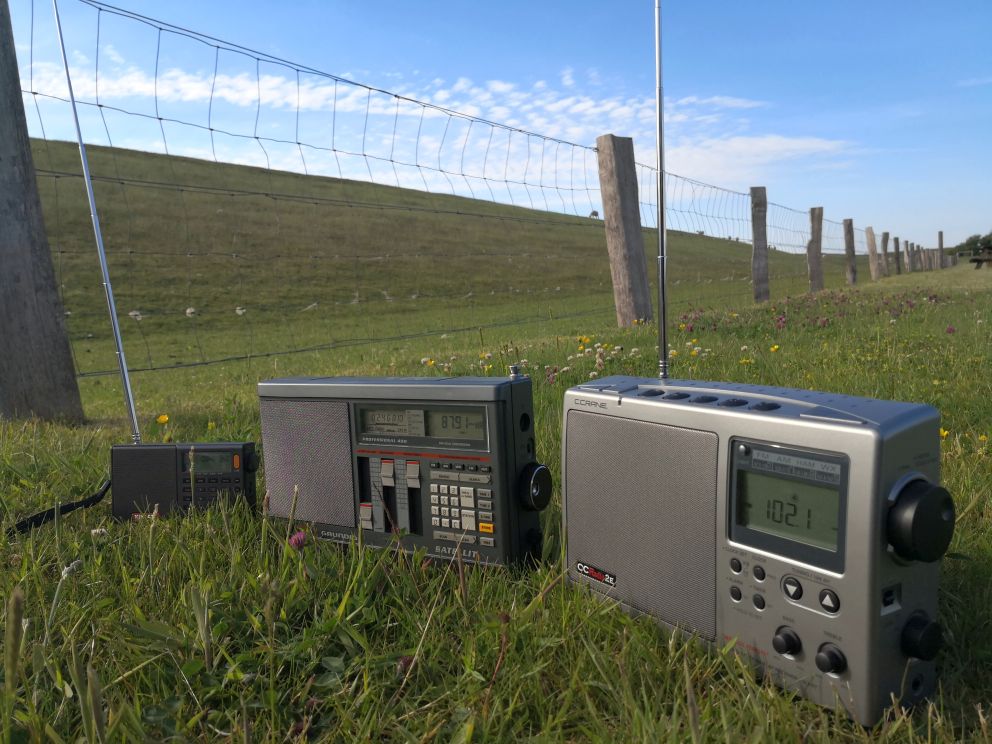
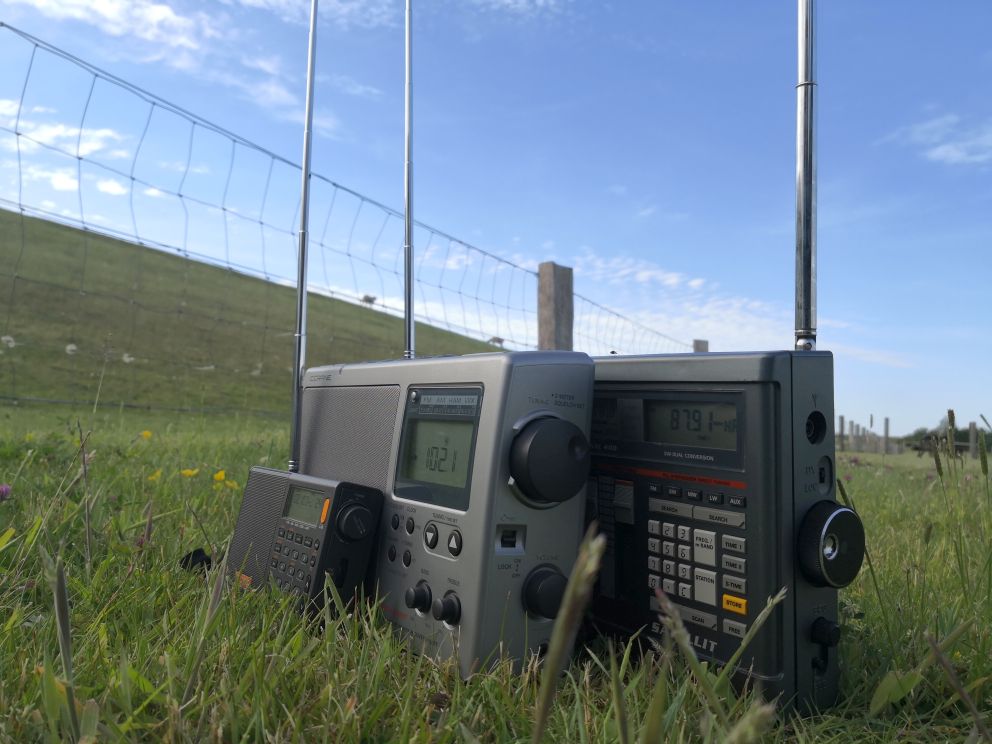
After 2 weeks of gleeful anticipation it finally arrived last month and I rushed to the mall to buy plenty of ‘D’-cells, then to the dike to answer my own, most pressing question: “how much better is a top tier Jay-Allen-5-star radio than my average 3-star radios anyway?”. I wasn’t sure what to expect from the 2E, partly because the videos I could find compared it with other good AM radios, or they didn’t compare it at all and sometimes the radio didn’t even get turned on. Nothing really related to the radios I have, after all they represent a whole bunch of popular radios people currently own with a similar (around average) AM performance, like the Tecsun PL-nnn, Eton Executive Satellit or Field, or ICF-7600, Zenith TO/R-7000 to name a few older types – and I was looking forward to fill that gap!

Sensitivity

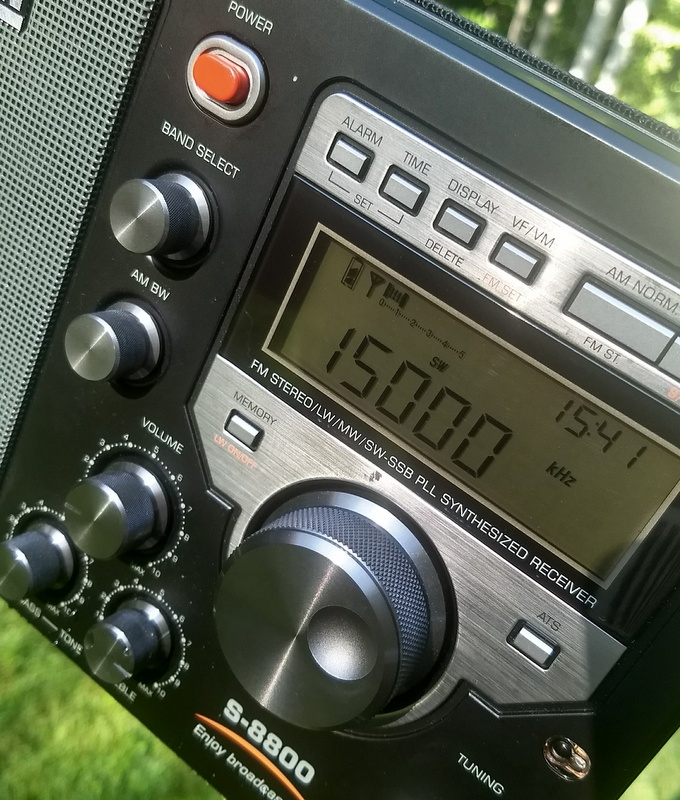
Spoiler alert: the CCR2E’s sensitivity obviously bests all of my other portables. Duh! It should, because my example of the PL-660 isn’t good on AM at all, the XHDATA D-808 [read my full review here] is a 2-1/2 star radio and the Tecsun S-8800 [read my full review here] is a 3-star radio on the “Jay Allen rating scale”, even though I’d rate my examples of these radios the other way around – my D-808 has a tiny sensitivity edge over my S-8800.

So how much better is it? Here’s a cellphone video letting the radios speak for themselves, alas with plenty of wind noise (sorry, it’s usually windy here at the coast!). Make sure you watch it past the somewhat unspectacular first minute:

Click here to view on YouTube.

I hope you’ll agree that this is pretty impressive, and that’s the kind of results I was hoping for. There’s also a simple way of quantifying how much better it is in numbers: if I tune across the band in the afternoon and note all frequencies that clearly show signs of a station (not counting how well it comes in, just the pure existence of some signal that can be identified as “broadcast station”), the D-808 has 11 frequencies populated, the CCR2E has 25. That’s more than twice as much, the 2E has twice as many stars, sounds about right. Let’s also keep in mind that the XHDATA or the Tecsun represent “average”, “serviceable” or “decent” AM radios that are quite satisfactory for most people, and yet there is apparently a whole world between an average radio and the top of the heap. To be honest, I didn’t expect how dramatic the difference would turn out.

That made me curious how my battered old Grundig Satellit 400 would do, after all it was always a tad better than the other portables I have (Jay Allen might rate it 3-1/2 stars), and MW is the only thing in it that still really works. I decided to buy it the last bunch of batteries of its life and took it to the dike:

Click here to view on YouTube.

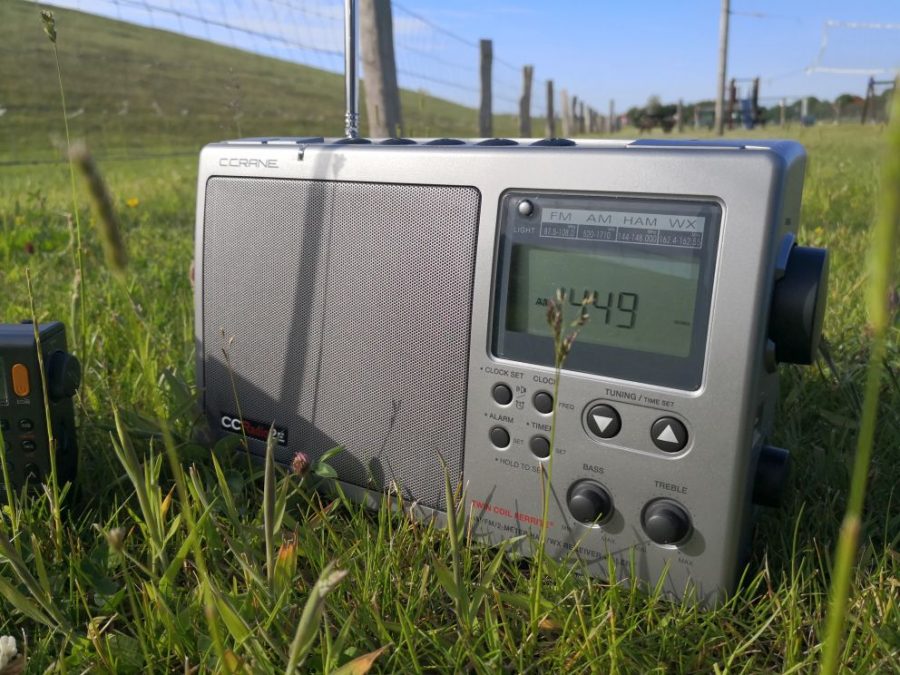
Evidently the Grundig is a bit more sensitive than my other average radios but without much benefit. Stations with some appreciable level turn out a bit better but it fails at the same stations as the other radios and the C.Crane unsurprisingly runs circles around the Grundig as well. The first and the last station recorded in this video demonstrate that nicely – my favorite low power benchmark station (1602 kHz) transmitting with 100W from a moored old pirate radio ship was just making it over the noise on the S-8800 in the previous video. The Satellit picks it up OK but with more noise. The last station is the BBC transmitter in Redmoss (Aberdeen, Scotland), which is pretty crystal clear on the CCR2E while the Satellit has only little remnants of modulation and the D-808 is at least on par with the Satellit there. That station pretty much didn’t exist on the S-8800 in the previous video either and I wish I’d know why this example turns out so extreme, why the 2E and that station like each other so much.

The closest stations in these videos are in The Netherlands, 150+ miles away and have only 100W, most of the UK stations are between 350 and 420 miles away (most of them not very powerful either), Scottish stations are around 500 miles from here and the Redmoss 2kW BBC transmitter on 1449 kHz with its beautiful signal is 490 miles. Given that this is daytime groundwave reception with no help from an external antenna, I consider this pretty darn impressive. But keep in mind that a part of the impressive results is due to the low noise location and the conductive North Sea water being only 50m from my position behind the dike, then stretching most, sometimes all of the distance between the radio and the transmitters, which definitely helps groundwave propagation a lot.

To put the benefit in some more practical metrics – my average radios pick up at most 3-4 stations in a halfway sufficient quality for continuous listening during the day, the 2E makes that at least 8-10 stations. While sensitivity is playing a somewhat lesser role at night, it’s pure fun to browse the band and discover stations that didn’t stick out of the noise enough in the past. It is undeniably an exceptionally sensitive and stunning AM receiver.

Selectivity, overloading resilience

The 2E has a wisely chosen single bandwidth more on the narrow side. Given the intended purpose of this radio, I think one can live very well with the “one size fits all” setting and the intelligibility remains excellent. At night when the band is getting crowded even over here, the 2E has absolutely no trouble separating the channels.

Other reviews mentioned that its dynamic range may not be sufficient to cope with local blowtorches and I’m sure that this is true. I don’t have local blowtorches, but I tried coupling wire fences between 200 and 1000m (600-3,000′) to the loopstick antenna, and it could cope with those arrangements better than the S-8800 and the D-808: at night, both of the latter present some roar between the stations on the lower end of the band (which is of course mostly intermodulation products). Both radios then need some looser coupling from the coupling coil, on the the S-8800 I can also lose the preamp stage (“local” switch) to mitigate this, the D-808 can’t do that and has the most problems with images, for example clearly discernible images from the top of the NDB band just 100 kHz lower in the same band.

The CCR2E stays pretty quiet on the few frequencies the fence antennas leave unpopulated. In other words, its frontend may not be as good as the one in some vintage receivers, but it still takes more of a beating than e.g. the Tecsun S-8800 with its improved (over the PL-880) frontend.

AGC

Lacking really strong signals, I can’t comment much on all of the AGC action but I too think it doesn’t pull up weak signals as much as other radios. That makes the 2E appear even less noisy between stations, but being desperate to catch some transatlantic DX before sunrise (yawn!) despite the season being over, I found myself a few times with the volume knob turned up all the way to the right stop on some quiet channels, while the band was filled elsewhere with considerable signals from that 3,000′ fence. The time constants are more on the slow-ish side, thunderstorm impulses make the signal dive away for half a second and it seems to struggle with weaker stations that come with a fast fading. SDRs with fully adjustable AGC characteristics sure have spoiled me.

FM Broadcast Band

Sensitivity

FM sensitivity is excellent in all of the portables I have (S-8800, D-808, PL-660) and the CCR2E can match their performance, there are generally only very little differences between all those. As mentioned in my S-8800 review, I found its sensitivity can’t fully match the PL-660 and the D-808, even though it employs the same DSP chip type as the D-808. I briefly compared the CCR2E with the S-8800 on FM (simply because both are big radios, and I guess I wanted the 2E to win this too).

Comparing portables on FM is a bit of hit and miss though – you need to find borderline weak stations to begin with, and then you have to make sure each radio’s whip antenna is adjusted for maximum signal, and you need to put one radio at a time on the table, because otherwise the whip antennas can interact with each other and make it hard to find the optimal antenna postion/tilt/rotation. When I tried the CCR2E at the dike, a complete lack of tropo conditions limited the number of test stations a lot, and the remaining stations were not really weak enough to find a clear winner among the two. Both radios were on par most times, sometimes it felt like once the 2E gets a bit of signal it will present it a tad less noisy than the S-8800.

But then a very borderline faint Dutch station on 88.1 MHz made it over the North Sea with much noise on the S-8800. No matter what I tried with the 2E (antenna gymnastics, raising, repositioning, lifting up and tilting the whole radio and swearing at it), it picked up nothing at all. That looked much like the 2E is actually less sensitive than I thought, but as it turned out later there is a much happier explanation for this:

Selectivity

Since the day I got it, I had the impression that the 2E has a narrower FM filter than my other radios. Tuning 50 kHz next to a weak station makes it almost disappear and 200 kHz off a local station gave me much hope for letting a weaker station pass unharmed. Now when I checked the station listings for my Dutch mystery station on 88.1 MHz it turned out to be very unlikely that I received the station listed there for 88.1 – “Radio 10” in Hilversum has only 3 kW and is a bit too far away, without any tropo help anyway. What’s way more likely is that I actually heard the much closer 60 kW “NPO 2” transmitter in Smilde on 88.0, that is, its upper sideband on 88.1. To understand this you need to know that Dutch (and AFAIK French) FM stations like to plow their channels with some rather hefty FM deviation unknown in Germany. The wider filter of the S-8800 picked up so much of that extra-wide deviation that I could identify the language. I could not hear the station on its actual frequency 88.0 MHz either, because a much stronger local station on 87.9 was whacking it.

The CCR2E just didn’t pick up any of the surplus deviation from 100 kHz lower, which is a quite striking evidence for a narrower filter (<200kHz), and this might also explain why it appears more sensitive when it picks up some weak station – a narrower filter means a better SNR on FM. I did not read Jay Allen’s “FM shootout” (where the 2E is the topmost radio as well) before tried the radio and I’m not sure yet if I’d put it above all other radios too. But it’s very safe to say that the 2E is likely about as sensitive as all of the contenders in the very crowded 5-star class in the “FM shootout” and its selectivity might be giving it an advantage over other radios. Too bad such a good performer on such a short antenna doesn’t have an external FM antenna input and RD(B)S.

2 Meter – VHF and Weather Band, SSI

Short story, there is no NOAA WX band in Europe, and my local 2m repeaters don’t even seem to transmit their ID every 10 minutes anymore like they were supposed to do in ye olde days, maybe they’re gone. Analog VHF ham radio has ceased to exist around here and if we’d have some catastrophic event, all a 2m receiver could do to help you is emitting some soothing white noise.

I will use this section to talk about the signal strength indicator on the CCR2E instead. With 12 discrete bars it has a better resolution than e.g. average portables, which often try to look like they had even more bars but actually have 5 sections of 4-bar groups, in other words they just have 5 real bars. The better resolution of the 2E is certainly helpful, for example when you pair it up with some kind of tuned external antenna – but it seems to indicate levels with some delayed response and that ruins it a bit.

Sound

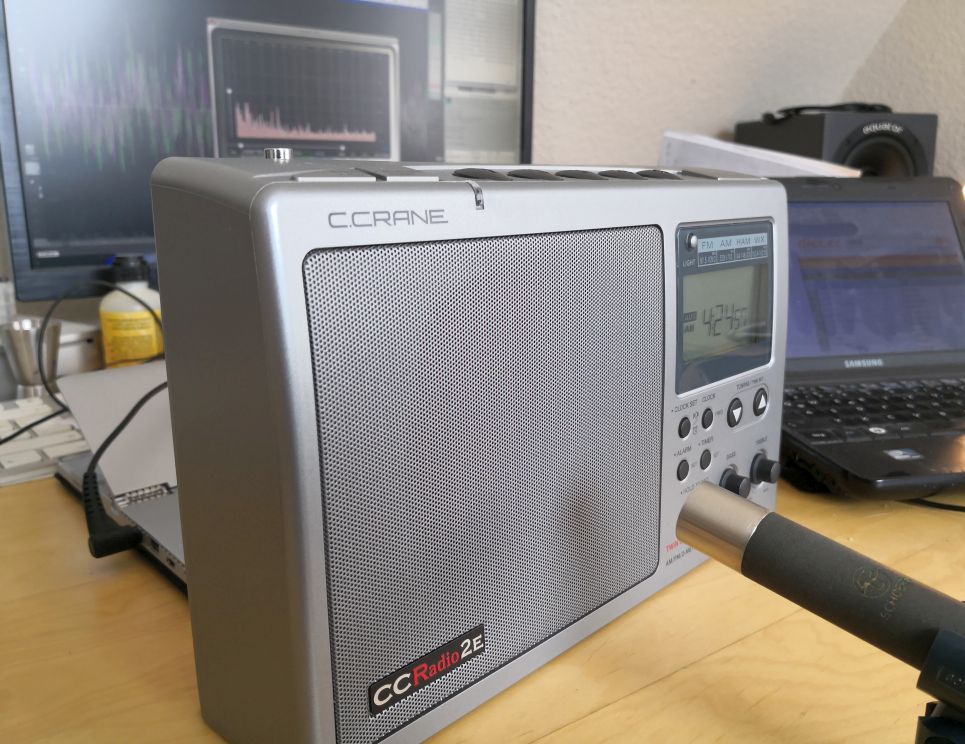
The 2E has a quite satisfying bass and treble response for music listening on FM (if you turn up the controls). It has the biggest speaker of all of my portables and creates some audio that rather reminds me of a small home stereo than a portable radio. However it doesn’t have the power to really do “loud” and the bass may run out of breath and distort pretty soon on some music styles.

For a few days I couldn’t quite put my finger on why it didn’t put that much of a smile in my face like the S-8800 or my old Satellit 400 do, and I remembered the quite controversial ratings of the 2E’s sound I had read. I felt that it doesn’t have that special “big portable” in-your-face bass sound my other big radios have, a sound that was burned into my eardrums by all the big Grundigs and Nordmendes I had since when I was a teenager.

The answer might be quite simple though: the 2E has a much wider frequency response than those radios, it actually reaches down lower and the treble range is also extended. What we (OK, at least I) perceive as that “warm” and “big” sound in those old portables is actually “pseudo-bass”. Pseudo-bass is a psychoacoustic effect that tricks our brain to perceive louder and fuller bass when actually only the first harmonics (typically one octave higher) of bass instruments are heard, for example because the speaker is too small to actually render the fundamentals, with the “bass” tone control boosting the harmonics instead. The 2E sounds more like a small 2-way hi-fi speaker and tries to do “real bass” rather than pseudo-bass, which is much more demanding in many ways. Pseudo-bass is also much less depending on automatic loudness correction at low volumes, so the 2E seems to lack bass at “bedroom” volumes sometimes, compared to the Tecsun or the Grundig. Though once a station plays the right music and the 2E is turned up a bit, it’s getting quite obvious that it can sound even bigger than those other radios.

On AM the CCR2E can even produce too much bass that needs to be dialed back: like talk radio dominates the US AM band, its EU pendant is still reigned by pop/rock stations (usually employing lots of signal processing for extra-fat sound). On those stations, the CCR2E can be bassy to a degree where the bass is almost sounding detached from the rest of the signal, as if it’s coming from a different, stronger station. It’s a more boomy, “wet” or maybe a hint less “musical” bass sound, this is rather a wordy description of impressions and not a complaint though. It just doesn’t massage my auditory cortex the same way the other radios do, which is of course a matter of taste and “getting used to it”.

The tone controls are modern and efficient like the ones you find on the S-8800 – compared to my old Satellit, they have a steeper roll-off at well-chosen cutoff frequencies so you can eliminate just the hissy top end in the treble range or remove all that rumble below 200Hz, leaving the midrange in between untouched. On the positive end of the knob range, they just add deep bass and a nice clarity on the top, as if the 2E had a tweeter.

So it does sound great and I can see now why the successor radio, the C.Crane Radio 3 got upgraded with Bluetooth. But the 2E is a great powered speaker as well, it has an AUX input radio nuts can use to boost the audio of an SDR connected to a laptop or a small SW portable to the same level of fidelity. The manual claims that the 2E has a battery endurance of 250 hours, which would mean it should serve all day for at least a whole week as an awesome powered speaker for your other radios out in the woods, and it even might become the best speaker (with very useful tone controls!) in your home shack. This works so well that I deem this a serious (and perhaps often unconsidered) asset.

Quirks

One thing I don’t like a bit is a strange scratchy narrowband distortion that seems to come up within a certain level range. It’s independent from the station, the frequency or the noise on it (and not to be confused with multipath distortion), it’s showing up across the band and is solely depending on the input signal as it seems. It doesn’t affect stronger signals (so there shouldn’t be anything overloading) but if a station hits a certain low signal level it’s quite permanent and also quite disturbing, if there’s fading the noise will come and go when it passes through that level range. The only way to mitigate that prickly “frying pan” sound is turning the treble knob all the way down. I don’t know if that’s a bad case of demodulator distortion or some AGC related malfunction and for some reason beyond my understanding (strong out-of-band signals playing a role maybe?) this does not always happen. Still a bit of a fly in the ointment.

A rather harmless little quirk I (among others) found is happening when I recall preset stations on AM: under unknown circumstances the 2E will not tune the antenna properly so I need to change the frequency and tune back to get full signal. I assume that the coil tuner setting is saved with the preset, and when the environment of the loopstick changes (like when you saved the preset at a different place), the saved tuner setting does not fit anymore. Retuning, then saving the preset again should fix that.

Rather fast fading can have a similar effect on the tuning process, if I tune and retune to such a station, I may end up with different signal meter readings and volume every time – it seems that the integration time window used to automatically tune to peak signal can be too short in relation to the fading speed and that may lead to a less than optimal match of the coil. Admittedly, tuning to peak signal on fickle stations like that is just as hard for a human being. Since the tuner seems to rely much on locking onto a carrier, offset tuning (e.g. like DXers often do to optimize reception of a station with a strong channel neighbor) may not work as well as with regular receivers, signal and volume can drop quite dramatically when tuning 1 kHz to the side, and it sounds like this is bad for the SNR too.

Here’s a video demonstrating these issues:

Click here to view on YouTube.

My example of the 2E has a “birdie” between 99.7 and 100.0 MHz, which luckily doesn’t make any noise on FM. It doesn’t seem to harm reception much (if at all), I can still get a rather weak Danish station on 99.9 MHz but I can’t tell what effect it has on stations on the other affected frequencies.

External AM antennas

This is not a quirk, it’s rather a design decision I deem not working anymore in many (if not most) of today’s homes, or simply an oversight: the CCR2E is yet another radio that has screw terminals for an external AM antenna but no means to take the internal loopstick out of the circuit. This is not a problem as long you are using radio and antenna in an electrically quiet and interference-free environment, in which you may not even need an external antenna because the CCR2E is such a good performer. If you want to use one anyway, the 2E will benefit only from antennas with considerable gain, very lossy designs that trade gain for low noise and high SNR (like BOG, LOG, EWE…) may not even leave a clue of their existence on the 2E.

If you live in the city, in an apartment building, a crowded neighborhood or just a modern home and want to let your family use computers, appliances, switching-type wall warts and so on while you listen to distant stations, an external antenna may be the only way to enjoy the radio’s performance but even an antenna with lots of gain will not help getting rid of the hash and noise of the digital world. It may increase the signal a bit to improve the SNR, but the noise level will stay the same because it’s being picked up and added back by the internal loopstick. I think that any ambitious modern receiver should take the ever-worsening noise situation into consideration. Paradoxically, back in the 50s and 60s local noise was much less of an issue but a lot of radios had switchable loopsticks. They were all tabletops though and to be fair, I know only one portable radio with that feature (and that’s a scanner which sucks on AM).

The hardware

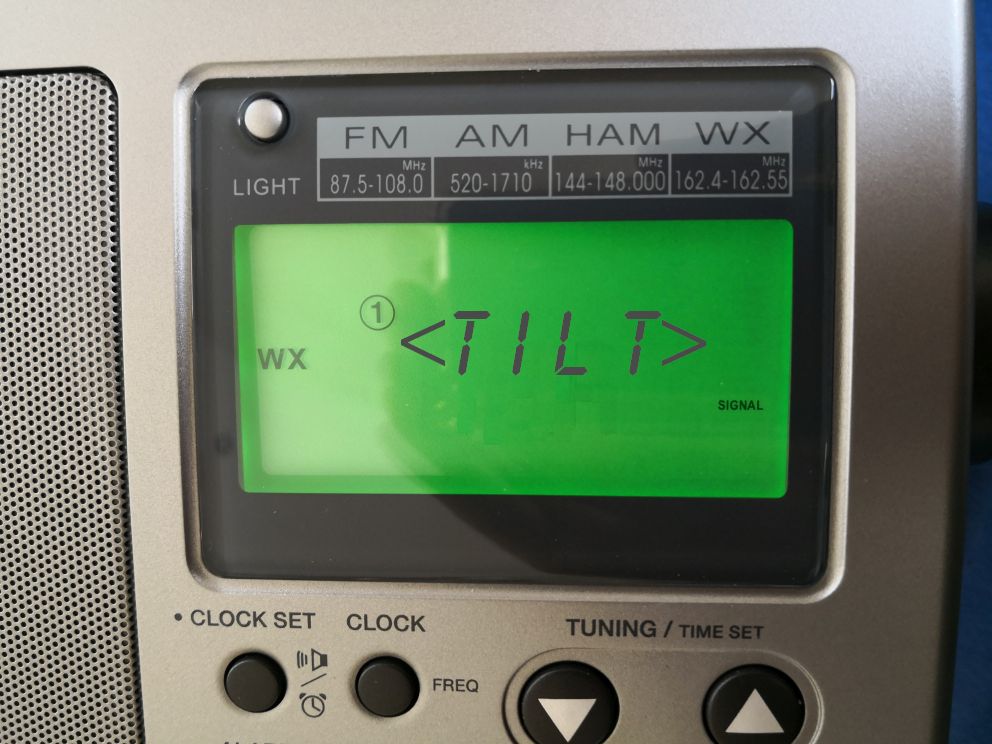
First off, using this radio is generally very straightforward. The only thing I needed to learn from the manual was how to keep the frequency on display, which is only possible with newer versions of the firmware. My radio was manufactured in January 2018 and it has this option, plus an updated version of the printed manual, now describing that (and the antenna calibration) procedure. (Just hold the “Clock” button, then immediately hit the ‘1’ memory button on top. The radio should emit a beep and from then on the display will show the frequency.)

You may want to think twice about buying the “Titanium” version of the radio. The product photos on Amazon were showing the radio with somewhat different and darker hues between grey and champaign, so I spontaneously decided to not buy yet another black radio. What I pulled out of the box was blindingly silvery and yelling “plastic” though, so don’t let any pics fool you – “Titanium” is just a fancy name for the same old standard “light grey-ish/silvery plastic” seen on a billion products from the Far East in the past 50 years. A matter of taste of course.

If it wasn’t obvious to everyone already – this bulky radio is more like a “portable tabletop”, it’s only little more “portable” than a big old Transoceanic or Grundig Satellit with a broken handle. New radios get lighter and lighter even when they get big (like the S-8800), the CCR2E brings gravity back into the game, so on the plus side it will stay put on the table when you push a button, or when there’s an earthquake.

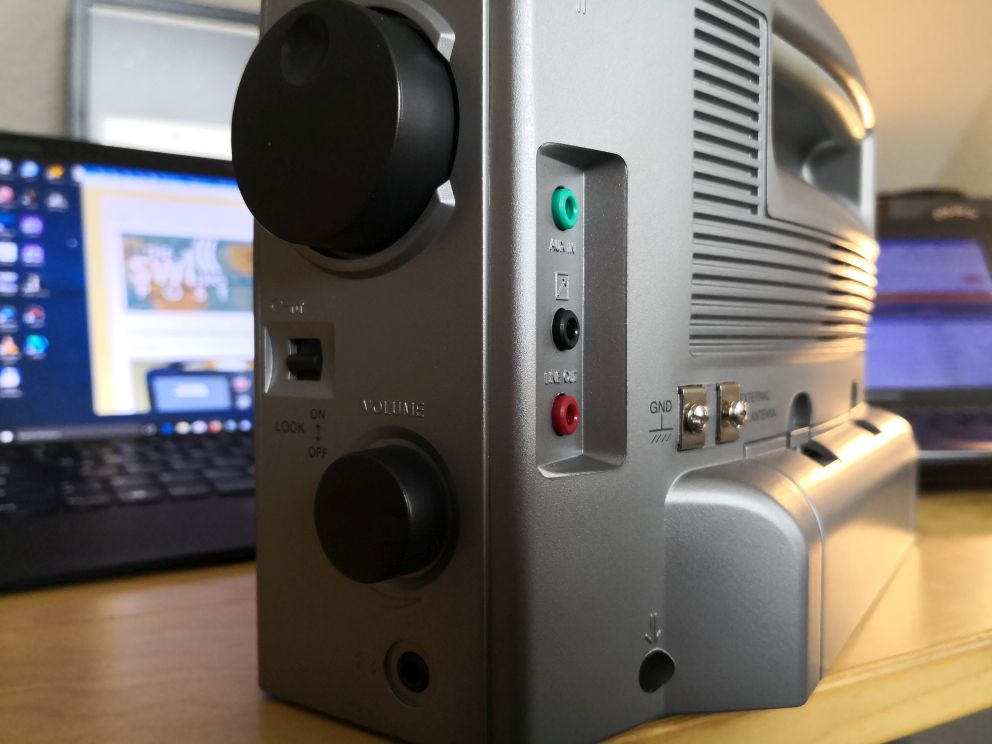
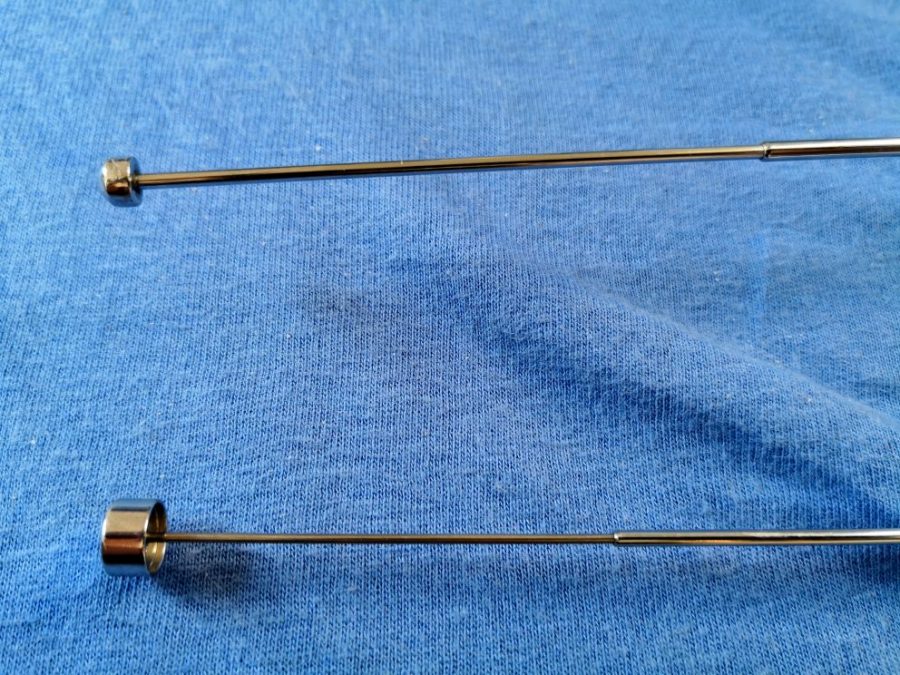
While it does radiate some quality feel (nothing is loose, wobbly or rattling), the tuning knob is the exception: it has a tiny bit of play and it feels and sounds like it had a former life as a hairspray can cap. The stepping/rasterization of the encoder resonates in that cap and if you want to tune to a distant frequency on the dial you just need to say “rien ne vas plus” before you turn the knob to create a great acoustic impression of a roulette table. On the other hand, the solid steps of the encoder causing that sound are very precise and the sound helps me counting the 9 steps I need for hitting the next channel in the European AM BC band. Some reviews also complained about the flimsy FM whip and I used to think the D-808’s whip is flimsy, but this one has a top segment with a diameter of one millimeter, the antenna is the shortest of all my radios and looks exactly like the whips I’ve seen on most of the cheapest (<$20) radios I came across. But that doesn’t affect its function of course – that is, while it lasts.

Now that’s even more a matter of taste, but I just can’t leave the design uncommented. I’m still undecided whether it looks more like a hi-tech humidifier than a radio or not, luckily it says “Radio” in red letters on the speaker grille but still… I don’t know if it’s the complete lack of “retro style” and its sober, “senior-friendly” approach or just the color – whichever way I look at it, it ain’t the most handsome radio of the pack. I think I can get over it, provided I never watch any of Thomas’ videos featuring his gorgeous RF-2200s again. So all it can do to win my heart is working well, that is, very, very well. Let’s see if it succeeded:

Summary/Verdict

The C.Crane CC Radio 2E is an extraordinarily sensitive radio on AM and certainly among the best on FM. It puts some effort in picking up AM stations that most other portables won’t and that’s what it really does as advertised. Like any other radio (so that’s not Bob Crane’s fault like some disappointed Amazon reviews allude), it will not be able to do that in noisy, interference-infested environments and not even an external antenna might help much with that, because the internal loopstick stays on. In an electrically quiet environment though, it’s nothing short of marvelous.

It has a great sound and to my own surprise, I found its qualities as a powered (also long-lasting battery-powered) speaker for other radios a serious asset. It’s simple and easy to use but that also means it lacks all advanced features that would help in difficult, “hardcore DX” reception cases. With its bulky form factor, the built-in power supply, the 4 D-cells, the weight that all brings and the lack of a proper handle, it might not fit into everyone’s understanding of “portable” and its specs are rather meant to cater the needs of American homes. However, importing it to Europe can make sense even with the extra taxes and shipping (which means a 40% markup in Germany), at least for AM radio lovers who want top performance and avoid the problems vintage portables can bring. It’s at any rate a sensible choice if your favorite station is somewhat beyond the range of average radios, if you just want more stations to choose from, or if you enjoy general daytime groundwave DX, all without making an external antenna a necessity.

Of course the CCR2E is not the mythical “perfect radio” either. The muting and automatic loop-tuning when browsing the band isn’t great, it has a few quirks, a flimsy whip antenna and a tuning knob with a cheap feel to it but then again, it’s not an overly expensive radio either and its price/performance ratio is certainly appropriate and attractive. It may not be much to look at but I like it anyway because – among all the all-rounder radios I have – it’s the specialist doing that one thing really well: making AM radio feel like it used to be.

So do I really need this radio? Maybe I don’t, but now that I’ve learned how excellent it really is, I know that I really, really wanted it!


Wow!  What a brilliant review! I absolutely love the details you fit into your evaluation and your wit, too (especially that bit about the tuning knob possibly having “a former life as a hairspray can cap”–!). Ha ha!

No doubt the CCRadio 2E is a solid performer and among the best AM portables currently available. While the CCRadio 2E has been replaced by the CCRadio 3, many 2E models can still be found on Amazon (note this is an affiliate link), and eBay (partner link).

The CCRadio 2E is still available new on C. Crane’s website, but you should also check out C. Crane’s Orphan page for the occasional discounted unit. 

Thanks again for a thoroughly enjoyable and informative radio review! I, for one, can’t wait to read your next review! 

Click here to read 13dka’s previous posts and reviews.


Do you enjoy the SWLing Post?

Please consider supporting us via Patreon or our Coffee Fund!

Your support makes articles like this one possible. Thank you!

Spread the radio love

Golan’s take on the Digitech AR-1780, XHDATA D-808 and CC Skywave SSB

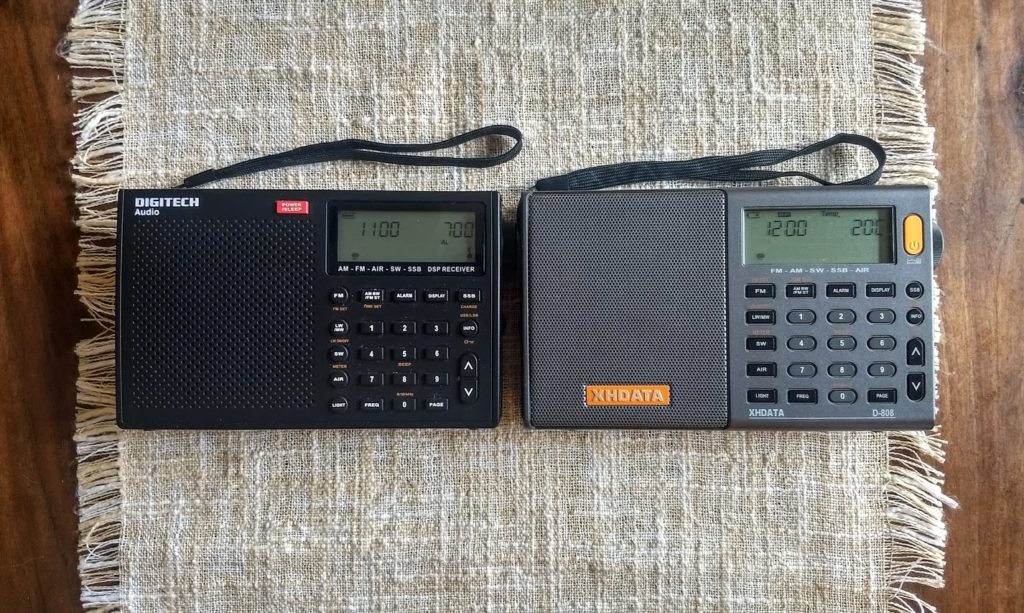
Digitech AR-1780 (left) and XHDATA D-808 (right)

Many thanks to SWLing Post contributor, Golan Klinger, who leaves the following comment regarding the Digitech AR-1780:

I bought my AR1780 from Jaycar when they were first announced because I was too impatient to wait for the Skywave SSB.

It looked good on paper and I was really pleased when I finally tried it out. It turned out to be one of the best travel-sized radios I’ve ever owned.

Being a radio junkie, I did buy the CC Skywave SSB when it was finally released and an XHDATA D-808 when they first offered them at a huge discount. Both are capable radios, the latter being almost identical to the AR1780, but if I had to choose one, I’d take the Digitech. I just love it.

And that’s the thing isn’t it, Golan?  Sometimes our favorite radios just “feel” good.

Like you, I’m a bit of a radio junkie and own all three of these radios. My preference is the CC Skywave SSB closely followed by the AR-1780. I also love the D-808, but although it’s superior to the other two radios in terms of audio and is slightly more sensitive than the AR-1780, I still tend to reach for the other two radios first.

Note that all three of these radios were featured in my “Best of the best” portable radio reviews.

Thanks for sharing, Golan!

Spread the radio love

Best of the best: Reviews of some of my favorite portable shortwave radios

The following article originally appeared in the November 2018 issue of The Spectrum Monitor magazine:


Shortwave Portables: Some of my favorites

Being a radio writer and blogger, I’m often asked, “Isn’t radio dying?” or “How long are you going to keep listening to radio when there are so many other options out there?”

My answer? It’s simple:

Radio is about the journey.  And radios are the vehicles with which I explore our planet, albeit sonically.  I’ll stop listening to radio when it stops transporting me to far-flung, fascinating places across our planet.

I’ll stop listening to radio when when it can no longer provide the kind of direct information and understated entertainment that is, for me (and a few others like me), a welcome relief from the overwhelming demands and distractions of the Internet.

And I’m perhaps a bit anachronistic in that I prefer radio’s subtler theatre of the mind over the mindless image consumption that television demands; thus, I’ll stop listening to radio when it too, tells me what I must think, what I must imagine, and what I must feel.

In short, radio is my tool for exploration, and I continue to enjoy tuning, listening, logging and learning from it.  Very fortunately, I have the great pleasure of being in the middle of the world of radio technology in my reviews, evaluations, and alpha/beta testing.

This is why, over the years, I’ve made an effort to share some of my picks of the litter with others.  So when TSM editor Ken Rietz asked if I would be interested in writing a feature about this, how could I resist?

What follows is a series of mini-reviews which focus primarily on the portable radio market. This is, by definition, a curated list, but I’ve done my best to include a variety of receivers I regularly recommend. The radios are listed roughly from least expensive ($25) to most expensive ($270), and I’ve only included models that are in production at the time of this publication.

Ever-popular portables

Portables are truly the most popular category of radio among shortwave radio enthusiasts, and it’s no wonder why! Among their other virtues, modern portables can pack a lot of performance into an affordable package, they’re great for travelling, and their all-in-one nature makes shortwave listening accessible to virtually everyone.
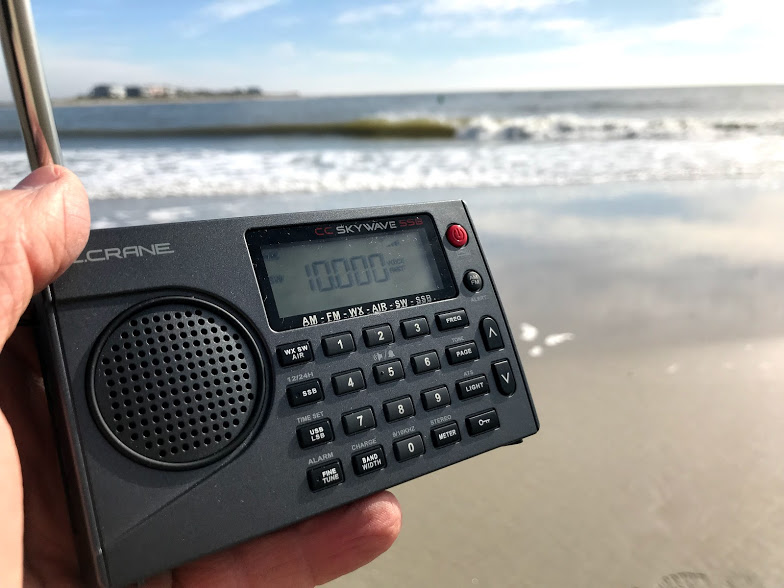
Since I’m in the constant stream of correspondence and comments from radio enthusiasts, I know another reason some listeners consider portables simply invaluable: portables give us refuge from noise. Since many of us live in, and/or travel to, busy urban areas filled with radio interference, portables give us a means to head to the park, beach, or the countryside to escape the noise and increase our odds of working DX.

Fortunately for us, modern portables pack features of which, in former radio-listening days, we could have only dreamed.

What follows is a list of my favorite portables, listed by price in US dollars, with the least expensive first. Please note that retailer links include Amazon and eBay affiliate links that support the SWLing Post with your purchase.

Best Portable Shortwave Radios

$25 – $50 Range

Tivdio V-115 / Retekess V115 / Audiomax SRW-710S
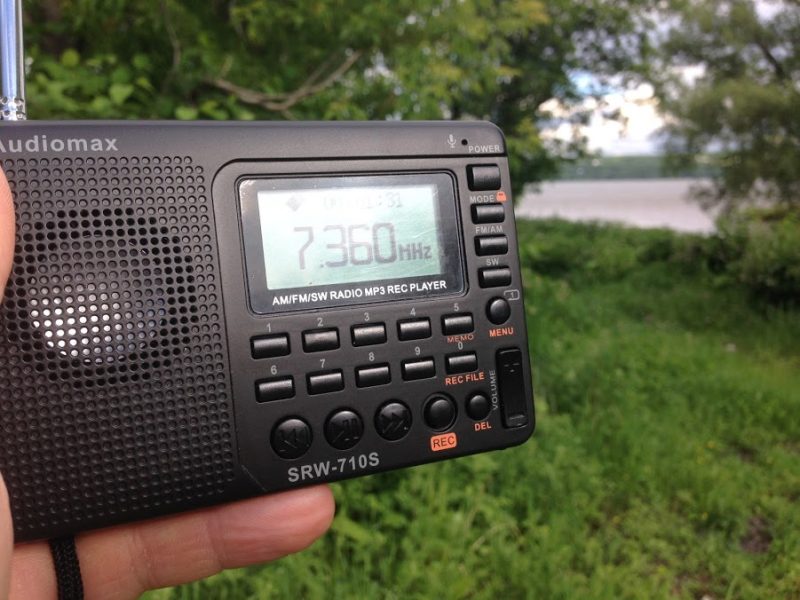
Listening to the BBC Midwinter Broadcast on June 21, 2017 in Québec.

Pros: Affordability, sensitivity, built-in recording and audio playback features, compact size, impressive audio from internal speaker

Cons: Mutes between frequencies, front panel buttons feel rather cheap, no SSB mode, sluggish response from controls, small telescoping whip

Summary: For about $25, it’s hard to complain about the V-115. Its performance and list of features exceeds expectations for radios in this price range, which are generally a disappointment. As for myself, I mainly use the V-115 as receiver to make off-air recordings and as an occasional backup radio. Unless your budget is very tight, don’t buy the V-115 as your main receiver; rather, buy it to keep in the glove compartment of your car or in your go-bag. Note that this radio carries a number of brand names and has been rebadged many times. Click here to read more reviews of the V-115 on the SWLing Post.

Retailers:

Grundig Mini
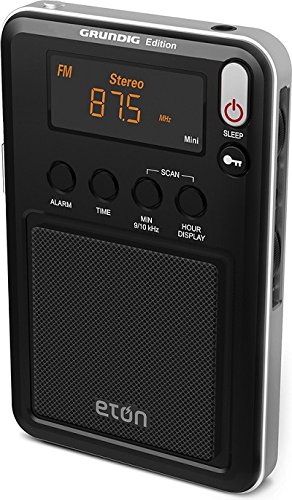
Pros: Compact, simple, adequate sensitivity and selectivity, clear backlight display, surprisingly decent audio from internal speaker

Cons: No direct frequency entry, no SSB mode, limited features compared with pricier receivers

Summary: The Grundig/Eton Mini is the latest in the lineage of the Mini series from Eton.  The Mini has remained a popular radio because it delivers decent performance, with above average audio and makes for a nice broadcast listening companion. I recommend the Mini as a gift for those who want a simple pocket radio to operate with an easy-to-read display––great for the traveler or for elderly parents or grandparents who don’t like too many fussy buttons. Certainly a great value for the money.

Retailers:

Tecsun PL-380
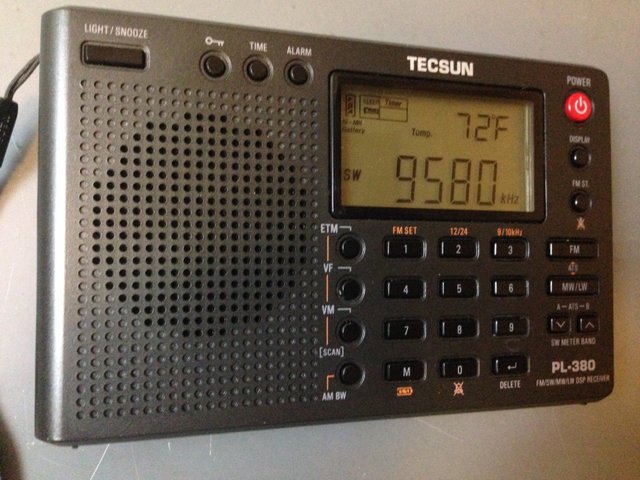
Pros: Excellent sensitivity and selectivity, excellent audio via headphones, multiple AM bandwidths, ETM auto-tuning, excellent ergonomics, responsive controls, direct frequency entry, excellent bang-for-buck

Cons: No SSB mode, slight muting between frequency changes

Summary: The venerable PL-380 was my first ultralight Tecsun radio. It’s been on the market for many years, no doubt due to its solid performance. The PL-380 has an excellent receiver with impressive sensitivity and selectivity. The ETM auto-tuning feature is ideal for those of us who like to travel. The PL-380 is durable, affordable, and in terms of performance, is very similar to the PL-310ET (below). The PL-310ET might have a slight edge in terms of sensitivity. But for just $45, you simply can’t go wrong with the PL-380.

Retailers:

Tecsun PL-310ET
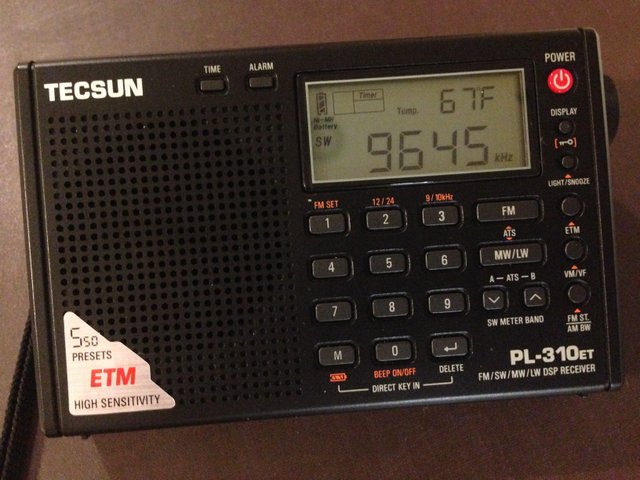
Pros: Excellent sensitivity and selectivity (perhaps slightly more sensitive than similarly-priced PL-380), excellent audio via headphones, multiple AM bandwidths, ETM auto-tuning, excellent ergonomics, responsive controls, direct frequency entry, excellent bang-for-buck

Cons: No SSB mode, slight muting between frequency changes

Summary: The PL-310ET, like its cousin the PL-380, is a classic ultralight radio and performs brilliantly for the price. The PL-310ET has long been the backup radio I’ve taken along on mini DXpeditions and field-listening sessions. The ETM auto-tuning feature is ideal for those of us who like to travel. The PL-310ET is reliable, and you’re hard-pressed to find a better performer under $50––indeed, it rivals some receivers twice its price. A solid choice for the budget-minded radio enthusiast and Ultralight DXer.

Retailers:

$50 – $100 Range

XHDATA D-808
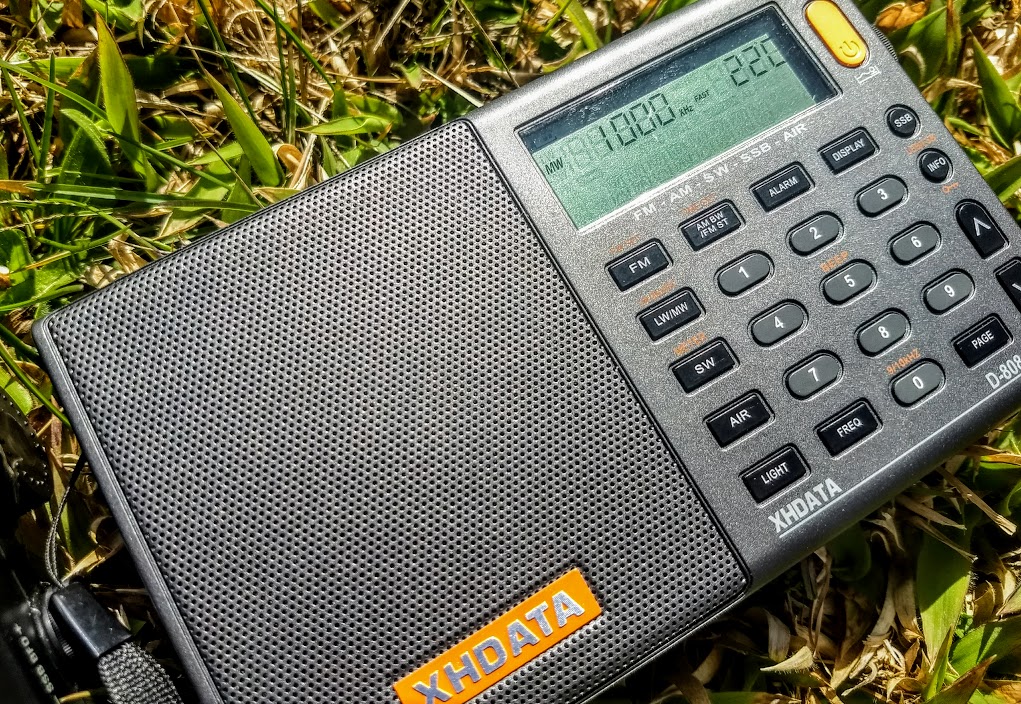
Pros: Impressive overall performance, SSB mode, multiple AM and SSB filter widths, above-average audio from internal speaker, RDS, dedicated fine-tuning control, decent battery life from four standard AA cells, includes AIR band

Cons: Mutes between frequency changes, sluggish response from controls

Summary: The XHDATA D-808 was, no doubt, the most surprising receiver to hit the market in 2017. It’s an impressively sensitive radio across the bands, and can be snagged for an affordable price (generally $75-80 US). I was very skeptical of the D-808, but when I put it on the air, I discovered it gave some of my full-featured portables a run for their money. It is, indeed, a budget workhorse. If you live in New Zealand or Australia, you might find the very similar Digitech AR-1780 a more accessible option. Internally, the D-808 and Digitech AR-1780 (see below) are very similar. Click here to read more D-808 reviews on the SWLing Post.

Retailers:

Eton Field BT
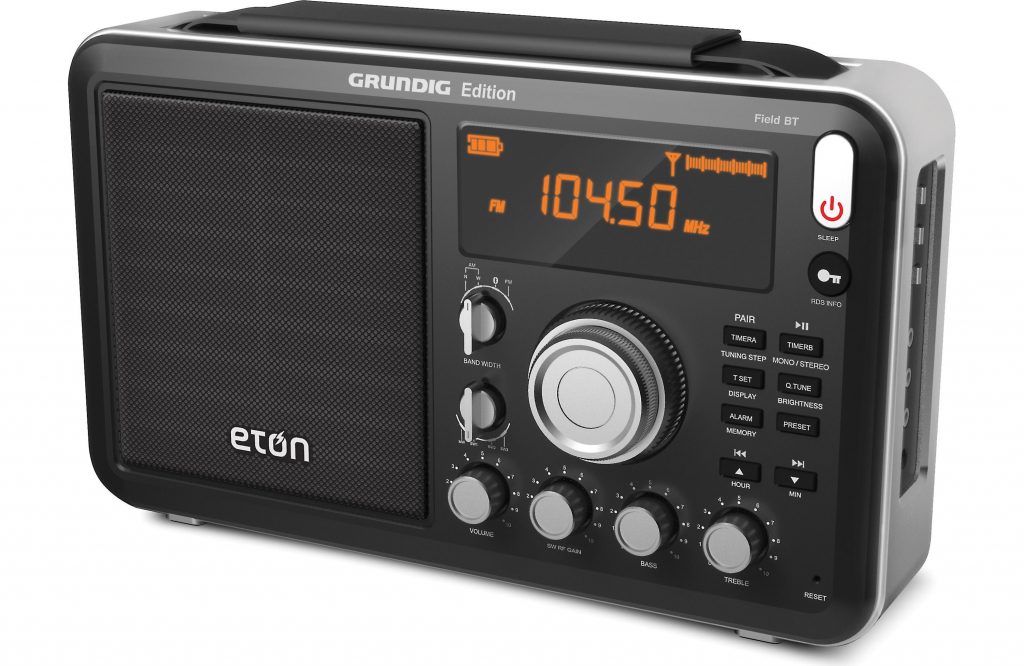
The Grundig Field BT

Pros: Impressive sensitivity, excellent audio fidelity, can be used as a Bluetooth speaker, intuitive display, dedicated RF gain, simple tactile controls, overall quality feel

Cons: Clunky/quirky tuning is painfully slow, no direct frequency keying, no SSB mode

Summary: Last year, my friend Troy Riedel and I met at Mount Mitchell State Park to compare the Eton Field BT with the benchmark ($270) Tecsun S-8800. We were impressed that the Field BT did an admirable job competing with the S-8800 (see below). Indeed, due to the Field BT’s excellent audio, some broadcasts were slightly more intelligible than on the S-8800 (noting the S-8800 also has excellent audio). The only negative that was quite obvious at the time was how cumbersome it was to tune the Field BT compared with the S-8800. One year ago, the Field BT was widely available for $129––lately I’ve seen the price as low as $80 shipped. If you’re looking for a lunchbox radio that packs serious performance, room-filling robust audio, and you don’t mind slow tuning, the Eton Field BT is an excellent choice.

Retailers:

CountyComm GP5-SSB (a.k.a. Tecsun PL-365)
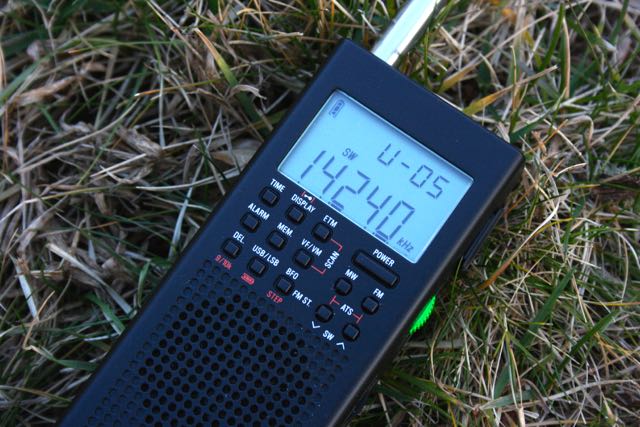
Pros: Excellent sensitivity, audio fidelity quite good via headphones, effective SSB mode, multiple AM and SSB bandwidths, very good medium-wave reception with supplied external bar antenna, unique form factor for one-handed operation, uses three standard AA batteries

Cons: No direct frequency entry, audio tinny via internal speaker, AGC doesn’t cope with fading as well as other comparable portables, no back stand nor rotatable whip antenna; thus this radio is not ideal for tabletop listening, supplied belt clip feels flimsy––if you plan to use this in the field, consider purchasing the excellent CountyComm GP5 series rugged case.

Summary: The GP5-SSB was one of the first sub-$100 DSP portables with SSB mode. Since its release others have entered the market (see XHDATA D-808 above for example). The GP5-SSB has a unique form factor tailored for handheld operation, much like a handie talkie. I keep a GP5-SSB in my backpack to use while on hikes, and am always very pleased with its performance. If you’re looking for a bedside or tabletop portable, I would recommend other similarly-priced receivers like the XHDATA D-808 or Digitech AR-1780. Note that if you live outside North America, you might find it easier to purchase the Tecsun PL-365 which is identical to the GP5-SSB. Click here to read our full review of the CountyComm GP5-SSB.

Retailers:

C. Crane CC Skywave
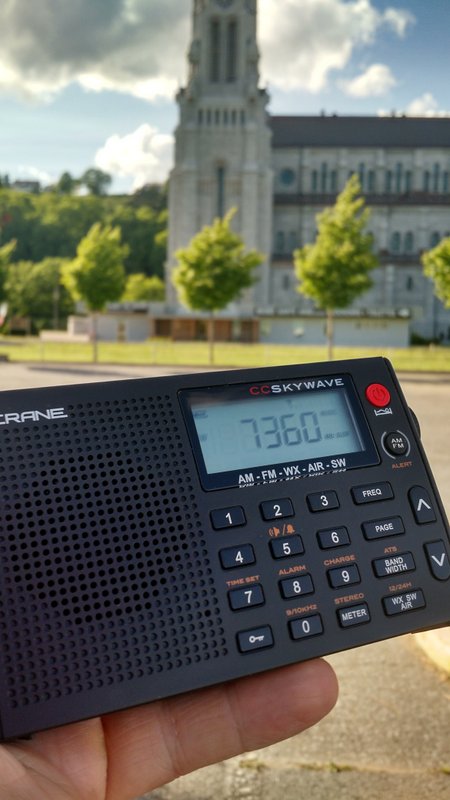
Listening to the 2016 BBC Midwinter Broadcast to Antarctica while traveling in Canada with the CC Skywave.

Pros: Overall great sensitivity and selectivity for a portable in this price class, considerate design, well-tailored for the traveler, AIR band is truly functional, NOAA Weather radio reception excellent, includes soft silicone earphones (in-ear type) actually worthy of AM/SW listening, auto scanning with the up/down buttons is very rapid, uses common micro USB port for power/charging

Cons: No SSB mode, internal speaker audio is somewhat tinny (use of the voice audio filter helps), no external antenna jack, mutes between frequency changes

Summary: I think the original CC Skywave is a brilliant little radio. Although it lacks SSB mode, it’s a fine broadcast receiver and one of the most sensitive travel portables on the market. For those of us living and traveling in North America, the CC Skywave is a veritable “Swiss Army Knife” receiver, as it not only covers AM, FM and shortwave, but is a capable AIR band and incredibly adept NOAA/Environment Canada weather radio receiver. At $90, I believe it’s the best radio value in the C. Crane product line. If the lack of SSB mode is a deal-breaker for you, consider the Skywave’s pricier brother, the CC Skywave SSB (below), also an excellent performer. Click here to read our full review of the CC Skywave.

Retailers:

$100 – 200 Range

Digitech AR-1780
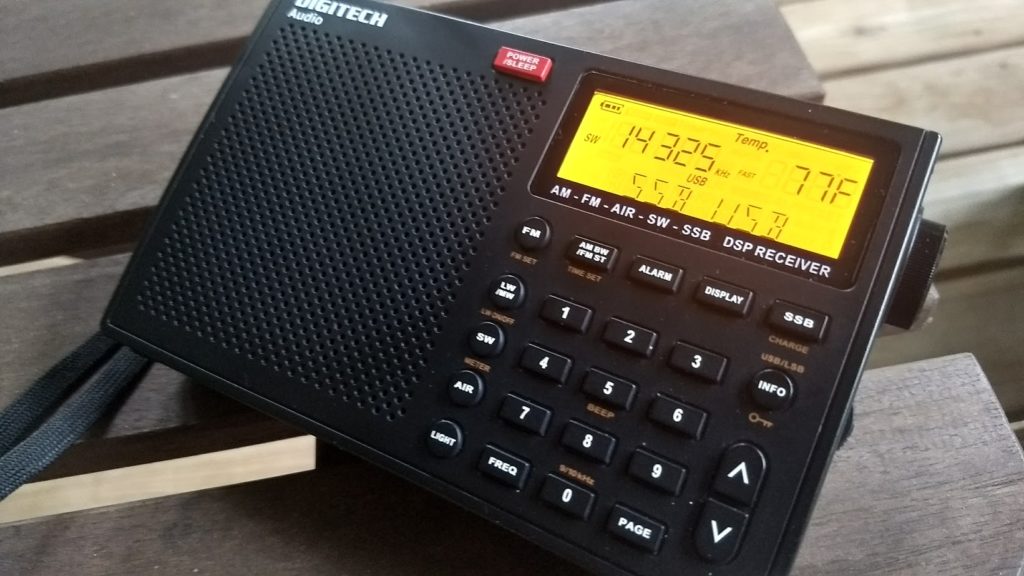
Pros: Impressive overall performance, SSB mode, multiple AM and SSB filter widths, above-average audio from internal speaker, RDS, dedicated fine-tuning control, decent on-air battery life from four standard AA cells, includes AIR band

Cons: Mutes between frequency changes, sluggish response from controls. Note that at least one user has reported quick battery discharge when the radio is turned off. This has not been the case with my unit–in fact, it’s often turned off for a couple months at a time and maintains a steady, healthy charge.

Summary: Digitech is not a brand known for delivering enthusiast-grade receivers to the Australian/New Zealand markets through retailer Jaycar.. While they’ve a number of portables on the market, so many are plagued with internal noise and quirky controls. The AR-1780 is an exception. For $129.00 AUD (roughly $103 USD), you’re getting a full-featured radio that is, by and large, a pleasure to operate. The AR-1780 has its quirks, but so do so many ultra-compact portables in this price bracket. As mentioned in the cons above, there have been reports of some units draining batteries rather quickly when turned off (essentially in standby)––I have not experienced this, but this issue has been reported by a number of AR-1780 owners. The AR-1780 is certainly worth considering if you live in Australia or New Zealand. Note that the Digitech AR1780 and previously mentioned XHDATA D-808 share a nearly identical receiver design although their outer dimensions are slightly different. Click here to read our full review of the Digitech AR-1780.

Retailers:

Tecsun PL-660
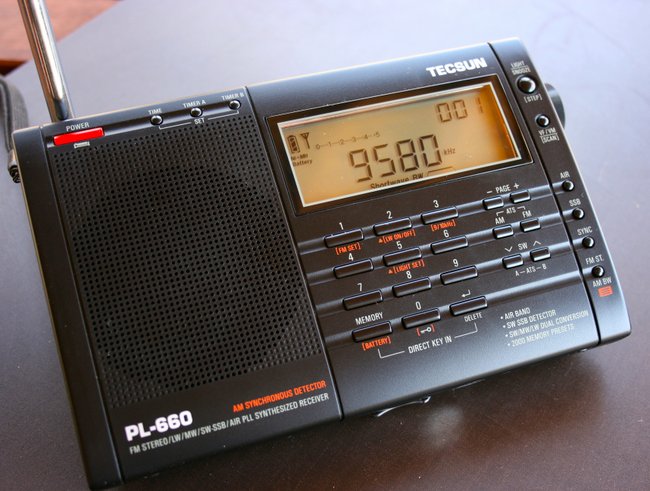
Pros: Smooth digital tuning with no muting between frequencies, excellent synchronous detector, functional SSB mode, direct frequency entry via keypad, brilliant ergonomics, excellent sensitivity and selectivity (a best-in-class!), excellent price point and value for benchmark portable performance

Cons: BFO knob instead instead of push-button SSB, only two filters (wide/narrow), lacks a line-out jack

Summary: I’ve owned a PL-660 since 2011 and still take it on DXpeditions and to use as a benchmark when evaluating new receivers. It has rock-solid performance all around with pleasant audio from the built-in speaker, and one of the best synchronous detectors on the portables market. The PL-660 is the radio I’ve recommended more than any other for newcomers to the hobby: it’s a very capable DX machine with an ergonomic, intuitive interface. Click here to read other SWLing Post reviews that include the PL-660.

Retailers:

Tecsun PL-680
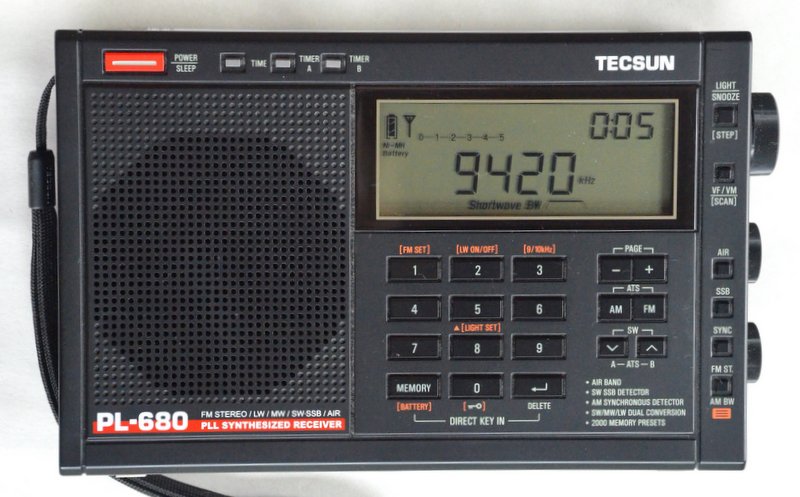
The Tecsun PL-680

Pros: Excellent sensitivity and selectivity on the shortwave bands, improved weak signal stability over the PL-660, stable sync lock, proven form factor with good overall ergonomics, great internal speaker––an improvement over the PL-660, but not as good as the PL-880––in short, other than medium-wave performance (see con), a worthy replacement for the PL-660; also sports excellent audio from the PL-680 internal speaker: improved over the PL-660, but not matching the fidelity of the PL-880

Cons: Medium-wave performance is lackluster, marginal noise floor increase on the shortwave bands (compared with the PL-660), lacks a line-out jack, SSB frequency display on my unit is + 1 kHz, so slight BFO adjustment is needed

Summary: If you’re a shortwave radio listener, you’ll be pleased with the Tecsun PL-680. In all of my comparison tests between the Tecsun PL-660 and Tecsun PL-680, the PL-680 tends to edge out the PL-660 performance-wise. This coincides with blind user surveys I conducted on the SWLing Post. If you’re a medium-wave DXer, you might skip over the PL-680; the PL-660 is likely a better choice for you. If you’re a casual medium-wave listener on the other hand, you’ll probably be pleased with the PL-680. Click here to read our full review of the PL-680.

Retailers:

CC Skywave SSB
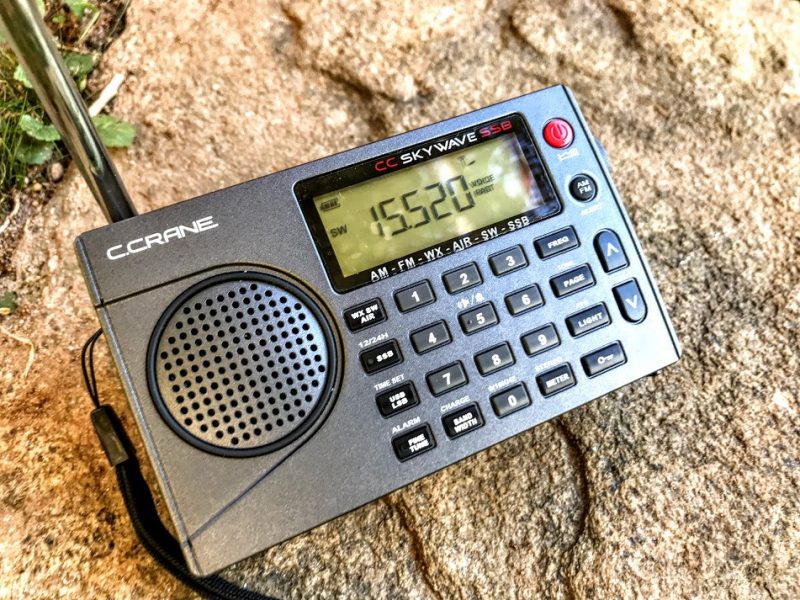
Pros: Considerate design and ergonomics, well-tailored for the traveler, excellent sensitivity and selectivity for a compact radio, faster AIR scanning compared with the original CC Skywave, better HF frequency coverage than the original Skywave (1.711-29.999 MHz, compared to 2.300-26.100 MHz), pleasant SSB audio, multiple bandwidths in both AM and SSB modes, no overloading noted, well-written operation manual, excellent weather band reception, nice red LED indication lamps for SSB and Fine Tune engagement, NOAA Weather radio reception excellent, includes soft silicone earphones (in-ear type) actually worthy of AM/SW listening, uses common micro USB port for power/charging, excellent battery life from two AA cells

Cons: At $169, US the CC Skywave SSB is certainly the priciest compact portable on the market, yet mutes between frequencies, engaging SSB mode requires 2-3 seconds of delay (common for this DSP chip), no RDS, no audio-out jack, no sync detector (a “con” in this price class), no long-wave reception, first production run had some quirks which have now been addressed by C. Crane (in case you shop for a used unit).

Summary: I love the CC Skywave SSB. Sure, I wish it had RDS, an audio-out jack, didn’t mute between frequencies, and was less expensive (the current price of $169 seems excessive). But overall, it’s a fantastic package. I’m impressed with the amount of performance the Skywave SSB provides with such a short telescoping antenna. Since first being introduced to the Skywave SSB last year, it has become my choice travel portable. Check out our initial review of the CC Skywave SSB and the important updated second production run review.

Retailers:

Tecsun PL-880
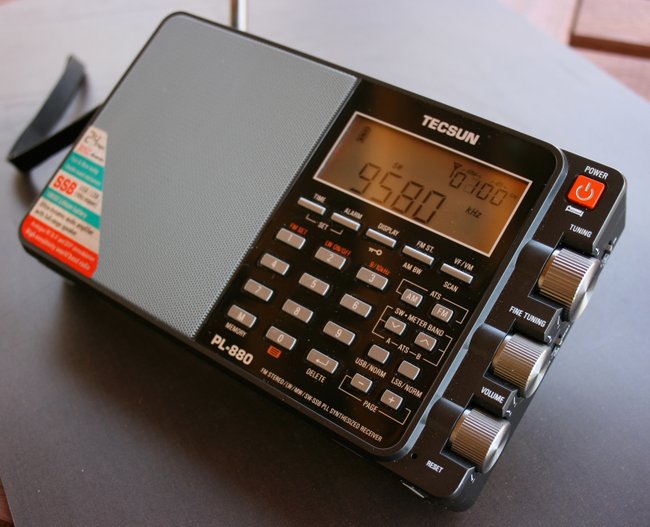
Pros: Excellent ergonomics, excellent sensitivity and selectivity, superb audio from internal speaker, wide array of filter options in both AM/SSB more than on any sub-$200 portable on the market!), absolutely no muting between frequencies even while using a .5 kHz filter in SSB, sturdy carrying case has dedicated pocket for English operation manual, single supplied rechargeable battery delivers a very long life

Cons: Two-second delay when changing modes (AM/SSB/AM sync), some audio splatter on peaks in weak signal DX, sync detector (hidden feature) delivers mediocre performance and substantially reduced audio fidelity, AM (medium wave) prone to imaging if strong AM broadcasters are nearby, supplied rechargeable battery is not as common as AA batteries

Summary: I’ve owned the Tecsun PL-880 for five years and it continues to impress. Tecsun has made iterative changes to the firmware over time, and now this radio is one of the best performers in the sub-$200 price bracket. The audio from the PL-880 internal speaker is simply unsurpassed in this size of radio. The PL-880 isn’t perfect, but it does an amazing job, pleasing DXers from every angle and even ham radio operators who appreciate the narrow filter settings in SSB mode. All in all, you can’t go wrong with the PL-880––it’s certainly a quality piece of radio kit! Click here to read our full review of the PL-880. Click here to read our list of PL-880 hidden features.

Retailers:

Eton (Grundig Edition) Executive Satellit
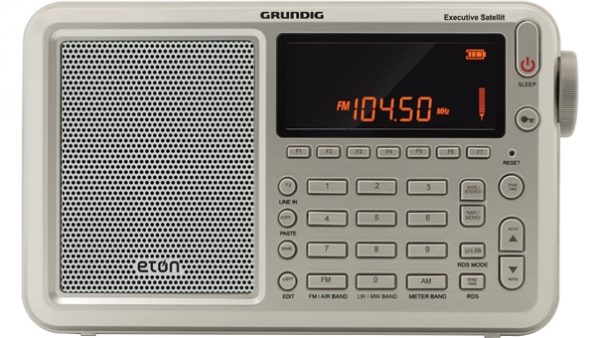
Pros: Excellent sensitivity, excellent audio from built-in speaker, ergonomic and intuitive interface, uses common AA batteries, multi-joint swivel antenna is best in class, excellent build quality, display is easy to read, effective station memory management

Cons: Mutes between frequencies, executive Satellit model typically costs more than previous non-executive model

Summary: The Satellit has a dedicated following among hard-core DXers, both the audio and superb sensitivity placing it well within the realm of benchmark receivers. It’s a fantastic field radio and feels like one that should serve you over the long haul. It’s not a perfect radio; I especially wish it didn’t mute between frequency changes, although Eton seem to have minimized this in the latest production runs. If you’re seeking a super-sensitive portable to sniff out weak DX, then the Satellit is worth serious consideration. Check out some of Oxford Shortwave’s previous posts which include the Executive Satellit.

Retailers:

$200+ Range

Tecsun S-8800
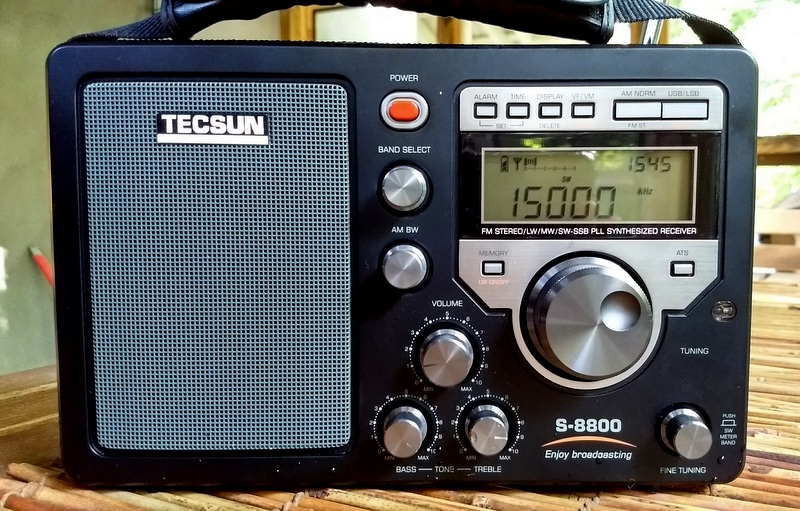
Pros: Brilliant audio fidelity from built-in speaker, dedicated AM bandwidth and fine tuning controls, excellent bespoke IR remote control, capable SSB mode, excellent shortwave sensitivity, excellent shortwave selectivity, excellent FM performance, easy-to-read backlit LCD digital display, remote control beautifully equipped for full radio functionality, included 18650 rechargeable lithium batteries power this radio for hours, BNC connection for external antennas, does not overload even when connected to large external antennas

Cons: Lackluster mediumwave performance, no synchronous detector, no direct keypad entry (pro: remote control, however, has excellent keypad entry), can’t charge and listen at the same time as is not designed for AC operation, no backstand, when in narrowest SSB filters AGC can’t reliably handle audio/signal changes, slight “warbling” sound while using fine-tuning control in SSB mode, no RDS display on the FM band

Summary: If your primary use of the S-8800 is for medium-wave or long-wave DXing, you should look elsewhere. While the S-8800 will serve you well with local AM stations, it will not dig signals out of the noise like other better-equipped AM receivers. But: if you’re primarily a shortwave radio listener, you’ll certainly be pleased with the S-8800! The S-8800 consistently outperforms my beloved Sony ICF-SW7600GR and my Tecsun PL-880. Indeed, it is the most sensitive and selective shortwave portable I own. On the flip side, it’s also the most expensive: $268 at time of publication. If you want top-class HF performance from a portable radio and you expect superb audio, I think you’ll find the S-8800 well worth your investment. Click the following links to read our full review of the S-8800, 13dka’s review which compares the S-8800 with the PL-660 and D-808 and Dan Robinson’s most recent S-8800 comparative review.

Retailers:

There’s a portable for everyone

You might have noticed that there’s a portable receiver on this list for everyone:

  • The listener who wants turn-on-and-play functionality
  • The casual listener
  • The hiker
  • The traveler
  • The DXer
  • The ham radio operator

Keep in mind that this is a curated list of some of my favorites that are widely available on the market new. There are a number of receivers on the market––the Degen DE1103 comes to mind––which would have made it to this list had they not been “updated” with a DSP chip. Manufacturers add DSP to reliable models in order to increase profit margin, since DSP chips cost a fraction of traditional receiver design. DSP chips have revolutionized the portable market in many positive ways, but if they’re not properly implemented in a set, they can produce higher noise floors, audio anomalies, shaky AGC, and other undesirable traits.  The DSP receivers in the list above have properly implemented DSP technology and, save the cheapest models, are all what I would consider “enthusiast grade” radios.

What about other types of radios?

Of course, if you’ve become addicted to radio, you shouldn’t stop at portables! I would encourage you to check out the three-part Software Defined Radio Primer published in September (Part 1), October (Part 2), and November (Part 3). The SDRs I mention in the primer are essentially what I consider the best of the best.

Of course, there are still a handful of tabletop shortwave receivers like the Alinco DX-R8T HF receiver, the Elad FDM-DUOr SDR receiver, and the Icom IC-R8600 wideband receiver. All are top-notch performers and, when paired with an effective antenna, can pull out weak signals much better than a portable radio ever could.

If you’re a ham radio operator, take advantage of modern general-coverage transceivers. Only a couple decades ago, most transceivers were “ham band only” and the ones that were not compromised performance if they included the broadcast bands.  This is no longer the case. Modern general coverage HF transceivers can rival dedicated tabletop receivers in many cases. I’m particularly fond of the Icom IC-7300, IC-7200, and Kenwood TS-590SG as home stations, and the Yaesu FT-818, Elecraft KX3, and the Elecraft KX2. This is a mere sampling of some of the excellent general-coverage transceivers on the market. Before you purchase a general-coverage transceiver, simply make sure it has AM mode and that the bandwidth is wide enough for pleasant audio. Ask current owners how their transceiver sounds on the broadcast bands.

In summary
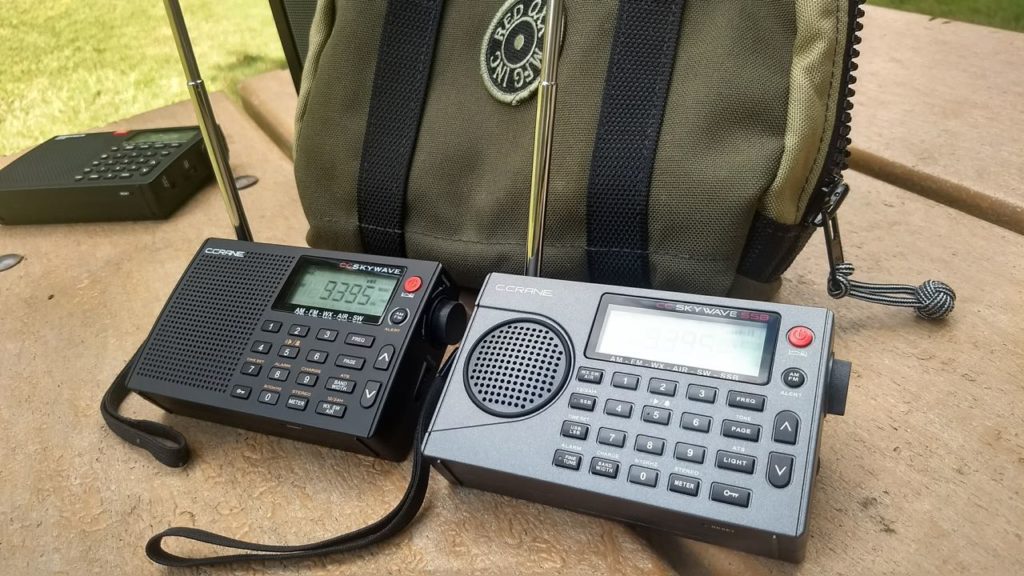
As you select your next radio, take into consideration how and where you plan to use it, as well as what you’re willing to spend. The good news is, we live in an era with an extraordinary number of options covering all price ranges and uses. So, be assured: there’s a radio out there just waiting to sonically transport you to far-flung and fascinating regions, too.

Vive la radio! Long live radio!

Do you enjoy the SWLing Post?

Please consider supporting us via Patreon or our Coffee Fund!

Your support makes articles like this one possible. Thank you!

Spread the radio love

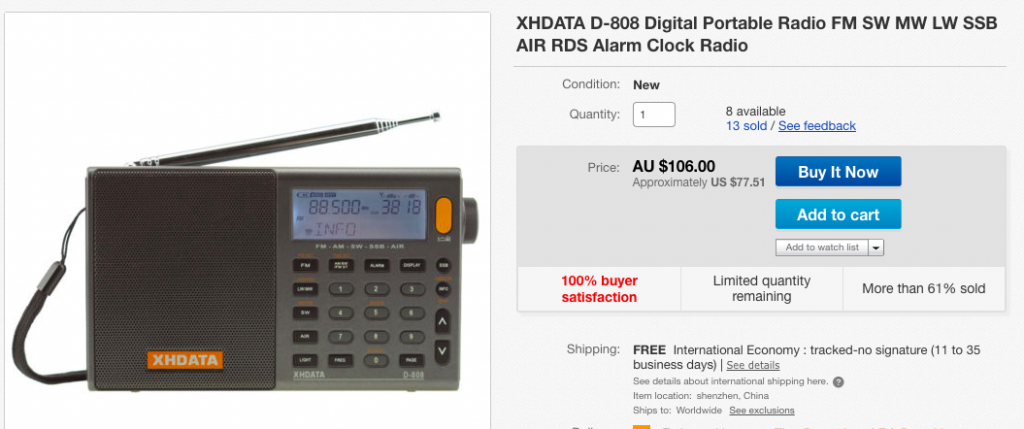
Radio Deal: XHDATA D-808 on eBay

Many thanks to SWLing Post contribuor, Charlie (WA2ONH), who notes:

A good price for the XHDATA D-808 on eBay right now. No connection with the vendor. Buy at your own risk.

Click here to view on eBay.

Thank you for the tip, Charlie! Looks like the seller has a 99.6% positive rating–impressive for the volume they handle. I suppose the only thing worth noting is shipping time–if you opt for free shipping, it could take a few weeks to arrive.

The price–$106.00 AU or $77.51 US–is a great price for the XHDATA D-808.

Spread the radio love

XHDATA D-808 and C.Crane CC Skywave SSB size comparison

Many thanks to SWLing Post contributor, 13dka, who left the following comment on my post about coastal SWLing:

Nice weather and pics! Hmmm… it wasn’t so obvious to me before but it looks like the Skywave SSB is even smaller than the D-808. Now I’m jealous! ?

I find it pretty amazing is that just a few wavelengths away from the water, the signals seem to be tapering off a bit already, so standing IN the water and holding a portable is certainly getting the absolute best out of the radio. When I moved here (to the coast) I took a portable with a relatively stable station tuned in and drove to my beach listening post with it, then I headed back home right away. It seemed pretty obvious how the proximity to the water gradually improved the signals but of course that was a pretty unscientific test. I should repeat that with an SDR rigged up on the passenger seat and do that a few times in a row.

I’m off now to check how I can get a Skywave SSB to Europe.

It is quite amazing how large bodies of salt water enhance reception! 🙂 Although my home in the mountains has very little RFI, the ground conductivity is poor. Those who live on the coast get much better mileage from their antennas!

Regarding the size of the CC Skywave SSB and XHDATA D-808, based on my measuring tape, the D-808 is about 1.25″ wider, 0.5″ taller and perhaps 0.125″ deeper than the CC Skywave SSB. Here are a few photos:

Not a massive difference in size by any means, but the Skywave SSB is smaller in every dimension. Since I typically do one-bag travel, I always choose the smaller radio. Of course, the D-808 is more affordable than the Skywave SSB and is easier to purchase outside the US.

I don’t know of a C. Crane distributor in Europe.  Perhaps Post readers might comment with suggestions?

Spread the radio love

Guest Post: Supercharging the XHDATA D-808 with a 7.5″ loopstick

Many thanks to SWLing Post contributor, Gary DeBock, for sharing the following guest post:


Supercharging the XHDATA D-808

Installation of High Performance AM and LW Loopsticks

By Gary DeBock, Puyallup, WA, USA, September 2018

Introduction

As a stock receiver the Chinese-made D-808 AM-LW-FM-SW-AIR portable is a very capable performer, with AM reception superior to that of any current Ultralight model, and impressive FM reception as well. The radio was certainly “inspired” (to use a generous term) by the C.Crane Skywave SSB model, which coincidentally was manufactured in the same part of China by C.Crane’s Redsun partner—with the first units going out the door a few months before the D-808 came into existence.

Because foreign intellectual property is routinely copied in China with no punishment from the government, XHDATA essentially had the chance to copy all the good points in the Skywave SSB design and improve upon its weak points as well. The only precaution that XHDATA took after this wholesale design appropriation was to forbid direct shipments of the D-808 from China to North America—presumably to avoid a copyright lawsuit by C.Crane. As such, the first D-808 models were sold to the rest of the world around January of 2018 at a price about half that of the Skywave SSB, while North American DXers were told that since the model couldn’t be shipped to the USA or Canada, they were out of luck.

Of course some D-808 models did make it into North America, where it was found to be a very capable portable with astonishing value for the price. Finally around March, an enterprising Chinese eBay seller came up with a plan to ship the model to North America through Israel, thereby skirting around XHDATA’s direct shipment prohibition. As of late August this eBay seller (harelan ecommerce) has already sold 62 of the D-808 models this way, even though he charges a premium for shipment to North America. Whether this single supply source will continue to serve North American customers is currently unknown, but out of the 7 models that I have purchased from him there hasn’t been a single D-808 model with any issues– despite the apparent lack of any manufacturer’s warranty offered on the radio.

Despite the D-808’s rather dubious design pedigree there is no doubt that the Chinese engineers (or reverse engineers?) did a superb job in creating an awesome radio for the money. Besides directly copying the Skywave’s SSB design and controls, XHDATA also made significant improvements, including a longer loopstick (providing clearly superior AM sensitivity), a much more powerful audio amplifier (correcting a serious shortcoming in the Skywave SSB) and a much lower price (about half that of the $169.99 Skywave SSB, for models shipped outside North America). Another great advantage for someone wishing to perform this loopstick upgrade are the perfectly located, highly accessible Litz wire connections on the RF circuit board—apparently used by the Chinese engineers to conveniently test out various loopsticks, and retained in the final product.  The radio’s high quality construction and survivability in adverse conditions were proven repeatedly over the summer here, with the model surviving accidental exposure to a 104 degree (43 degrees C) car trunk temperature, exposure to moderate rain, repeated travel bumps, and use as the main receiver during a 9-day DXpedition to a plunging ocean side cliff in Oregon state. The 3.7v lithium-ion rechargeable battery provides superior run time for extended DXing sessions, and is included in the D-808 shipping package, along with a USB cord to charge the battery, a plug-in wire antenna (for FM,SW and AIR), a vinyl carrying case, and a pretty basic English instruction manual.

One thing you will NOT find supplied with the D-808 is a warranty card– either in the shipping box, or online. This is pretty standard practice in China, incidentally, where concepts like refunds and warranties aren’t generally part of customers’ expectations. This doesn’t necessarily mean that XHDATA won’t repair obvious problems in a new D-808, but it does mean that they aren’t assuming the obligation to do so. I have heard from one North American purchaser who received a new D-808 with a defective speaker, and he is still waiting for the model to be repaired (after paying the shipping charge to send it back to China). Each individual purchaser must decide whether or not this lack of any warranty is a deal breaker. But if you are looking for a final reason to perform this loopstick transplant, why not consider the fact that you will not be violating any manufacturer’s warranty by doing so??

Realistic Expectations

Although this 7.5” loopstick upgrade will certainly make your D-808 far more sensitive than the stock model on Medium Wave or Longwave, it is not designed to compete with large (2’ sided or larger) inductively coupled box loops, or any of the new FSL antennas. The sensitivity upgrade will boost the D-808’s MW band weak-signal performance up to the level of classic portables like the ICF-2010 and RF-2200; however, and since the D-808’s DSP-enhanced selectivity will generally exceed that offered by these classic portables, the overall DXing capability in the AM mode could be considered slightly greater. The D-808 does have SSB capability, although it lacks the SSB tuning convenience offered by the ICF-2010 and RF-2200. It also lacks the ICF-2010’s superb Synch detector, a big advantage in weak signal DXing. But in portability, versatility and DXing value for the price, the “Supercharged” D-808 is a real winner.

Project Overview

This construction article will provide the builder with step-by-step instructions to upgrade the XHDATA D-808’s loopstick to a much more sensitive, externally-mounted 7.5” Medium Wave or Longwave loopstick replacement. Both the Medium Wave and Longwave 7.5” loopstick designs have been thoroughly tested and proven effective in actual DXing by hobbyists other than the author, and as long as the instructions are followed carefully, this relatively inexpensive modification will provide a major improvement in the D-808’s weak-signal reception capability.

This modification project involves close-order soldering on the D-808’s circuit board, and should only be attempted by builders with reasonably good eyesight, good hand coordination and soldering experience. The project also calls for the use of a precut plastic loopstick frame to attach the antenna to the top of the D-808’s top back cabinet surface, and the construction of this precut plastic frame requires either the use of a 12” (or larger) power miter saw, or some rather lengthy cutting with a hacksaw. Use of a power miter saw SHOULD NOT be attempted by those without serious power tool experience! The author assumes that only qualified power tool operators will attempt to use a 12” miter saw to cut these frames quickly, and that other builders who wish to construct them will use a hacksaw. As such, only basic cutting instructions are provided for the 12” power miter saw users, while detailed instructions are provided for the hacksaw users. To assist builders who are not qualified to use power tools, the author has prepared a LIMITED number of these precut plastic loopstick frames on a power miter saw, which will be offered at cost to these builders on a first come, first served basis.

A final warning is in order concerning the step of gluing the precut plastic loopstick frame to the D-808’s top back cabinet surface. Although this step is not dangerous, it is pretty tricky. Since the superglue “grips” very rapidly, you will only get one chance to ensure that the frame is straight, and centered on the D-808’s top cabinet surface. Do yourself a favor, and make multiple “dry runs” to practice this important step before applying the glue! Failure to take this step seriously will probably result in a crooked loopstick frame—which will hold the antenna just fine for DXing purposes, but which will be an eternal reminder to the DXer (and everyone else) of the hazards of haste.

Construction Parts Required

This 7.5” loopstick D-808 construction article will guide you through the assembly of either a 7.5” Medium Wave loopstick D-808 or a 7.5” Longwave loopstick D-808, so make sure that you order the parts necessary for construction of your chosen model. The picture above shows the parts that will be necessary for construction of either model, but the Litz wire and 7.5” ferrite rod components differ according to whether you are building the Medium Wave or Longwave model.

A)  XHDATA D-808 Receiver, currently available to North American purchasers (for $112.87 + $10. Click here to search eBay.

B)   Scotch brand “Extreme” strapping tape (any size roll)

C)   15 feet (4.6 meters) of 250/46 Litz wire (Medium Wave model). Click here to view on eBay.

OR 25 feet (7.7 meters) of 100/44 Litz wire (Longwave model). Click here to view on eBay.

D)  Two 120 lb. test plastic tie wraps (any length over 6”)

E)  Johnson Level & Tool Mfg. Co., Inc. 48” orange plastic carpenter’s level, part # 7748-O (provides enough plastic for two loopstick frames)

F)  Two 3/4” lengths of 1/2” I.D. clear vinyl hose

G)  Two 1” lengths of 5/8” I.D. rubber hose

H)  Roll of 2” Johnson & Johnson waterproof (medical) tape OR roll of 1” Rite-Aid waterproof tape

I)  Amidon 7.5” x .5” ferrite rod, part no.  R61-050-750 (MW model) OR part no. R33-050-750 (LW Model), available at http://www.amidoncorp.com/rods-and-tiles/

J)  6” of 1/16” shrink tubing

Miscellaneous:  One packet of Duro Super Glue (.07 ounce size), solder, 25w (low heat) soldering iron, hacksaw (or power miter saw), screwdriver set, sandpaper, needle nose pliers, diagonal cutters

D-808 Radio Preparation

Before starting the modification give the radio a thorough test on all bands, ensuring that all the stock model functions work properly, and that there are no issues with the display, speaker, headphone jack, battery or charging system. It’s also a good idea to run a daytime DX band scan on the AM or Longwave band (for whichever band you plan to construct an upgrade loopstick) and document the results—to use as a benchmark for the upgrade loopstick’s performance.

Step-By-Step Construction

Antenna Frame and 7.5 inch Loopstick Preparation

1)   Refer to the photo below. Using the “Supercharging the Tecsun PL-380” article (posted at  http://www.mediafire.com/file/du3sr5cd9thqvau/7.5inch-LS-PL380.doc/file or available directly from the author) carefully prepare the orange loopstick antenna frame according to construction steps 1-9, EXCEPT note that the lower (glue surface) edge of the antenna frame should be cut to a length of 5 3/4” (147mm), NOT 5” (127mm) as described in the PL-380 transplant article. Pay close attention to the safety precautions concerning power tool usage, and DO NOT attempt to use a power miter saw unless you have SERIOUS power tool experience!

2)   If you are constructing an AM (Medium Wave) loopstick, follow construction steps 10-16 in the PL-380 transplant article to construct the antenna. If you are constructing a Longwave loopstick, follow construction steps 10a-16a in the PL-380 transplant article to construct the antenna. If you are constructing both loopsticks, MAKE SURE that the ferrite rod and Litz wire are only used in the antennas for which they were designed. Mixing up these items is very easy, and such a mistake will make both loopsticks perform like clunkers.

3)   After construction of either the AM or Longwave loopstick, follow the instructions in steps 29 and 30 of the PL-380 transplant article to install a piece of 3 1/8” (79mm) shrink tubing, EXCEPT note that this length is slightly longer than the 3” (76mm) length called for in the PL-380 article.

4)   Refer to the photo below for the following three steps. [NOTE: Although this photo shows the AM (Medium Wave) loopstick, the procedures in this step are the same for the Longwave loopstick, although the position of the rubber hose lengths and clear vinyl inserts will be closer to the ends of the ferrite rod]. Carefully slide the length of 3 1/8” shrink tubing into the position shown, ensuring that there are no Litz wire kinks or bends inside the shrink tubing.

5)   Take the two 3/4” (19mm) clear vinyl inserts and slide them onto the ferrite rod ends, twisting them up against the border of the Scotch “Extreme” tape ends to lock the tape in place under the vinyl inserts. Ensure that the clear vinyl inserts do not touch any Litz wire leads or coil turns.

6)    Slide the 1” (25mm) lengths of rubber heater hose over the clear vinyl inserts until the appearance of the loopstick resembles the above photo. Ensure that the rubber hose sections also do not touch either the Litz wire leads or any coil turns. Finally, place the completed loopstick in a safe place until it is called for in Step  .

Radio Disassembly

7) Refer to the photo above for this step. Remove the battery from the radio, and using a Jeweler’s Phillips screwdriver of the correct size, remove the six identical screws in the positions shown (NOTE: These screws have a tendency to stick inside their slots, even when the slots are turned upside down. If you cannot remove all six screws it’s not a major problem, but at least ensure that the screws are completely loose in their slots, and that you don’t lose any of them during the remaining steps). Grasp the tuning knob, and pull it out horizontally in a completely straight manner to remove it from the radio. Ensure that the battery, tuning knob and all removed screws are placed in a safe place until the radio is reassembled.

8)   Carefully separate the front and back cabinet sections and place them down in the position shown in the photo below. Note that the front and back sections of the radio are connected by a ribbon wire plug-in system– ensure that this plug remains securely inside its slot at all times, and that no great stress is placed on the speaker wires.

9)   Refer to the close up photo below, and note the position of the two Litz wire soldering points on the circuit board (in the lower right corner of the photo). Using diagonal cutters, cut the two Litz wire leads at the position shown, UNLESS you wish to salvage this stock loopstick for other projects—in which case you should desolder the entire lengths of the Litz wire leads from the circuit board at the positions shown in the lower right corner (NOTE: The stock loopstick is of a fairly good design, and has an inductance that would be compatible with any DSP-chip Ultralight radio, providing an AM sensitivity boost in the process).

10)   Refer to the photo below. Using a flat Jeweler’s screwdriver with a 1/16” blade, carefully probe around all four sides of the stock loopstick to break all of the glue bonds. Work slowly and carefully around the perimeter of the ferrite rod, including the plastic covers on each end. Once most of the glue bonds have been broken the ferrite rod will begin to shift around as you break up the few remaining bonds, but until this point work slowly and patiently to break up the glue.

11)   Refer to the photo below. Using the flat Jeweler’s screwdriver, once all of the glue bonds have been broken and the ferrite rod is loose in its slot, lift the ferrite rod out of its slot on one side by prying up under the plastic cover on the end of the ferrite rod. Ensure that the Litz wire leads have either been cut or desoldered from the circuit board, then grasp the ferrite rod with your fingers and pull it completely out of the slot with a slight twisting motion.


12)   Remove the wrist strap, and refer to the photo below. Carefully pick up the two sides of the radio and place the back section in a vertical position as shown, with a heavy flat weight (barbell, or other heavy flat item) pressing up against the back cabinet section to keep it in a vertical position. Ensure that there is adequate, even lighting on the top cabinet section for the gluing process in the next step, and that the back cabinet surface will not shift around as you make the gluing “dry runs,” and perform the actual gluing of the loopstick frame to the top of the cabinet.


13) Take the previously prepared orange plastic loopstick frame, and ensure that its bottom glue surface is completely smooth and flat, with no uneven ridges on the edges of the glue surface (remove these with fine sandpaper, but ONLY on the ridges, and not on the rest of the flat glue surface). Using a damp paper towel, wipe the top cabinet glue surface and the loopstick frame glue surface to remove any dust or debris, then wipe them again with a dry, clean paper towel to ensure that they are both completely dry.

Take the loopstick frame and gently slide the frame over the top cabinet surface to ensure that both surfaces are smooth and flat. Refer to the photo at the top of the next page. Ensure that there is even, bright lighting on the top cabinet surface, and make several “dry runs” to place the loopstick frame in the exact center of the top cabinet surface (with 1/16”, or 1.5mm of space between the frame ends to the cabinet ends), and also 1/16” (1.5mm) of overhang above the front edge of the cabinet’s glue surface (NOTE: if you wish to simplify the process by lining up the front edge of the loopstick frame with the front edge of the cabinet’s glue surface it will still provide an acceptable result, but you will need to do some minor sanding of the whip antenna’s plastic slot post, as shown in the photo below. In either case, make repeated “dry runs” with the loopstick frame to practice placing it in the exact center of the top cabinet’s glue surface, since you will only get one chance to place it in the proper center position once the superglue is applied.

NOTE: The back of the loopstick frame has a beveled surface to permit full operation of the radio’s whip antenna after the frame is glued on the top of the cabinet surface. If the loopstick frame is glued with a 1/16” (1.5mm) overhang in front of the front edge of the cabinet surface then the whip antenna should have enough space for free operation. The alternative is to glue the two front edges lined up with each other to simplify the gluing process, in which case minor sanding may be required on the whip antenna slot post, as shown in the photo below.

14)   After making multiple “dry runs” and becoming familiar with accurate placement of the loopstick frame on top of the cabinet, refer to the photo at the top of the next page. After once again ensuring that the back cabinet section will not shift around during the gluing process, take the Duro superglue packet and apply a thin (1/8”, or 3mm) bead of glue along the center of the cabinet’s glue surface, extending it 5 1/4” (133mm)long, with equal spaces on both ends (as shown). While sighting the two sides place the loopstick frame carefully down in the correct center position as practiced previously, with the 1/16” overhang if desired. If satisfied with the position, press down on the frame to lock the two surfaces together securely. Usually the frame may be shifted around slightly within 1 or 2 seconds of placing it on the superglue, so use this brief time to promptly shift the frame to a straight position, if necessary. After a couple of seconds, though, you will need to be satisfied with whatever position the frame has ended up with (regardless, it will still hold the loopstick just fine, for DXing purposes).

15)   After the loopstick frame is securely placed and locked on top of the D-808’s cabinet surface, place downward pressure on the loopstick frame along its length in order to ensure a tight glue bond throughout the entire top cabinet surface. Continue this process for about one minute, and sight both ends of the loopstick frame to ensure that they are both completely flat against the D-808 cabinet.

16)   Inspect the front and back edges of the loopstick frame’s border with the D-808 cabinet for any glue seepage, and if any is found,  remove it promptly with the 1/16” flat Jeweler’s screwdriver blade. Glue should not be allowed to run past the frame edges. This completes the process of gluing the frame to the D-808 cabinet.

7.5” Loopstick Installation

17)   [NOTE:  The installation procedures of the Medium Wave (AM) and Longwave loopsticks are identical, except that the plastic tie wraps and rubber hose sections are closer to the ends of the ferrite rod in the Longwave version. The following photos are for the Medium Wave (AM) version,  but Longwave loopstick builders should follow the same steps, while referring to the Longwave model photo in the “Operation” section as a guide]

Refer to the photo below. Carefully take the previously prepared 7.5” loopstick and hold it in the position shown—in its slot, centered in the middle of the orange antenna frame, with the shrink tubing and Litz wire leads running down to the left. Take the two plastic tie wraps and install them in the position shown, centered over the rubber hose sections on the loopstick, while ensuring that no Litz wires or shrink tubing is bound under the plastic tie wraps.

18)   Refer to the photo below. Lay the two cabinet sections down flat as shown, ensuring that the Litz wire shrink tubing is in the exact position shown (if it isn’t, carefully slide it along both Litz wires until it is in this exact position). Carefully thread one Litz wire end through the empty wrist strap hole, then thread the other Litz wire end through the hole, as shown. Finally pull on the two Litz wires together from the right while guiding the end of the shrink tubing into the empty wrist strap hole, and pull a short section of the shrink tubing through the hole (as shown) to protect the Litz wire insulation from friction damage.

19) Refer to the photo below. Using the previous procedure to install shrink tubing (which is described in the PL-380 transplant article) install a 2.5” (63mm) length of shrink tubing over the two Litz wire ends, and shift the shrink tubing into the position shown in the photo. After this is done cut the two Litz wire leads to the lengths shown in the photo (NOTE: make sure that the ends of both Litz wires are cleanly cut, not frayed and at the minimum diameter before attempting to insert them into the shrink tubing. The process is much easier when the Litz wires pass smoothly through the shrink tubing).

20) Refer to the close up photo below. Using a low heat (25w) pencil-type soldering iron, remove the two stock Litz wire leads at the positions shown, taking care not to use excessive heat, or touch the adjacent components. Ensure that the new Litz wire leads are at the length shown when the leads are in a horizontal position throughout the cabinet, and cut them to this length if they are not.

21) NOTE: When tinning the 250/46 Litz wire it is essential that all of the individual Litz wire strands be completely soldered together for a length of at least 1/4” (6mm), with bright, shiny solder around the circumference of the Litz wire ends for this minimum (1/4”) length. The Litz wire must be heated with a clean, hot soldering iron around its circumference in order to melt the solder properly for this step]

Refer to the photo above. Pull the Litz wires up out of the previous position, and place a clean rag underneath them (on top of the circuit board) to completely protect the circuit board from any solder which might accidentally drop down during the tinning process. Using your hot 25w soldering iron melt a generous amount of solder on its tip, and work the soldering iron tip slowly and patiently around the circumference of each Litz wire end until there is a bright, shiny solder length of at least 1/4” (6mm) in a cylindrical pattern at the end of each Litz wire. When doing this, take great care not to allow any solder to drip down onto the circuit board below (i.e., make sure that your rag completely covers the circuit board). The final appearance of your Litz wire lead ends should resemble those in the photo.

22) When your Litz wire lead ends resemble the photo above, cut the soldered portion down to a length of 3/16” (5mm) and observe the appearance of the end of the Litz wire. It should have a bright, solid circular shape, with no gaps or individual Litz wires showing. If not, reheat the end of the Litz wire while adding some solder, and repeat this step.

23) NOTE: The Litz wire connection points on the circuit board are surrounded by other important components. It is important to avoid solder drips on these components, or solder bridges to their leads. Solder the Litz wire leads down at an angle to avoid these surrounding components, and use the minimum amount of heat and solder to ensure good electrical connections)

Refer to the close up photo above. Following the precautions described, solder the two Litz wire leads down onto the circuit board at an angle, as shown in the photo. After soldering, make a close visual inspection to ensure that there are no solder bridges across the Litz wire connections, or nearby components. The remaining length of the Litz wire leads should be routed in a horizontal manner to the wrist strap hole.

24) Carefully pick up the front and back cabinet sections, and hold the back cabinet section fairly close to the front section (as the radio would normally be oriented, when assembled). Refer to the photo below, and carefully insert the “Fine Tuning” control thumbwheel from the front cabinet section into its slot on the back cabinet section in a sideway movement. This will allow you to fully close the front and back cabinet sections in the next step.

25) Refer to the photo below. Pick up the two cabinet halves and carefully snap them together (this action should not require any great force). Place the radio face down in the position shown (with a soft surface underneath, for protection), and using the Jewelers Phillips screwdriver of the correct size, carefully screw in the six screws that were loosened previously, starting with the screw near the whip antenna post (you should pick up the radio temporarily and hold the two cabinet sections together tightly at this corner, as you do this).

After all six screws have been retightened take the Tuning control knob and press it back onto its shaft in a straight horizontal motion. Finally, reinstall the battery and battery compartment cover to finish up the reassembly.

TESTING AND OPERATION– MEDIUM WAVE MODEL

This 7.5” transplant loopstick is designed to provide a major boost in sensitivity from 530-1700 kHz, and if the antenna is working properly both the weak signal reception and the radio’s nulling capability should be greatly enhanced. It is normal for the antenna to receive more background noise on the low band frequencies, although the sensitivity boost should be substantial across the band.

The construction design of the orange antenna frame allows full usage of the whip antenna for checking SW parallels of MW-DX stations, although if you chose to glue the antenna frame flush with the front of the back cabinet surface to simplify the gluing process, you may need to sand the whip antenna slot post slightly to allow free movement of the whip antenna (see step #13).

In the photo above, some of the important controls for Medium DXing are highlighted. The AM Bandwidth control allows you to choose multiple DSP filtering selections to enhance selectivity as desired, with the narrowest filtering (1 kHz) providing both the sharpest selectivity and the best weak-signal sensitivity. However this 1 kHz setting also has the poorest audio fidelity, with the higher audio frequencies typically cut off by the DSP filtering. As such, for regular DXing far away from strong local pests, the other AM Bandwidth settings may be more suitable. The Direct Frequency Entry key allows you to manual enter in any MW frequency, to which the radio will shift once the numbers are pressed on the keypad. The Tuning knob has three different modes, which can be toggled by pressing the knob horizontally. The first mode is tuning in either 9 kHz or 10 kHz steps (depending on which of these step you have selected), while the second mode is tuning in 1 kHz steps. The third mode is to lock the frequency in place. Pressing the knob again will return the tuning to 9 or 10 kHz steps.

The XHDATA D-808 has multiple display functions, which can be toggled by the indicated key. The first option is the temperature in either Centigrade or Fahrenheit (depending on your pre-set preference), while the second option is the alarm time. The third option is the current time (which you need to set according whether you prefer UTC or local time), while the fourth option is the received signal strength in both dBu and dB.

The supplied 3.7v lithium ion battery has superior run time, and may be easily charged using the supplied USB cable to either a computer or AC outlet (with the appropriate adapter). As reported in various posts throughout this year, the D-808 model has rugged construction with an excellent record of survival under tough conditions, including hot summer days, moderate rain exposure and extended usage as the main receiver during a 9-day ocean cliff DXpedition in Oregon—performing flawlessly at all times.

Conclusion

It is the author’s sincere hope that this “Supercharged” D-808 model will bring you a lot of DXing fun during travel, as well as at other times. When conditions are good you should never underestimate this enhanced model’s potential of receiving awesome DX beyond your expectations—as an example, here is the stand-alone performance of a 7.5” loopstick D-808 in receiving 1017-A3Z in Nuku’alofa, Tonga (10 kW at 5,632 miles/ 9,063 km) on the ocean cliff near Manzanita, Oregon at 1301 UTC on August 8th of this year:

Not only Tonga is received, but even the Australian horse racing station 1017-2KY in Sydney (5 kW at 7,630 miles/ 12,280 km) is received as a weak co-channel in the middle of the recording. My hope is that you all will be so lucky with your new Supercharged D-808!

73 and Good DX,

Gary DeBock (in Puyallup, WA, USA)


Absolutely amazing!  Thank you for taking the time to put this procedure together and describing the process in such fine detail, Gary! Hats off to you! 

Click here to read all of Gary DeBock’s posts on the SWLing Post.

Spread the radio love

A detailed review of the Tecsun S-8800 and comparison with the Tecsun PL-660 & XHDATA D-808

Many thanks to SWLing Post contributor, 13dka, for the following guest post:


Tecsun S-8800 Review

by 13dka

Looking for a new toy again I recently revisited the Tecsun S-8800, which looked like it could replace both my battered old Grundig Satellit and my Tecsun PL-660.  Being in production for a few years now, and with the “birdies” situation ironed out long ago, the S-8800 has gathered much acclaim by now but also a few somewhat contradicting reviews.  For example, one review reports that the S-8800 can cope with larger antennas, another one states the exact opposite, one praises the MW performance, another one attests only average sensitivity, and only one mentioned an unpleasant detail I’m going to emphasize on in a bit.

All reviews touted the improved SW performance in AM and SSB though, and that was reason enough to make my own experiences.  Testing it turned out to be a bit of an emotional rollercoaster though.

I hope I can share more than only redundant bits of information about the radio, and I’ll skip most of the general information you can read in most other reviews.

Off to the 13dka radio test site at the dike!

13dka’s SWL Happy Place

General

Like the technically somewhat similar Tecsun PL-880, the S-8800 is a triple conversion receiver and has 2 conventional IF stages, the third IF stage is using a Si4735 DSP chip again, providing the  filters and all that jazz.

Tecsun seems to have thrown a lot more parts into it than in previous radios, plus a pretty big ferrite rod (covering 8-9/10th of the radio’s width) with individual LW and MW coils (most of the smaller receivers have only one coil), a 108mm telescopic whip and of course the “gun metal” knobs.  Designing a radio with a rather simple front panel and making a remote control an integral part of the operation concept (like it is reality with TVs for a long time) is a charming oddball approach, in a way reviving an utmost luxurious feature of 1930s high-end radios.  So let’s cut to the chase and talk performance:

Longwave and Mediumwave

On LW and MW, I first compared the S-8800 with my old Grundig Satellit 400 at home.  The old clunker has similar dimensions, a big old speaker bass/treble controls and it was known to have an average sensitivity on the AMBC band in its time, when all the great, now vintage AM performers were still ubiquitous, so that’s rather a “Jay Allen average” than an “average of the mediocre AM radios of this millenium”.  I think Jay Allen might rate it 3 stars.

Longwave

The first station I tuned in was the BBC LW transmitter network on 198kHz and it turned out a tad more noisy on the Satellit.  Great!  I could also pick up Medi1 and Kalundborg a smidge better than on the Grundig, and in the early evening, out at the beach I was picking up stations on all still populated channels on LW (minus 180kHz where it has one of the remaining birdies).  The other new portables I currently own (PL-660, D-808) are far away (PL-660) and far, far, far away (D-808) from that kind of performance.

Mediumwave

Unfortunately that good impression vanishes gradually when leaving the long wave for the NDB band (still good) and finally medium wave.  Before I left the house to test the radios on the electrically quiet beach again, I was checking out one of my favorite border case stations (low power station from The Netherlands on 1602kHz, whatever their name is this week) and that made very clear already that the S-8800 can’t hold a candle to the Satellit, at least not on the top end of the MW band.  Despite all the noise indoors, on the Satellit I could easily recognize the song being played while the S-8800 didn’t pick up anything at all.

On the beach it turned out that – despite the ferrite rod being twice the size – I find it only marginally better than the PL-660, and not close enough to the little XHDATA D-808 (if you’ve read my D-808 review you already know that this little radio is almost on par with the Grundig on MW):

Timeline: 0:00: D-808 0:07: S-8800 0:11: D-808

Click here to download audio.

Of course I have read Thomas’ assessment of the AM performance so I was prepared to be underwhelmed.  But at least you can connect some high gain MW antenna to make up for the missing sensitivity and be happy again, or can you?

A not so nice surprise

The unpleasant detail I mentioned before is:  the Int/Ext Antenna switch does not turn off the internal ferrite bar antenna.  Jay Allen mentioned it in his review, it was the only review with that detail and unfortunately I overlooked it.  How does that matter?

The main issue is this: if you’re (like me) forced to use outdoor antennas to escape high indoor noise levels, the internal loopstick just won’t let you.  The external antenna will just increase the SNR a bit when the station is strong enough anyway.  Even in a low noise environment, the internal loopstick will needlessly add noise to the signal received from a high-performance active loop or FSL antenna.

That also explains a paragraph in Thomas’ S-8800 review:

“I also hooked up the S-8800 to my large horizontal loop antenna. This certainly did improve MW reception, but not as dramatically as I hoped. Additionally, it seemed to be very sensitive to RFI in my shack even when hooked up to the external antenna.”

There’s more external antenna idiosyncrasy:  only the BNC jack is wired to the “Ext” position of the antenna switch,  the “hot” (red) Hi-Z terminal is active when the switch is in the “Int”-position, it just seems to save you an alligator clip on the whip.

The dedicated “AM antenna” terminal was in part what sold the S-8800 to me.  The label made me assume this would be specifically wired to the AM circuit but as it turns out it’s just a generic high impedance input and I really didn’t anticipate that the internal loopstick remains always active (or in case of the Hi-Z terminals, the retracted whip).  Yes, technically you can connect an external antenna for MW, practically…YMMV.

To conclude this section, the final outcome of this antenna connector issue plus the not so brilliant MW sensitivity was that not even my active ML-200 loop (connected to the BNC-jack) could improve reception on 1602kHz enough to make the S-8800 get at least a bit into the ballpark of the Grundig with its loopstick antenna.  The currently mounted small 80cm rigid loop on the ML-200 just couldn’t produce enough signal to lift the station over the noise that much.

Shortwave SSB

As the other reviews reported already, Tecsun has obviously worked on the AGC issues their former products had.  I can confirm this so far, the AGC does not show the distorted onset of leveling anymore – unless the signal is very strong.  But the leveling happens much faster than e.g. on the PL-880 so the remaining blasts of distortion are quite short:

Click here to download audio.

A more relaxed AGC release time would save us most of those too.  I noticed AGC pumping effects from strong signals in the spectrum neighborhood only with a big antenna connected.  But unfortunately there is more…

Stuff you have to live with:

In his great review, Thomas mentioned the auto mute sometimes interfering with reception. I noticed this too (with all bandwidths on SSB) and I credited this to very low noise figures. When the bandwidth is narrow (=less noise) or if you have a very low noise floor anyway like when tuning through 25-30MHz, the receiver gets muted over the entire chunk of spectrum, just to intermittently and pretty suddenly pass the noise again.  Sounds like a broken antenna cable and has some potential to confuse people:

Click here to download audio.

Then I made some experiments with ECSS, destroying my “noise floor” theory.  It doesn’t always happen but under circumstances that may sound like this:

Click here to download audio.

Too bad that setting auto mute to ’00’ doesn’t actually turn it off in SSB mode so there’s likely no remedy for that.

On my example, there is absolutely no difference between the 3kHz and 4kHz SSB filters.  A working 4kHz filter would have been a good choice for ECSS reception.

Another remaining quirk at least on my specimen of the S-8800 is a slight FM modulation of an oscillator in SSB, particularly with strong signals.  You can hear it best if you create a heterodyne or listen to CW, the tone sounds a bit hoarse, so do voices and I’m not sure whether or not this could affect narrow-bandwidth digimiode decoding.  The front panel (namely the bandwidth knob area) is quite susceptible for “hand capacity”, the frequency varies a bit when you move your hand in front of the S-8800.  This is not uncommon with portables of course, but my D-808 for example has its “Theremin playing area” on the back of the radio.

In this clip you can hear both the “hoarse” modulation and my hand waving  to you.

This leads me to calibration and frequency drift.  The S-8800 can be calibrated on SSB (see the “Hidden features” section below), however this turned out to be a (too) fast moving target.  I don’t know if it’s the VFO or the BFO but it is so temperature-dependent that 6°C temperature difference equates to a quite substantial (for SSB) drift of 150Hz.  Whatever oscillator it is, it seems to lack any temperature compensation measures, with all the implications that may have on relaxed SSB listening, digimode decoding and ECSS reception when the temperature isn’t quite stable where you want to use it.  After calibrating it, it’s often slightly off again within the same minute.  My cheap little D-808 won’t drift even when I take it from an overheated apartment into a -5°C cold winter storm.

The good stuff

Now to the fun part!  When I compared the SSB performance of the S-8800 with my PL-660 the first time, I found them very close for some reason.  I could find only one weak station that came in noticeably better on the S-8800 and while I was happy that it wasn’t worse than the PL-660 I was also a bit disappointed.

Timeline: 0:00: PL-660, 0:10: S-8800 receiving the “Gander Radio” VOLMET.

Click here to download audio.

Then I repeated the test a few days later, this time a bit more into the evening and the outcome was very, very different.  The S-8800 won every single weak signal comparison with ease and sometimes in a way that made me think my PL-660 must be broken.

But then I could help the PL getting a lot closer by simply holding it in my hand, the difference was that I had placed the PL-660 differently so I could record both radios easier.  The factor I forgot to put in the equation was that the S-8800 is absolutely not depending on anyone holding it to give it some counterpoise – that and the long whip is certainly a part of its advantage, and the receivers would be much closer when used with the same external antenna.  With the radios just standing there tho (and that’s what most people will do with their radio instead of holding it in their hand), the difference is remarkable nonetheless and I also learned that you should always look and listen twice when testing radios!

Timeline: 0:00 D-808, 0:03: S-8800, 0:08: D-808, 0:10: S-8800

Click here to download audio.

Timeline: 0:00: PL-660, 0:05: S-8800, 0:10: PL-660, 0:16: S-8800

Click here to download audio.

When I repeated the test yet again but granted the PL-660/D-808 the litte bit of counterpoise they seem to need (I let them rest on the car door instead of holding them), the results were not that unequivocal anymore.  However, the receivers were 50% on par, the S-8800 was clearly better the other 50% and overall the other two receivers could not score a single point for them.  I think that shows that the S-8800 really is a hair or three better.  Beyond the increased sensitivity and minus the frequency drift, SSB reception feels more mature, the the S-8800 behaves more like a regular communications receiver now and the big speaker is a big plus.  Of course that means there should be also an improved reception of…

Shortwave Broadcasts

I know that the S-8800 has inherited the “Enjoy broadcasting” and “BCL RECEIVER” lettering from the cheap S350, but after stepping the PL-660 and the S-8800 through all shortwave broadcast bands, I felt that’s exactly hat it was made for, and it shows!

There is no doubt that a big speaker can create the illusion of better reception, but I think I don’t fall for that easily and rather listen to the background noise and how intelligible the “content” is.  While the comparison with the PL-660 often ended up in a tie when I subtracted the impact of the speaker in my mind, there were indeed some stations where the S-8800 had remarkably less noise than the PL-660.  But of course the big speaker is giving the S-8800 a permanent edge on all reception cases, and it’s a real joy to listen!  Combined with lower noise and a generally more stable signal (through better AGC) this made quite a difference between the two.

Bottom line is that when listening to shortwave broadcasts, the S-8800 gives you the warm and lush sound of yesterday’s famous receivers while it technically delivers the best performance of all Tecsun portables so far.  If you fancy music programs on shortwave and if you don’t mind the price for the luxury and performance, you’ll enjoy this radio a lot.

FM

Short story: my specimen of the S-8800 lacks the very good FM band sensitivity of the PL-660 or the XHDATA D-808.  While the latter radios present my favorite marginal case station 100km away  fairly with some noise at sea level, the S-8800 just doesn’t receive that station at all, no matter how I position the whip.  It’s not exactly worlds between them but considering that (assumedly) most of the FM receiver is in the Si4735 chip that it shares with a couple of great FM performers from the same company, this is a bit surprising.

Signal handling capabilities

The S-8800 is said to have a pretty robust frontend, which I found true but I want to put that a bit into relation.  My “lonely beach/dike listening post” sports 2 abandoned steel flag poles of 6 and 8m height.  They can serve as support for wire antennas, or easily be used as an antenna themselves by inductively coupling them to the receiver – IOW by winding a wire 2-4 times around the pole (you could use the Eiffel tower as an antenna this way) and connecting the other end to the radio.

For some reason this contraption produces quite massive output voltages, but I could always use it for a quick and thorough (and due to the location QRM-free!) reception improvement with my PL-660 anyway.  Why?

The PL-660/880 have a 3-position (DX, Normal, Local) switch. I think it turns off the input preamp in the “Normal” postion and adds a simple attenuator circuit in the “Local” setting.  The latter is sufficient to tame the output of all sorts of antennas (including the flag pole) enough to make my PL-660 work just fine with that on all bands.

The S-8800’s sensitivity switch on the other hand has only 2 positions and telling from the results it really only turns off the preamp.  Now it actually acts up much less on the flag pole than the PL-660 in its comparable “DX” and “Normal” positions, so obviously Tecsun has put some effort into making the frontend more robust indeed.  But it seems they thought “that should do, let’s ditch the 3rd (attenuator) position and save 3 resistors” and that left me with many (but tolerable) images across the entire shortwave above 3 MHz, and a heavily image-infested 160m band.  BTW, a few soft images from (I guess) 49/41m blowtorches could be heard around 29MHz with only the whip.

A word on the audio

I believe that the “legendary” status of the Grundig and Zenith lines of world band receivers is partly owed to their big sound.  They had their music loving and program listening audience in mind, and Tecsun’s choice of casing, big speaker, the bass and treble controls are certainly taking the same line.

Compared to my Satellit 400 (80s model, but still has much of that “legendary” sound), the Tecsun sounds a bit more boomy in the lower mids while having a less super-deep bass response than the Grundig, which also sounds more neutral.  Besides these very unimportant distinctions, the S-8800 does sound big and that also helps reception – lacking low mid/bass content can impair intelligibility as well, and it causes more fatique on long DXing sessions.

The bass/treble shelving EQ is certainly more sophisticated than the Grundig’s, it has quite sharp cutoffs at very sensibly chosen frequencies, so turning the knobs down will leave the main chunk of the mid range completely unaffected and just helps removing rumble or the 5kHz beat frequency from a band neighbor, or add some nice hifi-highs and beefy low end when you turn them all the way up.  In other words you can continuously blend the speaker sound from perfect “voice communications” style to “dad’s big old radio”.

Hidden functions

Of course the S-8800 has some unofficial “power off” and “power on” extra functions assigned to the number keypad on the remote (they all work by pressing and holding a number key for up to 10 seconds).  Some are identical to the PL-880, some are different:

0.) I found calibrating the S-8800 on SSB works with the same method used on the PL-880:  Tune to a station with a known frequency, switch to USB or LSB and use the fine tuning knob to tune for best audio/music playback. An alternative way of doing this is downloading a free spectrum analyzer app for your smartphone (“SpecScope”), tuning the radio 1kHz off frequency so you get a nice heterodyne tone on USB or LSB, then using the fine tuning knob to tune the tone to hit exactly the 1kHz mark on the analyzer display.  Your last 2 (Hz) frequency digits will now show an offset frequency.

1.) Then press and hold the ‘0’ button until a ’00’ appears in the top right corner of the display and the last 2 digits of the frequency readout start flashing.  Release the button and quickly use the fine tuning knob to reset the last frequency digits to ’00’ (the number on the top right corner should be changing while doing that), then immediately hold the ‘0’ key again to confirm – tadaa, the offset should be gone while the last 2 frequency digits show ’00’ now.  This all needs to happen pretty quickly and with the right timing, so it may take a few attempts to get it right.

2.) With the radio off, button ‘2’ turns the LW band on/off.

3.) Press and hold the ‘3’ button while the radio is off to toggle between permanent and “intelligent” display illumination.

4.) When the radio is turned on, this button enables access to the extra functions of the number 6 and number 9 keys.  The display will read “On” when you perform this the first time, doing it again will turn it off again.

5.) Radio on, set to FM band: this toggles between 75 (US) and 50 (anywhere else) microseconds deemphasis on FM.

6.) Radio on: When enabled using the ‘4’-button as described before, holding the ‘6’ will toggle the (annoying) dynamic bandwidth feature off and on.  You can set this independently for AM and SSB.  Ideally to zero, because it automatically resets your bandwidth setting and since this is happening in steps, it sounds quite strange.  The PL-660 uses a stepless dynamic envelope following low pass filter (which is I believe what they called “DNR).

7.) This is still a mystery to me.  On the PL-880, this button apparently controls the line out level on FM.  On the S-8800 it (ostensibly) seems to control the S-meter bias with numbers running from ’00’ to ‘+99’ and ‘-99′ for all bands.  Positive values reduces the S-meter display which made me curious if it rather controls AGC level or gain at some stage, but it really seems to affect the S-meter display only.

8.) Radio off: Toggles the seconds display on the main clock (when the clock is displayed instead of frequency).

9.) Another important one: this controls the threshold of auto squelch/soft mute.  If you want to turn that off, turn it down to ’00’ with the main tuning knob, then hit the ‘9’ key again.  You need to do this for AM, FM and SSB separately.

Random stuff

  • The S-meter was indicating a permanent base level of 2 bars even at my remote beach listening post.  But even though it can apparently be “calibrated”, a 5-bar indicator is quite a step backwards from the 99-step RSSI meter of the PL-880.
  • After an initial discharge and recharge cycle, the 2x2000mAh “18650” batteries gave me a continuous runtime of 21 hours.  When you connect the charger and then turn on the radio, it stops charging unless – and this seems odd – you are in FM mode.  A full charge while listening to FM radio took 4:41.

Verdict

I had a pretty hard time making my mind up about this radio.  It has so elaborate details, so much design improvement and costly parts went into it but I feel like it doesn’t quite meet the expectations Tecsun created with this radio.   Sadly, it has a few things that were started ambitious and ended underwhelming.

It got a huge 2-coil loopstick and somehow they managed to make it perform slightly worse than a 70€-radio with not even half of that loopstick size, they gave it 2 external antenna ports but they disappoint MW enthusiasts right again by keeping the loopstick always active, and how FM could turn out less sensitive than many radios with the same Silicon Labs chip (including their own models) is beyond me.

They improved the front end but then they dropped the attenuator, which costs the overall flexibility and better overloading-resilience their other radios have, they fixed the SSB issues of the predecessors and introduced a free-floating BFO with a mind of its own.

The price tag is making these downers certainly weigh heavier, and I think without them this radio may have turned out to be a real classic.

On the plus side I found a radio that really excels on shortwave. Shortwave program listeners can feast on a most sensitive, selective, luxurious and well-behaved portable with a big sound and I think there’s probably no current portable that could compete with that.

Ham radio aficionados get improved SSB reception and if there wouldn’t be this “cheap 70s receiver trademark” unstable oscillator, it would come close to communications receiver performance levels (minus the frontend needed for big antenna voltages).

That the price reaches into the ballpark of pre-loved high-end(-ish) JRC/Icom/Yaesu communication receivers or buys you a mint-condition ICF-2010/2001D may seem like a problem too.  But then again, none of those radios is perfect either, and only the Sony is a portable.

Despite the quirks, the S-8800 is still a great, valuable radio that revives an out-of-fashion style of radios in a pretty unique and modern way.


What a brilliant, critical review of the Tecsun S-8800!  Thank you so much for taking the time to properly test and compare the S-8800 with the venerable PL-660 and the XHDATA D-808 (readers, also check out his review of the D-808).

You’re right, too, in that I’ve noticed some contradictions in reviews–I do wonder if part of this might be variations between US and EU versions of the radio, or perhaps small quirks in production runs.

No doubt, however, that the Tecsun S-8800 is a champion of the shortwave broadcast bands and its audio fidelity is in a class of its own.

Click here to view the Tecsun S-8800 at Anon-Co or here to search eBay.

Do you enjoy the SWLing Post?

Consider supporting us via Patreon or our Coffee Fund! Thank you!

Spread the radio love