The following review originally appeared in the May 2015 issue of The Spectrum Monitor magazine.
It’s no secret…I’m a bit of an SDR geek. Yes, after discovering the power of software-defined radios a few years ago, I’m hooked: SDR listening represents nearly 95% of my home listening and monitoring. And I love it.
As a result, I’m always looking at new SDR technologies to note advances that could improve both my at-home and on-the-road listening––not to mention, satisfy my appetite for spectrum and broadcast recordings.
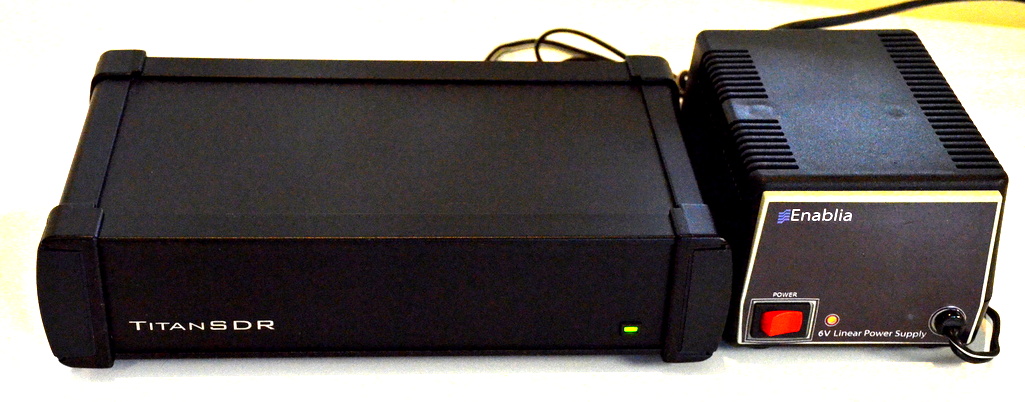
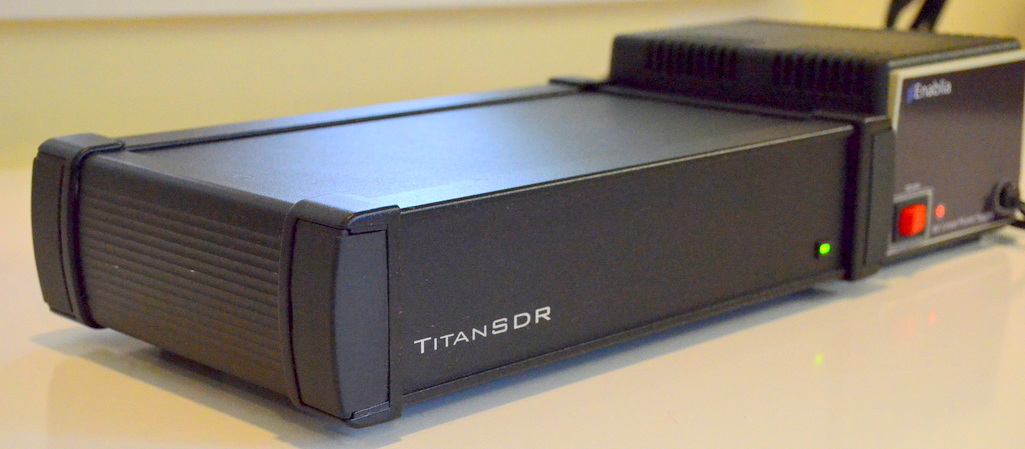
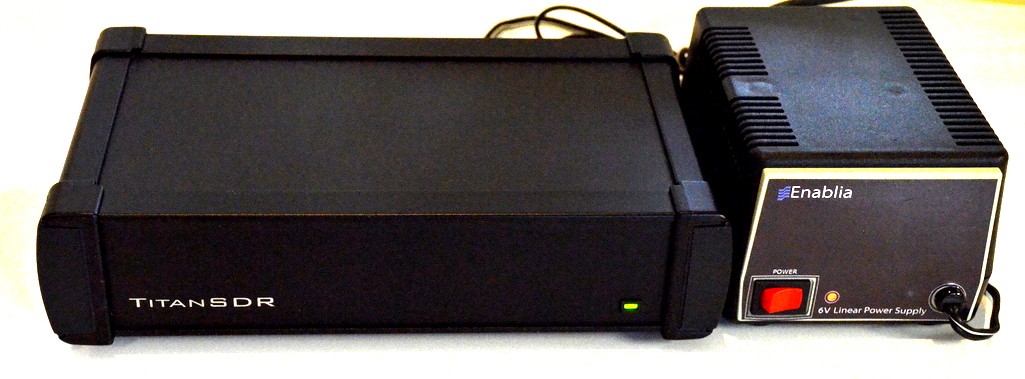
A few months ago, I heard about a new military-grade SDR called the TitanSDR. Being eager to check it out, I reached out to the Italy-based manufacturer, Enablia; they kindly lent me a TitanSDR Pro for review.
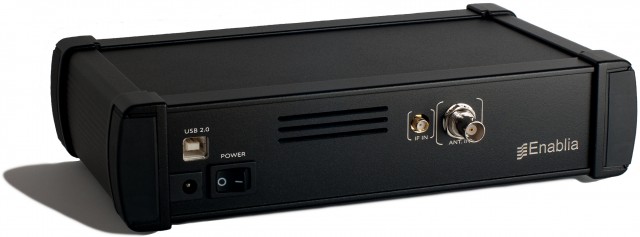
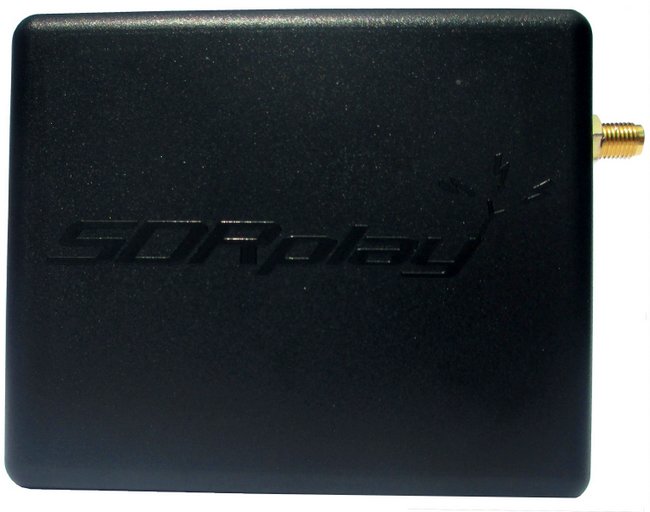
TitanSDR back panel (Photo: Enablia)
But here I must insert a disclaimer. Even though I love SDRs, I always find myself hesitating slightly when it comes to writing a review of one––simply because, when compared with tabletop and portable radios, SDRs tend to be so very complex. While I’m fairly well versed in what to expect of an SDR application, the learning curve (and sometimes even installation curve) can be formidable. And the TitanSDR seemed especially daunting: since it’s designed for heavy, full-duty, multi-channel SIGNET and military use, I expected to need a at least a few days to both install the device and, more significantly, to learn the ropes of the application which drives the SDR.
Fortunately, my fears were unfounded. The TitanSDR and I were in sync almost before I knew it, hinting favorably about an accessible user interface.
First impressions
The TitanSDR ships in a box with the following components: the Titan SDR “black box” receiver, a TitanSDR installation DVD, a printed installation manual, a USB memory stick with a license key, USB cable with chokes on both ends, and a separate regulated power supply.
Not purely a plug-and-play device, the TitanSDR requires a proper three-step installation. Fortunately, the installation manual walks you through the process, which is actually quite simple. Within a mere five minutes, I had the TitanSDR installed and on the air.
The TitanSDR application
The application which runs an SDR is your interface to all of the radio’s capabilities. A top-notch SDR paired with a confusing SDR application will greatly diminish usability and, frankly, sheer enjoyment.
Fortunately, this is where the TitanSDR comes up trumps. To be clear: the TitanSDR has one of the best user interfaces of any SDR I’ve ever tested. While SDR interfaces are subjectively evaluated––some prefer a more dense, involved GUI––I always appreciate simplicity and overall usability over lots of (visible) bells and whistles.

Click to enlarge
I’m especially impressed with how easily the TitanSDR app is designed to cope with multiple band windows, both wide and narrow, while many SDR manufacturers struggle with making an intuitive interface for merely one wideband and one narrowband window, each.
The user interface is divided into three major components: the panoramic scope, the wideband scope, and the narrowband scope. Let’s take a look at each.
Panoramic Scope

TitanSDR Panoramic Scope. Click to enlarge.
When you first open the Titan application and connect the SDR, the panoramic display, which spans the top of the window, comes to life. If hooked up to an antenna, you’ll see spectrum peaks across the display, but you’ll hear no audio because you must first select a wideband and then a narrowband window.
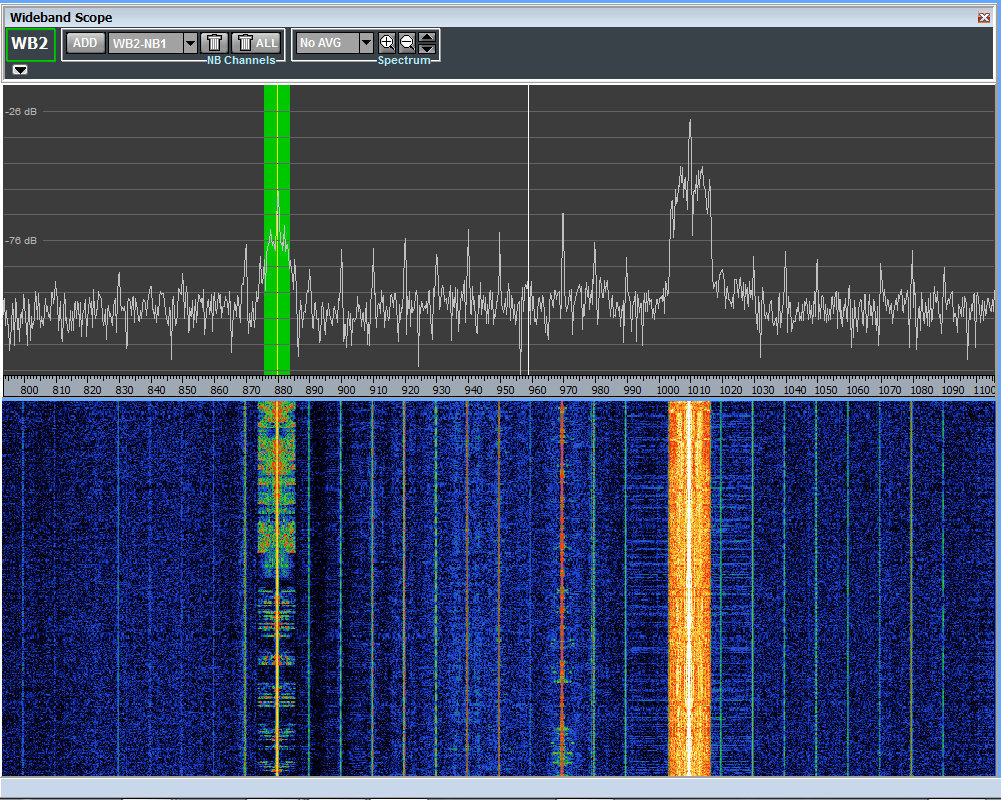
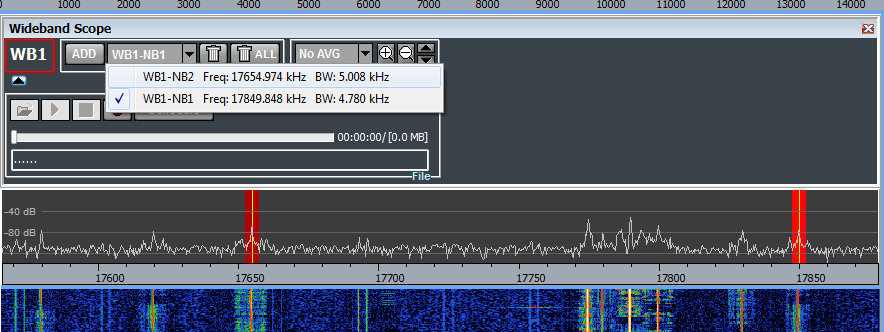
Wideband Scope
At the upper left portion of the panoramic scope, you’ll find a button that allows you to add a wideband selection/channel. After clicking the “add” button, you’ll need to choose the width of your wideband slice. Your choices:
- 2.1875 MHz
- 1.875 MHz
- 1.5625 MHz
- 1.25 MHz
- 937.5 kHz
- 625 kHz
- 312.5 kHZ
After selecting your wideband width, the wideband scope will appear with the spectrum and waterfall in action. At this point, you’ll still hear no audio, but you’ll see a wideband swatch of frequency represented by your selection.
New wideband selections default with a beginning frequency of 0 kHz. To place the wideband selection into the part of the shortwave spectrum you want to hear or record, you simply click and drag the appropriately colored wideband swatch within the panoramic display to the part of the HF spectrum you wish to monitor.
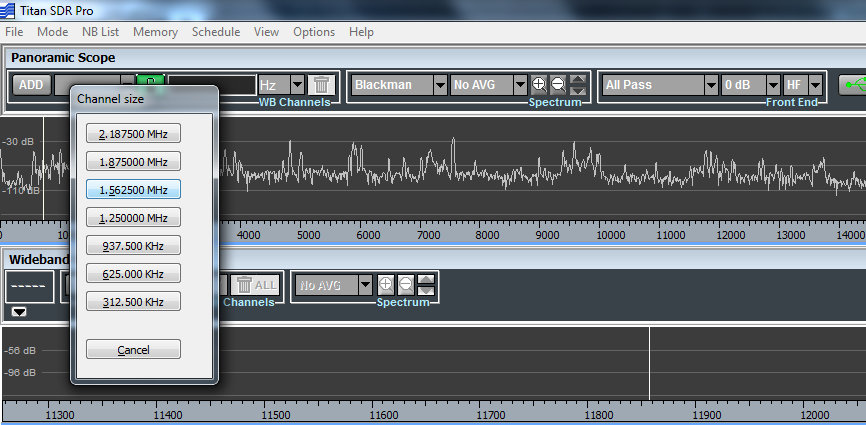
Selecting a Wideband channel size. Click to enlarge.
Your first wideband selection is labeled in red, the second in green, third in blue, fourth in purple. While there are limits to the number of wideband selections you can make, based on the total bandwidth of your selections [the TitanSDR owner’s manual provides a matrix of possible combinations], each is readily identifiable by color in the panoramic display.
After you’ve created a wideband selection and placed it where you’d like to listen, you’ll now need to make a narrowband selection in order to begin tuning and listening.
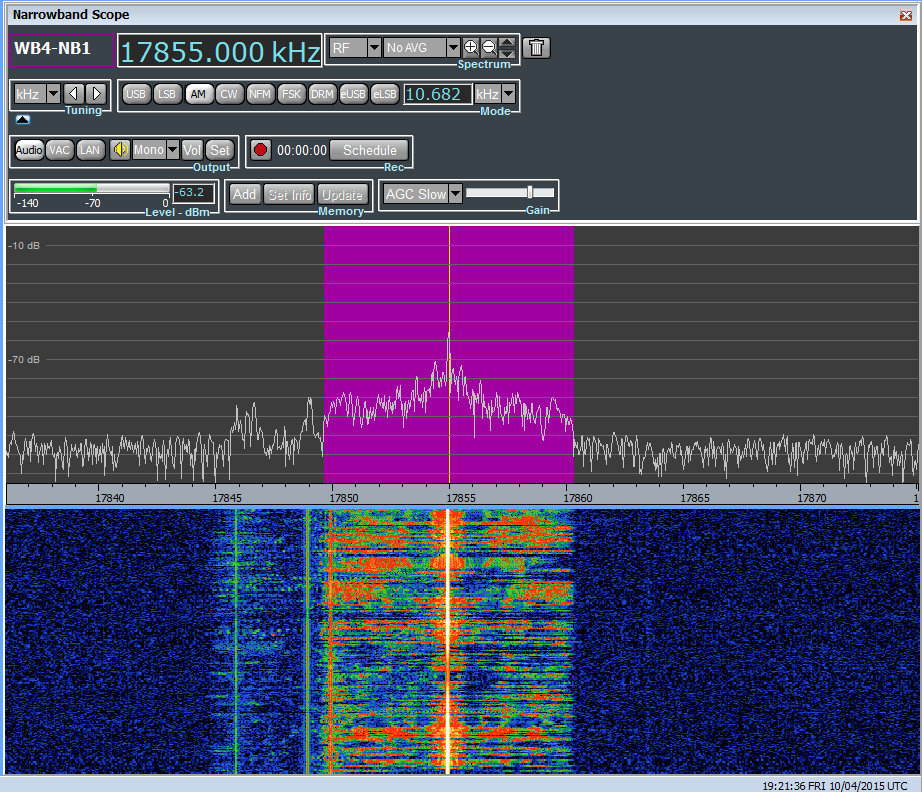
Narrowband Scope
Creating a narrowband channel is similar to creating a wideband channel: at the top of the wideband scope window, simply click on the “add” button, and then click within the wideband scope spectrum display to place the narrowband channel where you want it.
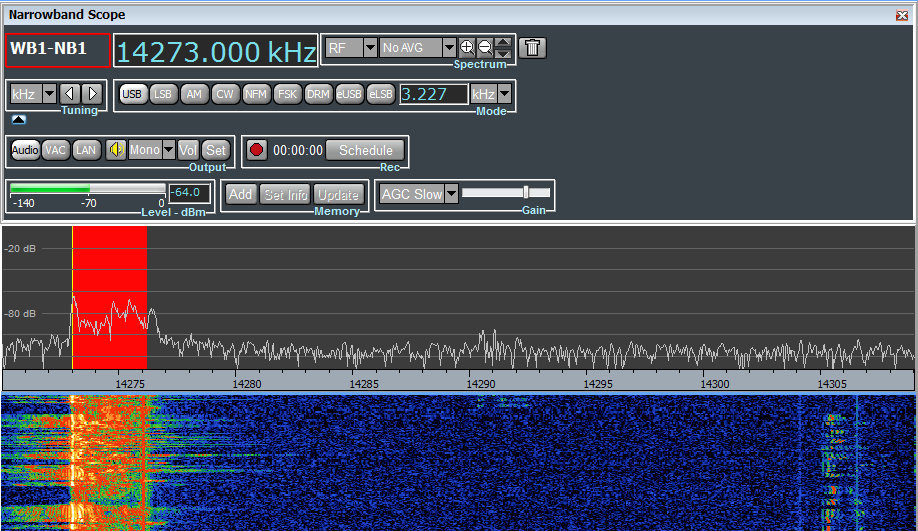
Once placed, this new narrowband scope will be visible in the lower right portion of the TitanSDR application window. You’ll also hear audio for the narrowband selection.
The narrowband selection defaults in USB mode, but you can quickly change modes by selecting one from the panel above the narrowband spectrum. Your choices:
- USB
- LSB
- AM
- CW
- NFM
- FSK
- DRM (built-in, no separate license needed)
- eUSB
- eLSB
Tuning
After using the TitanSDR for only a couple of days, I found I was quite comfortable tuning through the bands. Every SDR application has its own quirks; the TitanSDR app gives you several tuning options.
Within a narrowband window, you may tune by:
- Clicking the center of the shaded area (representing the frequency and mode you are monitoring) and moving it within the NB spectrum display
- By manually keying in the frequency within the frequency display window
- By placing the cursor within the frequency display and using the scroll wheel of your mouse to increase and decrease frequency increments
- By using hot keys: “Ctrl + K” to increase frequency, “Ctrl + J” to decrease frequency
Tuning within the wideband scope is as simple as clicking and dragging the narrowband shaded area.
Of course, wideband areas can be moved to different parts of the HF spectrum by simply clicking on the shaded wideband area within the panoramic scope and moving it to a different location. But you can only do this if there are no active narrowband channels within the selected wideband channel.
With the ability to load multiple wideband channels with multiple embedded narrowband channels, you might think tuning and manipulating the various channels would get confusing. But this is just not the case. Herein lies the excellent user design behind the TitanSDR.
The software engineers at Enablia obviously put time into designing their application for users who routinely use multiple channels. Each channel is clearly color-coded across the scopes, and selecting them is a simple process: one of four wideband channels via the panoramic display, and one of many narrowband channels via the wideband display. Indeed, TitanSDR produced a brief video (http://youtu.be/XDdilGykSuY) describing how to use the TitanSDR application interface. The concept of selecting and manipulating the various channels is so easy, I actually knew how to do it prior to receiving and installing the software…and all from this eleven-minute video tutorial.
Without a doubt, the TitanSDR user interface is one of my favorites among the numerous SDRs I’ve evaluated.
Speaking of multiple channels, if you have a particular combination of wideband and narrowband channels that you like to load each time, you can save the full configuration and reload it at startup, preserving every frequency and channel. Brilliant.
Recording
For shortwave archivists (like the author of this review!), the TitanSDR is very enticing. Even the most basic version of the TitanSDR allows for 4 wideband channels and 8 narrowband channels of simultaneous recording. This means that you can record a wideband channel and as many as eight individual live broadcasts consecutively. While rarely needed, it’s an impressive feature. Quite often I’ve wanted to record as many as three broadcasts simultaneously; my WinRadio Excalibur, for example, allows for as many as three consecutive broadcast recordings, but limited within a 2 MHz bandwidth. The TitanSDR has no such limitation. You could load four wideband channels across the spectrum––say, one within the mediumwave band, one on 41 meters, one on 31 meters, and one on 10 meters––and record or listen to up to eight individual broadcasts within those channels. The TitanSDR pro will even allow for up to 40 consecutive narrowband channels of recording.
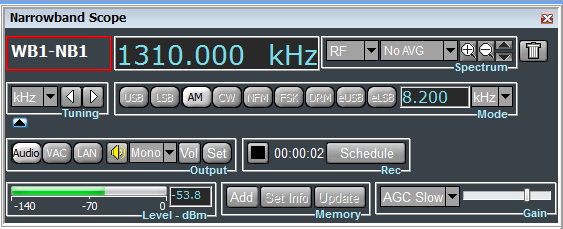
The record and schedule functions are prominent in the narrowband scope window (above) and the wideband scope window.
What’s more, the TitanSDR has one of the most versatile automatic file naming systems I’ve ever used. Not only can it embed the date, frequency, and mode, but also the start time and end time. It also has a user-defined string which allows for more file name customization. And another nifty feature: the Titan can be set to embed either local or UTC time in the filename.
Yet another feature the archivist in me delights in? You can schedule narrowband and wideband recordings within the application––no need for an external program or macro.
Missing features?
As a product designed specifically for military and government applications, the Titan application currently lacks many of the features you might expect in a $1000+ software defined receiver. The version of the TitanSDR application (at time of publishing this review) lacks a variable notch filter, 90 second waterfall review, and an embedded time stamp––features one might well expect from a receiver in this price class.
Prior to publishing this review, I contacted Enablia with a list of features I thought should be included, and they agreed that these features should be added to appeal to the ham radio and shortwave listening customer base. Indeed, within a matter of two weeks, I was sent a new version of the Titan application with the addition of a number of keyboard shortcuts that I recommended. A few weeks later, I received another update which included the ability to set the maximum size of spectrum recording “chunks” to anything between 50MB and 2GB. Enablia plans to add more of the features for the radio hobbyist in time, but after this review has been posted.
If you’re seriously considering purchasing the TitanSDR, you might contact Enablia first to see if and/or when these features are to be added. I’m confident they will be added in time.
Summary

When I begin a radio review, I keep a checklist of pros and cons as I discover them to remind myself of my initial discoveries.
Here’s my list from the TitanSDR:
Pros:
- Superb sensitivity and selectivity
- No less than 16 preselectors (hardware)
- Brilliant application user interface, one of the best I’ve encountered
- Simple controls, logically laid out
- Effective selection system to move between narrow/wide band windows
- Customizable waterfall and spectrum displays
- Frequency display can be set to Hz, kHz or MHz
- Full panel configuration with multiple custom wideband and narrowband channels can be saved and loaded in the future
- Recording functionality
- Up to one spectrum recording can be made, while four wideband windows may be open
- Between 8-40 AF/Audio recordings can be made simultaneously live or from wideband recordings
- File naming convention automatic with excellent customization options
- Full recording scheduling in both wide and narrow bands
- Spectrum recordings can be parsed to anything between 50 MB to 2 GB each, or left to grow to without a size ceiling; like other SDRs, recording chunks are played consecutively
- Excellent overall build quality
- SDR application very stable and quick to load
- Supplied power supply is regulated and quiet
- TitanSDR application updates are simple to install
- Enablia support has been responsive
Cons:
- Both the TitanSDR and TitanSDR Pro are pricey for most radio enthusiasts
- Missing some features that would be expected in a radio of this price class (though Enablia have confirmed these features may be added in future updates):
- No notch
- No waterfall review
- Neither embedded time code nor memory labeling in spectrum display
- Windows/PC only (not supported by OS X or Linux)
Conclusion

No doubt, I’m impressed with the TitanSDR, performance-wise. It’s as sensitive and selective as any SDR I’ve ever tested. Serious weak-signal DXers will be pleased with this rig.
Of course, there’s the daunting price tag of the TitanSDR, which makes it clear that this was a receiver designed for government and commercial use: the basic version of the TitanSDR retails for 1380 EUR, the TitanSDR Pro for an even heftier 1970 EUR.
This pricing places it well above the Microtelecom Perseus, WinRadio Excalibur and Elad FDM-S2, all of which can be purchased for $1000 or less.
Who might benefit from the extra cost of the TitanSDR? Those who need a receiver with a very robust front end. With no less than 16 pre-selectors, the TitanSDR is a great choice for those living in the vicinity of blowtorch radio stations. If you’re looking for a stable, easy-to-use flagship SDR with a rock-solid application to support it, you might just splurge on this impressive SDR.
I always ask myself at the end of a review if I would purchase the equipment I’ve spent a couple of months evaluating. I can honestly say that if I had the money, I would not hesitate to purchase the basic version of the TitanSDR. With its four wideband and eight narrowband channels, it would more than suit my receiver needs as a broadcast archivist.
1,380 EUR buys the basic version of the TitanSDR – With four WB (Wideband) channels, eight NB (Narrowband) channels (to be allocated on WB channels) and VAC (virtual audio) interfaces to third party SW decoders, this is a solid and adaptable SDR.
1,970 EUR buys the TitanSDR Pro – With four WB channels, 40 NB channels (to be allocated on WB channels), VAC interfaces to third party SW decoders, basic LAN control and plug-in software interfaces (by LAN Ethernet) to software decoders CODE300-32 by Hoka Electronic (http://www.hoka.net/products/code300-32.html) and Krypto500 by Comint Consulting (http://www.comintconsulting.com/k500.html), this SDR can sing and dance.
View TitanSDR purchasing information and options on Enablia’s website: http://www.enablia.com/titansdr-receiver.html


 Thanks for sharing the recording and for including a few minutes of the RSI interval signal. RSI was always a difficult broadcaster for me to catch here in North America, though I heard them a number of times via the University Twente Web SDR.