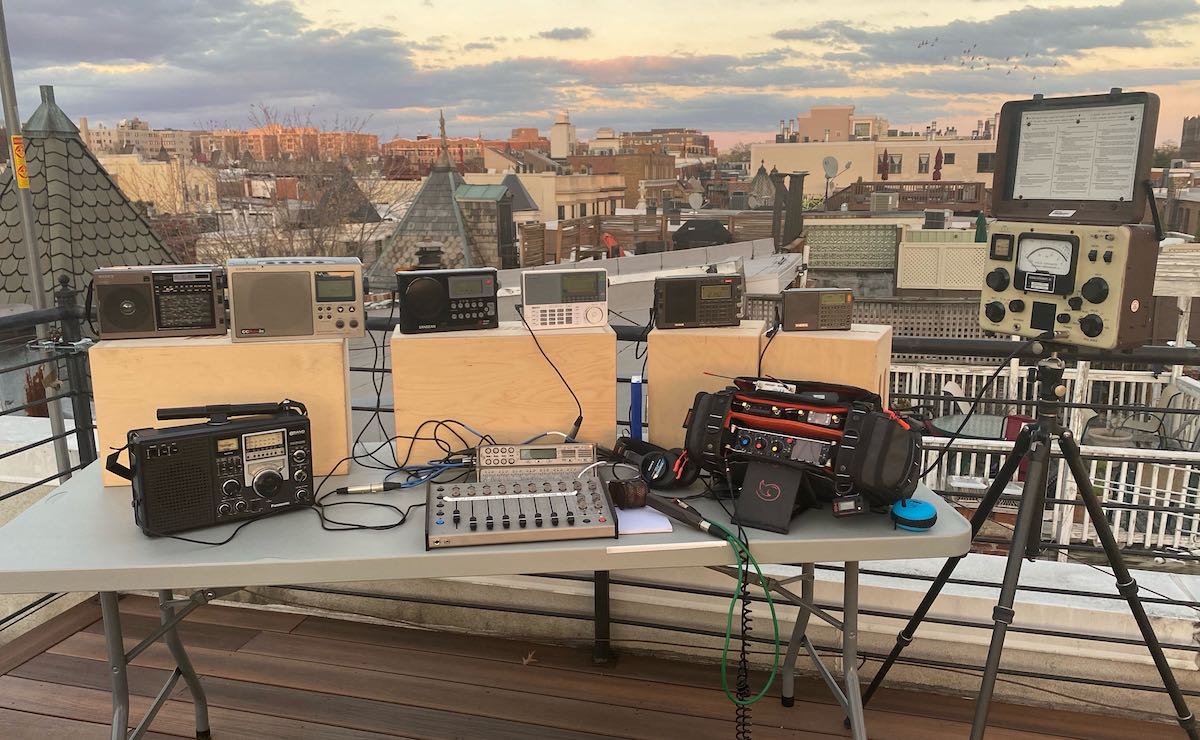
Many thanks to Loyd Van Horn who notes that he has launched a new website devoted to AM/FM DX. Click here to download his press release (PDF) and click here to visit his website!
Thanks for sharing, Loyd! Good luck with the new site–great design!
Many thanks to Loyd Van Horn who notes that he has launched a new website devoted to AM/FM DX. Click here to download his press release (PDF) and click here to visit his website!
Thanks for sharing, Loyd! Good luck with the new site–great design!
UPDATE 11 May 2020: We recently learned that the MSI.SDR software defined radio dongle in the following post and tutorial is a clone of the SDRplay RSP1 SDR. We did not realize this when the post was published. Grayhat had done research prior to purchase and believed it not to be a clone, but only using the same chipset as the RSP1 (hence the compatibility with SDRuno). We have confirmed that it is indeed a clone now via SDRplay (clear here to read more via the excellent RTL-SDR blog). What follows isn’t an SDR review. Indeed, Grahat’s post has little to do with the receiver and much, much more to do with building proper antennas! We’ve removed links to the MSI.SDR and would encourage you to invest in the excellent SDRplay RSP1a instead (click here to read our RSP1a review). Thank you for understanding!
Many thanks to SWLing Post contributor, Grayhat, who shares the following guest post. He lives in Italy and has been in lock-down since the beginning of the pandemic. He pitched the idea of building an entire SDR setup from scratch–receiver and antennas–for less than 150 Euros (roughly $163 USD). I thought it was a brilliant idea and I believe he thoroughly enjoyed the challenge of sourcing the components and building a mini antenna farm on his balcony while in quarantine:
by Grayhat
What follows doesn’t pretend to be some kind of “definitive guide” or “last word”, on the contrary, it’s aimed at people who have little or no experience with SDR but want to try putting together a decent station without paying an arm and a leg.
The idea of writing this came to me after reading a number of messages and discussions on various online groups/forums, in a lot of cases, someone bought an SDR (usually the ones coming with a telescopic whip antenna), and after connecting it was expecting it “just to work” or, better said, pretending that the SDR connected to that whip (usually placed on a table right near the computer) could receive ANY POSSIBLE signal, including transmissions coming from the “dark side of the moon.” 🙂 Those folks got scared by the fact that the SDR “didn’t work” and decided to give up; now, this short “guide” should allow anyone to setup what’s needed to have a working SDR
My self-imposed limitations for this project/experiment were the following:
With the above limitations in mind, I took pencil, paper and rubber eraser (high-tech instruments, indeed) and started writing down a list of the needed stuff, after some writing, wiping and second thought, I came out with the following list, available on Amazon:
The above includes all the needed stuff to put together a number of wire antennas (random wire, random dipole, loop…) the coax to connect the SDR, a balun to match the coax to the antenna and the accessory parts needed to put up the antenna. The selected SDR isn’t the common “RTL SDR” type, not that they don’t work, but their 8 bit ADC is far from being a good performer, so I decided to pick a different SDR which offers a 12 bits ADC and which also “presents itself” to the system as an SDRplay RSP1.
[Please note: we’ve since learned from SDRplay that the MSI.SDR is indeed a clone of the SDRplay RSP1. Here’s a post from the RTL-SDR blog confirming this. We recommend purchasing the RSP1a as a better alternative.]
Anyhow; all I can say is that after some tests, the MSI.SDR is a quite good unit and offers quite a lot of bangs for the buck, so I believe it may be a good unit for people willing to get their feet wet with SDRs
The above being said, here’s a pic of the MSI.SDR unit with the included stuff:
The unit is very small and the box has two connectors, an SMA for the antenna and a micro-USB (like the ones used in cellphones) for the USB cable which is used to both power and control it; the other bits are the telescopic whip antenna (around 98cm fully extended) with a magnetic base and a short run of coax, and the USB cable.
Once I got the SDR I decided to give the included whip antenna a try… well, to be clear, while it will allow you to pick up some strong local FM stations and maybe a bit else, it will only be useful to test if the SDR unit is working (before putting together our antenna), so don’t expect to receive much with that whip, yet… don’t throw it away, it may become useful (more later).
The other important piece is the BalUn. I picked a NooElec “Nine to One” v2, since I’ve used their v1 model and I’ve found it to work well, I decided to pick the newest model which has a better antenna wire connector. The BalUn, which is in effect a so-called “transformer balun” is really small and the junction box I bought is much bigger, but it isn’t a problem. All in all, the box may host a preamplifier in the future, but for the moment it’s fine for the balun. The following pic shows the balun “installed” inside the junction box:
The scissors are there to give you an idea of the sizes; to put together the whole thing, I started by preparing two pieces of wire (the 2.5mm one), made a turn with each wire and locked them with a nylon cable tier. Those turns will prevent the wire from sliding out and putting a strain on the balun connector. I did that since I didn’t have plastic washers at hand, otherwise you may just slide two plastic washers (or proper diameter) over the wires and use two nylon tiers to lock them. In either case, the idea is that the “loops” or the washers won’t slide through the box holes and will support that (little bit of) strain caused by the wire connection.
Next, I stripped some of the insulation from the ends and connected the wires to one of the balun connectors (I chose the one in the pic since I believe it’s the most suitable for this setup), at that point I continued cutting the smaller “ring” of the box insulation caps (the two at top and the bottom one). Then I placed a piece of carboard roll (from a kitchen-paper roll) at the bottom to serve as a support (you can see it below the balun). At that point, I slid the balun SMA connector through the bottom hole and used the SMA to BNC adapter to hold it, done so I slid the two wires (connected to the green wire connector) through the side hole and then inserted the connector into the balun. I then placed the other piece of paper roll above the balun and closed the box with its cap. As a note, to properly close it, start by inserting the screw into the cap holes till end, so that they’ll extrude from the bottom, then place the cap over the box and tighten the screws–you may need to use some force to properly tighten it.
Notice that the wire shown in the pic are SHORT, later on I replaced them with longer wires (outside the box) to be able to better connect the balun box to the antenna, but the remainder of the build is the same.
Now that I had my “balun box” ready, I measured the antenna wire and, using the paracord and some nylon tiers, I installed it. I also installed the “counterpoise” wire. For the latter, at first I tried just connecting the remainder of wire to the “gnd” of the balun, leaving the spool laying on the floor, but later on I decided to hang up the counterpoise and the final result was the following:
Not a work of art, but then since I was experimenting, I decided not to add PTFE and tape to allow me to quickly rearrange the antenna to run other configurations, yet, the whole setup worked quite well and stood fine to some wind and rain, the picture below shows the balun box with the antenna/counterpoise wires and the coax with the snap-on ferrite chokes.
Notice that to avoid putting strain on the balun wires, I used a wire clamp I had in my junkbox–the clamp is then tied to the paracord using a nylon tier and the paracord holds the assembly and keeps the antenna wire in position. The ferrite chokes aren’t properly seated, and I’m planning to remove and re-place them, but for the moment they’re okay. The balcony faces to south/south-west so the antenna has a free horizon of about 270 degrees ranging from the Adriatic coast to the Appennines (Mt. S.Vicino can be seen behind the paracord)–not bad. Here’s another pic showing the horizon to West, just to give you an idea:
Getting back to the antenna installation, the other end of the antenna wire is tied to the opposite side of the balcony as shown below (let aside the tent/awning, I raise them when using the SDR, also, the bowline knot isn’t correct, I’ll need to tie that again):
The counterpoise instead is supported by a lamp I’ve on the terrace, here’s it’s setup:
The “paracord” goes down to a plastic bottle filled with a water/chlorine mixture which serves to keep it in place. The remainder of the wire is just hanging down for about 1.5 meters (the counterpoise is shorter than the antenna wire, it’s about 2/3 of its length).
Ok, time to put the antenna and SDR to test, so I brought the coax inside home, connected the other SMA to BNC adapter to the SDR and connected the coax going to the antenna. Note that 15 meters of coax is enough for me, but if one wants a length of up to 25 mt, it won’t be a problem.
I already installed the SDR software, in my case since the unit identifies itself as an “SDR1” I downloaded the SDRPlay “SDRuno” software https://sdrplay.com/windl2.php and since I was at it I also downloaded the PDF manual https://www.sdrplay.com/downloads/ and the “CookBook” http://www.nn4f.com/SDRuno-cookbook.pdf and I heartly recommend reading and digesting them before starting the whole thing (while you wait for all the stuff to be delivered). An important note is that you MUST install the SDRuno software BEFORE connecting the SDR since that way, the SDRuno setup will install the proper drivers and you won’t have issues.
Anyhow, I connected the coax to the SDR and then it was time to fire up the whole thing and give it a spin; so I powered up the laptop (technically, a “transformable” laptop/tablet), started SDRuno, opened the “RX control” and “Main Spectrum” windows and then clicked the “play” button, clicked the “broadcast” band, and the “MW” one and got this:
Not exceptional maybe, but not bad, either; in particular if one considers that it’s from a quite short piece of wire which isn’t exactly placed in an ideal position.
So I went on and explored the bands a bit. On ham bands the SDR picked up signals from the whole mediterranean basin (Cyprus, Lebanon, Spain and then some) and from north too (Russia, Germany, Denmark); then depending on time, I was able to clearly receive broadcasts from China, South America, Africa and more ham QSOs from a lot of places.
I must admit I didn’ record the callsigns or stations identifiers (“guilty” your honor–!) but I was more focused on testing the SDR and antenna than running a “DX session” at any rate. On the BCB bands I picked up WWV, BBC, VoA, China Radio International, Radio Free Asia, Radio Romania and a bunch of others from Middle East, Asia, Africa and South America. While on the ham bands, I was able to pick up some quite interesting QSOs and then… well, I went hunting for higher frequencies signals!
I got Police, Ambulances, Air control…so even if that “piece of wire” isn’t optimized for VHF/UHF it seems to be working decently there too. By the way, when changing bands you may (and probably will) need to adjust the gain control, but that will be almost the only thing needed to pull in signals
At the end of the day, I can say that I’m quite pleased with the performance offered by this simple and cheap setup. For less than 150 euros you have everything you need, not just the SDR.
Sure, the setup may be improved, but then again you’ll have all of the basic parts, so you won’t need too much. For example, if you live in a really noisy environment, it would be a good idea to use a loop antenna. You would only need a “cross shaped” support (PVC pipes or wood will do). You could quickly put together the SRL (Small Receiving Loop) designed by Matt Roberts (KK5JY) http://www.kk5jy.net/rx-loop/ the balun will be the SAME (yes, no need to wind whatsoever!) so building it will just be a matter of assembling a cross shaped support for the wire (which we already have because it’s the same used for the wire antenna) and you’ll have it. While I already tried the SRL, I didn’t build one to test with this SDR, but I’ll probably do that as soon as SWMBO will start complaining about those “wires on the balcony.”
Also, at the beginning I wrote “more later” when writing about the telescopic whip included with the SDR. Here’s the idea–it requires soldering, so if you don’t want that, skip this: remove the adhesive sheet on the bottom of the antenna base to expose the bottom cap and then remove (extract) the bottom cap. You’ll see a magnetic ring and a “bell shaped” piece of metal (the “ground” for the whip). In the middle of the “bell” there will be the antenna connector which is soldered to the coax wire with a nut holding the connector (and the “bell”) in place. De-solder the coax, unscrew the antenna connector and extract it, at that point you’ll have the telescopic whip and its connector, now you may use them to build the active “whip” antenna described here:
http://www.techlib.com/electronics/antennas.html#Improved%20Active%20Antenna
Notice that it is NOT the “usual” active whip–the circuitry and idea behind it is totally different–yet it works fine and will serve you from VLF (not kidding) up to around 100MHz. It might be a good companion for the SDR. It won’t be as quiet as the loop, yet it may be a valid “all rounder.”
To conclude, I believe that the setup described above is something anyone can afford. You don’t need to be an engineer or to have special knowledge or abilities–it’s just a matter of putting together some bits and pieces.
Obviously, this setup doesn’t require a large space and offers good performance across the bands. Plus it’s so easy to improve since the 12bit SDR is a good starting point
All the best everyone and STAY HOME, STAY SAFE !
Thank you so much, Grayhat!
I love the fact that you invested (however modestly) in a proper antenna setup to better serve you rather than relying on the basic whip antenna that comes with the SDR. You’re right: too often, we invest a receiver, yet invest no money or time into building an appropriate antenna. The antenna is the most important component in a proper radio setup and those included telescoping whip antennas simply don’t perform well on the HF bands.
Based on our correspondence, I know you had fun piecing together this little system using a simple bill of materials and items you had on hand during the Covid-19 quarantine. Thank you for sharing it here with your SWLing Post community!
Because I keep my ear to the waves, as well as receive many tips from others who do the same, I find myself privy to radio-related stories that might interest SWLing Post readers. To that end: Welcome to the SWLing Post’s Radio Waves, a collection of links to interesting stories making waves in the world of radio. Enjoy!
Many thanks to SWLing Post contributors Ron, Andrea Borgnino, and Tracy Wood for the following tips:
Non-official radio stations always attracted shortwave listeners who call them “clandestines”, follwing a mixture of mis-understanding and romanticism. The range of this class of stations is remarkably wide. Nowadays, the majority of them is renting time from major transmission centres like Nauen/Germany, Issoudun/France or Toshkent/Uzbekistan.
As all media, they are put into service to influence people and to sell something by propaganda. The difference between an official broadcaster, like Voice of America, and a “clandestine” like North Korea Reform Radio is not palpable – both are financed by the U.S. Congress.
With most broadcasters transmitting on a scale between facts (“white” – nearly only the BBC) and sheer disinformation (“black”), clandestines are placed on the darker third of this range. The separation between “clandestine” and “official” is rather artificial. There simply is no difference between e.g. the official World Harvest Radio and the clandestine Voice of Wilderness, both religious brodcasters, funded by Cornerstone Ministries International/USA – to take just two religious stations.
Today’s activity of clandestines is concentrated on Africa and Asia with especially taking countries like North Korea, China, Eritrea and Sudan into focus.[…]
In anticipation of its upcoming move, the FCC has adopted a new FCC seal. The redesigned seal is the product of an agency-wide contest that solicited proposals from employees and contractors. The winning design, submitted by Umasankar Arumugam, was selected by a vote of the agency’s employees and contractors.
The revised design incorporates several elements: communications technologies currently transforming our world; four stars on the outer seal border, drawing from the legacy of the predecessor Federal Radio Commission seal; 18 stars on the shield, recognizing the current number of bureaus and offices; and the eagle and shield, identifying the FCC as a federal government agency.[…]
The notion of WNYC becoming the flagship station of a non-commercial network of cultural stations was first publicly articulated by Mayor La Guardia at the launching of the station’s new WPA-built transmitter facility in Greenpoint, Brooklyn on October 31, 1937. La Guardia envisioned a non-commercial/educational radio network connected via shortwave rather than expensive landlines leased by AT&T, but the FCC prohibited interstation communication by means other than wire when wire is available. At the ceremony La Guardia sharply criticized the FCC prohibition: “That is just as nonsensical and as unreasonable as to say that one isn’t permitted to fly from here to Chicago because there are railroads going from here to Chicago. Of course, all this is very good for the New York Telephone Company, but it is not so hot for us.”[…]
On behalf of Radio Amateurs of Canada, I would like to thank you for your continued support of Amateur Radio in Canada and internationally.
Your membership has helped RAC in its two primary objectives: to support and promote Amateur Radio in Canada and internationally; and to provide valuable programs and services to RAC members (see below).
As a result of the COVID-19 global pandemic, the RAC Head Office in Ottawa has been closed temporarily and we are no longer able to send out membership renewal notices by mail and we will be sending out email notices instead.
We would appreciate it if you would please watch for these messages in your inbox and also in your junk folders – this is especially true if you have Outlook or Hotmail email addresses.
In addition, you can assist us by checking to see when your membership will expire by logging on to the RAC website and going to the “My Membership” webpage (https://www.rac.ca/my-membership/). You can also find it on the mailing label of the paper version of The Canadian Amateur magazine or by calling the RAC office as described below.If you need to renew your membership you can do so by using one of the following options:
- Online: by completing the online renewal form (or by clicking on the “Join Radio Amateurs of Canada” logo on the top right of the RAC website). Payments must be made by credit card or by PayPal.
- By phone: by calling 877-273-8304 from 10 am to 4 pm EST/EDT, Monday through Friday (except statutory holidays). You may pay by credit card or you may send a cheque for the appropriate amount to the RAC head office.
- By mail: if you prefer to have your renewal form processed via standard mail, you can download an application for your region from the Membership Renewals webpage and mail it to the RAC Office.
73, Glenn MacDonell, VE3XRA
RAC President
Please consider supporting us via Patreon or our Coffee Fund!
Your support makes articles like this one possible. Thank you!
Many thanks to SWLing Post contributor, Mario Filippi (N2HUN), who shares the following guest post:
by Mario Filippi
During the pandemic a source of local information for residents in certain areas of the country can be found on Emergency Advisory Radio stations that dot the country and provide 24/7 information pertinent to a community. Not all communities have these stations, which can be found from 1610 – 1710 kHz and operate at varying power outputs.
For example, a station I regularly hear is WRBX655 about 12 miles away in Franklin Township, NJ operating on 1630 kHz : https://www.franklintwpnj.org/Home/Components/News/News/6384/1130?cftype=News
At the moment it is broadcasting information on COVID-19 from the Center for Disease Control. Every EAS station has a call sign and wattage generally is from about 10 – 50 watts. However some stations do not necessarily announce their call signs so you can check theradiosource at: http://www.theradiosource.com/resources/stations-alert.htm
Now some of these stations are part of the HAR (Highway Advisory System) that broadcast on major roadways and usually have prominent road signs announcing where to tune your car’s AM radio for latest traffic conditions. These stations were also termed TIS (Traveler’s Information Stations) at one time and were the precursors of HAR. However, over the years the FCC allowed more leeway on what information could be broadcast and as a result these EAS stations appeared in communities and even state parks.
You can look up the locations of these stations to ascertain if one serves your community but the best way is to tune regularly from 1610 – 1710 kHz. The optimal time to listen is during daylight hours as propagation changes greatly after dark and you’ll hear commercial AM radio stations coming in and overpowering most EAS. As for range, I’ve heard HAR stations as far away as 40 miles depending on ground wave conditions which can vary greatly. QSB is common. Many of these stations will rebroadcast NWS weather information when no pertinent emergencies exist and that is another way to spot them. Some highway stations I’ve heard will begin each broadcast loop with a tone, they’re all different in their approach.
Attached [at the top of the page] is a picture of the author’s Yaesu FRG-100 tuned to WRBX655 from Franklin Township, New Jersey. For an antenna I’ve used a 31 foot vertical and a loop and success will depend on using an outdoor antenna but when away from the home QTH, I’ve heard many of these stations while traveling on the roadways of America, They’re a good break casual AM radio listening. Give it a try.
Thank you, Mario! I must admit that when I travel, I often hunt down EAS transmitters via my car’s AM radio. Besides being a good source of local information, I do know some DXers who’ve identified and logged an impressive number of distant stations when conditions were ideal.
If you live outside the US, do you have similar networks for local information? Please comment!
Many thanks to SWLing Post contributor, Carlos Latuff, who recently shared a video clip of a Spanish language station he received in Porto Alegre, Brazil. Carlos is curious if it could possibly be Rádio Rebelde in Cuba. He said he received this station early in the morning (local) on Sunday, April 26:
https://youtu.be/Yuxuv74P3Gw
If you can help Carlos ID this station, please comment!
Many thanks to SWLing Post contributor, Mario Filippi (N2HUN), who shares a find in the QRZ.com online swapmeet: Talking House Broadcasters.
If you’re not aware, Talking House Broadcasters are AM transmitters that were designed to be used by real estate agents so that potential customers could drive by a house on the market, tune their car’s AM radio to a specific frequency, and listen to a pre-recorded message.
I’ve also been to ARRL Field Day sites where a Talking House Broadcaster was used to relay information about the Field Day activities to visitors.
Of course, I would use one of these to broadcast my own music and Internet radio streams throughout my house. If I didn’t already have an SSTRAN AMT3000, I would snap one of these up in a heartbeat!
The AM output power is FCC Part 15 compliant, but with a good antenna/ground, you might be surprised at the signal’s footprint!
The seller currently has three working units he’s priced at $25/each or $50 for all three. Even as used units, this is a fantastic deal!
Click here to check out the ad on QRZ.com.
Assume if the link above is broken or missing, the items are all sold. Thanks again for the tip, Mario!
Because I keep my ear to the waves, as well as receive many tips from others who do the same, I find myself privy to radio-related stories that might interest SWLing Post readers. To that end: Welcome to the SWLing Post’s Radio Waves, a collection of links to interesting stories making waves in the world of radio. Enjoy!
Many thanks to SWLing Post contributors Kim Elliott, Dave Anderson, and Paul Evans for the following tips:
Almost all new cars include so-called “infotainment systems,” which provide navigation and various sources for music and news. Most companies have begun to outsource these systems to the Silicon Valley mainstays such as Apple, Amazon, and Google. The electric car manufacturer Tesla, however, has developed its own infotainment system that is far more integrated with the car itself.
Tesla recently announced an “upgrade,” which would allow users to watch Netflix, Hulu, and YouTube (when the car is parked). This innovation has a flip side: it removes AM / FM radio capabilities. Tesla and other electric car manufacturers claim they have removed AM radio in many of their models due to concerns over interference. But Tesla’s announcement is peculiar because electric engines do not interfere with FM radio reception.
Former FEMA director Brock Long worries that Tesla’s decision could prevent the government from transmitting crucial information in emergencies. Long’s concerns are valid, particularly in a crisis like the ongoing pandemic, when broad communication with the public is necessary to protect national security. AM/FM radio reach places that television and broadband do not, and that is why the government has invested tens of millions of dollars to ensure radio stations can remain on the air during periods of widespread threat to the public – including the current one. As the coronavirus reminds us, our nation still has public safety needs that no amount of technical wizardry can obviate.
The public safety concerns are real, but Tesla decision to remove AM/FM radio also raise the perennial tech issues of privacy and competition.
Tesla has contracts with tech companies such as Spotify and Pandora, many of which are pay services. These tech companies are no doubt pleased that Tesla is contemplating taking out AM/FM radio, which is still the most listened to audio platform—and constitutes meaningful competition. However, these conflicting interests creates mismatched incentives for Tesla.
Because Tesla’s market share is small, and the upgrade is optional, this conduct likely does not rise to anything close to an antitrust violation. However, the vertically integrated model which Tesla is following raises the same type of concerns as when Big Tech firms pick and choose what apps and services customers can favor. If Google, Apple, and Amazon, which have their own podcast and streaming audio services, begin to demand that auto manufacturers carry their services exclusively, then more serious competition problems will arise.[…]
You may sometimes see the Crosley name today on cheap record players, but from what we can tell that company isn’t connected with the Crosley Radio company that was a powerhouse in the field from 1921 to 1956. [Uniservo] looks at two of the very early entries from Crosley: the model VIII and the XJ. You can see the video of both radios, below.
The company started by making car parts but grew rapidly and entered the radio business very successfully in 1921. We can only imagine what a non-technical person thought of these radios with all the knobs and switches, for some it must have been very intimidating.
The model VIII had two large knobs, three small knobs, and a switch. Oddly enough there were very few markings on the knobs, as you were expected to know how to use a tuned RF radio. The large knobs were for tuning capacitors and the switch was for coil taps, while the three small knobs controlled the tube filament supplies.[…]
The rate at which amateurs are joining CW clubs has gone through the roof with ‘lockdown’.
The fastest growing club (SKCC) has tripled its daily new members rate and is now increasing by 14-15 per day. Information and files can be found at: http://www.g4bki.com/club_call_history.htm
Contest University 2020 will be held online free via Zoom (Link will be available on May 7th)
Thursday, May 14th 9:00 am EDT
CTU 2020 outline is available on the 2020 Course Outline Page
Please consider supporting us via Patreon or our Coffee Fund!
Your support makes articles like this one possible. Thank you!