Tag Archives: Elad FDM-S2

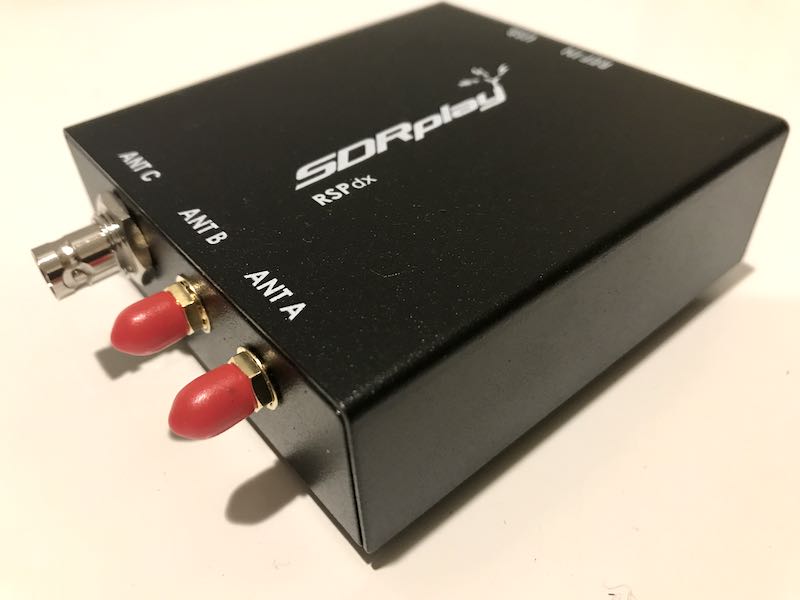
Mike compares the SDRplay RSPdx on mediumwave and longwave

Many thanks to SWLing Post contributor, Mike Ladd with SDRplay, who shares the following videos comparing the new RSPdx with a number of benchmark SDRs:

SDRplay RSPdx and ELAD FDM-S2 weak NDB station

SDRplay RSPdx and ELAD FDM-S2 medium wave selectivity

https://youtu.be/ah5Zu8qgvp8

SDRplay RSPdx and Airspy HF+ Discovery medium wave selectivity

SDRplay RSPdx and Airspy HF+ Discovery weak NDB station

SDRplay RSPdx and Microtelecom Perseus medium wave selectivity

SDRplay RSPdx and Microtelecom Perseus weak NDB station

Spread the radio love

Radio Travel: A complete SDR station for superb portable DXing

Many thanks to SWLing Post contributor, Don Moore–author of  Following Ghosts in Northern Peru–for the following guest post:


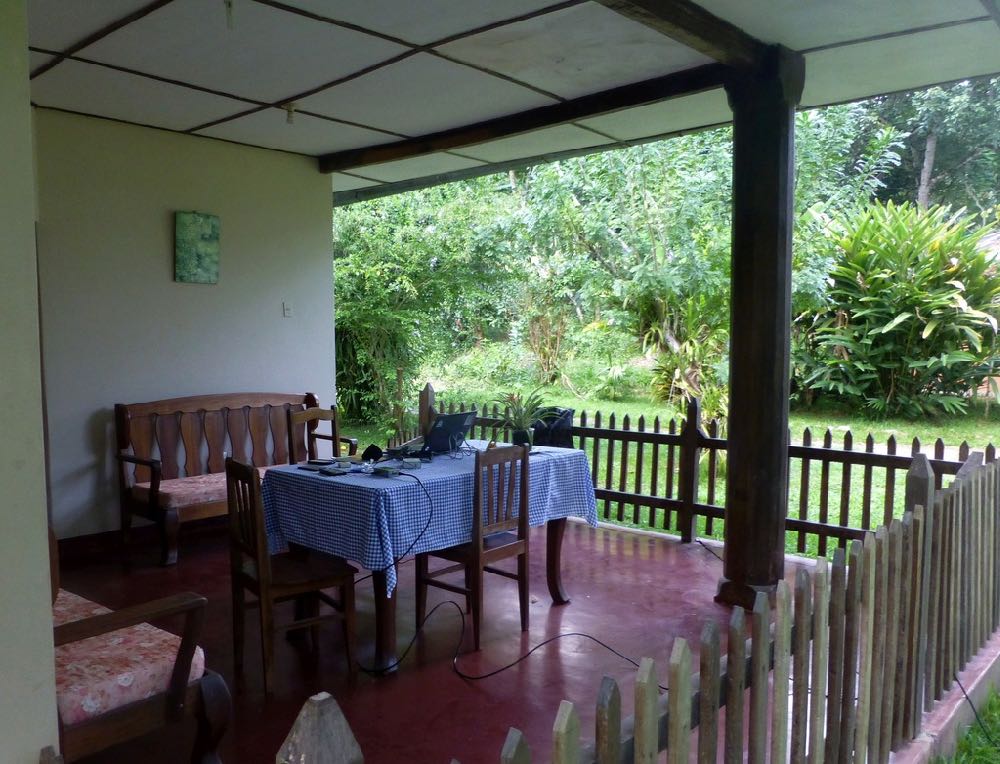
One of my favorite DXing locations was this little cottage at the El Rancho Hotel just outside San Ramon, on the edge of the Amazon jungle in Peru. At $18/night, including breakfast, the hotel was a bargain, and there was plenty of room for my delta loop.

A Guide To Vagabond DXing

By Don Moore

Ever since I served as a Peace Corps volunteer in Honduras in the early 1980s, Latin America has been my primary focus for both DXing and traveling. So when I retired in 2017, my main goal was to begin taking long annual trips . . . and I do mean long. From October 2017 to May 2018, I traveled through Peru, Ecuador, and Colombia visiting about fifty different towns and cities. This year, I’m on a five-month trip through southern South America. In Latin America you can get just about anywhere cheaply and easily by bus, so that’s how I get around. It’s also a great way to meet people and to see the countryside. But luggage can become a burden, so I limit myself to a single mid-sized wheeled suitcase and a large knapsack. And that means that my mobile DX shack has to be very carefully planned.

Your plans may not include multi-month odysseys like mine, but I think my experiences will help you prepare to DX on your next trip, wherever it might be. Of course, what makes a good mobile DX shack depends on what your DX interests are. I consider myself a station collector, in that I want to make loggings of lots of new and different stations and to build up an understanding of radio broadcasting in different regions. So on my travels I concentrate on the medium wave broadcast band and longwave beacons, with maybe little bit of shortwave utility DX. (There’s not much on shortwave broadcast that I can’t also hear at home.)

Take the DX Home With You

For years my standard DX travel gear was a Sony ICF-2010, a cassette recorder, and an old Radio West ferrite loop antenna. But listening time was always limited since it was a vacation. There were other activities on the agenda and I was generally too tired to get up early for DXing. I always went home with some interesting loggings and audio recordings, but once I left for home the DXing was done.

SDRs have changed all that and now my first rule of travel DX now is take the DX home. The best souvenir of a trip is the hundreds of hours of DXing that I take home with me. In a 2016 trip to central Colombia, I made about 300 MB of recordings of the medium wave band. While listening to them later I logged over 400 stations from twenty countries (and I still have about half the files to go through). I never would have even gotten close to that many stations listening on my Sony like an ‘old-fashioned’ DXer, hi!

Lately, I’ve been accumulating SDR files much faster than I could possibly go through them, so it’s a fair question to ask what the point is. When will I ever listen to them all? Like most DXers, I’m not fortunate enough to live in a perfect DX location. When conditions are mediocre, I’d rather spend my DXing time going through some more interesting SDR files.  And, I know I’ll have lots of good DX waiting for me years from now when I’m no longer able to travel the way that I do now. For me, SDR recordings make much better souvenirs that some cheap tourist trinkets that will gather dust on a shelf. It doesn’t matter whether your travels take you to a nearby park or to a distant continent. SDRs can preserve the DXing experience for years to come.

My Mobile DX Shack

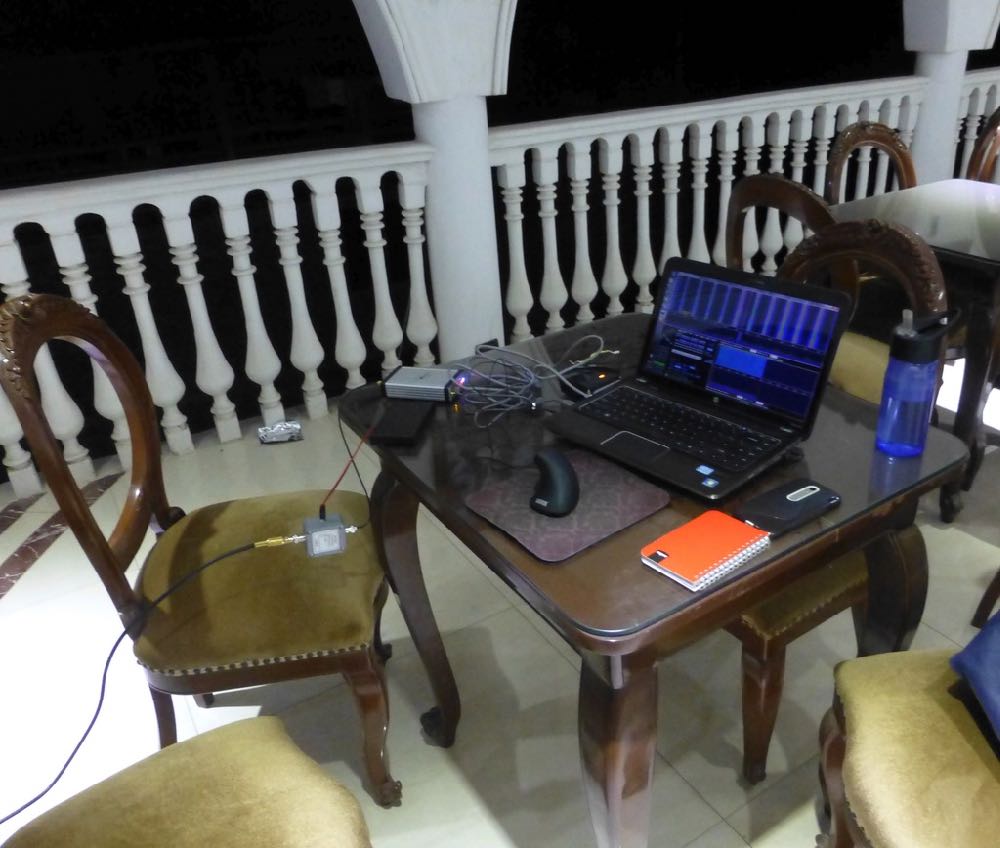
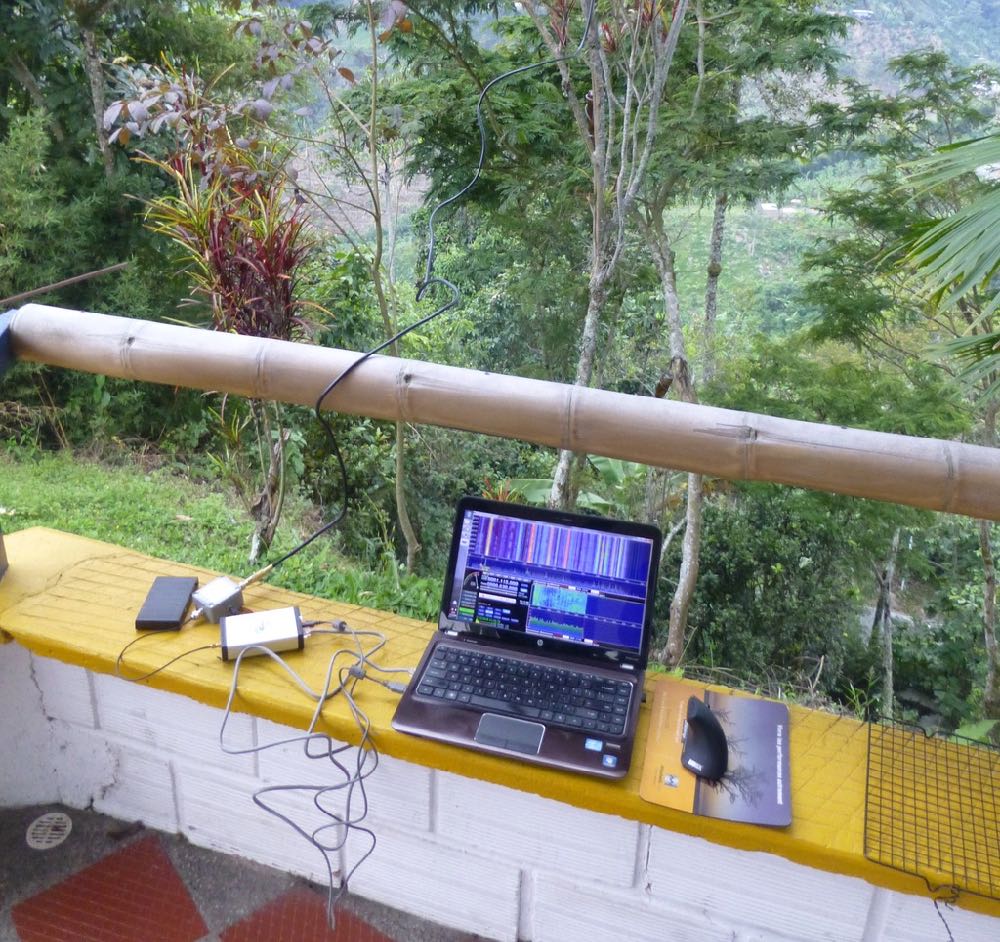
This is my typical DXing setup with the Afedri. The rooftoop terrace at the Hotel Rosa Ermila ($10/night) in Cascas, Peru was the most elegant place I’ve ever DXed from, but reception was only average with the PA0RDT dangling from the railing.

The centerpiece of any DX shack is the receiver. On my 2017-18 trip, I had an Afredri SDR-Net with an SDRPlay RSP1 as a backup, but this year I replaced the Afedri with an Elad FDM-2. Together, my two SDRs are smaller than all but the smallest portable receivers. Of course I also need a laptop, but I’m going to take one anyway. An important consideration in selecting a travel SDR is to get something that is powered off the laptop’s USB connection so that it is easy to DX totally off battery power if line noise becomes an issue.

The other vital component of DXing is the antenna. A good on-the-road antenna for SDR DXing has to be small, easy to erect, broadband, and versatile. That sounds like a lot to ask, but the perfect DX travel antennas do exist.

For compactness and ease of use, nothing can surpass the PA0RDT mini-whip. How good is it? That’s what I used to log over 400 medium wave stations in Colombia in 2016. I just attached the unit to my coax and threw it about three meters up into a short tree. The antenna works best when mounted away from nearby structures, but sometimes I’ve gotten decent results placing the PA0RDT on balconies and windowsills of tall buildings. It’s mostly a matter of luck as to how bad the local noise levels in the building are and how much the building itself may block signals. Using a short support, such as a broom or a hiking pole, it may be possible to mount the unit a meter or so away from the building.

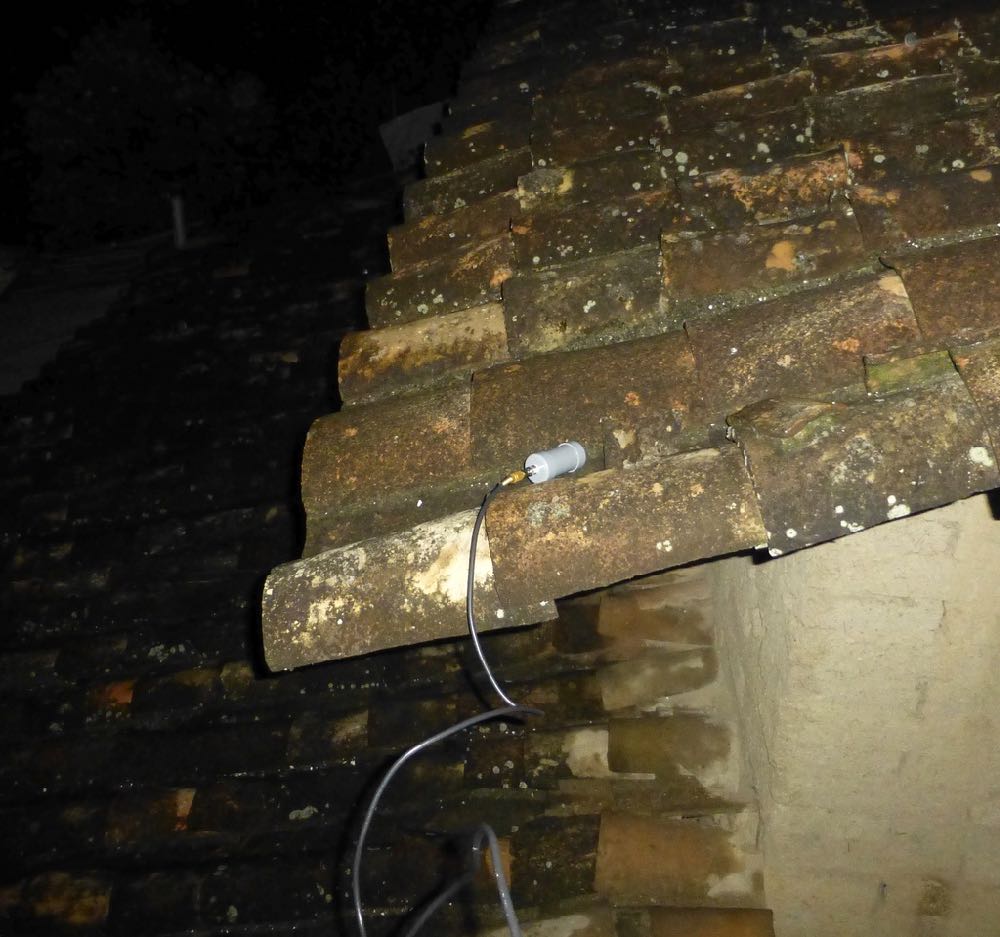
While it’s best to mount the PA0RDT away from obstructions, the antenna might give good results anywhere, even on the neighbor’s roof. (Just make sure it’s not likely to get stuck. Pulling the unit out of a stubborn papaya tree is no joke.)

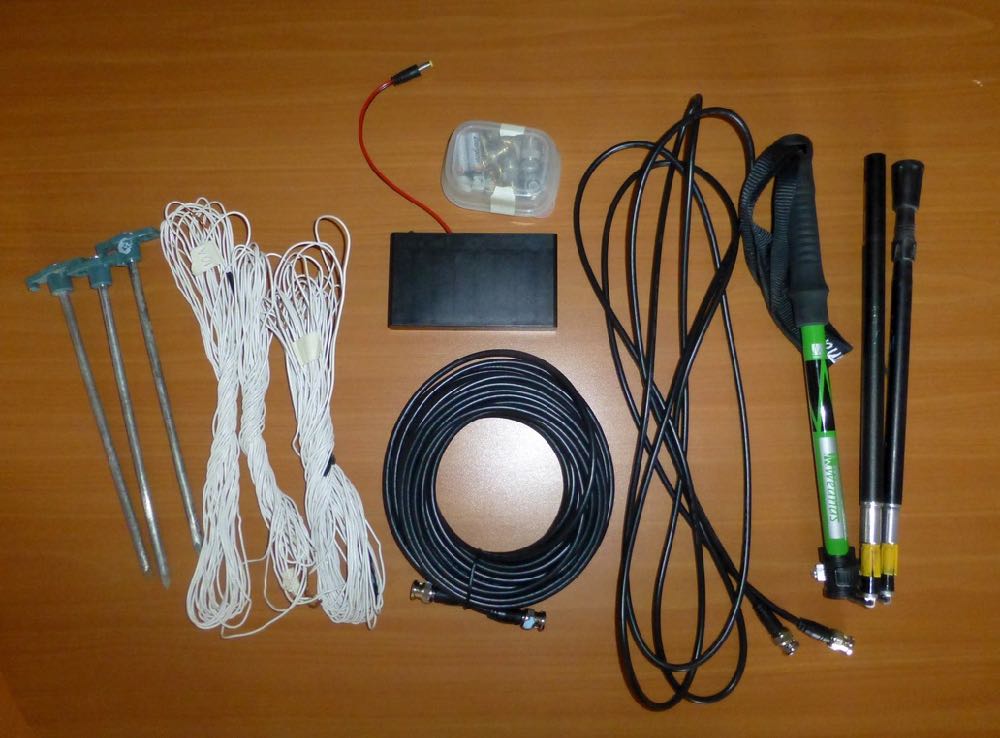
The biggest drawback of the PA0RDT for serious MW and LW DXing is that it is non-directional. For a directional antenna, a Wellbrook loop is great if you’re traveling by car, but that one-meter diameter aluminum loop doesn’t fit in my suitcase. Fortunately, a few years ago Guy Atkins and Brett Saylor told me about an alternative: buy a Wellbrook ALA-100LN unit and attach it to a large homemade wire loop. Now my travel kit includes two nine-meter lengths and one eighteen-meter length of #18 stranded copper wire. The wires can be spliced together for loops of 9, 18, 27, or 36 meters circumference, according to what fits in a location. Erection of a wire loop is easy enough with a suitable tree branch. I just throw the wire over the branch and then form it into delta (with the bottom running just above the ground) using two tent stakes and some short cord to hold the corners. The ALA-100LN unit goes in the bottom center.

Items that go in my suitcase, left to right: tent stakes and wire for the Wellbrook loop, a small box with more adapters, another battery box, 50 foot coax, 12 foot coax, and my hiking pole. The pole doubles as a support for the PA0RDT sometimes.

The loop doesn’t have to be in a delta; that’s just often the easiest to erect. I’ve successfully used squares, rectangles, trapezoids, oblong diamonds, and right angle triangles. Any balanced shape with the ALA-100LN in the bottom center should be bi-directional in a figure-eight pattern. Non-balanced shapes will work equally well but with unpredictable directionality. Just keep the wire in a single plane and place the ALA-100LN unit someplace along the bottom.

Both the PA0RDT and the Wellbrook require a 12V power supply. The North American version of the Wellbrook comes with an excellent noise-free 110V power supply, but that’s of no use in 220V countries and also I want to be able to DX totally off battery power when necessary. Fortunately both antennas use the same size power connector, so I carry three eight-cell AA battery packs for remote power.

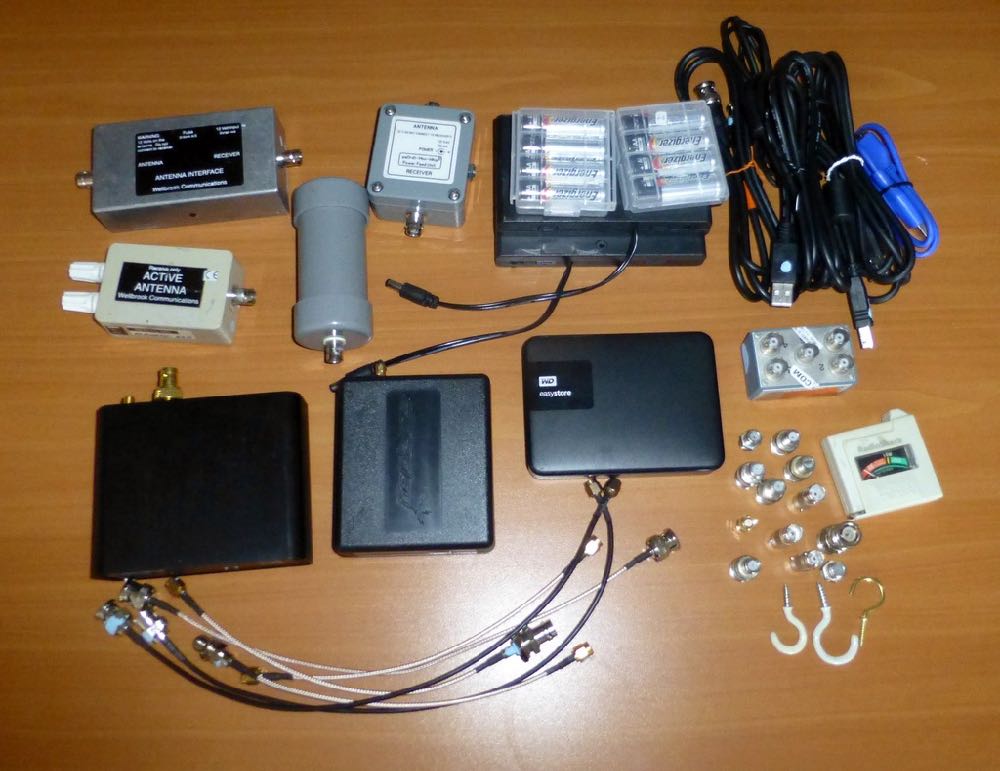
Contents of the DX box, clockwise from upper left: the two pieces of the Wellbrook ALA-100LN, the two pieces of the PA0RDT mini-whip, two 8xAA battery boxes and a set of batteries, USB and coax cables, a passive 4-way antenna splitter, battery tester, various adapters and cup hooks (for securing wires), 4TB hard drive, the SDRPlay RSP1, the Elad FDM-2, and more short patch cords.

My mobile DX shack is rounded out with everything that is needed to connect the parts together. I have at least four of every adapter and patchcord, since I know they won’t be easy to replace on the road. For lead-ins, I have 12-foot and 50-foot lengths of lightweight coax with BNC connectors. I also have a few F-to-BNC adapters so I could buy some standard TV coax if needed. A 4 TB hard drive provides plenty of space the SDR recordings I plan to make. (Before leaving, I fill it with videos that I can delete after I watch them or when I need space.) For DX references, I download various station lists online so that I have them available even if I don’t have an Internet connection. It’s also important to keep those lists with the SDR files from the trip so that if I’m listening to the files years from now I’ll have references which were current at the time.

Airport Security

A common concern for traveling DXers is getting through airport security. When I went to Colombia in 2016, I wrapped my DX gear in clothing for protection and then stuffed everything into my backpack. Security didn’t like what they saw and I had to empty the bag so that every single item could be examined and swabbed for explosive residue. The TSA lady was very nice about it, but I wanted to minimize the chance of that happening again.

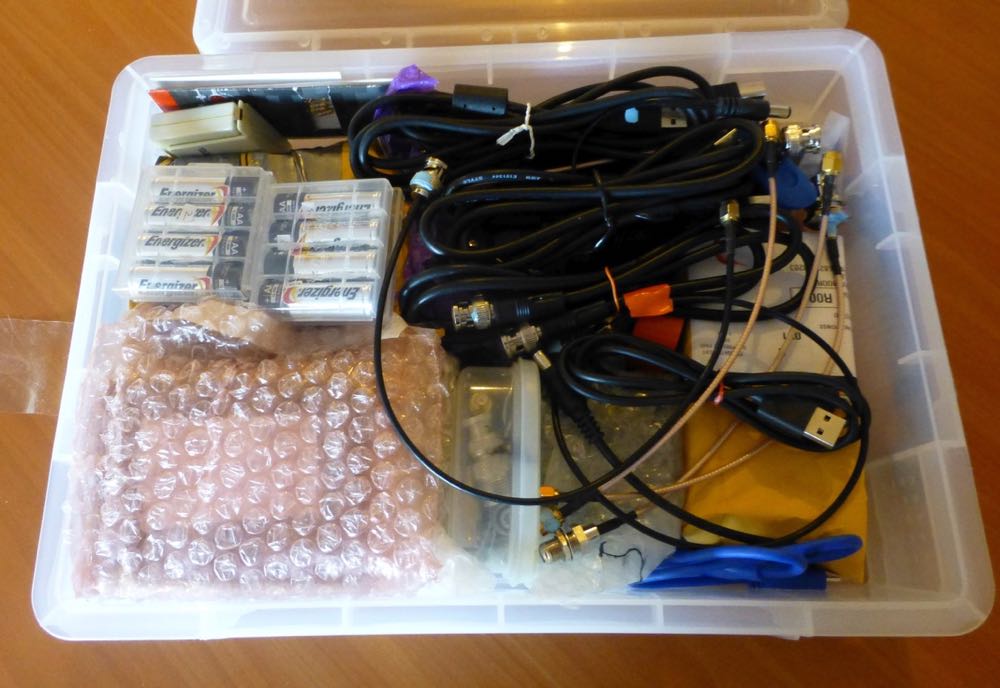
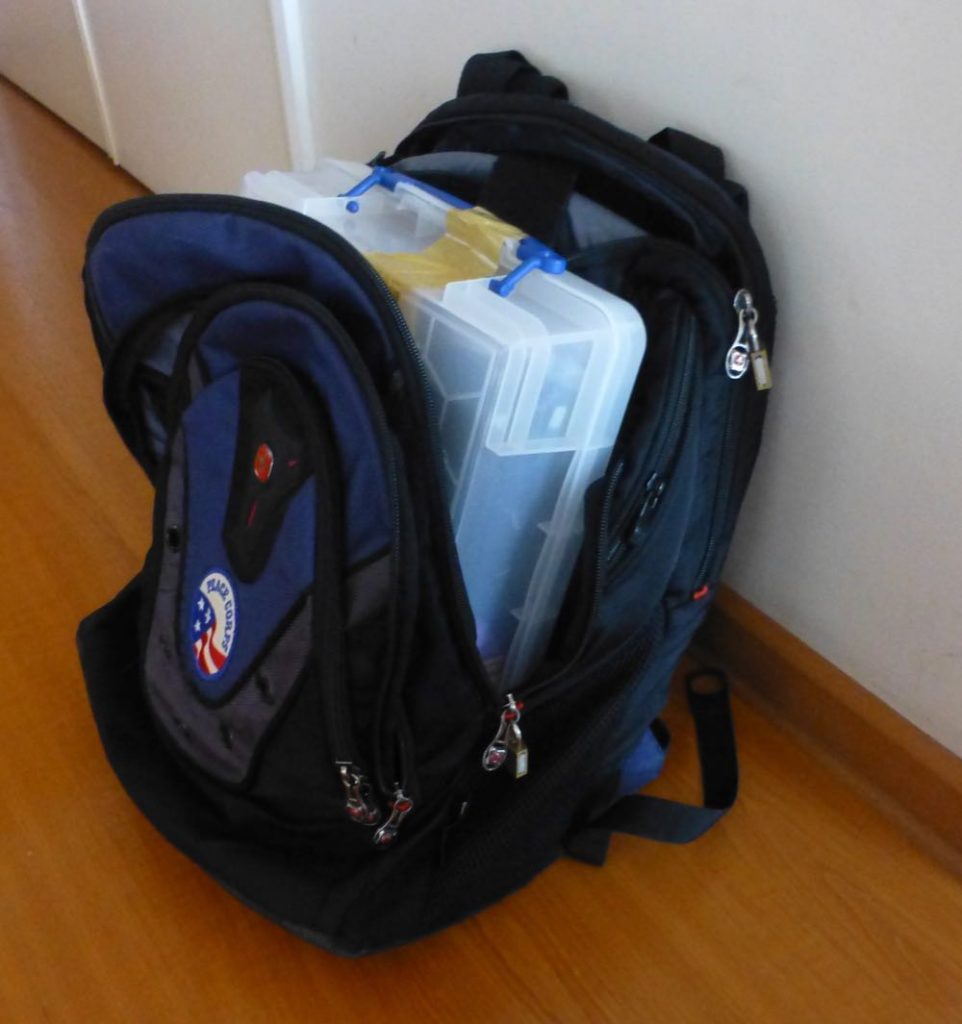
At an office supply store I found a plastic storage box that fits inside the main pocket of my backpack. My SDRs, antenna components, and hard drive get wrapped in bubble wrap and all placed together in the box along with small cables, adapters, etc. Larger items – the wire, coax, and stakes for the loop – get packed in my checked bag.

The DX Box packed and ready to go.

At the airport, I slide the box out of my backpack, place it into a cloth shopping bag, and then send it through the X-Ray machine on its own so that the agent can get a close look at the contents. So far in about a dozen security checks in the USA, Peru, and Mexico, the box of gear hasn’t caused so much as a pause on the conveyor belt. And, if the box would get pulled for a closer look, at least I won’t have to empty the entire backpack again.

Most of my equipment fits in this plastic box which slides into my backpack.

Where to DX

A mobile DX shack isn’t worth anything without a suitable place to DX from. Hotels may work if you have a balcony where you can put a small antenna, but more likely than not there’ll be problems with RF noise. The best hotels are ones that are a collection of cottages or bungalows or that otherwise have an open yard-like space for an antenna. My favorite place to find possible DXing sites is on AirBnB. It’s often easy to find AirBnBs that are on the edge of town or even in the countryside with lots of space. Of course, since I don’t have a car, I need to make sure I can get there using public transportation.

While visiting Huanchaco, Peru with DX friends Karl Forth and John Fisher, we had a beach-front apartment with an adjoining rooftop terrace. We had excellent results with an oblong loop and the ALA-100LN on the terrace.

The key to selecting a DX location is to examine all the photos very carefully. Is there open space for the antennas? Are there trees or other potential supports? Is there a gazebo, terrace, or other space that could be used for DXing? Google satellite view and Google street view can be very helpful in scouting out a location (And it’s surprising how much of South America is now on Google Street View.)  And, I always look for possible noise sources. One place I almost rented in Colombia turned out to have high voltage power lines running next door when I found it on Street View.

I always tell the hotel staff or AirBnB host what I’m doing so that they understand why the gringo has wires running around. And I make sure not to put my antennas or coax anywhere that might interfere with the employees or other guests. Most of the time I’m able to erect the antenna near my room and run the lead-in into my room through a window. Then I can leave my laptop running all night to make scheduled SDR recordings. That’s the Holy Grail of DXing – catching the overnight DX while you sleep. But if my room turns out to have too much RF noise (as has been the case a few times), then I head out to the gazebo or terrace to DX using battery power.  That does mean I have to stay up late or get up early since I can’t leave the laptop outside on its own. But, some of the best DX that I’ve had has come from running off full battery power in gazebos.

My delta loop had plenty of space at the Posada de Sauce ($25/night with breakfast) in the jungle near Tarapoto, Peru. The lodge was totally powered by solar panels and was one of the quietest places I’ve ever DXed from.

Antenna security is another consideration. At one place I stayed I wasn’t comfortable leaving my expensive antenna components unattended outside all night. And then there was what happened on my first trip to Colombia in 2010. I knew that a place I would be staying at for two nights had an open field right behind it, so on that trip I took 500 feet of thin insulated wire for a mini beverage-on-the-ground. DXing was great the first night but terrible the second. When I went out the next morning to wind up the wire I learned why. The worker who had been weed-wacking the hotel gardens the previous day had also done the field, and in doing so he had cut my wire in three places. He had, however, very nicely tied the wires back together.

Share the DX

DXing off battery power in the gazebo in the Mauro Hilton Hostel in the mountains above Manizales, Colombia. The antenna was the PA0RDT thrown in a tree. I had great DX with the loop from my room, but I came here to enjoy the views one evening.

Finally, if you take an SDR on a trip and get some good DX, make a selection of your files available for download. Other DXers will enjoy hearing what the band sounds like somewhere else. Several dozen of my files from Peru, Ecuador, and Colombia are available for download in a shared Google Drive folder. If you see something you want, be sure to download it now. The winter DX season is just starting here in deep South America and in the coming weeks I’ll be replacing some of those older files with ones made in Argentina and maybe in Uruguay and southern Brazil. I’ve found a lot of places to stay that look to be perfect for a vagabond DXer.

Links

For fun, here are some of the better places I DXed from in Peru, Ecuador, and Colombia. The key thing to look for is an open place for the antennas:


Don, thank you so much for sharing your travel DXing expertise. This article is absolutely brilliant and so informative for anyone who wishes to make SDR field recordings. I love how carefully you’ve curated and distilled your portable setup and have given priority to having antennas for all occasions. I also think carrying spare parts and, especially, a spare SDR makes a lot of sense.

Post Readers:  As we mentioned in a previous post, Don is an author and has recently published “Following Ghosts in Northern Peru: In the Footsteps of 19th Century Travelers on the old Moyobamba Route” which is available in Kindle and print formats via Amazon.

Purchasing through this Amazon link supports both the author and the SWLing Post.

Click here to check out other guest posts by Don Moore.


Do you enjoy the SWLing Post?

Please consider supporting us via Patreon or our Coffee Fund!

Your support makes articles like this one possible. Thank you!

Spread the radio love

SDR Primer Part 3: From High-End SDR Receivers to SDR Transceivers

The following article originally appeared in the October 2018 issue of The Spectrum Monitor magazine:


Welcome back to the world of SDRs once again

In September we began of our three-part Primer on Software-Defined Radios (SDRs). Part One (September) focused on the nomenclature and components of a functioning SDR system; Part Two (October) took a look at some affordable SDR station options that will propel you into the world of SDRs for less than $200 US. This month, in Part Three––our final installation––we’ll dive a little deeper into the SDR rabbit hole, and investigate higher-end SDRs as well as ham radio transceivers with embedded SDRs.

Investing in SDR hardware

As we mentioned in Part 2 of our primer, gaining entry into the world of SDRs can be quite affordable. With merely $200 or less, you can fully explore the radio spectrum with an SDR that has truly excellent performance characteristics.

So, why would you pay more?

Let’s consider this.  If, say, you happen to live in an RF-dense environment, such as a busy city, if you live near strong broadcaster(s), and/or if you’re a DXer who’s seeking benchmark performance, then you might wish to devote a little more of your cash to your SDR hardware.

When you pay more for an SDR, the additional cost is typically going toward the hardware rather than the software. Indeed, my favorite SDR (software) applications are absolutely free, and pair with a number of benchmark SDRs. But good hardware is vital to performance. The lineup of SDRs––that is, the receiver hardware––discussed below typically has better filtering, preselectors, shielding, and receiver architecture focused on HF performance. They also tend to offer a more robust front end, lower noise floor, and better dynamic range. All of this, of course, results in better performance overall. Some of these SDRs also offer unique specialty features, like built-in web servers.

The following SDRs are carefully hand selected, and in my view, represent a balance between price and performance. And again, this is by no means a comprehensive list; it’s simply a selection of what you’ll find currently available on the SDR market.

So, without further ado, we’ll begin our discussion with “black box” SDRs, then move on to  SDR transceivers and transceivers with embedded SDRs.

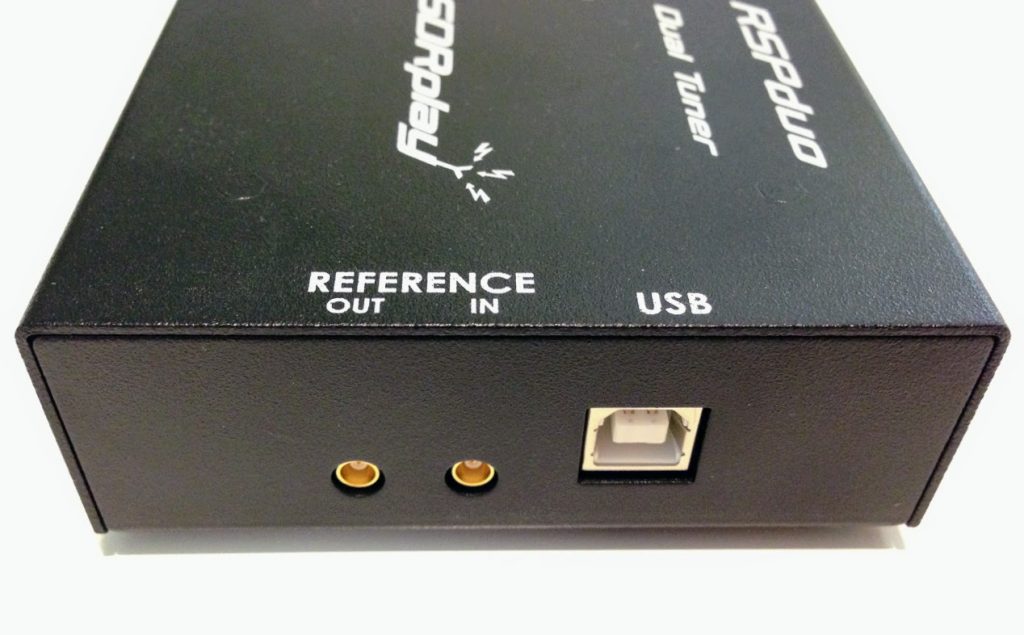
SDRplay RSPduo
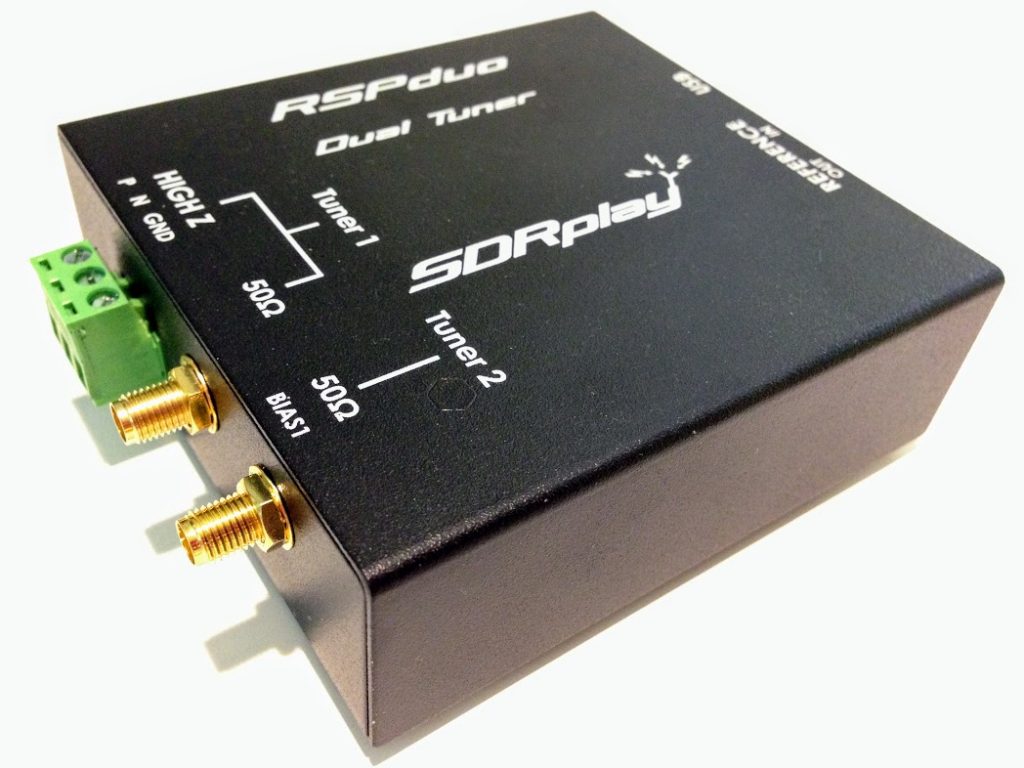
The SDRplay RSPduo

In May of this year (2018), the UK-based SDR designer and manufacturer SDRplay released their latest receiver: the SDRplay RSPduo.

What sets this little black box apart from the competition is just what its name implies:  the duo is a dual tuner SDR.  In other words, it’s two independent SDRs rolled into one.

Being the price leader in the world of SDRs, SDRplay retails the RSPduo for $279.95. And, I must add, it’s a true bargain for a feature-packed 14-bit high-performance device.

The RSPduo’s tuners can operate individually, anywhere between 1kHz and 2GHz, with up to 10MHz of working bandwidth. You could also set up the RSPduo so that both tuners can operate simultaneously, again between 1kHz and 2GHz, with up to 2MHz of bandwidth per tuner. The RSPduo has a high-stability reference along with external clocking features which makes this SDR an affordable option for industrial, scientific, as well as educational applications. It’s housed in a quality steel enclosure.

SDRplay’s development team is already working on new features such as true diversity reception, which will be included as a free upgrade to their popular SDRuno proprietary application.

To be clear, there is no other sub-$300 SDR on the market that currently has true dual-tuner functionality. Thus, the RSPduo is a good value, in my opinion––and an inexpensive upgrade to a proper dual-receiver SDR––so if this is something you’d like to add to your shack, go ahead!  Bite the bullet, and acquire an RSPduo. Likely you won’t regret it.

Check out the RSPduo via:

KiwiSDR
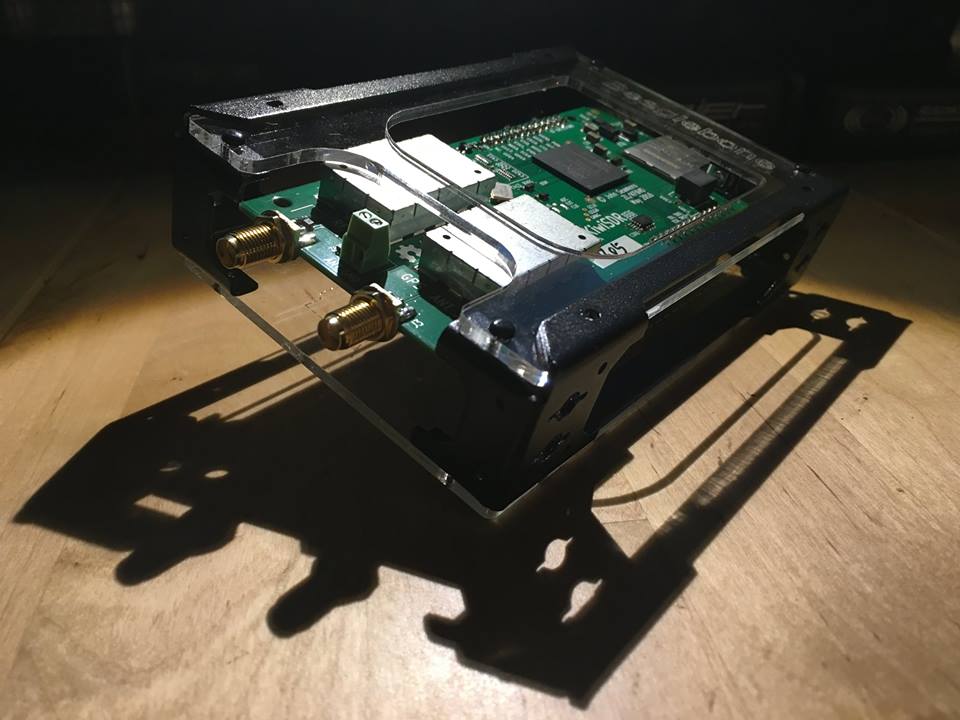
Photo by Mark Fahey

Like the RSPduo, the KiwiSDR has a unique feature that makes it stand out among the other receivers mentioned here: it is designed to be fully controlled via a web-browser-based SDR application. Not only can you use your KiwiSDR locally, but you can share it with the world via the KiwiSDR network. You can configure the KiwiSDR to allow up to eight simultaneous guest users, assuming only that you have access to the modest amount of Internet bandwidth this requires.

The KiwiSDR ships as a simple modular kit, and requires no special tools to assemble: the SDR is a custom circuit board (known as a “cape”) that you connect to BeagleBone Green or BeagleBone Black mini computer. (Click here to learn more about the BeagleBone).

The KiwiSDR is available in two versions: the SDR cape, alone, and a more complete version which includes the SDR cape, BeagleBone computer, enclosure, and GPS antenna. Both versions include all SDR software loaded on a micro-SD card.

Although the KiwiSDR might sound like an experimenter’s receiver since it requires a degree of assembly and configuration––at least, a bit more so than the other units I review here––it’s actually fairly simple to assemble, install, and put on the air. In fact, the only challenge that you might face is that of setting up your router for global access to your KiwiSDR. It does require either a static IP address or (more commonly) an IP address forwarding service. Check out the support documentation in advance to make sure your Internet connection will work.

The KiwiSDR covers from 10 kHz to 30 MHz, thus is not a wideband receiver like the SDRduo. Like the SDRs that follow, it focuses its performance on HF and lower bands.

I find it incredible that for just $299 US, you can purchase the full KiwiSDR kit––one that includes everything you need to put your SDR on the air and online. Because of this, I believe the KiwiSDR has become the dominant web SDR platform currently on the market. Perhaps this remarkable fact overshadows the fact that the KiwiSDR is also a superb performer, touting a brilliant dynamic range as well as overall excellent sensitivity and selectivity.

As my friend and fellow radio listener Mark Fahey, an early adopter of the KiwiSDR, is quick to point out, the KIwiSDR is unique in that it doesn’t connect to a PC or other computer to operate. It’s a stand-alone:  just connect an antenna, DC supply, and network cable, then you’re ready to go. All of the “work” is delivered by the piggyback BeagleBone CPU.

What’s not to love? While the web-based SDR application is full-featured, it does lack spectrum recording and some other advanced controls. This is due to the relatively modest processing power of the onboard CPU. That said, The KiwiSDR application does contain features/functionality via extensions that are fairly impressive.

Additionally, when updates are rolled out for the KiwiSDr application, these take effect globally. Only recently, for example, audio recording and amazing TDoA (Time Distance of Arrival) functionality were added.

Oh, and one more thing before we move on: the KiwiSDR is the only SDR I know that is exclusively controlled by a web-based SDR application for both the online guest and the local user/owner. There is no separate downloadable application.  Thus, whether you’re using your own local KiwiSDR or an online SDR, the user experience is exactly the same. It’s seamless and user-friendly…just as it should be.

Want to try the KiwiSDR before purchasing? Easy! You can browse and select any one of two hundred KiwiSDRs online on SDR.hu.

Check out the KiwiSDR via:

ELAD FDM-S2/FDM-S3
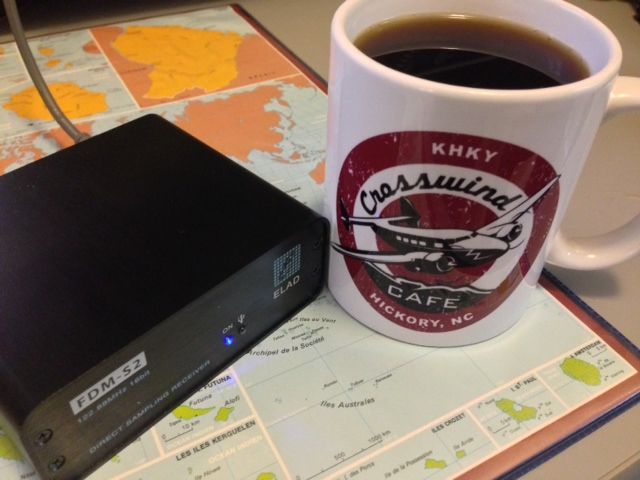
Italian-based SDR manufacturer, ELAD, has built a solid reputation over the years for truly pushing the SDR performance envelope in the $500-$1000 market.

I have owned their Elad FDM-S2 for four years now (check out my full review in the November 2014 issue of The Spectrum Monitor). The FDM-S2 continues to impress and to hold its own among more recent competitors––a true indication of excellent engineering and hardware.

The FDM-S2’s frequency coverage is 9 kHz-52 MHz, 74-108 MHz, and 135-160 MHz. I should note here that besides being a great HF and mediumwave performer, the FDM-S2 is an FM DXer’s choice receiver; FM performance on this rig is just superb.

ELAD supports all of their SDRs with their own proprietary application which, of course, is designed to take full advantage of the SDR’s available performance. The ELAD application is feature-packed and even includes built-in DRM decoding. Interestingly, it will allow the FDM-S2 to be used as two completely independent tuners in “double DDC mode”––the working bandwidth of each tuner, in this case, is 384 kHz, and each can be placed within one of the FDM-S2’s input ranges.

In truth, I like pairing my FDM-S2 with the excellent (and free) SDR Console SDR application; I prefer its user interface and recording functionality over the ELAD application.

If you live in an RF-dense area, you might consider one of ELADs external pre-selection filter systems to keep the FDM-S2 from overloading in the presence of very strong signals.

The FDM-S2 is currently priced at $529 US.
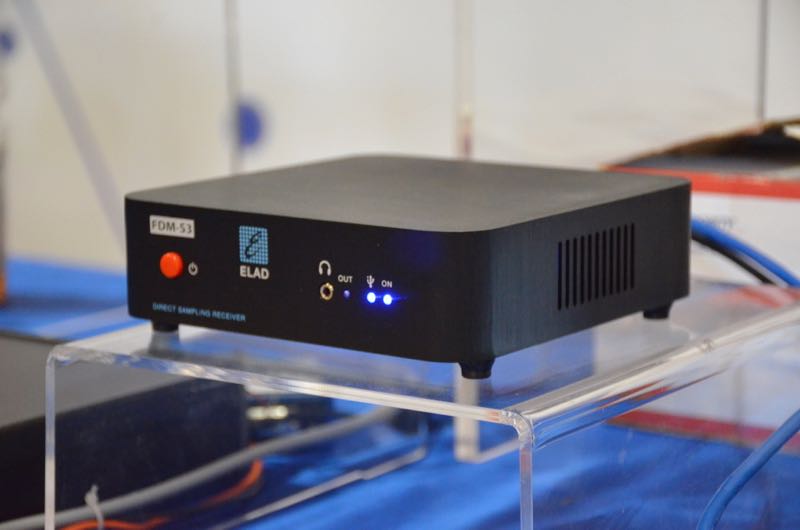
Photo of the new ELAD FDM-S3 from the 2018 Hamvention

Note that ELAD will soon be releasing the newest addition to their product line: the FDM-S3. I know very little about the FDM-S3, but I do know ELAD is promising groundbreaking performance and dynamic range, setting a new benchmark for the $1000 price bracket. We do know the FDM-S3’s processing bandwidth is an impressive 24.576 MHz––wide enough to include the entire FM broadcast band!

I’m not sure if FM DXers will be able to take advantage of spectrum recording at a 24 MHz bandwidth, because I suspect it could push 24GB of data per minute. The FDM-S3 may well keep up, but I’m not sure the typical computer hardware can handle that kind of data transfer…it may be likened to, in radio terms, drinking from the proverbial fire hose!

However: ELAD will be sending me a loaner FDM-S3 to review in the coming months, so stay tuned for more on this DXer’s dream rig!

The current FDM-S3 price, by the way, is 949.90 EUR.

WinRadio Excalibur
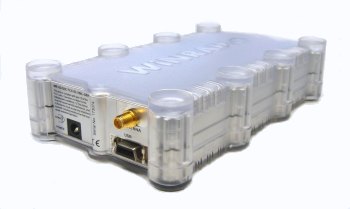
The WinRadio Excalibur

My first foray into the world of benchmark SDRs was made with the Australian-made WinRadio WR-G31DDC Excalibur. And although this SDR has been on the market for the better part of a decade, it still outperforms many of its competitors.The Excalibur’s frequency range is 9 kHz to 49.995 MHz, providing absolutely stellar performance across the spectrum.

It’s a favorite SDR in my radio shack, despite the fact that it can only be fully controlled by WinRadio’s own proprietary SDR application (at least, I know of no other compatible applications). On the plus side, the WinRadio application is one of my favorites.

The application’s file size is extremely compact––only a 9MB download. The user interface is logical, ergonomic, and responsive. Other than SDR Console, it has some of the best recording functionality available today.

I’ve logged more airtime with the Excalibur than with any other SDR I own, mainly because of its superb overall performance, responsive application, and recording functionality. I use the Excalibur as a benchmark for receiver evaluations and find that very few can match its solid performance.

The WinRadio Excalibur can be purchased through a number of distributors worldwide for about $950.

Enablia TitanSDR Pro
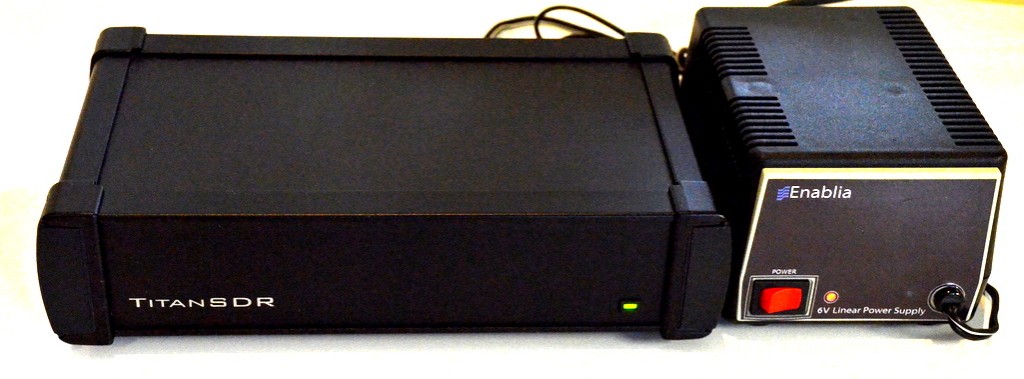
The Enablia Titan SDR Pro is an outlier product in our SDR Primer series, in that it retails in excess of $2,000. However, it’s the highest performing SDR I’ve ever tested. Serious weak-signal DXers will likely be quite pleased with this rig.

And speaking as a radio archivist, the Titan has the most powerful set of audio and spectrum recording features I’ve used, to date. Selectable spectrum recordings can be made from within the wide working bandwidth, and it can run up to four fully-independent SDR receivers, simultaneously.

The Titan comes with 16 frequency preselectors onboard, and a 9 kHz to 32 MHz frequency coverage. Its front end is simply bullet-proof, and thus could be operated in a demanding RF environment.

The TitanSDR ships with a brilliant proprietary application. It’s designed to make managing the Titan’s multiple virtual receivers and four independent SDR receivers as straightforward (and easy!) as possible. As I said in my review, Enablia engineers quite successfully accomplished this. The only downside is that only the TitanSDR application can run only the TitanSDR; no other third-party apps work with it. In addition, when making spectrum recordings, the file format is unique and the header information is actually stored in a separate file. This means when you are transferring a set of spectrum recordings, the header file must also be accounted for.

Of course, there is the daunting price tag of the TitanSDR, which makes it clear that this was a receiver designed for government and commercial use, in particular, for signal intelligence.  Thus it’s likely no surprise that the basic version of the TitanSDR retails for 1380 EUR, the TitanSDR Pro for an even heftier 1970 EUR.

To be fair, there are not many readers who would consider the TitanSDR Pro, but I thought it worth mentioning as it demonstrates a clear case of hardware becoming an innovation’s primary focus.

Enablia’s website is quite basic, so I would recommend you contact them directly to ask for a price quote if you’re interested in one of their TitanSDRs.

Other SDRs

The SDRs above represent merely a small slice of SDR market availability. There are several other notable manufacturers and SDRs worth considering, thus worth noting.
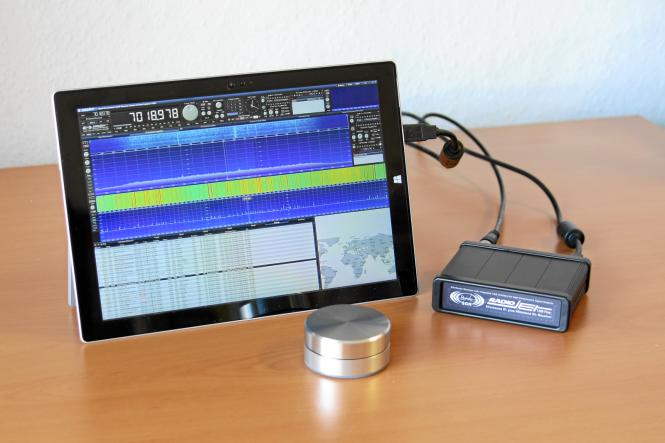
The Bonito Radiojet 1309 Plus

Germany-based Bonito manufactures a number of SDRs, antennas and components that are highly regarded among DXers. Bonito’s “hybrid” SDRs pack a lot of performance yet require very little in terms of computer resources.  Their latest SDR, the Bonito RadioJet 1309 Plus covers 0.02 MHz to 1600 MHz with a spectrum display that can be widened to 3.2 MHz. I have not personally evaluated the RadioJet 1309 Plus, but I did review an early version of the RadioJet (the 1102S) that lacked the additional IQ-receiver of the 1309. I found it an impressively sensitive and selective receiver with excellent audio characteristics. Click here to read that review.

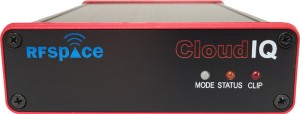
The RFspace Cloud-IQ

RF Space has been manufacturing SDRs longer than many other manufacturers, and the company offers a number of products, including the SDR-IQ, the NetSDR+, the Cloud-IQ, and––soon to come––the CloudSDR.

In Part 2 of our primer, we mentioned the AirSpy HF+ which packs impressive HF performance. Airspy also manufactures the Airspy R2 and Spyverter R2–this $218 US combination produces a compact SDR package with excellent dynamic range and superb frequency stability.
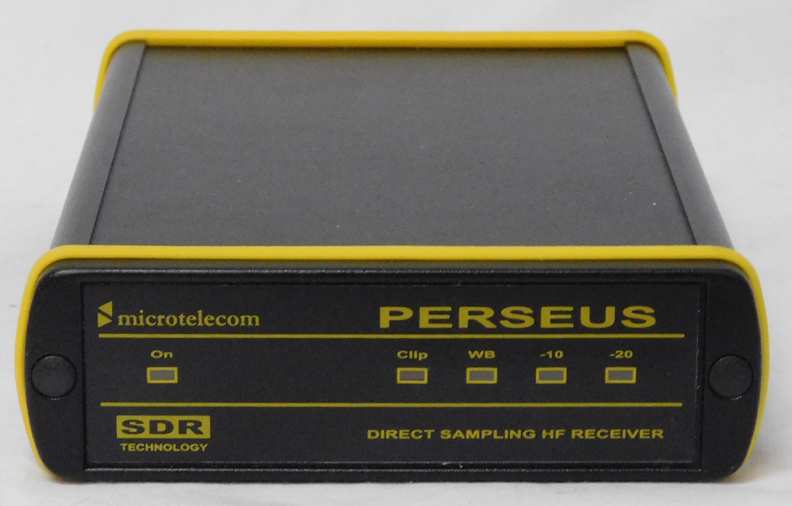
I’m also fond of the classic Microtelecom Perseus SDR, which I’ve seen sold used for approximately $700 US. WinRadio, too, offers higher-end SDRs with a wider frequency range and working bandwidth than the Excalibur––so if your budget allows, you might consider these.

Regardless, keep in mind that if you want to use your monetary resources efficiently, there is no need to splurge for higher-end SDRs unless your use and application demands increased performance. Before you pull the trigger to buy such a rig, I would simply take into consideration the unit’s frequency range, working bandwidth, and performance characteristics, as well as taking the time to read plenty of user reviews. This increases the odds that you’ll get just what you want.

SDR Transceivers

So far, I’ve only mentioned SDR receivers in this primer, but there is a healthy selection of “black box” type SDR transceivers on the market, as well. By “black box,” I mean the transceiver itself (all of the hardware) housed in a box––with, of course, the relevant ports for antennas, data, power, mics, CW keys, and a number of peripherals. These SDRs almost always require a computer for operation, although lately manufacturers are beginning to offer optional touch-screen front panels which can bypass the need for external computer operation.

Unlike the world of tabletop radios, where it might be less expensive to invest in a general coverage transceiver rather than a dedicated receiver, SDR transceivers almost always cost more than an equivalent SDR receiver.

Also note that SDR transceiver applications do not always include audio and spectrum recording functions.  In addition, their working bandwidth might be more narrow that other receive-only SDRs, although they may offer more virtual receivers and spectrum “slices.”

Finally, SDR transceiver applications tend to be proprietary; when you purchase the transceiver, you’re also likely receiving the only SDR application that will interface with it. Hypothetically, if you purchase an SDR transceiver and the company that produced it goes under, you might have issues when the application is no longer updated with operating system upgrades and iterations.  The lesson here is that I believe you should try to stick with the healthiest companies and those with solid, large user bases. This increases the likelihood that the application will be supported in the future.

Low-cost, low power SDRs for the experimenter

We’ll start with the least expensive SDR transceivers designed with the experimenter in mind, that can, with a little adaptation, also be employed by ham radio operators as very low-power transceivers.
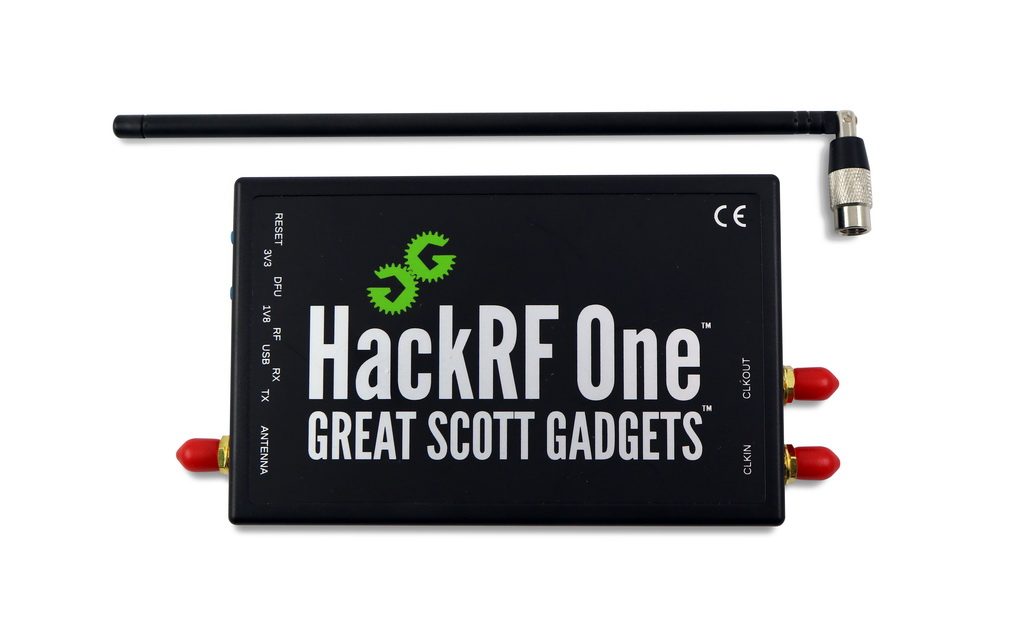
The HackRF One ($299) by Great Scott Gadgets is an excellent SDR. It has an incredibly wide frequency range (1 MHz to 6 GHz), and can transmit anywhere from 3 mW to 30 mW depending on the frequency. That’s flea power, true, but if your goal is to experiment in your local surroundings, it’s typically more than enough output. The HackRF is open-source and sports a large user community that have employed it in dozens of applications. The HackRF was one of the first SDRs to really give experimenters a full tool set to manipulate the world of wireless.

Check out the HackRF One via:
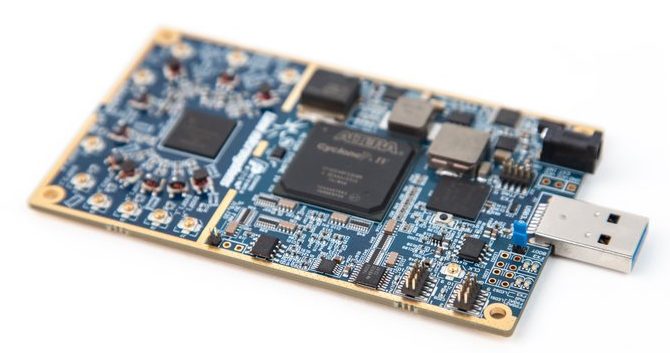
The LimeSDR board

The LimeSDR ($299) is another crowd-funded project that has been incredibly popular.  Like the HackRF, it is a low-cost, open-source SDR platform that can be used to support just about any type of wireless communication standard. What makes the LimeSDR unique is that it is integrated with a Snappy Ubuntu Core, which means users can simply install applications from an app store to increase functionality. As LimeSDR states, their platform “gives students, inventors, and developers an intelligent and flexible device for manipulating wireless signals, so they can learn, experiment, and develop with freedom from limited functionality and expensive proprietary devices.

Again, only consider the HackRF of LimeSDR if your main goal is to experiment with the world of wireless. If you’re looking for a full-featured SDR transceiver intended for ham radio, read on.

Ham Radio SDR Transceivers

The Flex Radio booth at the 2018 Hamvention.

Without a doubt, the dominant name in the world of US ham radio transceivers is Texas-based Flex Radio.  Flex has been around since the very earliest days of SDR transceivers and has produced a wide variety of high-performance rigs. In recent years, their product development and production has focused on higher-end transceivers with the discerning DXer and contester in mind. Their signature series SDRs pack incredible performance, yet can be operated from modest PCs since most of the processing horsepower and hardware are all within the radio chassis. Flex has also developed a fully wireless touch-screen Maestro Control Console that can be used over a local network, or even the Internet, to seamlessly control a remotely-connected Flex SDR. Flex Radio SDRs can cost anywhere from $2,000 – $7,500 US.
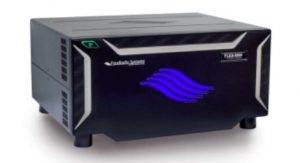
The Flex-6600

Gary Wise (W4EEY), my go-to guy for all things Flex Radio, also notes:

“One of Flex’s newest models, the Flex-6600, includes 7th Order Contest Band Bandpass Filters and dual Analog to Digital Converters. Which means that, using this radio, one can listen on one band while transmitting on another. Contesters call this ‘Single Operator Two Radio’ operation, and if you can do it successfully, it leads to big contest scores. Having this functionality in one box, without additional controllers and interfaces, is remarkable.”

Indeed.
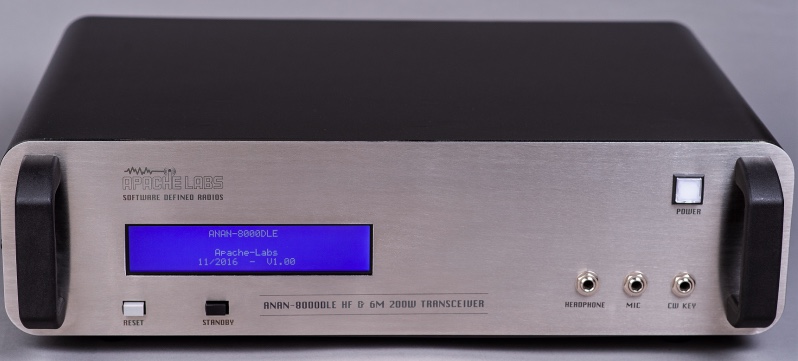
Two other SDR transceiver manufacturers with large user bases are the Sweden-based SunSDR and India-based Apache Labs. Both companies produce high-performance SDRs and, like Flex, set benchmarks in terms of transceiver performance. I will not comment at length about either company because I’ve not had the opportunity of personally testing their products, but I encourage you to search online reviews about their products.

Tabletop SDR transceivers
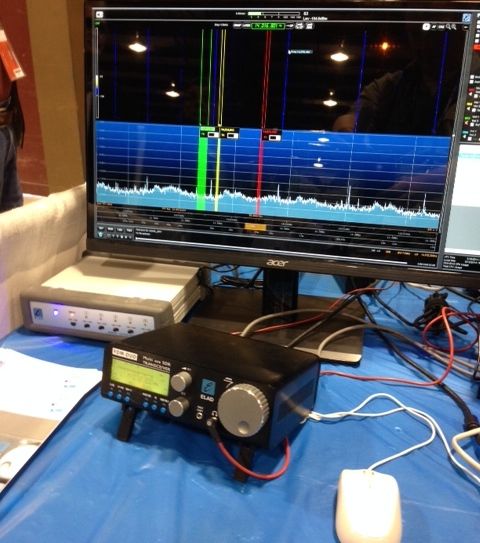
The Elad FDM-DUO transceiver is both a stand-alone tabletop and fully-functioning SDR when paired with a PC.

There are a number of full-featured tabletop SDR transceivers on the market. One of the first SDR manufacturers to build a fully self-contained tabletop model with PC integration was ELAD, with their FDM-DUO QRP transceiver. Tabletop SDRs at the time of the FDM-DUO’s release were very limited in their functionality when connected to a PC. Some of them had stripped-down applications and lacked features like spectrum recording and multiple virtual receivers. The FDM-DUO, when connected to a PC running ELAD’s software, gives the user full control of the SDR.  Indeed, the experience is identical to that of using the FDM-S2 mentioned above, however the DUO is also a transceiver. Since the DUO’s release, other SDR manufacturers have designed models with full SDR application integration.
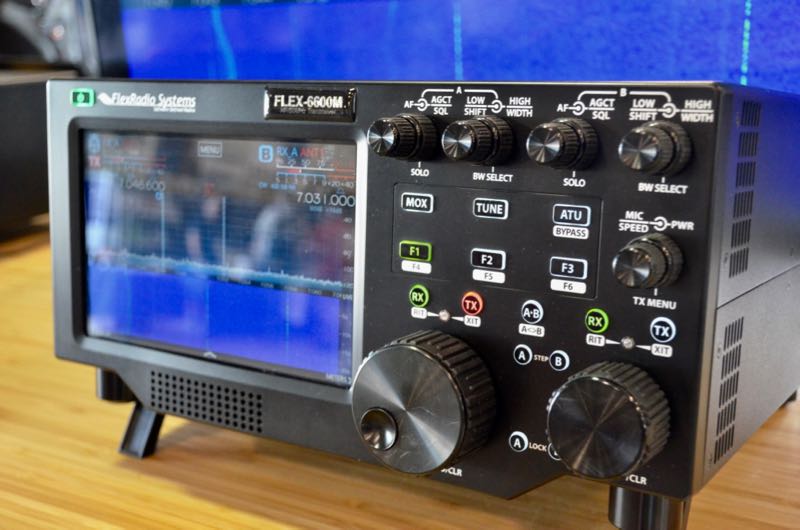
The Flex 6600M is a handsome standalone SDR transceiver.

Recently, Flex Radio introduced their Flex “M” Signature Series SDR Transceiver. These tabletop SDRs can be configured with most of the SDR receivers Flex currently produces. Their displays are impressive and useful; indeed, the spectrum waterfall resolution and size is one of the best I’ve seen on a tabletop transceiver.  The front panel is large and sports a number of controls, the design harkening back to large contest-grade transceivers like the Ten-Tec OMNI VII and Orion series.
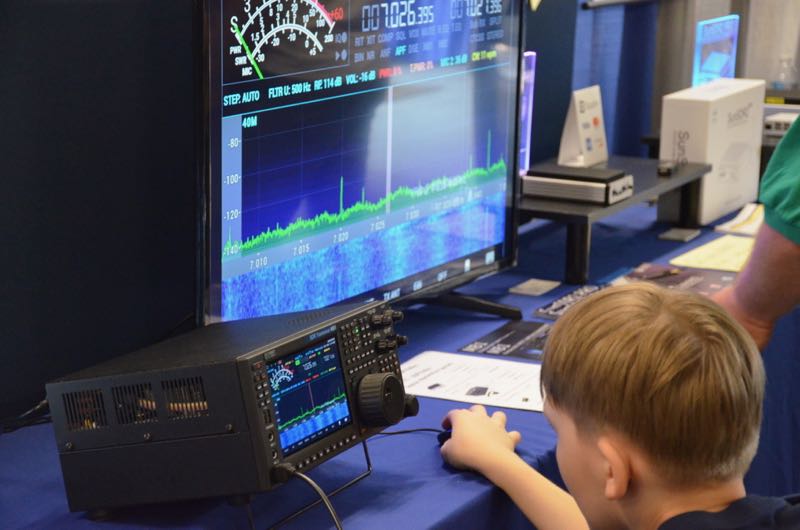
The SunSDR MB1 at the 2018 Hamvention.

This year at the Hamvention in Xenia, OH, I had a chance to check out the SunSDR MB1. Like the Flex M series, the MB1 sports a comprehensive front panel and an amazing assortment of connections on the back panel. As I took a tour of this radio––and it really did require a tour, it’s so densely feature-packed––I was most impressed by the thought that went into this stand-alone SDR transceiver. I love the front panel display, graphics, and overall ergonomics. I understand it will also deliver benchmark performance; indeed with prices starting at a steep $7,000 US, I would expect nothing less!

SDR transceiver summary

As we’ve pointed out in this part of our primer, pure SDR transceivers are a product for radio operators willing to invest more financially in order to take advantage of the advanced functionality and performance a true SDR can provide. At present there are surprisingly few players in the pure SDR transceiver market; this is a product category ripe for expansion. And as more manufacturers get into the game, I believe competition will direct prices into even more affordable territory.

Transceivers based upon SDR technology

The final category we’ll discuss is transceivers based upon SDR technology.  It’s a sign of the times, indicating the direction that all enthusiast-grade transceivers and receivers are likely heading.
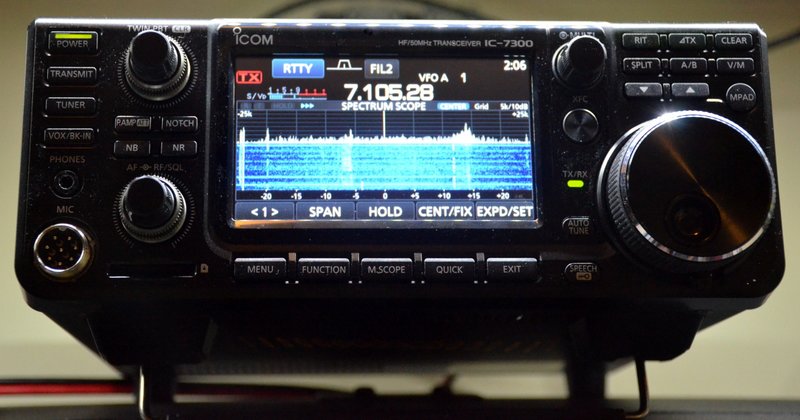
The Icom IC-7300 transceiver

Because the fact is, whether or not you feel inclined to embrace SDRs in your radio world, you may be surprised that you already have: for many years now, radio manufacturers have built their transceivers and receivers on SDR and I/Q quadrature down-sampling technology. All of the transceivers introduced in the past few years that sport on-board spectrum displays––like the Icom-IC7300, Icom IC-7610, and the new Yaesu FT-DX101D––are, of course, based on SDR technology.
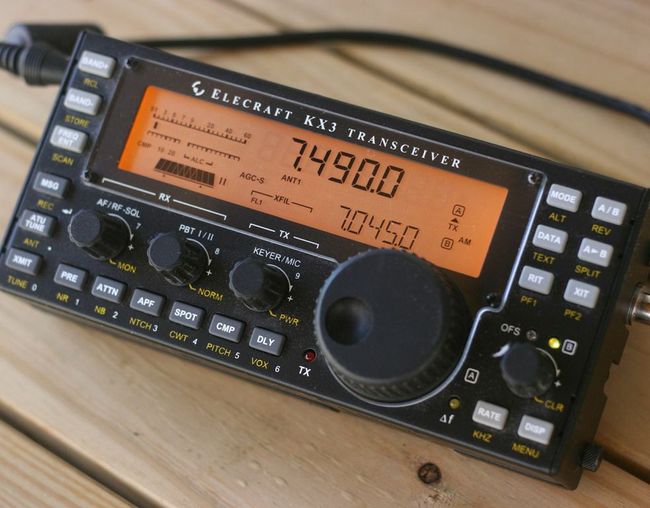
Many others, like the Elecraft KX3 and KX2, which look much more like a traditional radio, are also based on SDR architecture. Indeed, almost all of the major manufacturers implement SDR technology in their current product lines. Manufacturers have caught on, learning how to leverage SDR technology in a way that maximizes receiver performance while keeping the overall price more affordable than comparably-performing legacy radios of former days.

Yet while these radios are SDRs at their core, they often are limited in their functionality when connected to a PC; most can be completely controlled by a PC and many can even export their I/Q data, but usually they won’t offer the working bandwidth and the advanced functionality of a true SDR transceiver.

Conclusion
If I’ve piqued your curiosity about the world of SDRs, and have yet to add one to your shack, I would encourage you to invest in an SDR receiver––at the very least, in one of the affordable rigs mentioned in Part 2 of this series.

Speaking for myself, I was once a “knobs and buttons” radio operator who thought I’d never want to control a radio through a computer and monitor. But when I hesitantly invested in my first SDR, I found it eye-opening––not to mention somewhat democratizing, in that it sets all radio listeners on the same level, as the spectrum becomes visually understandable, and thus accessible, to all who encounter it. I found that if you love to listen, also being able to look at your audio, especially when editing or archiving, but any time you’re tuning around through the spectrum,  just clarifies and enhances your overall radio experience. I soon became hooked…and have never looked back.

Now, I can assure you, I’ll never again be without an SDR. The ability to visualize our radio spectrum via SDR’s virtual window is truly illuminative.  What’s more, I’d even venture to speculate that you may share in finding the experience, if you’ll forgive the colloquialism, pretty darn cool.

Do you enjoy the SWLing Post?

Please consider supporting us via Patreon or our Coffee Fund!

Your support makes articles like this one possible. Thank you!

Spread the radio love

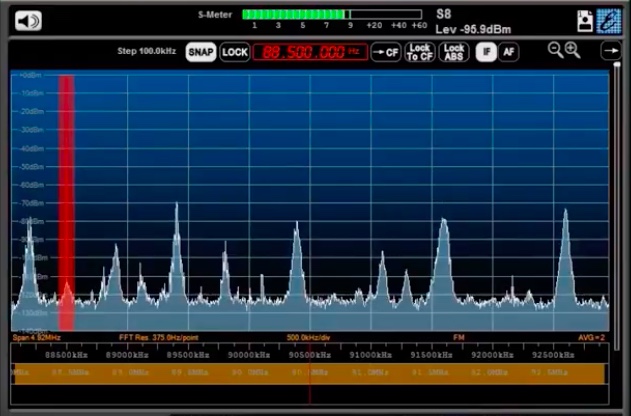
Impressive Transatlantic FM DX: Newfoundland to Northern Ireland on 88.5 MHz

(Source: Southgate ARC)

88 MHz Trans-Atlantic signals heard in Ireland

On Sunday the 8th of July 2018, there was a remarkable opening on the VHF bands across the North Atlantic. While there were plenty of strong multi-hop Sporadic-E signals on the 28 MHz and 50 MHz bands, the maximum qusable frequency did reach as high as 88 MHz at one stage.

Paul Logan in Lisnaskea, Fermanagh, Northern Ireland managed to catch CBC radio 1 on 88.5 MHz from Newfoundland, Canada at 22:35 local time (21:35 UTC). It is very rare for openings on Band 2 across the Atlantic and to date, only two people have managed to succeed in hearing North American radio stations.

Click here to view video of reception on YouTube.

Click here to read the full article on EI7GL’s blog.

Spread the radio love

Digging in the Noise: Weak Signal Audio Recovery with the AirSpy HF+ and Elad FDM-S2

I’m currently spending the better part of a week at Cape Lookout State Park on the Oregon coast, with a great view of the ocean through tall evergreen trees. This is one of my favorite parks in the Pacific Northwest, especially when DXing during the blustery winters from one of the nice cabins at Cape Lookout.

The view from the beach near my cabin; the turbulent waves were a precursor to the gale force winds at the park during the night of the 23rd!
https://youtu.be/EYUSU_gzgu4

Although I’m at the park for trans-Pacific medium wave DXing, I’m also comparing receivers, both SDRs and portables. This morning I sought out a few weak shortwave signals, pitting the Elad FDM-S2 SDR ($529 USD) against the AirSpy HF+ ($199 USD). I have a pair of the HF+ receivers to cover all of medium wave (as the FDM-S2 easily does). Many SWLing Post readers already know that the upstart HF+ trades bandwidth to gain high performance in order to keep the price reasonable.

My antenna used for the following recordings was a small “Flag” antenna using a Wellbrook Communications FLG100LN module and a 2K ohm variable potentiometer for termination. The design uses crossed tent poles in an “X” formation to support the wire loop. This design travels easily in a compact package; I have Dave Aichelman of Grants Pass, Oregon to thank for this very useful “tent pole loop” implementation of the Wellbrook FLG100LN.

The Wellbrook-based antenna functions superbly, and its low-noise design helps hold down QRM from the nearby cabins (which unfortunately have been “upgraded” recently with noisy cold fluorescent [CFL] light bulbs). The area around the Cape Lookout cabins used to be superbly low noise and suitable for radio listening, but now it is more of a challenge than before. The Wellbrook FLG100LN is perfect for the situation though; Wellbrook ALA1530LN  Pro and ALA1530S+ 1-meter loop antennas work commendably at the park too.

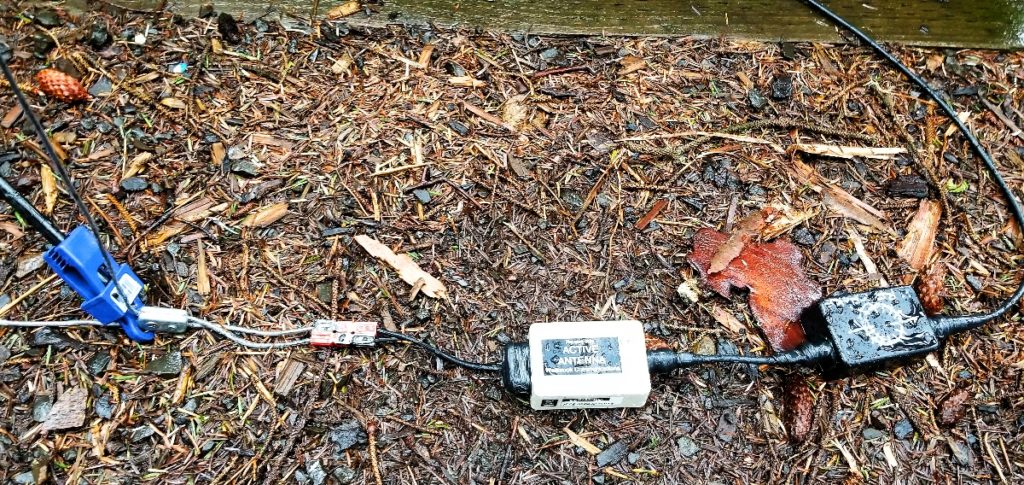
The Wellbrook FLG100LN module with a home brew RFI choke in-line

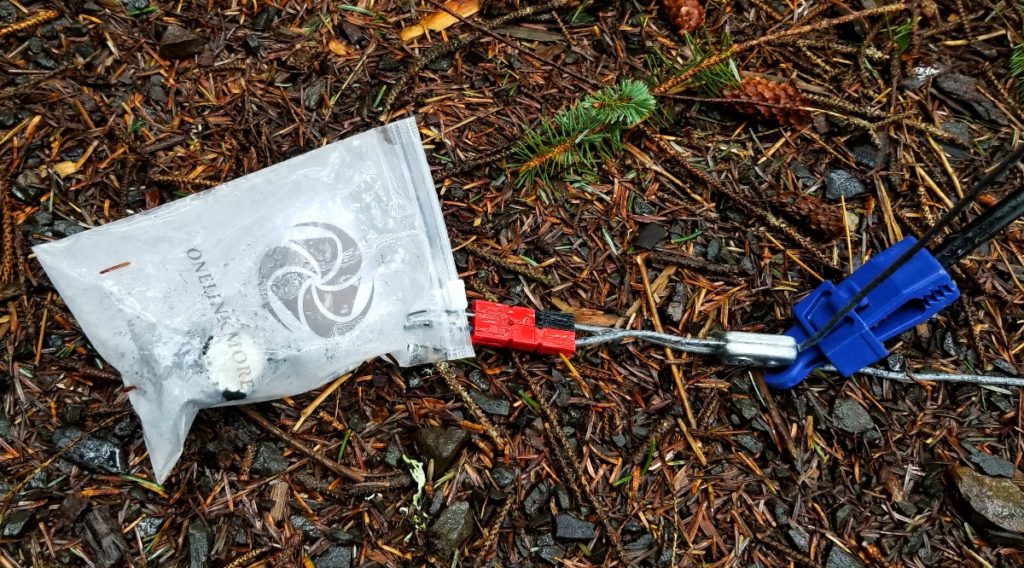
A 2K ohm variable potentiometer is protected from the elements in a small plastic bag. The “pot” is adjusted for the best nulling of medium wave stations off the back side of the antenna’s reception pattern.

The “tent pole loop” antenna is strapped to a fence railing with ultra-strong Gorilla Tape to keep the 7-ft. square loop vertical.

On with the recordings…

For the FDM-S2 and HF+ comparisons I used the SDR-Console V3 software. Every parameter was identical for the receivers–sampling bandwidth, filter bandwidth, AGC, mode and so on.

Take a critical listen to the weak signals recorded with the SDR receivers, identified as only “Radio A” and “Radio B”. A link to a poll is at the end of this article; please indicate which recording of each pair has the most intelligible audio in your opinion, and submit your choices when you’ve made up your mind on each audio clip. After a week or so I’ll post the results of the voting, and identify the receivers.

9.615 MHz, LSB, Radio A


9.615 MHz, LSB, 
Radio B (note: the same male announcer heard in clip “A” begins at 00:14 in this “B” clip)


9.730 MHz, USB, Radio A


9.730 MHz, USB, 
Radio B


7.230 MHz, S-AM, Radio A


7.230 MHz, S-AM, 
Radio B


9.860 MHz, S-AM, Radio A


9.860 MHz, S-AM, 
Radio  B


Note on 7.230 MHz recording: this was an interesting frequency, as the signal was tightly surrounded by a very strong local 40m ham radio LSB station as well as a strong China Radio International signal. There were other strong amateur and broadcast stations within 30-50 kHz of 7.230 MHz, also. This A-B test more than the others may indicate receiver performance in a strong RF environment on a crowded band.

Ready for the poll? Register your votes at the Google Docs form below:

https://tinyurl.com/ya38wj69

In a week to 10 days I’ll post the results in another article. NOTE: I haven’t provided a “both sound the same” choice in the poll to encourage you to ‘dig deep’ into the audio and listen critically–to find something that stands out in one clip versus the other.

Guy Atkins is a Sr. Graphic Designer for T-Mobile and lives near Seattle, Washington.  He’s a regular contributor to the SWLing Post.

Spread the radio love

The SWLing Post 2015-2016 Shortwave Radio Buyer’s Guide

This article originally appeared in the November 2015 issue of The Spectrum Monitor magazine:


FourRadiosAbstract2

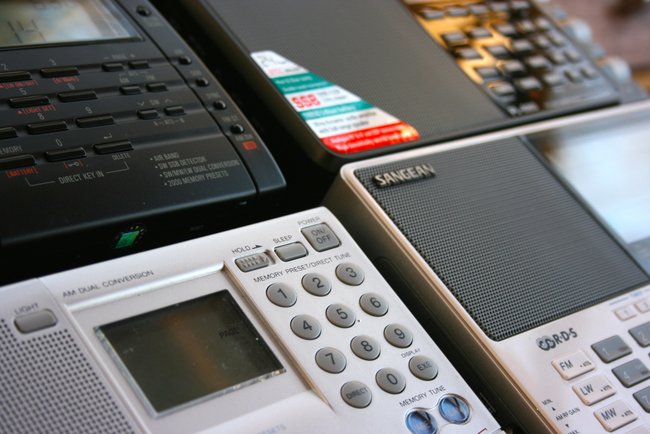
Despite the often-expressed view that shortwave may be on the decline, if one were to look at this year’s shortwave technology alone, the truth would seem to be anything but. Remarkably, 2015 has been a great year for the shortwave radio listener, as several models of portables, tabletops, and SDRs have been either introduced or improved.

The following is a basic, easy-to-follow buyer’s guide to some of the best receivers on the market currently. This guide is, by no means, comprehensive; rather, it’s a selection of rigs I have tested, some of which I now own. It builds on the guide I published in the November 2014 issue of TSM, and highlights innovations since that issue, while still acknowledging the contributions of previous models.

Compact/Travel portables

If your budget is tight, or if you’re looking for a radio that could easily slip into your glove compartment, backpack, carry-on, or even jacket pocket, you need to consider a compact shortwave radio.

Typically, there is a performance compromise with compact radios: they don’t always have the sensitivity of their more expensive cousins; they have a more limited frequency range; and they don’t detect single-sideband signals. Nonetheless, the ones listed here are fine performers for their size and price. Entries are listed in alphabetical order.

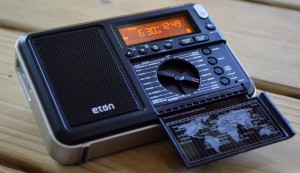
The Eton Traveller III

The Eton Traveller III

Eton Traveller III

Eton has once again refreshed the design of its popular “Traveller” series of compact receivers: their latest is the third edition, the Eton Traveller III. I’ve owned the past two versions of the Traveller, and having learned to appreciate these, was eager to get my hands on the newest Traveller III. As the name implies, this is a great little radio for the international traveler; it not only has shortwave, AM and FM bands, but it also has a world clock that can easily be switched from the front panel, a useful alarm function, and great built-in speaker. New to the Traveller III is FM RDS: a great way to capture FM station identification when visiting a new city. The key lock is prominent on the front panel and the included padded nylon case is one of the most rugged I’ve seen in years. Performance is what I’ve come to expect from the Traveller series: superb AM (mediumwave) reception, great FM reception, and capable shortwave reception. It lacks the multiple bandwidths found in other similar DSP radios, but my impression is that the default bandwidths are adequate for multi-band listening.

The Eton Traveller III is available from Universal Radio, Amazon.com and more outlets via Eton. Pricing ranges from is $55-60 US.

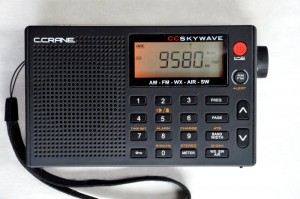
The C.Crane CC Skywave

The C.Crane CC Skywave

CC Skywave

Only a couple of weeks before the Christmas holiday of 2014, C. Crane introduced a compact portable that truly impressed me: the CC Skywave. The Skywave is as compact as any other ultralight radio, but adds a host of features that has made it an invaluable radio for my one-bag air travels. The CC Skywave covers the following bands: Shortwave, AM, FM, Weather, and Aviation. It’s a comprehensive toolbox of frequency bands and listening modes which only lacks, sadly, SSB.

Ergonomics are excellent for such a small portable. It’s easy to use, as well: I only needed to reference the well-written manual for a few functions. I find the CC Skywave to be very sensitive on shortwave and mediumwave, rivaling radios that cost much more.

One negative I’ve learned through readers of the SWLing Post is that the first production run of the CC Skywave was prone to overload in the presence of strong local broadcast stations. C.Crane have confirmed that this has been addressed in the latest CC Skywave production run and is no longer an issue. To insure you’re receiving a unit from the latest production run, consider purchasing directly through CCrane.

The CC Skywave is sold by Universal Radio, Amazon.com and directly by C.Crane. Price is $89 US.

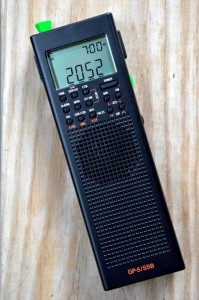
The CountyComm GP5/SSB

The CountyComm GP5/SSB

CountyComm GP5/SSB (Tecsun PL-365)

CountyComm––a retail distributor of products created primarily for use by the US government––introduced a new shortwave portable late in 2014: the GP5/SSB. The GP5/SSB came about as a result of a large order CountyComm received from a US government department for an “inexpensive, small portable, AM/FM/SW radio with SSB” for emergency supply caches and diplomatic posts. Like its predecessor, the GP5/DSP, the GP5/SSB has a vertical form factor, much like a handy-talky, and a detachable/rotatable ferrite bar antenna that greatly improves AM/mediumwave reception. The GP5 series is limited by a small internal speaker that sounds somewhat tinny; it also lacks a direct entry keypad. Still, with a pair of headphones and some careful memory allocation, the GP5 is a pleasure to use.

If you’re looking for an ultra-portable radio with SSB, then the GP5/SSB is a very good choice. (It may, in fact, be the only ultra-portable SSB choice currently on the market). While the SSB performance can’t compare with larger, pricier receivers, or ham radio transceivers, it’s very good for $80 US. If you’re looking for an emergency communications receiver––something to stash in your vehicle, emergency kit, or bug-out bag––the CountyComm GP5/SSB is a great choice and value. Indeed, that’s who the GP5/SSB was designed for, and why this rig has excellent frequency coverage in all modes, with good sensitivity/selectivity and designed for portable, one-handed operation. In fact, CountyComm has even designed and manufactured (and in the USA!) a robust, protective 1000-Denier case for the GP5/SSB. This case makes it very easy to strap the GP5/SSB to your belt or backpack securely.

The CountyComm GP5/SSB is available from Universal Radio and directly from CountyComm.

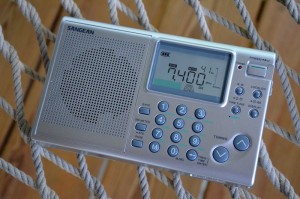
The Sangean ATS-405

The Sangean ATS-405

Sangean ATS-405

I was surprised this year when Sangean introduced its latest compact/travel receiver, the ATS-405. I had heard rumors that Sangean may have been leaving the shortwave radio scene, so was pleased to learn that Sangean was not only still invested in the hobby, but innovating. Indeed, the ATS-405 has features that have not yet been included on small DSP-powered portables: specifically, the ability to control squelch, tuning mute, and soft mute.

The ‘405 is a decent little radio with a great deal of functionality and features for a rig in its price class. But overall, its performance seems rather mediocre. If you primarily listen to FM, you’ll be pleased. If you’re a mediumwave listener, you’ll be pleased only if you don’t mind the 800/1600 kHz DSP birdies which plagued both of my review units. If you’re primarily a shortwave listener, you’ll need to carry a clip-on wire antenna to bring the sensitivity up to the level of similarly-priced receivers. I also found performance variations between my two review units; an indication that quality control is somewhat inconsistent at the factory.

The Sangean ATS-405 is available via Universal Radio and Amazon.com. Price is $89 US.

Other compact/travel radios

In the 2014 Buyer’s Guide we included several other compact travel radios worth considering: The [original] Kaito KA1103/Degen DE1103, Tecsun PL-310ET, and the Tecsun PL-380 to name a few.

Full-Featured Portables

In the portables market, I believe you get the most value and quality in the $90-250 price class. Most beginners and seasoned SWLs prefer a radio that includes everything necessary to get on the air immediately; all of these radios provide just that. Straight out of the box, you’ll have everything you need to listen to shortwave bands. All of these recommended radios are designed to pick up major shortwave broadcasters with ease, and offer the following features: good frequency coverage; circuitry that helps in the detection of weaker stations; and with a few notable exceptions, the ability to receive single-sideband.

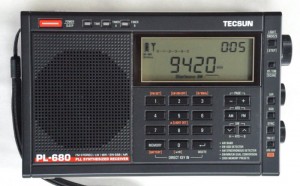
The Tecsun PL-680

The Tecsun PL-680

Tecsun PL-680

The latest Tecsun full-featured portable––the PL-680––appeared on the market in February this year. Cosmetically, the receiver is nearly identical to the Tecsun PL-600, but with the added features of the Tecsun PL-660. Indeed, in terms of features and comparing them with that of the venerable PL-660, there are no obvious additions on the PL-680. The PL-680 has been improved, however, in its shortwave reception. The PL-680 is both slightly more sensitive and has a more stable AGC (Automatic Gain Control) than the PL-660. If you are primarily a shortwave radio listener and wish to have one of the best sub-$200 receivers currently on the market, the PL-680 may be the rig for you.

On the other hand, if you are primarily a mediumwave DXer and already own the PL-660, you will likely want to pass on the PL-680. The PL-680’s mediumwave reception is simply not as good as that of the PL-660. The PL-660 is both more sensitive and has a lower noise floor on mediumwave.

Note that since its introduction, inventory of the PL-680 has fluctuated; the primary retailer is Anon-Co in Hong Kong and on eBay. Price is $95 US (plus shipping from China).

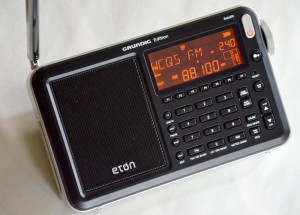
The Eton Satellit

The Eton Satellit

Eton Satellit

Last year, Eton released the Satellit: a new full-featured portable, essentially replacing the venerable Grundig G3, but carrying the name of the flagship Grundig Satellit series.

The Satellit has many of the same functions as the Grundig G3, and has a near-identical form-factor, but sports a new amber backlit display, multiple bandwidths, and a double-jointed telescopic antenna. The Satellit performs admirably on the AM/mediumwave bands, quite well on the shortwave band but, most notably, performs brilliantly on FM. The audio fidelity from the built-in speaker is quite robust; indeed, it’s among the best in its class. The key layout and ergonomics are similar to the Grundig G3 and G5; meaning, the radio is quite simple to use. One negative is that the Satellit mutes between frequencies while tuning, however, this is minimal in the most recently-updated production runs. I’m very pleased that all of the new Eton radios lack the tactile rubber coating found on some previous models, for while the coating works excellently to improve one’s grip on the radio, over time it can become sticky to the touch (if you find this to be a problem, here are several techniques to clean the sticky residue: http://bit.ly/1KQN8TX).

At time of print, the Satellit is generally available for about $180-190 from a variety of retailers, including Universal Radio and Amazon.com.

Other full-featured portables

In the 2014 Buyer’s Guide, we included several other full-featured radios that are still certainly worth considering: The C. Crane CCRadio-SW, Sangean ATS-909X, Sony ICF-SW7600GR, Tecsun PL-600, Tecsun PL-660, and the Tecsun PL-880.

Hybrid Stand-Alone SDR/Tabletops

While tabletop receivers have started to decline with the advent of SDRs, there are many listeners who still prefer a simple, dedicated, stand-alone high-performance receiver with a good tuning knob and clear display, which is to say, a tabletop receiver. Tabletops are designed to perform best with a resonant external antenna.

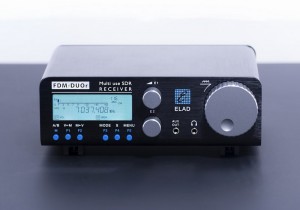
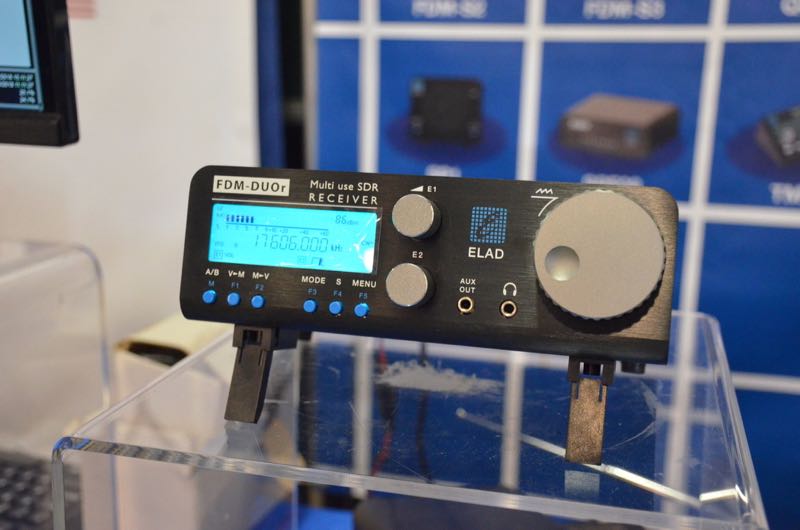
The Elad FDM-DUOr

The Elad FDM-DUOr

Elad FDM-DUOr

If you’ve been thinking of purchasing an SDR, but really want a traditional front-panel tabletop receiver, the Elad FDM-DUOr may be for you. I’ve included the FDM-DUOr under the tabletop heading because it is, in fact, a tabletop receiver, with the features of a tabletop such as a front panel, knobs, display, and capability to operate independent of a PC. However, if you choose to hook it to a PC, you unleash a full-fledged SDR and a wide array of features. The FDM-DUOr is built on the same receiver and software as the FDM-S2, one of my favorite sub $1000 SDRs. The FDM-DUOr also sports 10 selectable and customizable filter preselectors and an internal switch box for use with an external transceiver.

At time of print, Elad is seeking FCC approval for the FDM-DUOr in order to distribute these units in the USA. The FDM-DUOr is currently available in Europe via the Elad online store: Price is 899.00 €.

The CommRadio CR-1a

The CommRadio CR-1a

CommRadio CR1-a

US-based manufacturer CommRadio introduced the CR-1 in 2013––an amazingly rugged, portable receiver, and essentially a small tabletop SDR. I’ve used mine in travels and at home; the built-in rechargeable battery will power it for hours, it’s built to a mil-spec standard, and it performs like a champ.

In 2014, CommRadio increased the SDR potential of the CR-1 by updating with a new model: the CR-1a. In 2015, CommRadio continued to add features to the CR-1a through firmware and software upgrades, such as a new Spectrum Viewer SDR application, and 3D-Waterfall for Windows PCs.

CommRadio CR-1a owners only need to update their firmware and download software to use the new feature. The CR-1a is priced at $599.95 US, shipped, and includes a battery through Universal Radio––good value for a quality piece of kit. CommRadio also sells the CR-1a directly through their website.

Other tabletops

In the 2014 Buyer’s Guide, we included several other tabletop radios, including the Alinco DX-R8T and the Icom IC-R75.

SDRs/IF Receivers

If you’re searching for maximum performance for the price, software-defined radios (SDRs) and IF receivers are hard to beat. These small “black box” radios require a computer to unlock performance, none are stand-alone. But while I was never a fan of combining my PC with radio listening, once I starting using an SDR, I never turned back. Now, 90% of the time that I’m on the air, it’s with an SDR. The ease of doing so is incomparable, and the functionality simply incredible.

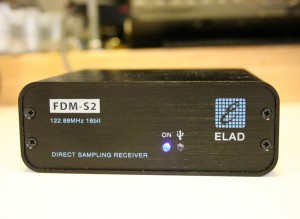
The Elad FDM-S2

The Elad FDM-S2

Elad FDM-S2 and the new SPF-08 preselector

If you read the Elad FDM-S2 review in the November 2014 issue of TSM you’ll know that this little SDR packs a powerful punch for the price. FDM-S2 performance is uncompromising, comparing favorably to receivers $300-400 more in price. The S2 also provides native DRM decoding; it’s a fine DRM receiver.

Users who live in the vicinity of high-powered AM stations will be pleased to know that Elad has developed an outboard preselector box that pairs with the FDM-S2––the new SPF-08, which covers the amateur radio bands. Elad already has a broadcast band version of the SPF-8 in development. The SPF-08 enclosure is the same size as that of the FDM-S2 and couples with it directly via a port on the back of both units.

Both the Elad FDM-S2 and SPF-08 are available via Elad’s online store: http://ecom.eladit.com/

The SDRplay RSP

The SDRplay RSP

SDRplay RSP

The SDRplay RSP was one of the most pleasant surprises I encountered in the world of software defined receivers this year. I published a review of the RSP in the May 2015 issue of TSM; in short, I was amazed at the performance of this $149 SDR. While it doesn’t have its own proprietary SDR application, it is compatible with some of the most popular free applications on the market: SDR Console, SDR Sharp, and HDSDR to name a few. SDRplay developers are even testing a Raspberry Pi application for the RSP.

Since the time of my review, SDRplay has updated the RSP to include gapless coverage from 100 kHz to 2 GHz––talk about wideband coverage!

If you have been hesitant to invest in a benchmark SDR, or simply want to explore the world of SDRs on a small budget, the SDRplay RSP is a no-brainer. Without a doubt, it packs a lot of performance in a tiny, affordable package. The SDRplay user community is also very active and routinely pushes the boundaries of this little receiver.

The SDRplay RSP is available at SDRplay.com and, in the US, at Ham Radio Outlet.

The RFspace Cloud-IQ

The RFspace Cloud-IQ

RFSpace CloudIQ

The Cloud-IQ is the latest software-defined receiver from the US-based company RFSPACE. The Cloud-IQ offers two modes of operation:

  • the “IQ mode,” which provides 24-bit IQ streaming to your PC over an ethernet cable (much like the RFSpace NetSDR).
  • the stand-alone “cloud mode,” which includes a built-in internet server. In cloud mode, according to RFSpace, “the receiver performs the tuning and demodulation of signals and transmits the demodulated information back to a PC, OS-X, Linux, or Android client anywhere in the world.”

RFSpace is essentially one of the first SDR manufacturers to include built-in SDR streaming functionality, something that has been somewhat complicated to implement in other SDRs.

The price point is also favorable at $629.95 through Ham Radio OutletAmazon, Astroradio and ML&S. Availability has been quite limited this year, but more production runs are planned for the near future. I plan to review the RFSpace CloudIQ in late 2015 or early 2016, as soon as a unit becomes available.

Other SDR/IF receivers

In the 2014 Buyer’s Guide we included several other SDRs and IF receivers worth considering, including the Bonito RadioJet IF-Receiver 1102S, Microtelecom Perseus, and the WinRadio Excalibur. Additionally, note that the affordable Airspy SDR will soon have a new converter to cover HF down to 1kHz–look for a review in 2016.

The Shortwave Radio Index

If you would like to view a comprehensive list of all shortwave radios currently on the market, check out the Shortwave Radio Index (http://swling.com/db).

Spread the radio love

Elad FDM-S2 on sale $499 US

Elad-Summer-Sale

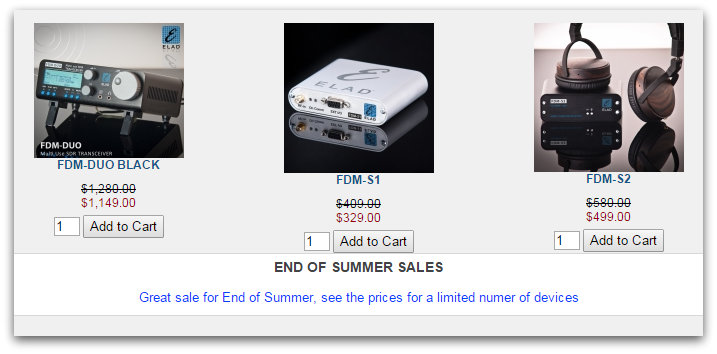
While browsing the Elad website, I noticed an End of Summer sale on their US retail page.

The sale includes one of my favorite sub-$1000 SDRs–the Elad FDM-S2–priced at $499 US (originally $580). If you’ve been on the fence about purchasing the FDM-S2, this might be a good time to bite the bullet. Certainly a great value, in my book. Click here to read my review.

Note that the Elad FDM-DUO stand-alone SDR transceiver and FDM-S1 receiver are also on sale.

I don’t see an indication of when the sale ends, but I assume it may last until the end of summer. If interested, you might contact the Elad sales department to confirm.

Spread the radio love