Category Archives: Antennas

The Eton Satellit: a poignant recording of ABC Northern Territories & further DX…

Hi there, I’ve just returned from a business trip to Genoa, Italy and took the Eton Satellit with me. Now, I’m sure many of you know from your own experiences that DXing from a noisy hotel room can be just about impossible – and so it was in the main. I did however manage to copy a very nice signal from BBC Radio 5 Live on 693 kHz medium wave and Chaîne 3, from Tipaza, Algeria on 252 kHz – the latter is a much more difficult catch back in the UK. Reception videos for these two signals also follow below and I have to say that given the very noisy environment, this was a pleasing result using the Eton’s internal ferrite antenna. Prior to my trip this week, I recorded a really nice signal from Radio Nacional Brasilia on 11780 kHz and the best signal from North Korea (Voice of Korea KCBS) I’ve ever copied on the 41 metre broadcast band. Both are testament to the Eton Satellit’s performance as an excellent portable reciever per se and it’s hard-core DXing capabilities. Finally, what now feels a very poignant recording, I managed to catch – ABC Northern Territories on 2325, 2485 and 4835 kHz during the same session and on one reception video. Embedded videos and text links to these videos on Oxford Shortwave Log follow below, along with a brief video review of the main functions and features of the Satellit.

With regard to the closure of ABC on shortwave, my full support goes out Senator Nick Xeonophon and his quest to introduce new legislation to force the ABC to reinstate their shortwave transmissions. There, I’ve said it and that’s enough politics for now lol. In the meantime, my plans to test the Eton Satellit against more established DXing portables remain in place and work commitments allowing, this should happen soon. Thanks for reading/watching/listening and I wish you all great DX!


Click here to view on YouTube


Click here to view on YouTube


Click here to view on YouTube


Click here to view on YouTube

Click here to view on YouTube

Click here to view on YouTube

Clint Gouveia is the author of this post and a regular contributor to the SWLing Post. Clint actively publishes videos of his shortwave radio excursions on his YouTube channel: Oxford Shortwave Log. Clint is based in Oxfordshire, England.

Spread the radio love

A New Approach to FSL Antenna Construction

Introduction

I’m very fortunate to live across town from my good radio hobby pal Gary DeBock. He has been responsible for the rapid growth in Ultralight radio DXing and the construction of Ferrite Sleeve Loop (FSL) antennas. Living near each other as we do, I’ve benefited a lot from his expertise and creativity in the hobby. We’ve enjoyed visiting about Ultralight radios and antennas many times over a leisurely lunch. If you’re unfamiliar with Gary’s efforts, just do a YouTube search on his name and see just a few of the many FSL antenna variations he’s built!

Gary uses PVC tubing, “Fun Noodle” foam cylinders, sections of curved foam, and rubber plumbing adapters almost exclusively as the core supporting structures for his FSLs, from small 3-inch models to 17-inch monsters. Gary certainly has perfected his own techniques with these raw materials; he’s an expert in combining them. He even makes PVC table structures to support his FSLs during Oregon coastal DXpeditions, as seen in some of his YouTube videos.

These materials work well, but over time even FSLs as small as 7 to 8 inches in diameter begin to sag and lose their perfectly circular shape. This seems to be caused by the shifting of individual segments of foam which are wrapped around a “Fun Noodle” core and center PVC tubing.

What possibilities are there for other materials in FSL antenna construction? It would be a fun challenge to build a small to medium sized FSL antenna that would have these qualities:

  • Maintain a circular cross-section without sagging
  • An appearance less like a threatening explosive and more like a commercial product
  • Use alternate construction methods for those not skilled with cutting & gluing PVC tubing

I began to keep my eyes open for likely candidates as I visited hardware stores, department stores, and office supply outlets. Eventually some ideas began to gel.

Raw Materials

Here is a visual and descriptive list of what I used in this alternate design of Ferrite Sleeve Loop antenna. I won’t go into great detail about dimensions, quantities, and measurements, as other DIYers should be able to easily follow the general idea presented here. This article is mainly to get you thinking about other ways to construct a ferrite sleeve loop antenna.

The Core of the Matter

This 18-inch long, semi-rigid foam roller is six inches in diameter. It’s a workout and exercise aid which I found in the sports department of my local Walmart store. The cost was approximately $13. This one-piece foam is a perfect foundation for holding and protecting the fragile ferrite rods and keeping them in a circular arrangement; since the roller is in one piece there is nothing to shift around, or sag. When placed on this core, the final diameter of the FSL antenna is approximately seven inches.

So, what to put the antenna in? Something needs to suspend and protect the antenna as a substitute for the PVC frame previously used. This Sterilite tote box is the perfect size to hold the antenna. As shown in the photo, the dimensions are approximately 14-1/4″ X 9-5/8″ X 12-1/4″; the model number is 1896.

Early on, I decided that the flimsy “locking tabs” on the cover would not suffice for holding the relatively heavy antenna when carrying the tote by the handle. I drilled holes and attached a dozen small Nylon nuts and bolts to secure the cover. (Nylon avoids distorting the medium wave reception pattern of signals, as metal hardware could.)

An ample quantity of 200mm ferrite rods are needed, plus a air variable capacitor (preferably with a 8:1 reduction drive shaft), and Litz wire. 1162 strands/46 ga. Litz provides the most sensitivity but the coil will cover a greater width on the rods.

Gary likes to use waterproof medical tape, sticky side out, to hold the rods in place, but I like to use Gorilla brand tape, as it is extremely sticky and holds the rods better. My choice for the rod-to-coil spacing  material is two turns of 1/8″ thick bubble wrap.

This is the foam core, ferrite rods, bubble spacer, and coil assembly prior to fitting in the Sterilite tote container. Before assembly to this point you’ll need to cut the foam roller to length using a serrated knife or electric carving knife. Two sturdy cable ties help hold all of the rods in place. A better alternative might be strips of 1/2″ wide Velcro straps purchased from a fabric shop or home improvement store.

Another key item to this construction method is the use of plastic drywall anchor screws. These are meant to be pushed and screwed into gypsum wallboard for sturdy attachment of bolts or picture hangers on walls. When screwed through drilled holes in the side of the Sterilite tote, they secure and suspend the foam roller/ferrite sleeve loop assembly. The density of the foam roller is sufficient to give a good grip to the drywall anchors. Eight to ten anchors per side are enough to hold the assembly in place. See the photo at the beginning of this article for a good view of this mounting method.

Every good FSL antenna design needs an official sounding manufacturer! With tongue firmly in cheek I’ve appropriated the name shown on this self-produced label. Clearly, a Ferrite Sleeve Loop antenna from Naughtabaum Ferrite Specialties Ltd. stands a better chance than most of passing through TSA checkpoints, right?

I hope this article has given you some new ideas for FSL antenna designs. There’s certainly room for improvement, including making the antenna’s ferrite rods look less intimidating…less like a bundle of dynamite! Perhaps the entire assembly can be wrapped with something that shields the rods from view, or you could use an opaque tote container rather than a clear model.

Be on the lookout for useful materials to repurpose. Trips to your local home improvement stores, office supply, and other outlets will give you further ideas on how to design your own Ferrite Sleeve Loop antenna.

Guy Atkins is a Sr. Graphic Designer for T-Mobile and lives near Seattle, Washington.  He’s a regular contributor to the SWLing Post.

Spread the radio love

The Eton Satellit: a short history & first impressions as a DX workhorse

Hi there, I’m sure some of you will read the title of this post and conclude ‘that’s exactly that the Eton Satellit could never be’. I was of the same opinion, having read many reviews online suggesting this little radio on shortwave at least was essentially a bit ‘duff’ as we say in the UK. The fundamental flaws identified when it was first released included, but were not limited to – a general lack of sensitivity, poor AM SYNC stability and poor AM SYNC audio, poor filtering, particularly in SSB mode, muting whilst tuning, poor display visibility in sunlight, poor AGC timing…the list goes on.

On MW and FM there was a general consensus that this little radio performed very well, but with all the other flaws highlighted here, it certainly did not represent good value for money. A number of reviewers concluded that the Eton was an insult to the ‘Satellit’ brand. Oh dear, yet another shot in the foot for Eton then. User perception was confirmed when I posted my first reception video using this radio –  a number of my Oxford Shortwave Log subscribers got in touch to say they were essentially scared off buying this radio at the time and that this was of course driven by the negative reviews that proliferated the internet.


Since the original launch, however, it would appear that firmware updates have improved this receiver immesurably, although I am quite certain this news hasn’t really filtered out into the market because there still appears to be a consensus that the newest Satellit is ‘not worthy’ so-to-speak. So, how did I come to buy a Satellit, a decision that could very well be perceived as risky to say the least, even foolhardy?! Well, one of my DXing fellows on YouTube (check out his YouTube channel – it’s full of amazing DX) posted a video of his recently purchased Satellit in a number of tests against the (largely) brilliant Tecsun PL-880. The Satellit equalled or bettered the PL-880 on MW and SW. I was very surprised at this outcome, for the same reasons as everyone else – it wasn’t supposed to be that good.

Even though the poster himself suggested the Eton might not be classified as a classic Satellit, it’s interesting to note that another DXer with three decades of experience and someone who’s owned the Satellit 400, 500 and 700 models concluded the opposite and that for various reasons, the newest Satellit is a far better performer with weak DX than those vintage receivers ever were. In his experience, the classic Satellit receivers always delivered excellent audio and thus were brilliant for listening to international broadcasters. However, for weak DX the Satellit 500 didn’t perform as well as the budget Sangean ATS-803A  and the ICF-2001D wiped the floor with the 700. So, is the Eton worthy of the Satellit branding? Perhaps the problem is it’s just so small – I mean compared to the Satellit 800….you could confuse the Eton to be it’s remote control – if it had one! It is diminutive and I’ve purposely taken a picture of it with my calculator to demonstrate this. It’s actually not much bigger than the Tecsun PL-310ET, so in terms of form-factor, definitely a departure from Satellits of the past.


What about performance? I tested the Eton at the woods I use for DXing, with a 50 metre longwire. In the space of a couple of hours, I’d recorded ABC Northern Territories on 2325, 2485 and 4835 kHz, Pyongyang BS, North Korea on 3320 kHz, Angola on 4950 kHz, Guinea on 9650 kHz and a weak signal from the Solomon Islands on 5020 kHz. The signals from ABC on 2485 kHz, Angola and Guinea were stronger and clearer than I’d ever heard previously. Pyongyang on 3320 kHz and the Solomon Islands were personal firsts.

The Eton performed way beyond my expectations and I hope this post will go some way to restoring the repuation of this brilliant little radio, which in my opinion fully deserves to be called a Satellit. More testing is necssary, including direct comparisons with other receivers – all of that to come in due course. Text links and embedded reception videos follow. Thanks for reading/watching/listening and I wish you all great DX!


Click here to view on YouTube.

Click here to view on YouTube.

Click here to view on YouTube.

Click here to view on YouTube.

Click here to view on YouTube.

Click here to view on YouTube.

Clint Gouveia is the author of this post and a regular contributor to the SWLing Post. Clint actively publishes videos of his shortwave radio excursions on his YouTube channel: Oxford Shortwave Log. Clint is based in Oxfordshire, England.
Spread the radio love

Making broadcast towers safer for birds

(Source: NPR)

It’s likely the only time you really notice one of your neighborhood broadcast and cell towers is at night when they’re lit up with conspicuous bright red lights.

Those lights help pilots see the huge metal structures that can reach 1,000 feet into the air — but they can spell disaster for birds.

In 1976 in Gun Lake, Mich., one tower killed over 2,300 birds in one night, says Caleb Putnam, who works for the Michigan Department of Natural Resources. He says for reasons scientists still can’t quite figure out, birds kept flying headlong into towers.

“If that many are dying at one night at one tower and yet there are thousands of towers across the country and as you go across the world, the numbers are staggering,” he says.

Putnam says in North America alone it’s estimated that 7 million birds smash into towers every year. But until recently scientists didn’t know why it was happening.

[…]”We were able reduce the numbers of bird fatalities on communications towers by simply extinguishing those non-flashing lights,” she says. “Those fatalities were reduced by as much as 70 percent.”[…]

Click here to listen/read this full report on NPR.

Spread the radio love

The diminutive but brilliant Sony ICF-SW100: a few autumn/winter DX catches

Hi there, I posted an article on this brilliant little radio a few months ago because it had demonstrated a level of performance way beyond my expectations. Notwithstanding it’s incredibly small size the DX results I obtained with it were beyond my ICF-SW55 and up there with the iconic ICF-2001D. Armed with synchronous detection, selectable side bands, SSB, CW and sensitivity seemingly boyond it’s tiny form factor I can’t recommend this radio highly enough.


Originally introduced into the market in 1993 and discontinued in 2005, the ICF-SW100 won’t ever be repeated – a point I made in my original post, but of course they are available on eBay and prices remain robust for what is now essentially a vintage receiver. Unfortunately, I don’t get to use my ICF-SW100 very much as I have various other receivers and have been involved in antenna building/testing and MW DX for the past few months. However, on the couple of occasions when I have taken the Sony on a mini DXpedition, it’s resulted in some fine DX. As demonstrated in the examples below, Mali, Guinea, Alaska and Japan are amongst the more difficult signals to copy in Europe and yet the ICF-SW100 delivered them! Text links to reception videos on the Oxford Shortwave Log YouTube channel follow below and futher down you will find embedded videos. Thanks for reading/watching/listening and I wish you all great DX!


Clint Gouveia is the author of this post and a regular contributor to the SWLing Post. Clint actively publishes videos of his shortwave radio excursions on his YouTube channel: Oxford Shortwave Log. Clint is based in Oxfordshire, England.
Spread the radio love

DXpedition antenna testing: the Bonito Boni whip and a 240 metre barbed wire fence


Hi there, a few days ago I posted some reception videos comparing the performance of the Boni whip with a 30 metre longwire antenna at home, with a further check against the performance of the H field Wellbrook ALA1530 active loop. The conclusion of those tests was essentially confirmation that E field antennas don’t usually perform very well under a blanket of ‘electrosmog’ and that only on Longwave, did the Boni whip prevailed over the longwire; otherwise there was no usable difference in performance between the two.

                         Sony ICF-SW55 receiver                                     ‘Quiet’ location for Boni whip test

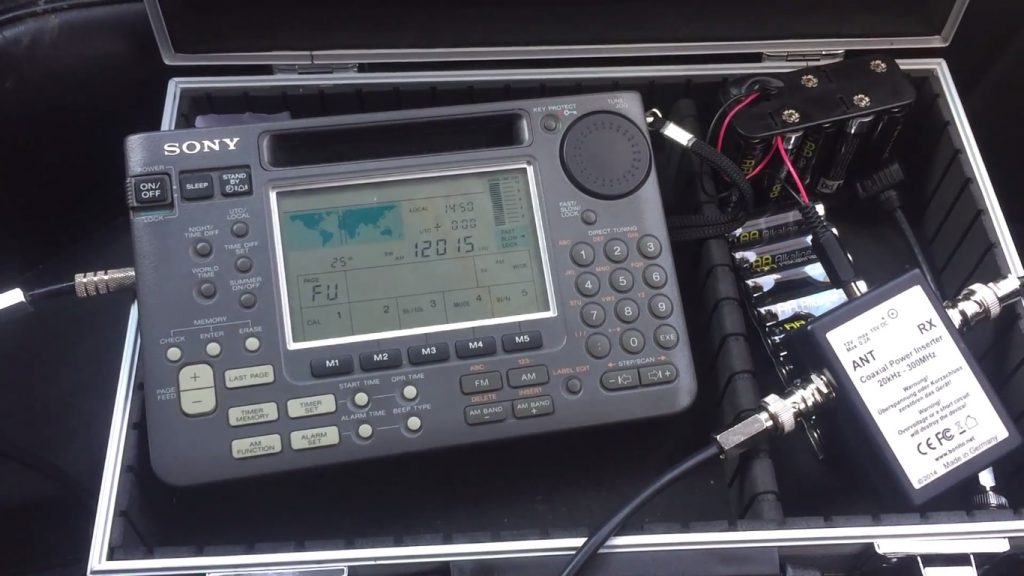
This prompted a number of my subscribers to ask when I would be taking the Boni whip on a DXpedition for an outdoor test against the Wellbrook and either a substantial longwire, or the 200 metre Beverage. Time is limited right now for a full test, however, I managed to throw together a kit of parts necessary to run a quick set of comparison tests with the whip, against the barbed wire fence I use for ad hoc DXing when out walking the dog! Over a period of an hour or so, I managed to copy a few stations on 31 and 49 metres and thus recorded signals using the Sony ICF-SW55 receiver with the Boni whip and barbed wire fence. Now previously, I have used that fence as an antenna for the excellent little Tecsun PL-310ET, with some nice results. However, after this series of tests, my views on the fence have changed a little. Obviously it might be somewhat directional and earthed along it’s length, neither of which I’ve checked, however, notwithstanding these performance-related factors, the performance of the whip which at home had been terrible, surprised me greatly. Text links to a set-up video and the reception videos on my Oxford Shortwave Log YouTube channel follow directly below, with embedded videos at the end of the post. 

Finally, if you’re looking for a well performing, compact and portable active antenna for outdoor use in quiet environments and of course, DXpeditions, I would definitely recommend the Boni whip. Just bear in mind that the SNR it delivers at home might not be usable for anything more than casual listening.

Thanks for watching/listening/reading and I wish you all great DX!


Clint Gouveia is the author of this post and a regular contributor to the SWLing Post. Clint actively publishes videos of his shortwave radio excursions on his YouTube channel: Oxford Shortwave Log. Clint is based in Oxfordshire, England.
Spread the radio love

Southgate ARC: What Is a Balun and How to Make One Cheaply

(Source: Southgate ARC)

Ham Radio – What Is a Balun and How to Make One Cheaply

A Balun is a transformer which allows coaxial cable, which is an unbalanced lead to be connected to a balanced load, for example a resonant aerial.

The 1:1 balun is often called a choke balun, it works by eliminating Radio Frequency currents flowing on the outside of your coaxial cable, this is important because it prevents the pattern of the dipole becoming distorted and prevents the braid of the coaxial cable radiating.

Connecting coax to your resonant dipole which can be configured in a V shape or in a sloping fashion, however serious power loss and feeder radiation can occur without the use of a balun transformer. No one wants to induce Radio Frequency currents into Television receivers or Broadcast equipment as it may result in disputes with neighbours and could possibly lead to your station having to close down. Try to keep the centre of your aerial away from buildings as it may induce Radio currents into the mains wiring.

Building a choke is not difficult all you need is some plastic pipe available from many Do It Yourself outlets and warehouses. I use a length of about 1 foot of plastic pipe and 21 feet of coaxial cable, the length of the pipe and diameter is chosen because it works well if using R-G-5-8 coax the ends of the pipe can be sealed after placing a SO-239 connector for your coaxial lead. I use two bolts and solder tags at the other end of the pipe to connect the ends of the dipole to the choke.

When wrapping your coax around the pipe don’t use too much force as it may damage the inner braid and space the turns away from each other by a millimetre or two. R-G-2-1-3 coax around 21 feet used with 5 inch pipe will handle 400 watts pf power. Wire ties can be used to hold the turns together along the length of the pipe. Using these measurements your choke will cover all of the ham radio bands from 1.8 Megahertz through to 28 Megahertz and will keep the radiation pattern.

Using a dummy load connected to the choke and transmitting 100 watts from my transmitter indicated an S.W.R. readings of around 1.5 to 1 at 3.5 Megahertz when testing 28 Megahertz the S.W.R. reading came down to 1.1 to 1 which is an excellent match. Using the choke as it should be at the feed point of a dipole cut for 40 metres give an S.W.R. reading of 1.2 to 1. The highest reading was 1.5 to 1 when using 18 Megahertz but the rest of the High frequency bands gave me very acceptable matching.

By
John Allsopp G4YDM
https://g4ydm.blogspot.co.uk/

Article Source:
http://EzineArticles.com/expert/John_Allsopp/1925417

Article Source:
http://EzineArticles.com/9615600

Spread the radio love